Follow along with the video below to see how to install our site as a web app on your home screen.
Note: This feature currently requires accessing the site using the built-in Safari browser.
We noticed you are blocking ads. DO THE TON only works with community supporters. Most are active members of the site with small businesses. Please consider disabling your ad blocking tool and checking out the businesses that help keep our site up and free.
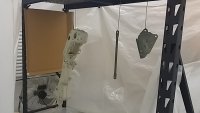
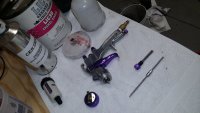
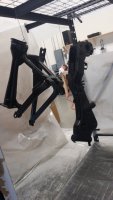
Instead of blowing all this prep on a cheap rattle can paint job Robert was kind enough to let me use his HVLP spray gun to shoot some higher quality urethane doped enamel paint. Had to cobble together a makeshift spray booth but with a little visquene, cardboard and shop fan I was ready to roll. BUT, last weekends storms delayed my plans for paint so by mid week humidity was down and temps up so off to the races. Simple but effective little setup and after getting the gun dialed I spent the next couple days painting the parts in groups since I could only squeeze in a few parts at a time into 'da booth'. After initial 24 hr curing I moved the parts up into the rafters to be stored like a meat locker until they're ready for assembly. Starting to get excited!!
awesome work, loving the finish. Still undecided whether or not to powder or paint my own project. temps are hovering about 2-4deg C here at the mo, so plenty of time to decide.....
awesome work, loving the finish. Still undecided whether or not to powder or paint my own project. temps are hovering about 2-4deg C here at the mo, so plenty of time to decide.....
Seems real tough after a few days of cure. Definitely tougher than the best rattle can I've ever done. Put this one to bed and let's get on with assembly. Woohoo!
Awesome build! Are you doing anything performance wise to the engine? Rode a few of these (poorly tuned though) and that engine sure feels tired. Maxed out at 140 kph :/
Awesome build! Are you doing anything performance wise to the engine? Rode a few of these (poorly tuned though) and that engine sure feels tired. Maxed out at 140 kph :/
Seems like every time I try to make a push to get going on this project, that 4 letter word just finds a way to steal the show. Things are slow going. The majority of the engineering/fabrication is behind me and now I'm down to the "million little little things" phase so I'm trying to use what little time I have to chip away.
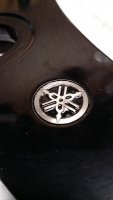
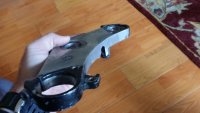
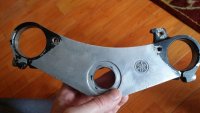
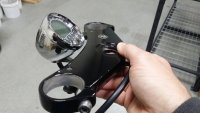
I really wasn't keen on having my keys up on the triples where they would clutter the minimalist look I really wanted so I lopped off the stock ignition mount from the upper triple. With a bit of hand work I was able to match the existing arc. Of course all this had to happen before I could powder coat and re-assmble the front end. Now it's back into shape and with a little bit of 600 grit brought back the stock emblem nicely.
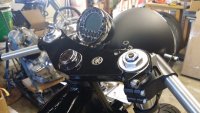
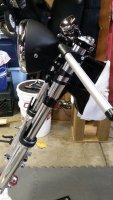
Messed around with a couple ideas but simple was best when it came to a gauge mount. Again, one of the many little things on the long list.
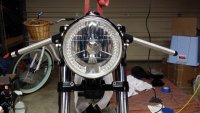
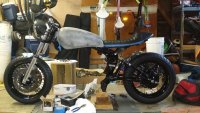
Using some universal mounts for now just to get things mocked up, I was able to get the headlight and spacers installed. Clip ons aren't where I want them do to interference with the gauge mount. Quick trim will fix that.
But, the whole package is starting to come together nicely.
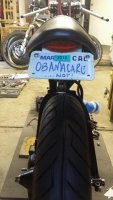
Screwed around with the taillight and license plate mount but still kicking around ideas here.
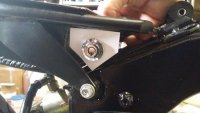
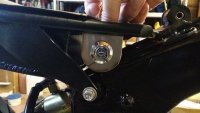
Also, since I lopped off my only ignition location I figured I'd better start looking for a new home. I'm a big baseball kinda guy so I had to at least entertain the idea right....Maybe it's better to go with something simple that doesn't draw too much attention.
Like dusting off an old guitar that's been patiently sitting in the corner waiting to be played, it's time to pick this project back up and make it sing.
It's been exactly a year since I first started this project and 6 months since my last update.....man that sounds weird. Time flies when life happens.
Anyway, if you guys haven't lost interest I'll start trickling in some progress pics...
Settled on a location and method for mounting the shock rez. Not the most elegant solution but I think it'll get the job done.
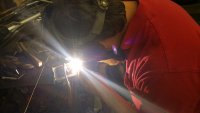
While welding the shock rez mount I also had to deepen the electronics bay to increase the head room, things were just too tight. Takes away from the original clean work but it's better than having to remake the entire tray. Robert was patient enough with me on the request and made quick work of it.
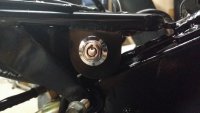
Also finalized the location of the ignition switch. Definitely diggin how it came out!
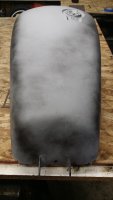
The part of the build that was initially a story has turned into a friggin novel. I knew the tank was going to present significant challenges but it's gone way beyond that both technically and logistically and has tested everyone involved.
Without going into the boring details, this is how the tank sits as of right now. The exterior paint and body filler has been sanded back down to metal. Body work was redone, tank reshaped, and now has the filler primer exposed and ready for color.
I've gone back n forth on whether to tackle the paint job myself using 2k rattle cans but I just don't have the patience if I blow it on the first go around. I would rather spend my energy wrapping up the 1000 other loose ends on this project. In the end I found a local guy that does piece work for several paint shops around town who has access to professional equipment/paint and is willing to do it on the cheap. Keep my fingers crossed.
As I work through the assembly from the ground up I've painstakingly removed 30+ years of oxidation from every nut, bolt and washer to preserve the vintage-native Japanese steel. I guess it's my way of preserving as much of the history of this bike as I can manage.
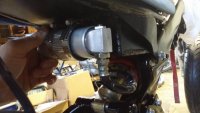
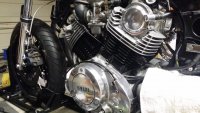
After wire brushing enough of the original hardware I was able to remount the motor and carbs.
I appreciate the positive feedback! I'm definitely getting a junkie-itch to finish this build. Part of the the drive to finish is wanting to get my garage back space back (or at least not hear my wife gripe about the mess), this thing is exploded to all corners of my puny garage.
This site uses cookies to help personalise content, tailor your experience and to keep you logged in if you register.
By continuing to use this site, you are consenting to our use of cookies.

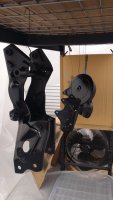

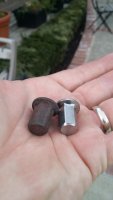
") .....powder coated just a couple more parts. Figured the rear set brackets would take a beating so why not give'em the iron coating.
.....powder coated just a couple more parts. Figured the rear set brackets would take a beating so why not give'em the iron coating.