We noticed you are blocking ads. DO THE TON only works with community supporters. Most are active members of the site with small businesses. Please consider disabling your ad blocking tool and checking out the businesses that help keep our site up and free.
You are using an out of date browser. It may not display this or other websites correctly.
You should upgrade or use an alternative browser.
You should upgrade or use an alternative browser.
'81 TR1 build.................(yup another Mojave tank combo!!)
- Thread starter lchris21
- Start date
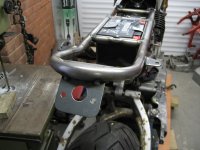
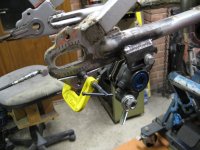
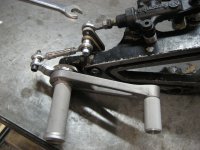
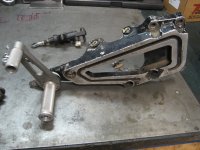
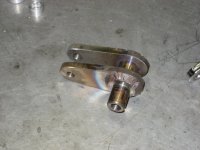
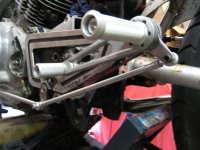
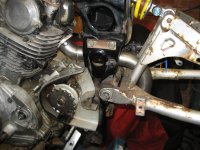
next task was to get the tarozzi's mounted. I wanted to use the R1 rear master cylinder so had to fabricate up an off set linkage to enable it to be mounted where I wanted it. I'm not a big fan of dog leg push rods....
Attachments


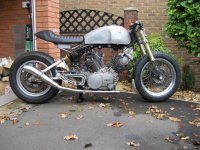
swapped over the front rubber to the fatter section I planned. this give a bit more ground clearance and adds to the look I think......
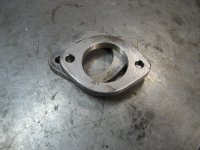
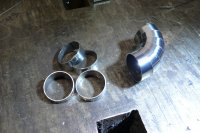
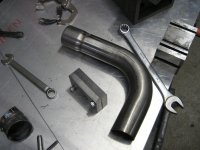
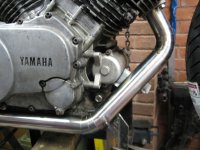
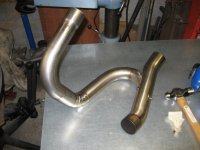
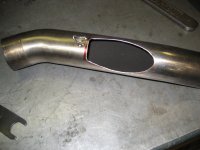
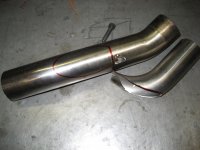
next job is to get the exhaust hooked up. The silencer came off a GSXR 750. It was an ebay special, originally fabricated by Danmoto. Needed to make some exhaust port flanges before any fabrication.
I quite like the look of the lobster backed silencer style, so will carry on with the front header. Most of the rear header will be hidden, so I'll use some mandrel bends I've got left over from a previous project....
Attachments

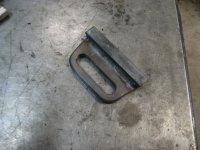
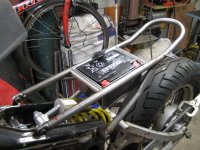
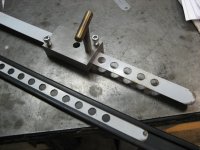
part of the exhaust fabrication job is to make some hangers for the silencer...
the one that came with it is a bit rough, and I could not find another the right size, so I've decided to have a go making my own.
I located a supplier for the rubber insulator extrusion, so its a simple case of some trips of stainless and a little jig to drill the holes. I can now make them any diameter I want...
Attachments

so that's it so far......
its taken nearly a calendar year to get to this stage of the build. I only get to work on the bike during the winter months from October til March. So i'll keep the build thread updated over the coming few months.
You don't think I did all this in 24hrs........ ;D
its taken nearly a calendar year to get to this stage of the build. I only get to work on the bike during the winter months from October til March. So i'll keep the build thread updated over the coming few months.
You don't think I did all this in 24hrs........ ;D
Erskine said:Love the stance of this thing, looks so ready to pounce on unsuspecting victims and steal their socks.
cheers.....its a bit smaller than I thought when its on its wheels..........at 6feet, I might end up looking like a gorilla on a monkey bike !!!
Nuckingfuts
Been Around the Block
Your a braver man than I starting with that rough of a canvas. Doing well though!
claytonisbob
New Member
Looks familiar ") You had a much rougher starting point than me, but looks like you're making good progress. What's your plan with the chain, a 530? XS650 front sprockets will work with a little tweaking.
You had a much rougher starting point than me, but looks like you're making good progress. What's your plan with the chain, a 530? XS650 front sprockets will work with a little tweaking.
You had a much rougher starting point than me, but looks like you're making good progress. What's your plan with the chain, a 530? XS650 front sprockets will work with a little tweaking.claytonisbob said:Looks familiar
Cheers,
yeah got a 530 setup ready to go. little bit of alignment and modification to the sprocket carrier on the Triumph hub and I should be good to go.......
I have a limited choice of fronts at the moment, only found a 15T, so undecided what size to go on the rear. Bit more research when the time comes???
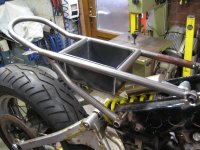
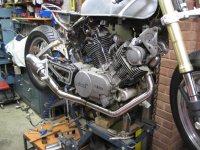
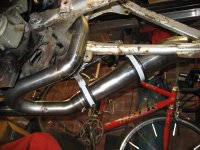
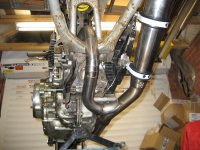
been making some progress on the zorst system......
nothing too radical or extreme, just a straight out and back job.
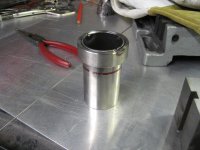
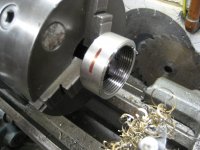
Found an old pipe socket to make the header clamp then started tacking it together to mate up with the silncer. made a couple of hangers using my jig. The front cylinder is all there just ready for final weld.
Made a start on the rear cylinder, more progress on that this weekend.
nothing too radical or extreme, just a straight out and back job.
Found an old pipe socket to make the header clamp then started tacking it together to mate up with the silncer. made a couple of hangers using my jig. The front cylinder is all there just ready for final weld.
Made a start on the rear cylinder, more progress on that this weekend.
Attachments


I stand in awe at the work skilled people can achieve with a welder !
I currently have 6 jobs awaiting welder "mates" to find the time for me. BTW - these are PAYING jobs, not asking for freebies, but still seems to take forever. :
Erskine - what you up to mate ??????? HAven't heard from you in a while. 8)
I currently have 6 jobs awaiting welder "mates" to find the time for me. BTW - these are PAYING jobs, not asking for freebies, but still seems to take forever. :
Erskine - what you up to mate ??????? HAven't heard from you in a while. 8)
lchris21 said:tacking and welding are a bit different.............no drinking for a week before i weld it......need a steady hand !!!!
Beachcomber, name rings a bell................I'm still looking for a V5 for it (ebay
yep, the very same ............. I've got the word out with my mates
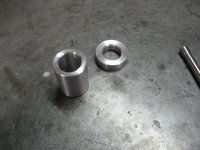
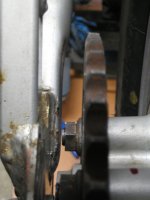
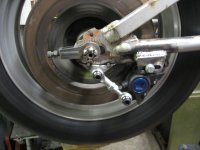
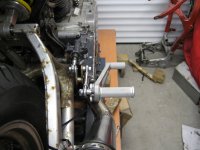
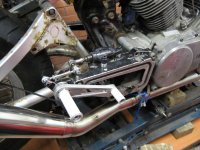
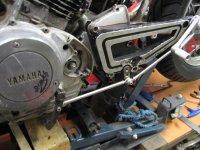
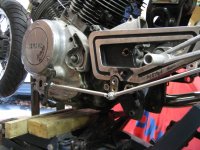
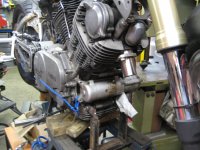
got the rear wheel centered and fitted into its home position. had to do a bit of fettling to the sprocket mounting studs first. these had to removed (after welding nuts on them) then shortened. This gave me enough clearance on the swingarm, and allowed the sprockets to line up pretty good and tyre to be centralised along the bike axis.
made up some alloy spacers, and its looking good.
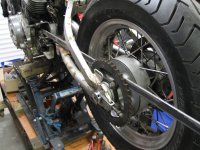
cracked on with mounting the R1 rear caliper. bit more head scratching with this one as it needed to be adjustable fore and aft to allow for the chain tension. need to make up a nice chunky tie rod for the rose joints but that should work a treat.
made up some alloy spacers, and its looking good.
cracked on with mounting the R1 rear caliper. bit more head scratching with this one as it needed to be adjustable fore and aft to allow for the chain tension. need to make up a nice chunky tie rod for the rose joints but that should work a treat.