
We noticed you are blocking ads. DO THE TON only works with community supporters. Most are active members of the site with small businesses. Please consider disabling your ad blocking tool and checking out the businesses that help keep our site up and free.
You are using an out of date browser. It may not display this or other websites correctly.
You should upgrade or use an alternative browser.
You should upgrade or use an alternative browser.
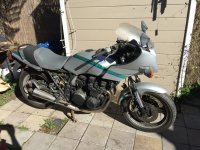
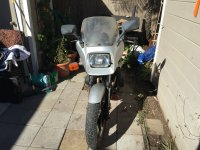
85 GPz750 Cafe' Build
- Thread starter CafeCruzer
- Start date
CafeCruzer
New Member
CafeCruzer
New Member
CafeCruzer
New Member
Re: 85 GPz750 Build
i ordered a bunch of LED's, resistors and diodes to fab up my TRON style lights. I'll post details as the parts come.
i ordered a bunch of LED's, resistors and diodes to fab up my TRON style lights. I'll post details as the parts come.
CafeCruzer
New Member
CafeCruzer
New Member
CafeCruzer
New Member
Re: 85 GPz750 Build
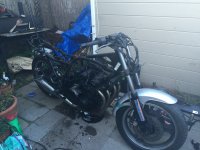
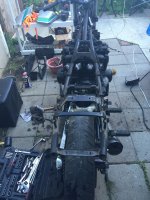
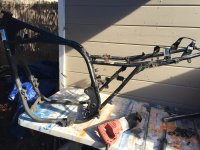
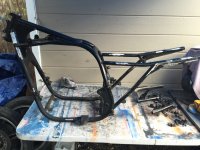
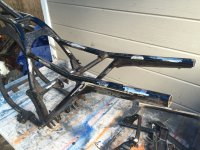
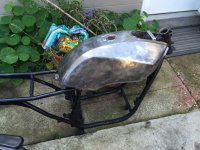
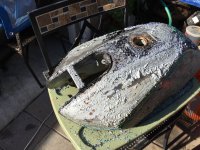
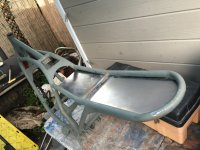
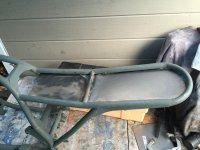
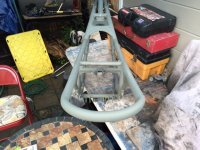
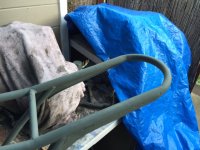
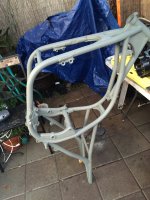
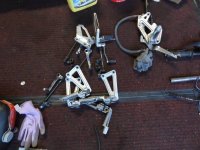
Did some work on the frame. Hit it with the wire brush on the grinder and then took the rest of the paint off with aircraft stripper. After a wash down with phosphoric acid she was ready for some self etching primer to stop surface rust. Then i bent some tube, welded in the hoop and some plates to go under the seat pan from my electrics.
Did some work on the frame. Hit it with the wire brush on the grinder and then took the rest of the paint off with aircraft stripper. After a wash down with phosphoric acid she was ready for some self etching primer to stop surface rust. Then i bent some tube, welded in the hoop and some plates to go under the seat pan from my electrics.
Attachments
CafeCruzer
New Member
CafeCruzer
New Member
Re: 85 GPz750 Build
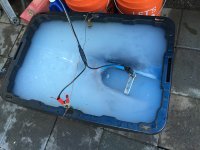
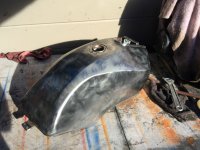
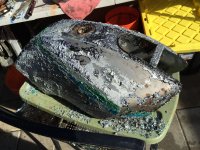
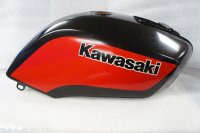
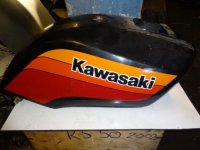
I bought this GPz tank on 3bay. Slight surface rust inside which i can remove. No dents just dings and pretty decent paint. The bottom one is a shot of the '88 GPz550 paint scheme that I am contemplating (problem is, the decal set is like $170 and I only want the tank decal ):
I bought this GPz tank on 3bay. Slight surface rust inside which i can remove. No dents just dings and pretty decent paint. The bottom one is a shot of the '88 GPz550 paint scheme that I am contemplating (problem is, the decal set is like $170 and I only want the tank decal ):
Attachments
Maybe you should mock up the rear suspension. Looks like a rear tire conflict with that pan. Looking good otherwise. Maybe you could find just the Kawasaki lettering graphic and paint the background colors. The background paint would be easy to do, and probably you can find just the simple "KAWASAKI" decal pretty cheap.
CafeCruzer
New Member
jpmobius said:Maybe you should mock up the rear suspension. Looks like a rear tire conflict with that pan. Looking good otherwise. Maybe you could find just the Kawasaki lettering graphic and paint the background colors. The background paint would be easy to do, and probably you can find just the simple "KAWASAKI" decal pretty cheap.
Sage advice jpmobious...
I was looking at this fella's bike and he seems to have the same elevations:
http://thebikeshed.cc/forums/topic/gpz750-unitrak-based-street-tracker-work-in-progress/
Alas, I will still be taking your advice and mocking it up!
As-far-as graphics, I was going to go with a black tank and use a lime green, vinyl KAWASAKI decal under some clear coat. I do like the idea of recreating the 88 paint and slapping on a KAWASAKI decal though...
")
CafeCruzer
New Member
Thanks all for the comments and advice!
Im actually kinda stoked to mock it up and check now... 8)
Im actually kinda stoked to mock it up and check now... 8)
CafeCruzer said:Thanks all for the comments and advice!
Im actually kinda stoked to mock it up and check now... 8)
good on ya ! you'll need to pull the spring off the shock or at least back the preload as far off as you can then ratchet strap it down against the bottom bumper....to know what clearance you need
CafeCruzer
New Member
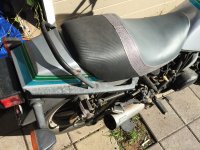
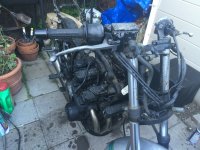
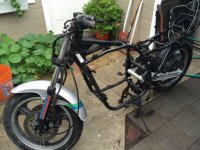
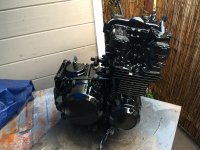
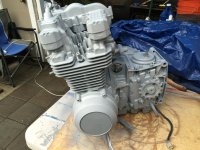
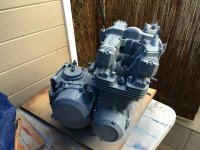
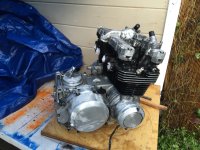
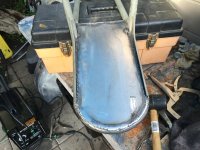
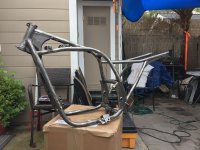
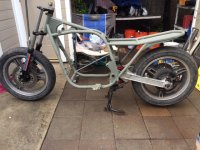
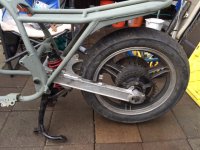
Mocked up the bike to check a few things. Even with the ZR750 mono shock I'm sticking with the specs that call for 104mm of rear travel. I measured 82mm with the current set up. So, I will be relocating the rear pan up 2cm to allow for clearance. Thanks to all for your tips on that one.
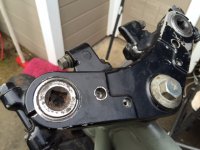
While I have the forks in, I cut the tubes down 7/8" and sprayed some Blaster PB on the cap bolts. After a few taps with the ball peen and some bruised elbows, those baby are loose --ready for the fork over hall.
So far so good.
While I have the forks in, I cut the tubes down 7/8" and sprayed some Blaster PB on the cap bolts. After a few taps with the ball peen and some bruised elbows, those baby are loose --ready for the fork over hall.
So far so good.
Attachments
BigSherm
Been Around the Block
Hey Cruzer-
If you adjust the rear axle eccentrics so the axle is at the bottom, that'll give you more room.
Also, are you planning to just move the sheet metal from the bottom of the frame hoop to the top? It looks like the hoop will allow the tire to move up inside it, so you could keep the hoop as is, if you like it that way. You could even dome the pan if you need even more room.
-Sherm
CafeCruzer
New Member
Sherm,
Dude, you are mindreader!
I was eyeballing the eccentrics as I sat there staring at the mock-up like a mental patient... I am keeping the hoop intact. The doming is a good idea. I have been debating whether to cut the pan out completely and mount it on top, or just carve out the area as needed. I think relocating the entire pan may be overkill, it just depends on how much wiggle room I have in there and how much I am willing to re-fabricate...
CafeCruzer
New Member
Rotated the eccentrics around (allowing for a similar chain tension) and I gained 33mm! The clearance under the pan now measures out at 115mm which is well past the 104mm and even allows a little more wiggle room. I looks like I can leave the pan intact.


