Follow along with the video below to see how to install our site as a web app on your home screen.
Note: This feature currently requires accessing the site using the built-in Safari browser.
We noticed you are blocking ads. DO THE TON only works with community supporters. Most are active members of the site with small businesses. Please consider disabling your ad blocking tool and checking out the businesses that help keep our site up and free.
Good score on the manual Milky! I'd be surprised if much (or anything) changed throughout the years too. But if you think there's a difference on something small, check the part numbers between the years. A different part number = different part = might be a different procedure. Just thought I'd bring it up.
Your gas cap look very much like the one on my GS450. I've been working a bunch of overtime lately, but once I finish up (and remember) I'll measure my gas cap.
gonna have to save every penny i can looking for alternative parts.. I took the "full floater" swing arm off yesterday and discoverd that the rear shock is not too bad BUT a new one would be 400-600 dollars!
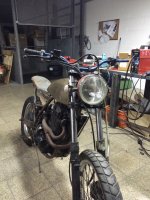
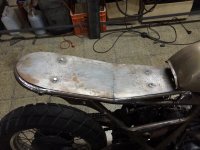
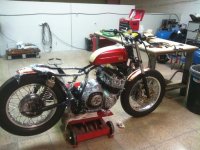
i've done a little seat pan work..and i think using part of the original palstic pan, with some fibre glass mods I should be able to get that and the foam to draw the eye in a starightish line.
Milky - I think what Big was suggesting was that the leading edge of your seat base be at the same level as the tank tail and that the seat base angle be a continuation of the line at the bottom of the tank (i.e., higher than the frame tubes). Your pictured mockup shows the seat starting much lower and following the frame tubes. This will throw off the lines. The line under the tank would run straight across to (about) where the rear frame triangle meets. You could kick up the seat a little from that point.
Milky - I think what Big was suggesting was that the leading edge of your seat base be at the same level as the tank tail and that the seat base angle be a continuation of the line at the bottom of the tank (i.e., higher than the frame tubes). Your pictured mockup shows the seat starting much lower and following the frame tubes. This will throw off the lines. The line under the tank would run straight across to (about) where the rear frame triangle meets. You could kick up the seat a little from that point.
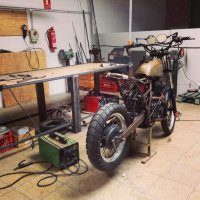
finally got me a welder.. and more... charly from http://www.vintageaddictioncrew.com has very generously offered to weld for me AND i can store my bike at his workshop and I can work on it myself from there!
woop!
i know charly from some film shows i put together last year here in barcelona and london, and since then he's expanded his workshop to include bikes...
this means I can finally move the bike from my garden (which has pleased the wife no end), and gives me access to all the specialized tools and expertise I dont yet have.
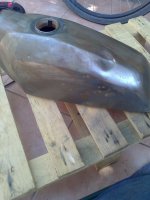
I have stripped the tank (using gel type paintstripper).
Removed two of the three dents, they were not too deep and using a heat gun and a prybar, caution and patience they slowly came out.
you can hardly see where they were..one was right by the filler cap the other further down toward the back... so quite pleased.
not sure what the "shotgun pellet" marks are on the side though maybe someone had a pop at it with a BB?
the final deeper dent i'll try and pop out by welding on a little steel rod and then pulling using a slide hammer or summat!
if not then BONDO!
the interior i'll restore using a nice german tank restore kit i bought... phosphoric acid and some liner "cream". NOT KREEM (i have heard of some very mixed results using that brand).
i'm back... had a shit ton of work to do AND it was august holidays here in spain where EVERYONE is on holiday!
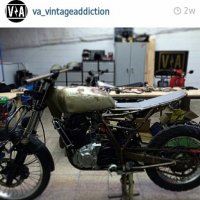
so finally did a little work.
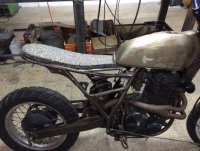
welded up the hoop.
cut and bolted on the seet pan
made tabs for tank fitting
hammered out about 2 inches on the underside of the tank to for the frame
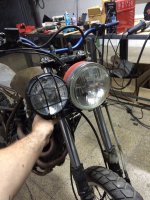
making custom bars.
Just want to check - did you do a leak down test on the gas tank after hammering out for the frame? I know sometimes the seams of the tank can get a small split after some persuading with a hammer......
Just want to check - did you do a leak down test on the gas tank after hammering out for the frame? I know sometimes the seams of the tank can get a small split after some persuading with a hammer......
havent checked it yet... the tank hasnt had gas in it for at least 20 years.. so i'm sure if it leaks we'll be able to weld it a little.. espcialy pinholes... after that test i'll be re-sealing with a new liner fluid etc etc.
then a lot of "bondo" for the tiny dents.
phew... i only get about 3 to 4 hours a week to work on this project.. its sloooooooooow
No worries mate. I got the English and German manual as well. I will start my own topic as soon as I find some time. Maybe after the DGR this Sunday.
I am about to cut off that ugly subframe tomorrow and save some weight.
This site uses cookies to help personalise content, tailor your experience and to keep you logged in if you register.
By continuing to use this site, you are consenting to our use of cookies.


")