Follow along with the video below to see how to install our site as a web app on your home screen.
Note: This feature currently requires accessing the site using the built-in Safari browser.
We noticed you are blocking ads. DO THE TON only works with community supporters. Most are active members of the site with small businesses. Please consider disabling your ad blocking tool and checking out the businesses that help keep our site up and free.
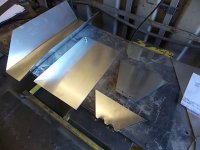
Hey Irk - Boom, boom .... just got it ! Where I marked "tank" on the set up frame was so that I could position the mounts once the "tank" was removed.
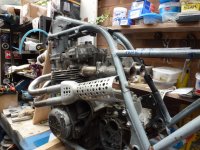
In reality of course - it's not the tank ! Nor even a "tank cover". My problem is that I'm using the frame to set up as much as possible until my pal gets back mid July and I can then transfer all the parts / measurements over to the red rolling chassis. My main problem as you can see from the pix - is that I can only access one side !
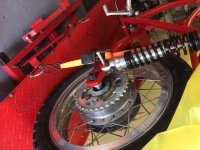
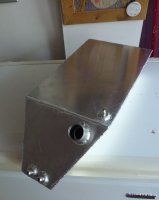
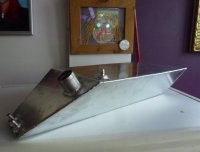
The actual "tank" [ fuel cell ] will be fabricated by that talented builder Uncle Rob of this parish. It's worked out really well at around 2 Imp gallons - the main issue yet to resolve is the path for the filler tube to the top of the frame. I have got the 4" over swingarm and as soon as I find a suitable spindle / bolt I can offer it up and see what space I have for the filler tube.
Ooohhh - that's sweet Rob. Wish I lived a bit closer to you !!!!!
Errrrr - dummy time : ..... I just noticed what I forgot to add to the original sketch !! - any tabs for the mounts !! I had planned for the fuel cell to be carried in the belly fairing, but I guess there needs to be a tab or 2 to bolt it to the GRP ?
The fuel flller neck needs to be inline with the breather and can be 90 degrees to the sloping face. Centres 2" and 2" from the top right hand edge. Sketch with you tomorrow - sorry about that. I'll be proud to have that on my bike. 8)
I had wondered how you planned to mount it TJ.....but sort of assumed you were going to bond it into the belly pan.....same way as I do with the Honda tanks? I quite like doing it that way as it avoids any possibility of a fracture at the mounting points....but happy to stick some on....just say where!
Popping down to Neil Foremans place in a couple of days and will pick up the filler neck....not sure how long you'd like it?
To be honest I hadn't considered the foam option - although I had planned to put some self adhesive foam in there.
That makes sense as I have to mount the belly fairing anyway : : ! So, ignore the sketch I sent for the tabs !!!!! What foam did you use ?
I've sent details for the positioning of the filler neck - 1 1/2" long will be fine.
The Classic Silver Aluminium celly arrived today - I haven't given it a thorough mix yet - but it's looking good. The seat base is ready for another coat - so I'll shoot that in the Silver and see if it's somewere near 8)
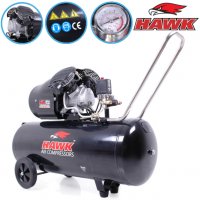
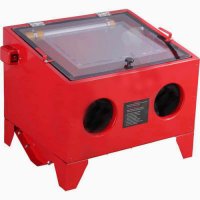
Sold one of my Eaton blowers - bought this !!!!! ;D Plenty of capacity to run the blast cabinet, soda blast pot and all the air tools. I'm just clearing a space in my garage for the blast cabinet [ bench model ] and while I'm at it I'll sort some more stuff out to put on E-Bay .... need money !
I just use an aerosol can of polyurethane foam TJ, I locate the tank in the mould with a couple of dabs of body filler and once its gone off squirt the foam in....and always use less than I think I need....it expands a lot!
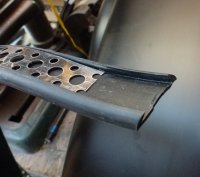
If you haven't seen it before have a look at Car Builder Solutions site TJ....run by Neil Foreman (Ferrari P4 and Can Am replica guy) and his sons.....lots of good bike bits....including that rubber strip! They're local to me so I get down to their shop quite often, everything they sell is decent quality, they build cars and bikes themselves rather than just selling things and they're currently setting up a new site....Bike Builder Solutions!
That's exactly where I got it from Rob !!!! ;D I have their #31 issue catalogue on my desk. Back when I was building / selling kits I used to buy my components direct from the rubber moulding manufactures.
I use the catalogue mainly for reference and ideas - like all things modern, generally there is a Chinabay alternative. Sadly a lot of the components offered by UK outlets ARE the Chinabay offerings - sometimes the UK sellers even use the Chinese seller's same exact pix !
You remember the story about those Borrani rims when they first came back on the market ? Available from an Alibaba source at $10 [US ] per piece if you bought 100. They were then imported into Italy where they had "Borrani - Made in Italy" stamped on them ! I was on the cusp of placing an order, but the issue was buying 400 rims to cover front / rear and 2 different spoke numbers. I DID buy 3 sets as samples [ £200 landed ] - one set now on my KZ ! I contacted the same company about having the Grimeca 4LS hubs copied. Initial costings were £200 per unit in 100's. :'(
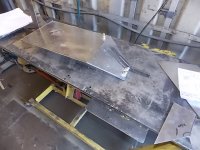
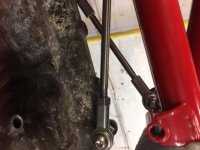
Time to start busting down the mock up. Now my pal's back I can get all the parts transferred over to the "real" bike. Theoretically, what fitted to the mule should fit the rolling chassis. There's a few jobs I couldn't finalise on the mule, as I could only access one side ! Mainly the belly pan and seat trimming to fettle for a good fit. I've also got to offer up and decide which top fairing looks best - then sell the other one. I'm hoping I can arrange someone to come and tack the headers before I dismantle the dummy engine. Worse case - I'll have to re-assemble and get it done at my pal's. Note to self ..... in the next life, learn how to weld proficiently ! :
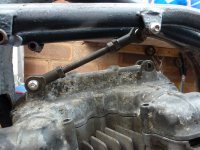
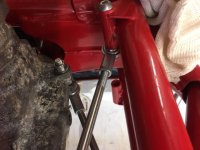
Not very exciting, but I finished mocking up the head steadies. The one the other side will be the opposite orientation giving maximum rigidity and I can then trash the nonsense that Kawasaki fitted. More room and places to mount stuff, like the dual output coils, NOS solenoids, fuel pump, etc.
The mock up mule is completely stripped now and all the parts back round my pal's garage ready for re-assembly into the Red frame.
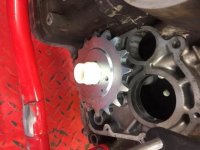
Double checked the measurement for the front spindle to convert the Grimeca hub to the KZ forks. That'll be done next week. I've also got a guy coming round with his portable welder to tack up the exhaust headers. That's the last of the ballache jobs that I can't tackle myself : Then I have to find someone to tig the headers so I can get them polished to look like a single pipe !
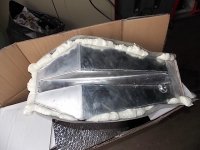
The under frame fuel cell is now completed [ Thanx Uncle Rob ] and on it's way .... can't wait to see that !
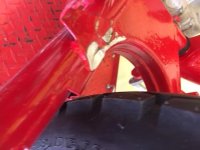
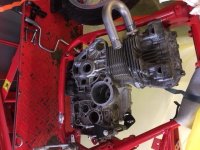
Hindsight - what a wonderful attribute. ! : Various lugs and brackets need to be removed from my nicely powder coated frame !!! Also need to trim part of the rear tank mount [ that takes the rubber strap ] to clear the long Weber manifold.
Ah well, I've already ordered a litre of Red Celly to do the stripes / graffix, so that'll do to touch in the ground off areas. Fortunately they're pretty well hidden.
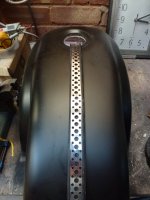
Tried the Classic Silver on the seat / tank - just didn't look right with the Red [ should have ! ], so It's back to Satin Black with Red central stripe / graffix.
Just need confirmation [ help guys ] of the o/d of the front fork axle sleeve nut so the guy can make up the sleeve / spacer for the Grimeca front hub.
This site uses cookies to help personalise content, tailor your experience and to keep you logged in if you register.
By continuing to use this site, you are consenting to our use of cookies.

")