jdesignerw
New Member
I bought a 1971 CB350 10/17/2015. It only has a little over 4300 miles on it. Got it running (sort of), but I want it running great! I'll post updates (with pics) as I go. I appreciate any advice! ")

MotorbikeBruno said:There we go! I've got a CL350 basket here (71') so I'll give you any help I can since they are basically the same thing
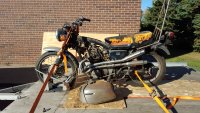
hurco550 said:I can tell your from the northern states when you haul bikes home on a snowmobile trailer =)
jdesignerw said:I replaced the spark plugs and installed K&N Air Filters (http://www.amazon.com/gp/product/B000E7H458?psc=1&redirect=true&ref_=oh_aui_detailpage_o00_s00). I ordered a couple carb kits from a local shop that should arrive this Tues 11/3/15.
I attempted to check the points, but was unable to take the cover off. 2 of the 3 screws were stripped. I'm going to have to pick up a screw extractor to get those out. Does anyone have any tips for stripped screws?
I'm going to remove the carbs this week. I've got a Clymer manual, but if you have any tips let me know.
Dime City for example. jdesignerw said:MotorbikeBruno, thanks for the all the advice. You are the man!
Double check that your floats are the same....haha...his were not.


did you cable synch the butterflies ? as i describedjdesignerw said:I ended up cutting down the float bowl gaskets. That seemed to work fine with no leaks. After reattaching the throttle cables it wasn't idling right. Still trying to fiddle with idle to get that right. I was able to ride it a little when the weather warmed up for a couple days. Also, I put on side mirrors.