74' CL360 - Project Pale-Skull - DormRoom Build

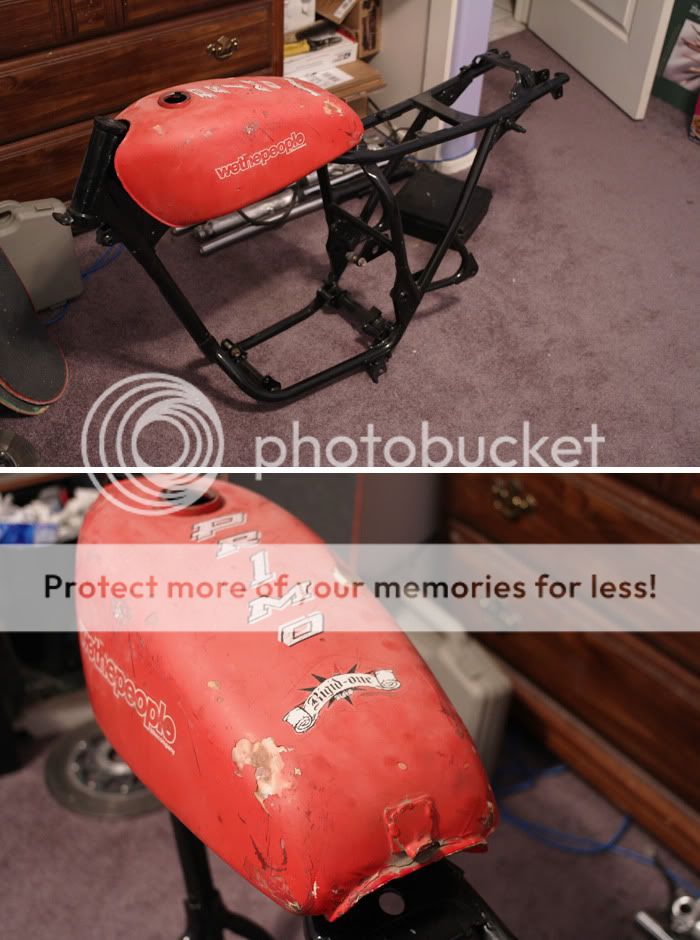
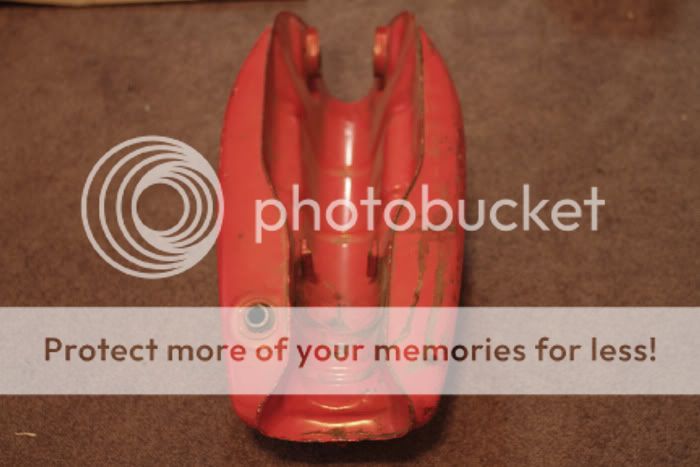
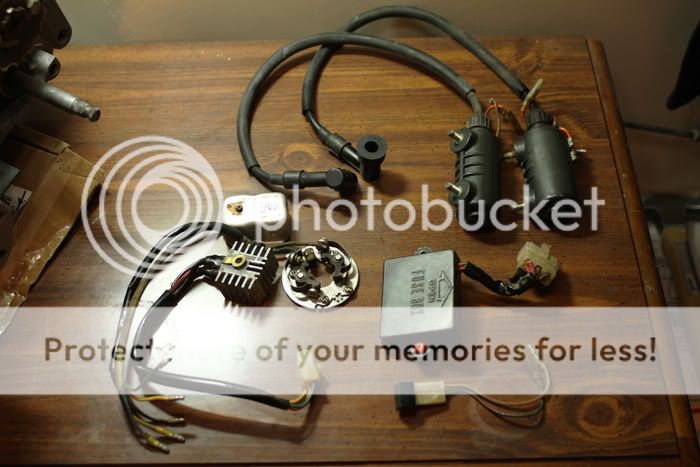
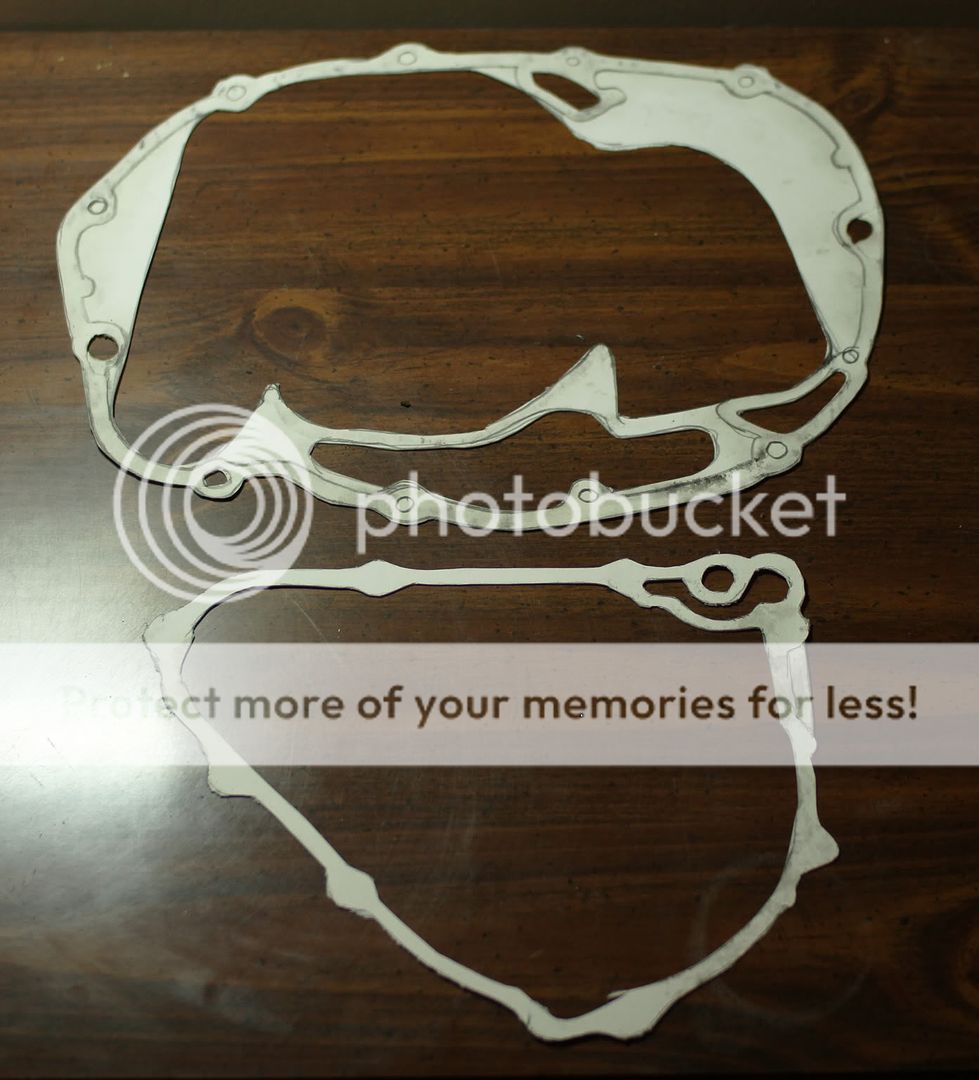
74' CL360 - Dorm Room Build

Thank you fellas!


I'm bashing that junk out tonight then! Thanks for the ice plug tip!
Sorry CJ.. I'll have to hold on a "proper" plug.


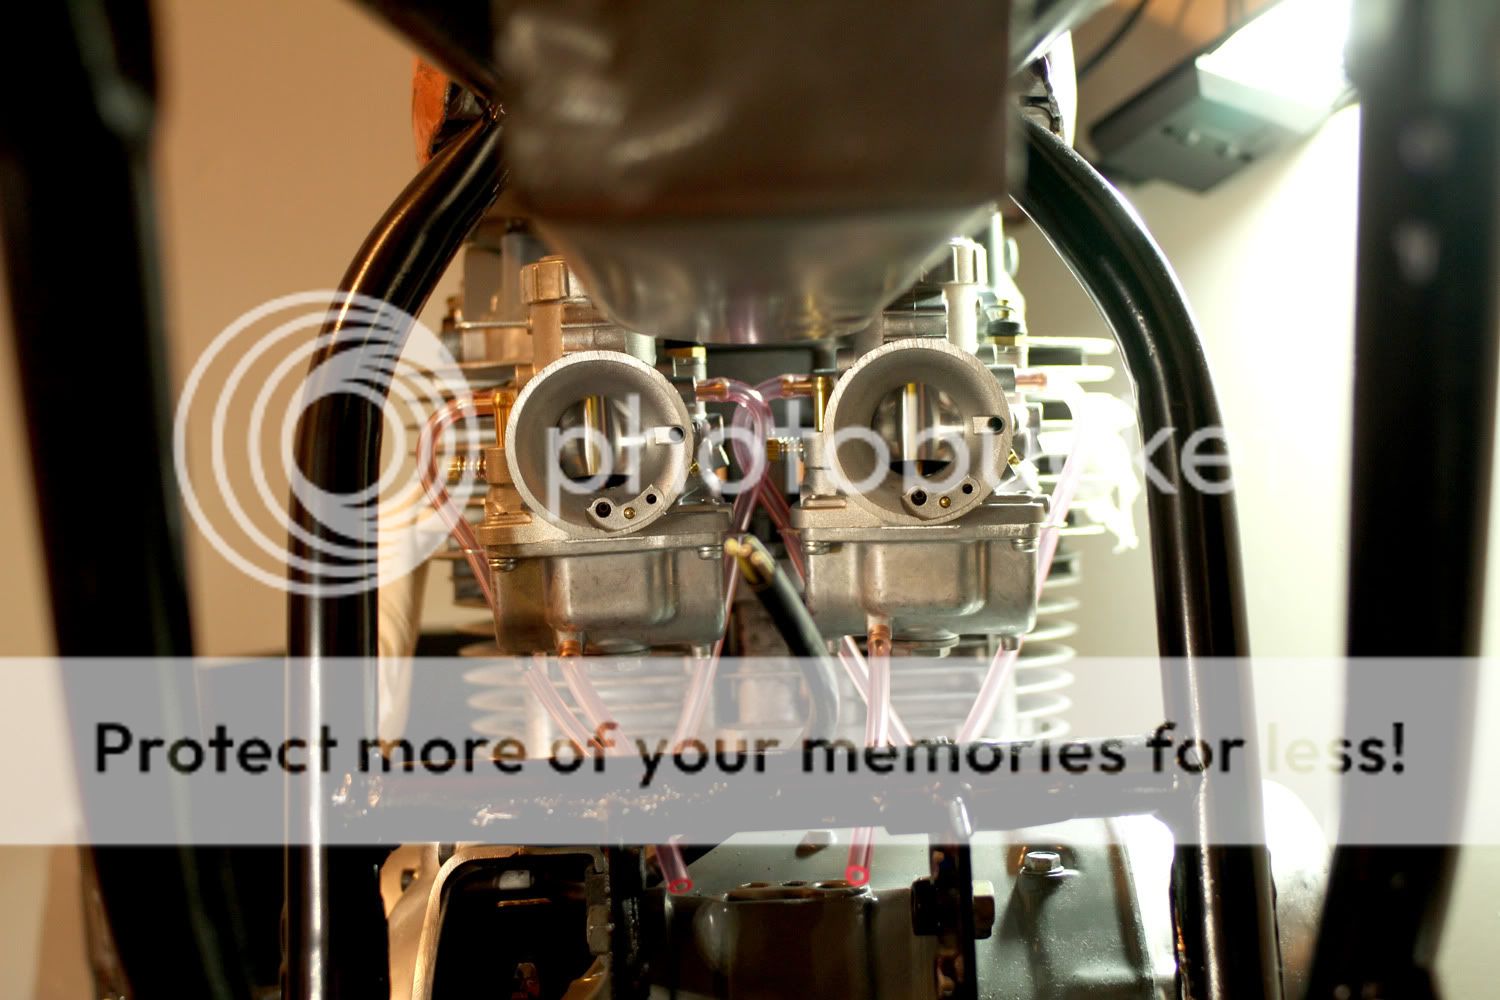
As for the carbs, I don't have access to decent stock carbs, and a good price.
From what I've seen, paying $80 a pop for VM30's isn't too bad.. Besides my exhaust,
I predict the carbs to be the most "expensive" purchase of the build..


The results I've seen have been all close @:
Main: 145- 150
Pilot: 20-25
Needle: p5-159


Reguardless I'll be spending time with the carbs, and since I have no carbs to fall back on at all, it kinda gives me
the freedom to choose around.


For as broke as I am, there is no budget..
This bike gets done no matter what! and well!


What are you fellas with VM30's running your jets at?
No pods as of now.. Exhaust will be as open as my ears and neighbors will allow..
 
QUICK UPDATE:


Engine.jpg


Alright guys here's a quick update of things..


1. How/where do I put the loose Green neutral wire from the stator?
NeutralSwitch.jpg


2. What size is the Rotor Setting bolt? Can i Just get something similar - a bolt/washer/flange bolt, set up from a hardware store?


3. Is there anyway I could make this tank fit? Tobiism hooked it up with this cool tank, but it seems to be a bit skinny at the base..
I was looking for a tank like this, something Long, as it's much longer than a CL360 tank..


Can any cutting/welding get this thing going? or is it more trouble than it's worth?


Should have shot a side profile.. But you can see the tank floating about an inch or two in the rear..


PrimoTank.jpg


Tank.jpg


OTHER SHIT..


- Got all the electrical to get the engine going (condenser/plugs not shown).
- Got some 78' Yama. XS650 Coils in there.. Should be the same as the MikeXS


Electrical.jpg


- Also, I decided to go the hard route an make some gaskets.. (Cheaper this way for me..)
- I think they turned out pretty good, when I can truly "trail & Error" these, I'll make a PDF/AI File for you guys, get them plotted out on a 11 X 17" at your local printers... Once I made the stencils, transferring to some gasket paper was no big deal. Saves a little $$.


Gaskets.jpg


Pic of the (Right) Gasket Fitted, not torqued down yet.


GasketOn.jpg


More to come..
 
Looks great Cleon! Those carbs are from a mid '90's watercooled GSXR. They are C.V. flatslides, not the super expensive cable pull flatslides people are raving about. I picked them up from Ebay for about $30.
 
I was still going to hold off posting a little longer for more updates, but, here's a quickie.


At this point the Engine looks solid, had a real fun time trying to put it back in the frame by myself.. but it worked out.


I'm currently on electrical. I have a harness off ebay but it's been brought to my attention that it would be easier and more beneficial to just make one. So here goes..


Question: Could I strip the Gas Tank to bare metal and keep it that way? With some clear from a can or something? I want it to be RAW...


IMG_0038.jpg
 
Looks great man! Yes you can run it raw, get yourself some "Gibbs Brand Penetrant". You could probably get by with just the occasional rubdown of WD40, but nothing beats Gibbs!
 
Wanted to give you guys and gals a more 'thorough' update to read, but, here's another half assed one.
Waiting on some parts etc...

Matthew T. pointed me in the direction of some Gibbs Spray. I use it much more than on just this build, very great shit.


But, I got the Kuni's in there and made a little components box.

Box was just a means of getting some 16G sheet, cutting, torching and bending it, done.
Hopefully I can fit a stock seat pan on it.


Few Question's - One Main one accutally...


Wheel Resto - got any tips on cleaning these things?

I may take the easy way out and paint my spokes and hub. But even with that. MUST I disassemble the wheel to get to the INNER part of hub? Like, between the spokes flanges?

Couldn't I just spray ZEP of some type of cleaner in there, wipe with some denatured Alchy and spray away?


TwinsPost.jpg


BatteryBox.jpg
 
Personally, If I was going to go through the trouble of tearing them down to clean them up and paint, I'd just go ahead and lace up some new alloy wheels and spokes. If I was going to paint, I'd do like you said, just clean them up the best you can and spray them.
 
Right on, I'll end up just removing as much rust as I can if not all from spoke/nipples, mask the wheel/nipps, then bomb em with some black Appliance Epoxy.


As for the Hub innards, the drum lining has a decent deal of rust in there.
Can I take a 400 Grit or a Scotchbrite pad to it, rinse with some soapy water, and then wipe down with denatured alchy?
 
cleoncleon said:
Right on, I'll end up just removing as much rust as I can if not all from spoke/nipples, mask the wheel/nipps, then bomb em with some black Appliance Epoxy.


As for the Hub innards, the drum lining has a decent deal of rust in there.
Can I take a 400 Grit or a Scotchbrite pad to it, rinse with some soapy water, and then wipe down with denatured alchy?

plug the bearing hole and fill up the drum with vinegar. It will eat away at the rust. Coke works pretty well too. Guess I shouldn't have kept them outside huh?
 
I see no one answered your question about neutral switch, you compress spring and washer, the wire has solder on the end and fits through a hole drilled in shaft, spring and washer hold it in place.
 
tobiism said:
oh yeah are those VM's the new light sabre edition? :eek:


Matt I'm not sure at all haha... I plucked em from 80$ a pop off of ebay.


crazypj said:
I see no one answered your question about neutral switch, you compress spring and washer, the wire has solder on the end and fits through a hole drilled in shaft, spring and washer hold it in place.


PJ! I had even forgot I still had this to deal with... I had even proceeded to bolt the cover on haha.
Okay so, that little Green looking wire from my stator should go in that tiny hole right? What exactly does that neutral switch do and do I need it? And is what you see in the pic all I need? there's a little paint on it, that i'll need to clean off.


Do these 360's need to be in neutral to start?
 
They have to be in neutral to kick start them, the clutch will disengage the kicker system from the rest of the engine. IF you are running idiot lights then yeah good idea to hook it up.
 
Neutral switch is a real simple grounding contact on end of gear change shift drum.
Power goes from ign side , to bulb, from bulb to light green with red tracer.in neutral, the bulb is grounded so lights up.
Kickstrt oes through transmission so it can't be started in gear
 
Ahhh okay, that's good news. I thought it was something more important.
Jumping on the wheels now, I'll wait for a few more components before i get into
wiring again.


Thankyou sirs
 
tobiism said:
plug the bearing hole and fill up the drum with vinegar. It will eat away at the rust. Coke works pretty well too. Guess I shouldn't have kept them outside huh?


Haha, they aren't to bad Matt, just a bit here and there... I'll try this.


I've been using the foil trick on the chrome/spokes, foil is my new Mr. Clean magic eraser.
 
Matt T, I tried your chemistry experiment and it did wonders.
Honestly, a bottle of Simple Green, Vinegar, a Tooth Brush, and some Tin Foil will take you far, it terms of cleaning things on a scoot.


Don't forget some denatured alchy! Keep things dry.


VinnyBath.jpg


Babies in the Bubble Bath..


Bubbles.jpg


BubblesTwo.jpg


Babies all Dry..


Wheels.jpg


The only thing I'm still struggling with is the Hubs... I may end up just cleaning the Rims/Spokes up, but if i could get inbetween the spoke flanges without tearing them down that would be nice. Simple Green is too simple for the hardend grime on the hubs. The chrome and Spokes are cake.


Any tips? Originally I was going to spray the Spokes and Hubs black.


FrontRoller.jpg
 
If all you want to do is paint hub, roughing it up a bit with chemical cleaning then using an etch primer should be fine.
If you want something more ambitious, you'll have to dismantle wheels.
I did some major modifications to front and rear hubs
on one of my 360's
Rear
Rearhub2.jpg

Rearhub3.jpg

Front
Hub-holes.jpg

Hub-closeup.jpg
 
Those Hubs looks insane sir!
It's amazing how much material you can remove from these things...
I was thinking about making a few holes in my front hub, not any big enough for much water/dirt to get into.
Do i need some heavy machinery for this or will a normal hand drill work?
 
Back
Top Bottom