
We noticed you are blocking ads. DO THE TON only works with community supporters. Most are active members of the site with small businesses. Please consider disabling your ad blocking tool and checking out the businesses that help keep our site up and free.
You are using an out of date browser. It may not display this or other websites correctly.
You should upgrade or use an alternative browser.
You should upgrade or use an alternative browser.
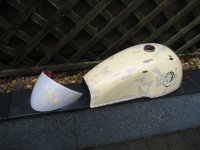
'81 TR1 build.................(yup another Mojave tank combo!!)
- Thread starter lchris21
- Start date
Nuckingfuts
Been Around the Block
That seat cowl is sick!! Nice work.
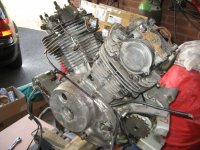
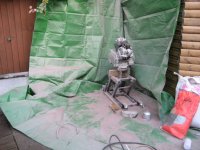
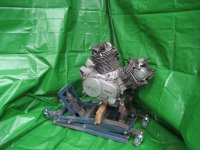
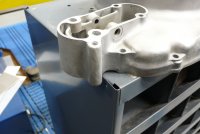
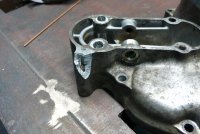
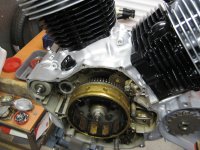
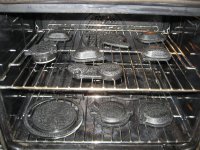
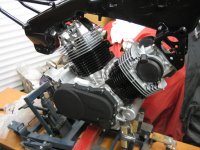
Some progress................I've mostly been cleaning up the engine, a job I've not been looking forward to since the start !!!
Made up some bungs and plugs for all the key ports then got at it with a cheapo sand blasting gun. Emptied my bench top blasting cabinet for the media and spent a few hours getting covered in dust !! I could still feel it in my teeth the following day ...................never again, what a messy job. I knew it was going to be, that's why I've been putting it off
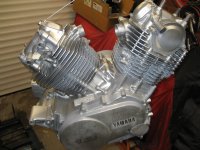
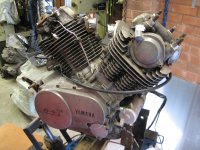
Got some primer on it then some silver engine paint. Now its all clean I'm looking forward to detailing it. Various covers and the side cases are going to be painted in Black to break up the silver lump
Made up some bungs and plugs for all the key ports then got at it with a cheapo sand blasting gun. Emptied my bench top blasting cabinet for the media and spent a few hours getting covered in dust !! I could still feel it in my teeth the following day
...................never again, what a messy job. I knew it was going to be, that's why I've been putting it off Got some primer on it then some silver engine paint. Now its all clean I'm looking forward to detailing it. Various covers and the side cases are going to be painted in Black to break up the silver lump
Attachments
-
 IMG_5427.JPG2.5 MB · Views: 246
 -
 IMG_5500.JPG2.8 MB · Views: 245
 -
 IMG_5498.JPG2.5 MB · Views: 239
 -
 IMG_5489.JPG2.7 MB · Views: 254
 -
 IMG_5487.JPG813.6 KB · Views: 253
 -
 IMG_5466.JPG2.5 MB · Views: 247
 -
 IMG_5457.JPG2.7 MB · Views: 249
 -
 IMG_5455.JPG3.2 MB · Views: 252
 -
 IMG_5442.JPG2.7 MB · Views: 240
 -
 IMG_5431.JPG2.8 MB · Views: 260
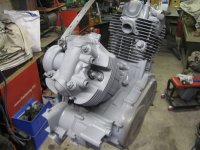
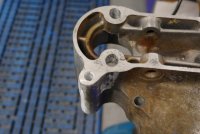
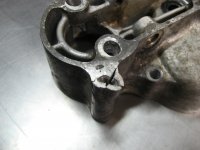
During the clean up process, I decided to drop the engine off my workbench onto the floor................
Luckily my finger saved the day :'( ..............my right glove is now a little bit tight and my finger has got about 5mm wider and thinner..........and there was a little bit of swearing
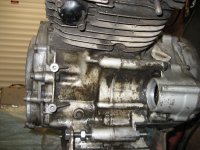
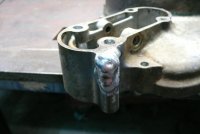
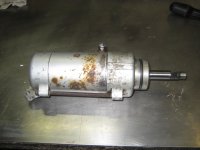
Bit of damage to the engine case on one side, which meant getting the TIG out
Luckily my finger saved the day :'( ..............my right glove is now a little bit tight and my finger has got about 5mm wider and thinner..........and there was a little bit of swearing
Bit of damage to the engine case on one side, which meant getting the TIG out
Attachments

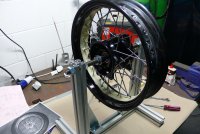
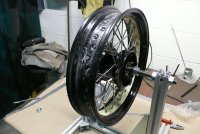
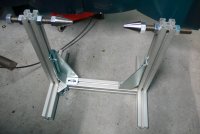
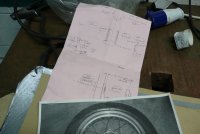
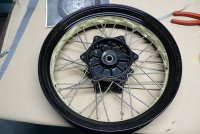
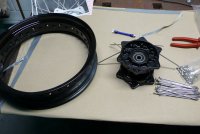
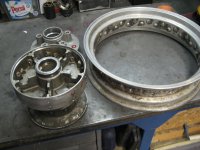
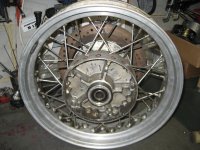
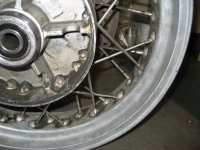
Made a start on putting the wheels back together. Wisely made some sketches and took some pics before I stripped them down. Got them all laced up ready for truing. Made up a truing stand out of some aluminium extrusion that was lying around...........................
Polished all the spokes up with a bit of 600grit in the lathe, then put some masking tape on the rims to stop the lacing process scratching the newly polished paint. Will leave that on when I'm in there with the spoke spanner just in case......All the nipples are brand new, along with a few new spokes.
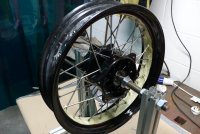
They've come up quite nicely considering the state they were in.
Polished all the spokes up with a bit of 600grit in the lathe, then put some masking tape on the rims to stop the lacing process scratching the newly polished paint. Will leave that on when I'm in there with the spoke spanner just in case......All the nipples are brand new, along with a few new spokes.
They've come up quite nicely considering the state they were in.
Attachments
-
 P1160957.JPG765.8 KB · Views: 238
 -
 P1160956.JPG3.7 MB · Views: 246
 -
 P1160955.JPG2.4 MB · Views: 254
 -
 P1160954.JPG3.7 MB · Views: 254
 -
 P1160951.JPG721.4 KB · Views: 241
 -
 P1160949.JPG4 MB · Views: 248
 -
 P1160946.JPG3.8 MB · Views: 246
 -
 IMG_4658.JPG2.8 MB · Views: 229
 -
 IMG_4554.JPG582 KB · Views: 233
 -
 IMG_4553.JPG2.6 MB · Views: 229
redwillissuperman
Keep it simple- engine, wheels, bars
Don't tell your wife or else she could start getting ideas.lchris21 said:During the clean up process, I decided to drop the engine off my workbench onto the floor................
Luckily my finger saved the day :'( ..............my right glove is now a little bit tight and my finger has got about 5mm wider
Nuckingfuts
Been Around the Block
Nice job bouncing back aggressively with the case fix. Good stuff!
Been off work this week so made some decent progress....
Some good news and some bad news :-\
Lets get the bad news out of the way first....
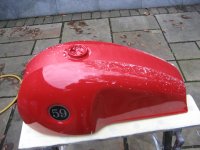
The tank, yep the tank. The most single time consuming part of this project again has decided to eat up a bit more time..
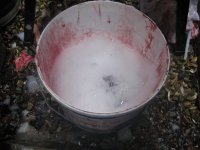
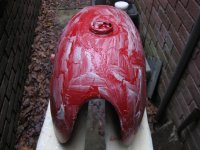
For those following the thread, If you recall I painted it myself. I did lots of research on paints to use, prep, primers, guns, you name it. It all went on well and I was happy with the way it turned out but the clearcoat just would not harden properly even after nearly 5-weeks curing in my daughters bedroom who's imminent arrival back from college has preempted the the course of action!!! Top it all off the finish was shrinking and affecting the base coat....................only one thing for it, 3hrs punishment in the rain scraping and flatting it off
Some good news and some bad news :-\
Lets get the bad news out of the way first....
The tank, yep the tank. The most single time consuming part of this project again has decided to eat up a bit more time..
For those following the thread, If you recall I painted it myself. I did lots of research on paints to use, prep, primers, guns, you name it. It all went on well and I was happy with the way it turned out but the clearcoat just would not harden properly even after nearly 5-weeks curing in my daughters bedroom who's imminent arrival back from college has preempted the the course of action!!! Top it all off the finish was shrinking and affecting the base coat....................only one thing for it, 3hrs punishment in the rain scraping and flatting it off
Attachments
Right that's over, onto some good news.....................
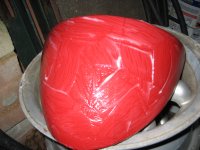
Tank is now being painted with the poisonous 2k stuff by a pro, so should be hard and shiny in a week or two !!!..........................Pics to follow as I've had a change of colour also. When I finished painting it, I went off the colour a little..................
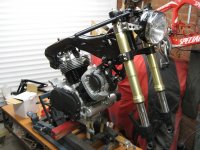
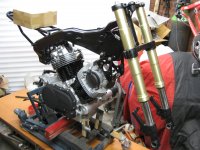
Other bits of the build are coming along nicely. Its great to be putting the bike together finally. Been doing lots of cleaning, painting, wire brushing, renewing seals, bearings, bolts etc....
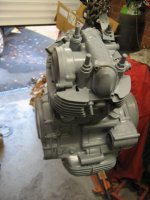
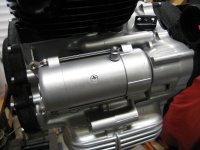
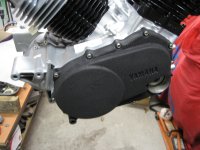
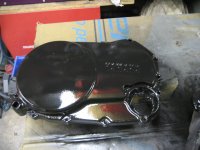
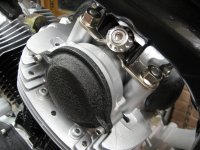
Been cracking on with the engine make-over, including a bit of home baking with some crinkle finish paint....................
Tank is now being painted with the poisonous 2k stuff by a pro, so should be hard and shiny in a week or two !!!..........................Pics to follow as I've had a change of colour also. When I finished painting it, I went off the colour a little..................
Other bits of the build are coming along nicely. Its great to be putting the bike together finally. Been doing lots of cleaning, painting, wire brushing, renewing seals, bearings, bolts etc....
Been cracking on with the engine make-over, including a bit of home baking with some crinkle finish paint....................
Attachments
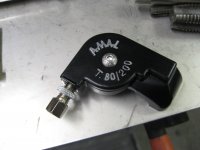
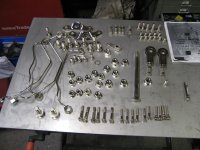
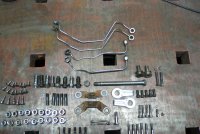
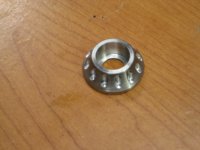
Had my fixture and fittings back from the platers...............they only managed to loose 3 items !!! Gone for the nickel finish rather than chrome or galvanized
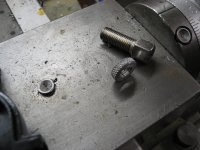
They lost a crucial bit for the throttle housing. Only a small piece, the cable adjusting locknut but the thread was an unusual size. I managed to knock out one on the lathe.
They lost a crucial bit for the throttle housing. Only a small piece, the cable adjusting locknut but the thread was an unusual size. I managed to knock out one on the lathe.
Attachments
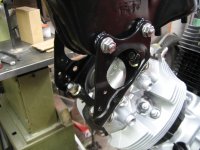
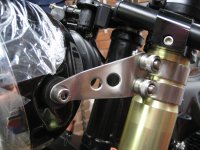
Got the frame mounted onto the engine.
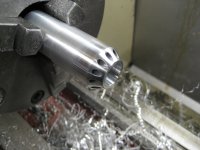
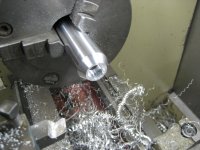
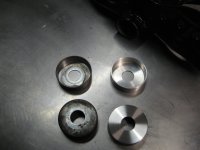
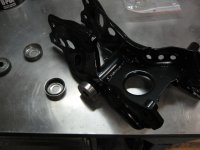
Was looking at the sad plain old washer sitting under the rear mounts and decided to spice them up a bit. They will be visible when the bike is finished. I remebered seeing something similar on my mates Aprilla superbike, so got out the rotary table and knocked a couple up on the mill.
At this rate the bike will never be finished, hand making washers
Attachments

I'm supposed to be catching up on some household work on my week off................................it can wait ;D
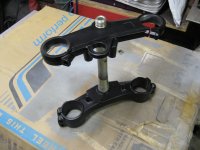
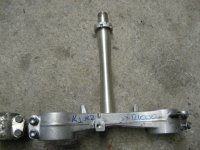
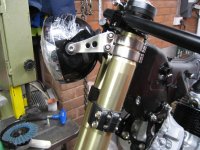
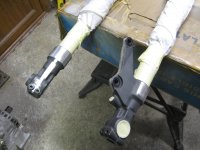
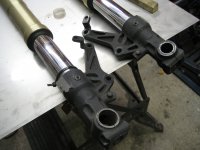
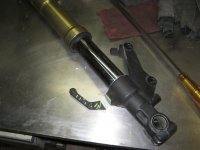
Chopped off the excess brackets on the forks and got them mounted onto the triple clamps.
Made up some new seal retainers for the swing arm mounting pivot, and started bolting stuff on.
Surprising how many boxes I've got to search through for the bits and pieces. They've been scattered to the five corners of the garage during the fabrication and mock-up...........trying to think where the shock mounting pin is????? I'll be searching for that this afternoon...................Probably have to make a new one
Attachments
Nuckingfuts
Been Around the Block
The plated hardware turned out nice, looks good with refreshed engine!
dannywrx88
Been Around the Block
Where are those headlight clamps from?
Sent from my iPhone using Tapatalk
Sent from my iPhone using Tapatalk
dannywrx88 said:Where are those headlight clamps from?
Sent from my iPhone using Tapatalk
if you google diary or food pipe clamps there's lots of different types around???
jimmer said:The wrinkle finish looks superb. Is it as good as it looks? What brand is it? Keep up the fine progress.
VHT SP201 Wrinkle case paint. It can turn out a bit patchy as you've got to put heavy coats on. Took 3 attempts on one of the side casings. All good now....


