1983 Nighthawk 650 build

Leetillman351

Active Member
Howdy!

My name is Lee Tillman, I've been on here for a few years and documented half of my first build but sold the project a little before it was completed. Since then I've had a few bikes and this forum has helped me with ideas and problem solving. So I figured I would document this next build to hopefully help others who are doing the same thing with the same bike, and hopefully get help and advice along the way from you all.

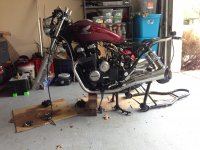
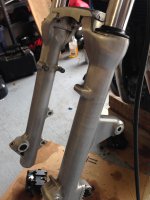
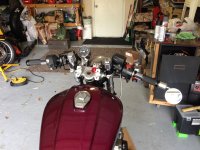
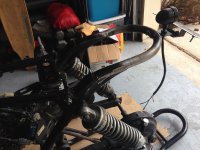
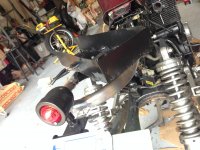
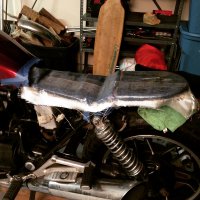
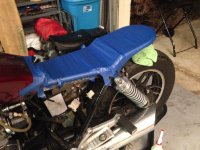
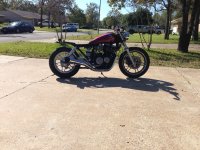
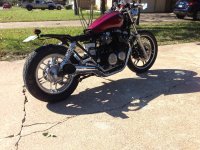
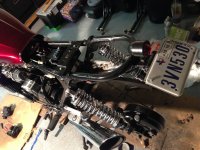
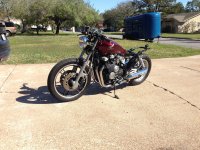
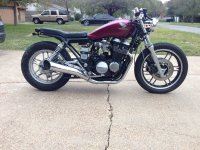
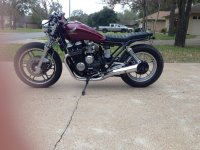
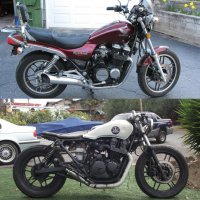
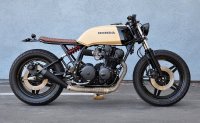
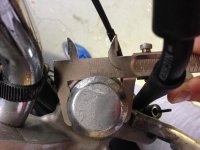
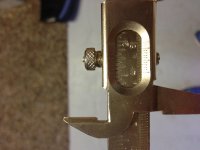
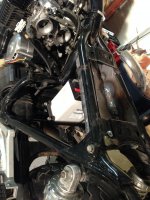
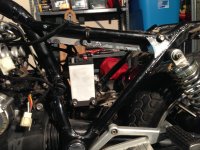
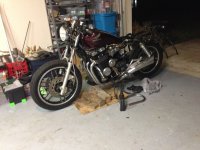
Anyways, picked up this all original nighthawk 650 last week, and could help but get it torn down and cafe'd. I know its not a very desirable bike, but I enjoy the challenge! My plans are to get it along these lines, but better. Possibly doing a mono shock conversion as well, who knows. What advice do yall have for me in building this bike? What style would best suit this bike? What should I watch out for? Also, I ordered 35mm clip-on's and they were to small. I measured the fork diameter and it came out to around 1.5inches so should be 38mm? I have seen 35mm, 38mm and 39mm when I look up the fork diameter. Could anyone help me out on this?

Thanks in advance!
 

Attachments

  • IMG_0853.JPG
    IMG_0853.JPG
    141.4 KB · Views: 11,311
Put a vernier caliper on the fork for the size, but they are supposed to be 35mm forks so maybe the forks got swapped out at some point and now they are 37mm since honda used that size as well during those years.
I wonder if you could use the swing arm off another model that is shaft drive and mono shocked?? Like a GL650 and then use the whole Pro-link setup to have a mono shock that would function very well (also use a better shock than the GL comes with) and not some slapped together crap that sags after or is a death trap.

Plus if it was to be done then it would look like honda made it that way
 
And you could keep the forks since they already come with a built in brace and dual disc, but improve it with some Racetech springs and emulators
 
That would be cool getting another shaft driven rear end. I wonder if others are compatible..

Part of the reason that I wanted to do a monoshock is because I could then chop the subframe and make it more cafe instead of having the dip. Otherwise it'll come out like this which looks really weird. But if there is a way around that then I won't monoshock, but it would be pretty sweet. And I'll get a caliper on it later and send a picture of it.
 

Attachments

  • image.jpeg
    image.jpeg
    38 KB · Views: 8,709
How much are those racetech springs? I thought about getting progressive springs but I also wanted to lower is substantially. What would be the best way to get a better ride and also lower, without a front end swap?

Kinda like this with the cafe look but with a monoshock
 

Attachments

  • image.jpeg
    image.jpeg
    77.7 KB · Views: 8,509
that is a 39mm front end

gl650 stuff wont swap on to that bike the drive turns the other way and is on the right side
 
So I've been making some progress. I'm in the process of fabricating an electronics tray, clip ons, brake lines/master and rebuilding calipers, forks and starting to design a seat. Here's how it's looking. Let me know what y'all think and if you have any pointers. Right now I'm struggling with the clutch and brake lines. When my handlebars were dangling the other day, the fluid leaked out of my master clutch cylinder and now I have no pressure so the clutch is not engaging. Any tips on bleeding it properly? I've never been the best with bleeding brakes or clutches. i know my welds aren't the best, but it holds the metal together and that's all that matters!
 

Attachments

  • image.jpeg
    image.jpeg
    1.2 MB · Views: 864
  • image.jpeg
    image.jpeg
    1.6 MB · Views: 980
  • image.jpeg
    image.jpeg
    1.4 MB · Views: 1,291
Leetillman351 said:
Thanks for confirming, went ahead and ordered a 39mm set.

Any opposition to converting it to a monoshock?
you dont have the knowledge or skills to do a mono shock
the entire frame would have to be redesigned
 
I have already decided against a monoshock. Right now I'm just trying to get everything working properly to go get in inspected and everything.
 
This was the slave cylinder, figured out it was the issue after disassembling it and cleaning it. It's working great now!
 

Attachments

  • image.jpeg
    image.jpeg
    1.1 MB · Views: 851
Need some help with the front brakes.

I have a brand new master cylinder, new steel braided brake lines, and fresh seals in both calipers. I have bled and bled the brakes and no air is in the lines. However, the actuation is still really squishy and the brakes are not wanting to release the pressure. I have removed the pads to feel the actual piston sliding and they are able to slide freely when I push the lever. My question is: is there some step I missed where I have to "prime" the master anyway? Like get all the air out of the piston first? I can't find anything online but that's the only thing I can think of. Any help is greatly appreciated!!
 
What is the easiest way to bleed the master?

Here's a few updates on the bike. Polished and cleared the forks and fork brace. Finished painting the electronics tray and re wired the bike so the fuse box under the seat. Just sent the fiberglass pan to an upholstery shop, and welded the rear hoop! Here's a few pictures.
I still need to put the tray in, but I'm waiting until I paint the subframe (not doing a full powdercoat).
 

Attachments

  • image.jpeg
    image.jpeg
    831.9 KB · Views: 761
  • image.jpeg
    image.jpeg
    808 KB · Views: 731
  • image.jpeg
    image.jpeg
    2 MB · Views: 717
  • image.jpeg
    image.jpeg
    2.2 MB · Views: 746
  • image.jpeg
    image.jpeg
    1.9 MB · Views: 719
  • image.jpeg
    image.jpeg
    1.2 MB · Views: 758
  • image.jpeg
    image.jpeg
    1.4 MB · Views: 773
Here is a few shots of the bike without the seat (still being upholstered), and the wheels are not painter yet. Going to paint those and maybe the tank and it'll be about finished. Rebuilt and re jetted the carbs, runs smooth now. Tried to bench bleed the master with some luck, still sticking a little bit; not fully relieving the pressure after the lever is depressed. I'm happy so far, although it isn't quite what I had in mind. Hopefully the seat will help complete the look. Already on the hunt for the next project!
 

Attachments

  • image.jpeg
    image.jpeg
    3.9 MB · Views: 823
  • image.jpeg
    image.jpeg
    3.6 MB · Views: 876
  • image.jpeg
    image.jpeg
    2.1 MB · Views: 775
  • image.jpeg
    image.jpeg
    1.7 MB · Views: 847
Leetillman351 said:
Here is a few shots of the bike without the seat (still being upholstered), and the wheels are not painter yet. Going to paint those and maybe the tank and it'll be about finished. Rebuilt and re jetted the carbs, runs smooth now. Tried to bench bleed the master with some luck, still sticking a little bit; not fully relieving the pressure after the lever is depressed. I'm happy so far, although it isn't quite what I had in mind. Hopefully the seat will help complete the look. Already on the hunt for the next project!
Cool bike.

Have you bled the lines at the banjo fittings with the system installed? Just build and hold pressure as normal then crack the banjo bolts loose and retighten just like a bleeder. Have some water and a rag handy for messes.
 
Got the seat back from the upholstery shop today. Seat turned out great but not to excited about the flow of the bike. Maybe after I paint the wheels and tank it'll look better. Any suggestions?
 

Attachments

  • image.jpeg
    image.jpeg
    3.7 MB · Views: 2,015
  • image.jpeg
    image.jpeg
    3.4 MB · Views: 1,414
Back
Top Bottom