
Lol. I get it. I want to know what Z1 suggests for my own edification. I'm just a bit wary of doing this myself as a cam chain failure would be catastrophic. I'm gonna have my buddy come over and give me a hand as well. He is a amazing bike mechanic, so I will feel more comfortable doing this, having never riveted/peened a cam chain before.
We noticed you are blocking ads. DO THE TON only works with community supporters. Most are active members of the site with small businesses. Please consider disabling your ad blocking tool and checking out the businesses that help keep our site up and free.
You are using an out of date browser. It may not display this or other websites correctly.
You should upgrade or use an alternative browser.
You should upgrade or use an alternative browser.
modified, aftermarket, or custom. nothing is safe (78 KZ1000)
- Thread starter doc_rot
- Start date
Tune-A-Fish
BOTM LOSER Proudly Deplorable
I have used them, and will again in a few days, you will be no more than manually duplicating what the dude at the factory did, but with slightly less expensive tooling. Like XB says, no much lateral stress on the pin/link.
I use a double drift method, on heavy flat held by the wife or rags (it wont get far) and a hard hollow tip... one peen the same as a punch dimple and yer done. the breaker and anvil has failed me in the past as it is attempting to "press" a shoulder on the pin and tends to bend it or the tool fails it's self.
Just my 2 cents... worth the same, about a penny. Think of all the stress a final drive chain takes with that little clip holding on
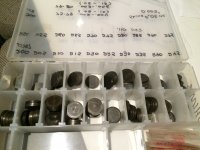
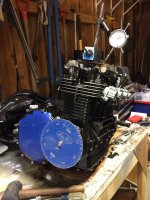
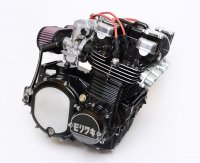
Well its been a while since i had time to work on this, unfortunately it got triaged into the corner for a while, however i recently tore the motor completely back down, installed a new cam chain (couldn't find a new Tsubaki and no masterlinks for the D.I.D.) and got it built back up. A friend of a friend has graciously let me borrow his huge shim kit to degree the cams. hope to have the motor buttoned up and in the frame by next week.
Attachments


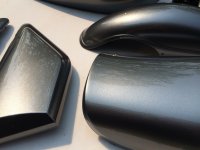
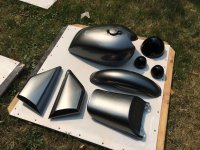
jpmobius said:Looks Beautiful! did you do it yourself? What material?
Thanks guys.
I used;
PPG DCU2021 urethane clear.
Deltron 2000 base - Ford magnetic metallic that i added quite a bit of silver toner to.
PPG DP90LF epoxy primer.
I got this LVLP gun a bit ago and am so impressed with the results over my HVLP guns. Almost no orange peel at all. very little overspray. I think i might get another 2; one as a standalone clear gun, and one for primers, etc. Metallics are like herpes, once you put them in a gun you never really get them out.
r.s.hutchinson
Active Member
I've been following this for a while, great to see it finally coming together!
Looking amazing.
Got a link to the LVLP gun you're using?
Looking amazing.
Got a link to the LVLP gun you're using?
Heres the gun I am using although I also have the 1.8 tip set that i was using for the primer and sealers. Relatively inexpensive for a solid gun.
http://spraygunworld.com/products/Astro/Astro%20Pneumatic%20-%20EVO4014.htm
http://spraygunworld.com/products/Astro/Astro%20Pneumatic%20-%20EVO4014.htm
I dont have a garage so my projects have been in storage. I currently have a little bit of time to work on them but progess will be slow for a while
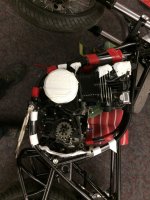
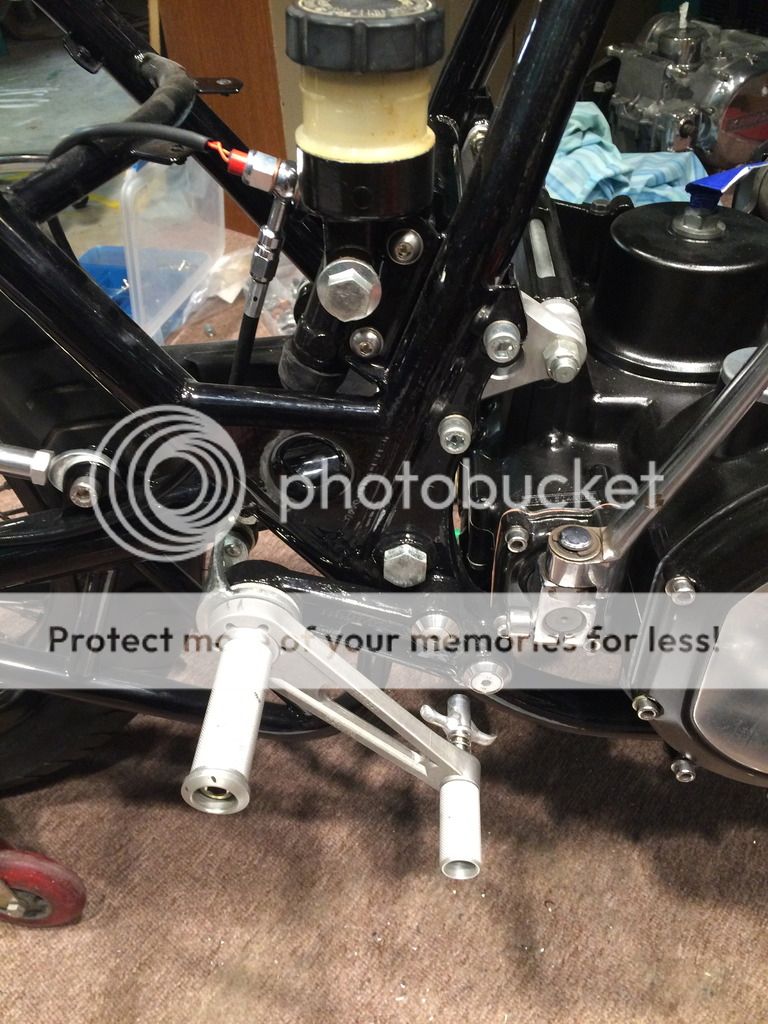
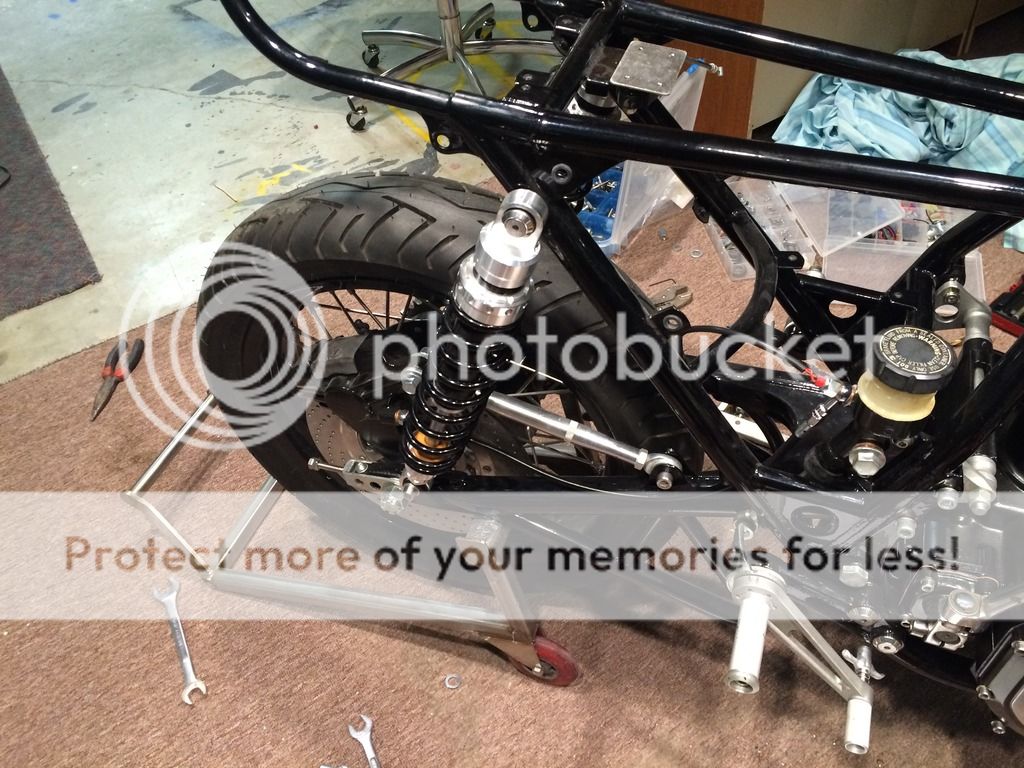
I finally have some time to work on the bike and started assembling a couple more things. Very pleased with how the rear sets worked out, but I need to modify the kick for more clearance, and perhaps get some folding footpegs. which are a good safety feature as well for a street bike. My buddy also gave me this sweet stainless stand he welded up years ago for his track bike.
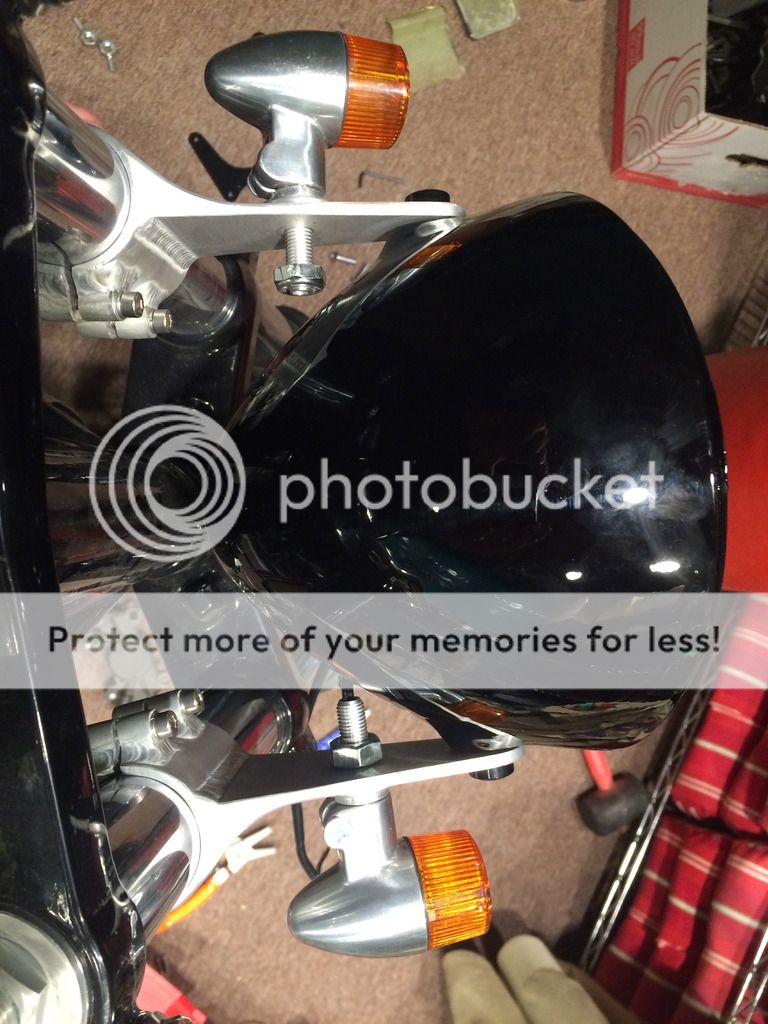
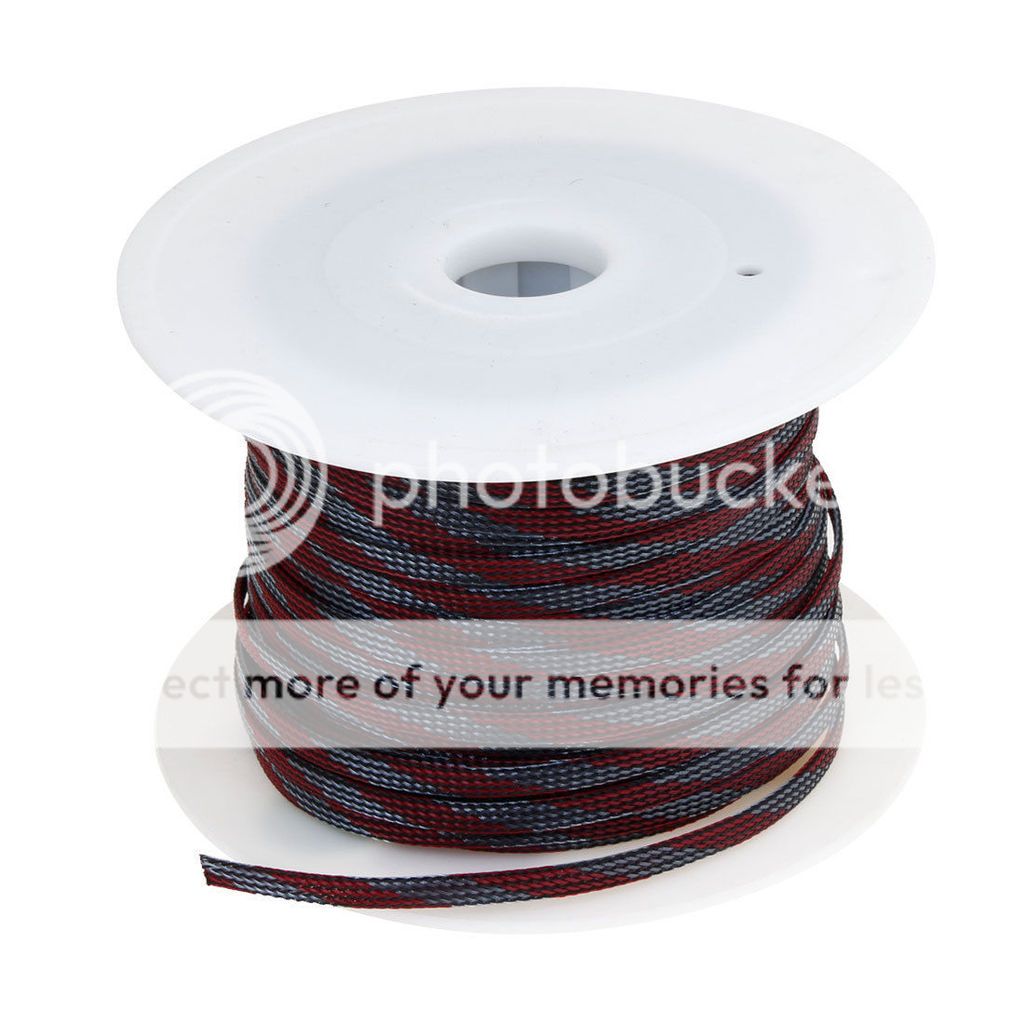
Also here is a design feature I'm trying to work out; I need to finish the back of the turn signal off a little more elegantly. I'm thinkin of triming the bolt down, using a flanged nut, and then routing the wires straight to the headlight bucket with a small hole and a grommet. Im not really satisfied with this solution as i think seeing wires bridging a gap like this doesnt look great, but im am stumped and not willing to remake the headlight ears. I was thinking about getting some cool expandable sleeve to dress up the wires a bit. thoughts?
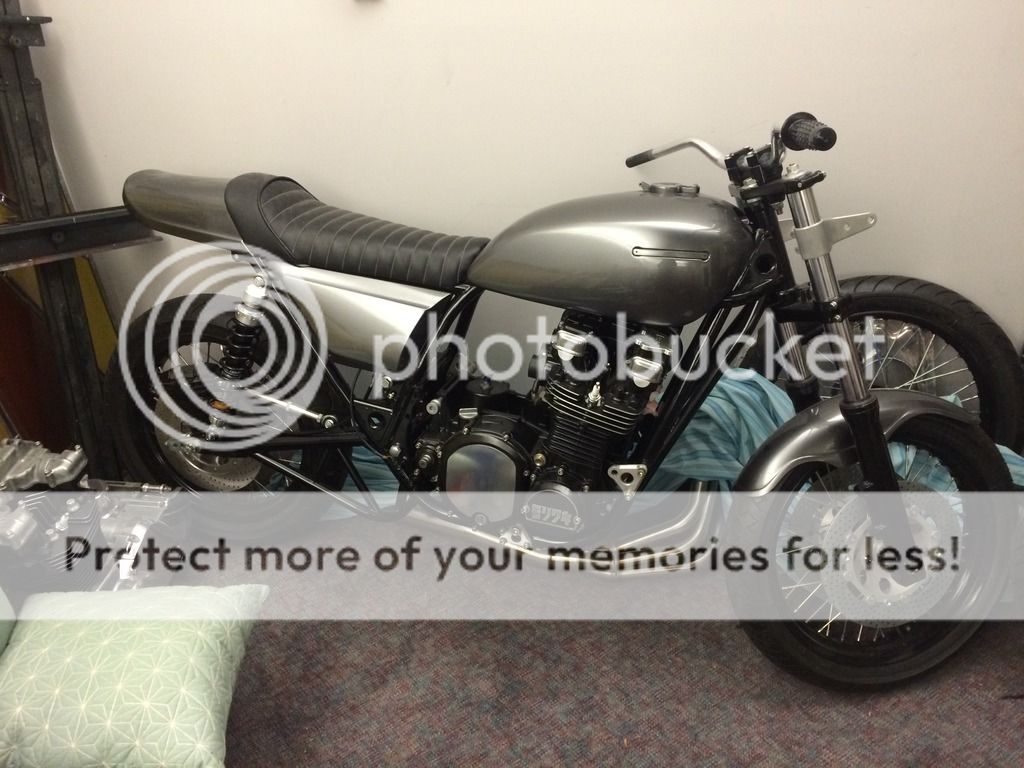

I finally have some time to work on the bike and started assembling a couple more things. Very pleased with how the rear sets worked out, but I need to modify the kick for more clearance, and perhaps get some folding footpegs. which are a good safety feature as well for a street bike. My buddy also gave me this sweet stainless stand he welded up years ago for his track bike.
Also here is a design feature I'm trying to work out; I need to finish the back of the turn signal off a little more elegantly. I'm thinkin of triming the bolt down, using a flanged nut, and then routing the wires straight to the headlight bucket with a small hole and a grommet. Im not really satisfied with this solution as i think seeing wires bridging a gap like this doesnt look great, but im am stumped and not willing to remake the headlight ears. I was thinking about getting some cool expandable sleeve to dress up the wires a bit. thoughts?
CarbsAndCylinders
Careful With That Axe Eugene
Looks very nice!
I like the flange nut idea and trimming the exposed threaded post accordingly (and the notion of taking the time to improve this minor item at all). I thought perhaps routing the wires themselves through some nicely curved metal tubes would look pretty clean. Possibly leave the threaded stalk long enough for the tube to slip over to station the one end, and run the tube through a tight fitting grommet in the headlight bucket. The grommet would hold it in position and still allow for some flexibility and headlight aiming adjustment. The wires would be protected and rigid tubing would take away the unfinished look of having them exposed. You could paint them black or polish them if stainless or aluminum. Alternatively, you could simply relocate the signals themselves to make them the mounting bolts for the headlight bucket which of course is common on many bikes, though the general aesthetic would change.
CarbsAndCylinders
Careful With That Axe Eugene
Something like this?
http://bluewireautomotive.com/products/stainless-steel-door-jams
http://bluewireautomotive.com/products/stainless-steel-door-jams
jpmobius said:Alternatively, you could simply relocate the signals themselves to make them the mounting bolts for the headlight bucket which of course is common on many bikes, though the general aesthetic would change.
Yeah i usually like that look but because the headlight bucket is fairly long it sticks out a good way from the triples, I originally mounted the turn signals at the headlight mounting point but it looked weird with them sticking so far out. This was a compromise. I like the tube idea, I'm going to play around with some stock i have and see what I can come up with. Once the gauges are bolted on this feature is not readily noticeable but the details matter to me.
CarbsandCylinders - those lines are sweet, I think i have some stainless sleeve sitting around. i might try that as well.
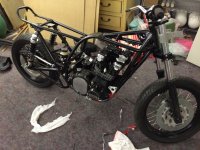
The forgotten child. I finally got off my ass and made some good progress on this. There were some fitment issues that I was dreading dealing with but my friend Eric sorted them out. Because this was the first seat pan I ever made I accidentally went a little too thin on it and when the seat cover was stretched over the pan it caused the whole back end to bow up and had an unsightly 3/4" gap to the tail. Eric bent a piece of titanium (according to him it was because he didn't want to paint it : ) and riveted it to the back pulling the gap shut, he also attached the mounting hardware and the seat fits great, in fact it is probably the easiest seat to remove I have ever had. I welded up a stainless exhaust mount using the hardware I turned on the lathe a few months ago and it is rubber mounted. I also go the instrument cluster mounted so I can figure out where i need to start drilling holes in things, I think I have about 50 hours in the instrument/headlight cluster alone. The rear fender turned out real nice as well, too bad you cant really see it. This project has been bumped up in the triage list and is now a top priority. I'm getting near the end of stuff that needs to be done; I can see the end!
https://youtu.be/a6d8e-H5zCY
) and riveted it to the back pulling the gap shut, he also attached the mounting hardware and the seat fits great, in fact it is probably the easiest seat to remove I have ever had. I welded up a stainless exhaust mount using the hardware I turned on the lathe a few months ago and it is rubber mounted. I also go the instrument cluster mounted so I can figure out where i need to start drilling holes in things, I think I have about 50 hours in the instrument/headlight cluster alone. The rear fender turned out real nice as well, too bad you cant really see it. This project has been bumped up in the triage list and is now a top priority. I'm getting near the end of stuff that needs to be done; I can see the end!https://youtu.be/a6d8e-H5zCY
Attachments
Tune-A-Fish
BOTM LOSER Proudly Deplorable
Racetech :'(


