1977 Yamaha XS750D

ManxieRacer said:
Good to see you back at it, I'm about to restart my XS750 build now that the Beamer is finally finished.

Good to hear, this site needs more Triples haha.

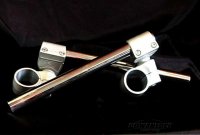
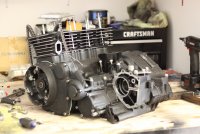
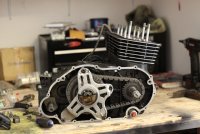
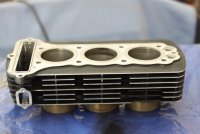
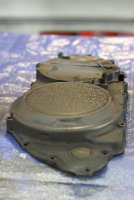
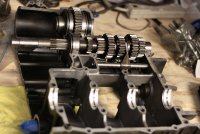
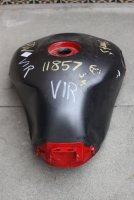
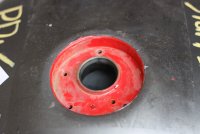
I've been prepping and spraying the case halves and the side covers and some spall parts here and there. I'm using VHT wrinkle finish black paint. Most parts have come out looking really good, only one had a big wrinkle "line" in it that I really didn't like so I had to sand it back down to metal and give it another spray. This stuff take like 48 or more to fully cure.
 

Attachments

  • IMG_3674.JPG
    IMG_3674.JPG
    4.6 MB · Views: 333
  • IMG_3675.JPG
    IMG_3675.JPG
    4.7 MB · Views: 325
  • IMG_3676.JPG
    IMG_3676.JPG
    4.6 MB · Views: 314
  • IMG_3678.JPG
    IMG_3678.JPG
    4.8 MB · Views: 333
I see you replaced 5th gear, I'm guessing that was to fix the second gear issue with the dogs being too worn? Did you also remove the spacer between them or just leave it as-is?

Im trying to figure out what approach I need to take on mine.
 
ManxieRacer said:
I see you replaced 5th gear, I'm guessing that was to fix the second gear issue with the dogs being too worn? Did you also remove the spacer between them or just leave it as-is?

Im trying to figure out what approach I need to take on mine.

Yeah I replaced 5th gear, the dogs could probably have been machined and fixed on my original gear but I didn't want to deal with all that. New parts give me peace of mind.

I left the shim, the new gear had taller dogs. With the shim in place there was still full engagement
 
I'm glad I took the time to read through you build. Awesome job man. Great progress so far and can't wait to see whats next!
 
Sounds like a good way of going about it, I'll have a good look around eBay and see if I can find a new 5th gear. Thanks!
 
Thanks Sreter, feels good to be back working on the bike.

My donor R6 tank came in with the new gas cap. Pretty excited to get my tank to the body shop and have the fab work done.
 

Attachments

  • IMG_3681.JPG
    IMG_3681.JPG
    4 MB · Views: 343
  • IMG_3682.JPG
    IMG_3682.JPG
    5 MB · Views: 317
  • IMG_3679.JPG
    IMG_3679.JPG
    5 MB · Views: 373
clay69camaro said:
Well I had a fun 250 mile ride with some friends, but it also showed me that the bike needed a few things upgraded. First was a seal inside the shaft drive that was weeping oil past it and it was dripping onto the side of my tire. No that wasn't too fun on the twisties. The seal is of course discontinued by Yamaha so i found a comparable Honda one :)

Next the mount I made for the license plate and tail light sheared off, i'm assuming from vibration. So I replaced the tail light with the all in one turn/tail/stop light, and stole an idea I saw online for the license plate. License plate is now mounted using a connecting rod from a car.

I didn't like my clip-ons too much anymore either so I ditched them for some Woodcrafts.

thats awesome! good job


Top case half installed on the bottom half!

Getting some parts ordered up to continue the progress. I need to soak my new clutch discs so break in oil was ordered from summit and when it gets here I can soak the clutches and get them installed. I also ordered a newtronic electronic ignition to replace the old points that were on there originally. That's coming from England so it'll be a few weeks till it gets here. I can still get the rest of the engine back together and back in the frame in the mean time. Also work on upgrading all the connectors on the harness and getting the electronics hidden where I want them.

I'll show pics of the progress a little later. It's time for taco tuesday :)
 
Hey, Clay, your bike looks great!

You said your Tarozzi clip ons were too bulky.
You may not realize, you can mount them differently than in your pictures so they'll be quite narrower, more tucked-in.

You assembled yours as the bottom clip on is in this picture.
Notice that the top clip on in the picture uses the fork tube clamp in a reversed position.
That would make the grips much narrower.

Maybe you thought of it, just thought I'd mention it.

-Sherm
 

Attachments

  • image.jpg
    image.jpg
    44.5 KB · Views: 1,063
Piston rings are perfectly gapped, new clutch discs installed, new primary chain installed, and cylinders installed.

Waiting on the RHS engine cover to show up, I have one but I bought a later model one that has the engine oil sight glass in it. Cylinder head is almost ready to go, just need to paint it with the wrinkle paint and bolt it up.

Getting oh so close now.
 

Attachments

  • IMG_3683.JPG
    IMG_3683.JPG
    3.9 MB · Views: 318
  • IMG_3684.JPG
    IMG_3684.JPG
    4.4 MB · Views: 305
  • IMG_3685.JPG
    IMG_3685.JPG
    4.6 MB · Views: 328
So one shim installed in the wrong spot, and 3 not installed. Left me thinking "uhhh that's not right".

So while I rolled the bike around I hear tranny gears making contacts when they shouldn't. I take apart the left side cover, and the whole clutch assembly on the right and slip the tranny gears out from the bottom. All shims on the gear countershaft are in place but one of the shims that goes behind the bearing wasn't in place allowing the countershaft to be ohh so slightly off. Got that fixed and found the right homes for the other two shims. Woo!

Gas tank is at the fab shop, should be picking it up Wednesday.

Then it'll be just about time to paint the tank and seat.
 
Tank and seat are pretty much done. just have to cut and buff. Thinking about shooting the headlight bucket and the front fender tomorrow in a matte/flat black. Still have to figure out how I want to actually mount the seat to the bike.
 

Attachments

  • IMG_3705.jpg
    IMG_3705.jpg
    5.3 MB · Views: 320
That tank came up really well. I have done a couple of filler cap transplants and it's is not easy to get the finished article looking that good. Nice job all round.
 
Any closer pics of your tail light setup? I'm kinda leaning towards what you were describing. Beautiful build BTW.
 
DesertKZ said:
Any closer pics of your tail light setup? I'm kinda leaning towards what you were describing. Beautiful build BTW.

Thanks. Here a is a closer pic for the tailights. They are mounted on a tap welded to the frame. stop, turn and riding light. all functions
 

Attachments

  • IMG_0899.JPG
    IMG_0899.JPG
    933.7 KB · Views: 303
Thanks beldreugger.

Also got started on a rearset bracket using 3'8 alumunum today. They are not what I really want them to be, so I think I'm going to experiment

Also custom wiring harness
 
Well just been wiring lately. The new rear-set mounts are on hold for the moment, sort of prototyping, sort of...


Almost completely finished with the wiring though. I'm using these waterproof Deutsch connectors, they are pretty bad ass.

I'll throw the exhaust back on tomorrow and see if I can fire it up. If i can find the throttle cable that is.
 

Attachments

  • IMG_3728.jpg
    IMG_3728.jpg
    4.6 MB · Views: 299
Back
Top Bottom