Follow along with the video below to see how to install our site as a web app on your home screen.
Note: This feature currently requires accessing the site using the built-in Safari browser.
We noticed you are blocking ads. DO THE TON only works with community supporters. Most are active members of the site with small businesses. Please consider disabling your ad blocking tool and checking out the businesses that help keep our site up and free.
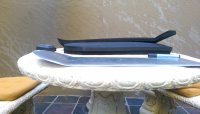
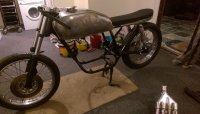
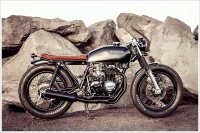
G'day all, I have been an interested onlooker for quite a while and decided I would jump in, buy my first motorbike and have a go at building a brat style bike. The inspiration has been for long time the 1978 CB400f built by Salty Speed Co. So after searching the ads, ebay and gumtree I found the perfect bike for this build, a 1975 CB400F.
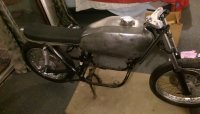
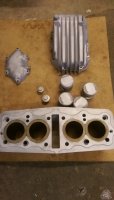
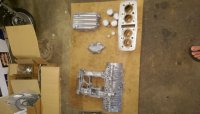
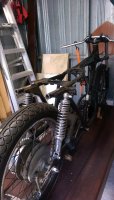
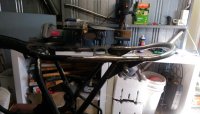
So far I have managed to strip the bike down and take most of the paint off the tank. The engine already had the covers removed and the oil pan taken off by the previous owner so I have taken the engine out and dropped it over to a local bike guru for a look over and we will be doing light rebuild of the engine, at this stage only replacing the cam chain and piston rings but will see what he has to say. The PO said the bike was in good running order before he started stripping it for a clean up so hopefully I'm all good there, however the bike has been sitting for about 8 years so you never know.
I have taken a bunch of pics to show what I have done so far and will post them here along with the Salty build so you can see where I am heading with it. I am a novice on the bike scene and hope that some of you out there are kind enough to share a bit of your knowledge with me and keep me on the right track.
good start but for all that is holy, don't put firestones or oversized tires on yours. These bikes are fun as hell and handle great for the year they were made and if you spend some time on suspension and good tires they will make you smile when you rev that little 4 cyl beast. The firestones on the inspiration bike would make it a complete shit riding bike. other than that the inspiration bike is pretty cool, has a front fender and they didn't lower it to useless etc. they should be shot for the firestones though. Welcome to the site, rant over, I am really just jealous because I rode one of these and now I want one and have yet to be able to get one.
Quick question...I have quite a few parts which I think are original that I won't be re-using..whats the best place to list these parts for sale...bearing in mind that I am in Australia.
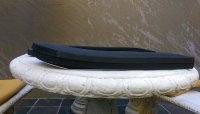
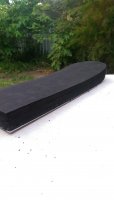
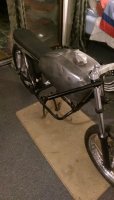
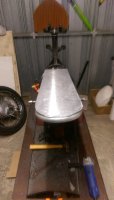
Got the grinder out for the first time last night....now I can start work on planning and building my seat. Going to use a sheet metal pan and neoprene rubber for the seat and get a local upholsterer to finish it off. Thinking a 20 degree kick on the rear hoop will look good.
Thanks for the advice Neevo I have managed to sell a few parts...the funds will be reinvested soon for new parts..!
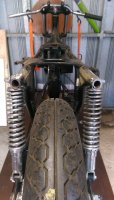
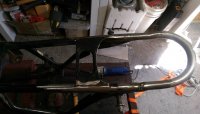
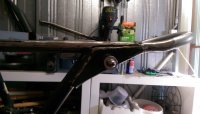
I have made some progress on the bike. The engine has been completely stripped down by my mechanic and happily the only thing to be replaced is the piston rings. The cam chain will also be replaced as the previous owner had already bought a replacement chain and that came with the bike. Have also had a rear hoop made up and welded that on last night, still a little bit of finishing off to do on the welds and have cut out a seat pan from a sheet of stainless steel...needs some minor trimming but other than that all good. Going to source some neoprene rubber for the seat tomorrow with a bit of luck. Here are a few pics...
Hi guys i am giving my header pipes a clean up and there is a fair bit of pitting on the upper end of the pipes. The PO had bought some header wrap so i think for the time being i will just wrap them. However as the bike has been sitting for ages there is a bit of corrosion inside the pipes, I have given it a blast with the compressor which has remover any loose corrosion but i wanted to know if there is a way to clean the inside of the header pipes or if it is necessary/advisable...?
Cheers
Regarding cleaning of the inside of your headers, I had my father in-law around and asked him the exact same question as he was a motorbike mechanic. His answer was "you will notice nothing if you do, they look fine and If you do decide to clean them its your OCD"! I laughed and thought I will focus my time on something else
P.s are you going to go clip on's? Cx500 is my next build and they look so sexy with the clip on's.
Hi Luke, thanks for that i will give another hit with the mallet and a blast with the compressor and leave it at that.
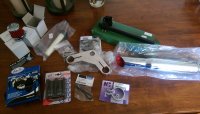
Yeah i am going with clip on's they arrived a couple of weeks ago with a box of other goodies from Dime City Cycles.
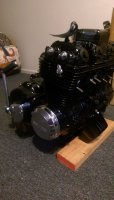
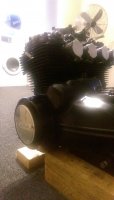
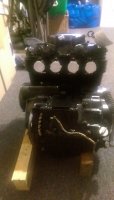
I have just gotten back from Bali and while i was away i had the engine bead blasted and dropped to the painters for a coat of satin black. Should get the frame back form the sand blaster tomorrow and once i work out all the mounting points for my seat and indicators will post some more pics of my progress.
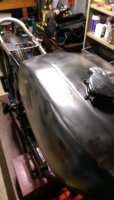
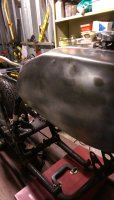
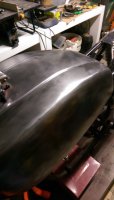
Few pics of the tank after i took to it with a wire brush on the grinder...I will get the dents fixed when i work out what colour i go with although i am considering just going with a clear coat on the polished tank until i am sure what i want...
Wow, coming along nicely. If that balck foam is the type I think, that seat will be all day comfy. I used half that much on a cafe seat and rode for 8 hours strait without getting sore. It absorbs vibrations well and supports great. Mine was from a kneeling pad I found in a hardware store.
Hey so its been a while since I have posted but there has been some slow but major progress on the bike.
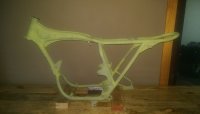
I have had the frame sandblasted and hit with a light coat of primer to keep any surface rust at bay. I need to work out exactly where all the mounting points need to be either drilled or welded so the frame won't see any paint for a little while yet.
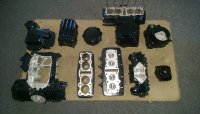
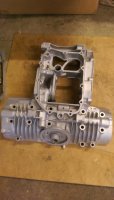
The big progress is that the engine has now been completed. Complete rebuild on the old girl which revealed no major wear tear or damage. We only replaced the seals and had the barrels honed and everything else was good to go. Mechanic said the engine looked like it had hardly been revved...! New gasket set and rebuild kits for the carbs and we have one fully assembled ready to run engine...!
This site uses cookies to help personalise content, tailor your experience and to keep you logged in if you register.
By continuing to use this site, you are consenting to our use of cookies.

 salty-11.jpg108.2 KB · Views: 351
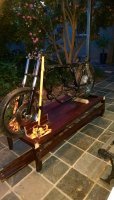 IMAG0069.jpg1.3 MB · Views: 308
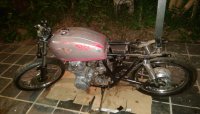 IMAG0049.jpg1.4 MB · Views: 310
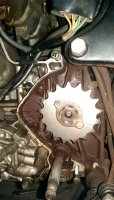 IMAG0043.jpg1.6 MB · Views: 300
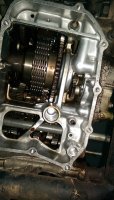 IMAG0040.jpg1.7 MB · Views: 302
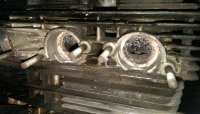 IMAG0033.jpg1.6 MB · Views: 324
 IMAG0027.jpg1.2 MB · Views: 339
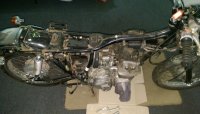 IMAG0024.jpg1.4 MB · Views: 302
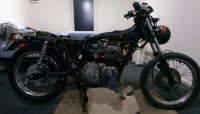 IMAG0023.jpg2.1 MB · Views: 326
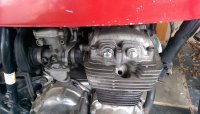 IMAG0017.jpg2.4 MB · Views: 320
 IMAG0015.jpg2.4 MB · Views: 358
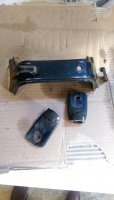
")