Looking for help mounting a full fairing. Looking for some pics of how others have done it. I haven't found anything good that doesn't require crazy custom parts.
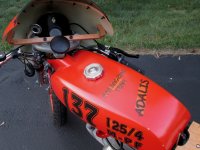
This will be going on an RD
This will be going on an RD
jpmobius said:Mounted to the triples AND the engine mounts? That's a mighty flexible fairing! ;D ;D
Race fairings are a bit of a pain on a street bike. I have done several (sorry - no pics), and it is worth some effort. It is tempting to make it less "quick release" than as done on racers, but it is a MAJOR drag to have to spend a bunch of time getting it off to work on the bike - and you will at least have lights to add to the trouble. I always really liked having the instruments mounted to the frame instead of the steering, but adds to the fabrication. Remember, the fairing may be super light, but it gets rather a lot of wind pressure, and it is going on a street bike. It will need to be more rugged than what you see on a race bike - not because it will be more highly stressed, but because it will be asked to be stressed for a lot longer.
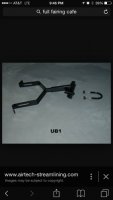
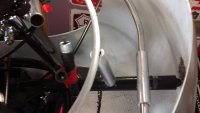
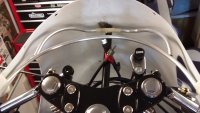
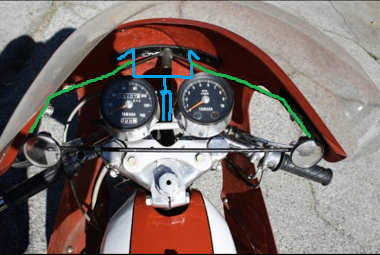
Generally, you need the front strut with a telescoping portion so you can just reach in and pull a pin to free the two halves. You can get a u-bolt around the steering neck of your RD, but you will be far better off welding a mount to it. It needs to be high (and strong) if you mount your instruments and/or upper supports for the bits that come over the bars. Remember, you will also have your (fairly) heavy headlight to support. Another mount down by the lower engine mounts, and another set of struts abreast of the carbs to keep the sides from flapping.
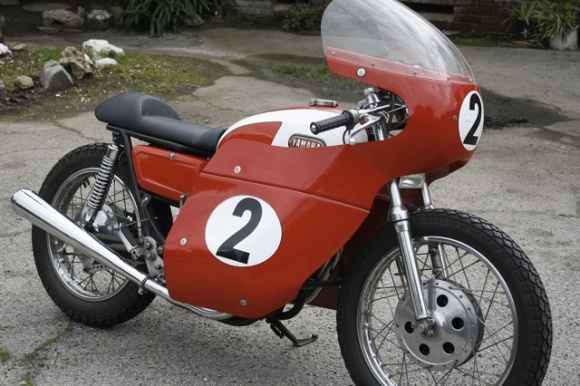


teazer said:That TD2 faring needs to be lifted at the front and used with clipons.
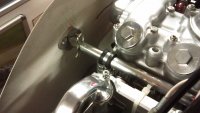
If your fairing of choice is closed under the motor, all it needs are front center to where the headlamp normally sits plus screen support like the one shown plus a main mount behind the motor.
TZ front mount
If the bottom is open, the sides will flap like a politicians gums without an additional mount to the lower front.
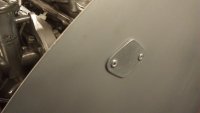
Use 1/4 turn fasteners - Dzus or others work well - screw type not D ring for a neater look or D ring for the technical trick look.
Simple flat steel or aluminum from a lower engine mount is fine for the front mounts.
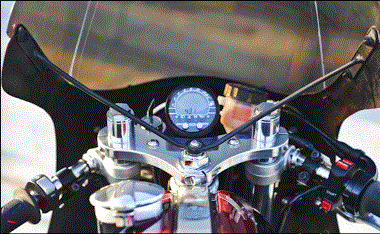
Mount the instrument/s to the front mount and clean up the top triple clamp. That way the gauges will not hit anything and everything as the bars are turned.
")