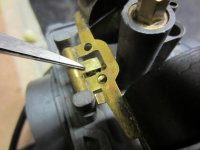
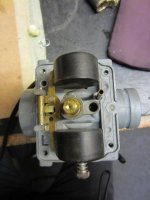
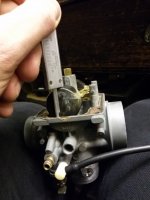
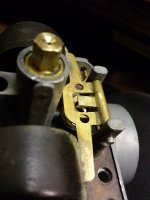
Your pics are sideways. The center looks like the carb is oriented as installed. If your last picture is of the carb body inverted from the installed orientation, it is definitely wrong. The float should be much closer to the body. Typically the float is more or less horizontal when inverted, though I do not have one in front of me to check. There should be something like 30 degrees of rotation from the needle closed position to wide open, though this never actually happens during normal operation. That is not a spec, just a generalization. Maybe it is like 20 degrees. The "down" or open position has no meaningful spec except for what I have posted already. Xb is correct. Go back and review the previous posts in this thread. You are asking questions that have been thoroughly covered already. If you want to verify, post right side up pics of the carb inverted with a caliper on it to show how you are taking the measurement, and also one of your manuals description. I understand how unfamiliar things can be a bit stressful, but the mechanism is really just as simple as it looks. When the fuel is high enough in the bowl, the float closes the needle. As fuel is used out of the bowl, it cracks open just the tiny amount needed to maintain that level. It hardly moves at all. So the down position is only important mechanically. See previous post!! It is the high, fuel off position that is critical, to maintain the correct fuel height in the bowl so that has to be right. If the fuel is too high, it will be too easy for the fuel to sucked into the carb, and if too low, it will be too hard. To work correctly, the fuel level needs to be the exact same height in the bowls at all times. Carburetors may seem fussy, but they are actually pretty simple, relying on basic physics to work. Once adjusted correctly, they work amazingly well and are super reliable (plus, you can repair them yourself unlike injectors) until they get dirty from fuel deposits or come out of adjustments for some reason.


") .
.

