Follow along with the video below to see how to install our site as a web app on your home screen.
Note: This feature currently requires accessing the site using the built-in Safari browser.
We noticed you are blocking ads. DO THE TON only works with community supporters. Most are active members of the site with small businesses. Please consider disabling your ad blocking tool and checking out the businesses that help keep our site up and free.
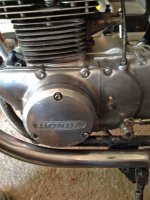
While I had the stator cover off for the timing, I gave the side covers a bit of a clean and polish. Just gave it a once over with 320 grit wet and dry and then used some wire wool to bring out the shine. I didn't want it too polished because it would be a nightmare to keep clean and because I want this bike to look like it gets ridden and isn't just a show piece.
I also replaced most of the bolts with stainless allen heads, but there are a few I still can't get out and a few which I didn't have the correct size replacement for so they will have to stay in for the time being.
And finally...(I really need to find out how to put more pictures in a post haha)...
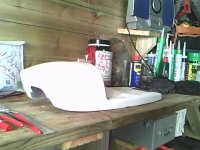
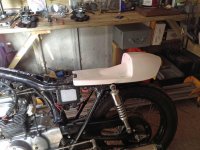
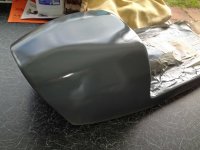
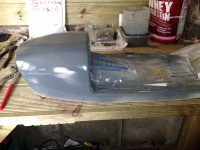
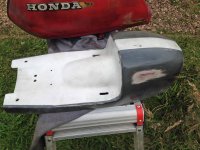
...put another few coats of primer on the seat and let it dry overnight. Just need to give it a wet-sand and should be able to spray some colour tomorrow as long as the weather holds up.
I moved the mounts for the seat about an inch forward. I should of really put the tank on the bike as well when I took the picture but I wasn't really thinking. Oh well.
I'm not too bothered about the quality of the base (the bit which gets covered by the seat) as I'm going to give it a thick white undercoat and leave it as it is.
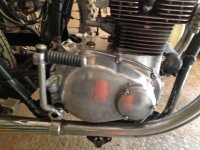
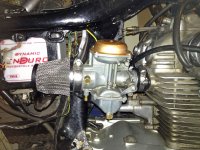
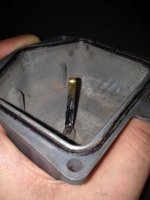
Seat's looking good. That crack in the intake manifold was probably leaning out the mixture pretty badly and would partially explain why the revs don't drop when you let off the throttle. I had the same issue with my GPz and ended up caulking it too until I could get a replacement
The soldering officially works so I'd definitely recommend doing it if you have a similar problem. I'll see about the fairing! haha...going to build with out it and when its kind of finished (most projects like these seem to never finish haha) I'll whack it back on and see if I can make it work.
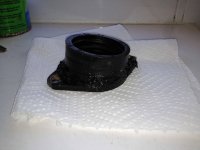
The original bit of sealant didn't work, and I was a bit put off because once it had dried it was still white. So I found some black sealant and tried caulking it again...made sure it was on nice and thick this time....and it seemed to work. (Still no luck trying to find a replacement so If anybody has let me know and I'll happily take it off your hands ;D)
Put the first few coats of paint on, but the nozzle broke and started spitting paint everywhere. So I had to spray a thick first coat on, and then I'll wetsand and lay some thinner final coats over the next few days.
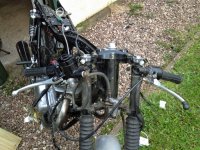
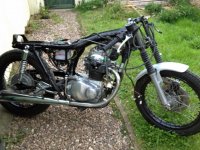
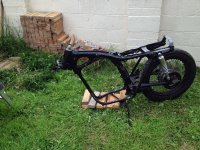
Got to this point...and then thought f*** it and began to fully tear into it.
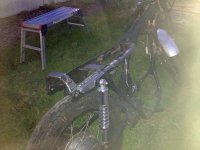
Started by removing the headlight and gauges, and started on the wiring. I need to check the conditions of the fork stancions because they seem rather pitted and rusty.
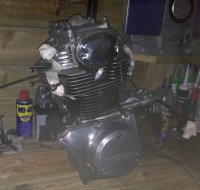
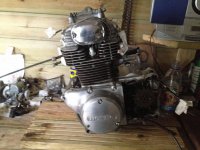
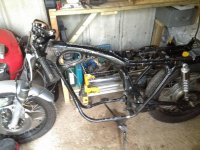
Not a lot achieved today....managed to free the motor from the frame and remove the wiring loom/foot controls. Then I heard the pub calling so had to call it a day haha...don't judge me! ;D
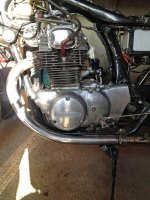
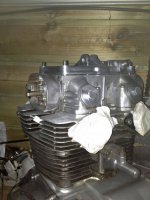
So with the frame almost bare I started to begin stripping the paint. Trying to do this on a budget so I couldn't really afford to get it sand blasted so I'm knuckling down with the wire wheel! Took it to the rocker cover to get rid of the corrosion and it seemed to shine up quite nicely. (Can only just tell in the pics, garage was pretty dark when I took the pic).
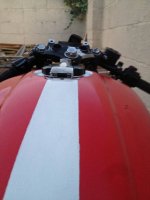
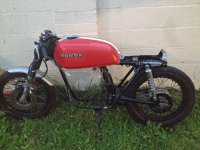
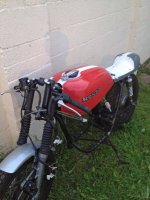
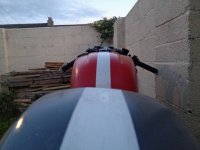
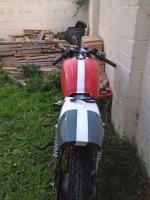
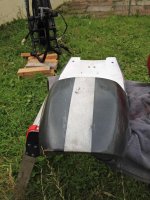
Decided that I will be going back to the original Gulf theme I was planning, but going to get it sprayed by someone other than myself. So for the time being Im going to just have a temporary spray job until everything else is done. Because of the dodgy nozzle on the grey paint I sprayed the tail with I had to leave the original colour, so I whacked a 'wicked cool' racing stripe down the middle...because, well, Its the easiest mod to get that extra 10Hp haha...didn't get a neat enough line with just masking tape so I'm going to get some pinstripe tape to outline the stripe in.
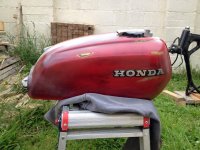
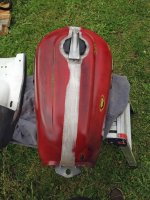
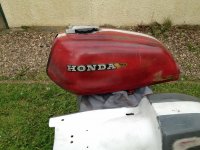
Tank turned out better than the tail, mainly due to paint the being flicked everywhich f*****g way by the nozzle, and because Im a total dick and managed to drop the seat just after painting the stripe and chipped it a bit...oh well, it'll have to do for the time being. The seat looks a bit wonky in the pics but its not sat on the frame properly.
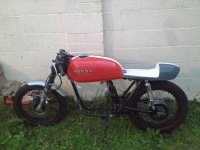
So the paint didn't quite go to plan. Let it cure for a few days and when I came back I noticed some drips and a few bubbles in it, and had no paint left to re-do it. So I went with it. Tried making it look distressed and shit to make it look better (great logic haha). Poured some fuel on it, sprayed some primer, bit of wet sanding and the finished article looked fresh out of the tip...but hey, that's what I was going for! ;D
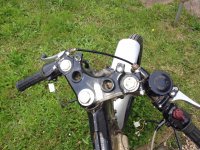
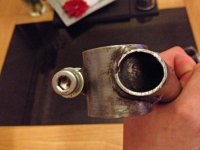
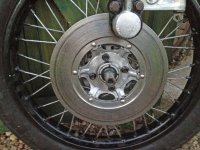
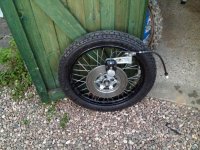
Took the front end off to check the condition of the forks and to be honest, they're not great. I'll give them a sand and see how they turn out.
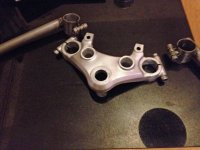
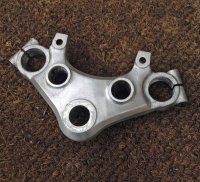
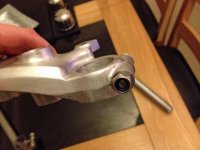
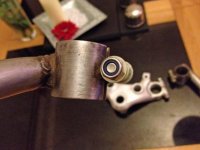
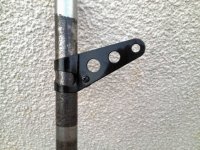
Also stripped the paint off of the top clamp. Was a horrible black, so just stripped it and gave it a light rub with some wire wool. Doesn't look very shiny, just clean, which sort of fits with the direction I'm now taking the bike.
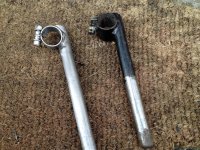
Also stripped the clip ons. They were also painted in the shitty black, so I stripped them off with a wire wheel and again, gave 'em a lil polish with some wire wool and they seemed to turn out pretty nice.
In the picture, the polished is on the left, original on the right.
Put some stainless hardware on them to spruce them up a bit and will be leaving them as they are.
Just read through your build and really think you are on to something with the Rustic Vintage look. What ever you did to that tank and tail you did it right! It looks just like it was dug up out of a saltpile at bonneville yesterday after 30 years in cryo.
Would have to agree with the others, keep the fairing, but I have a style proposition for you. Why not pay tribute to the old RC166?
Paint the fairing in the same grey as the tail, paint your lucky number on the side accented by dark green as the RC166 and weather it up good. Would look ace.
Sorry couldn't help myself, will be following this one for sure. 8)
dude, just saw the build. freaking sick! love it man, tank and seat look fantastic, and i would keep that fairing or better yet.. sell it to me! haha you are doing awesome keep it up! ill be watching
Probably no progress for a few days. Finally got some good weather to take my motocross/dirtbike out and ended up bailing pretty hard. Tweaked my shoulder so will let it rest up for a few days before I get back to the bike.
RotaryDane said:
Why not pay tribute to the old RC166?
Paint the fairing in the same grey as the tail, paint your lucky number on the side accented by dark green as the RC166 and weather it up good. Would look ace.
That's not a bad shout if I decide to keep the fairing. The bike when I got it was heading down the RC166 replica route, but the way it was pulled off just didn't thrill me, which is the reason I decided to change it. But to not try and replicate it but just take its influence sounds good. May have to try and mock something up on Photoshop.
sinbad85 said:
f#ck yeah this is sick!!!
nice job ageing the paint looks 10 times better.....
i reckon make that fairing quick release.......and paint it in same style!
I was going to try and fabricate something to make it a quick release, but the trouble is the headlight really. When attached to the fairing, the headlight sits like a foot further forward than it would sit if I ran without it. So I'll have to design some sort of slider device for the headlight to mount to.
fatherjon said:
dude, just saw the build. freaking sick! love it man, tank and seat look fantastic, and i would keep that fairing or better yet.. sell it to me! haha you are doing awesome keep it up! ill be watching
Not a lot achieved over the last few days, my shoulders been a right pain in the ass...
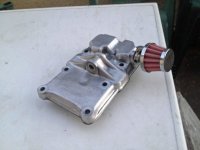
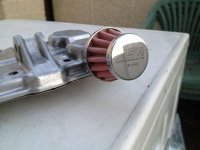
..but I did get some new parts!
Got a breather filter and some nice black headlight ears through. Luckily they're not particularly glossy, and more of a matt black, so they should look alright with the current scheme.
This site uses cookies to help personalise content, tailor your experience and to keep you logged in if you register.
By continuing to use this site, you are consenting to our use of cookies.