Uma, the CB

vandito.cb

Been Around the Block
i'm a little late on starting a build thread here, but i figured i'd start one to keep track of my progress, or lack of.

rewind a few months, say...january...i purchased a 1981 cb750f, my 8th bike, first one older than me. i made the mistake of not taking "she ran before i parked her." with a grain of salt and while financially fucked up, started digging myself a ditch i didnt know I was in.

it needed an airbox and a full brake overhaul as far as I knew, but little by little (being in the middle of two jobs, loved ones passing and few tools and no indoor workplace tends to slow things down) i began thinking "i don't like this. let's change it." or "I'll replace these later down the line so let me just get them out of the way now."

i essentially began spending more money on mostly visual things rather than focusing on getting it running.

fast forward a few months to now...i'm in a more stable job, therefore a little more financially stable than I was when I began so parts come in almost twice a week. I'm impulsive so a good chunk of things I order end up sitting either in a corner or a box because I decided otherwise.

so in the time I've owned uma (fucking slut), i've changed/replaced/added:

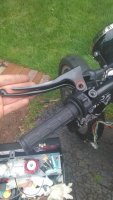
biltwell tracker bars
emgo oem style grips
new throttle tube
a new headlight to replace the non-existent previous one
swapped the F tank (i hate the swoop if side covers aren't there to compliment it) for a C tank
rebuilt what was left of the rear brakes
new clutch lever/perch
new front MC, lever and perch
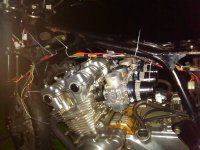
kerker 4-1 (still haven't ordered a muffler)
removed all bodywork
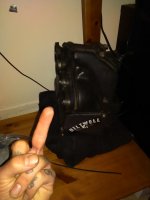
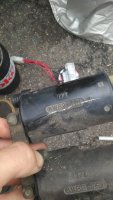
new headlight/killswitch in one
pollak momentary ignition switch
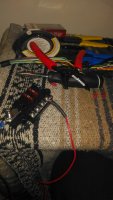
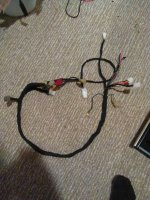
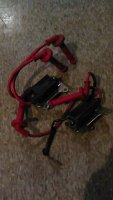
ripped out the harness, removed everything that will likely save my life and did all new connectors (still not 100% done)
and a million other parts laying around that i havent had time or proper tools to get on

i used to have a deadline as to when I planned on having her on the road, but with everything going on, it became too stressful to set a hard date so I've slowed things down a bit, but i hope to have her road-worthy sooner than later.

i'm not entirely sure what direction I plan to go with it either, but i brat something would be the general direction of what i'm shooting for...i like ugly things that function.

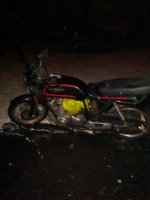
the night I got her:
 

Attachments

  • IMG_20160117_192238.jpg
    IMG_20160117_192238.jpg
    456.1 KB · Views: 387
sometime in between then and now:

i havent had much time to work on her so no real recent pics and since my "garage" is a 5x8 patch of asphalt, I can't do anything unless the weather permits.

i'm slowly recouping my tool collection.
 

Attachments

  • IMG_20160317_155632.jpg
    IMG_20160317_155632.jpg
    1.4 MB · Views: 384
I'd cut the sidecover tabs off of the F tank, and use it. The C tank just says cruiser. In my opinion of course.
 
J-Rod10 said:
I'd cut the sidecover tabs off of the F tank, and use it. The C tank just says cruiser. In my opinion of course.

i spent countless nights trying to force myself to like that idea along with painting the bottom of it black to follow the frame and hide it a little. i just couldn't like it.

as bulky and strange as the C tank is, i still like how it looks now better than it did with its original tank.
 
some goodies arrived in the mail today. time to button the carbs back up since the PO used the wrong screws on the float bowls and the drain screws had a rough life, apparently :/
 

Attachments

  • IMG_20160521_162120.jpg
    IMG_20160521_162120.jpg
    1.2 MB · Views: 379
  • IMG_20160521_162443.jpg
    IMG_20160521_162443.jpg
    774.2 KB · Views: 374
  • IMG_20160521_162148.jpg
    IMG_20160521_162148.jpg
    1.2 MB · Views: 384
  • IMG_20160521_162354.jpg
    IMG_20160521_162354.jpg
    752.6 KB · Views: 380
  • IMG_20160521_163537.jpg
    IMG_20160521_163537.jpg
    617.1 KB · Views: 376
and the fun begins 8)
 

Attachments

  • Screenshot_2016-05-21-20-30-28.png
    Screenshot_2016-05-21-20-30-28.png
    72.9 KB · Views: 1,344
  • Screenshot_2016-05-21-20-28-31.png
    Screenshot_2016-05-21-20-28-31.png
    127.2 KB · Views: 1,259
  • IMG_20160521_201218.jpg
    IMG_20160521_201218.jpg
    685.3 KB · Views: 381
first day to myself in over a month so i decided to get some stuff done.

they said it was going to be 73 and sunny so it rained anyway as soon as i came out and set up shop.

got the carbs buttoned up (if i ever have to fight getting them into the boots ever again, i'm done), pods that i'll never get to work on. on the plus side, my new clutch perch and lever freshen up the front end a bit. it's bugging me that the whole assembly is gloss black while the new MC, perch and lever are flat.

as far as electronics, i went through about 40 zip ties and terminals (and my only 6 terminal connector :-\ ) zeroing in on exactly how long the wires from the harness and controls needed to be. fuse box is on, just needs to get wired to each wire's destination...all two of them.

in the midst of untangling the bird's nest of what I was dealing with, i decided no idiot lights for me so stripped away wires accordingly and slapped my other old handlebar clamps on...anybody want to buy a SOHC pilot dash? :D

weather permitting, I'll be finishing up the rest of this shitfest after work tomorrow and wrapping it up, maybe even bringing the starter cover back to life because it looking like that drives me insane.

according to USPS, which I've learned over the years is wise to take their words with a grain of salt, my CBR coils are coming in tomorrow which is good because I never noticed mine were cracked.

hopefully it starts...

...one day.
 

Attachments

  • IMG_20160522_062402.jpg
    IMG_20160522_062402.jpg
    823.2 KB · Views: 380
  • IMG_20160522_112319.jpg
    IMG_20160522_112319.jpg
    878 KB · Views: 385
  • IMG_20160522_180937.jpg
    IMG_20160522_180937.jpg
    679.3 KB · Views: 364
  • IMG_20160522_204705.jpg
    IMG_20160522_204705.jpg
    1.2 MB · Views: 380
  • IMG_20160522_130741.jpg
    IMG_20160522_130741.jpg
    786.1 KB · Views: 385
Right on man. I usually put a light coat of grease on the intake side of the carbs to help them get on, cuz it can definitely be a SOB with the inline fours.
 
adventurco said:
Right on man. I usually put a light coat of grease on the intake side of the carbs to help them get on, cuz it can definitely be a SOB with the inline fours.
i hit them with some wd beforehand, but it's just such an awkward position to be pushing something that you can't even really get a good grip on.

looked for ratcheting straps around the house. did not find.
 
all that gone done this week so far...the harness is finished, wrapped up and ready to catch on fire go.

got a craftsman lined up for friday's payday hitlist and my coils came in ;D
 

Attachments

  • IMG_20160525_001759.jpg
    IMG_20160525_001759.jpg
    1.9 MB · Views: 366
  • IMG_20160523_191821.jpg
    IMG_20160523_191821.jpg
    1.4 MB · Views: 334
  • IMG_20160525_004449.jpg
    IMG_20160525_004449.jpg
    582.3 KB · Views: 350
Unless you dead set on that sears box I would look at HF adds for a much better box for the money I can give you a coupon if you need it
 
Jumping on board.

A trick I learned for getting the carbs on really easily is with vaseline on the rubbers. ;) Also, I hope for damn sure you went through both ball valves on the accelerator pump. If that sat for any amount of time, then it's likely the balls are gummed up or coated with crust. They should only let fuel through in one direction and it's pretty much a guarantee that are effed in someone every time.
 
Tune-A-Fish said:
Unless you dead set on that sears box I would look at HF adds for a much better box for the money I can give you a coupon if you need it

the general brand? i was in there a few weeks ago and it seemed like they all went up in price as i couldn't find anything relatively cheap.

deviant said:
Jumping on board.

A trick I learned for getting the carbs on really easily is with vaseline on the rubbers. ;) Also, I hope for damn sure you went through both ball valves on the accelerator pump.

i couldn't get in there since one of its screws was stripped. if it doesn't fire up, I'll strip them down 1000%, send them out for proper cleaning and syncing.
 
Hellofa box for the money

http://www.harborfreight.com/tool-storage/tool-chests-roller-cabinets/26-in-16-drawer-glossy-red-roller-cabinet-combo-67831.html
 
reasonable, eh. it's just small and basic enough now that I can afford it and add drawers or side boxes later when the time comes.

at $160, why not.
 
couldn't get much done today since it's starting to get dark and i got off work late.

it seems my new harness is fully functional which is a big relief. i knew 0 about electronics before i pulled it out. before i actually took it on, i spent weeks staring at wiring diagrams, trial and error, investing in tools, playing with wires, creating circuits and flooding sonreir's inbox (thanks/sorry, man).

i'm now comfortable with things i never thought i'd be comfortable with and its just a matter of making better joints, crimps, etc.

anyway, i did drive myself nuts trying to figure out why nothing was coming on and I was only getting .02 volts to my fuse box. turns out, i accidentally swapped the switched power in terminal with one of the accessories AFTER i wrapped it so i didnt notice the color difference. my multimeter has also developed a mind of its own reading direct contact between its prongs as .4 ohms and there is apparently negative voltage in the atmosphere :(

my battery has also seen better days so things are a bit complicated. my solenoid sounds like a buzzy doorbell when the poor thing goes off.

i'll be taking a stab at draining the 2 stroke mix from my tank and praying my old petcock doesn't leak so i can try to fire her up for the first time. those cbr coils need to go on as well.

oops
PBTZt0u.jpg


don't mind the tilt or the tape...ive taken it in and out of the house too many times to risk dropping it and glass going everywhere.
EusvP8t.jpg


QkDnRWW.jpg


digging through an old email address, i found pics of my old suzi before NJ drivers killed her (and my shoulder):
uXmwiew.jpg
 
vandito.cb said:
my multimeter has also developed a mind of its own reading direct contact between its prongs as .4 ohms

This is normal. There is resistance in pretty much everything to a certain extent. The proper way to test resistance with a meter is to touch the leads to get the meter's resistance, then subtract that number from every reading. So in your case, if you read a coil as having 3.4 ohms on it's primary resistance, then the actual number is 3 ohms.
 
Back
Top Bottom