
We noticed you are blocking ads. DO THE TON only works with community supporters. Most are active members of the site with small businesses. Please consider disabling your ad blocking tool and checking out the businesses that help keep our site up and free.
You are using an out of date browser. It may not display this or other websites correctly.
You should upgrade or use an alternative browser.
You should upgrade or use an alternative browser.
Down under, an idiot and a 400F
- Thread starter neevo
- Start date
crazypj
Split personality, I fake being smart
I would use full synthetic 10w/40 (in fact, I do ;D )
Plenty of friction modifiers to provide smooth action")
You did get the cartridge fully bled before assembly? (needs a 'special tool', tube to screw onto end of damper rod)
Full synthetic ATF will also be around 10wt
I'll have to check, but, I think stock damper settings are 1-1/2~2 turns on rebound and compression
Plenty of friction modifiers to provide smooth action
You did get the cartridge fully bled before assembly? (needs a 'special tool', tube to screw onto end of damper rod)
Full synthetic ATF will also be around 10wt
I'll have to check, but, I think stock damper settings are 1-1/2~2 turns on rebound and compression
neevo
Over 1,000 Posts
crazypj said:I would use full synthetic 10w/40 (in fact, I do ;D )
Plenty of friction modifiers to provide smooth action
You did get the cartridge fully bled before assembly? (needs a 'special tool', tube to screw onto end of damper rod)
Full synthetic ATF will also be around 10wt
I'll have to check, but, I think stock damper settings are 1-1/2~2 turns on rebound and compression
Eh??????
You know I'm talking about the steering stabiliser don't you? The 5w in the forks might be too light too but I haven't tested them yet. Stabiliser has almost no friction though with 5w so looking to bump it to 15w.
There's more steel in that undertray that in the Sydney Harbour Bridge. It isn't going anywhere any time soon.
Just as a reference point, I re-use brackets I cut off elsewhere or fold up a couple of square inches of 20 gauge steel and weld a nut to that. Mainly cut off brackets being re-purposed though. One of these days I need to buy a box load of small brackets from a race car fab supplier. They are so cheap.
Just as a reference point, I re-use brackets I cut off elsewhere or fold up a couple of square inches of 20 gauge steel and weld a nut to that. Mainly cut off brackets being re-purposed though. One of these days I need to buy a box load of small brackets from a race car fab supplier. They are so cheap.
neevo
Over 1,000 Posts
crazypj said:Use 10wt, mine works fine.
I used a the blunt needle and syringe from an inkjet re-fill kit to get all the bubbles out
Cheers PJ, I'll grab some oil today and give it a crack.
neevo
Over 1,000 Posts
A few things achieved today. First up found an old tub of Motul Synthetic 7100 engine oil (10w, 40) and decided to refill the steering damper with that as the 5w was just too light. Used a Tupperware container and submerged the damper to get all the bubbles out, much easier than a syringe and no cavitation at any point
Popped it back on the bike at its perfect, not much resistance on slow turns but catches a swift snap of the bars.
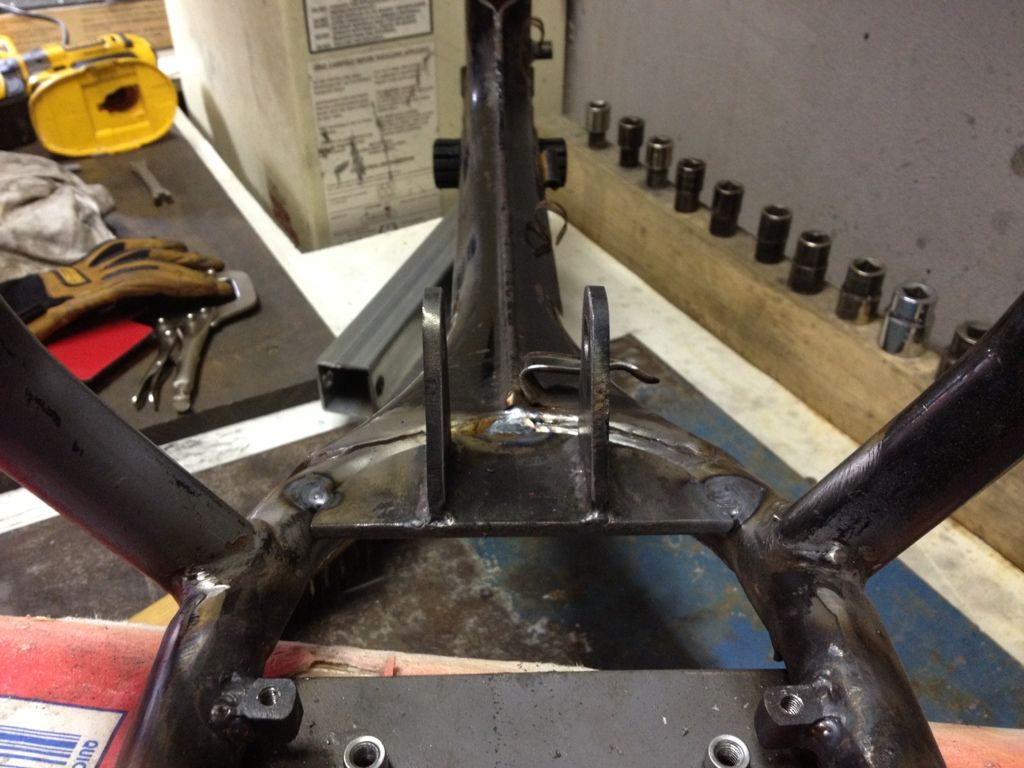
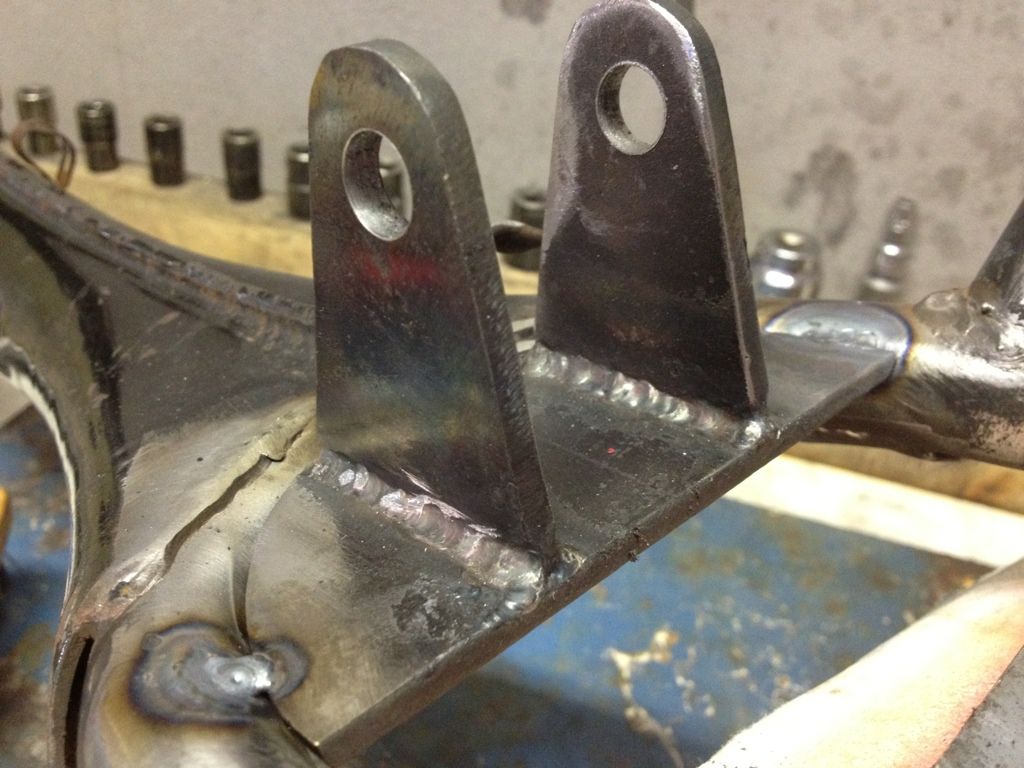
Next up I thought I would have a crack at the upper shock mount, just made it up really so if anyone thinks its not going to work let me know and I will try something else. Made it out of 5mm steel and decided to use this space to mount it:
Cut 3 pieces from the 5mm and mocked it up prior to welding:
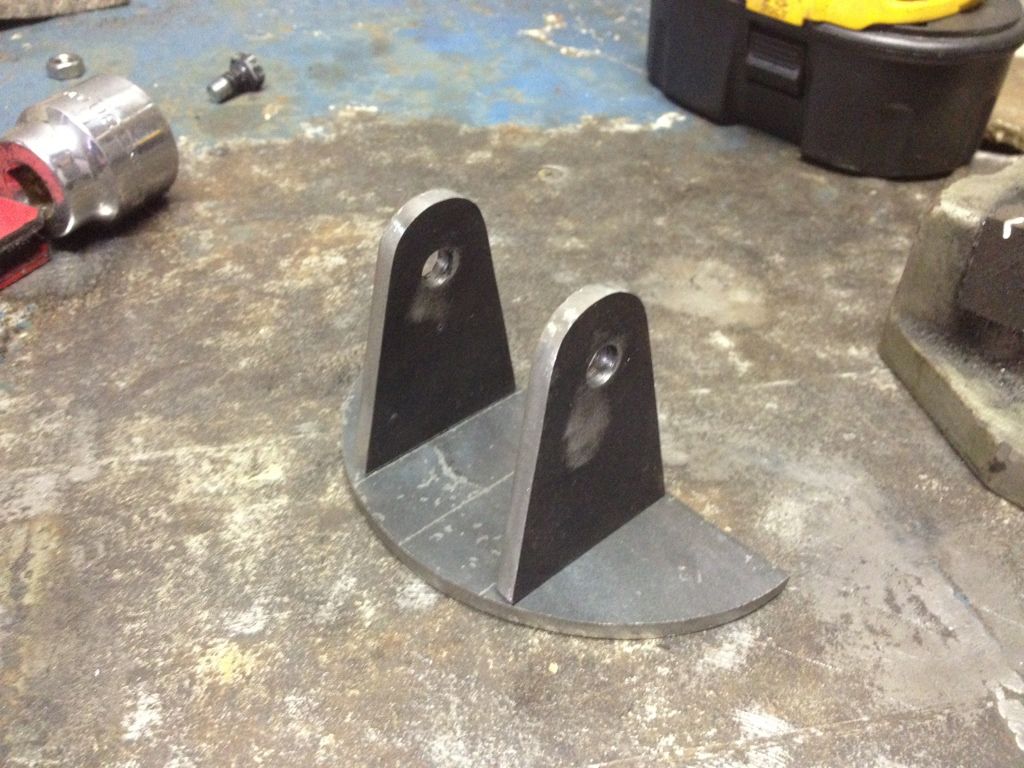
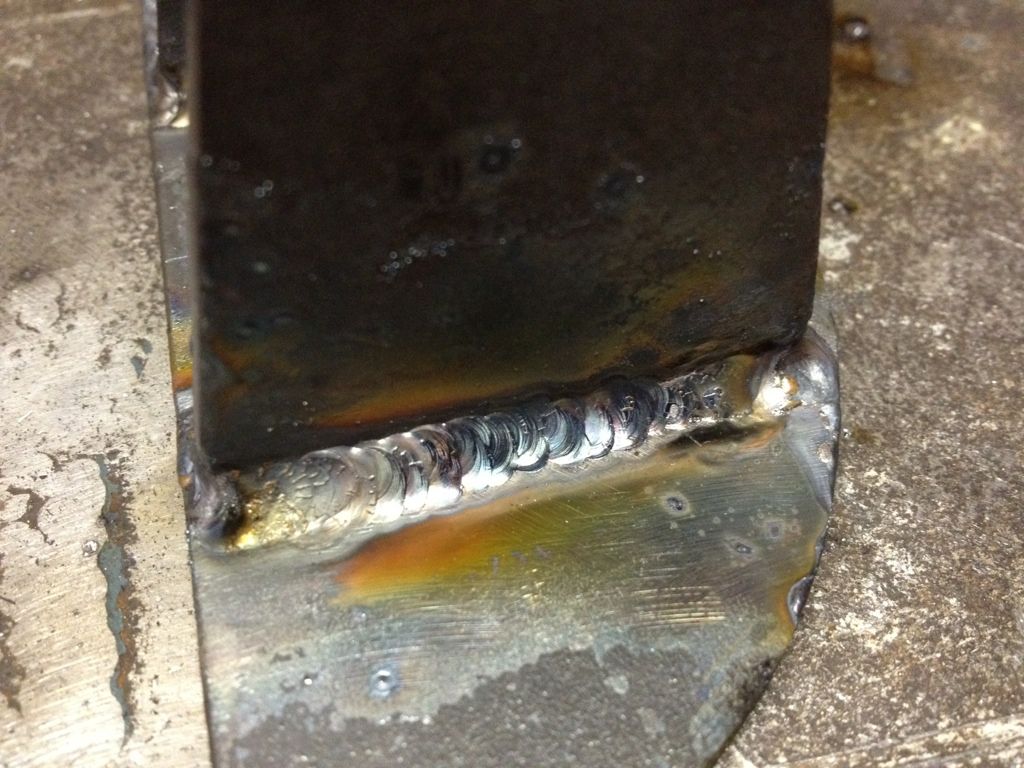
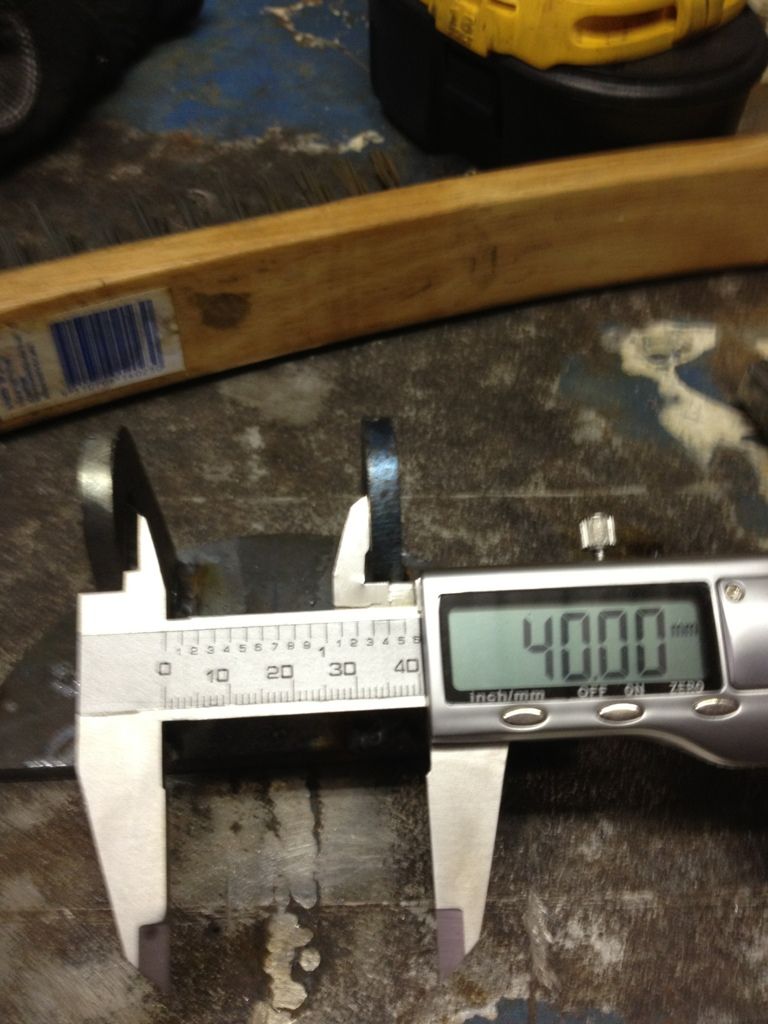
Looked good and I needed to keep the spacing 40mm as that's what the Hagon shock upper mount is. My welding has come on a fair bit since I started and I'm pretty pleased with how the mount came out:
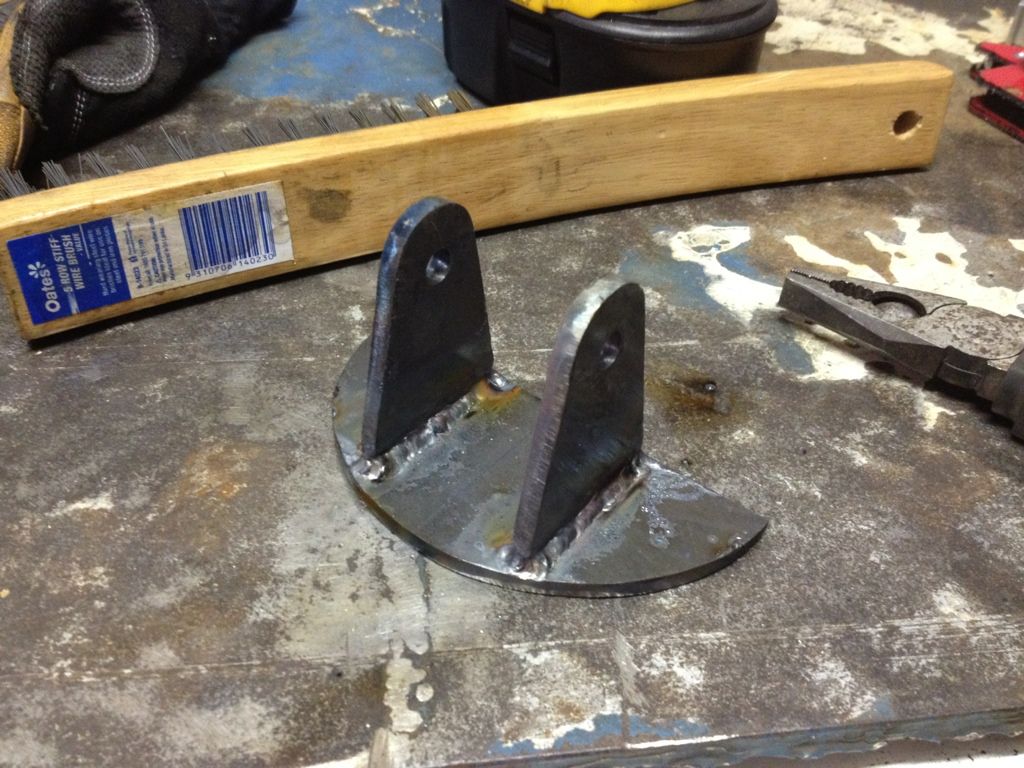
Wasn't going to weld it to the bike but I thought I might just tack it in and see if it fits when the shock arrives:
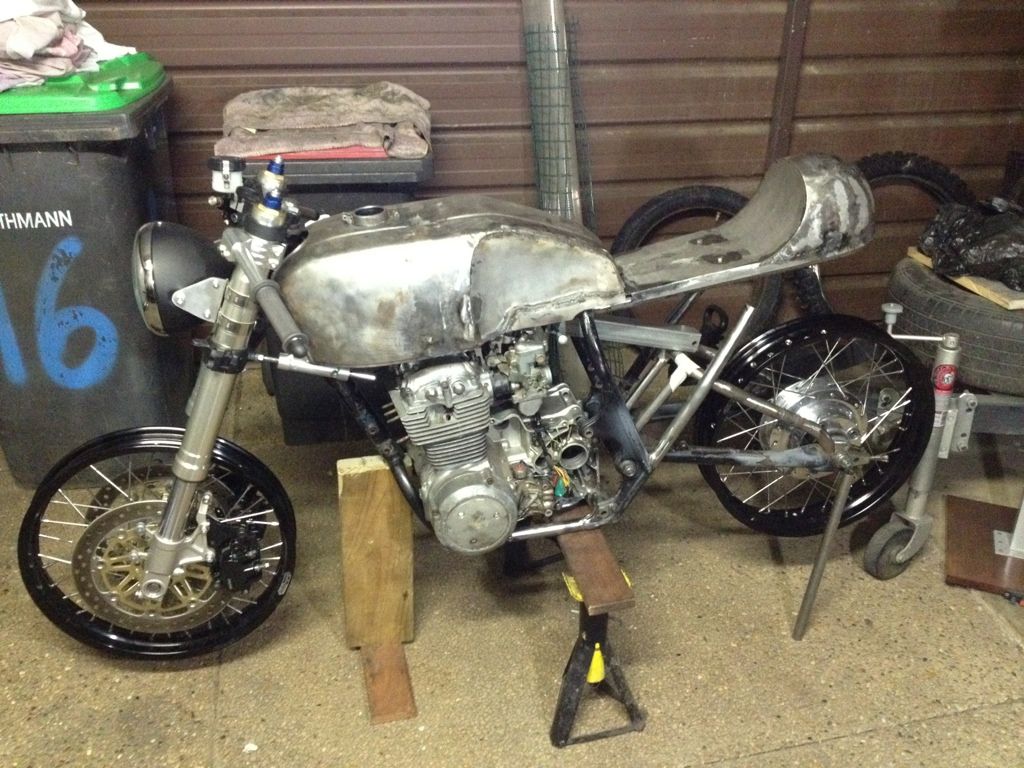
Put the bike to bed with its new wheels too, nearly a roller!!!!
Popped it back on the bike at its perfect, not much resistance on slow turns but catches a swift snap of the bars.
Next up I thought I would have a crack at the upper shock mount, just made it up really so if anyone thinks its not going to work let me know and I will try something else. Made it out of 5mm steel and decided to use this space to mount it:
Cut 3 pieces from the 5mm and mocked it up prior to welding:
Looked good and I needed to keep the spacing 40mm as that's what the Hagon shock upper mount is. My welding has come on a fair bit since I started and I'm pretty pleased with how the mount came out:
Wasn't going to weld it to the bike but I thought I might just tack it in and see if it fits when the shock arrives:
Put the bike to bed with its new wheels too, nearly a roller!!!!
crazypj
Split personality, I fake being smart
That's pretty much exactly how I did 400f monoshock, welded original tank mount back on though as I used stock tank.
Your just showing off with Tupperwear and submerged steering damper ;D
Good damping now though?
(should be pretty light at slow movement but go almost 'solid' if you 'jump' on it fast)
Your just showing off with Tupperwear and submerged steering damper
;D Good damping now though?
(should be pretty light at slow movement but go almost 'solid' if you 'jump' on it fast)
neevo
Over 1,000 Posts
PJ the damping is much better, as you said its not really noticeable until a sharp hit to the bars. Perfect as I like light steering.
Is my shock mount going to be strong enough, the shock mount part is quite tall to get the right angle which I assume would transfer a fair but of cantilever force. Hopefully 5mm plate and the welds are enough to keep it solid.
Is my shock mount going to be strong enough, the shock mount part is quite tall to get the right angle which I assume would transfer a fair but of cantilever force. Hopefully 5mm plate and the welds are enough to keep it solid.
Hoosier Daddy
Earache my eye...
andycafe said:Wow !
Exactly what I was thinking. Good stuff going on right here.
Might have to change the thread title
crazypj
Split personality, I fake being smart
neevo said:PJ the damping is much better, as you said its not really noticeable until a sharp hit to the bars. Perfect as I like light steering.
Is my shock mount going to be strong enough, the shock mount part is quite tall to get the right angle which I assume would transfer a fair but of cantilever force. Hopefully 5mm plate and the welds are enough to keep it solid.
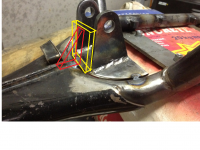
You'll have to fit the motor and the carbs before you add any braces.
You can probably buttress the front of both plates but clearance to fit carbs gets tight
Using a single angle plate won't work, the throttle pulley want's to be in the same place (if I remember right)
neevo
Over 1,000 Posts
crazypj said:You'll have to fit the motor and the carbs before you add any braces.
You can probably buttress the front of both plates but clearance to fit carbs gets tight
Using a single angle plate won't work, the throttle pulley want's to be in the same place (if I remember right)
PJ, I built the upper mount with the carbs and motor in place and then fabbed them off the bike. No issues with fitment at the moment (although stack clearance might be tight) and there is room for buttressing too.
crazypj
Split personality, I fake being smart
You'll have to re-fit motor and carbs and tape some card in position then try removing carbs.
I found out the hard way that I needed more room than I thought
Not being an engineer, I overbuilt the mounting.
3mm plate will be plenty thick enough, you don't have any twisting forceand any strass will be going through the widest section.
I would probably drill some 'speed holes' as well to lighten things up
At least I found out before frame was painted ;D
neevo
Over 1,000 Posts
crazypj said:You'll have to re-fit motor and carbs and tape some card in position then try removing carbs.
Oh, I didn't even think about if the carbs could be removed! Good pickup. I will double check that before adding some mild buttressing.
That's a long way out from the frame! I would have placed it so that the shock looks almost like an extension of the top frame tube. That way the forces are simple and in compression.
The current design includes a significant bending moment that is probably not a problem but it's not optimal.
The current design includes a significant bending moment that is probably not a problem but it's not optimal.
neevo
Over 1,000 Posts
teazer said:That's a long way out from the frame! I would have placed it so that the shock looks almost like an extension of the top frame tube. That way the forces are simple and in compression.
The current design includes a significant bending moment that is probably not a problem but it's not optimal.
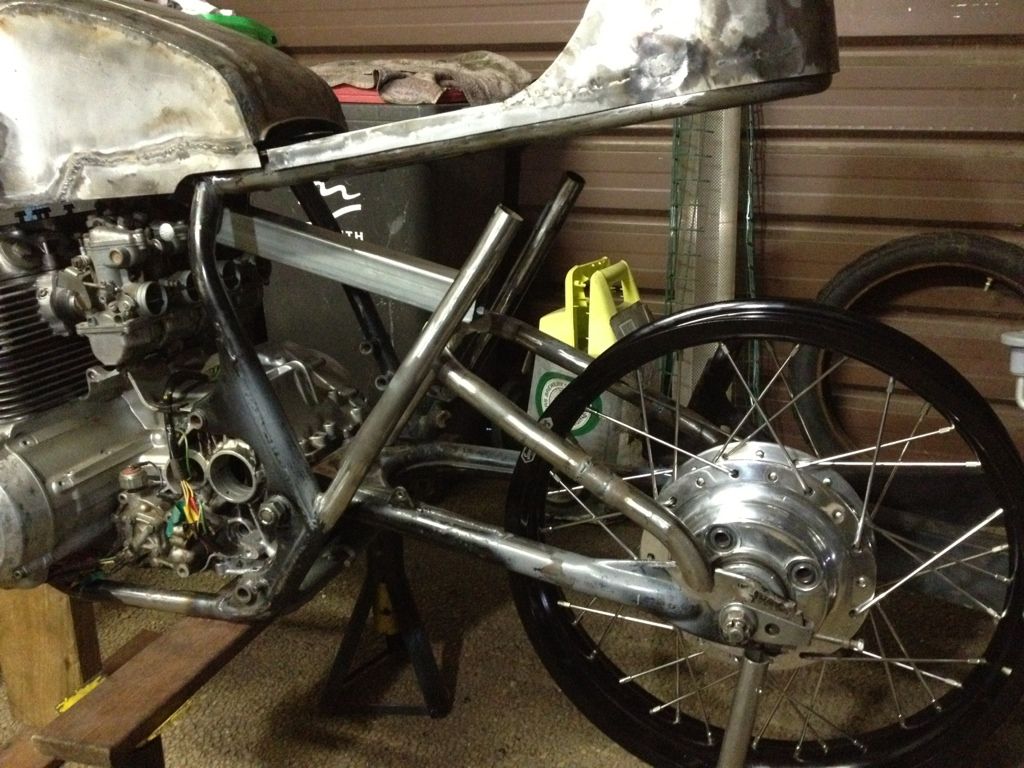
Reason for such extension is so that the spring on the shock can clear the subframe cover and also give the right angle down to the swingarm. It looks low and that's why I will put some basic bracing in front of it to transfer some of that force into the backbone.
crazypj
Split personality, I fake being smart
neevo said:Oh, I didn't even think about if the carbs could be removed! Good pickup. I will double check that before adding some mild buttressing.
That's why they make cutting discs for angle grinders
neevo
Over 1,000 Posts
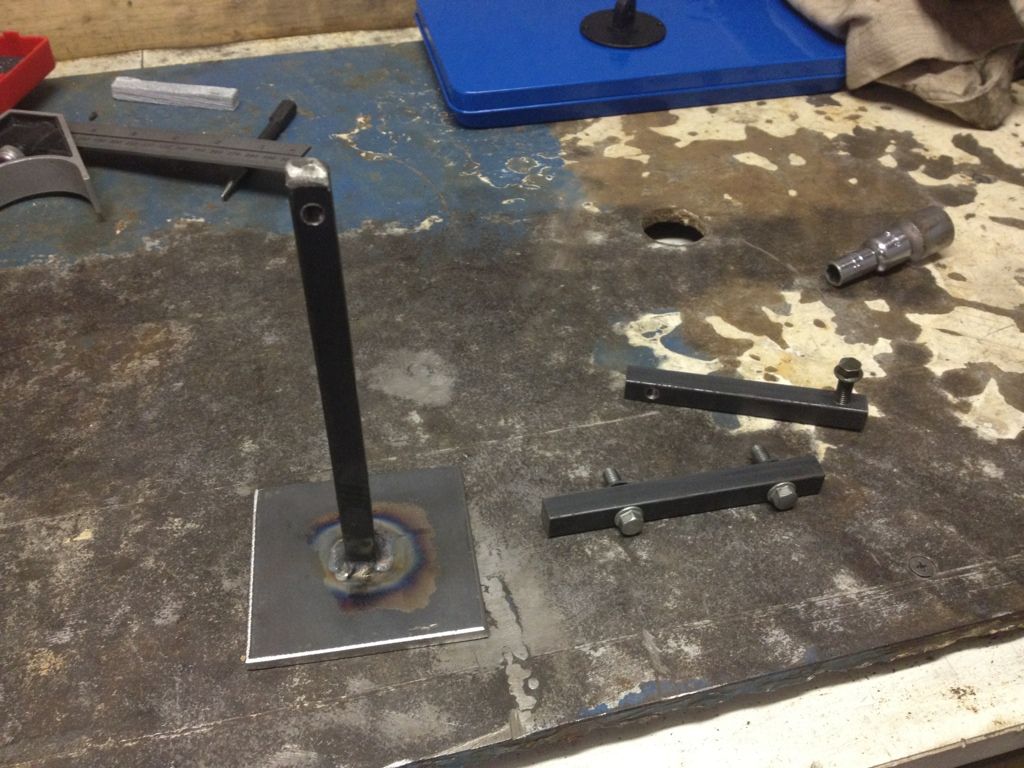
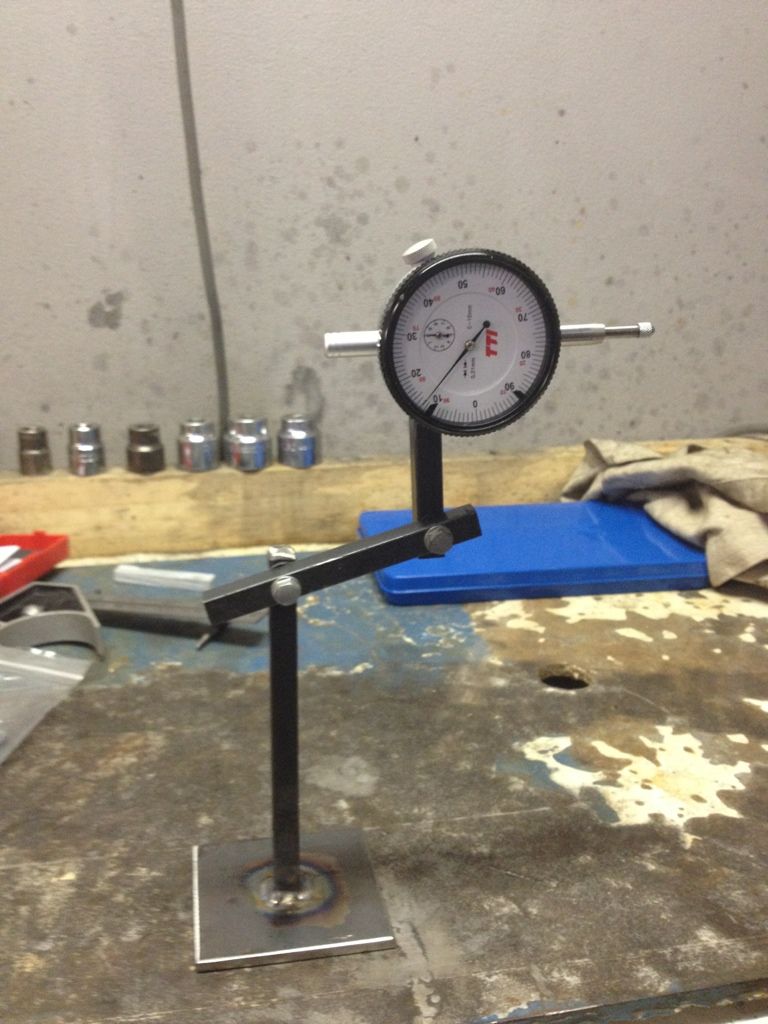
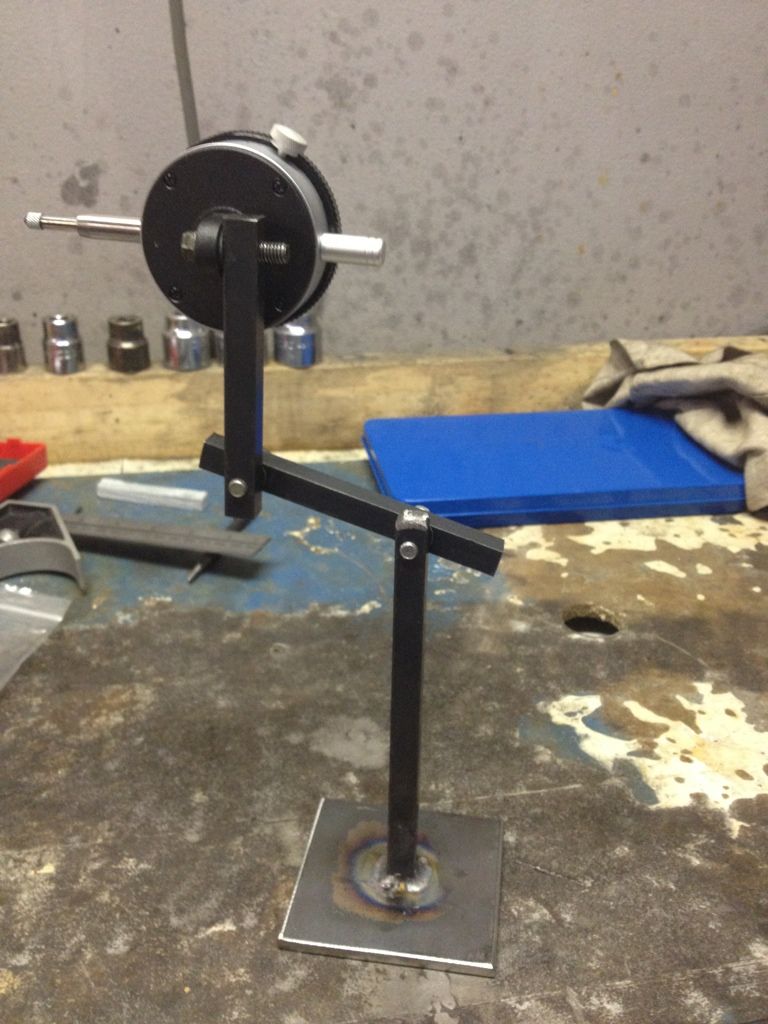
Jobs done today: trued rear wheel and finished the extensions on the subframe upright supports.
Struggled with the dial indicator when I did the front so I thought I would make a holder. A bit of 5mm plate, some 10mm square solid rod and we had it:
I got the wheel trued to 0.2mm however something funny is occurring with the beads. One is arrow straight and the other has a bit of a wobble. Any thoughts on what's going on?
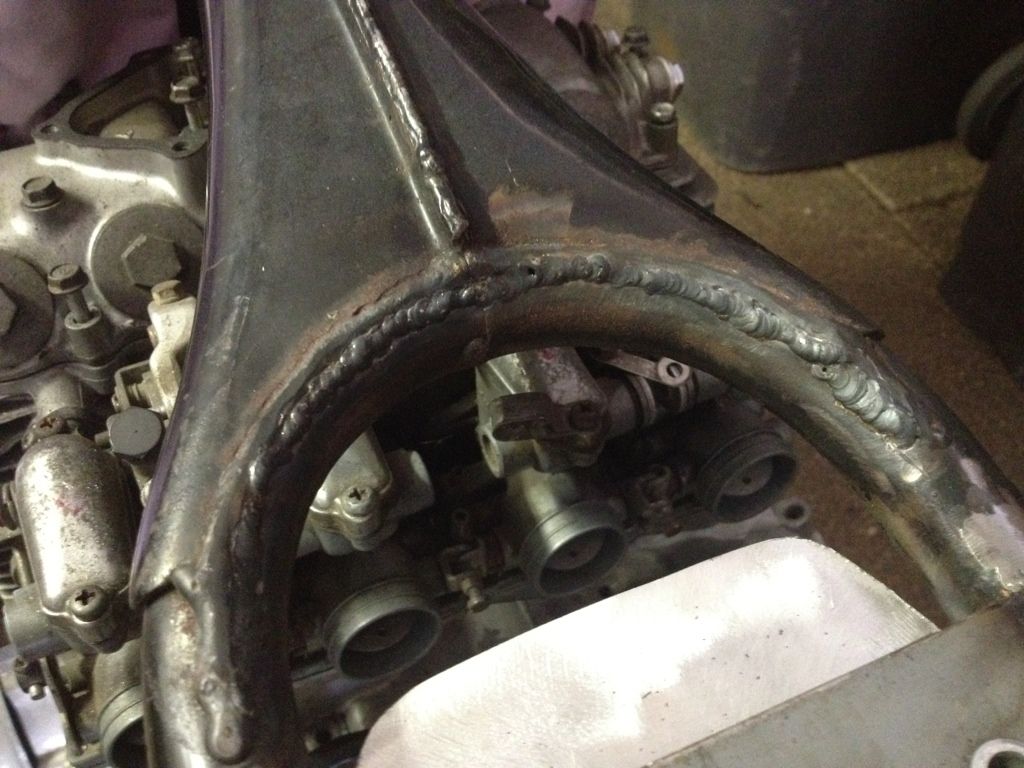
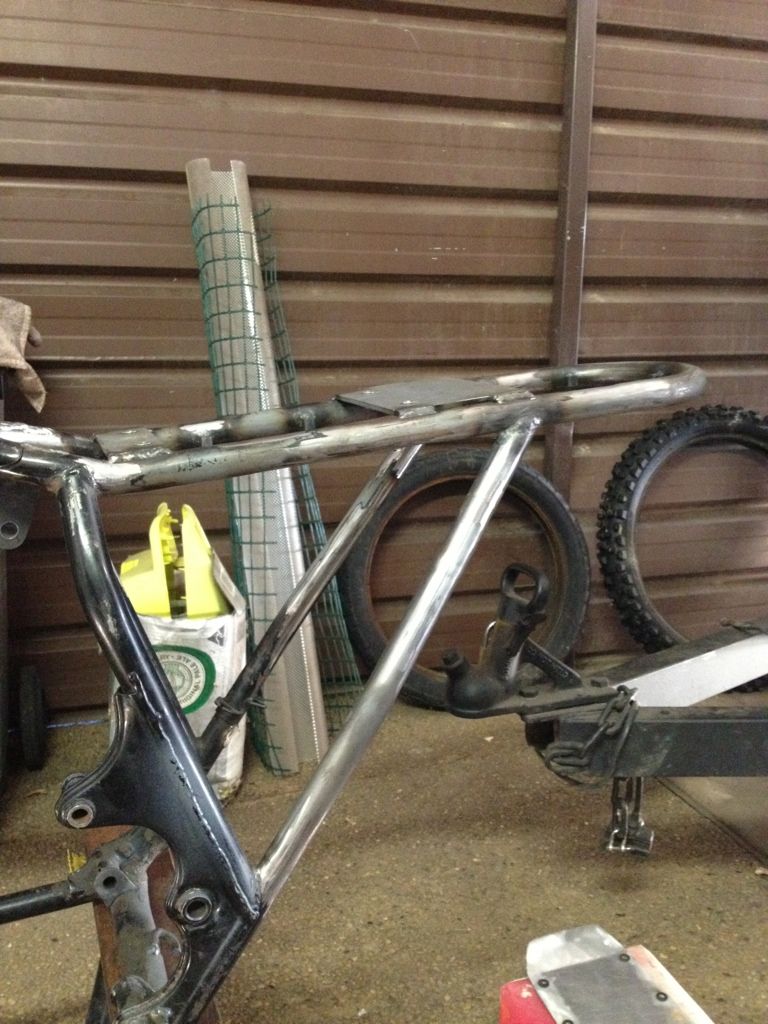
Lastly I cut some tube and finished off the subframe supports after lifting the subframe approx 1". I tried to use the hole saw to cut the ends but it just wouldnt work, so I cut them straight and topped it up with weld, not pretty but matches the original welds and should be plenty strong enough too:
Struggled with the dial indicator when I did the front so I thought I would make a holder. A bit of 5mm plate, some 10mm square solid rod and we had it:
I got the wheel trued to 0.2mm however something funny is occurring with the beads. One is arrow straight and the other has a bit of a wobble. Any thoughts on what's going on?
Lastly I cut some tube and finished off the subframe supports after lifting the subframe approx 1". I tried to use the hole saw to cut the ends but it just wouldnt work, so I cut them straight and topped it up with weld, not pretty but matches the original welds and should be plenty strong enough too:


