
We noticed you are blocking ads. DO THE TON only works with community supporters. Most are active members of the site with small businesses. Please consider disabling your ad blocking tool and checking out the businesses that help keep our site up and free.
You are using an out of date browser. It may not display this or other websites correctly.
You should upgrade or use an alternative browser.
You should upgrade or use an alternative browser.
Wife Bike - CB100
- Thread starter TurdFurguson
- Start date
JustinLonghorn
No Purple Hearts, No Blue Ribbons
I am sure y'all will get it straight. I have faith.
Maritime
Over 10,000 Posts
There is a thread here where someone detailed exactly what yo uneed to do, they cut a vee in the flat seat part, spread the sides open, then re-glassed. It turned out fine. Wish I could remember the build though as to search it out will be impossible I bet. 1/4" extra shoul dbe doable without cracking the original glass. See how it fits after you shorten the length.
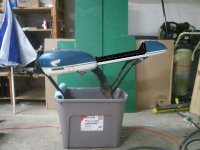
Alright, so today I trimmed up the seat about an inch shorter, and cut out the middle so it would slide around the tank mount. Now for pics..
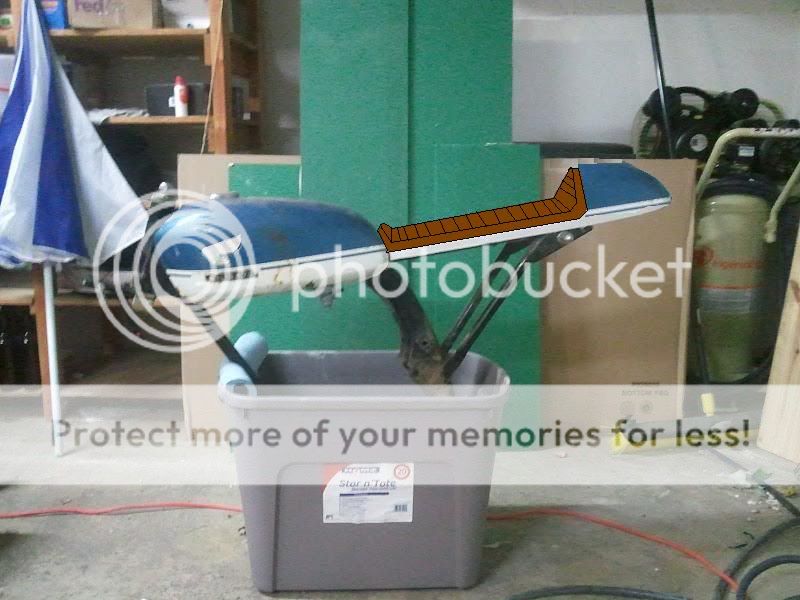
You can see that its seriously close to fitting, I really hate to hack it apart to get just a tiny bit of distance. The pic is of one side completely over the rail and this is the amount in off of this side fitting. I'm tempted to heat up the sides with a heat gun and see If I just cant carefully slide it down onto the frame.. It would need to be widened all the way down into the hump so im not sure that splitting it is going to solve my problem. I was able to 'force' the rear over the frame and it caused a hairline fracture so im pretty sure that it would be fine if I just gave it a little heat... Or I hope

Here is where it sits

You can see that its seriously close to fitting, I really hate to hack it apart to get just a tiny bit of distance. The pic is of one side completely over the rail and this is the amount in off of this side fitting. I'm tempted to heat up the sides with a heat gun and see If I just cant carefully slide it down onto the frame.. It would need to be widened all the way down into the hump so im not sure that splitting it is going to solve my problem. I was able to 'force' the rear over the frame and it caused a hairline fracture so im pretty sure that it would be fine if I just gave it a little heat... Or I hope
Here is where it sits
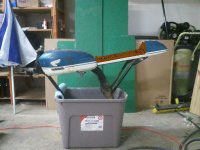
Alright, I decided I was going to stop being a puss and just get it on there.. So I did..
I ground down the welds so they were flat and the 'smoothed' the hard bend on the frame. Heated up the sides with a torch and slowly worked it over the frame going from side to side with the torch not to burn the glass. Got the seat over the frame! It was pretty hard to get off and on the frame and I didn't want it bending with the paint on and cracking so then I smoothed the fiberglass under the seat and not it slips on perfect. The seat sits on there now like it was made over the frame


I ground down the welds so they were flat and the 'smoothed' the hard bend on the frame. Heated up the sides with a torch and slowly worked it over the frame going from side to side with the torch not to burn the glass. Got the seat over the frame! It was pretty hard to get off and on the frame and I didn't want it bending with the paint on and cracking so then I smoothed the fiberglass under the seat and not it slips on perfect. The seat sits on there now like it was made over the frame
JustinLonghorn
No Purple Hearts, No Blue Ribbons
Yes sir, looking damn good. Damn good.
JustinLonghorn
No Purple Hearts, No Blue Ribbons
JustinLonghorn
No Purple Hearts, No Blue Ribbons
Ha, beat me to it.
Maritime
Over 10,000 Posts
JustinLonghorn said:Ha, beat me to it.
Your's is cleaner ;D
Maritime
Over 10,000 Posts
mothgils said:Nice renderings fellas. That looks good.
Jordan...you should mock it up with the rear wheel if you can or wait to finish the seat until you get it as a roller just to make sure the tail doesn't looking goofy long over the rear wheel.
Thanks A good idea, at least before attempting paint.
You stole my plan, I had planned to run a tan/brown pad with matching grips of sorts.
I should be able to throw the wheel on the swing arm and the swingarm back on the bike in about 15-20min so thats a good plan, I can do that tonight. However, if the seat needs to move its going to have to be split all the way down through the hump so lets hope it doesn't come to that.
Andrew, I need to get the frame brackets welded in the next week so that it can be blasted and painted. Christmas seems like a long ways away, but 2 months isn't really alot of time since i'll be out of town three of those weekends.
Not alot of work today, went to mothgils place of employment and got some metal on the frame.
Build an inner fender, a brace that'll hold the rectifier in place and a brace for the seat. Fender needs a little trimming fit perfect but I like how it turned out

Build an inner fender, a brace that'll hold the rectifier in place and a brace for the seat. Fender needs a little trimming fit perfect but I like how it turned out
Re: - CB100
Started tearing into the motor today, but hit a snag...
How the hell do you get the point advance off? Ive pried, banded, and wacked and no luck.. This is what im talking about. There has to just be a trick to it.. The shop manual just says 'take it off'

I also spent some time on the other side, took off the oil filter and cleaned it out. It was full of metal shavings and I believe that was because of the timing belt. It was 100% as loose as it could be and it looks like the chain had been slapping around all over. Need to get the head off and check the cylinders but will be changing the chain no matter what. I also have no idea how the oil filter works.. completely mystery to me. Oil pump seemed to work just fine. need to take the clutch off next and make sure it looks to be in order before cleaning/painting and putting it together with all new seals.

Started tearing into the motor today, but hit a snag...
How the hell do you get the point advance off? Ive pried, banded, and wacked and no luck.. This is what im talking about. There has to just be a trick to it.. The shop manual just says 'take it off'
I also spent some time on the other side, took off the oil filter and cleaned it out. It was full of metal shavings and I believe that was because of the timing belt. It was 100% as loose as it could be and it looks like the chain had been slapping around all over. Need to get the head off and check the cylinders but will be changing the chain no matter what. I also have no idea how the oil filter works.. completely mystery to me. Oil pump seemed to work just fine. need to take the clutch off next and make sure it looks to be in order before cleaning/painting and putting it together with all new seals.
surffly said:the advancer should slide off.
might need to "open" the springs as the little feet hold it on to the cam
Dont take my word as gospel because its been a little bit since i did one
I actually took the entire advance apart to see if there was something hidden behind that I wasn't aware of and even then it wouldn't come off.


