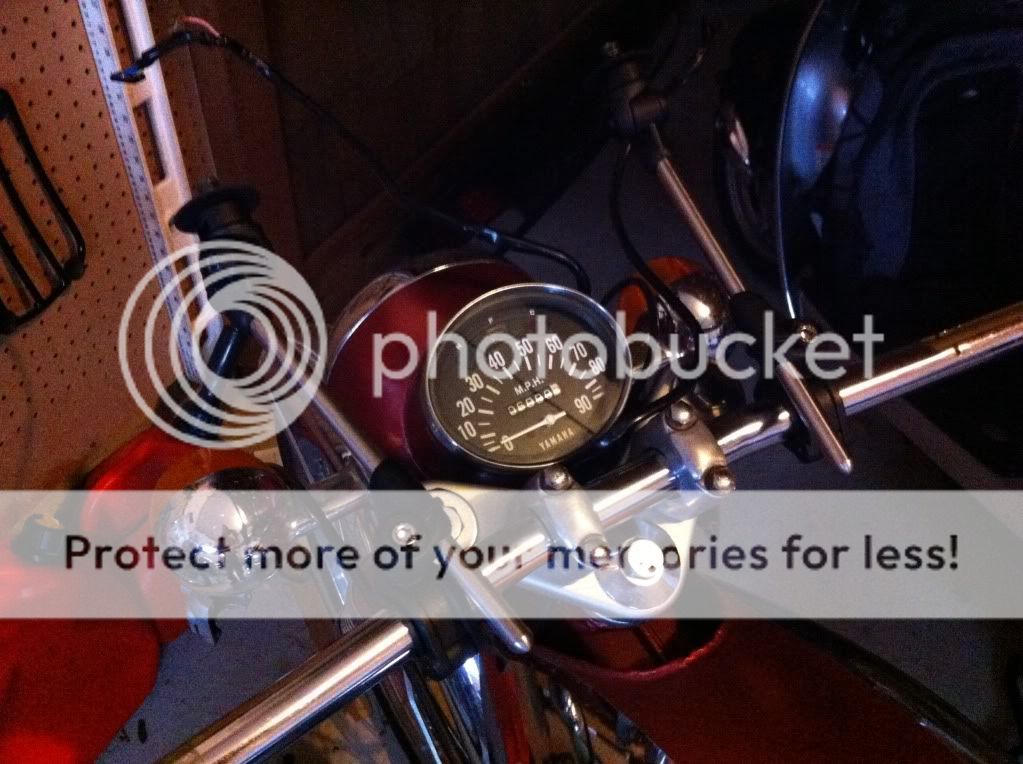
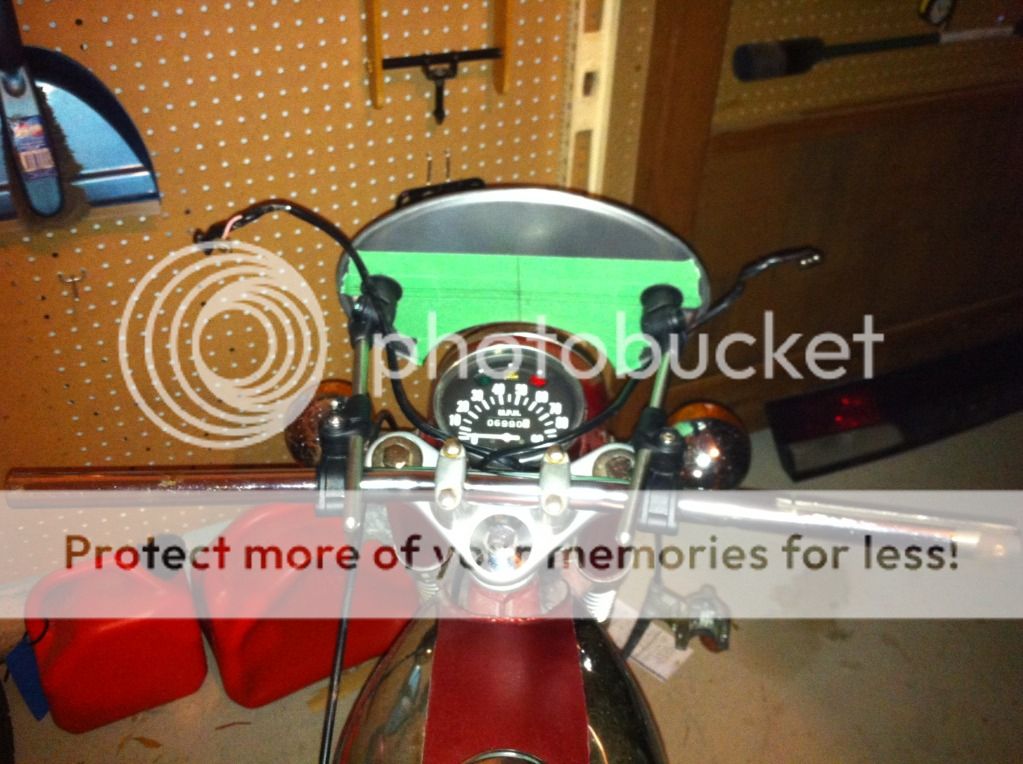
I was at a Halloween part last night. It was fun but today is not. Dr. Frankenstein is hungover like a dog today. Even so, I dragged my ass out of bed at noon and figured I would tackle getting the drag bars on. It took several hours which was a lot more than I had thought. Perhaps it was because I felt so bad, or perhaps it was the fact that the wiring runs through the handlebars. The wiring cover tubing was very brittle and stiff from age and was difficult to get out. I ended up spraying some cable pulling lube I had for work to get it out. Basically I had to disassemble the turn signal and high low-beam switch and feed the connector contacts through the bars as well. I bolted on the new drag bars and they definitely give the bike some "attitude" and they are reasonably comfortable too. It looks like clearance with the tank will be OK - but it's very close. I'd say about 1/16" with the brake and throttle. The clutch, throttle, and brake cables are way too long, so I'm going to have to do something about that. An added bonus, my mounts from the windshield look like they are just going to fit, with about 1/16" of clearance. It's almost like I planned it that way but the reality is it was just plain good luck. I'm too hungover to operate a camera so I'll get some pics posted tomorrow before I head out of town on a sales trip.
We noticed you are blocking ads. DO THE TON only works with community supporters. Most are active members of the site with small businesses. Please consider disabling your ad blocking tool and checking out the businesses that help keep our site up and free.
You are using an out of date browser. It may not display this or other websites correctly.
You should upgrade or use an alternative browser.
You should upgrade or use an alternative browser.
1966 Yamaha YL1 "Roadrunner"
- Thread starter CDNbiker
- Start date
")
Thanks Tim! I used a GIVI 660 windshield mount. I'm sure you could adapt just about anything though. Getting the wiring through the drag bars will be easier than the stock ones - just a straight run instead of through 2 curves.Tim said:Looking good - I like the windshield mounts for the flyscreen - might borrow that idea
Wiring through the bars sucks - been there with my old Hondas.
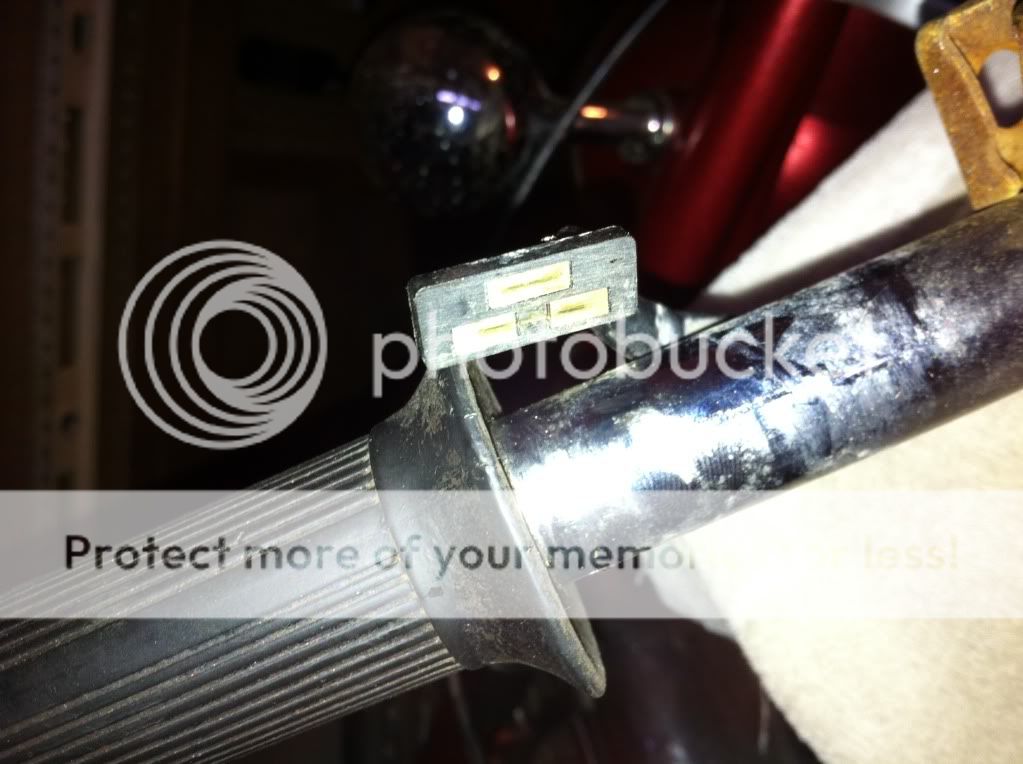
After disassembling the turn signal switch, I had to feed this and the wire through the old bars. This turned out to be much more of a PIA than I had expected. Wiring harness that is nearly 50 years old has gotten a little stiff:
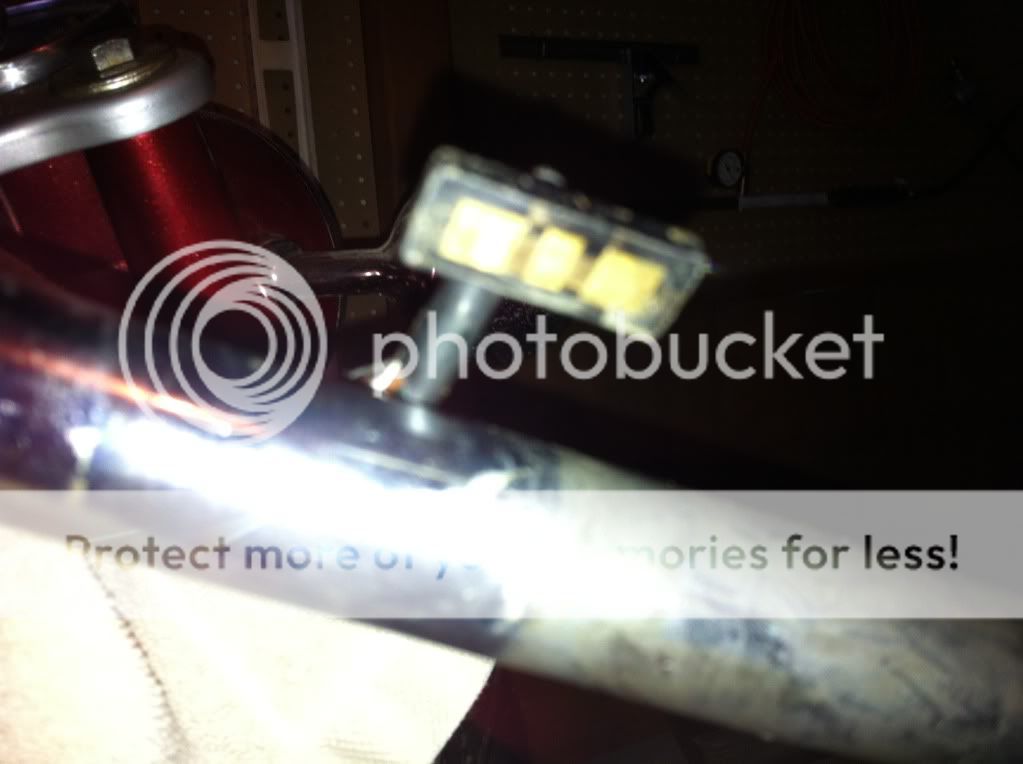
And the other side:
The NOS Yamaha bars in place:
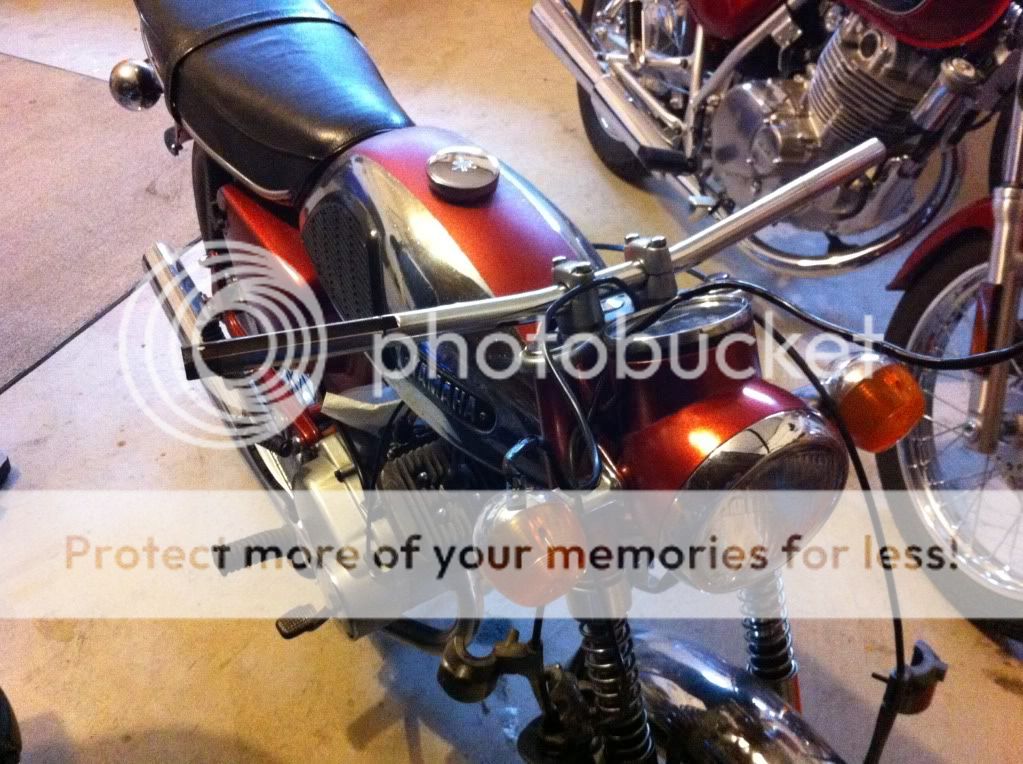
And a view from the cockpit:

And the other side:
The NOS Yamaha bars in place:
And a view from the cockpit:
And another photo after I put the windshield (now flyscreen/number plate) mounts on this morning. When I get back from my road trip to Halifax I'll have to make the windscreen. If anyone has any thoughts on the best material to use I'd appreciate some feedback. Needs to be easy to cut and drill. Clear is fine; I'll probably try and tint it after I make it.
I have two project YL-1s and am following your progress. I already bought a set of the handlebars like yours because I like the look you got with them.
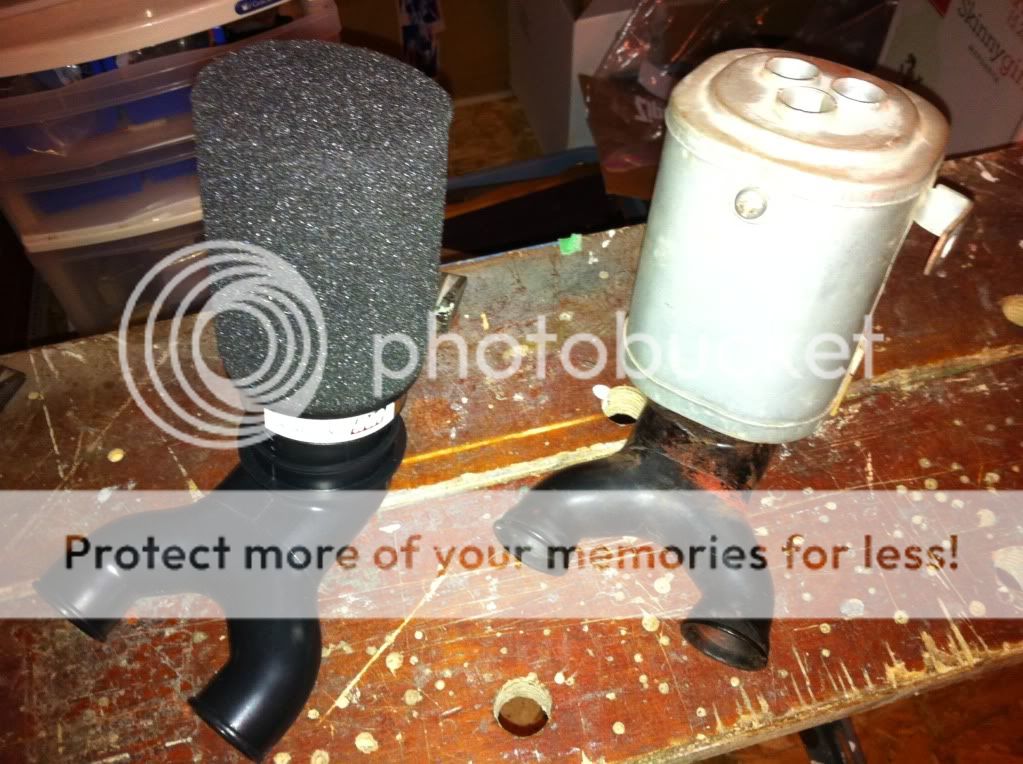
Can you post details about where you purchased the NOS manifold and the air filter? If your setup works out, I would like to do the same thing on my bikes (the manifold on one of mine is shot.) I noticed your NOS manifold is a fair bit bigger than OEM -- have you test fit it yet?
Awaiting more pics/progress...
The NOS manifold was a ebay find. It is an NOS OEM one that was still in the Yamaha package. Funny enough, the guy who had it was about 50 miles from my house. It cost me about $70.00 though. Not cheap but what are you gonna do. It's a pretty specialized part. You have to watch, you will see one come up every once and a while. The original manifold shrunk quite a bit and the rubber went hard. Probably a result of heat and age so it looks smaller because it is. That was the problem - could not get it to reach the carbs properly. The air filter is a standard 2" one from ebay as well. I used some 2" PVC pipe which fit the OEM manifold perfectly. I had to use a thin strip of rubber on the other end of the pipe to get it to work with the new filter. Here is a link:jeet said:I have two project YL-1s and am following your progress. I already bought a set of the handlebars like yours because I like the look you got with them.
Can you post details about where you purchased the NOS manifold and the air filter? If your setup works out, I would like to do the same thing on my bikes (the manifold on one of mine is shot.) I noticed your NOS manifold is a fair bit bigger than OEM -- have you test fit it yet?
Awaiting more pics/progress...
http://cgi.ebay.com/ws/eBayISAPI.dll?ViewItem&vxp=mtr&item=290789770385

Have a look at this and let me know what you think before I drill holes. Ever since I saw Noddy78's "CB350 Steampunk Frankenstein Cafe thing called Isabel" build, I have been dying to use a little brass accent(s) on this project. I have to say, I've never been a big fan of the steampunk style, but that bike Noddy built was very cool, and deserving of his Bike of the Month win. At any rate, I found this solid brass number at Home Depot. Since I plan to do the bike black, I think the brass may look kinda neat. And because I'm not really following any particular "style" with this project, anything goes - right?
Sorry you had to turn sideways to look at this, could not seem to be able to rotate the photo.
Sorry you had to turn sideways to look at this, could not seem to be able to rotate the photo.
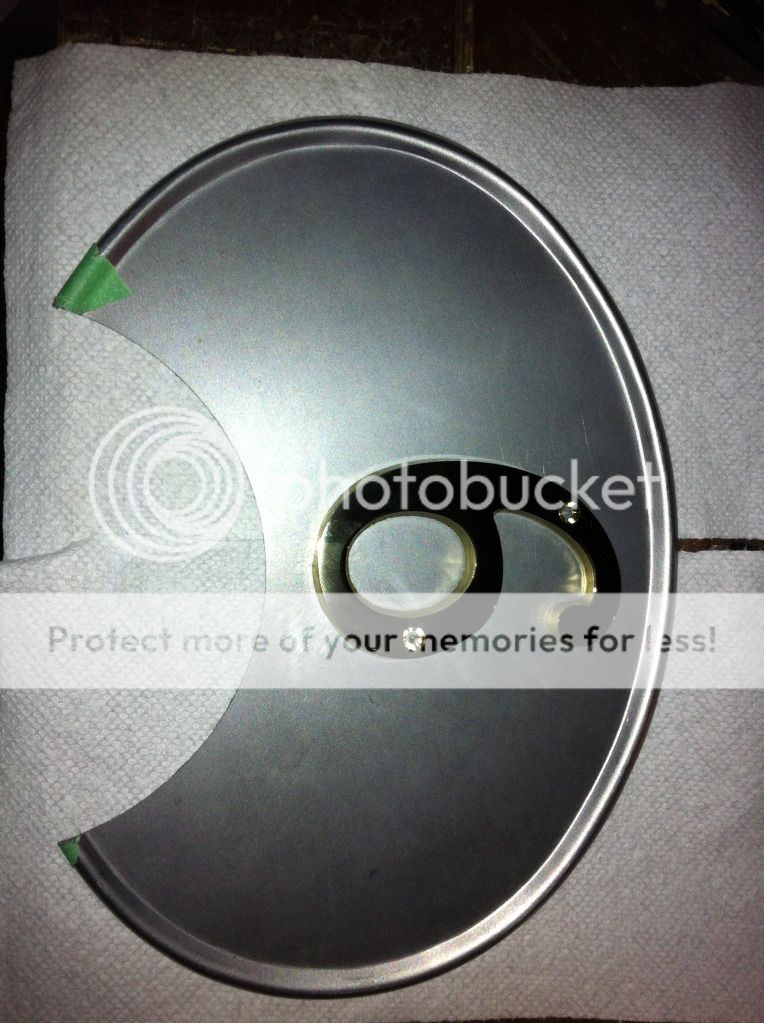
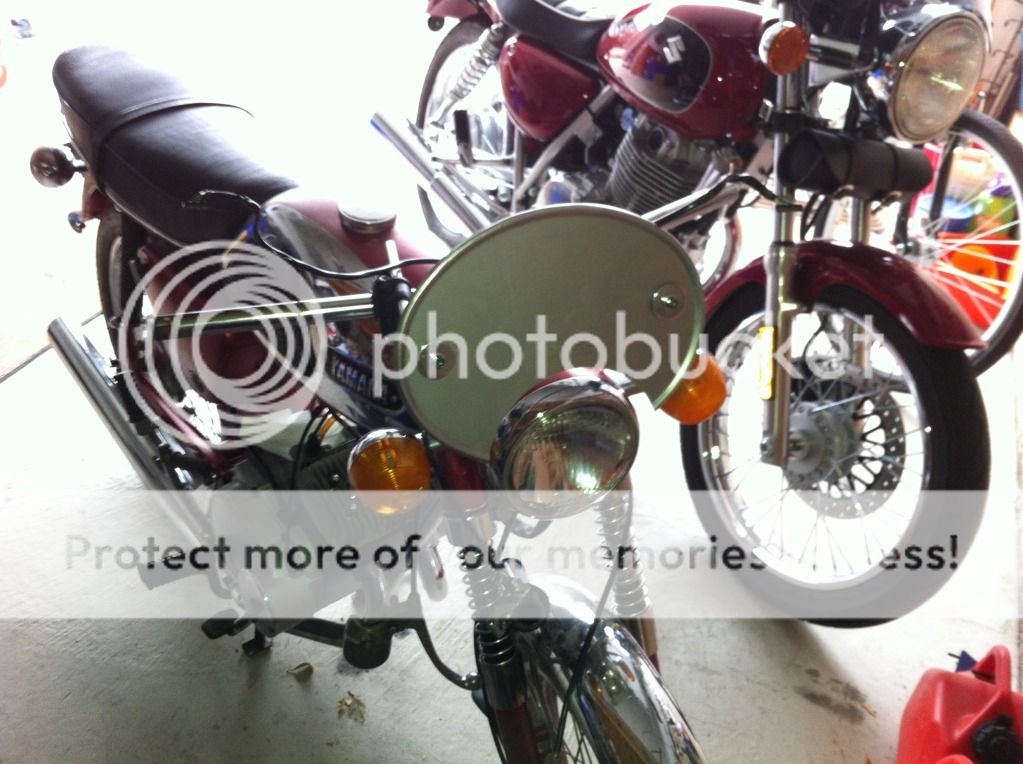
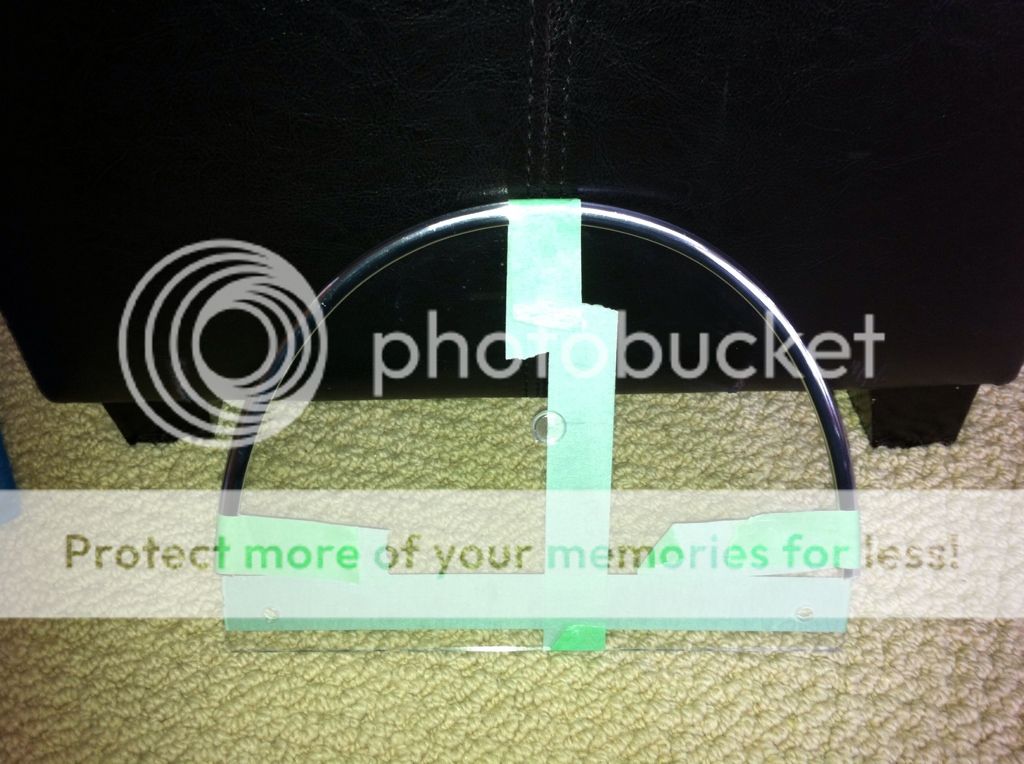
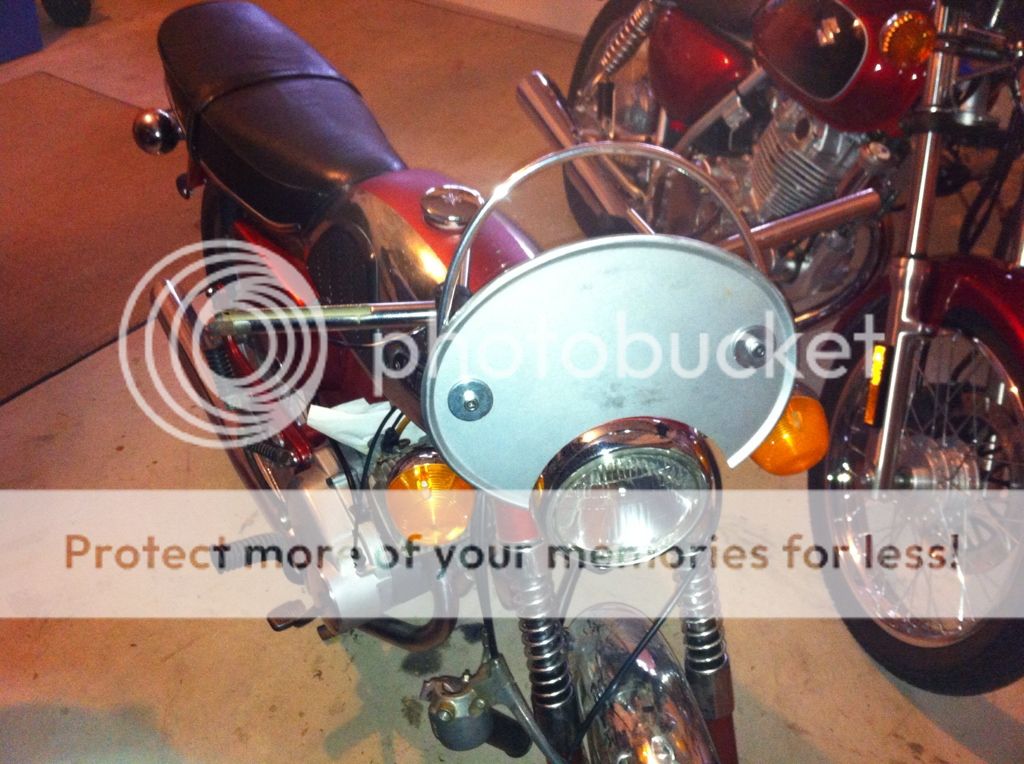
I've been on the road a lot lately but got home last night and started getting the number plate mounted for some test fitting. I think it turned out pretty good. Got to cut the Lexan for the screen and make a mounting bracket next.
This photo is a little deceptive because of the angle and it makes the plate look much bigger than it really is.

This is a better perspective of the size from this angle
This photo is a little deceptive because of the angle and it makes the plate look much bigger than it really is.
This is a better perspective of the size from this angle
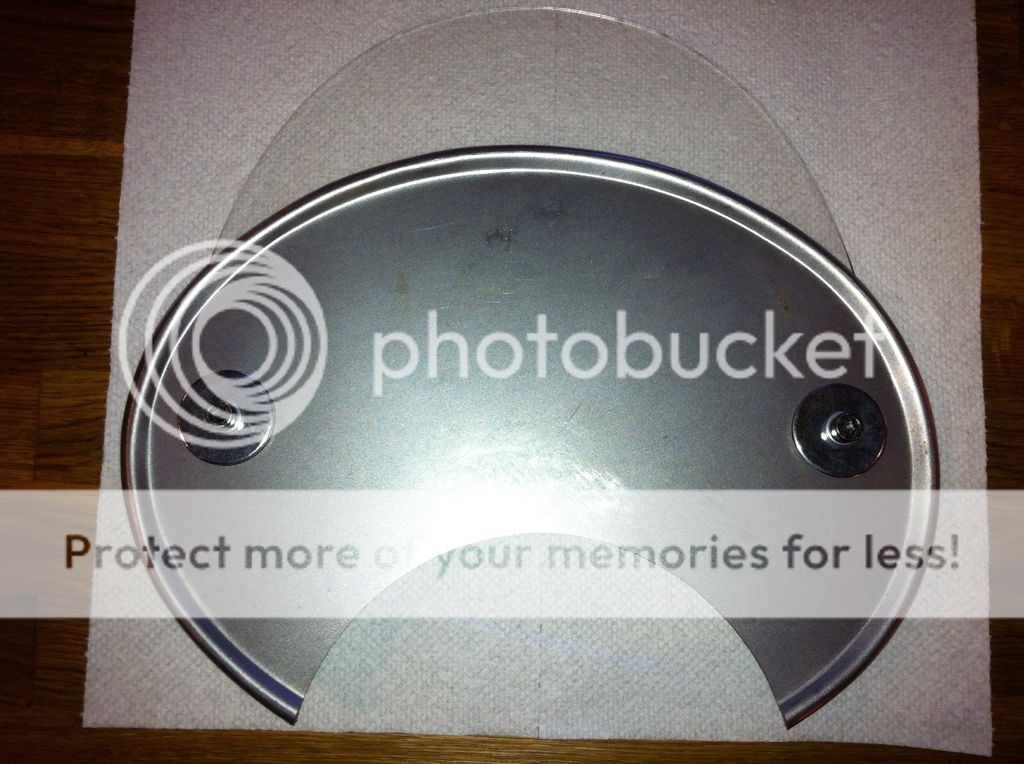
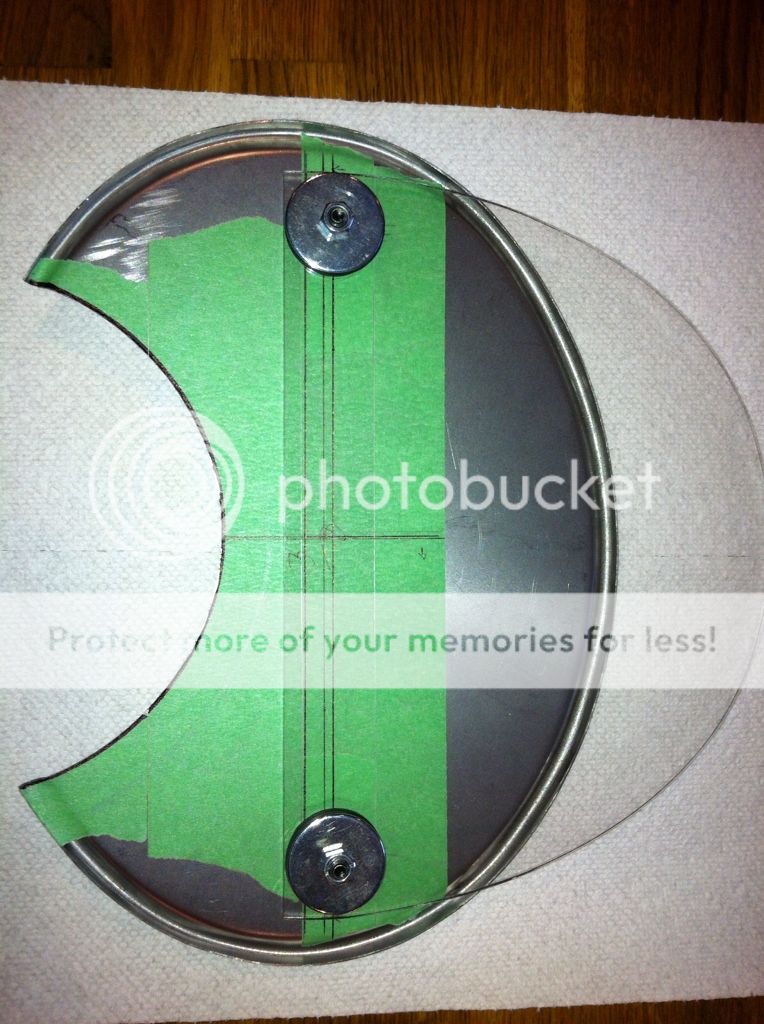
Again time seems to be my enemy lately. I did modify some fender washers to add some strength to the mounting points on the number plate. I then sandwiched the number plate between two large rubber washers and the fender washers. Should withstand any speed this bike is capable of.
I also picked up some UV protected Lexan sheet. I created a pattern for the windscreen then transferred the pattern to some masking tape on the Lexan. I drilled two mounting holes which line up with the number plate mounting points. Not sure how to cut this stuff. Some folks say a bandsaw is best but I don't have one. Others say a jigsaw will work but with varied results depending on speed and type of blade. I also found a place not too far from my appointment tomorrow that makes custom stuff from plexi and lexan so I think I'll stop in there and see if they will do it. If not, I'll give the jigsaw a try. Anyone who has cut this stuff have any ideas?
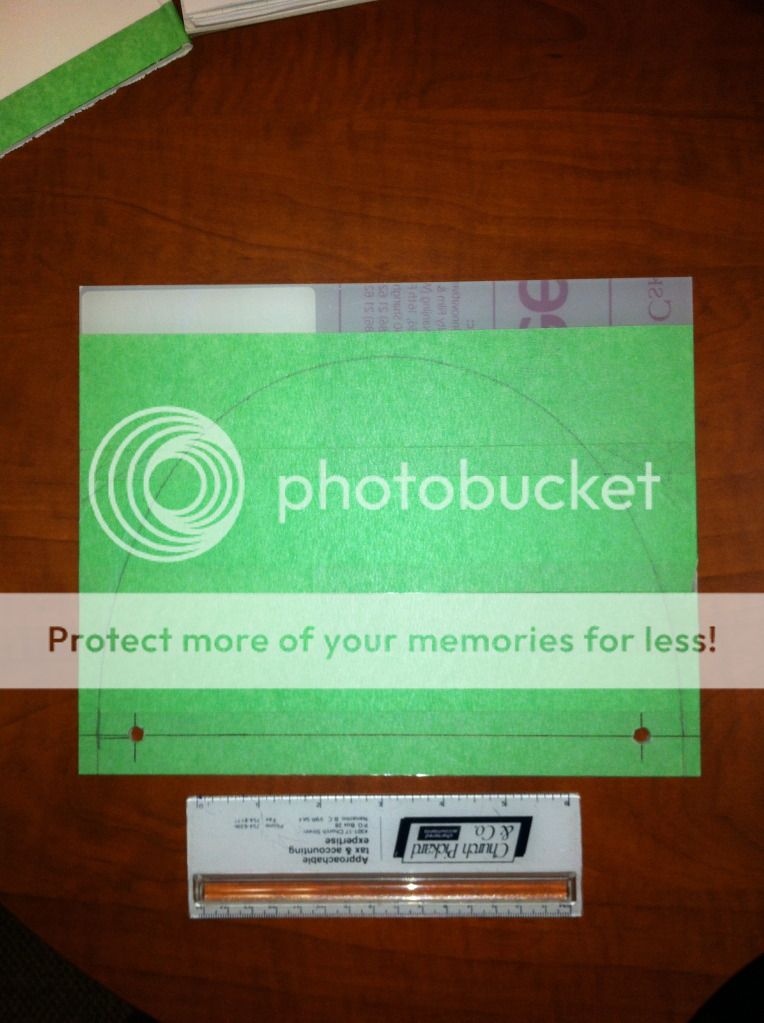
I also picked up some UV protected Lexan sheet. I created a pattern for the windscreen then transferred the pattern to some masking tape on the Lexan. I drilled two mounting holes which line up with the number plate mounting points. Not sure how to cut this stuff. Some folks say a bandsaw is best but I don't have one. Others say a jigsaw will work but with varied results depending on speed and type of blade. I also found a place not too far from my appointment tomorrow that makes custom stuff from plexi and lexan so I think I'll stop in there and see if they will do it. If not, I'll give the jigsaw a try. Anyone who has cut this stuff have any ideas?
Ended up dropping off the Lexan at that shop I found. Turns out the guy has made several custom windshields for various bikes so I thought I'd give him a try. Should be ready next week sometime.
Now I have to start thinking about the seat. What to do. I'm leaning towards a cafe type seat but finding one small enough off the shelf to work with this bike might be tough. So maybe Ill just custom fab something. Once I get the stock seat off I should have a better idea of what might work.
Now I have to start thinking about the seat. What to do. I'm leaning towards a cafe type seat but finding one small enough off the shelf to work with this bike might be tough. So maybe Ill just custom fab something. Once I get the stock seat off I should have a better idea of what might work.
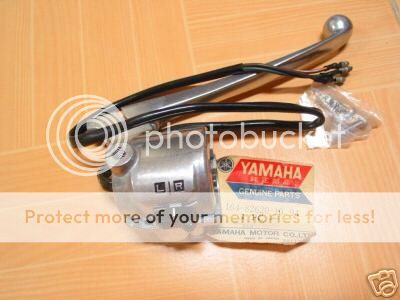
One of the "repairs" that was done to the bike at some point was something I discovered when removing the throttle off of the handlebars. One of the metric screws had fallen out, and the PO decided that a large wood screw would make a perfect replacement. This left the original threads in the aluminum destroyed. I was going to try and tap it with a larger screw, but found this on e-Bay. So its on order. Bonus that I get new wire and don't have to reuse the old harness.
Still waiting on my windscreen, should be done this week sometime.
Still waiting on my windscreen, should be done this week sometime.
Thanks, winters on its way here too. Probably not much riding time left. But at least this gives me something to do over the long cold winter.kingkelly said:Cool project man, loves me some old little yamahas.
This side of the country is full of snow, hoping you can get this guy out running smooth before winters in full bloom.
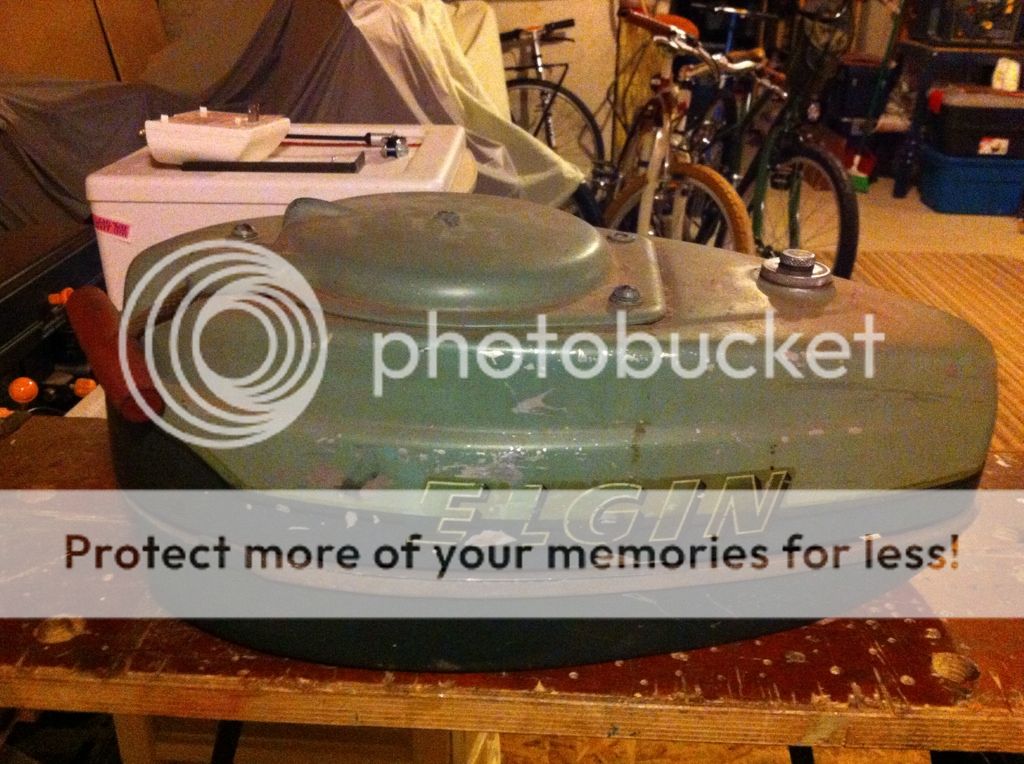
So I've been looking at a variety of off the shelf cafe seats and really have not seen anything that will "fit" this bike. Most are going too look too big. I could get a shop to do something with the stock pan or I could make my own seat. That's sort of where I'm leaning. And in my basement I have been keeping this old tank for some sort of yet to be built rat bike bobber project. It's an aluminum 1950's outboard motor tank of a "Elgin". And the profile of the back of it would be perfect for my seat bum stop. I'm not chopping up this tank, but maybe make a mold using it. I really don't want to destroy the lovely patina and decals it has though. Maybe if I clear coat it and use a good mold release compound? I've worked with fiberglass before but never made my own mold. Could use a little advice on what you folks that have made a mold think would work best.