1975 CL360 Build

LiveStoked

New Member
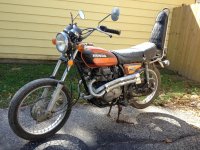
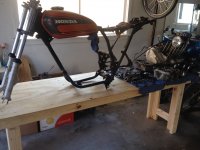
I scored a CL360 just recently, and decided to go all out with this bike. So I'm starting this build thread to track all the progress as time goes on.

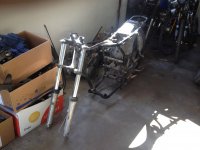
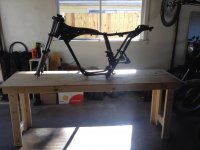
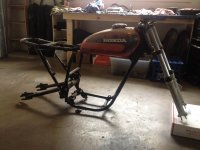
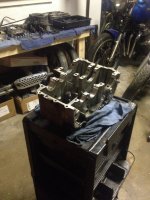
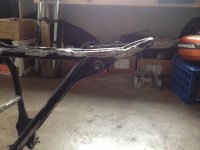
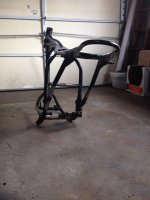
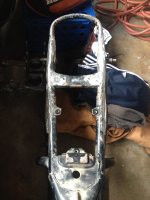
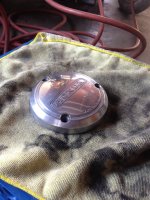
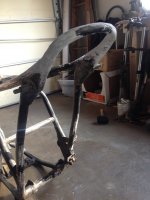
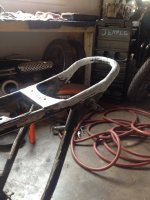
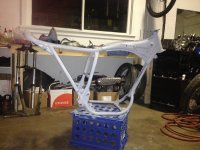
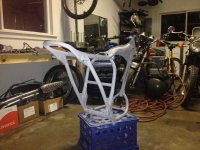
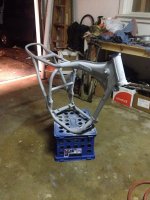
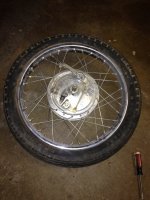
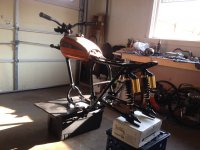
Bike starts as a bone stock CL360, and the plan is to do a full complete build which started today. I ripped the bike down to its bare bones today, and should start the modifying this weekend.

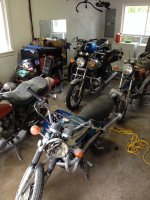
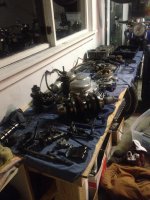
Also, when I bought this bike, there were a few other bikes at this guys shop (the owner fell into bad health and I stumbled across incredible deals), so I decided to take them all and give them good homes....in my garage.
 

Attachments

  • image.jpg
    image.jpg
    906.7 KB · Views: 338
  • image.jpg
    image.jpg
    1.6 MB · Views: 347
  • image.jpg
    image.jpg
    625.3 KB · Views: 347
Wow! Nice score. The 360 ran before you tore the bike apart? Is that blue bike a CL350? I like those colors.
 
The CL360 was frozen. Cylinders were left exposed through the exhaust pipe mounts. The pipes were unbolted and since the the bike was sitting in a body shop, overspray found its way in. Luckily I just opened the motor and it isn't too bad in there, so I don't have to get too crazy with machining. WOO!

The blue bike is a 1974 CL200. It's in near perfect shape, just a little damage on the headlight switch.
 
Built a table to hold the bike so I can build on it at chest level. Holy crap why haven't I ever built a table to work on bikes before? This is so great!
 

Attachments

  • image.jpg
    image.jpg
    1.5 MB · Views: 326
Also started tearing the engine down. Motor was seized, but it came loose entirely too easy. Made me so happy!
 

Attachments

  • image.jpg
    image.jpg
    1.5 MB · Views: 325
  • image.jpg
    image.jpg
    1.8 MB · Views: 312
Finally tore the entire motor down to inspect the insides. Everything looks and feels perfect. I got my new camshaft and can chain in, so now it's time to paint the motor and get it all back together.

I started cutting off all the unessessary tabs off today, still got a couple little things to cut off, then I can start prepping it for paint.

So while I was grinding on some metal, a few sparks were flying into my motor internals, so now there are a couple metal shavings and nasty stuff on them. How should I go about cleaning the internals of to make sure no mini metal shavings are still on them when I put them back in?
 

Attachments

  • image.jpg
    image.jpg
    1.5 MB · Views: 310
  • image.jpg
    image.jpg
    1.2 MB · Views: 307
  • image.jpg
    image.jpg
    1.2 MB · Views: 325
Today I took the old hoop, angled it upwards, and mounted it on the rear. I was going to get the one inch hoop to make it match the frame, but I decided to weld this on, bondo it a little, and have a smooth transition from 1 inch tubing on the frame, to 3/4 inch or whatever the stock hoop is. I grinded it down as much as possible after welding, and tomorrow I'll bondo it so it doesn't have such a drastic angle from frame to hoop. Should give it one fluid sweeping upward motion!
 

Attachments

  • image.jpg
    image.jpg
    1.6 MB · Views: 315
  • image.jpg
    image.jpg
    1.1 MB · Views: 327
  • image.jpg
    image.jpg
    1.3 MB · Views: 317
Typical polishing of side covers started today. Took two hours just to do this one. Turned out pretty good for the first time doing it.
 

Attachments

  • image.jpg
    image.jpg
    1.5 MB · Views: 312
  • image.jpg
    image.jpg
    1.5 MB · Views: 298
I got around to doing some bondo on the tail section to smooth things out, sanded it down, and gave the frame a coat of primer to show where more imperfections can be. I have some sanding to do tomorrow to clean and few little areas up, but other than that, the frame should be off to get painted black and I can start the process of getting it all together. WOOT!!
 

Attachments

  • IMG_5112.JPG
    IMG_5112.JPG
    261.6 KB · Views: 312
  • IMG_5113.JPG
    IMG_5113.JPG
    262 KB · Views: 311
  • IMG_5117.JPG
    IMG_5117.JPG
    734.1 KB · Views: 324
  • IMG_5119.JPG
    IMG_5119.JPG
    748.6 KB · Views: 300
  • IMG_5120.JPG
    IMG_5120.JPG
    382.6 KB · Views: 312
As soon as you take the pic, reposition the camera and make sure the pic flips the way you want it. It doesn't always happen, and that's when it shows up sideways.
 
Painted the frame today along with the wheels. Gloss black. Nothing too fancy. It's all rattle can and it turned out pretty good. A little wet sanding and clear as it should be pretty beautiful. Coming along nicely! The only problem I have had so far is when I work on the motorcycle before work, I can't drink beer. That's my only complaint.
 

Attachments

  • image.jpg
    image.jpg
    1.8 MB · Views: 319
It's been warm these last few days so I took advantage of it by painting damn near everything! I started putting together the wheels and cleaned up the rusty chrome parts. Everything polished out pretty well! Should have a roller by the weekend!

Also, I keep getting parts that I ordered recently, and my girlfriend thinks all of these packages are for her for Christmas! Ha!
 

Attachments

  • image.jpg
    image.jpg
    1.9 MB · Views: 322
  • image.jpg
    image.jpg
    1.9 MB · Views: 333
  • image.jpg
    image.jpg
    1.3 MB · Views: 339
  • image.jpg
    image.jpg
    2.1 MB · Views: 338
  • image.jpg
    image.jpg
    1.8 MB · Views: 312
I guess this is kind of a tracker style maybe mixed with brat? I guess that's what you could call it.

I put the shocks on last night and mounted some bars. It's coming together more and more!
 

Attachments

  • image.jpg
    image.jpg
    1.6 MB · Views: 322
  • image.jpg
    image.jpg
    1.5 MB · Views: 315
Back
Top Bottom