Follow along with the video below to see how to install our site as a web app on your home screen.
Note: This feature currently requires accessing the site using the built-in Safari browser.
We noticed you are blocking ads. DO THE TON only works with community supporters. Most are active members of the site with small businesses. Please consider disabling your ad blocking tool and checking out the businesses that help keep our site up and free.
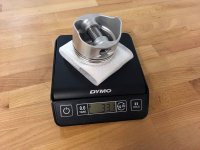
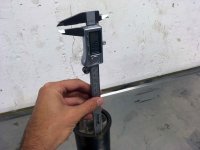
Over the weekend I managed to start the tear down of the top end and do a bit of a measure up. I wanted to know the exact weight of the piston assembly so we have a baseline for the new big bore piston. I hope that with new methods, we can achieve a bigger piston with the same weight as this one so that the balance of the engine (both the primary balance for the crankshaft and the secondary from the balancer shaft) remains the same - so not to effect the vibration levels. If this cannot be achieved, we will taper bore the piston wrist pin to get the weight back to stock.
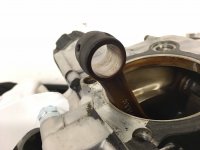
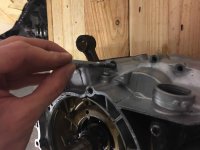
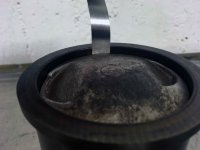
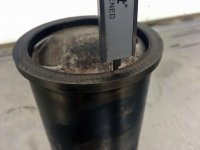
Then the piston producer wanted to know valve angle and wanted me to mark the valve centres on the piston so he has a reference for machining out the valve clearance pockets. The valve angles in the photos don't show up very accurate because of the perspective, but they were both 115 degrees.
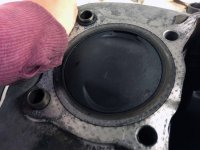
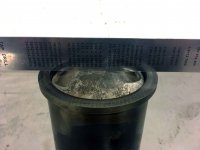
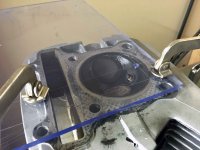
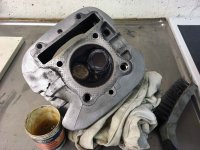
I also measured the compressed height of a used head gasket and the deck height. Deck height seems to be zero... So just relies on valve to piston clearance and the clearance from the head gasket height. Eventually I will cc the head and add this to the volume of the compressed gasket. Then I will be able to get an exact compression ratio and be able to calculate and predict a new compression ratio with the new piston and the new swept volume.
The head volume is listed in the manual as 30.4cm3, head gasket thickness as 1mm (which is correct for a compressed one) and compression ratio as 8.9:1 (for the 239cc versions) and I have no reason not to believe this, but I want to measure it anyway. I will also use that compression ratio and these listed numbers to reverse calculate the head and gasket volume just to double check my numbers and see if there are any differences.
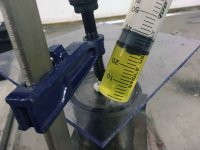
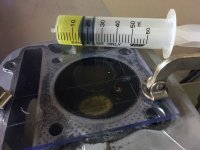
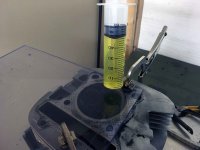
Tonight I managed to cc both the head and the piston dome. These methods are pretty common practice but are usually done in a much more controlled, accurate way with proper equipment! This was sort of a hack job to see if Yamaha were correct in the manual, where they state that the head volume is 30.4cc - which I didn't really understand, it just didn't add up in my calculations. But then, after all the measuring and math, it turns out that the stated figure is actually total volume at TDC - taking into account the head volume, the gasket volume and the piston dome volume!
My rough measurements (all are written on the calculations sheet) all added to a volume at TDC of 31.7cc which is 1.3cc off what the manual says. I was therefor happy to say that Yamaha are most likely correct and I am a little off haha, so will use this figure. But good to know I was in the ball park.
I calculated backwards for the different engine releases as well to double check the numbers - which added up.
With this number, I was able to calculate a new, predicted CR with the 77mm piston... Which will roughly be 9.6:1 for a 9% increase over stock. Is that enough? Would 10:1 be better? Imma look into it a little more.
In any case, I have many options to increase comp a little. But the two most practical would be a slightly thinner solid copper gasket (will need a custom copper gasket anyway for the custom piston dims, so may as well be a little thinner) or to shave a little off the head. Just by reducing compressed head gasket volume or actual head volume 2cc, the CR will be up to 10:1 ;D
Here is a great post by a guy who did this process properly and accurately: http://skrunkwerks.com/skrunk/measuring-compression-ratio-method-1/
Nicely documented too!
Just a little background perhaps for those CR numbers... The North American SR was in fact a proper 250cc bike - displacing 249cc. So with a TDC volume of 30.4 it gave a CR of 9.19, or as the specs round to, 9.2 Then all the other 239cc SR models have a CR of 8.8618, or as rounded to in the specs, 8.9
That's the plan! But feels a little optimistic at this stage :-\
Sorry for the lack of updates. Not so much work has been done, but a shite load of research and things are set in motion. Lot's of tech posts to come about the engine work ;D
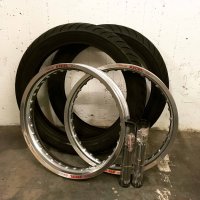
Finally saved the dough to buy the rims and the tires I mentioned. Already have the spoke sets in stock so that part was easy! Now can't decide if I should just build the wheels or if I should try make an instructional video on how to do it. Feels like there are plenty on Youtube already? But maybe good to have one specific to the SR?
I actually had one off spoke sets custom made for those 16'' wheels - for the look I was going for. Pretty idiotic of me to build a bike with 16" wheels, then not offer that option to customers. I just figured most people would want either the scrambler or cafe racer look with these bikes - so I made the spoke kits for 18" - the spokes actually convert the standard 16" rear wheel to 18".
In all honesty, and after comparing bikes, the way they ride, handle and feel, a good tyre on an 18" rim is much better than the 16's. There is just too much tyre on there - rubber = heavy = slower acceleration = slower steering as well.
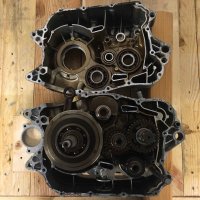
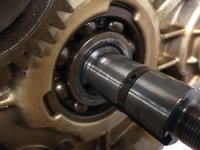
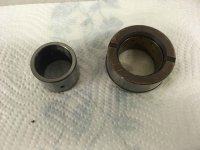
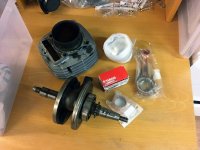
When pulling the head and barrel I noticed some pretty serious wear on the conrod small end and piston pin. Piston pin = no problem, getting replaced anyways. Conrod, kind of a bastard. And with the planned mods, it doesn't make sense not to have a strong bottom end. So I pulled her apart and will replace the crank pin, roller cage bearing, con rod and main bearings either side. Tranny seems sweet and other bearings and seals are all good.
Following this thread with a lot of interest, you're certainly analytical in your approach, very impressive.
I know that you really know your stuff with these little motors, but as you are chasing horsepower have you given any thought to removing the balancer shaft and then rebalancing the crank accordingly? Apologies if you've already covered this.
No, not covered yet and very good point, glad you brought it up. I did look into this and read up on it. Basically, vibration is a horsepower sapper. Plus it is incredibly destructive on engine components. I could have balanced the crank shaft with the new piston, but you can only balance for first order vibrations in a certain rpm range - say It was balanced for 10,000rpm, it would be horrible through the rest of the range. I would still like a smooth spread of power through the rpm range. Most modern 4 stroke singles (if not all?) have a balancer shaft, and those engineers are chasing power too. It's just better to get gains else where. Like for example by removing the electric start starter clutch, sprocket and chain, I will be removing a lot of rotational mass right there
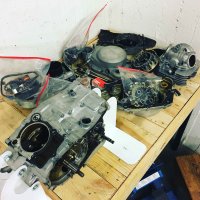
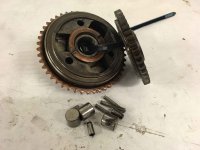
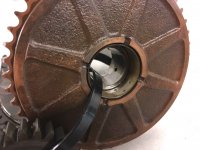
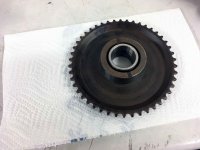
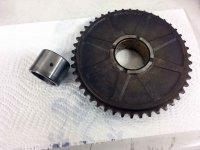
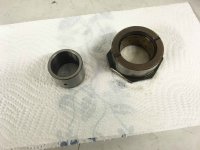
Here are the items I will do away with. I will also have the crank either welded or plugged at these holes - the oil delivery to the starter clutch will no longer be needed, so they can be blocked off (will double and triple check this). When taking apart the engine I cable tie assemblies together in the order they came off and then place them in ziplock bags. Along with a bunch of photos too! I also take photos of any special orientations or bolts that are longer than usual - to remember their placings.
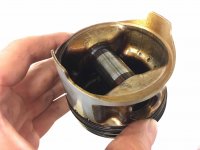
Merry Xmas all, hope you had a good one. I was pretty stoked because the custom piston I ordered arrived the day before the weekend. More about that later.
I have thought through (checked and double checked) the starter gear thing. I have decided I will not be blocking any oiling galleys. The centre part of the gear rotates on a bushing. The bushing has oiling holes very similar to other parts in the engine - the small end, the rocker arms, the clutch basket etc. This rotates on a plain machined bearing inside the starter gear - it even has golf ball drilling dimples to encourage better oil retention. On each side of this starter gear are some slots/details that indicate oil distribution. So I decided to retain it so that the other engine components around it - mostly the drive clutch drive gear and the counter balancer drive gear, receive oil the way they are supposed to. However, because not using the actual gear, I cut that part of it off and will have it turned down on a lathe to match the outer diameter of the core. This will make sure it is balanced - don't want any minute wobbling things at high rpm!
And on a completely different note, I reluctantly took on a commissioned build for a Danish customer. I am now super stoked about it and I am glad he convinced me to take it on - it'll be fun. But this adds another distraction to this project! If you're interested, keep up with the build on Instagram and I'll keep posting progress there.
And here is the awesome custom piston from http://www.specialpistonservices.com in Australia. I went to them because of their reputation and ability to produce one offs. Plus they were great to deal with - Colin has a wealth of knowledge and is very friendly to have contact with. They have stock of many different ring sizes and this sort of determines their piston diameter capabilities/offering. In this case, it was a 77mm (3.5mm dia increase from stock) piston which equates to 263cc, or roughly a 10% displacement and compression increase. It weighs in at about 330g's (without the packaging) which is roughly 10g (3%) heavier than stock. I think this will be fine and hopefully the balancer shaft will take up the diff/vibes.
I have touched on this previously but will mention it again here because I am getting a tonne of questions on social media about it... People ask 'why not use a warrior piston'?! Or, why not go big and bore up the crankcases? Almost every piece of engine tuning literature I have read advises against any one big change to the engine without compensating in other areas. The engine will work much better as a package if each components is improved slightly and incrementally. So, a bit more displacement, a bit more comp, a bit more cam (both duration and lift), a few more rpm (lighter valve train), a bit better flowing head, a bit better exhaust, intake etc etc. Using a stock warrior piston requires both a crank case bore plus a new liner and increase displacement by a whopping 30% - making the engine way out of balance not just in respects to engine vibrations, but also the ability of the other components - how could you expect the stock SR head to flow 30% more air to match that new piston area? And the crank to cope with that extra weight? Although, these are just my interpretations and my decided direction. I might end up being very wrong come testing ;D
I have now packed up the items that will be taken to the engine rebuilders. I will have the crank rebuilt with new components and have the SR sleeve bored up to match the piston. Should I provide the piston clearance spec or will they have a good guide for that based on bore, cylinder construction, piston and sleeve material and the fact that it's air cooled? The workshop manual has a spec of 0.035 - 0.055mm. Is this good?
This site uses cookies to help personalise content, tailor your experience and to keep you logged in if you register.
By continuing to use this site, you are consenting to our use of cookies.

 0mmDeckHeight.jpg437.7 KB · Views: 563
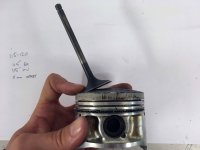 ValveAngle3.jpg328.3 KB · Views: 523
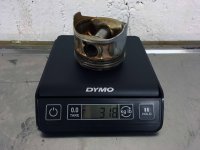 PistonWeight.jpg435.9 KB · Views: 528
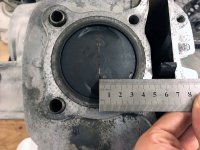 ValveCenters7.jpg423.4 KB · Views: 541
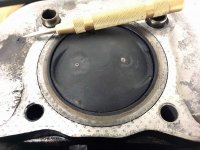 ValveCenters6.jpg439.9 KB · Views: 534
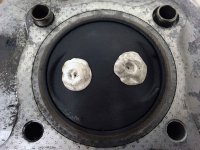 ValveCenters5.jpg482.7 KB · Views: 580
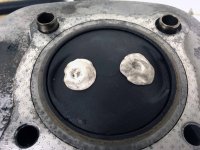 ValveCenters4.jpg443.3 KB · Views: 551
 ValveCenters3.jpg390.2 KB · Views: 536
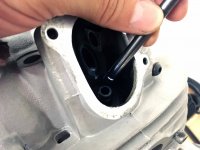 ValveCenters2.jpg412.2 KB · Views: 543
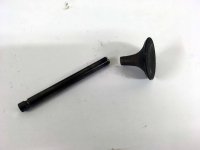 CutValveForTool.jpg274.5 KB · Views: 544
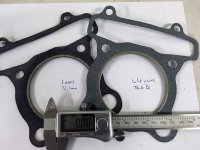 GasketNewVsCompressed.jpg430.3 KB · Views: 552
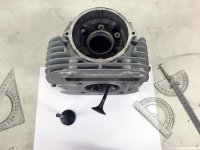 MeasureValveAngle.jpg336.1 KB · Views: 585
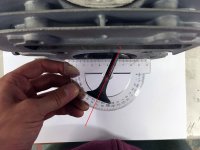 ValveAngle1.jpg343 KB · Views: 539
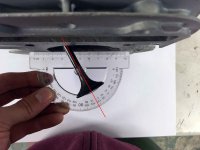 ValveAngle2.jpg333.7 KB · Views: 542
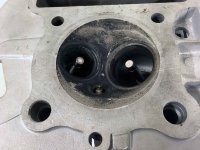 ValveOffset1.jpg500.5 KB · Views: 570
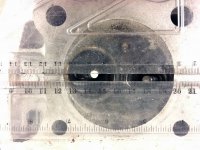 ValveOffset2.jpg429.1 KB · Views: 542
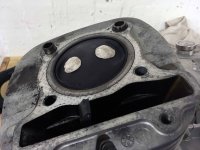 ValveCenters1.jpg469.2 KB · Views: 551
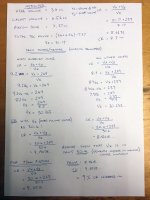
")