
We noticed you are blocking ads. DO THE TON only works with community supporters. Most are active members of the site with small businesses. Please consider disabling your ad blocking tool and checking out the businesses that help keep our site up and free.
You are using an out of date browser. It may not display this or other websites correctly.
You should upgrade or use an alternative browser.
You should upgrade or use an alternative browser.
Hi From Australia CB350
- Thread starter ducatiboy
- Start date
Thanks for the compliments guys ")
Hmmm...Muzz... 1st post...1st Ducati... 600SS... you wouldn't happen to be...ummm...oh don't worry 8)
As for headers, well now that the engine's done I'm going to have to refocus my train of thought and have a think about it. I can generally only think of one thing at a time before my brain goes fuzzy. I'll probably just keep them as they are and wrap them in exhaust tape but I'm also considering learning how to weld to have a go at making some sort of muffler myself
Another long day in the shed today. My hands are buzzing from hours with the angle grinder
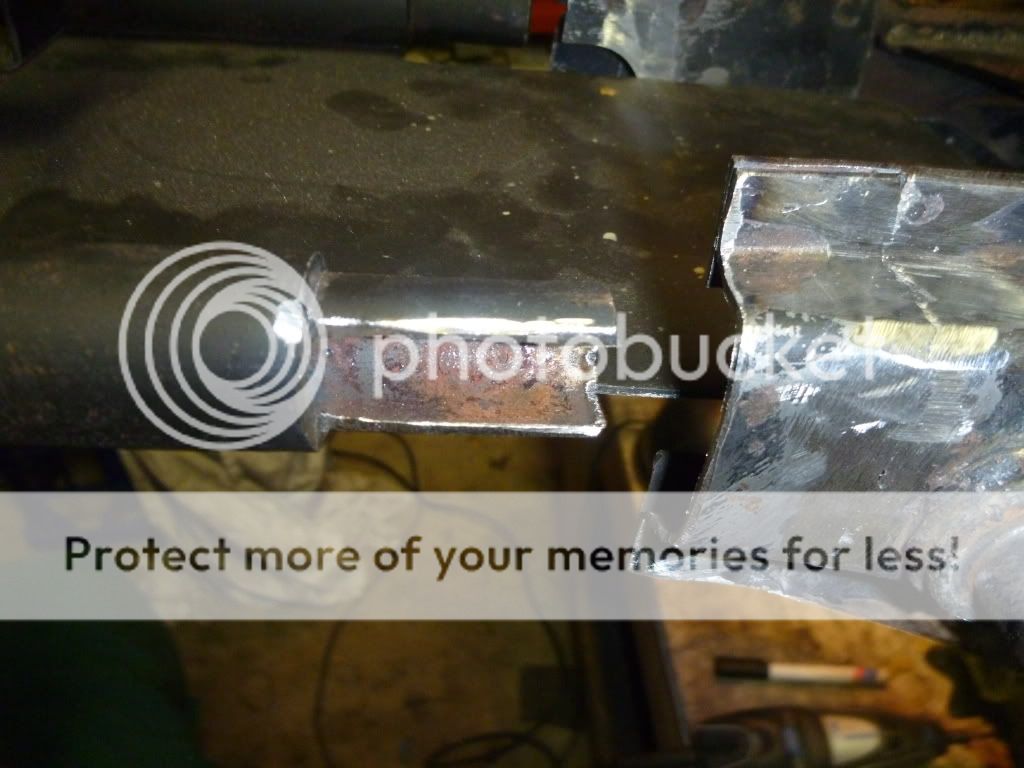
The left side lower frame rail is full of rusty holes


So I cut it out
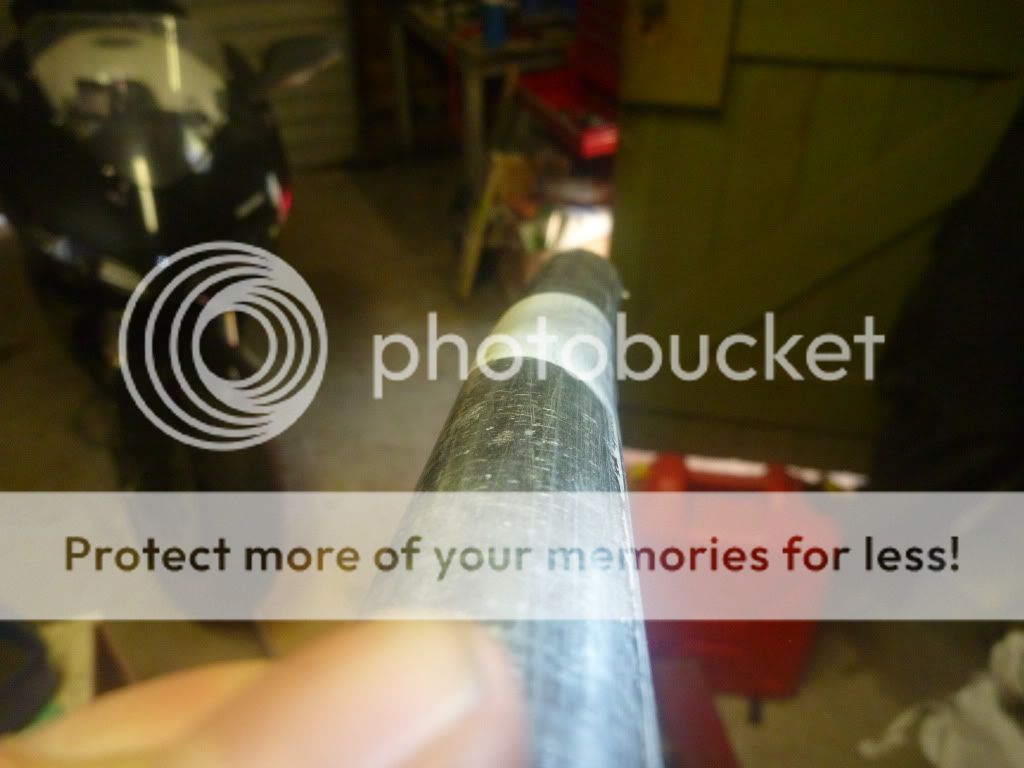
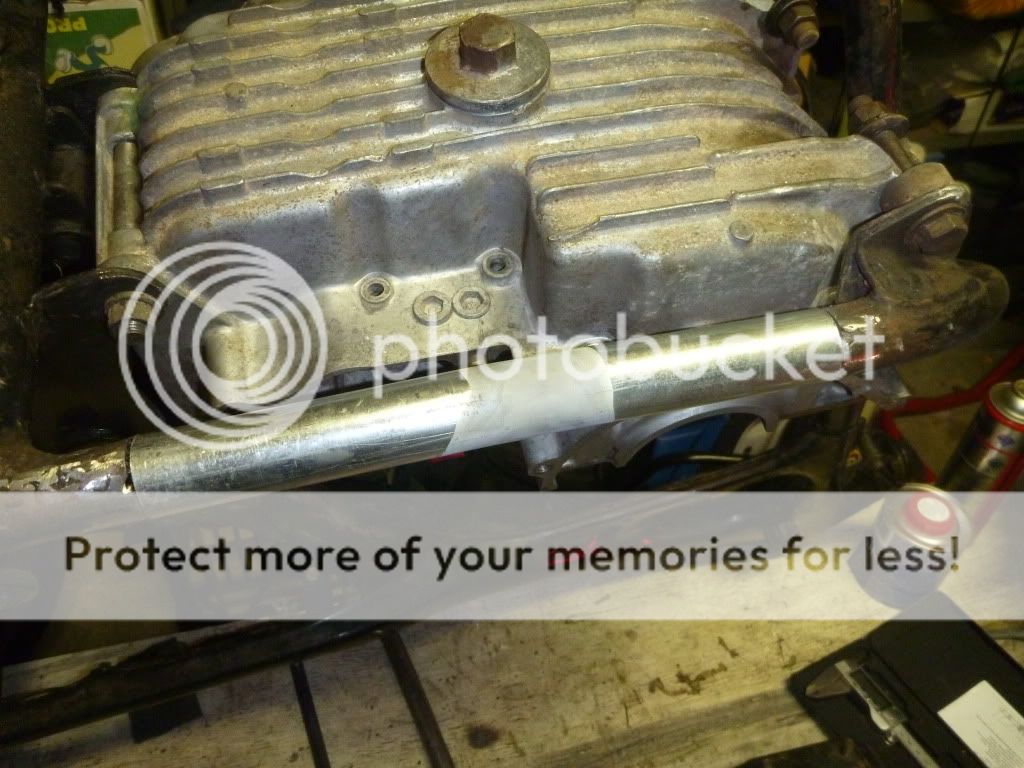
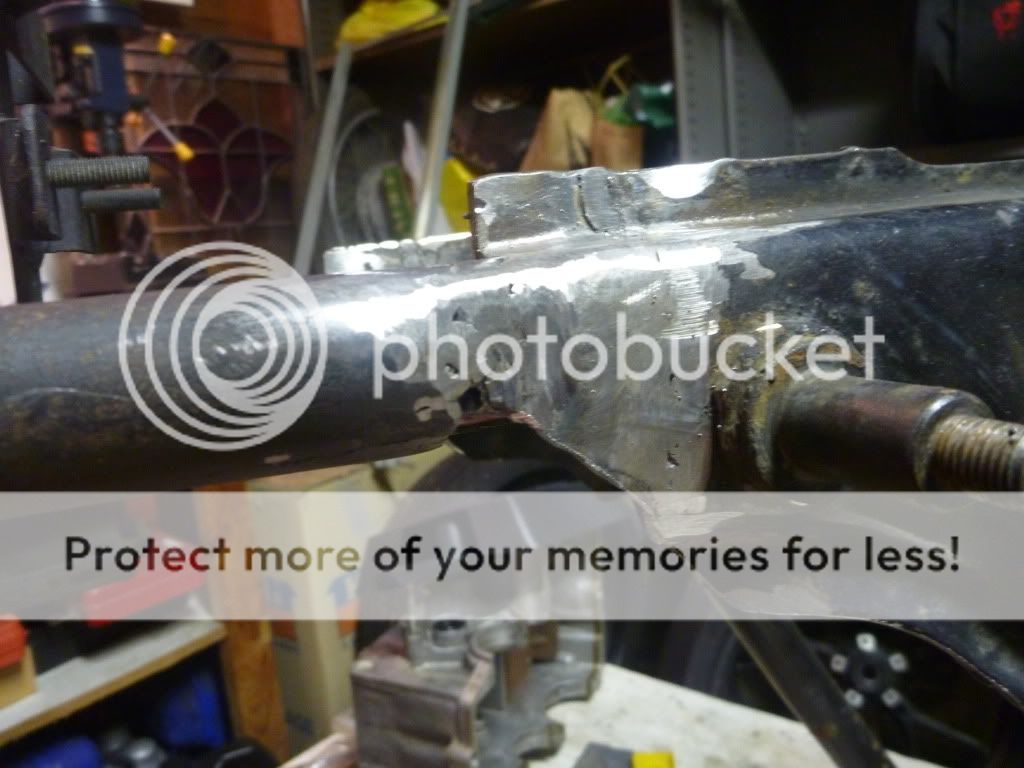
Bought some 1inch steel tube, cut it too size. Had to heat it up and put a slight bend in to get it to fit
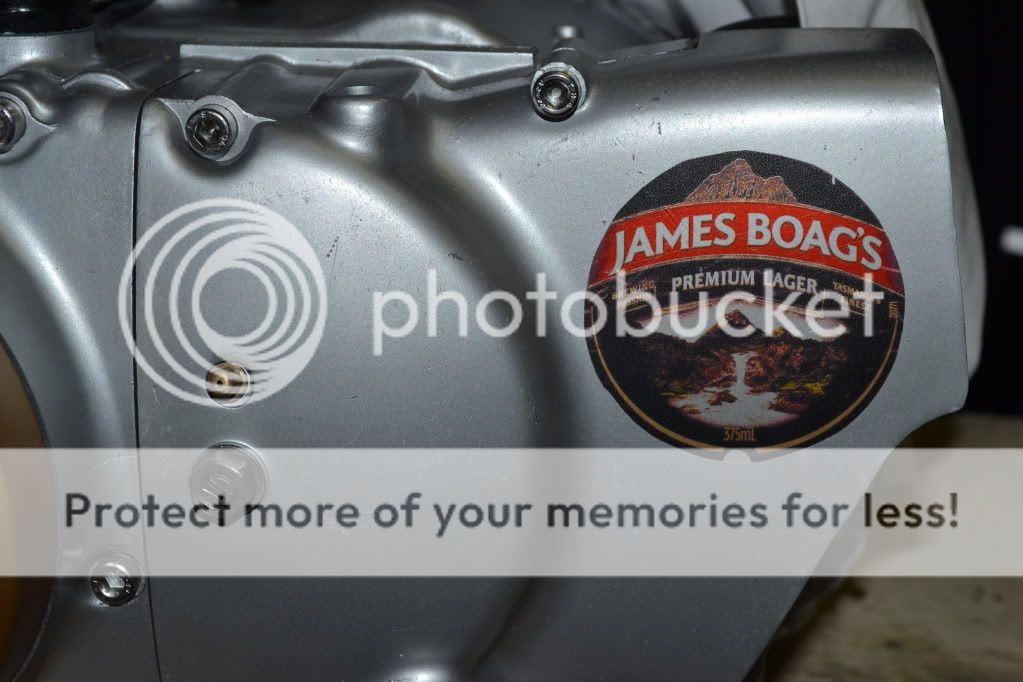
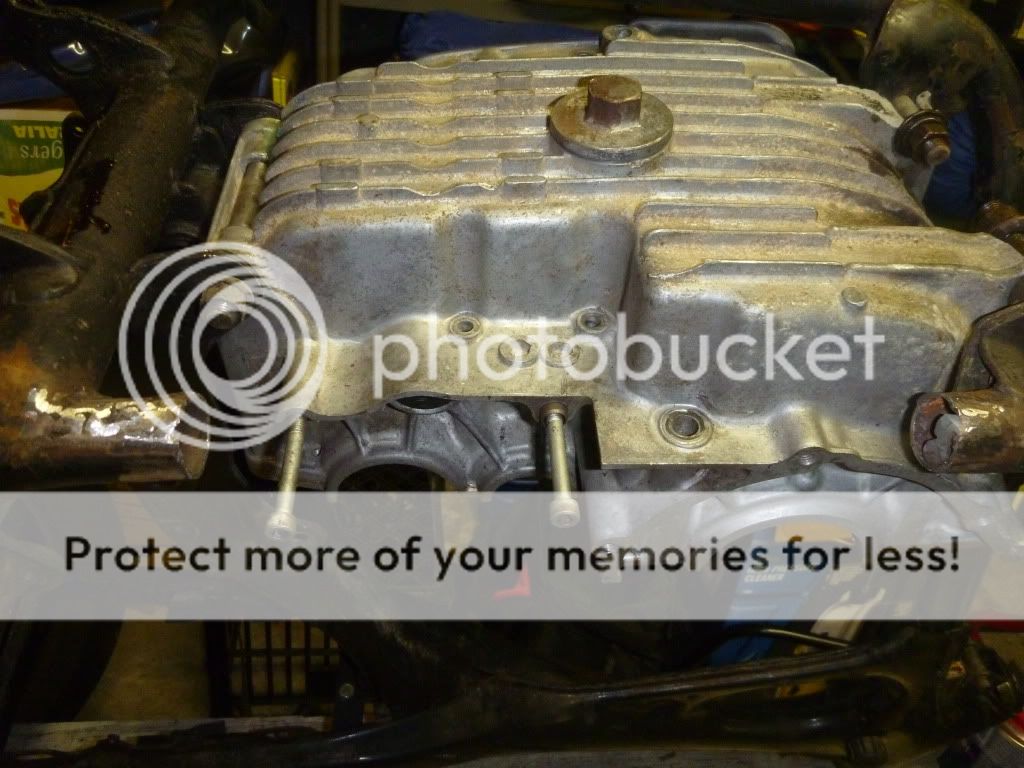
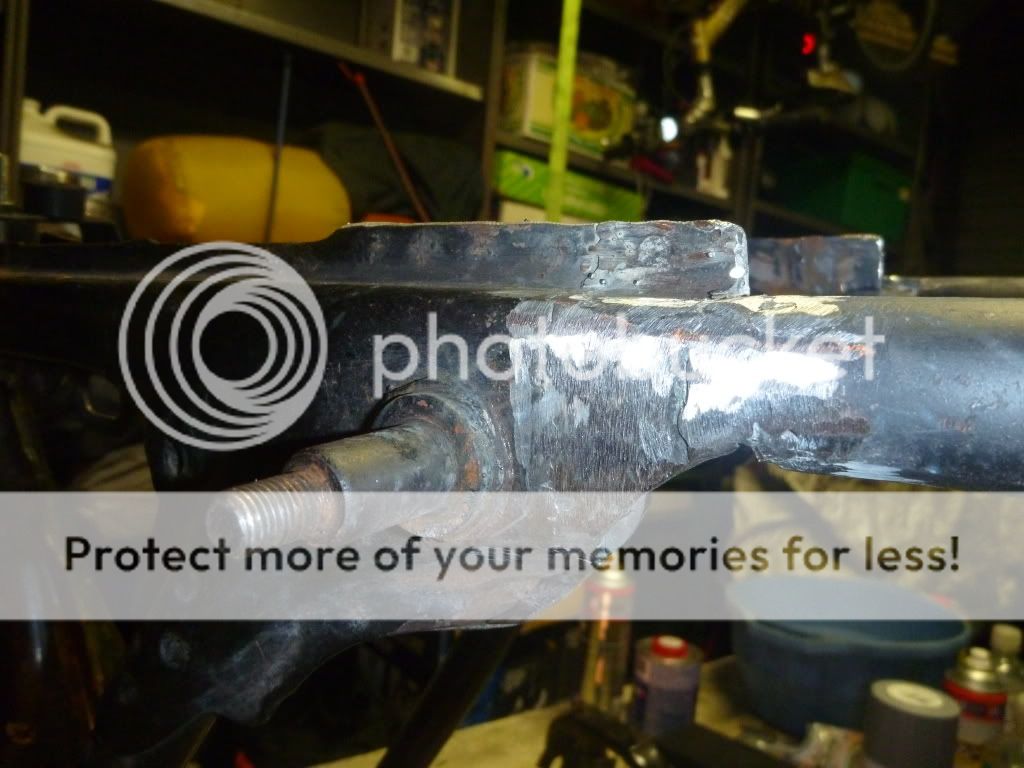
Tacked it in and welded it up. I had my old engine case bolted in the frame to make sure it stayed straight while welding.
I ground off the centre stand mounts, foot peg mounts, and various other lugs and welded on mounting points that are not required.


Spent some time mounting up the BCR seat subframe. It was a bit of an epic to get it fitted I assume because it must have been made for a CB360 not a CB350. The ends of the seat subframe tubing drop down to a smaller diameter in order for it to slot into the main frame tubing so it can be easily welded. The trouble is, the CB350 has a rectangular section frame not round tubing. You can't fit a round peg into a square hole so a little modification was necessary…
It sort of worked…
So now I can start the mock up build ;D ;D
The left side lower frame rail is full of rusty holes
So I cut it out
Bought some 1inch steel tube, cut it too size. Had to heat it up and put a slight bend in to get it to fit
Tacked it in and welded it up. I had my old engine case bolted in the frame to make sure it stayed straight while welding.
I ground off the centre stand mounts, foot peg mounts, and various other lugs and welded on mounting points that are not required.
Spent some time mounting up the BCR seat subframe. It was a bit of an epic to get it fitted I assume because it must have been made for a CB360 not a CB350. The ends of the seat subframe tubing drop down to a smaller diameter in order for it to slot into the main frame tubing so it can be easily welded. The trouble is, the CB350 has a rectangular section frame not round tubing. You can't fit a round peg into a square hole so a little modification was necessary…
It sort of worked…
So now I can start the mock up build ;D ;D
NvgtrWiggles
Been Around the Block
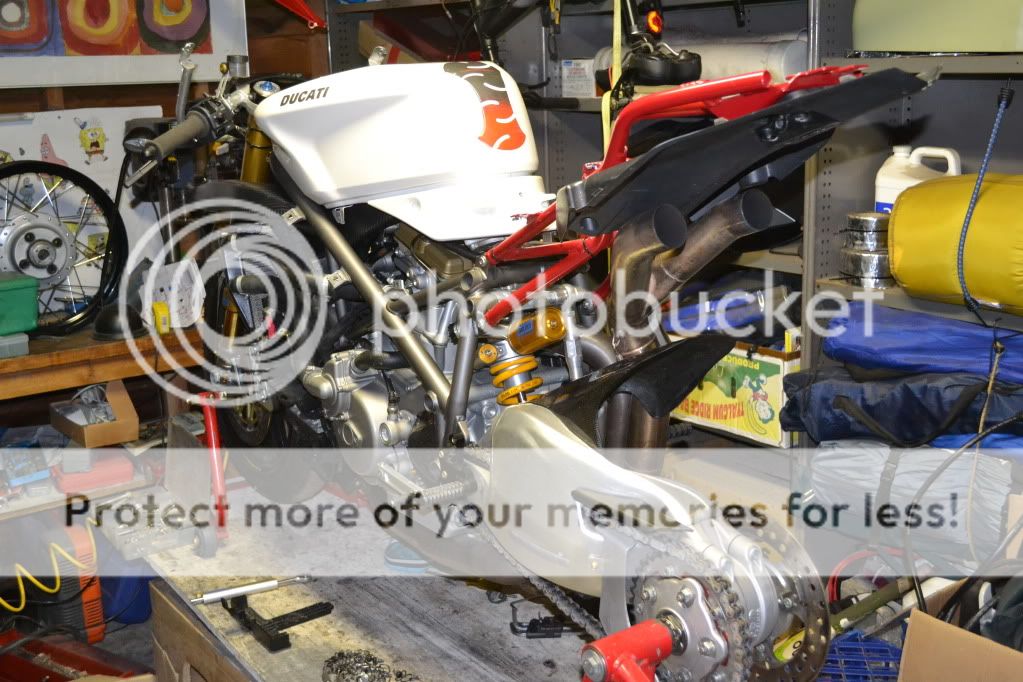
God, I want that 848 in the background...
NvggtrWiggles for years I've been thinking of giving the 848 away to some random guy on a bike forum. Send me a PM with your address and I'll ship it over.
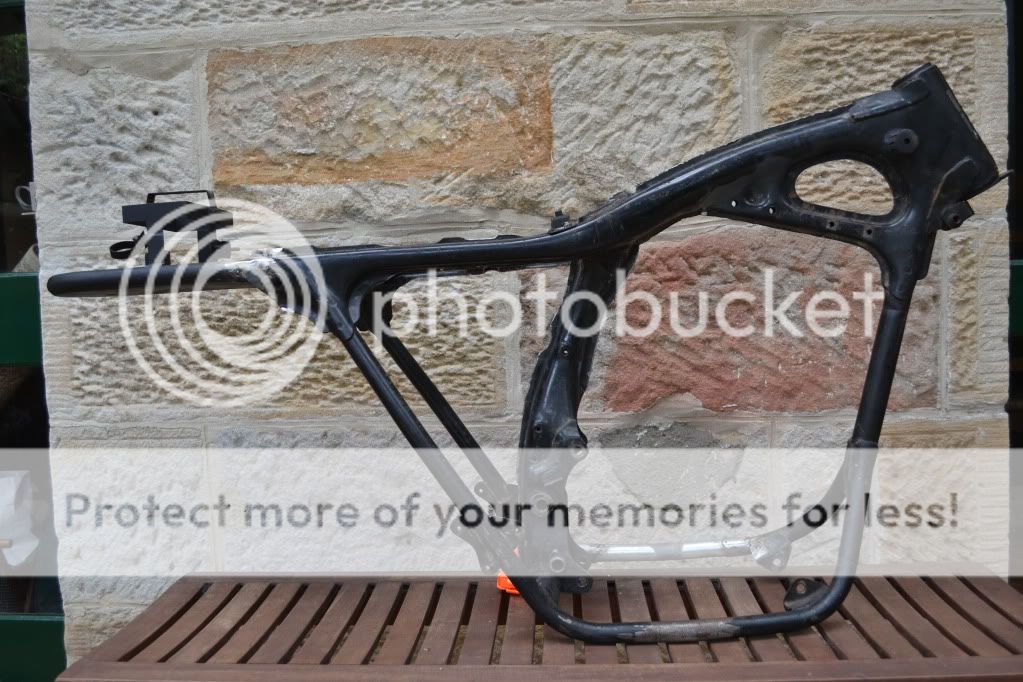
Swivel, I've got a side on photo of the frame. Where do you think you'd add bracing?
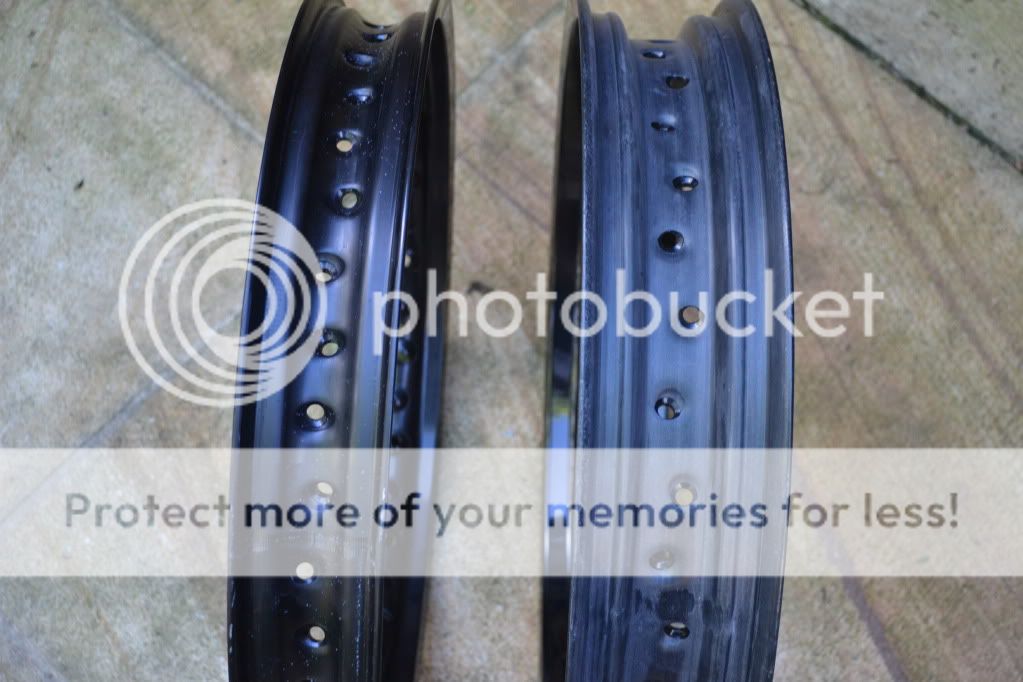
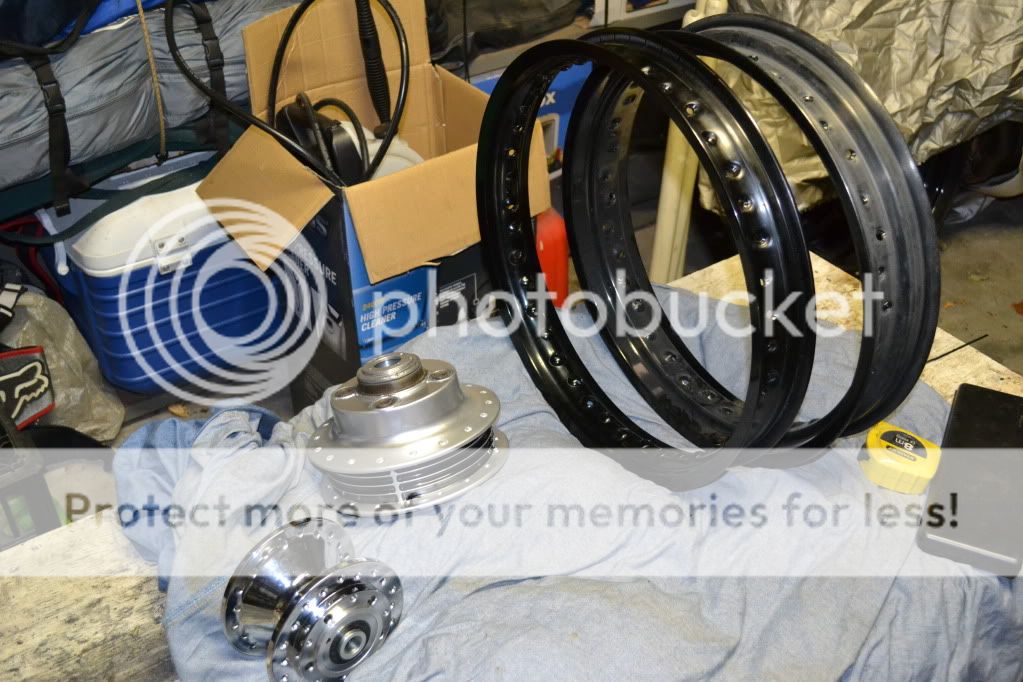
So some minor progress has been made. My rims arrived in a big box
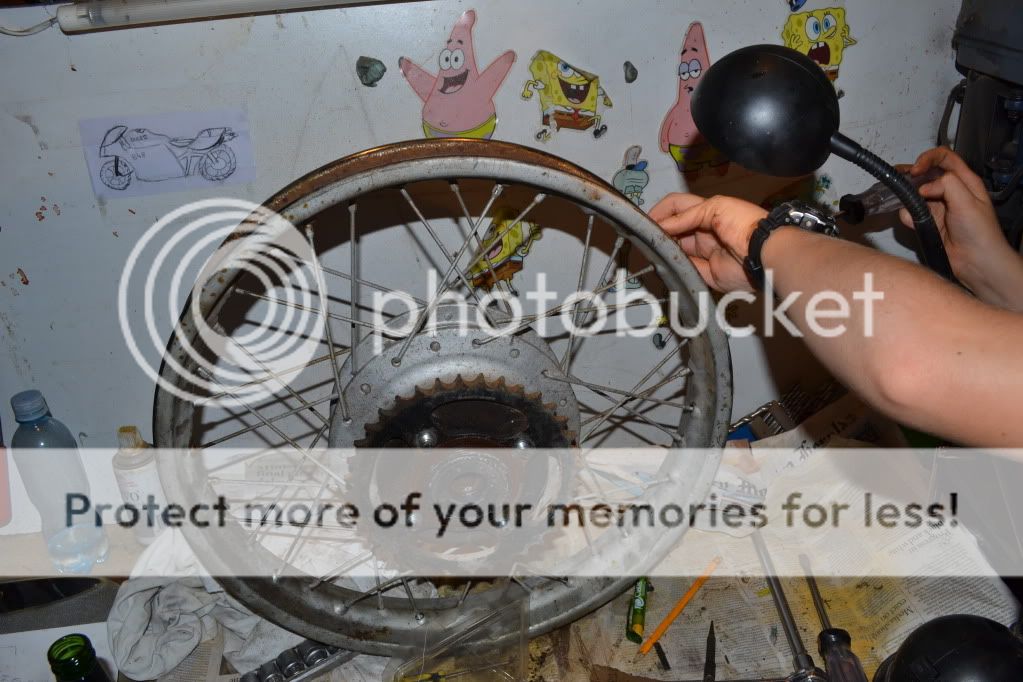
I started (for the first time ever) learning the Zen-like joy of lacing a hub to a rim. Not having ridden anything with spokes since I was 8 years old, my knowledge of what to do was a little rusty.
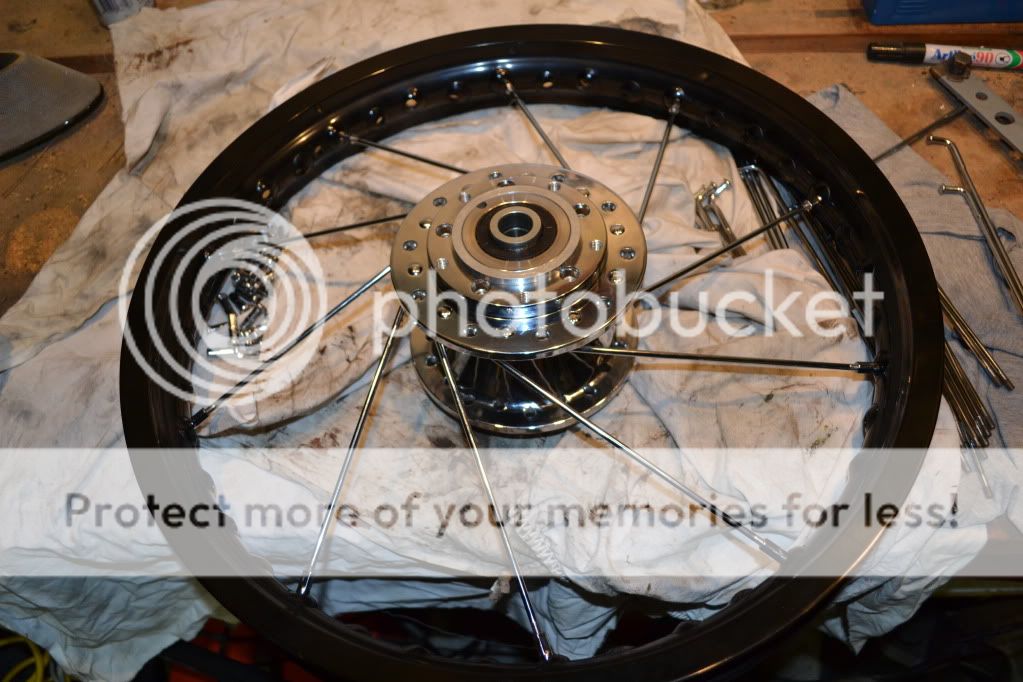
It's kind of therapeutic as you make mistake after mistake, screw a nipple on, screw it off again, move a spoke to a different hole, move it back again, remove a spoke so you can swing another spoke into position only to find that you now can't get the original spoke back in etc etc As the hours gently drifted by progress was somehow made.
After a while a trance like state is reached and with the right music in the background you could almost think you'd been elevated to a higher Nirvana-like plane with the spokes eventually placing themselves in the correct holes at the right angles all by themselves. Unfortunately I didn't reach this state although I did try to reach it for many hours. I did actually manage to get the wheel laced up though!! It is a thing of rare and exquisite beauty.
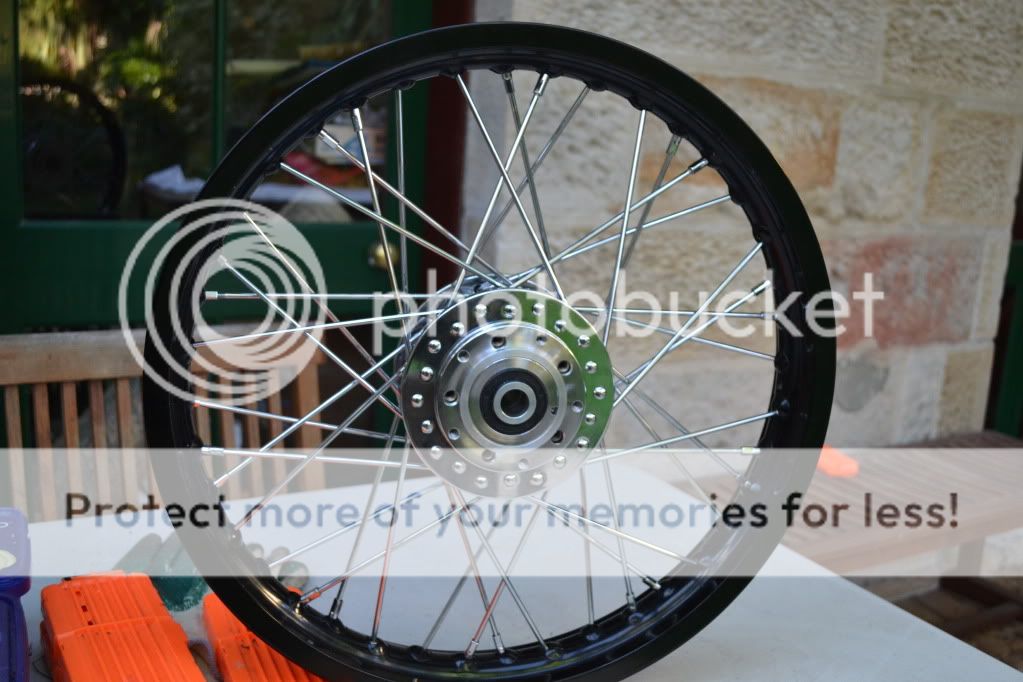
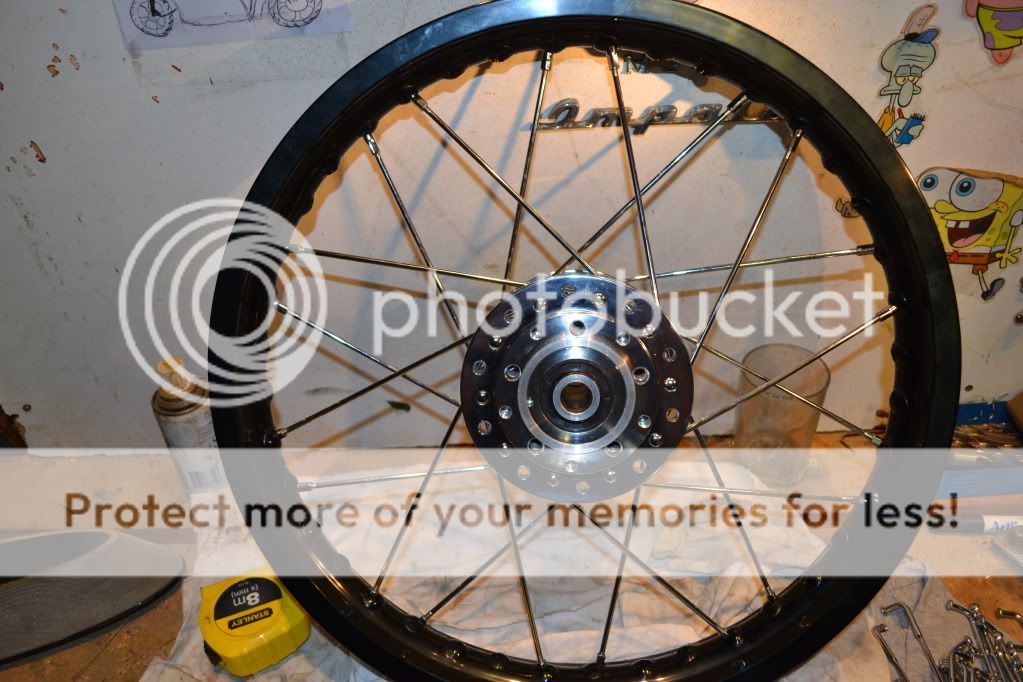
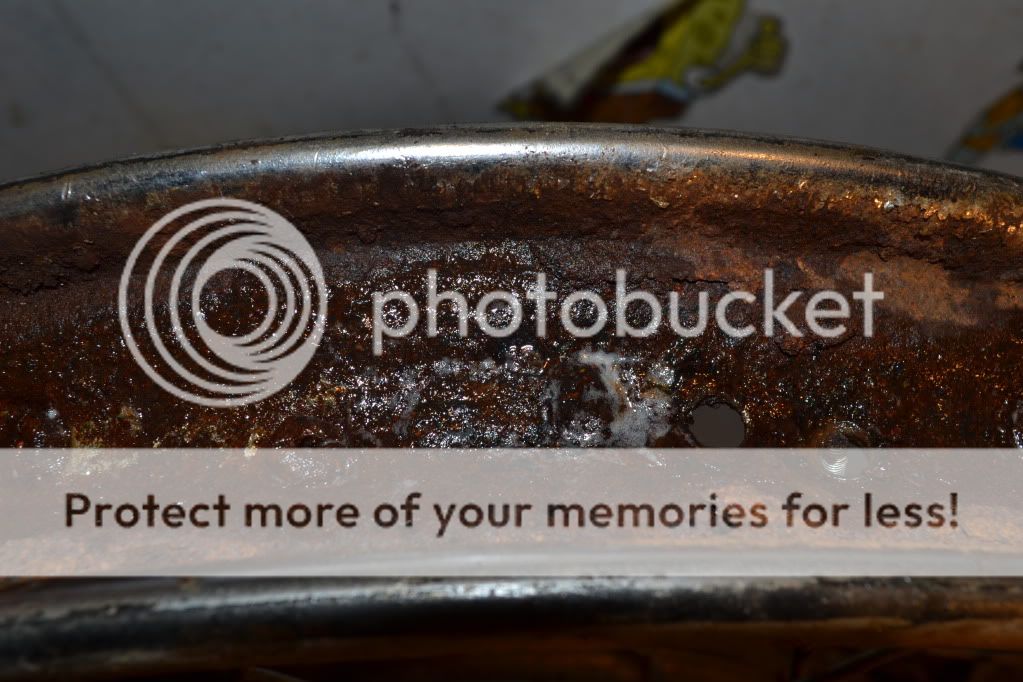
Unfortunately it's not right. The spokes are too long because they come from a 19 inch rim which I have replaced with an 18 inch. In the following photo you can see the spokes poking too far through the rim.
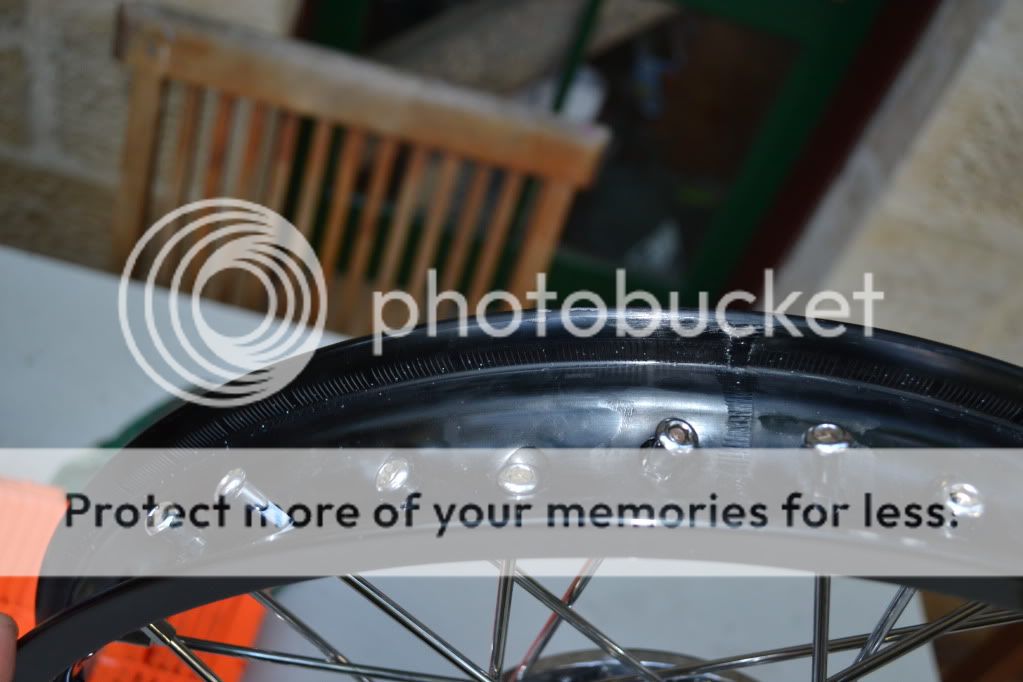
I had read somewhere on a forum that because the 19 inch Harley rim has a drop centre and the 18 inch replacement rim doesn't, the spokes will work out ok but may need a washer under the nipple. There is no way washers under the nipples are going to help the amount of slack these suckers have. So I'm pricing some custom spokes from Buchanan's. We'll see…
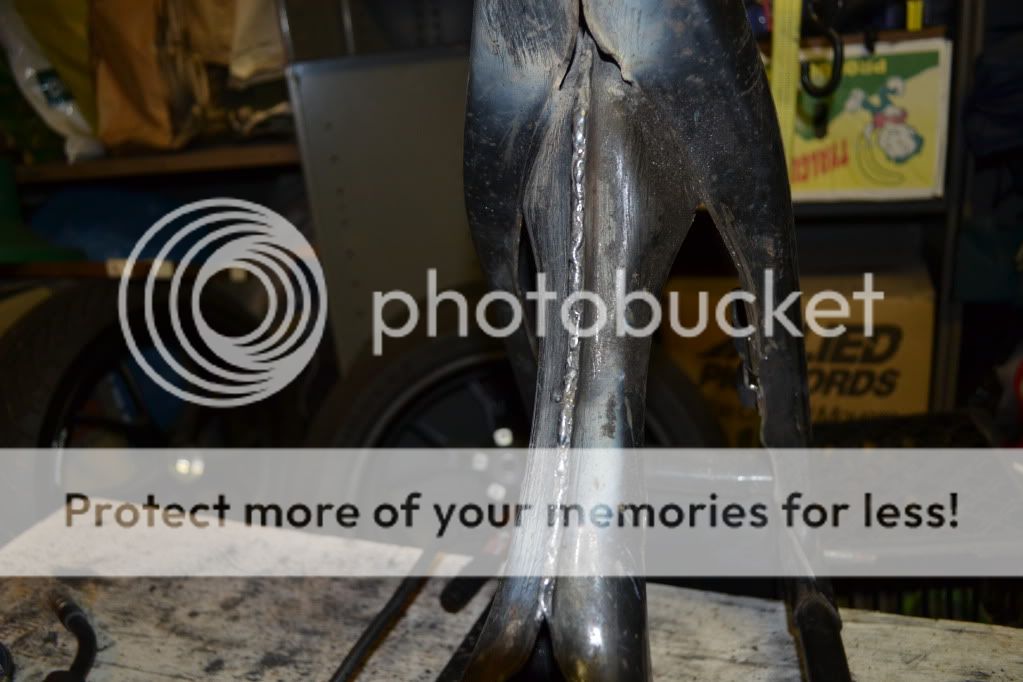
So on to other bits and pieces. I been playing around with the budget MIG welder I bought on special from repco. Welded up the spot welded seams on the frame. Also cleaned up the weld with the angle grinder so it looks a little better than the photo.
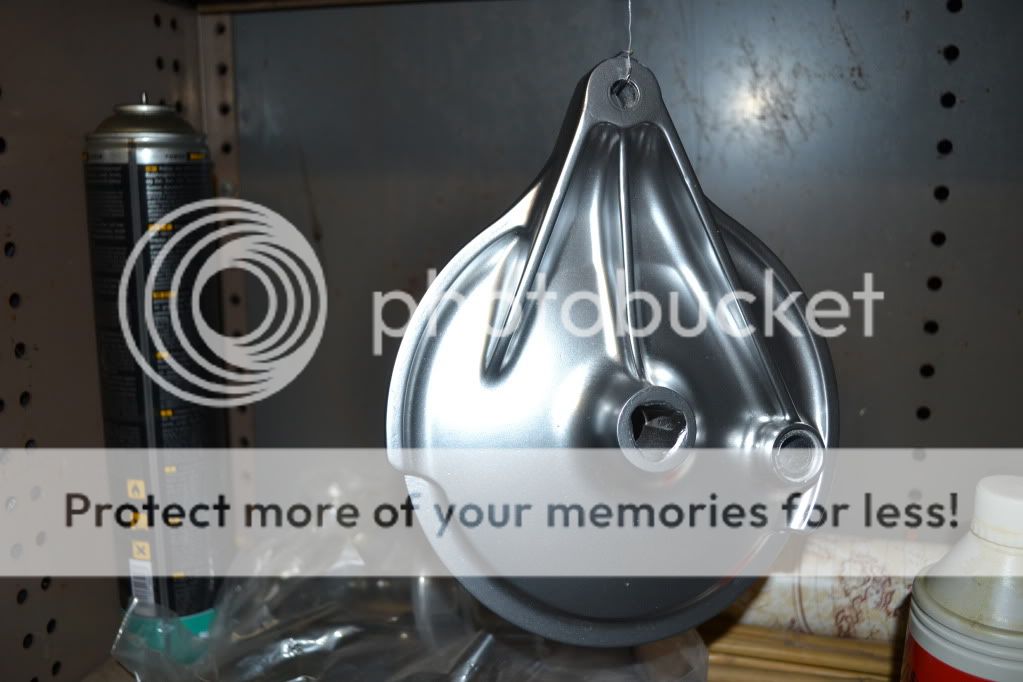
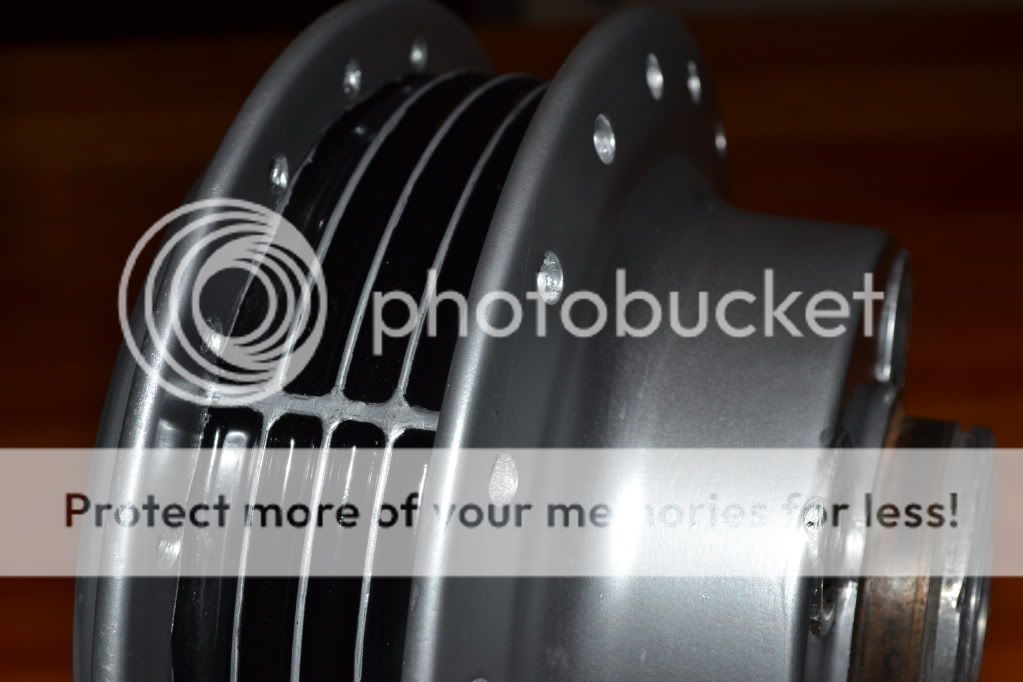
I was getting sick of sanding for hours and hours on the rear hub to try and get it to a polishable state. It just wasn't going to happen with too many imperfections to sand out and then polish out so I decided to have it chromed with this special can of spray on chrome. It is not just any spray on chrome though. This stuff is so good it is called Super Chrome.
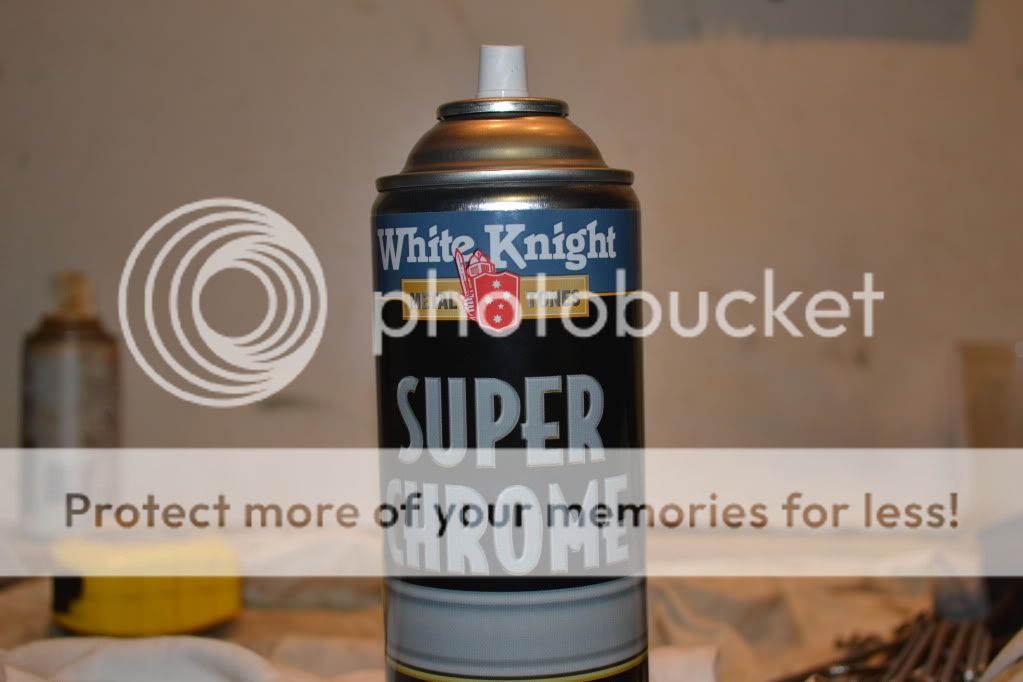
Voila! Tens of hours of sanding instantly rendered unnecessary
So what's next? I don't know…there is no plan. I just walk into the garage when I have some spare time and look around and see what needs doing and then I start doing it. I have ordered some spokes from Thailand for the rear wheel though
Swivel, I've got a side on photo of the frame. Where do you think you'd add bracing?
So some minor progress has been made. My rims arrived in a big box
I started (for the first time ever) learning the Zen-like joy of lacing a hub to a rim. Not having ridden anything with spokes since I was 8 years old, my knowledge of what to do was a little rusty.
It's kind of therapeutic as you make mistake after mistake, screw a nipple on, screw it off again, move a spoke to a different hole, move it back again, remove a spoke so you can swing another spoke into position only to find that you now can't get the original spoke back in etc etc As the hours gently drifted by progress was somehow made.
After a while a trance like state is reached and with the right music in the background you could almost think you'd been elevated to a higher Nirvana-like plane with the spokes eventually placing themselves in the correct holes at the right angles all by themselves. Unfortunately I didn't reach this state although I did try to reach it for many hours. I did actually manage to get the wheel laced up though!! It is a thing of rare and exquisite beauty.
Unfortunately it's not right. The spokes are too long because they come from a 19 inch rim which I have replaced with an 18 inch. In the following photo you can see the spokes poking too far through the rim.
I had read somewhere on a forum that because the 19 inch Harley rim has a drop centre and the 18 inch replacement rim doesn't, the spokes will work out ok but may need a washer under the nipple. There is no way washers under the nipples are going to help the amount of slack these suckers have. So I'm pricing some custom spokes from Buchanan's. We'll see…
So on to other bits and pieces. I been playing around with the budget MIG welder I bought on special from repco. Welded up the spot welded seams on the frame. Also cleaned up the weld with the angle grinder so it looks a little better than the photo.
I was getting sick of sanding for hours and hours on the rear hub to try and get it to a polishable state. It just wasn't going to happen with too many imperfections to sand out and then polish out so I decided to have it chromed with this special can of spray on chrome. It is not just any spray on chrome though. This stuff is so good it is called Super Chrome.
Voila! Tens of hours of sanding instantly rendered unnecessary
So what's next? I don't know…there is no plan. I just walk into the garage when I have some spare time and look around and see what needs doing and then I start doing it. I have ordered some spokes from Thailand for the rear wheel though
I agree with your point about grinding ugly welds down for the sake of aesthetics Swivel but I take comfort in the thought that the spot welded joins will be at least as strong as if I had not touched them at all. The advantage of having done it is the joins may be stronger and I at least have a little experience now. This bike is not headed for any race track so outright performance is not important. Given that thought, and my inability to weld a straight line in an aesthetically pleasing manner, I might give the bracing a miss but thanks for the idea.
With regard to my wheel re-spoking epic, I have diagnosed the problem with the front wheel. The donor wheel I am using is from a Harley Narrow Glide. I have adapted the hub of this wheel to use on the 848 front end and I have bought an 18 inch alloy rim from Ash's Spoked Wheels in Brisbane to lace to this hub. Naturally I specified that the rim will be laced to a Harley hub.
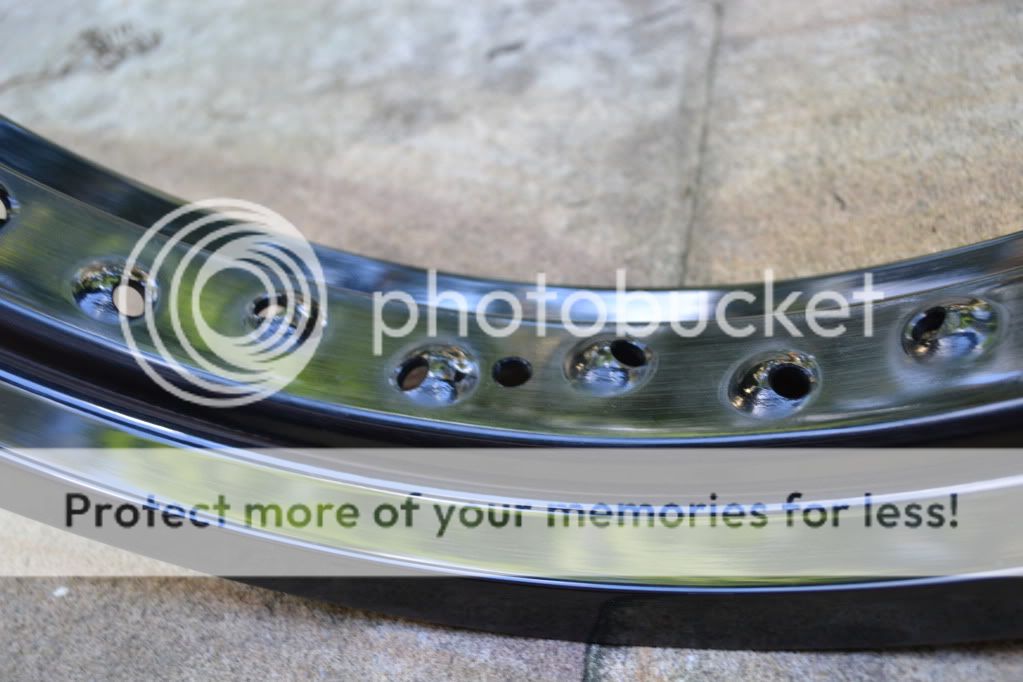
After the huge problem lacing up the rim, I had a closer look at the pattern of holes on the new rim vs Harley rim and found they are very different! On the new rim each spoke hole alternates left and right of the centre of the rim whereas on the Harley wheel pairs of spoke holes alternate sides
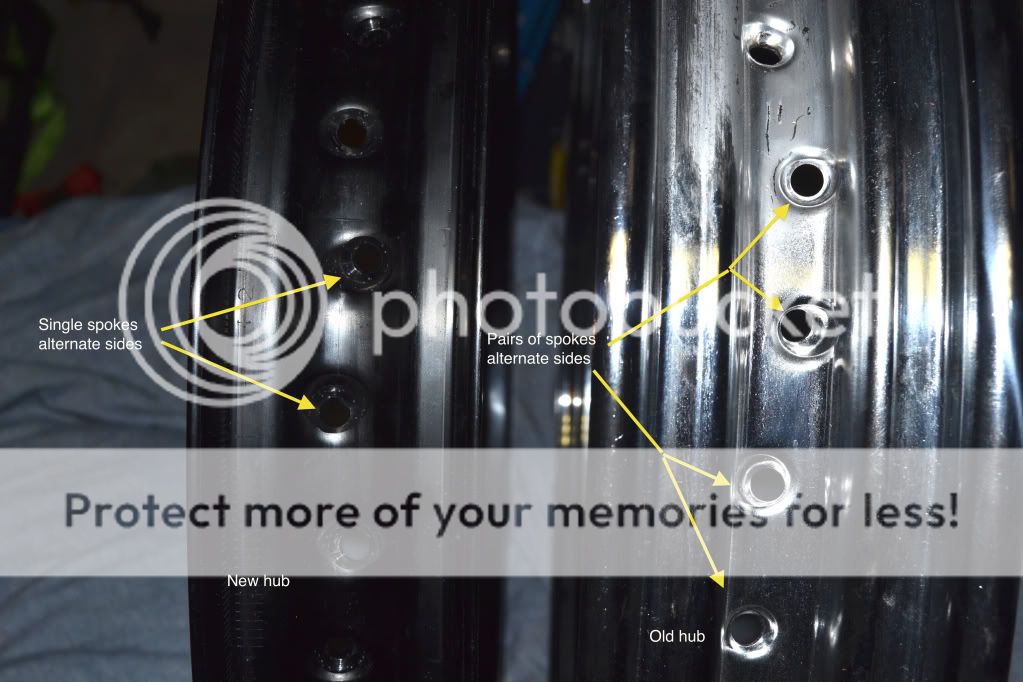
While it's a bit embarrassing that I hadn't noticed the difference before wasting 6 hours of my life, I claim in my defence that having ordered a rim to fit a specific hub I thought the assumption that it would actually fit that hub was a safe one. Apparently not though, so a lesson has been learnt! Double check everything. If your paranoid, triple check!
I spoke to the guy at Ash's and he sounded quite surprised that there was a problem with the fitting. He is going to consult his colleagues on Monday (it was Saturday when I called) and work out the best way to go. Preferably, they will send me the type of rim I actually ordered. Alternatively they will send me some spokes that will allow me to fit the rim they sent. At the very least, they could cut alternate pairs of the spokes I already have shorter and cut the thread a little further along the shaft.
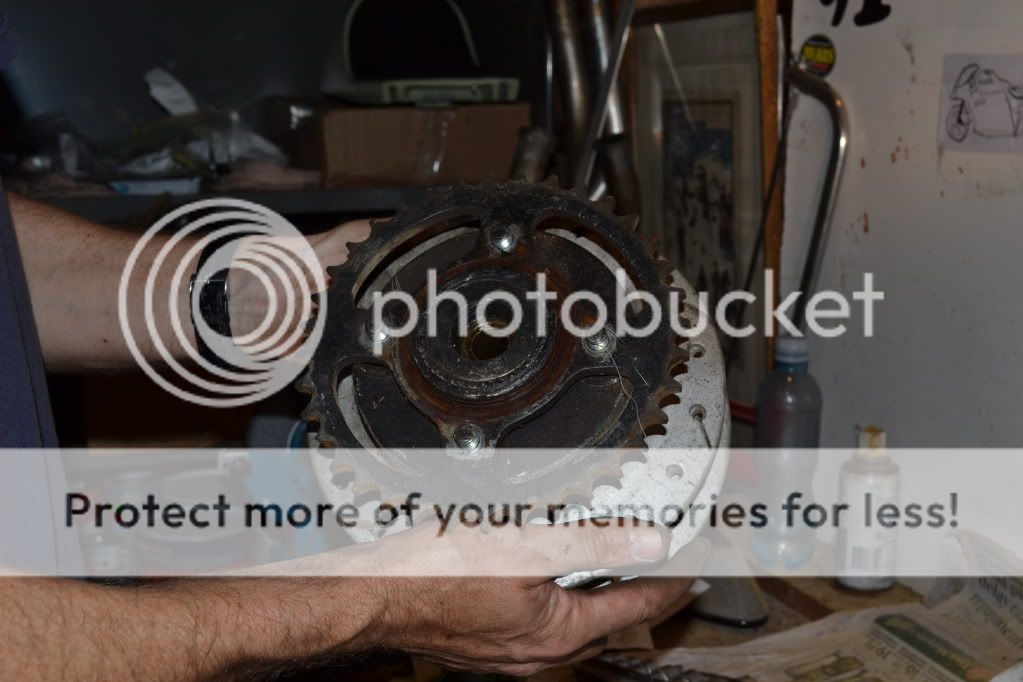
A few more shenanigans with the rear hub
Finished and looking good…not quite perfect with the masking tape but good enough. Just needs a coat of clear
Two hubs and two rims just waiting for spokes. Rears from Thailand, fronts from Brisbane
With regard to my wheel re-spoking epic, I have diagnosed the problem with the front wheel. The donor wheel I am using is from a Harley Narrow Glide. I have adapted the hub of this wheel to use on the 848 front end and I have bought an 18 inch alloy rim from Ash's Spoked Wheels in Brisbane to lace to this hub. Naturally I specified that the rim will be laced to a Harley hub.
After the huge problem lacing up the rim, I had a closer look at the pattern of holes on the new rim vs Harley rim and found they are very different! On the new rim each spoke hole alternates left and right of the centre of the rim whereas on the Harley wheel pairs of spoke holes alternate sides
While it's a bit embarrassing that I hadn't noticed the difference before wasting 6 hours of my life, I claim in my defence that having ordered a rim to fit a specific hub I thought the assumption that it would actually fit that hub was a safe one. Apparently not though, so a lesson has been learnt! Double check everything. If your paranoid, triple check!
I spoke to the guy at Ash's and he sounded quite surprised that there was a problem with the fitting. He is going to consult his colleagues on Monday (it was Saturday when I called) and work out the best way to go. Preferably, they will send me the type of rim I actually ordered. Alternatively they will send me some spokes that will allow me to fit the rim they sent. At the very least, they could cut alternate pairs of the spokes I already have shorter and cut the thread a little further along the shaft.
A few more shenanigans with the rear hub
Finished and looking good…not quite perfect with the masking tape but good enough. Just needs a coat of clear
Two hubs and two rims just waiting for spokes. Rears from Thailand, fronts from Brisbane
STRETCH-CB
Active Member
great build, love the white king super chrome hahaha, didnt think of that. keep up the good work man.
S
sam
Guest
I love your build so far. What colour scheme are you going to go for? Something similar to the original would go quite well with the job you've done on the engine.
P.S, you need to sneak more 848 cameos into your photos.
P.S, you need to sneak more 848 cameos into your photos.
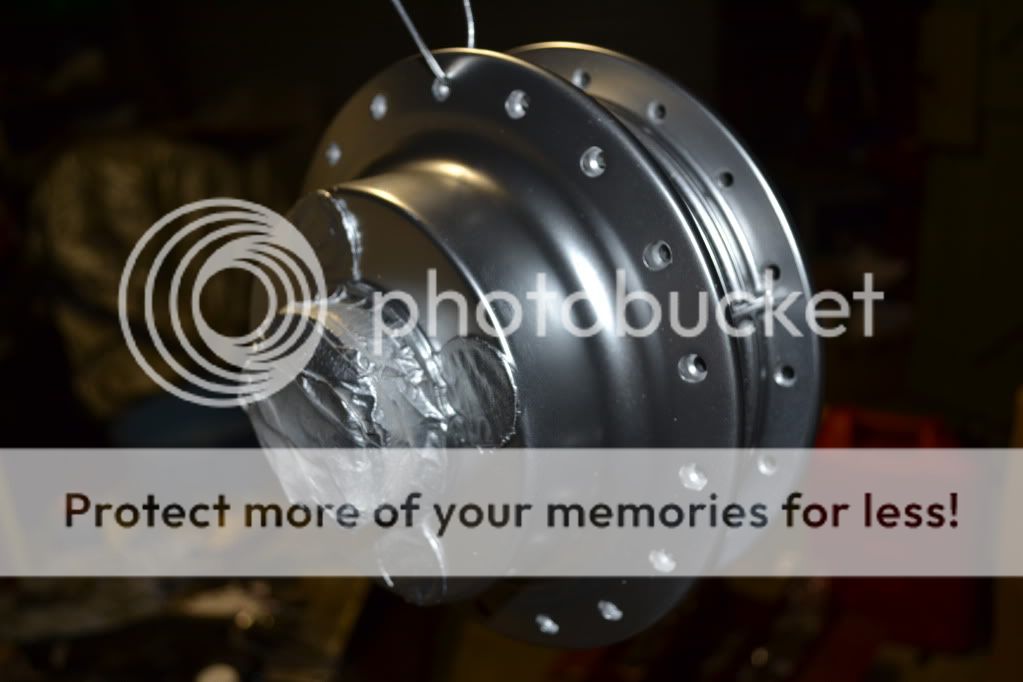
Bit of a disaster yesterday!!! The White King Super Chrome on the rear hub and the clear coat I sprayed over the top didn't seem to get on too well together. The colour has started to run in sections. :'( :'( :'( I don't think I can bear the thought of rubbing it all down and starting again so I might just leave it. Actually what I'll do is just get on with some other job like building the wiring harness. By the time I finish doing that maybe I'll be able to face fixing the paint on the hub.
Not sure of my colour scheme yet Sam but I quite like the look of the Norton Manx race bikes with the silver tank/seat and blue pinstripe. I'm waiting for inspiration. I'll see what I can do about posting a few 848 photos up. I'm thinking of entering a race meeting at Easter so will be doing a bit of work on it soon nothing major just new tyres, oil change etc
Not sure of my colour scheme yet Sam but I quite like the look of the Norton Manx race bikes with the silver tank/seat and blue pinstripe. I'm waiting for inspiration. I'll see what I can do about posting a few 848 photos up. I'm thinking of entering a race meeting at Easter so will be doing a bit of work on it soon nothing major just new tyres, oil change etc
I had a half day at work last week which meant I got home early to spend some quality time in the man cave. Not before a quick cup of coffee at my local cafe

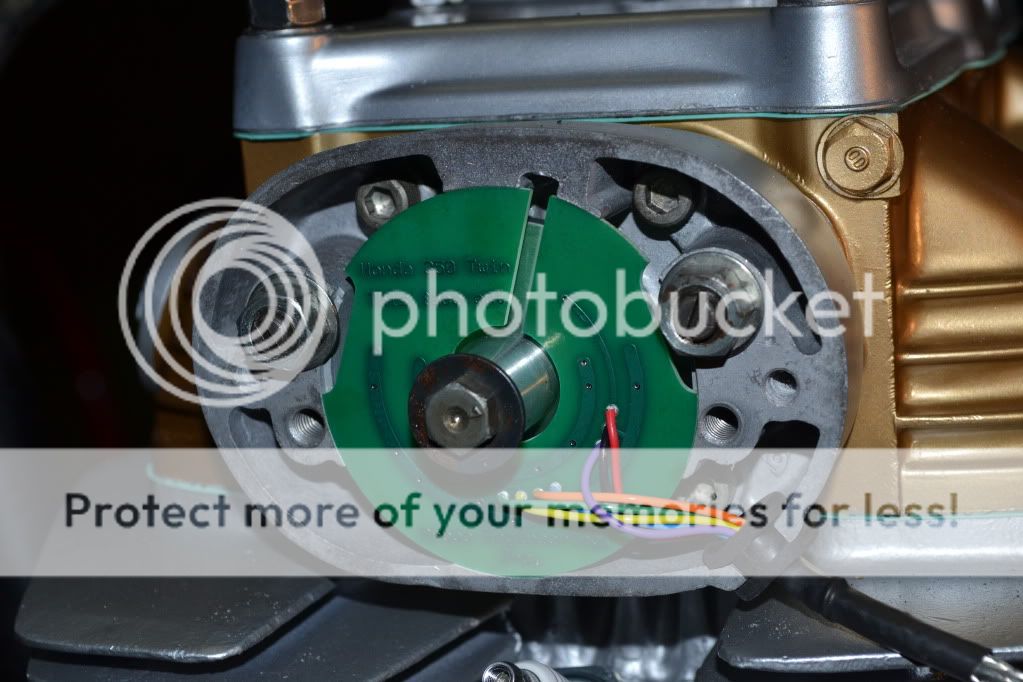
I've got the motor mounted in the frame and I'm now mocking up all the components to make sure they are going to fit. First up was to fit the electronic ignition from Boretec. Ignition housing with the points and mechanical ignition advance removed
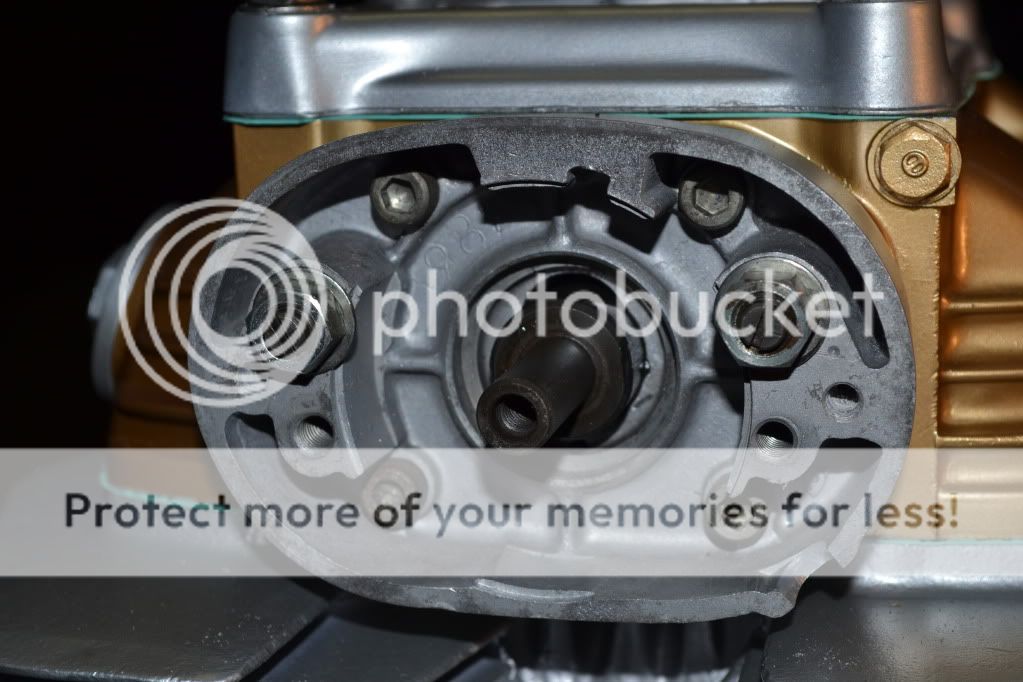
Electronic ignition rotor installed on the end of the cam shaft.
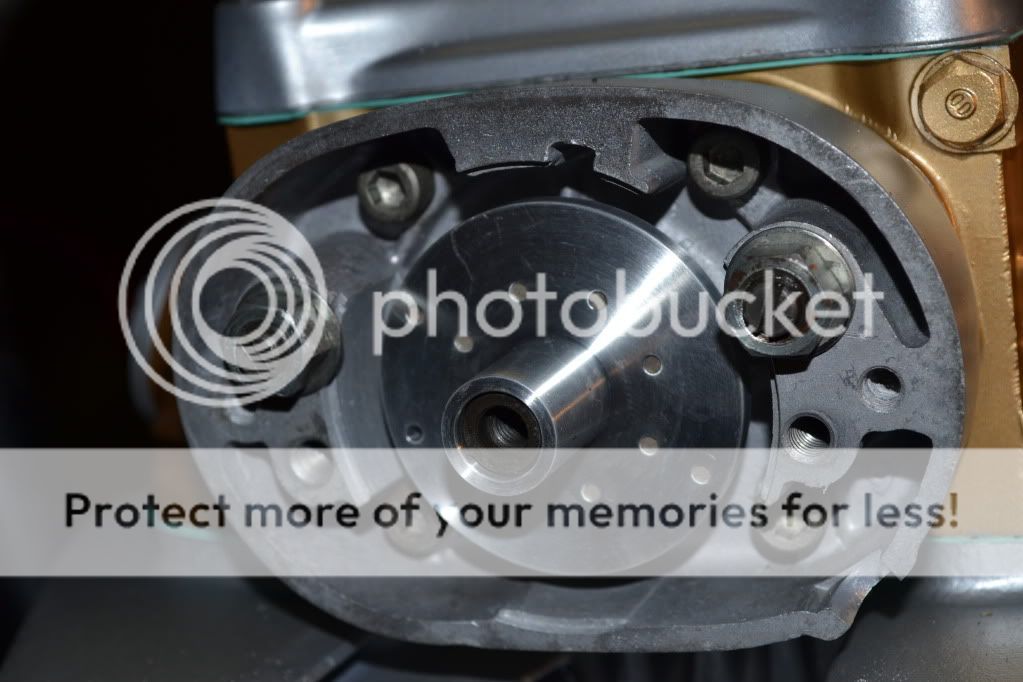
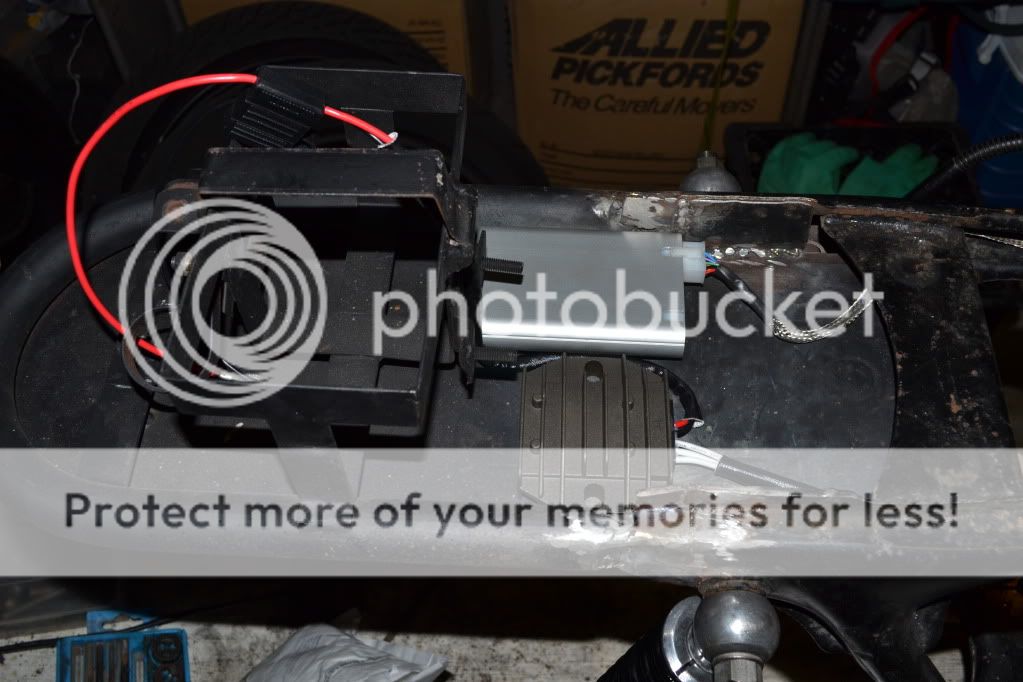
Electrical component installed
Regulator/rectifier and electronic ignition control unit on the underseat tray
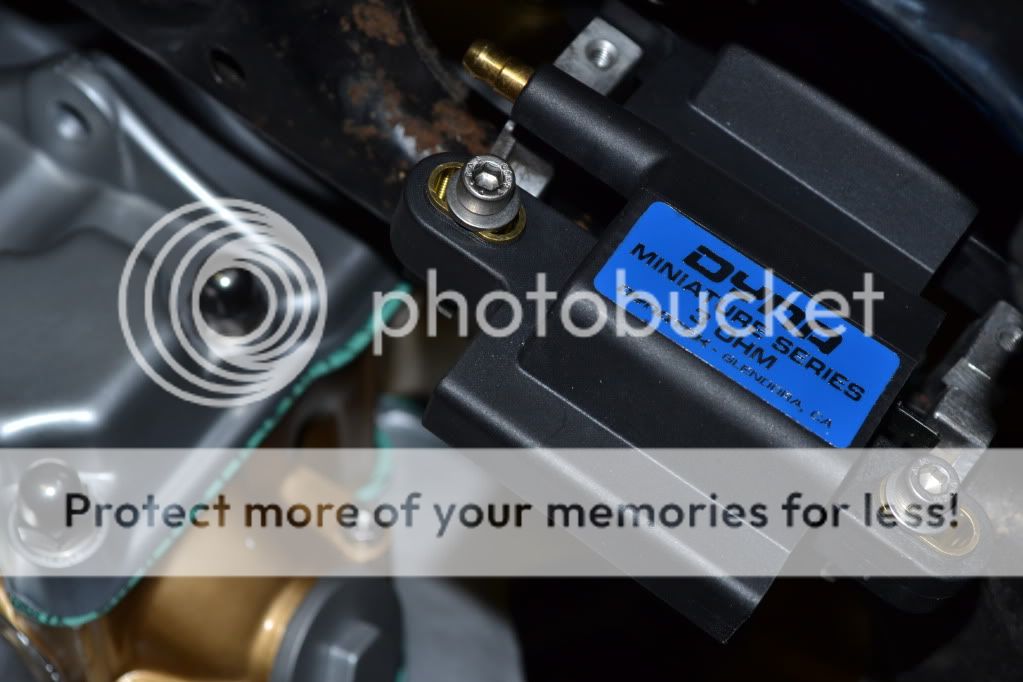
New coils in position under the tank
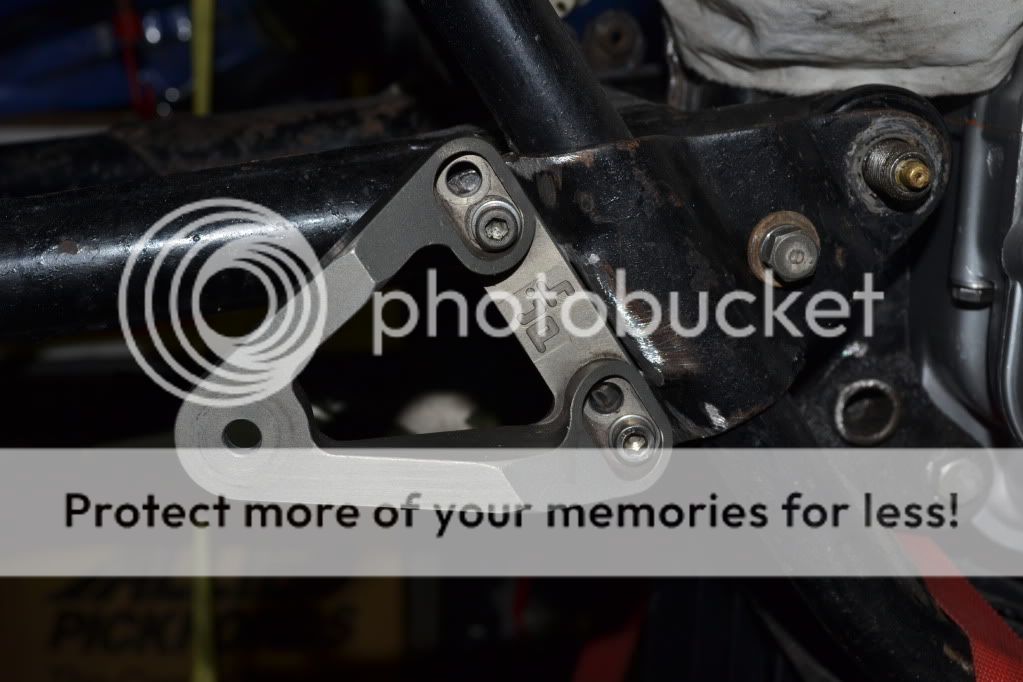
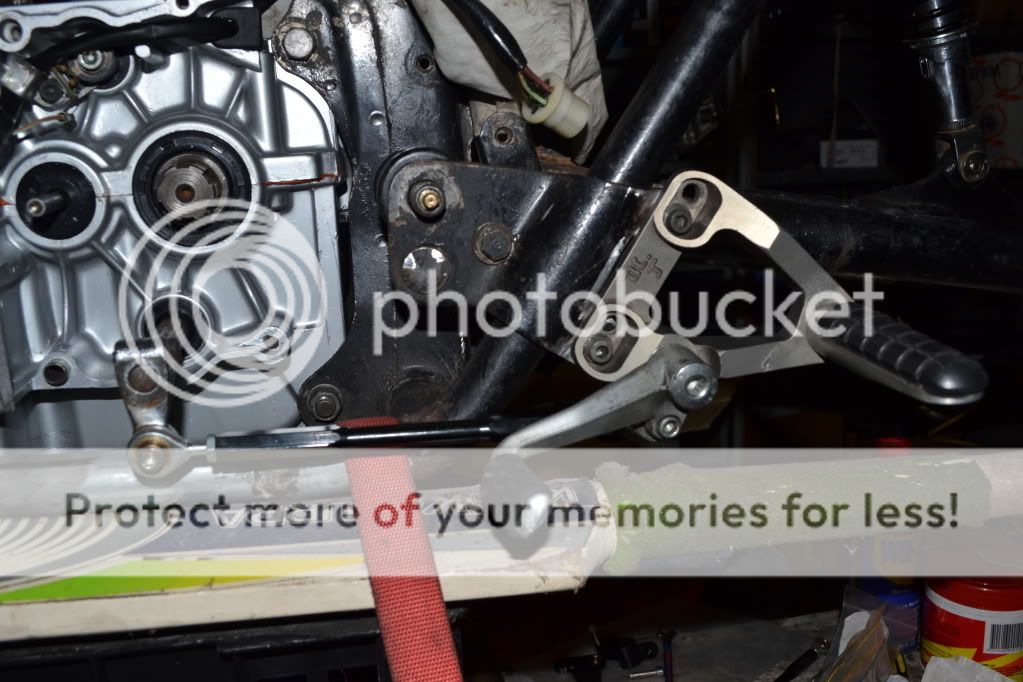
I've got a pair of left over foot peg hangers that I thought I could use. They were bought off ebay years ago and I used them on my race bike back then (748R). They've been kicking around the garage ever since so it's time they were put to good use. First picture mocked up to be sure they're going to fit and to mark a cutting line on the old passenger foot peg mount.
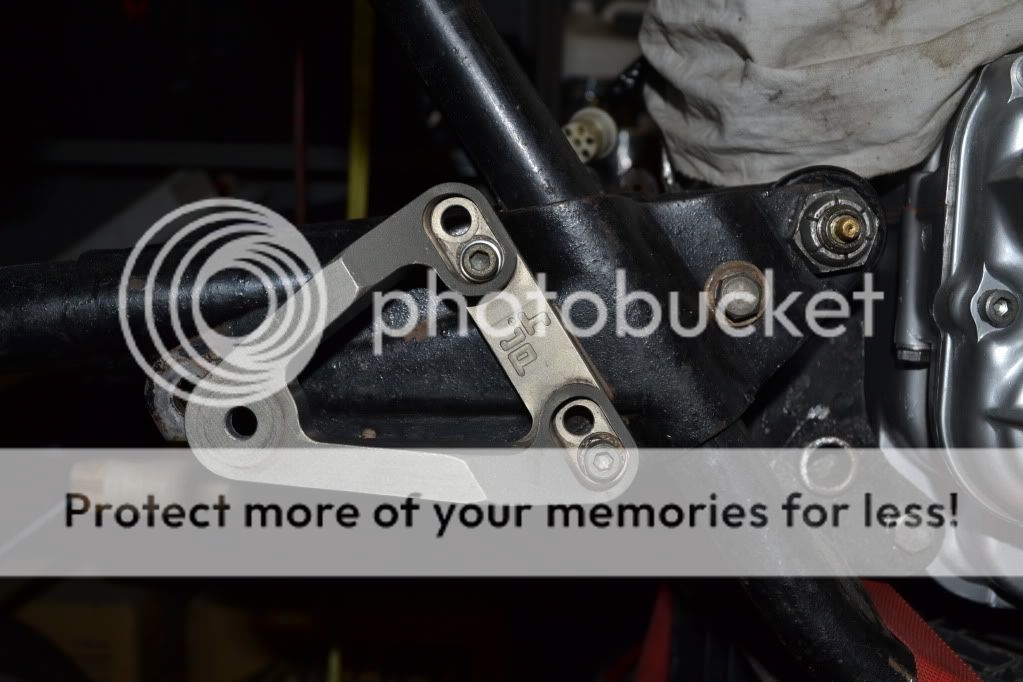
Next bolted in place. This is the brake side
Gear shift side with an 848 shift lever in position
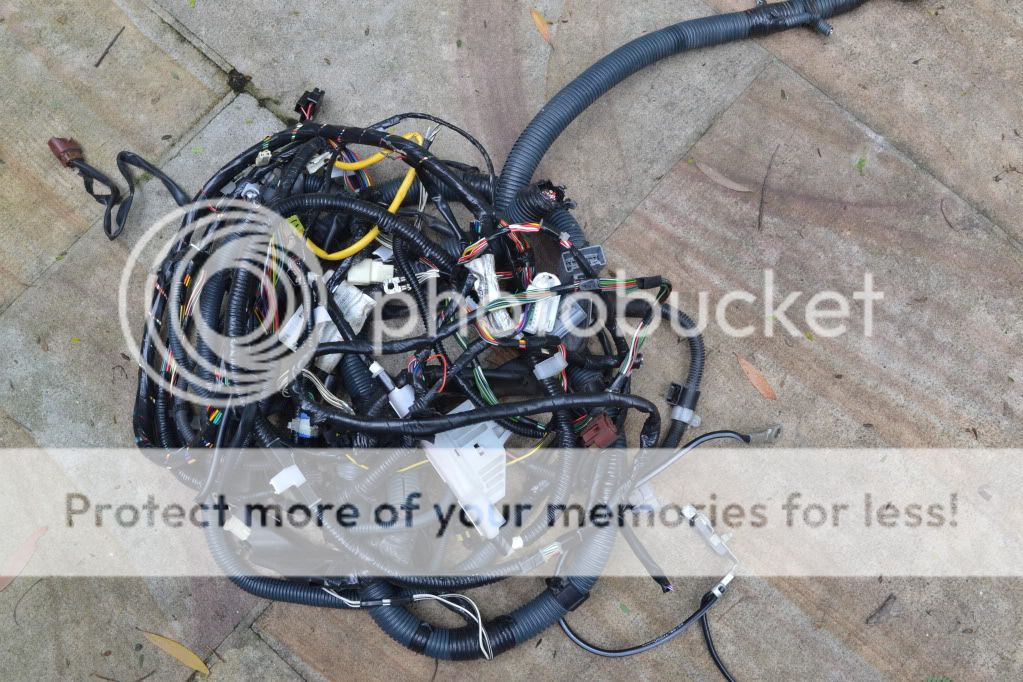
With all the electrical components replaced, I'm pretty keen to get some good wiring into this build to replace the 40 year old wiring loom and make sure the whole thing runs reliably. A good friend of mine told me that the wiring loom from a 2000 Toyota Camry will plug straight into a CB350. So I went out and bought one from the local wrecking yard. Looks pretty much like what I need
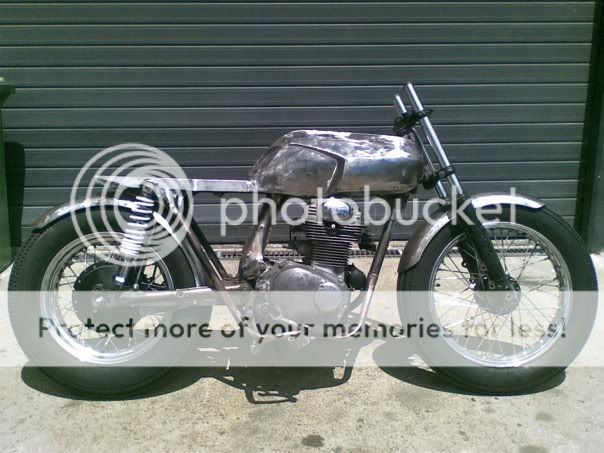
Meanwhile, being very mindful of the fact that the style of the bike that one rides makes some sort of statement about the rider, I've been thinking carefully about and looking for inspiration for the final styling of this particular build. There no doubt there are plenty of beautiful and inspirational styles to choose from as can be seen here...
Hmmmmm....
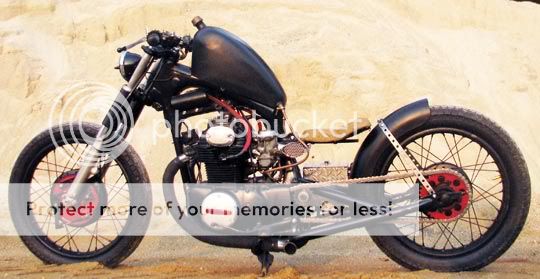
No....
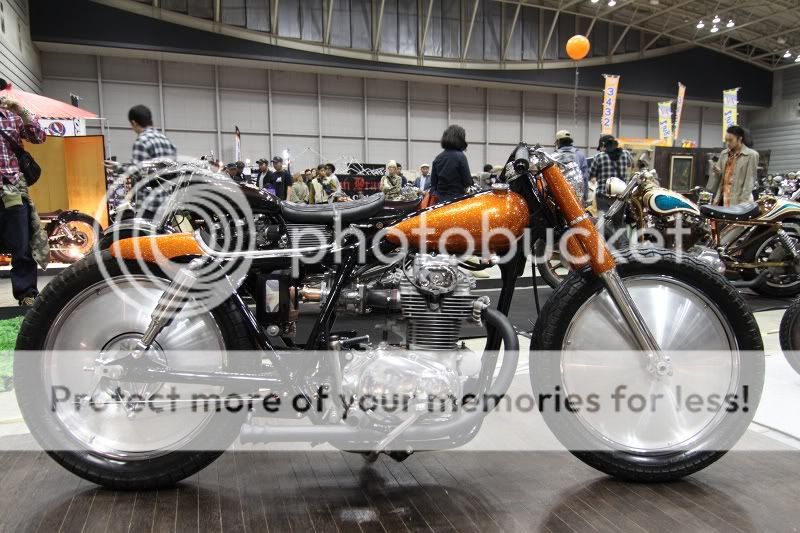
Nup....
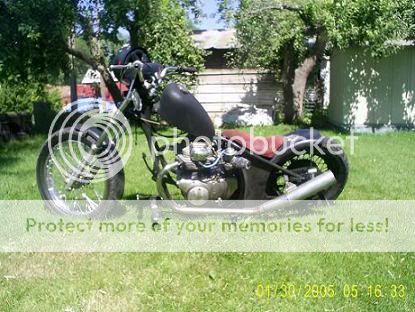
Next...
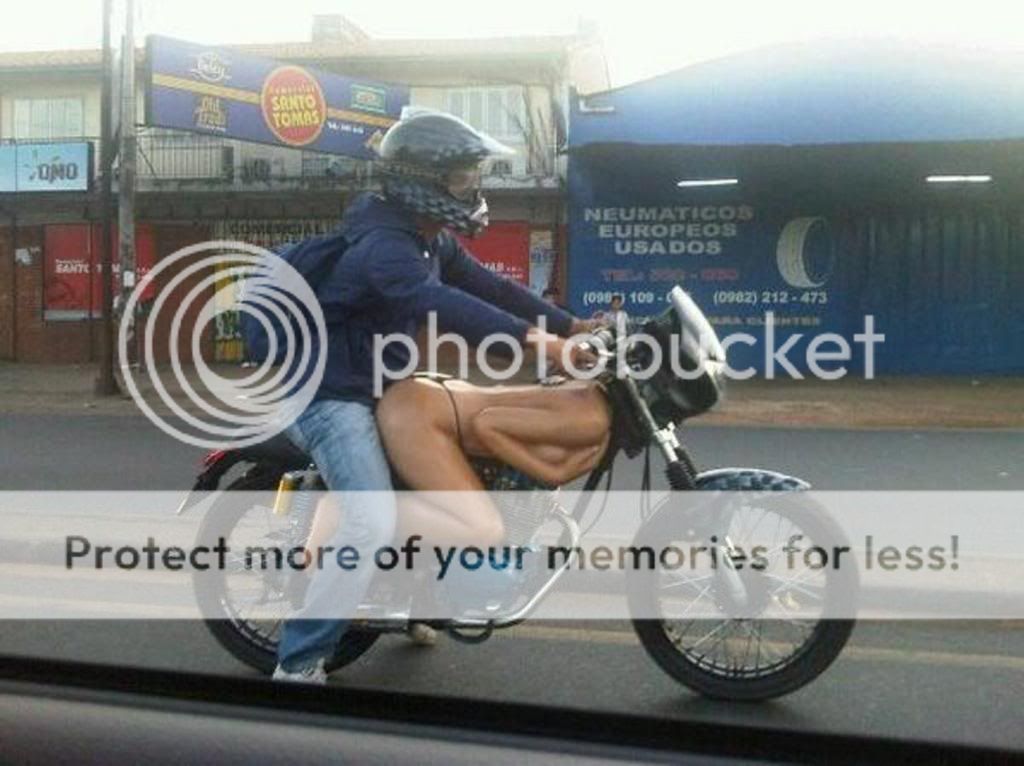
Ummm..
I think ultimately this will be the final shape if not the actual colour. Wouldn't mind that pipe either but $$$!!!
I've got the motor mounted in the frame and I'm now mocking up all the components to make sure they are going to fit. First up was to fit the electronic ignition from Boretec. Ignition housing with the points and mechanical ignition advance removed
Electronic ignition rotor installed on the end of the cam shaft.
Electrical component installed
Regulator/rectifier and electronic ignition control unit on the underseat tray
New coils in position under the tank
I've got a pair of left over foot peg hangers that I thought I could use. They were bought off ebay years ago and I used them on my race bike back then (748R). They've been kicking around the garage ever since so it's time they were put to good use. First picture mocked up to be sure they're going to fit and to mark a cutting line on the old passenger foot peg mount.
Next bolted in place. This is the brake side
Gear shift side with an 848 shift lever in position
With all the electrical components replaced, I'm pretty keen to get some good wiring into this build to replace the 40 year old wiring loom and make sure the whole thing runs reliably. A good friend of mine told me that the wiring loom from a 2000 Toyota Camry will plug straight into a CB350. So I went out and bought one from the local wrecking yard. Looks pretty much like what I need
Meanwhile, being very mindful of the fact that the style of the bike that one rides makes some sort of statement about the rider, I've been thinking carefully about and looking for inspiration for the final styling of this particular build. There no doubt there are plenty of beautiful and inspirational styles to choose from as can be seen here...
Hmmmmm....
No....
Nup....
Next...
Ummm..
I think ultimately this will be the final shape if not the actual colour. Wouldn't mind that pipe either but $$$!!!
TheBullitt
Active Member
Awesome work ducatiboy. Inspiring me to get going on my build!! Can't wait to see more progress.
redred5389
Active Member
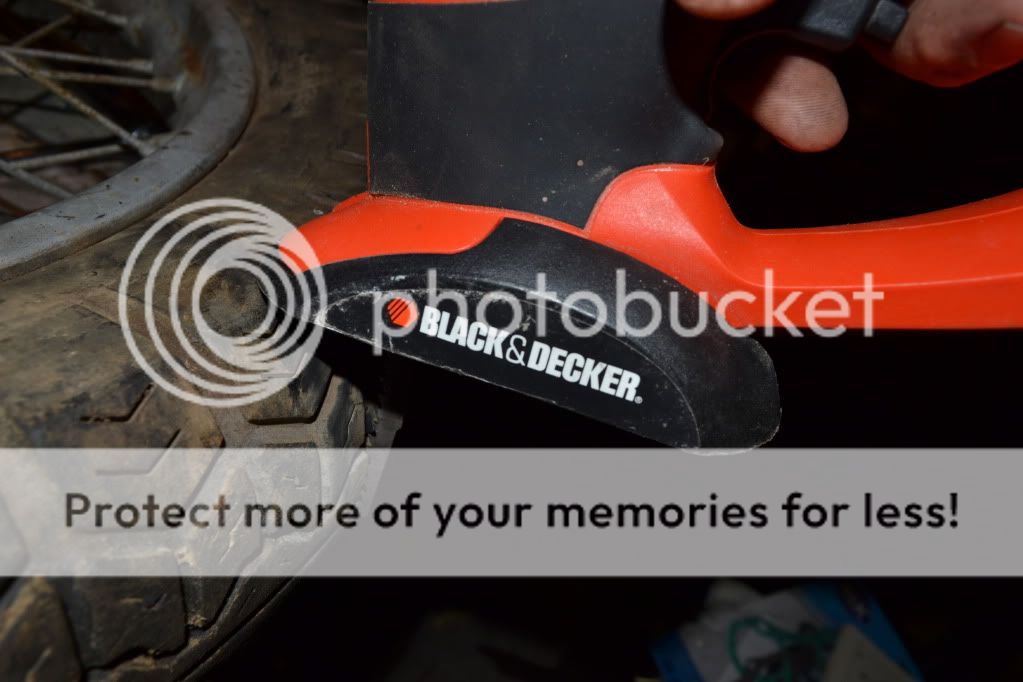
ducatiboy said:Not much done today but I did manage to pull apart the rear wheel. Getting the tyre off was no problem. Who needs tyre levers? Messrs Black and Decker are your friends
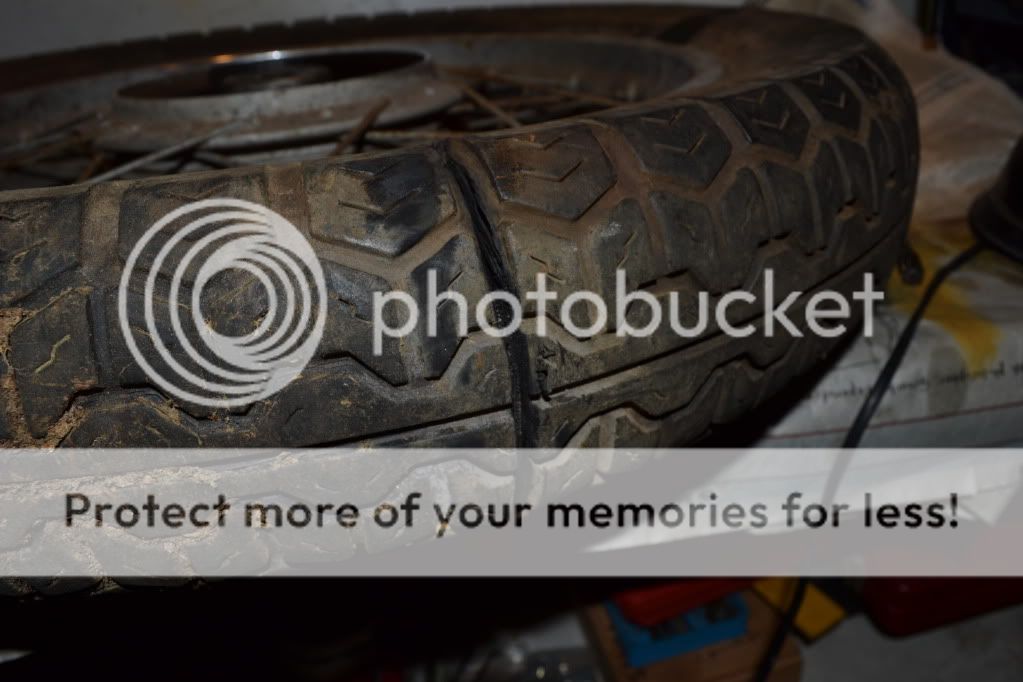
Getting the bead wires was a bit of struggle but got there in the end

Revealing this...
Getting the spokes out with the help of the deputy engineer of the project (my 12 year old son) and WD40 was surprisingly easy
Almost there
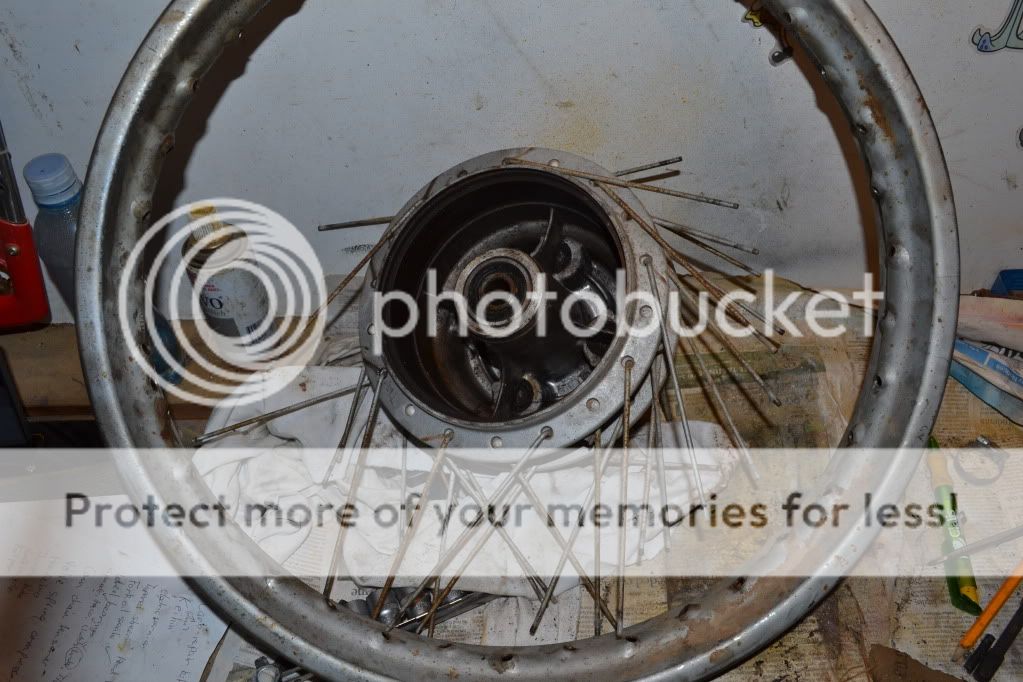
Hooray!
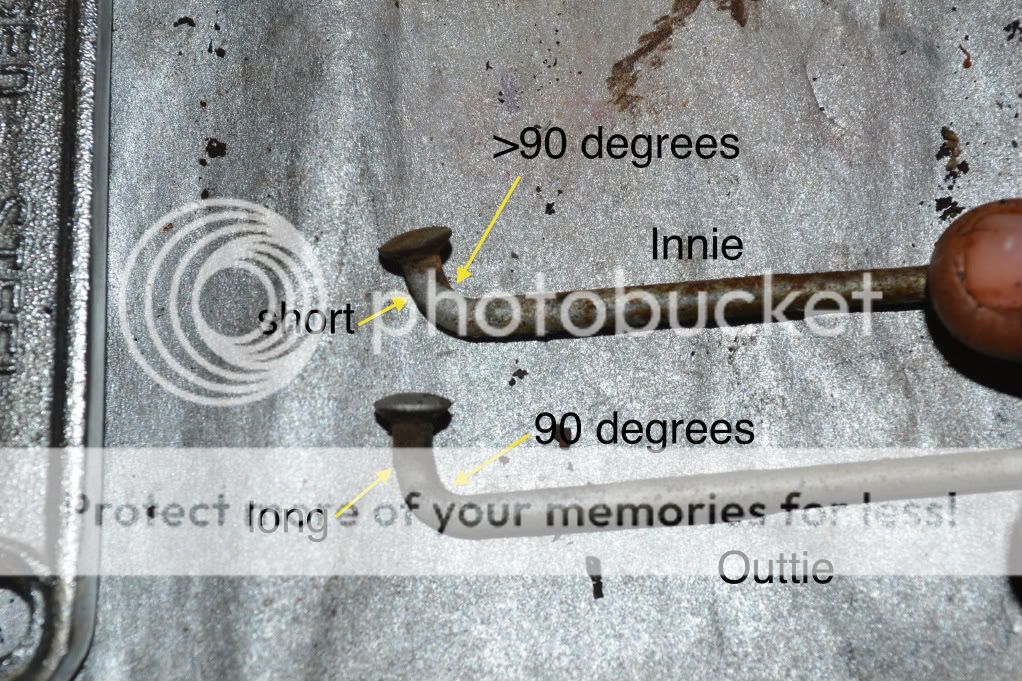
Thinking back over my 30 years of riding bikes on an almost daily basis, I don't think i've even ridden a bike with spoke wheels let alone worked on one. I've recently learned that spokes are like belly buttons...they come in two different types. Innies and outties. i.e. those with the little button part inside the hub and those with it outside. Here are the differences.
My plan (if I can get all this crap back together) is as follows
Front wheel: Harley 40 spoke 19 x 2.5 inch steel rim. Swap the 19 inch rim out for 18 inch alloy rim. Keep it at 2.5width. Reuse the (brand new) chrome spokes/nipples.
Rear wheel: CB350 hub laced up to 18 x 3.5 inch alloy rim. See how the old spokes/nipples clean up and have them chromed them if they clean up well or get new ones if they don't.
So questions at this stage are:
Can I re-use the spokes from a 19 inch rim in an 18 inch rim? I assume they'll need to be cut shorter and the threads cut a little further. If the thread is cut further, will they need to be rechromed to prevent the newly cut thread from rusting?
Has anyone transplanted a 3.5 inch rear wheel to a stock cb350 frame? Are there any issues with the chain run fouling the frame rail? I am expecting to have to buy or make an offset countershaft sprocket and move the rear sprocket out slightly
just curious what would happen if you laced up the wheel the wrong way? like if you used the inner spokes as the outer spokes
Super T.I.B
New Member
Awesome stuff Ducatiboy, you are giving me inspiration to tear down my CB175.
Just my second post on here, I've introduced myself on the local board, I'm from Picton NSW and was an owner of a Duc Monster (until I had to sell it to pay off debt, the worst way to sell a bike :'( )
Keep it up champion!
Just my second post on here, I've introduced myself on the local board, I'm from Picton NSW and was an owner of a Duc Monster (until I had to sell it to pay off debt, the worst way to sell a bike :'( )
Keep it up champion!
Thanks SuperTIB. Welcome to the DTT forum. Just make sure you don't waste too much time here at the expense of time in the garage working on the bike!
Red, it's not really possible to get the spokes in the wrong way because the different angles of the neck part of the spoke more or less forces the spoke to sit at a particular angle to the hub. If inserted the wrong way, it soon becomes obvious when you try to line it up to the rim. More confusing than getting the innies and outies on the right side of the hub is getting the correct spoke into the correct rim hole although even this is reasonably straight forward with careful thought and concentration.
Bullitt, I've found the hardest part is just getting the motivation to get started. After that, it all just snowballs from there and you just keep going till it's done!! Had a flick through your blog. Some great stuff there!
Red, it's not really possible to get the spokes in the wrong way because the different angles of the neck part of the spoke more or less forces the spoke to sit at a particular angle to the hub. If inserted the wrong way, it soon becomes obvious when you try to line it up to the rim. More confusing than getting the innies and outies on the right side of the hub is getting the correct spoke into the correct rim hole although even this is reasonably straight forward with careful thought and concentration.
Bullitt, I've found the hardest part is just getting the motivation to get started. After that, it all just snowballs from there and you just keep going till it's done!!
Had a flick through your blog. Some great stuff there!TheBullitt
Active Member
ducatiboy said:Bullitt, had a flick through your blog. Some great stuff there!
Much obliged sir. When your build is finished, I'd love to feature it on there!!
When your build is finished, I'd love to feature it on there!!
That'd be great to be featured on your site!! I just hope you don't need the content anytime soon because this has got to be the slowest CB350 build in the history of the planet (or so it seems to me).
Real life, work, family commitments etc all take their little slice out of the 24 hours in the day. But I do enjoy my time in the garage. I call it shed therapy ;D ;D

