Hi From Australia CB350

ducatiboy said:
That'd be great to be featured on your site!! I just hope you don't need the content anytime soon because this has got to be the slowest CB350 build in the history of the planet (or so it seems to me). :p :p Real life, work, family commitments etc all take their little slice out of the 24 hours in the day. But I do enjoy my time in the garage. I call it shed therapy ;D ;D

The blog's not going anywhere so I'll be ready whenever you're ready ;D
 
Bits and pieces over the last few days…

Headlight brackets arrived in the post. They are chrome not black like they look in the photo. They look a little too long and pointy for my liking and are begging to have some more holes drilled into them. I'll see what they look like when I get them on the forks.
DSC_6193.jpg


The Chinese are amazing! They can make and sell anything at a fraction of the cost of the greedy capitalist manufacturers/retailers in the Western world. These clip-ons were off ebay at a bargain price with FREE shipping! I know it will probably spell the end of Western civilisation along with the destruction of our economy but hey! Enjoy it while it lasts...
DSC_6010.jpg


Checking the fit of various components and starting the joyful process of making a wiring loom…
DSC_6108.jpg


I thought this was kind of funny. I'm sure this Ducati 848 horn will feel much more comfortable and at home on the Honda CB350
DSC_6179.jpg


Deputy project engineer tries out the bike for size. My garage is a little crowded…
DSC_6113.jpg


I wanted to use the 848 side stand mount because when I ground the CB350 mount off the frame, there wasn't really enough left of the mount to weld on at the right angle to function correctly. It had to be ground off because it's original position was on the riders foot peg mounting point. These were being removed to use rear sets.
DSC_6184.jpg


So I ended up cutting the 848 side stand mount down. I thought that because the left front engine mounting bolt was so conveniently located I'd use it to also mount the side stand. That way the side stand mount could be bolted on rather than welded.
DSC_6169.jpg


The trouble is, because the mounting lug is bolted at one point only it doesn't matter how tight you torque the bolt, the lug can turn when the weight of the bike is leaning on it. So I devised an ingenious plan to use a cut down allen key as a locating peg to hold the lug at the correct angle and to prevent it from wandering.
DSC_6170.jpg

DSC_6172.jpg


Of course this did not work because there ended up being too much play between the peg and the locating holes. So to stop it turning I put a blob of weld on anyway. Now the lug is permanently attached to the frame and will be reinforced with the engine mounting bolt.
DSC_6183.jpg


The other problem was the side stand spring lug was on the opposite side of the honda side stand. So I ground it off and put a new one on the back of the stand using another cut down allen key. I've found during this build that it is a good idea to have a plentiful supply of allen keys.
DSC_6174.jpg


During all this playing around with little bits and pieces of random bike parts, the thought suddenly dawned on me like a revelation, like a blinding flash, that I had been actually avoiding the REAL issue. All this time I thought I had been making good, albeit slow, progress plodding away in my quiet and humble way. But in fact what I had actually been doing all this time was simply avoiding the fundamental issue, the quintessential question at the heart of this build, indeed, of any build and that is what to do with the rear brake. This realisation threw me into a fit of depression from which I have barely managed to extricate myself. In these difficult times of self doubt, when one questions one's faith and somehow needs to find comfort, it often helps to turn to the DoTheTon forum, the cafe racer's bible equivalent. Within these pages I managed to find succour and guidance in the words of Korsch the rear brake guru and prophet. He has written a how-to guide of such detailed prose and accompanied by such exquisitely rendered pictures that it is enough to make a grown man weep. I have studied his teachings with the meticulousness of a born-again convert and have found them to be of such high calibre and usefulness that I have shamelessly copied his ideas and when finished will present them to my friends as my own. I would encourage you all to do the same. His solution here

http://www.dotheton.com/forum/index.php?topic=34650.30

And my plagiarised (and not yet completed) version
DSC_6186.jpg

DSC_6191.jpg


So that's all for now :) Thanks for reading!!
 
ducatiboy said:
In these difficult times of self doubt, when one questions one's faith and somehow needs to find comfort, it often helps to turn to the DoTheTon forum, the cafe racer's bible equivalent. Within these pages I managed to find succour and guidance in the words of Korsch the rear brake guru and prophet. He has written a how-to guide of such detailed prose and accompanied by such exquisitely rendered pictures that it is enough to make a grown man weep. I have studied his teachings with the meticulousness of a born-again convert and have found them to be of such high calibre and usefulness that I have shamelessly copied his ideas and when finished will present them to my friends as my own. I would encourage you all to do the same. His solution here

http://www.dotheton.com/forum/index.php?topic=34650.30

Haha just glad i could help! feel free to plagiarise all you like :) You will probably be the guinea pig finding out if this idea will actually work or not, as unfortunately I have to do some traveling for work so will not be able to work on the bike for a while :( Hopefully i will be able to use the hotel time to at least fix all those picture links!

Keep up the good work!
 
To my thousands of fans and followers I'd like to apologise for the lack of updates recently. Sadly work on the CB 350 has ground to a halt...

First I had to get my race bike ready for an Easter meeting and then I was away for a week working in the country. Here's the 848 all loaded up and ready to go

DSC_6201.jpg


and here's a link to a video of my first race

http://www.youtube.com/watch?v=sVgEol2XbxE

Unfortunately it was the only race that went well. An intermittent electrical misfire ruined the others :(

A few goodies arrived in the post though. Maybe this weekend I'll be able to get some work done.

Loaded Gun rearsets
DSC_6206.jpg


Rear sprocket bolts and a steering damper bracket
DSC_6207.jpg


I've been thinking about what I want the gauges to look like and I came up with the idea of replica Veglia tachometer/speedo faces like these. Hopefully Sonreir will be able to help out!
1972-giu-motociclismo-09.jpg


That's all for now. With any luck I'll have something a little more substantial for the next update
 
HAHA!! Yes I know Neevo I know...not good enough. And yes the 848 is a great bike and way more than I'm capable of riding to it's full capability! One simply does one's best...
 
awsome video mate, embarrassingly i was in the office watching it tilting my head on every turn you were making to me peers amusement. hahah well done
 
It's been a while since my last update to this blog. Sorry to all my fans but hey, give me a break and stop hassling me! Life gets in the way sometimes! But now, work proceeds apace!! I've got some serious momentum going so you just watch me roll, baby!

Finally got the rear brake worked out. From back to front, the stock brake drum lever is connected to the actuating lever by the stock connecting link. All original so far. Then the foot brake lever has been cut off and a tube extension welded onto the stock actuating mechanism. The tube extension allows the stock bolt to be used to bolt the actuating mechanism to the frame in it's original position but allows another actuating lever to be welded further out from the midline of the bike so as to line up with the rear set brake lever. I'm not entirely sure if this all makes sense but I do know it all works very nicely and is an elegant solution to the problem of getting the rear brake to work with rear sets. Thanks to Korsch for the idea.
DSC_6217.jpg

DSC_6228.jpg

DSC_6227.jpg


Once the whole mechanism is painted the same colour as the frame, it will all blend in and be less noticeable than in the photos. The stock actuating arm is quite close to the dust cover of the swing arm bushes so when it all gets put back together for the final time I'll grind a bit off the arm to give some clearance.
DSC_6218.jpg


Rear wheel arrived back from being laced and trued. It looks fantastic but unfortunately it doesn't spin true. Big wobble in it so it's gone back to be re-done.
DSC_6220.jpg


Front wheel also back and also looks good. Spins nice
DSC_6226.jpg


How the mock up looks so far. I think the headlight is too high and sticks out to far so I'm going to lower and shorten the headlight brackets
DSC_6226-1.jpg

DSC_6230.jpg


More to follow...
 
I've been spending a bit of time thinking about how to stop water, mud, crap and cowshit from flying up from the back wheel into the carburettors. I want to put some sort of mudguard on but preferably a subtle and unobtrusive one. A swing arm mounted hugger of some description seems like a good idea. The stock mudguard weighs a ton so is not really a viable option. Cut in half it might fit nicely and would then only weigh half a ton.
DSC_6232.jpg

DSC_6233.jpg


Then I thought I'd do one of my favourite things…make it out of fibreglass. Used the old mudguard to get the shape and away we went. I love the fibreglass resin fumes. In between hallucinations and violent projectile vomiting (I exaggerate) I managed to make something that MIGHT be useful.
DSC_6238.jpg

DSC_6239.jpg


While the fibreglass was going off I moved to the front end of the bike and lowered and shortened the headlight brackets.
DSC_6245.jpg

DSC_6248.jpg

DSC_6249.jpg


Started working on some brackets to hold the speedo and tacho
DSC_6241.jpg


Whenever I work in metal fabrication, I am reminded to not give up my day job. But eventually got the gauge mounting sorted out and quite pleased with the result.
DSC_6250.jpg


I've struck a problem with the fitting of the BCR El Poquito tank. It is supplied with a bracket with two rubber mounts for the tank to rest on and to be bolted to.
DSC_6225.jpg


Unfortunately the tank does not rest on these rubber stoppers but rests on the frame rail on each side just behind the fuel tap holes. This leaves a gap of approx 5mm between the tank and the rubber mounts. Hard to photograph…
DSC_6223.jpg


One solution would be to raise the bracket high enough for the tank to rest on it rather than rest on the frame rails but as you can see in this side on picture, the line of the lower edge of the tank is already too high to match the line of the seat. The tank wants to be lowered not raised!!
DSC_6222.jpg


I'm thinking I have to grind the tank away enough to allow it to be lowered onto the rubber mounts and to line up with the seat BUT to still clear the frame rails. Grinding this much of the tank away may mean grinding INTO the tank making fuel-proof repairs necessary. The alternative would be to heat up the frame rail at the appropriate point and smash it with a large hammer to bend it inward enough to allow the tank to sit lower. Neither of these options is attractive. Hmmm...anyone got any bright ideas?
 
The other thing I'm worried about is the clearance between the rear tyre and the BCR seat pan/battery tray. I haven't had a tyre on the wheel yet to check at full compression but it looks to me like there are going to be some issues. Longer shock or raise the tray? Bit annoying really as the BCR tray is supposedly made for CB350
DSC_6221.jpg
 
A major victory was won today in the bike building battlefield that is my garage. The problem of mounting my tank has been resolved. No more sleepless nights and no more staring blankly into space mentally wrestling with the complexity of the problem.

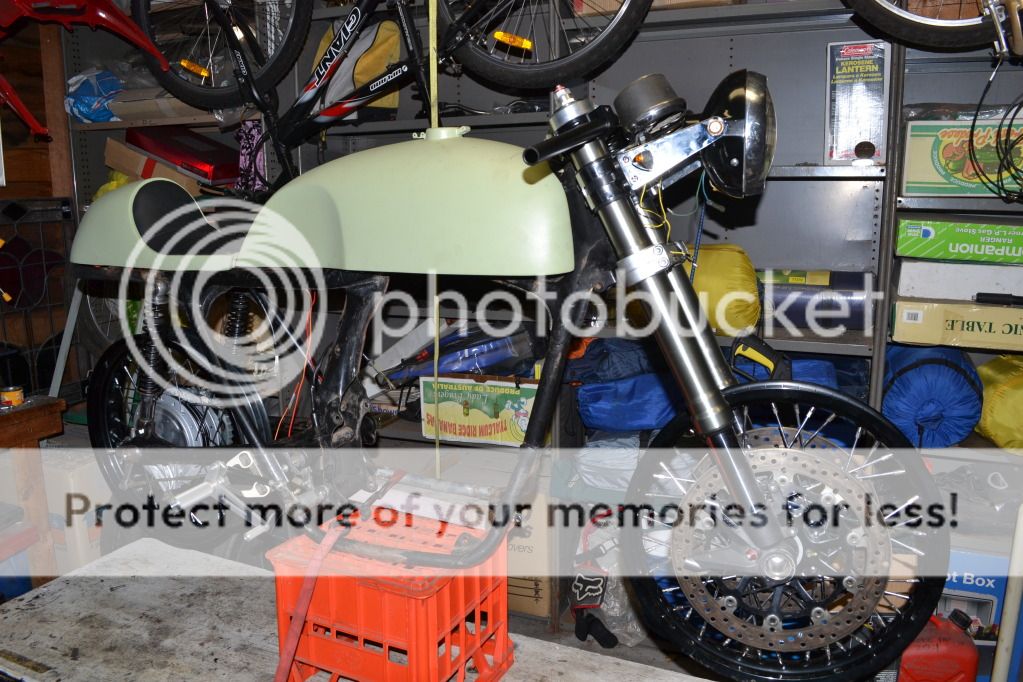
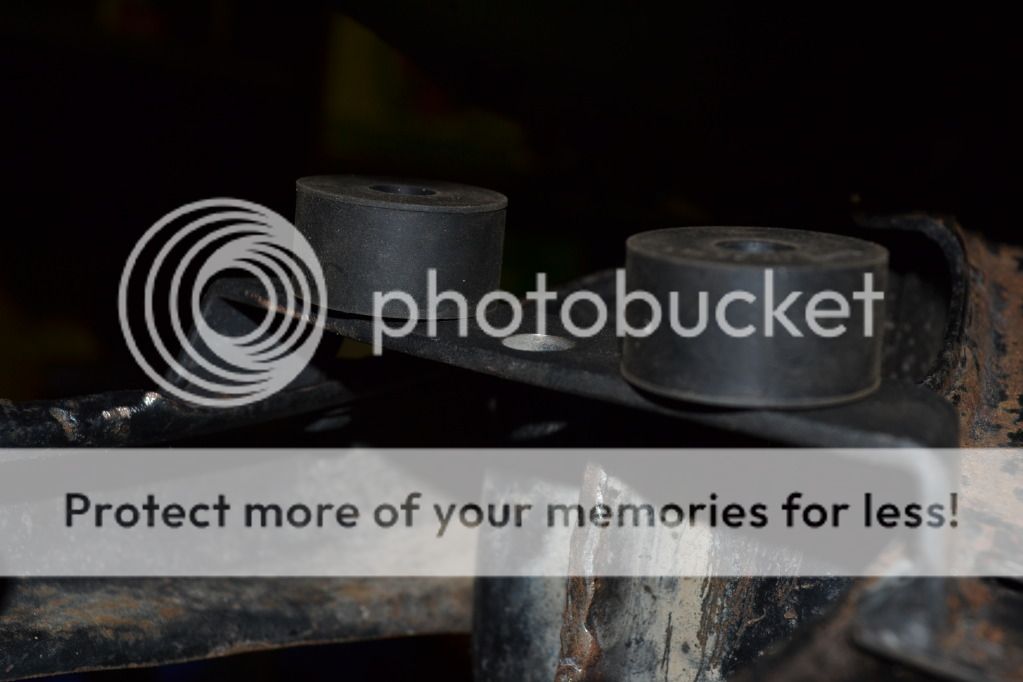
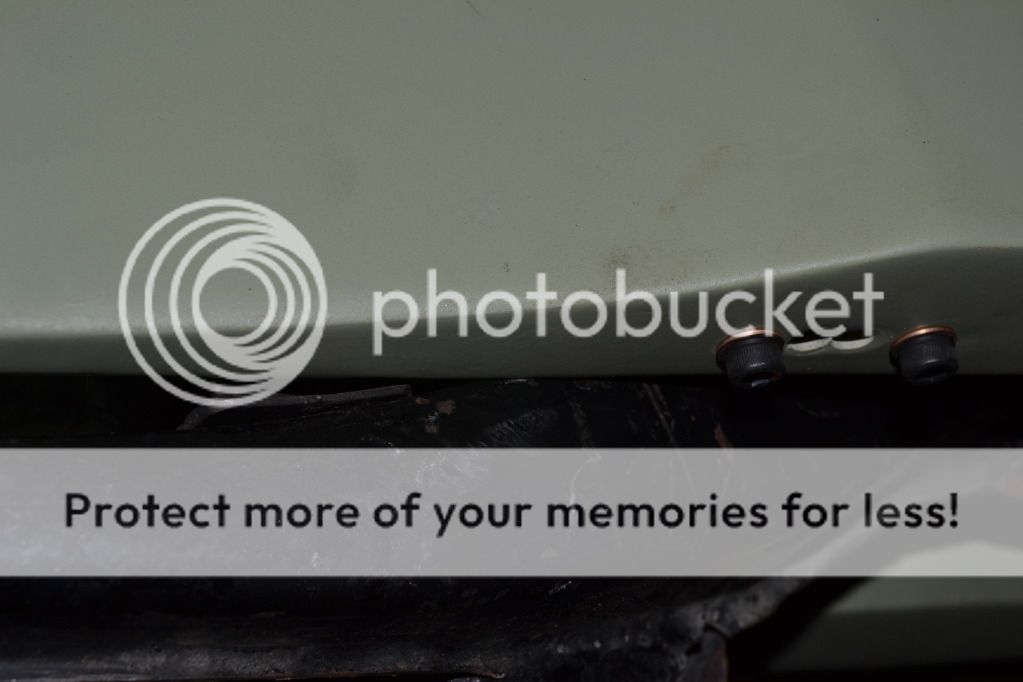
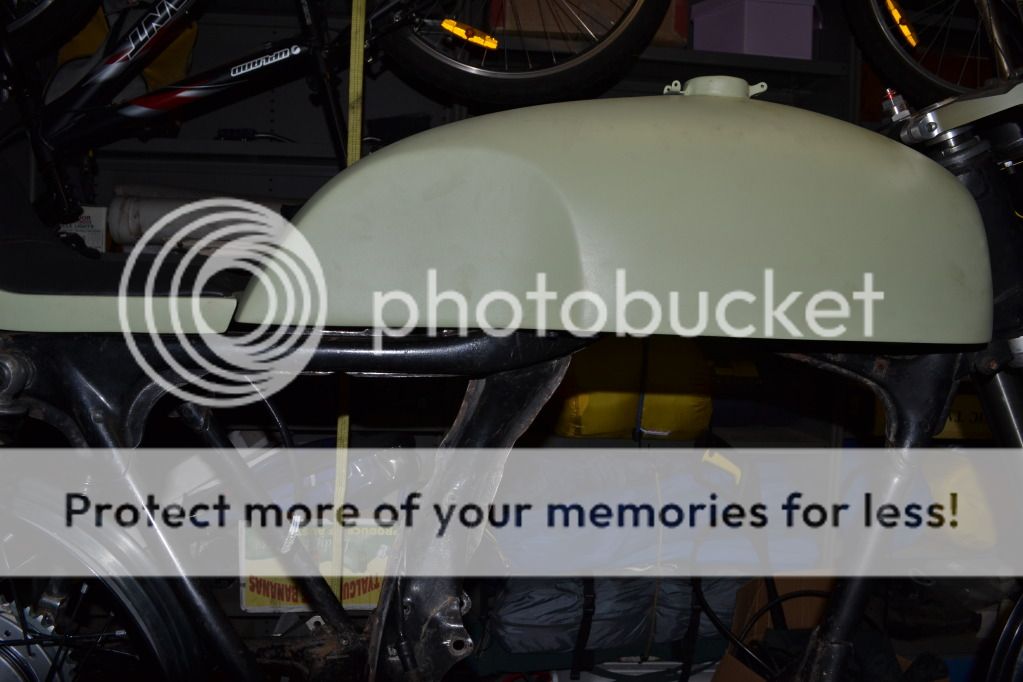
Those who have been paying attention will remember that the tank was resting on two frame rails instead of the rubber stoppers that are supposed to simultaneously bear the weight of the tank and isolate (to a degree) vibrations from the frame. The possible solutions:

1. Raise the stoppers higher so the tank rests on them and not the frame (not particularly desirable as the tank would then be sitting "abnormally" high. This abnormally high position could be "hidden" by fibreglassing a lip around the lower edge of the tank to make it look like it is sitting lower

2. Move the frame rail slightly with a big hammer to allow the tank to sit lower (not an especially elegant engineering solution)

3. Remove some of the inner edge of the tank with a big grinder (and run the risk that so much of the tank gets removed that it no longer capable of containing volatile and highly flammable and corrosive liquids i.e. I may grind right through to the inside of the tank)

The first option was considered for approximately a microsecond before being dismissed (such is my love of fibreglassing). With respect to the remaining two potential solutions, the stress of indecision was giving me stomach ulcers so I immediately decided that to do SOMETHING was preferable to doing nothing. So I tossed a coin and heads told me it was going to be option 3, grinding the tank away.

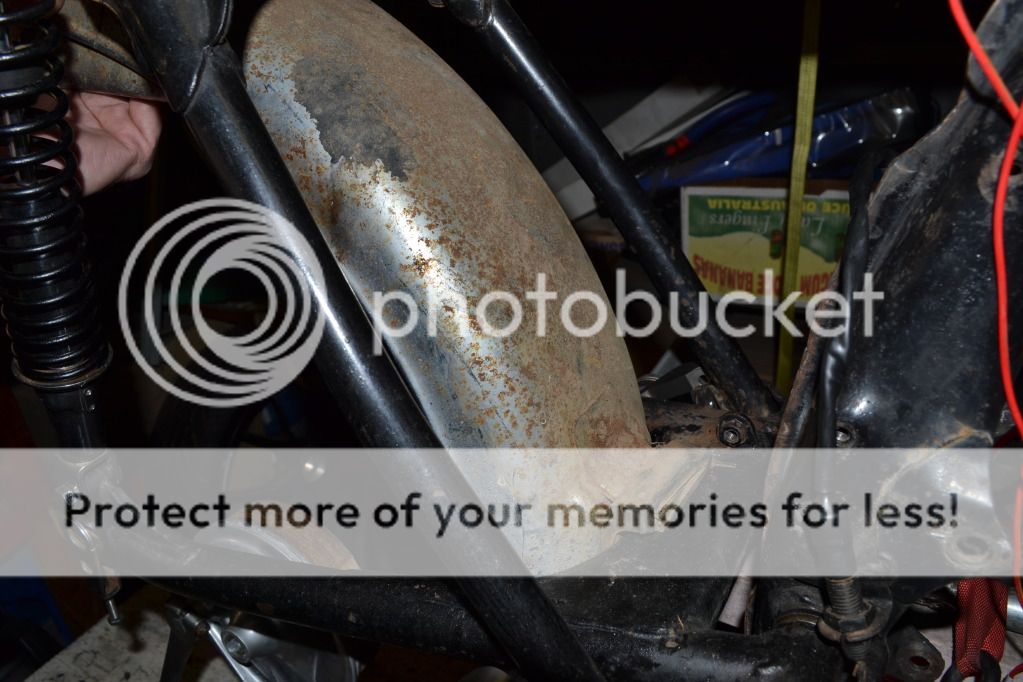
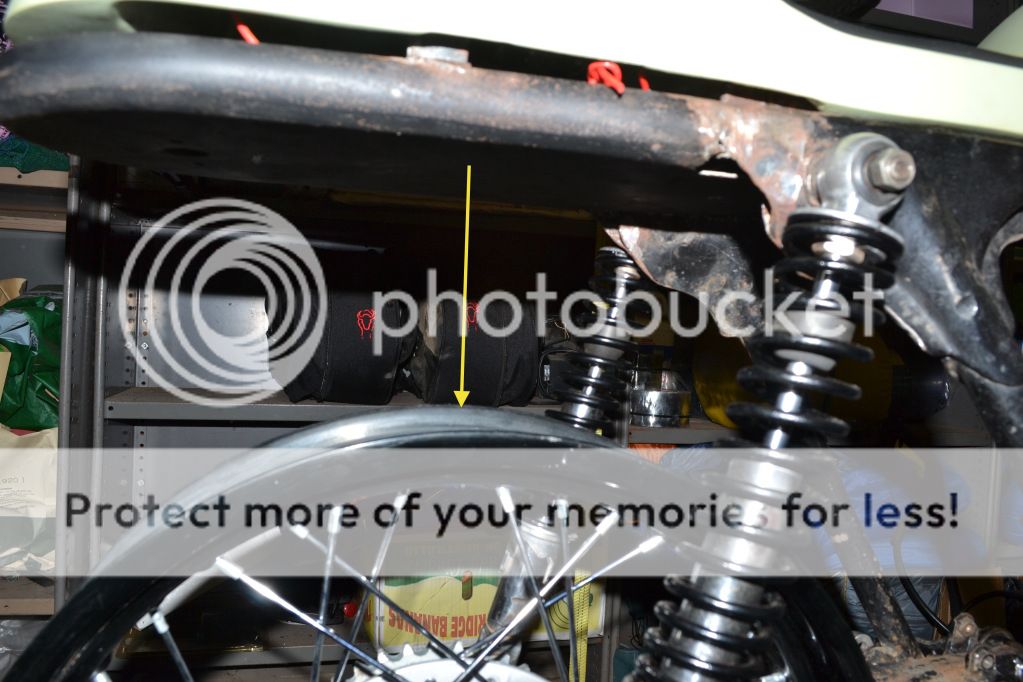
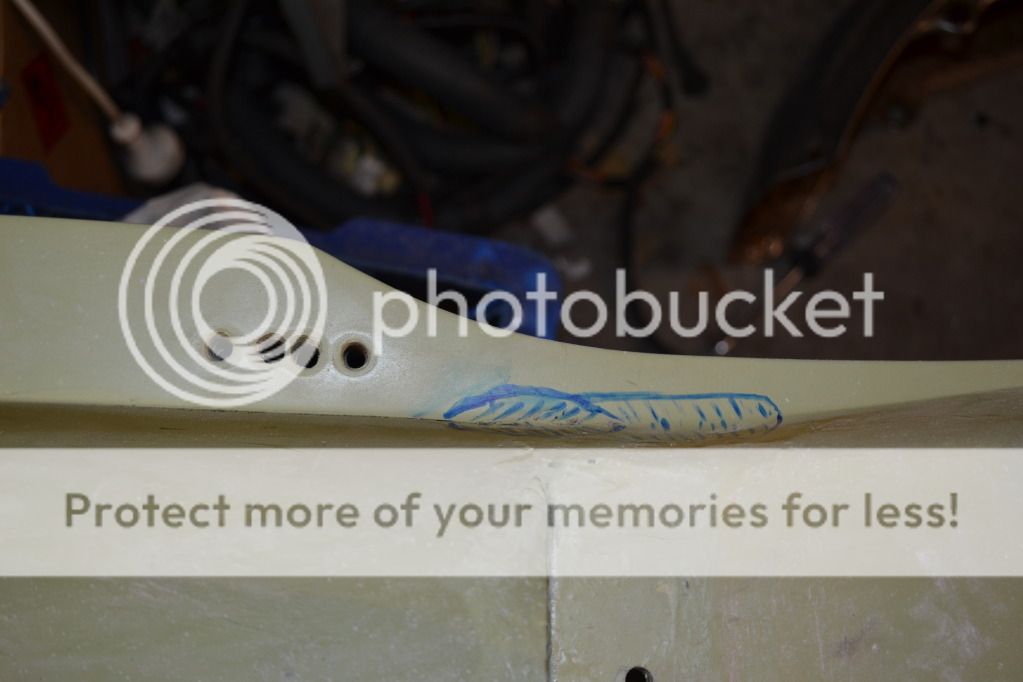
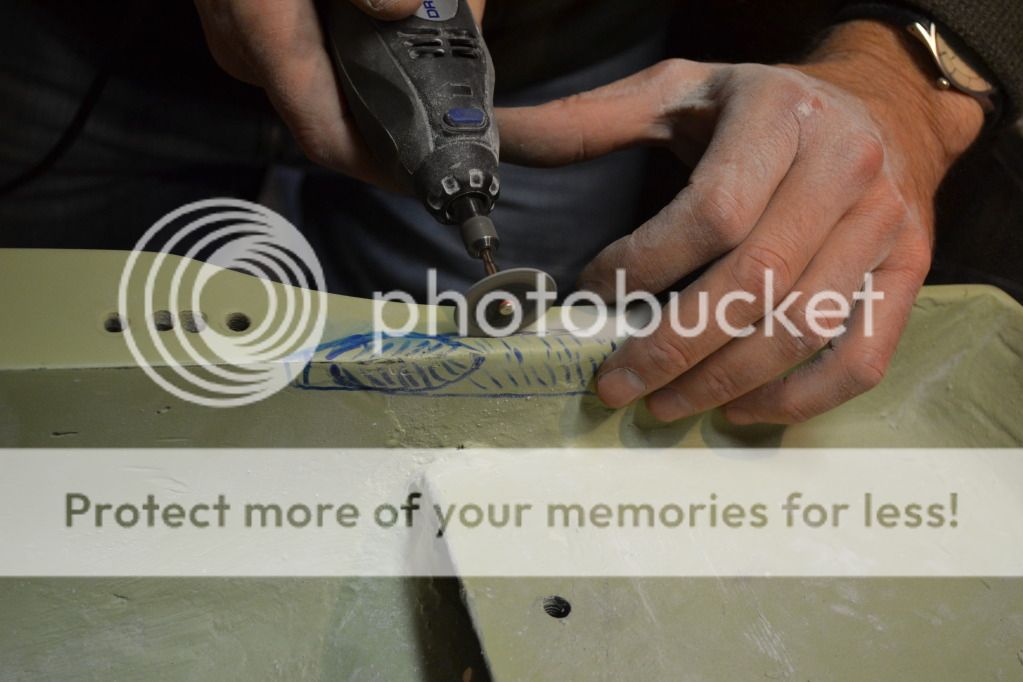
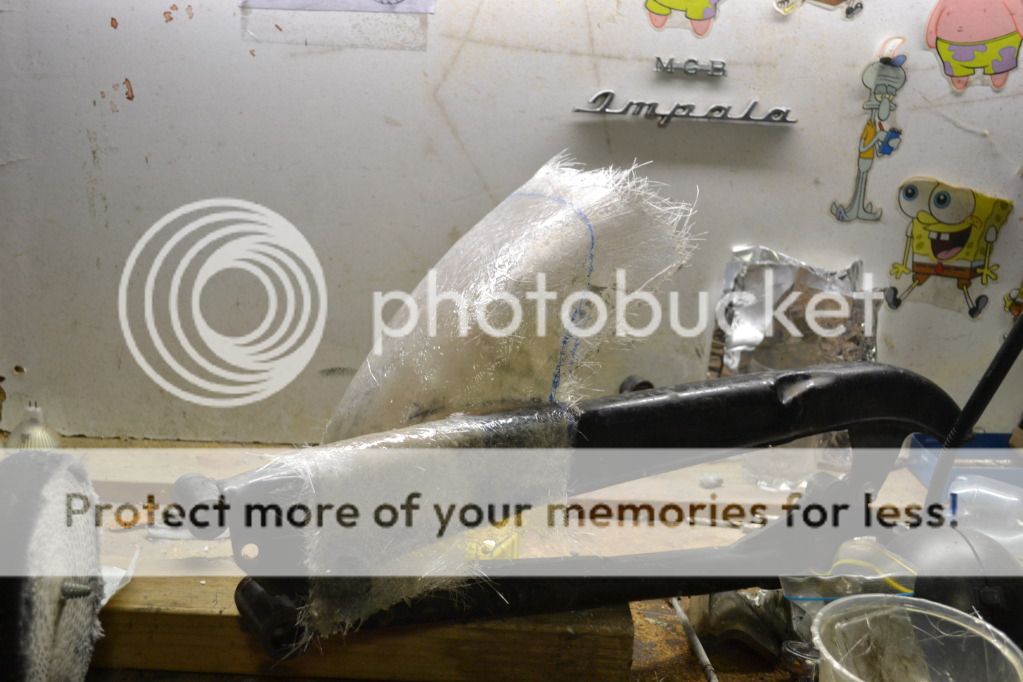
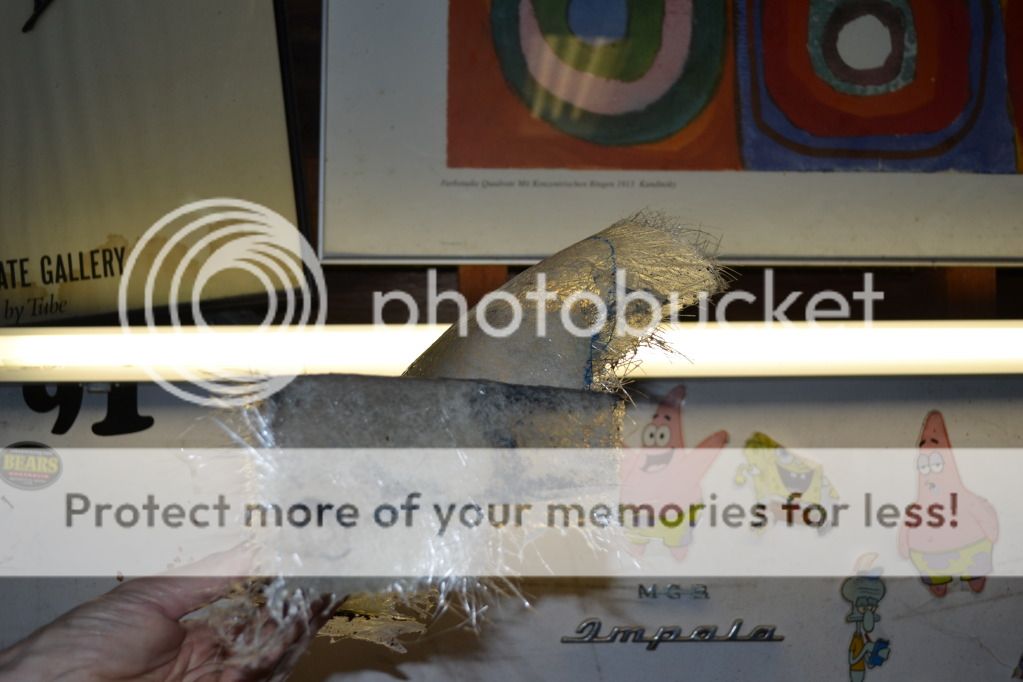
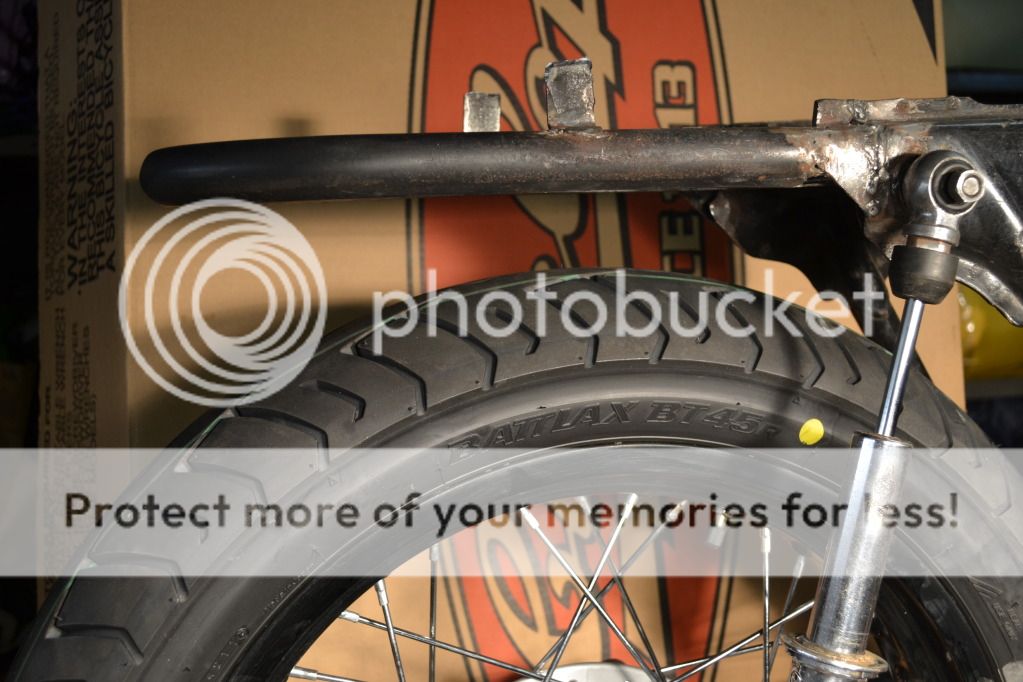
So I carefully marked the tank where it was hitting the frame and estimated how much needed to be removed to clear the frame
DSC_6256.jpg


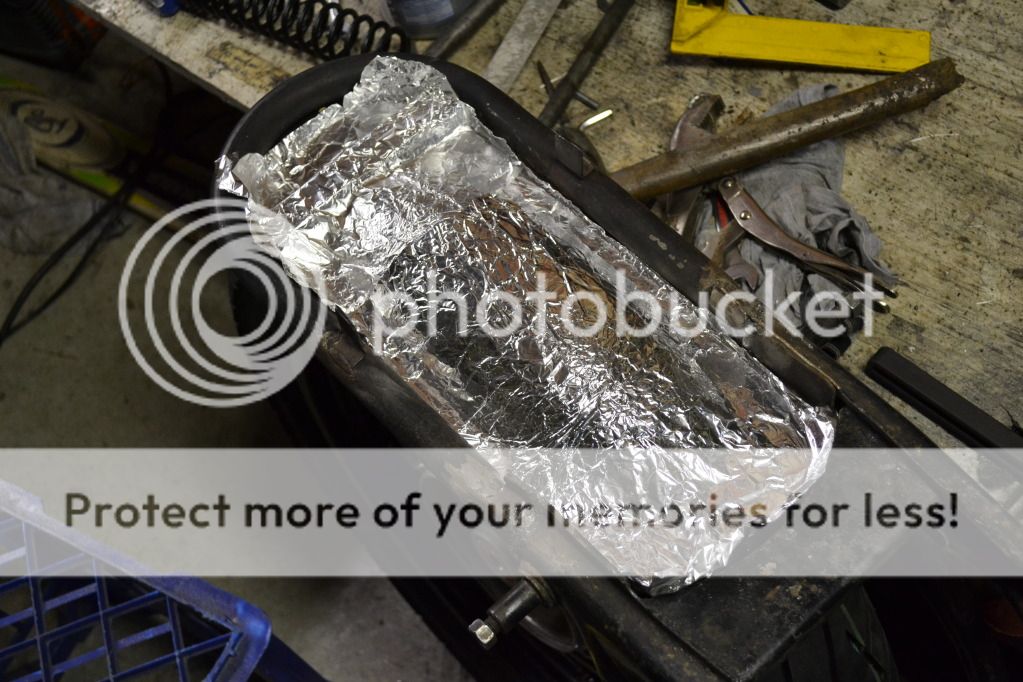
Then with my dremel in hand and my heart in my mouth I started to cut into the tank
DSC_6261.jpg


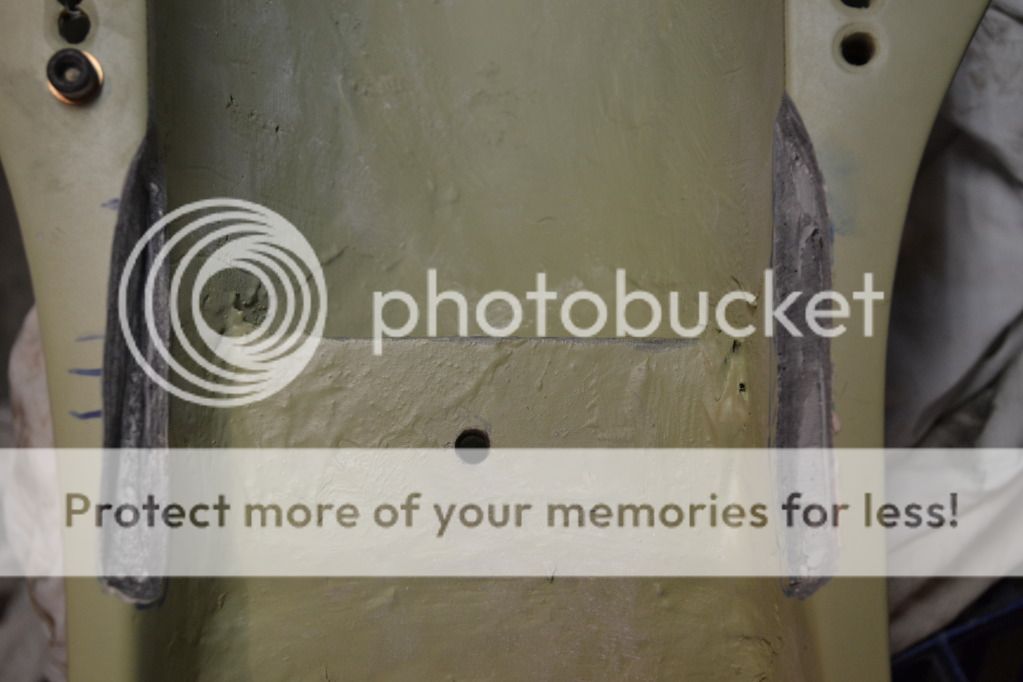
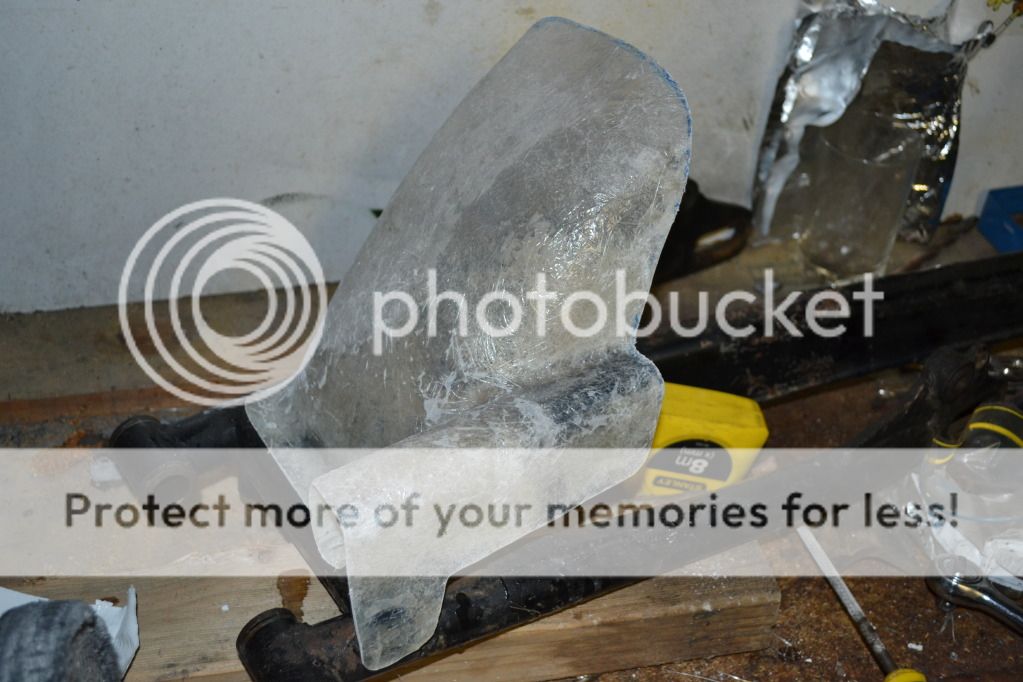
Both sides cut away and no sign of having entered the interior of the tank. :) Whew!!
DSC_6270.jpg


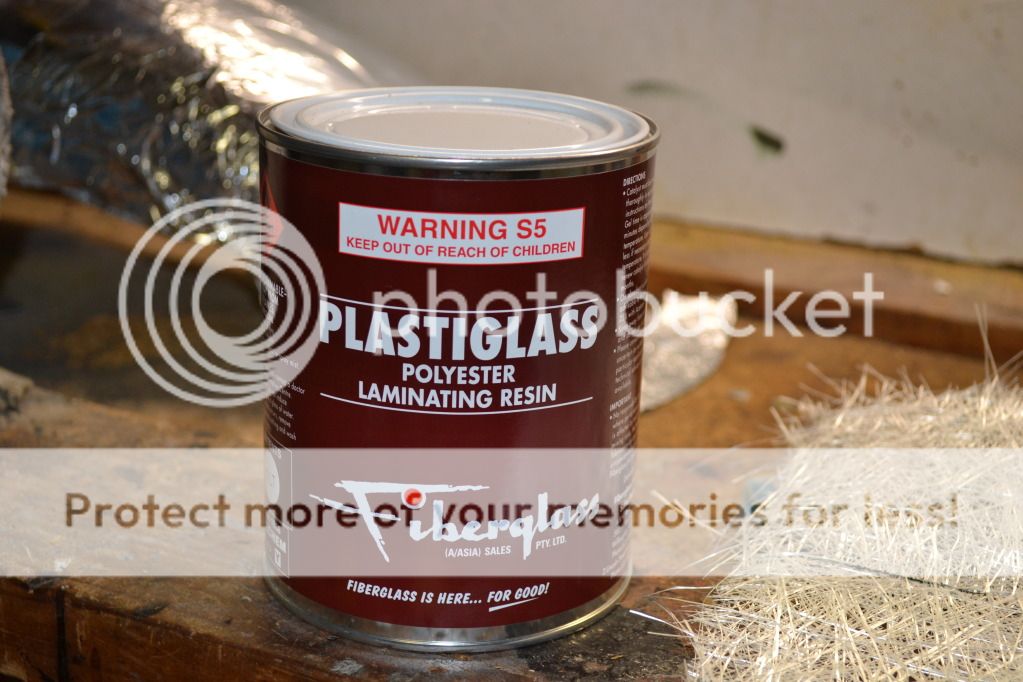
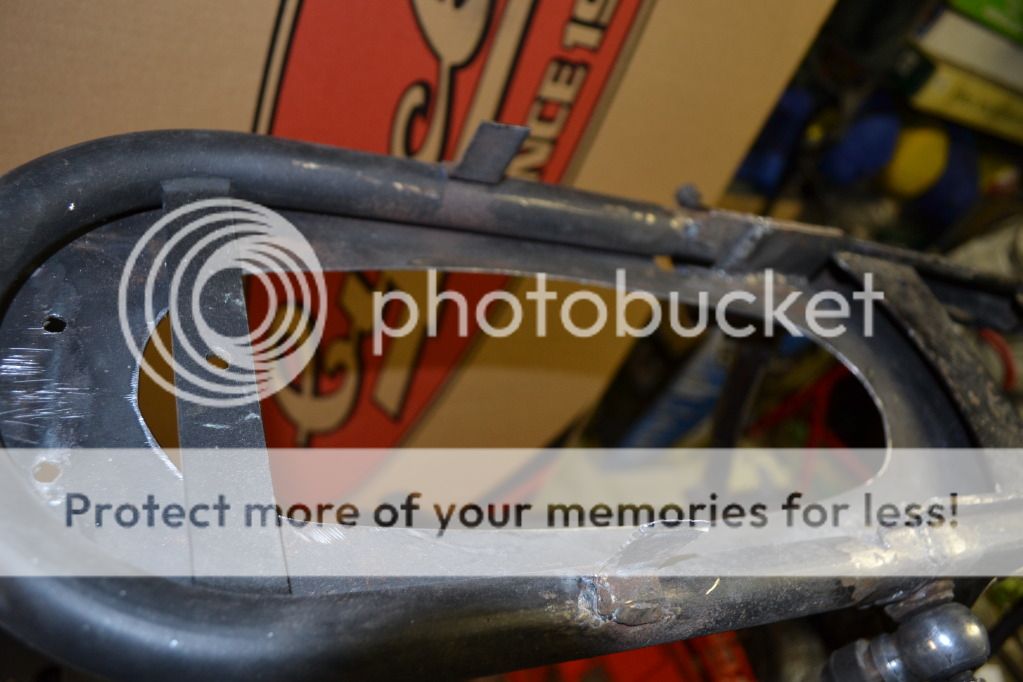
I don't know how thick the remaining material is but it feels pretty solid. There's plenty of clearance now so I may just run a bit of resin over the cut back sections just to be sure they're fuel-tight.
DSC_6266.jpg


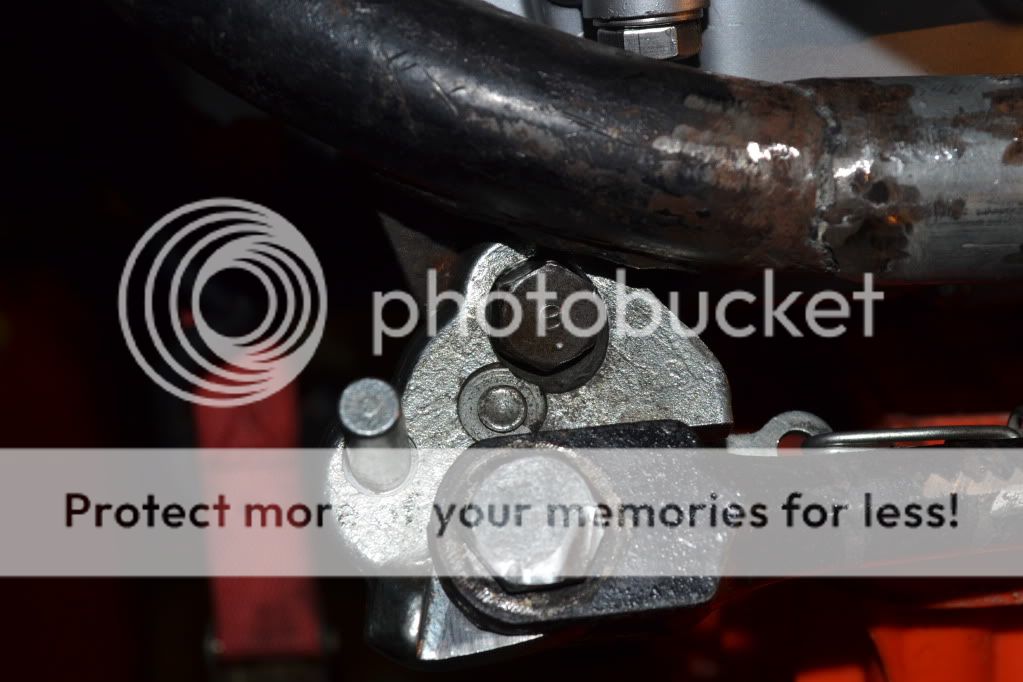
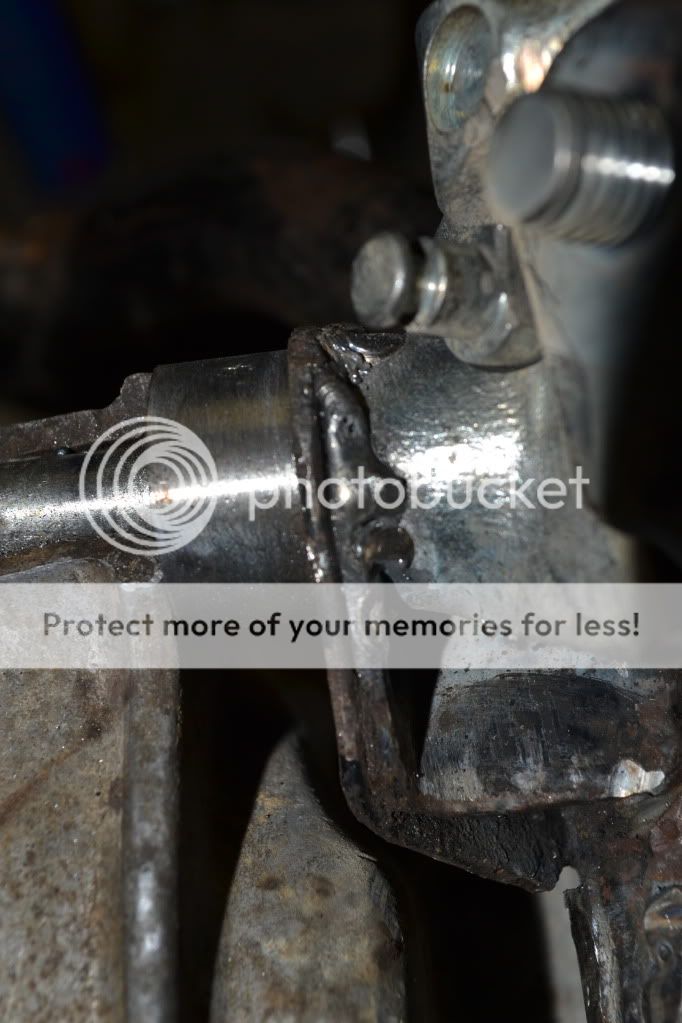
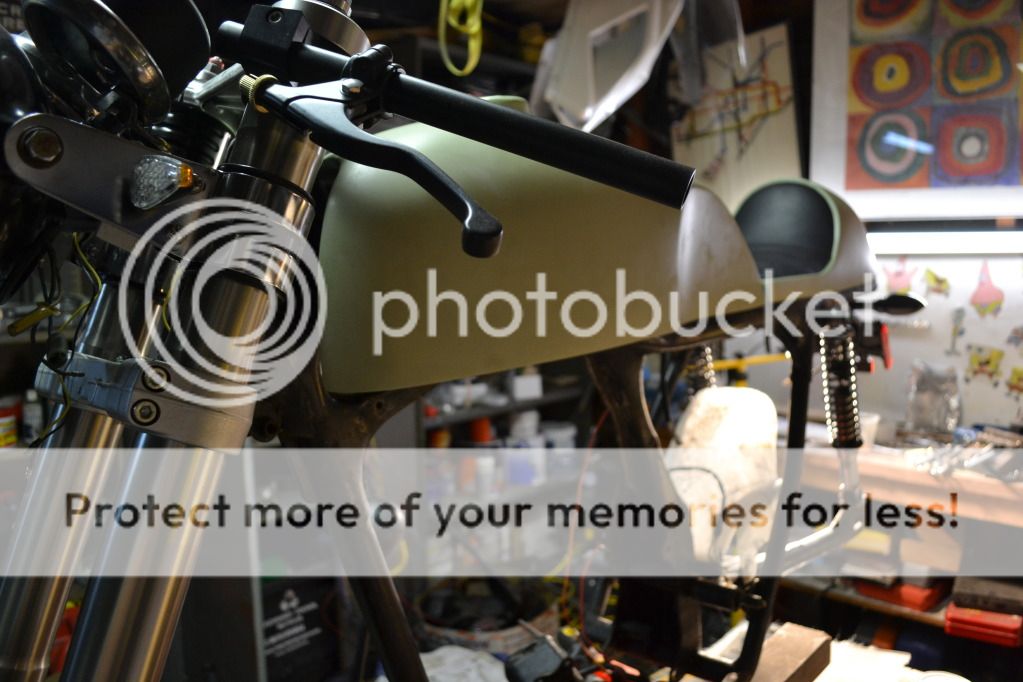
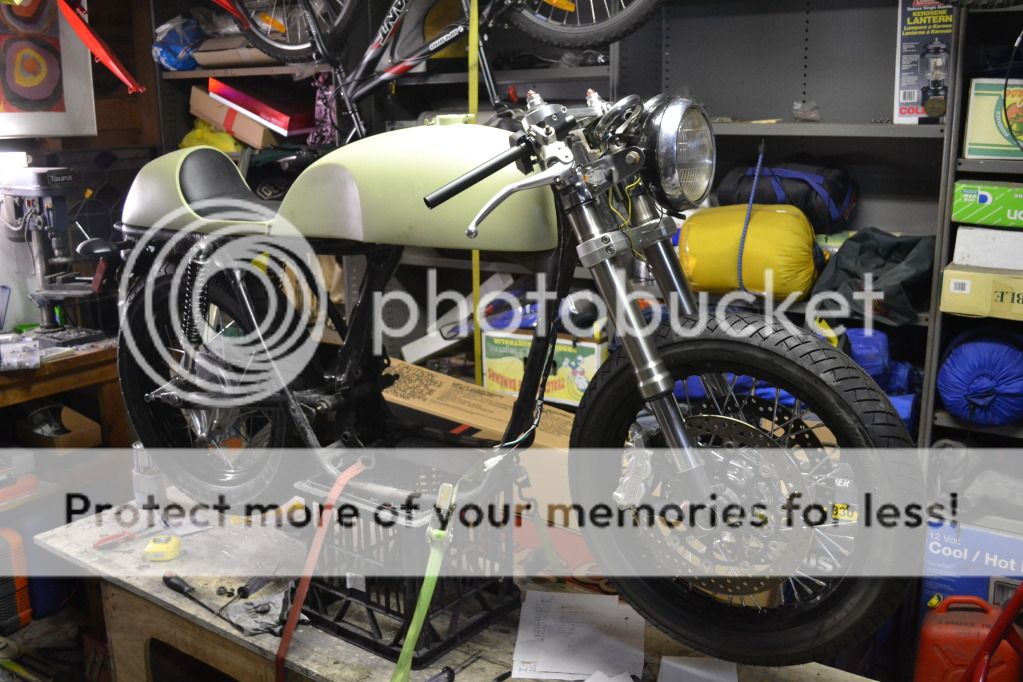
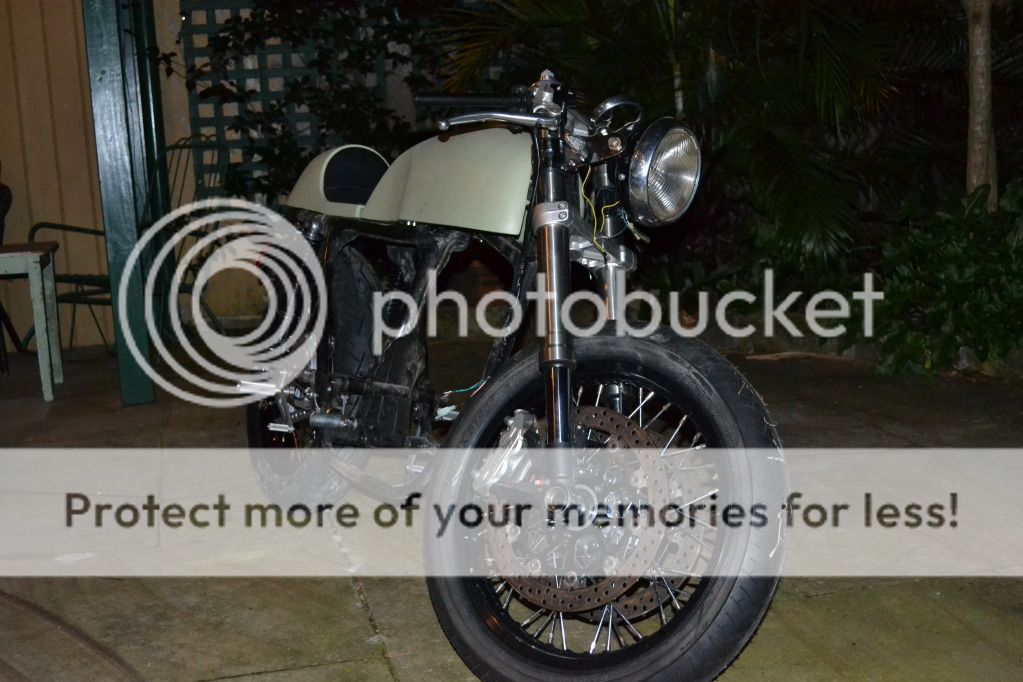
Tank/seat continuity line looks neat and the tank is resting on the rubber!
DSC_6271.jpg

DSC_6286.jpg

DSC_6289.jpg


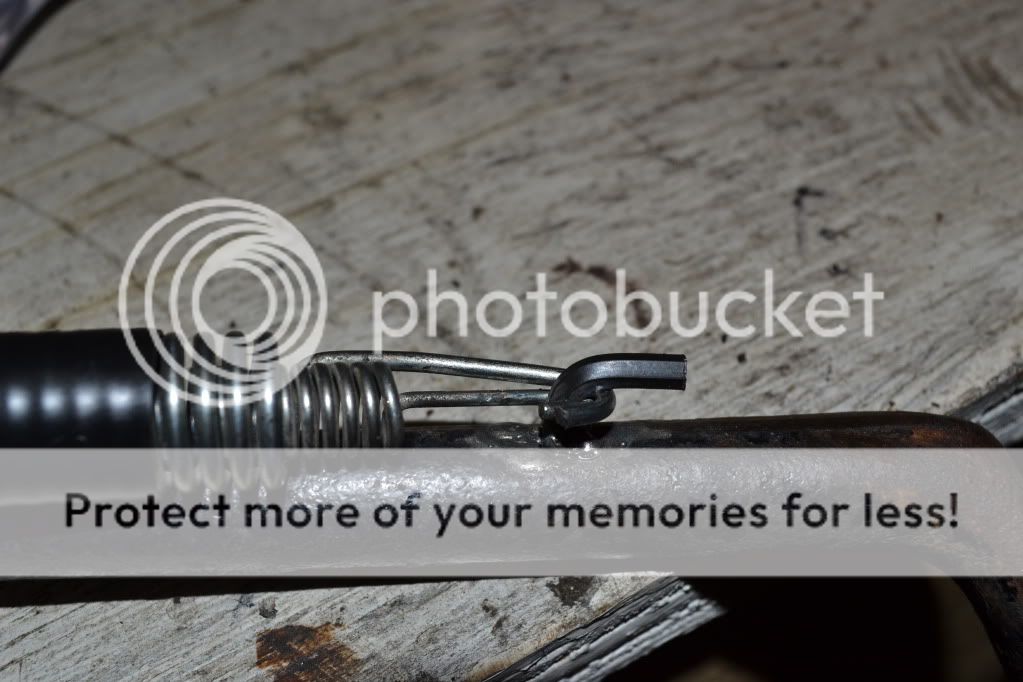
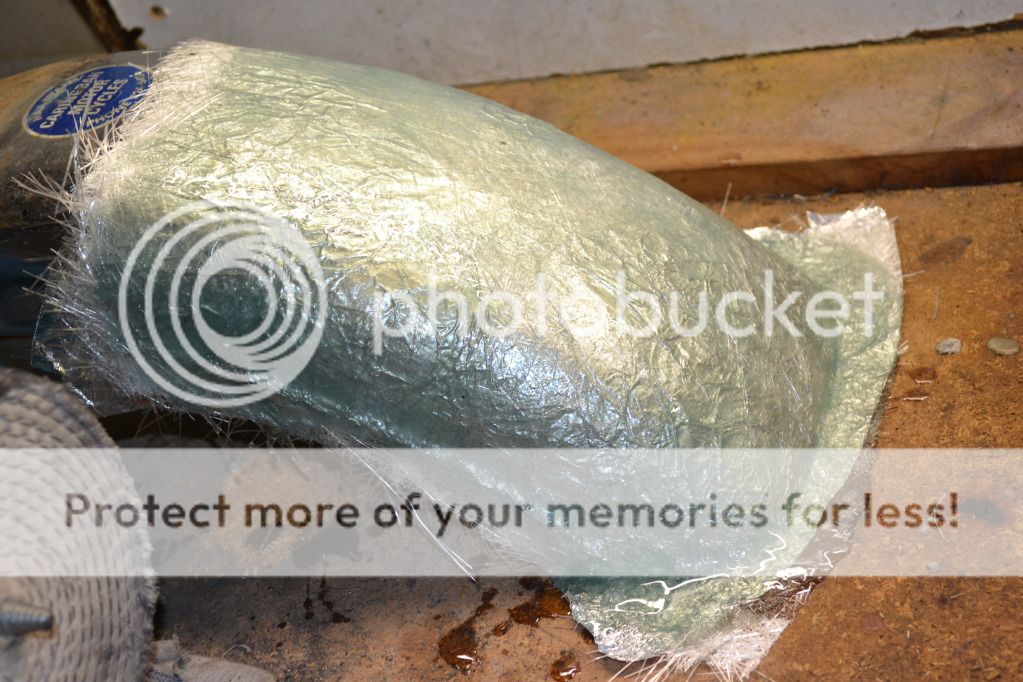
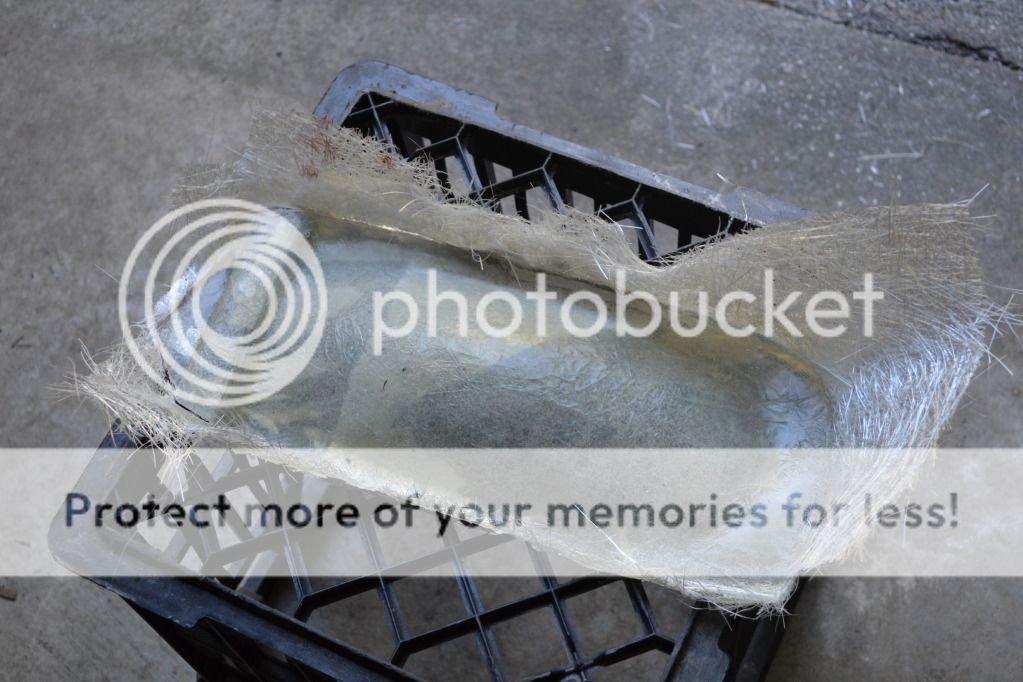
Next victory was completing my rear hugger. The first stage (previously posted) used part of the rear mudguard as a plug. I then attached stage 1 to the swing arm along with the chain guard and used that as a plug for stage 2
DSC_6251.jpg


Popped it off the plug (pulled some paint off with it)...
DSC_6252.jpg


After a bit of filing, the end result fits perfectly. Still needs filler, sanding, painting etc. All that boring stuff
DSC_6255.jpg


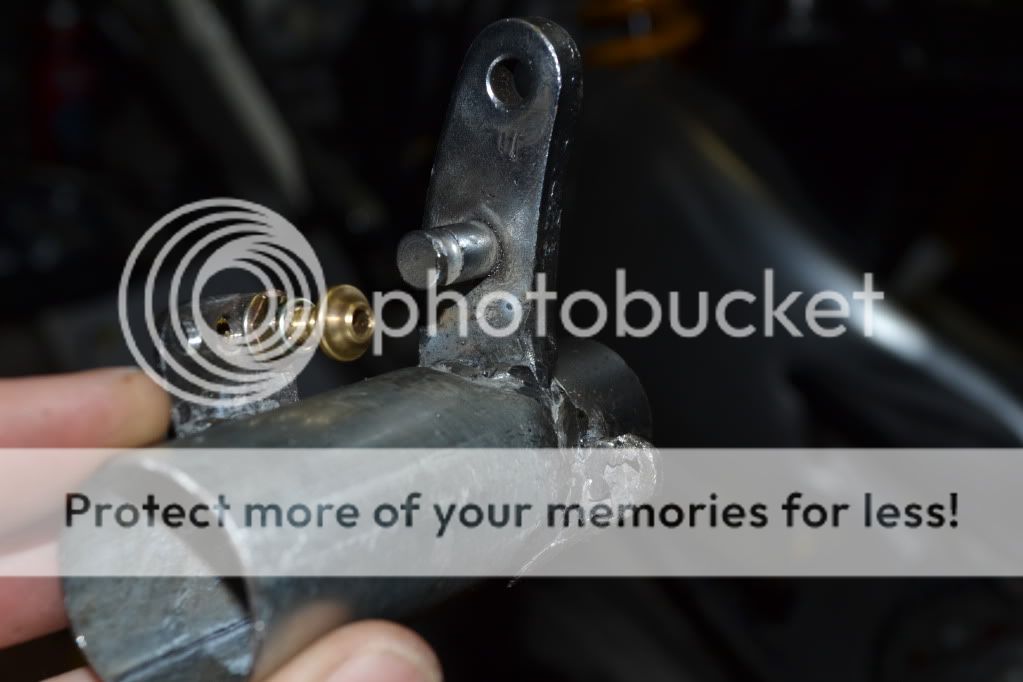
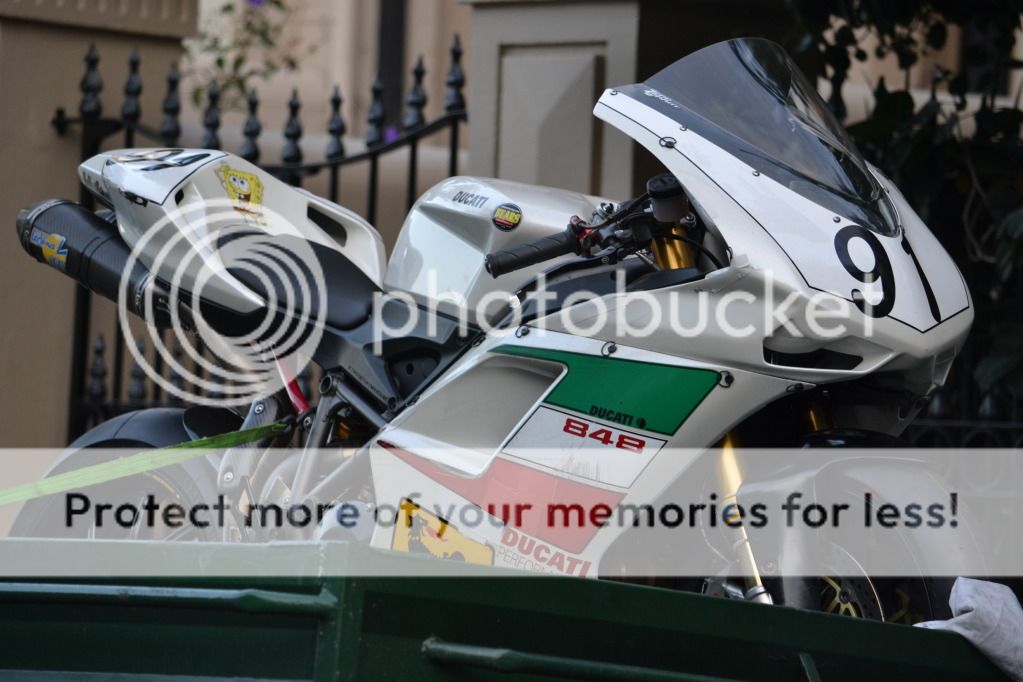
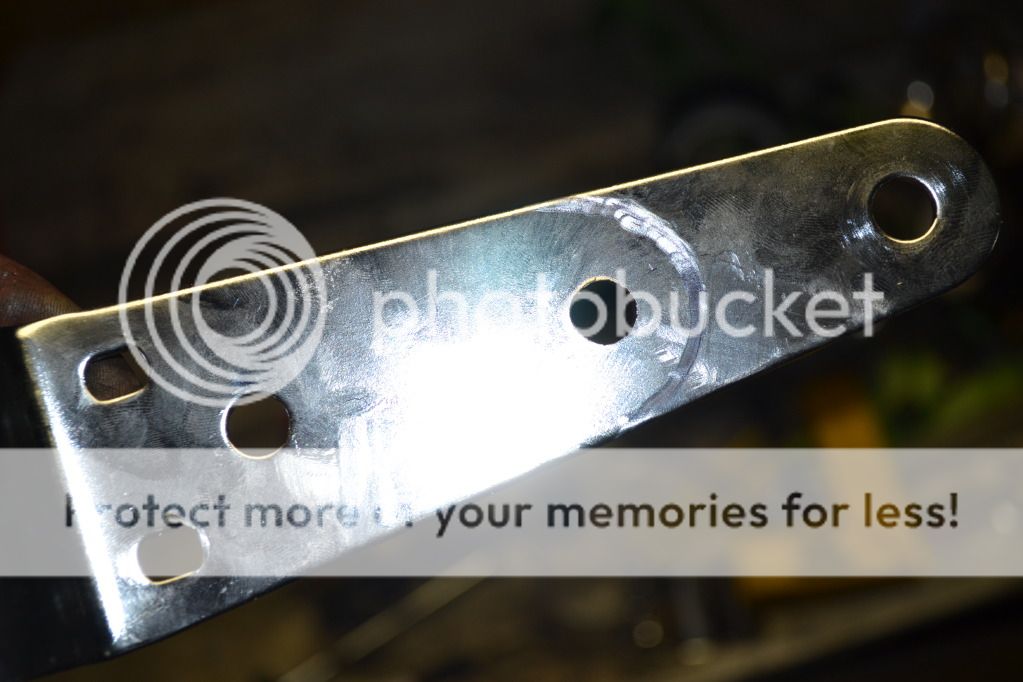
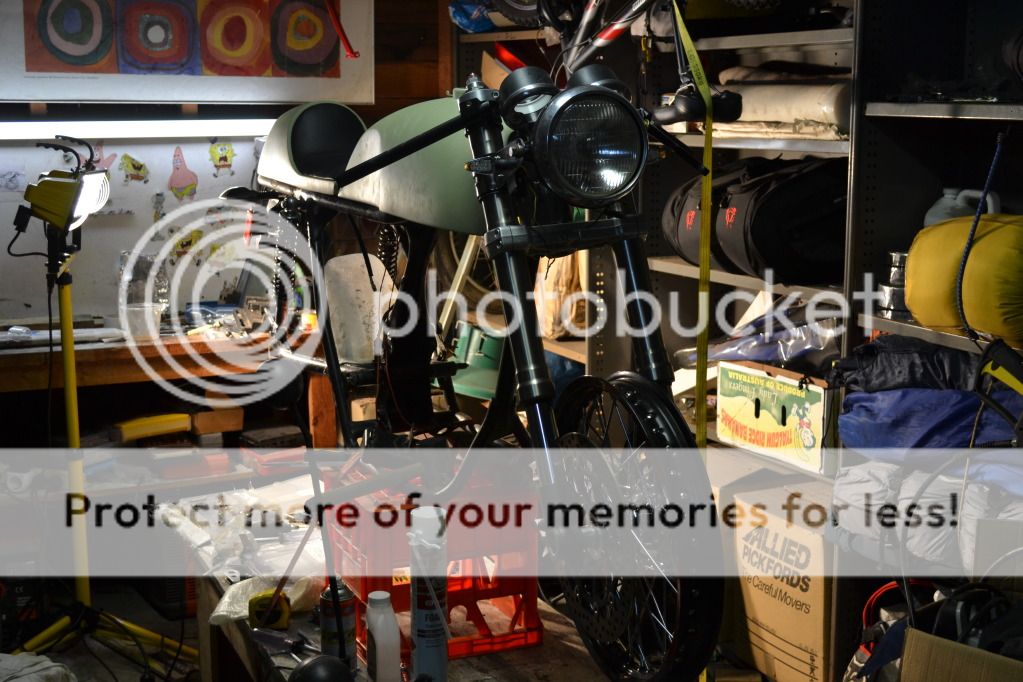
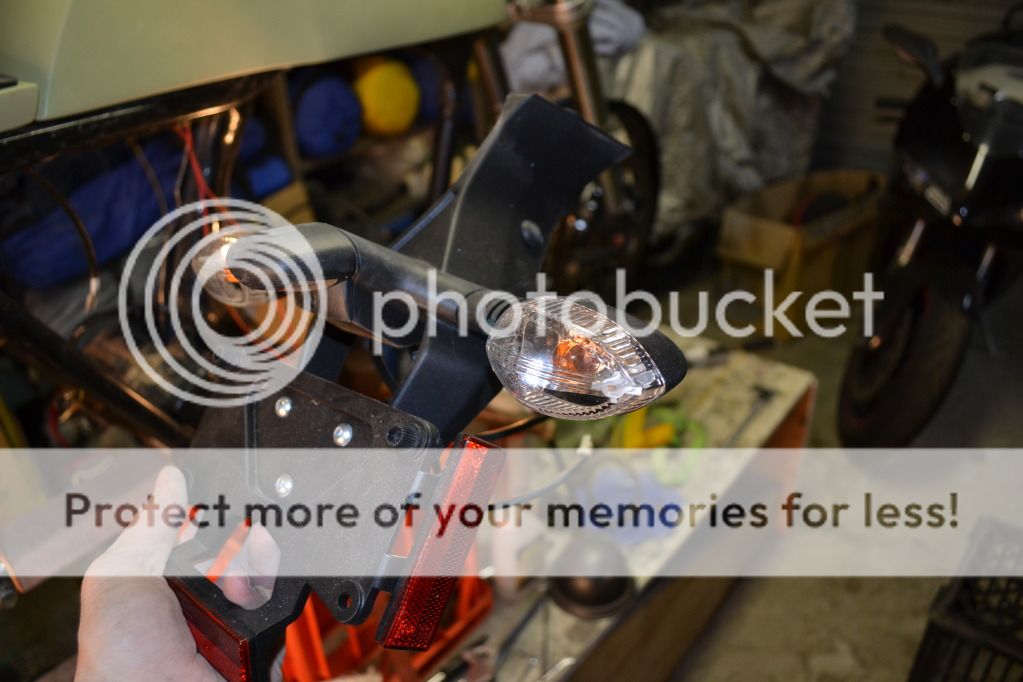
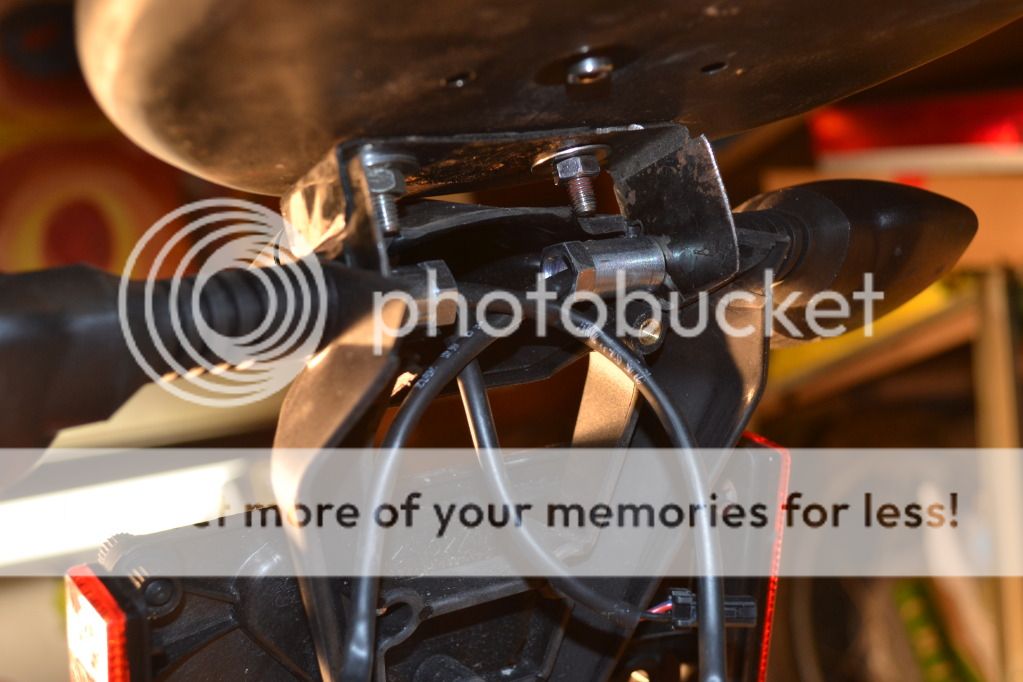
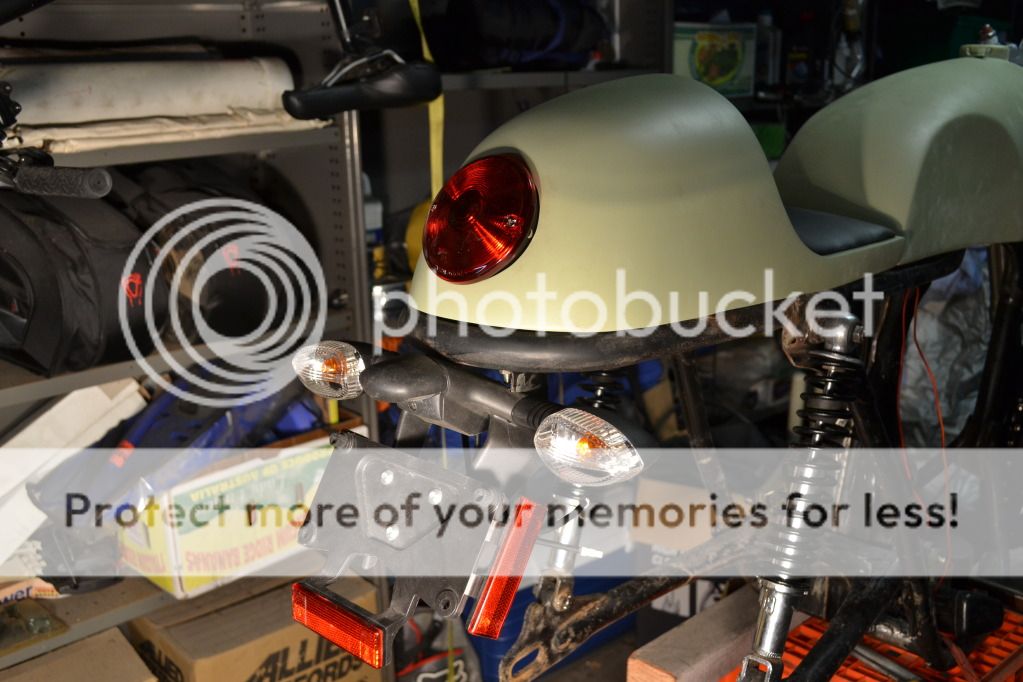
Next in this epic weekend of achievement was the mounting of rear indicators, license plate holder, license plate light and tail light. The indicators and license plate mount is from the 848.
DSC_6272.jpg


I had to cut the top part off and then fabricated a nice little bracket from the chopped up old battery box to mount the whole assembly at the back of the seat hoop
DSC_6283.jpg

DSC_6279.jpg


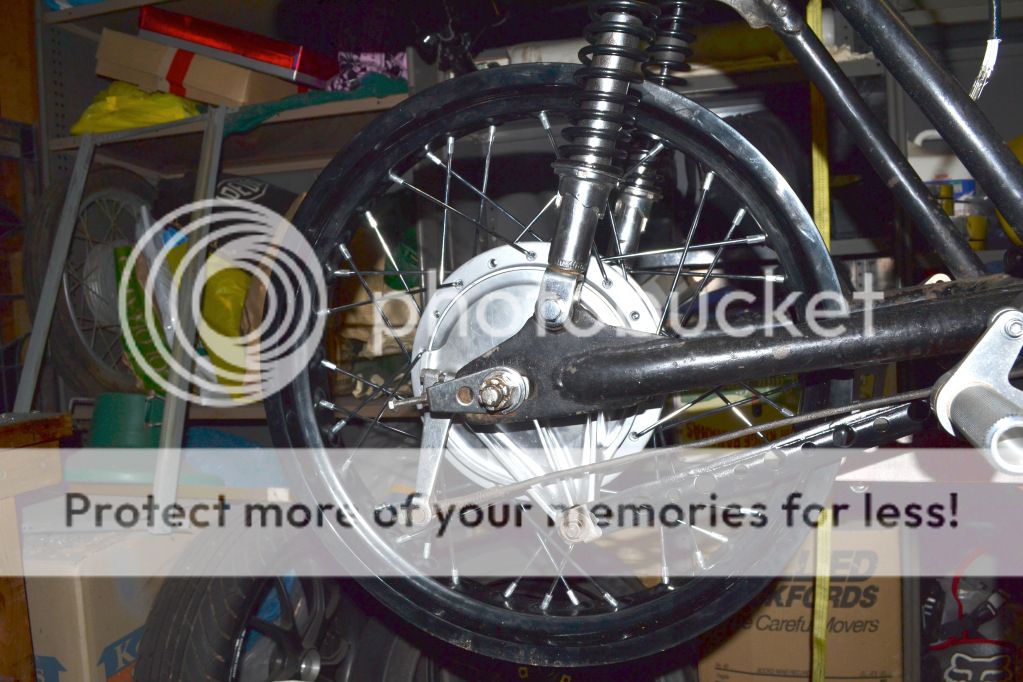
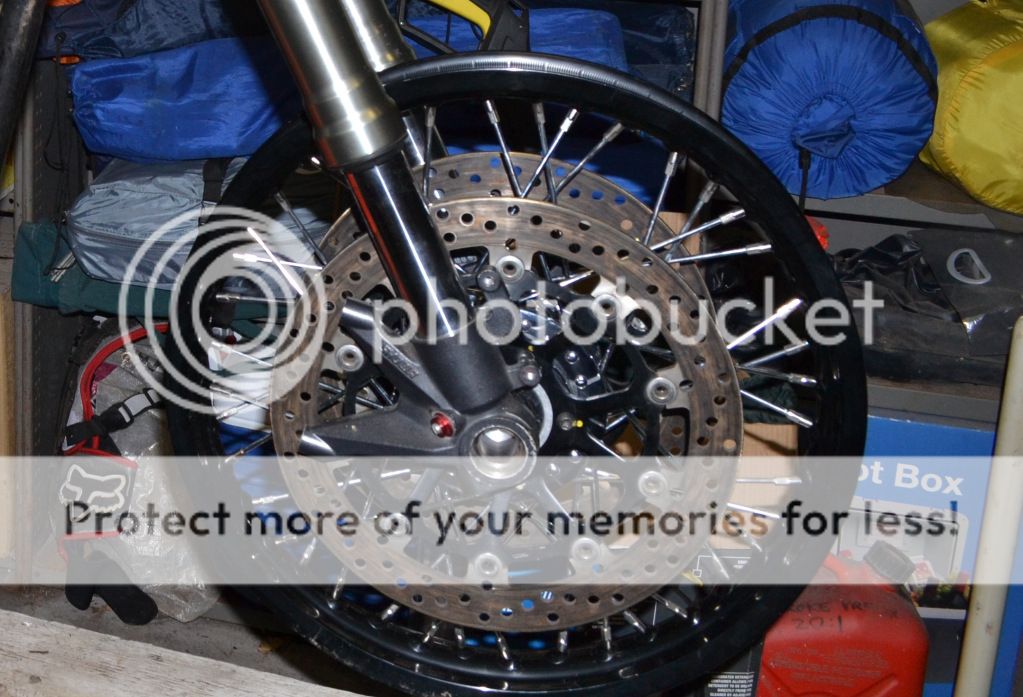
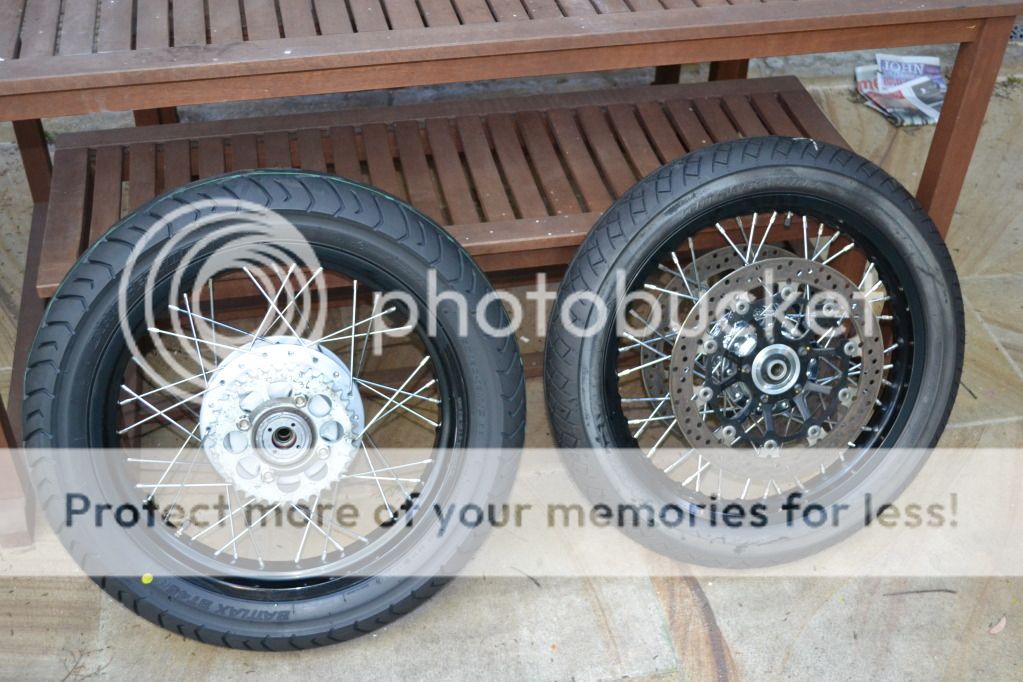
Now just waiting to get my rear wheel back from re-truing so I can get a tyre on it so I can check clearance of the tyre with the rear seat pan so I can send the frame, swing arm etc for painting so I can finish this bloody thing...

That's all for now folks!
 
ducatiboy said:
To my thousands of fans and followers I'd like to apologise for the lack of updates recently. Sadly work on the CB 350 has ground to a halt...

First I had to get my race bike ready for an Easter meeting and then I was away for a week working in the country. Here's the 848 all loaded up and ready to go

DSC_6201.jpg


And here's a link to footage of you racing last year; at the end is the race where you picked up those scratches under the 848 insignia !
http://www.youtube.com/watch?v=9MX0qpSpKmY
 
Oh my God!! Is there no end to the slander and rumour-mongering amongst the paparazzi who follow me constantly?

I don't see any crash in the footage you posted KC! All I see is me having to be picked up when a little electrical problem forced me to pull off the track and be picked up by the retrieval vehicle at the end of the race. And even if (IF KC, IF...) needing to be picked up was the result of a teeny weeny little crash, there is a popular saying that says if you're not crashing every now and then, you're just not going hard enough. Not that it applies in this case. At all.
 
LOL nice to see a member having a crack, even with those rumoured electrical issues ;D
 
Yes Andy, you have to have a go don't you, otherwise what's the point of all this time we spend in the shed tinkering on the two wheeled beasties? You have to get out there and rev it to the red every now and then!

So if you had to choose just one bike that you've had in your life that you sold and regretted ever since which would it be? Which one would you give your left testicle to have back again? For me it would be my Ducati TT2 race bike (identical to the one in my avatar). In honour of the memory of that beautiful bike, I decided I would make my speedo/tacho faces to be Veglia replicas courtesy of the awesome Sonreir who made them for me for the grand sum of $25. Honestly, all you bike builders, do yourselves a favour and get in touch with Sonreir (on this forum) and order some speedo/tacho faces made to your own custom design. He will reply to your message in a matter of seconds, will have the first prototype drawn up and emailled back to you within minutes and will revise his work 2, 3, 4, 5 times or as many times as it takes to get the perfect end result. Here' are some pics.

Stickers as they arrived in the post

DSC_6398.jpg


Preparing the needles for painting (can't have white needles with a white face!!)…

DSC_6293.jpg

DSC_6294.jpg


Installed after an epic battle to refit the outer casings (pity about the cracked plastic face on the tacho but helps make it look old I guess)…

DSC_6407.jpg


With the strip LEDs connected to 12V (cracked plastic a little less noticeable with the backlight)…

DSC_6408.jpg


Got a few more things done over the weekend. New Tyres!! Woohoo! Bridgestone BT45 18 130/80 rear, 18 100/80 front. I have not added up how much it has cost to get these two wheels to this final state and I have no intention of doing so.

DSC_6337.jpg


Brake fluid reservoir from DanMoto arrived from the US

DSC_6336.jpg


My tank stickers from Malta…

DSC_6338.jpg
 
The major issue for the weekend however was dealing with the following problem.

Problem…

DSC_6341.jpg


The lack of clearance between the tyre and the seat pan has had me tearing my hair out. Luckily I have a lot of hair and have been able to cope (sort of). Here is my solution…

DSC_6378.jpg


I cut a hole in the seat pan (my angle grinder is my new best friend) more or less the shape of the tyre profile to accommodate the tyre as it rises during compression. This has created a couple of problems not the least of which is the giant hole that will now allows all sorts of road grime, stones, water, mud, road kill etc to contaminate the under seat area. So a cover has had to be manufactured from fibreglass, my favourite material.

First a layer of aluminium foil to cover the tyre…

DSC_6379.jpg


I have to confess to being just a little nervous about pouring a fast setting resin over the top of my brand new tyre and hideously expensive wheel but it all worked out ok.

DSC_6380.jpg


Popped it out after a couple of hours…

DSC_6381.jpg


And started trimming…

DSC_6383.jpg


Now all fits beautifully but forgot to take a photo of the finished product. Also had to raise the battery box because the raised and now curved seat pan could not be raised high enough with it in place. Also had to move the number plate/rear indicator hanger further rearward to make room for the tyre.The problem of the tyre hitting the seat pan is now 90% solved but the it still hits at full compression particularly when the wheel is all the way forward or all the way back in the swing arm. It's a bit annoying to have had to spend so much time to make this fit when the seat pan/frame loop was supposedly made by BCR specifically for the CB350. I can't see how it could ever fit without major adjustments. If anyone has bought the BCR seat pan/loop/battery box and fitted it, I'd be interested to hear how.

Anyway, I now have a rolling chassis with rear suspension that almost works…

DSC_6384.jpg

DSC_6394.jpg

DSC_6386.jpg


Looks a little high in the front/low in the rear. Will only know when I get chance to measure things up. Also the rear REALLY squats down when I sit on it. Uses up about half the available travel if not a little more. This last fact has got me thinking that I may have mixed up the fork springs with my shock springs because it CAN"T be right the way it is. Feels way undersprung. I'll have to dig out the other springs I have and see if they are really the rear shock springs and the ones on it are actually the stock fork springs!! That'd be awkward... :-[ :-[ :-[ :-[ :-[ ::) ::) ::) ::)
 
Yes the longer rear shock has been in the back of my mind for a while but I was going to try and avoid it if possible. Also plenty of room on the fork legs for dropping front (i.e. raising forks through triples) but not sure about the travel and whether there is room for a mudguard above the tyre and still allow travel without hitting lower triple. I'll have to measure. The problem is the forks were made for low profile radial tyres on 17 inch wheels, not a high profile tyre on 18 inch rim!

The good thing about a flat pan under the seat is that it's easy to bolt electrical components to it...oh well, no big deal. Just have to find somewhere else for the bits and pieces....
 
just found this build!

nice one!
ill be having a geeze from now on.
great idea with the tyre mold in the undertray!
looks like its going to be killer!
 
Back
Top Bottom