CB360 - Clean and simple

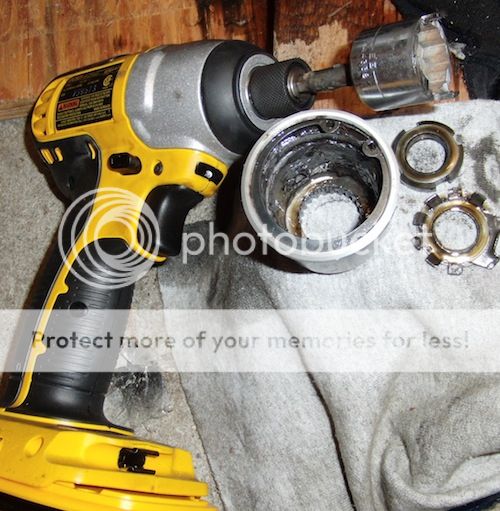
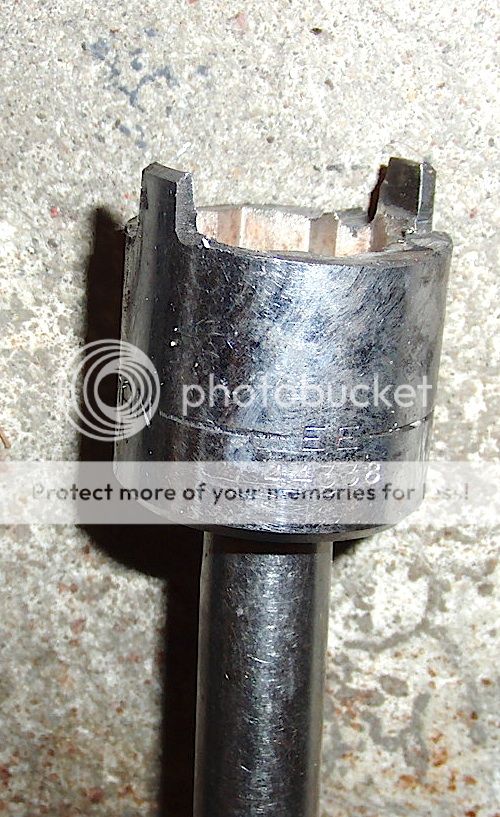
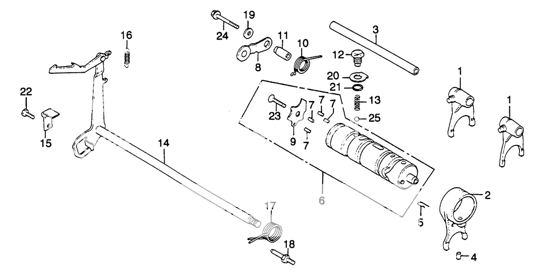
There's no paper oil filter on the 360. The part you're stuck on where you need the 4 prong tool to remove it is your 'oil filter' it spins the oil running through it and flings all the particles to the outside edges. It just needs to be cleaned and a new o-ring never hurts. #14 on the diagram is the centrifugal filter.

8bf24b0af10d19fbc6f0f30842f5ce49.jpg


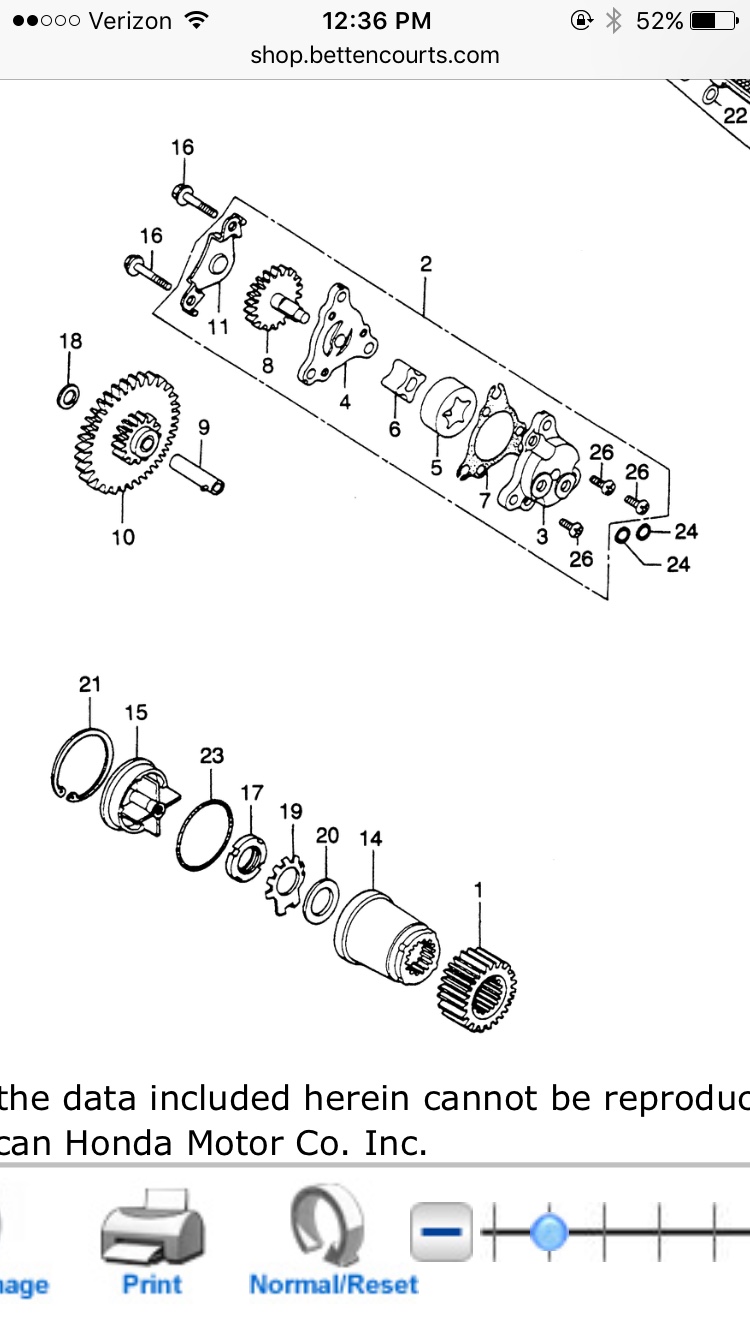
There's a screen on the sump too. Which should just be cleaned.

Sent from my iPhone using DO THE TON
 
+1 Pull snap ring #21 out. then thread a long M6 bolt (old case bolt works well) into the hole in the lid #15. AS you thread bolt in the lid. It will push the lid off and it will then fall into your hands.

reach in w a punch or screwdriver and straighten the tabs on the lock washer. so you can fit the socket tool.

I made one from a 13/16 sockets...so fari tis worked n 2 bikes my 360 and buddies KZ1000.

Also, if you find things spin on dis-assembly or re-assembly. Jamb a penny into the teeth of the gears to hold things. I got a pic of mine but cant find the pic at the moment.
CIMG1781.jpg


spanner1316.jpg
 
trek97 said:
Also, if you find things spin on dis-assembly or re-assembly. Jamb a penny into the teeth of the gears to hold things.

Yup good ol' Lincoln is the cheapest tool in my toolbox


Sent from my iPhone using DO THE TON
 
I also took this apart. and dont recall any drama. so it mustve been straight forward.

Keep an eye out for the little ball #25 and spring #13 on the shift drum. its under the large bolt #12 looking thing on the top rear of the top case.

that little ball needs to go back into the right spot on shift drum.

Screenshot2012-11-08at34950AM.png
 
trek97 said:
I replace a fair amount of bearings at my job. I would consider replacing the crank bearings. As, you will have trouble getting it all cleaned out.

sucks.

Replacing anything other than the outer bearing is a major job and will be real expensive

trek97 said:
I also took this apart. and dont recall any drama. so it mustve been straight forward.

Keep an eye out for the little ball #25 and spring #13 on the shift drum. its under the large bolt #12 looking thing on the top rear of the top case.

that little ball needs to go back into the right spot on shift drum.

Screenshot2012-11-08at34950AM.png

Pin#4 and clip #5 are a bit of a pain to re-fit but not a disaster. #12 to #25 fit from the outside so can wait until case is re-assembled if you want
 
crazypj said:
Pin#4 and clip #5 are a bit of a pain to re-fit but not a disaster. #12 to #25 fit from the outside so can wait until case is re-assembled if you want

I didnt take any of the tranny stuff apart. Left all the gears and forks their shafts. Just swapped them from bottom case to top case, immediately. SO I didnt have any of those headaches.
 
They may not need to come out, depends if beads got into mechanism.
After you've done a few of these motors you can go from a 'dead' bike to engine out, complete engine strip, new cam chain and tensioners, clean everything and have it running in about 12 hrs (probably less if you rush?)
 
crazypj said:
After you've done a few of these motors you can go from a 'dead' bike to engine out, complete engine strip, new cam chain and tensioners, clean everything and have it running in about 12 hrs (probably less if you rush?)
This is my plan. Sometime around 2am. The night before I have to leave with it for Barber.
 
The oil filter wrench came in so I was able to make some progress.

JVOz8uJ.jpg

3g4JvTJ.jpg

KThmaAZ.jpg


Splitting the case.
78IvoRZ.jpg

TDc6oDD.jpg


Not too dirty, but could use an extra cleaning while I'm in here... the good news is there isn't any glass.
JxQ4gGB.jpg

1XjwWCM.jpg


Ended up breaking one of the bolts though, so now I need to find another one.
d6sSrM5.jpg
 
The bottom of transmission area looks pretty nasty.
You should pull out the pins and remove the steel plates below crank to see how bad it is underneath them
Unlucky about the long bolt snapping, at least you got the broken piece out though. (It's actually pretty common in my experience)
It's a standard 6x1mm as far as I recall but it's always wise to actually measure it (Honda sometimes use 7mm bolts in 'high stress' area's) You can probably get a high tensile (minimum grade 8~9) bolt the correct length although Honda probably still use (130mm long?) on somehting so it will probably cross reference (if you can find a parts person worth a damn)
 
Less than ideal. But, as long as its in there...not a terrible price considering free shipping.

http://www.ebay.com/itm/1974-1975-1976-1977-cj360-cb360-cl360-CJ-CB-CL-360-engine-case-bolt-bolts-set-/112118039346?hash=item1a1ac18332:g:XvYAAOSwdIFXyMwl&vxp=mtr

Or for just a few dollars more. A bunch more misc stuff you dont need. But may come in handy one day. Even just to help someone else out of the same sort of predicament
.
http://www.ebay.com/itm/1976-HONDA-CB360T-CB360-MISC-ENGINE-HARDWARE-BOLTS-AND-PARTS-/401026918321?hash=item5d5f1127b1:g:1pwAAOSwvt1WR2kF&vxp=mtr
 
crazypj said:
The bottom of transmission area looks pretty nasty.
You should pull out the pins and remove the steel plates below crank to see how bad it is underneath them
Unlucky about the long bolt snapping, at least you got the broken piece out though. (It's actually pretty common in my experience)
It's a standard 6x1mm as far as I recall but it's always wise to actually measure it (Honda sometimes use 7mm bolts in 'high stress' area's) You can probably get a high tensile (minimum grade 8~9) bolt the correct length although Honda probably still use (130mm long?) on somehting so it will probably cross reference (if you can find a parts person worth a damn)

Is there a trick to getting the pin out? I haven't looked at it yet but it didn't seem loose either.

trek97 said:
Less than ideal. But, as long as its in there...not a terrible price considering free shipping.

http://www.ebay.com/itm/1974-1975-1976-1977-cj360-cb360-cl360-CJ-CB-CL-360-engine-case-bolt-bolts-set-/112118039346?hash=item1a1ac18332:g:XvYAAOSwdIFXyMwl&vxp=mtr

Thanks! I found a set for $10 shipped last night... so if anyone needs any of the other bolts I'll have an extra.

I also forgot to bend the tab down on the lock washer for the oil filter and ended up shearing it off.
vIYl5wY.jpg


Found another NOS one for a few bucks though...Probably not necessary at all but it would irk me knowing it's like that and I'll just clean it up and keep it as a spare. The part number is 90431-292-000 if that helps anyone else.
 
The pins that hold the oil separators in just push downwards a little (the spring of the steel plate holds it tight) and slides out from the side. There's a notch in the pin that keeps it locked in place so just take note of it.


Sent from my iPhone using DO THE TON
 
I'm kinda glad that over several years so many people have followed my instructions with 360's.
Saves me typing out the same stuff all the time 8) ;D
 
adventurco said:
The pins that hold the oil separators in just push downwards a little (the spring of the steel plate holds it tight) and slides out from the side. There's a notch in the pin that keeps it locked in place so just take note of it.

Sounds easy enough.


Thinking about getting this stuff for re-assembly too. Figure it'd be better than snapping all the bolts later if anything needs to be taken back apart. Anyone use it before?
https://www.amazon.com/gp/product/B00CEF65T4/ref=as_li_tl?ie=UTF8&tag=timnummy-20&camp=1789&creative=9325&linkCode=as2&creativeASIN=B00CEF65T4&linkId=17e3d063b16bcab25d96a4e433a90d75
 
Looks like only the plastic part was printed and the metal part is original?
 
JadusMotorcycleParts said:
Cool! Is that a printrbot metal you have there? Also, is that the Mercedes emblem? Not to the Honda right?

Yep, it's to a Mercedes. Still debating about how to do the ignition on the Honda...

crazypj said:
Looks like only the plastic part was printed and the metal part is original?

And you're right, the old plastic on the top of the metal key broke apart so I just printed a new top for it around the metal part.
 
Back
Top Bottom