Follow along with the video below to see how to install our site as a web app on your home screen.
Note: This feature currently requires accessing the site using the built-in Safari browser.
We noticed you are blocking ads. DO THE TON only works with community supporters. Most are active members of the site with small businesses. Please consider disabling your ad blocking tool and checking out the businesses that help keep our site up and free.
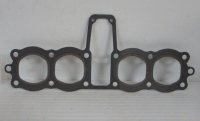
The build-up was fairly significant (0.5mm high maybe) - I guess that's the height of the compressed gasket in that case. It took some work on the honing glass to get the surface totally clean.
A trip to Gabriel's always costs me a few quid I wasn't expecting to spend, but always money well spent none the less. He's been repairing and restoring old Japanese bikes for 30+ years, so he knows his way around. Dropped off my frame and some parts for powdercoat/glass bead cleaning, and asked him if he could flex hone my cylinders to get that nice cross hatch. He told me he always sends his cylinders off to his machine shop connection and get it done right for $50 - didn't take long to agree that that was a very good idea.
While it's there I may get the few busted fins repaired and get the whole block glass bead cleaned too, if the price is doable. Do it right - deal with the wallet-dent later.
Learnt something the other day about brake fluid. DOT 5 is unlike DOT 3, 4 and 5.1 in that it is silicon based and not glycol-ether based. This means alls kinds of things, one of them being DOT 5 will not attack paintwork unlike the others.
The entire brake system must be either new or completely restored (there must be no moisture in the system, nor can DOT 5 be mixed with any other kind of brake fluid) - but on all the master cylinders I've seen (at least on older bikes) it always says DOT 3 (or DOT 4) ONLY.
Has anyone used DOT 5 in an older bike? As long as I follow the guidelines strictly, is there anything else I should look out for?
DOT 5 is actually recommended for antique vehicles because it has a much longer shelf life. So, for anything that sits for longer periods of time (looking at you Canadians with hellacious winters) it's a better fluid to use. Sludging is the concern if you mix the two, so definitely make sure you are putting it into a fresh system or one that has been cleaned really well. Also, it cannot be used on modern bikes with ABS.
I read that Irk - definitely a no-go with ABS systems. I'm hoping to powdercoat the brake calipers and in the process of talking about the pros and cons, the whole DOT 5 conversation came up - largely because whenever I bleed my brake lines I end up wearing half of it and getting the rest on the calipers. Knowing DOT 5 won't attack the paint/powder is great, but now knowing that it is actually recommended for older bikes (and yeah, especially ones that hibernate for 5 months) is a real bonus.
Are there any negatives with DOT 5 fluid in older bikes?
Cheers mate, looks to be almost exactly the same but I know Matt has a very good reputation for a very good reason. I'll definitely bear his offering in mind.
The one you linked may be ok, but I know Matt;s will light the road correctly and not burn out in a Week LOL. I grabbed his AUX lights and they are super well made vs some things I have seen online and at like Princess Auto or CT for the same price.
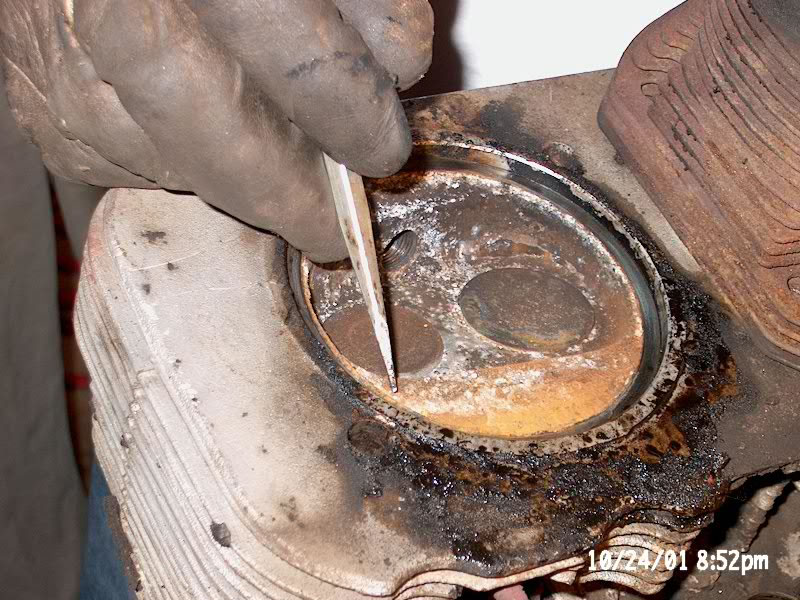
Installing the valves today - all the intakes went in no problem, poured acetone into the ports and no leaks. But I've got an acetone leak on one exhaust valve - I've pulled the thing out now three times and re-lapped it but it's still leaking. After lapping it didn't show that nice clean grey line -
- maybe a bit hard to see in the photo though. Could it be leaking because the seat on the valve itself is no good, or perhaps the seat itself in the head? What would I check to find out which it is - if not both?
- I'll try and get some better pics. This is after 4 laps, and it still doesn't have that clean, great line that the other valves/seats have after lapping. To compare, here's what one of my decent seats looks like -
Guess I'm wondering what the options are now. New valve? Take the head to a machine shop and have them re-cut the seat? New seat? Or just more lapping? And what would cause this in the first place?
Thanks for the insight gents. I think maybe I figured something out over the weekend. While I was lapping the valves I kept finding that the the suction tool was pulling off the valve face. I wondered if this may have been caused by one of (or both) of the following - 1. the face of the valve wasn't smooth enough and 2. the lapping compound was too thick. So I took one of the two valves that we were leaking (the other 14 were sealing just fine) and ran the face over the brass wheel on my grinder. Then I added a small amount of WD40 to the polishing compound - that worked a charm.
I think what was happening is that the thickness of the compound (it's also pretty cold still in my garage) was preventing me from being able to grind the compound down enough while lapping the valve, as the suction tool would pop off before it got thin enough. By adding the oil, it lubricated the lap more and therefore the lapping compound broke down completely. When I reinstalled the two valves that had been leaking before and filled the port with acetone guess what...no leaks.
With the valves installed I moved on to the forks. To anyone reading this that hasn't disassembled these forks before it's a really easy job with the right tools - but (as I found out on my last CB750) a right pain in the arse without them. The good news is, the right tools turn out to be not too many tools at all. Once you've got the oil and long spring out (there are two springs in there), clamp the lower tube in your vise. There's a 6mm allen bolt at the bottom of the lower fork tube - chances are you won't be able to remove it as it's bolted to a stem that sits underneath the long spring (in the bottom of the lower tube). Turning the bolt will just spin that stem. Here's where the other tool comes in - a broom. Shove the broom down the upper tube and put pressure on that stem sitting in the lower tube. With pressure on the stem you can then engage the allen bolt and unscrew it. For the visually motivated (like me) -
Remove the fork from the vise, and tip out the stem (there will be a smaller spring on this stem too - if it doesn't come out with the stem then it'll be stuck (loosely) on the bottom of the lower tube, easily removed). Then you can remove the dust seal, the large circlip (I use a couple of mechanic's picks to get that out), and slide the upper tube in a kind of slidehammer motion to ease out the fork seal. Job's a good'un.
I've found that if you remove that Allen bolt FIRST (but after draining), you don't need to worry about the the inside spinning. Loosen the top cap afterward (carefully). An air impact is good for getting the Allen loose quickly.
This site uses cookies to help personalise content, tailor your experience and to keep you logged in if you register.
By continuing to use this site, you are consenting to our use of cookies.