1981 GS1000L bob/chop/cafe?

bcvickers

New Member
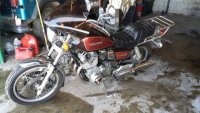
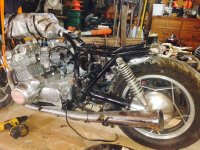
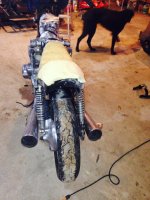
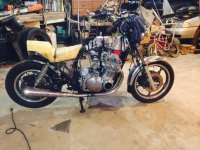
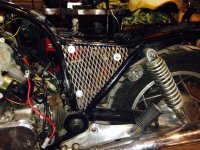
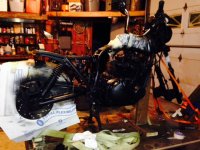
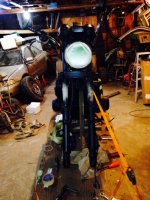
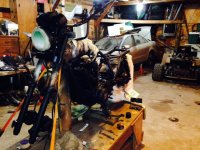
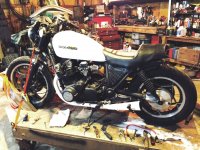
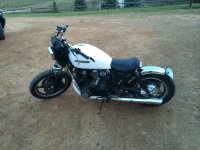
First off I'd like to extend a big thank you to this board for all the inspiration! This place really is a wealth of knowledge and advice. I've been riding since I was 7 starting out on a Yamaha 70 trail. Through the years I've owned a Kawi 650c (wish I still did!), a '70 sporty, and a '89 Katana but I've been on a dry spell for about the last 10 years. Just recently I picked up this '81 GS1000L that needed a little work to get it running, and it was ugly as hell as you can see from the first pic. I thought I wanted to cafe it but then I started reading here after I had disassembled and/or chopped a bunch of the ugly off her. Now it looks like I'm going more of a bobber/chopper route but I don't know what it's really going to end up as. The lines don't seem right for a cafe so...I shortened the original seat pan and rear frame about 5" as well as carved up the foam, reconstructed a new tail light mount for an all-in-one LED model, cut up the rear fender and created a new mount, rotated the battery 90 degrees and remounted it along with all the wiring as well as fabricating mesh side panels to avoid the use of those "bubbly" stock versions, de-pinstripped the tank and sanded it down to prep for dent removal and filling, and started painting the rear section because I just couldn't wait. My goal is to have a decent looking bike that has some character to it that I can ride the rest of the season. Any and all input is greatly appreciated. Oh and you'll also see my work table that I built just for this project after I got sick of sitting on the floor. I've got a set of clubmans on the way that I was thinking of using because they were cheap and I figured they could be mounted either direction?
 

Attachments

  • image_1.jpeg
    image_1.jpeg
    52.3 KB · Views: 797
  • image_10.jpeg
    image_10.jpeg
    390 KB · Views: 348
  • image_9.jpeg
    image_9.jpeg
    618.9 KB · Views: 369
  • image_8.jpeg
    image_8.jpeg
    536.6 KB · Views: 366
  • image_6.jpeg
    image_6.jpeg
    497.8 KB · Views: 374
  • image_5.jpeg
    image_5.jpeg
    567.1 KB · Views: 365
  • image_4.jpeg
    image_4.jpeg
    528.1 KB · Views: 356
Progress late last night! Matte black 500° enamel on the barrels and just straight matte black enamel for the rest of it. Now it's on to painting up the bolt-on pieces and parts and then reassembly!! Question for everyone; as you may notice the Suzuki emblem on the left side case cover is upside down and has been bondo'd over in the past, which was cracking and falling off. If I pull the cover can I just rotate the emblem and do I just reseal it with RTV like the PO? Or should I just bondo over it and paint it again like nothing ever happened. p.s. My goal is to ride her to work next Monday; do I have a prayer?
 

Attachments

  • photo 1.JPG
    photo 1.JPG
    153.2 KB · Views: 747
  • photo 2.JPG
    photo 2.JPG
    166.4 KB · Views: 734
  • photo 3.JPG
    photo 3.JPG
    171 KB · Views: 769
  • photo 4.JPG
    photo 4.JPG
    181.8 KB · Views: 775
Progress...All that's left (before the first test ride) is to button up the back portion of the seat. I do need to mount the tail/brake light and tuck a few more wires but otherwise she's ready to roll for what remains of the riding season up here!

Anyone have any tips on what to do to protect my white tank from getting dirty so easily? It's spray-bombed enamel with probably 5 coats overall and wet-sanded to 800 grit at the end. Should I wax it and if so how soon?
 

Attachments

  • photo 1.JPG
    photo 1.JPG
    485.1 KB · Views: 360
Thanks Canyoncarver! I had thought about clear coat but wasn't sure they made it in matte finish until I looked it up this morning. Sure enough, Home Depot carries it locally. Sounds like that's just the ticket.

Took her for a test ride Saturday and I'm pretty happy overall. There's some additional tuning required but she really gets up and moves.
 
Here's the latest pics of this project. I just got it back up on the table to wrap the exhaust, redo the rear fender strut, and replace the clutch springs.
 

Attachments

  • today.JPG
    today.JPG
    309.6 KB · Views: 298
Back
Top Bottom