Down under, an idiot and a 400F

Expanding tube slightly will be better than closing down connector. When 'squashed down' they always leak a little.
You could always weld solid to collector but you will need to remove rear wheel to get fitted or remove system (not impossible but a PITA sometimes)
Really you should enlarge it enough to fit over the collector and not inside it
Silencer over pipe is correct way to assemble. I can't find the article but as gas speed increases the lip caused by fitting pipe 'outside' will cause a massive restriction (up to 50% with an internal sharp edge)
 
crazypj said:
Expanding tube slightly will be better than closing down connector. When 'squashed down' they always leak a little.
You could always weld solid to collector but you will need to remove rear wheel to get fitted or remove system (not impossible but a PITA sometimes)
Really you should enlarge it enough to fit over the collector and not inside it
Silencer over pipe is correct way to assemble. I can't find the article but as gas speed increases the lip caused by fitting pipe 'outside' will cause a massive restriction (up to 50% with an internal sharp edge)

Basic rule is exhaust should go together the same direction of the flow... header into collector(s) collector into midpipe and midpipe into mufler.
 
crazypj said:
You could always weld solid to collector but you will need to remove rear wheel to get fitted or remove system (not impossible but a PITA sometimes)
Really you should enlarge it enough to fit over the collector and not inside it.

That's the plan PJ. I have enough clearance to get the secondaries off the headers I think, so don't think I would need to remove the wheel but we will see once I get it all back from welding.

I've also purchased some carbide burrs to ensure all the insides of the pipes and collectors are as smooth as possible prior to welding.

a48c50fa0ec9aa511c0efa2eead13451.jpg
 
If they are the 1/8"/3mm shank from China, be careful. They cut really well in a Dremel at 15,000 rpm, at 30,000 things 'disappear' real fast ;D If your going to do any slots, make sure you don't touch both sides at the same time, things either jamb or go haywire
 
They are Aus made from a local supplier. But I'll keep the speed down a bit anyway to be safe.

Always wear eye protection anyway these days after having to have metal taken out of my eye once.
 
Yep, it aint something you forget. I had small piece of rust (from wire wheeling RD250 side stand) removed the 'old fashioned' way in 1979. They told me to hold still and used hypodermic needle with syringe as handle (no BS 'high tech' magnets and stuff back then)
Watching a very sharp object coming towards your eye makes you make sure it aint happening again ;)
 
+1 with crazypj 1977 got drill swarf in the eyeball still can see the needle coming in safety glasses are there for a reason and ide defo keep the dremel rpm down new bits take away material real quick
 
Trying to move on with stuff that doesn't cost money as I wait for my secondaries to be finished.

Test fitted the Pamco electronic ignition as I am keen to finish off the wiring and I have 2 questions:

1. The Pamco has 2 wires with 3 strands in each (common ground though). I would prefer 1 black cable and wondering if I could desolder and do this myself?
2. What is the standard routing for the points wiring on the CB400F? Trying to work out if I go forwards and up front frame rail or backwards.
 
The wiring runs up between the points housing and the clutch housing cover should have a couple of holding clips to keep it in place
Havent got a good pic of the cable but hope these help mate .
 

Attachments

  • 749.jpg
    749.jpg
    1.7 MB · Views: 234
  • 780.jpg
    780.jpg
    1.1 MB · Views: 217
Thanks Yorkie, I remembered the clips but wasn't sure on which way it went. Looks like it used to go to the air box but without that you have to loop the wire up in to mid air with pods.

Hopefully I can go over the engine and loop it up the left frame rail that the generator wires will go up too.
 
Stock has two bullet connectors behind frame rail above rear engine mount. Wire runs under clutch cover and up behind it. Had a crashed 400 come into shop (light damage) that had no spark, exhaust system (cheap aftermarket, 1978~79) exhaust bracket had cut through wires Took a little while to find as wires were behind lower frame rail
 
Thanks PJ & Yorkie. I will look to see if there is a suitable option either over the top of the lower case (as per Yorkies pics) or alternatively down along the lower frame rail and up the side frame rail.

I also sent Pete (Pamco) an email to see if I can safely extend the wires with a 5 core cable vs the 2 x 3 core cables.
 
Secondaries complete. Pick them up Friday. Fingers crossed they are perfect as they were certainly not the cheapest option, but I'm super confident the final product will be worth it.
 
I picked up my secondaries from Carrington on Friday. They're a top bunch out there and super friendly/helpful. In the end the bends are pretty tight and so the gentle curves of the templates are not 100% replicated however I'll reserve judgement until I have them cut and test fit.

Took me some time to work out which way round they went (left was looking a fair way away from the template until I flipped it) but overall I'm very happy:

E9281371-1CE8-4E8E-9306-39E10F0C8BFA_zpsk3dpojnd.jpg


890D26C9-4109-46BE-87A9-D9E4E26F14EA_zpsci4luzsa.jpg


Now the daunting task of having to cut them. I have a big drop cutoff saw so no issues there but getting the cuts exactly straight is the challenge. I'm thinking I will tape the cuts, use a plumbing pipe cutter to mark, then cut slightly long and sand back.

Also Carrington are there to assist with some massaging if needed. So I think I'll check the fitment and then see if they can make adjustments with a big radius bend on the straight sections which will help if they look a bit too straight on the bike.
 
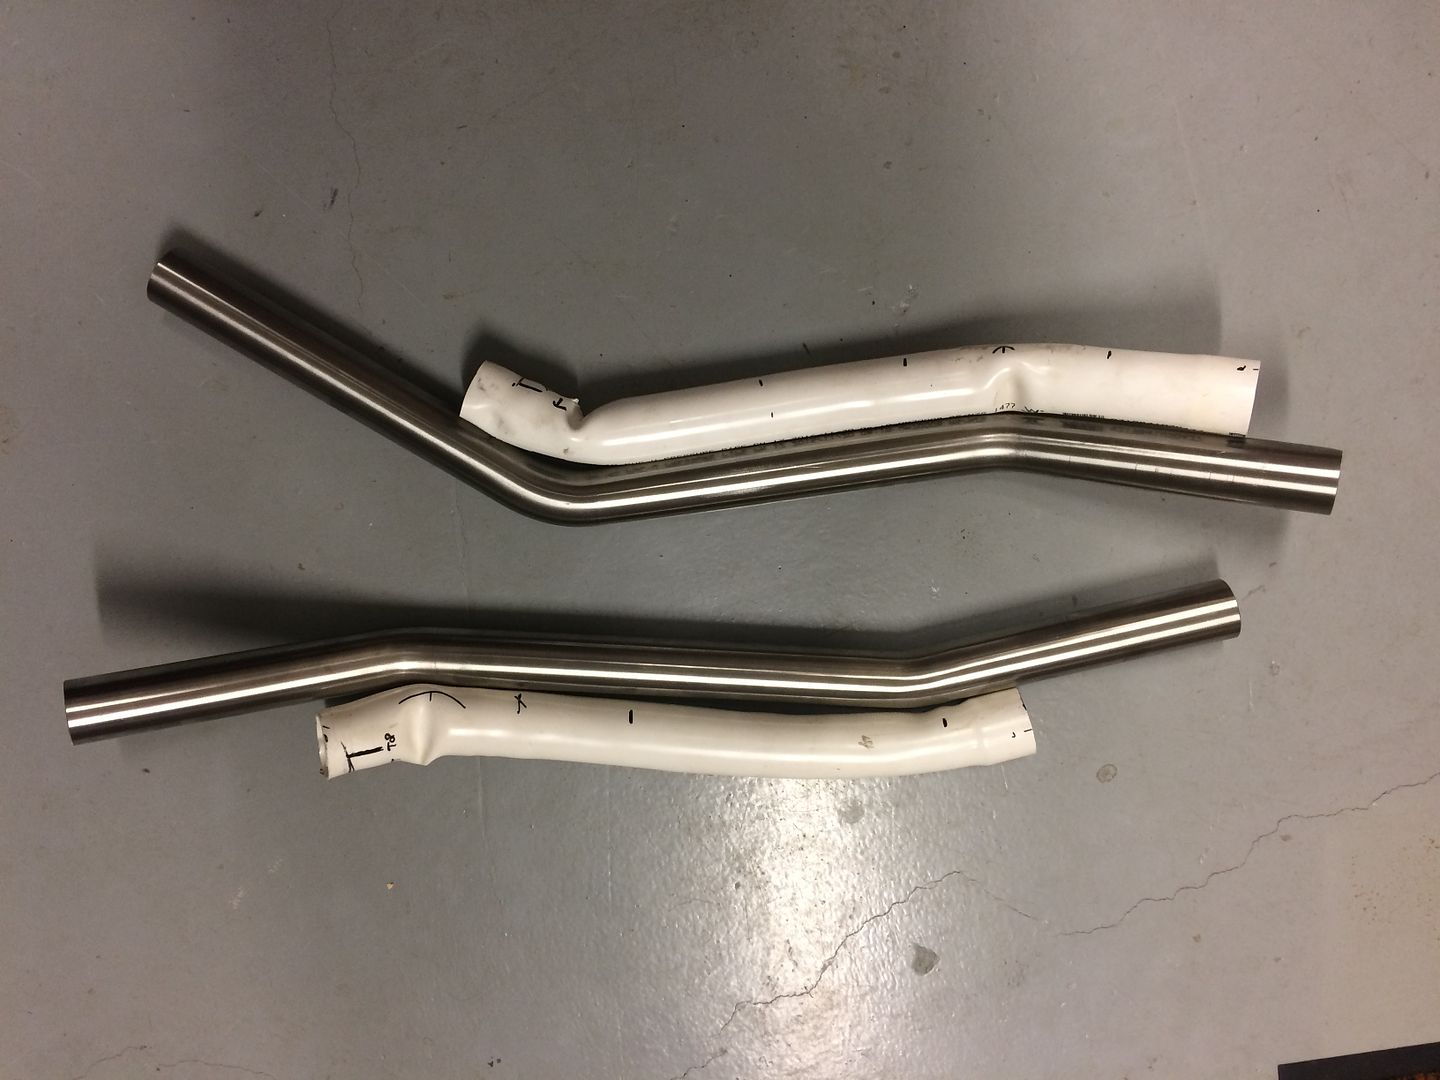
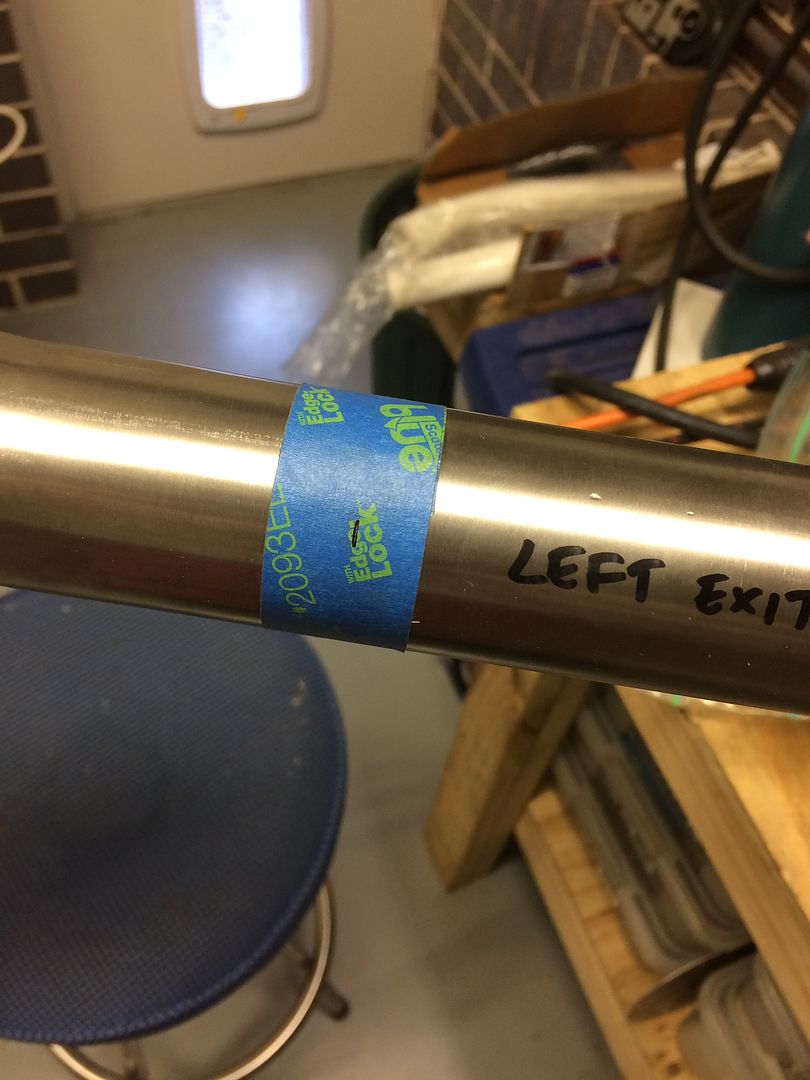
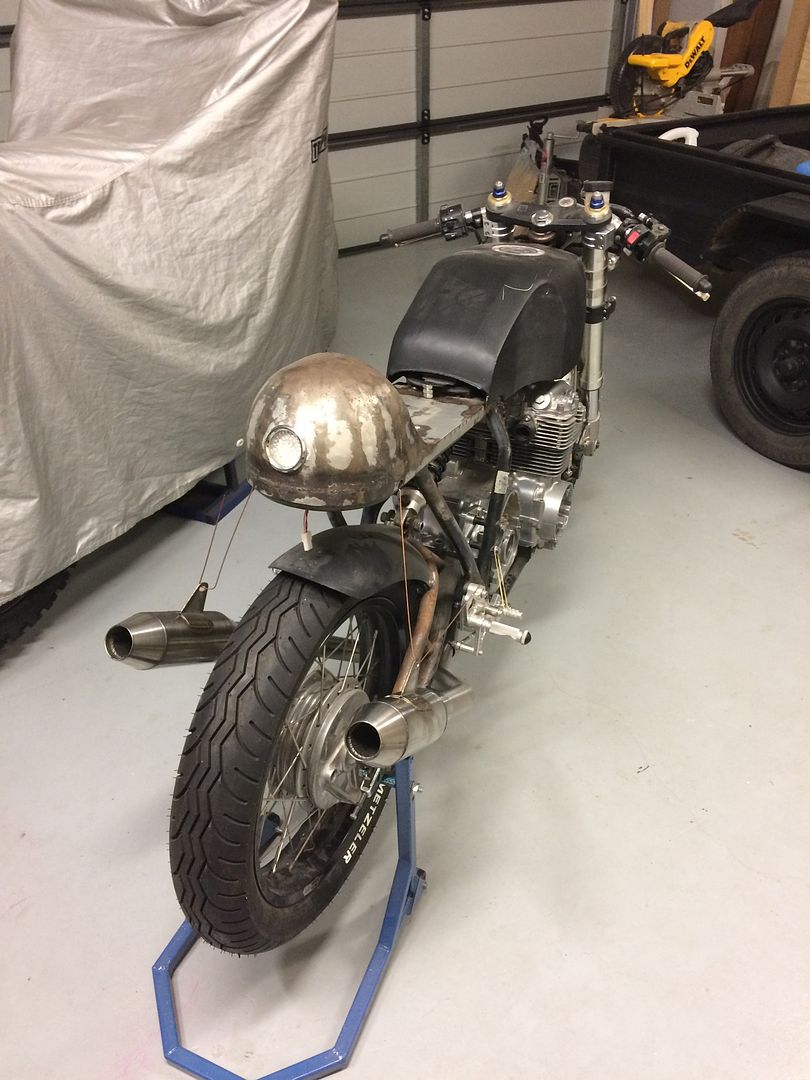
Went at the mid pipes today with the drop cutoff saw as I was busting to see them on the bike. I wanted to make sure I got really clean straight cuts so I marked each one with tape prior to cutting:

6C6107B1-F03E-4504-98D4-085E69D3E649_zpstben7p4s.jpg


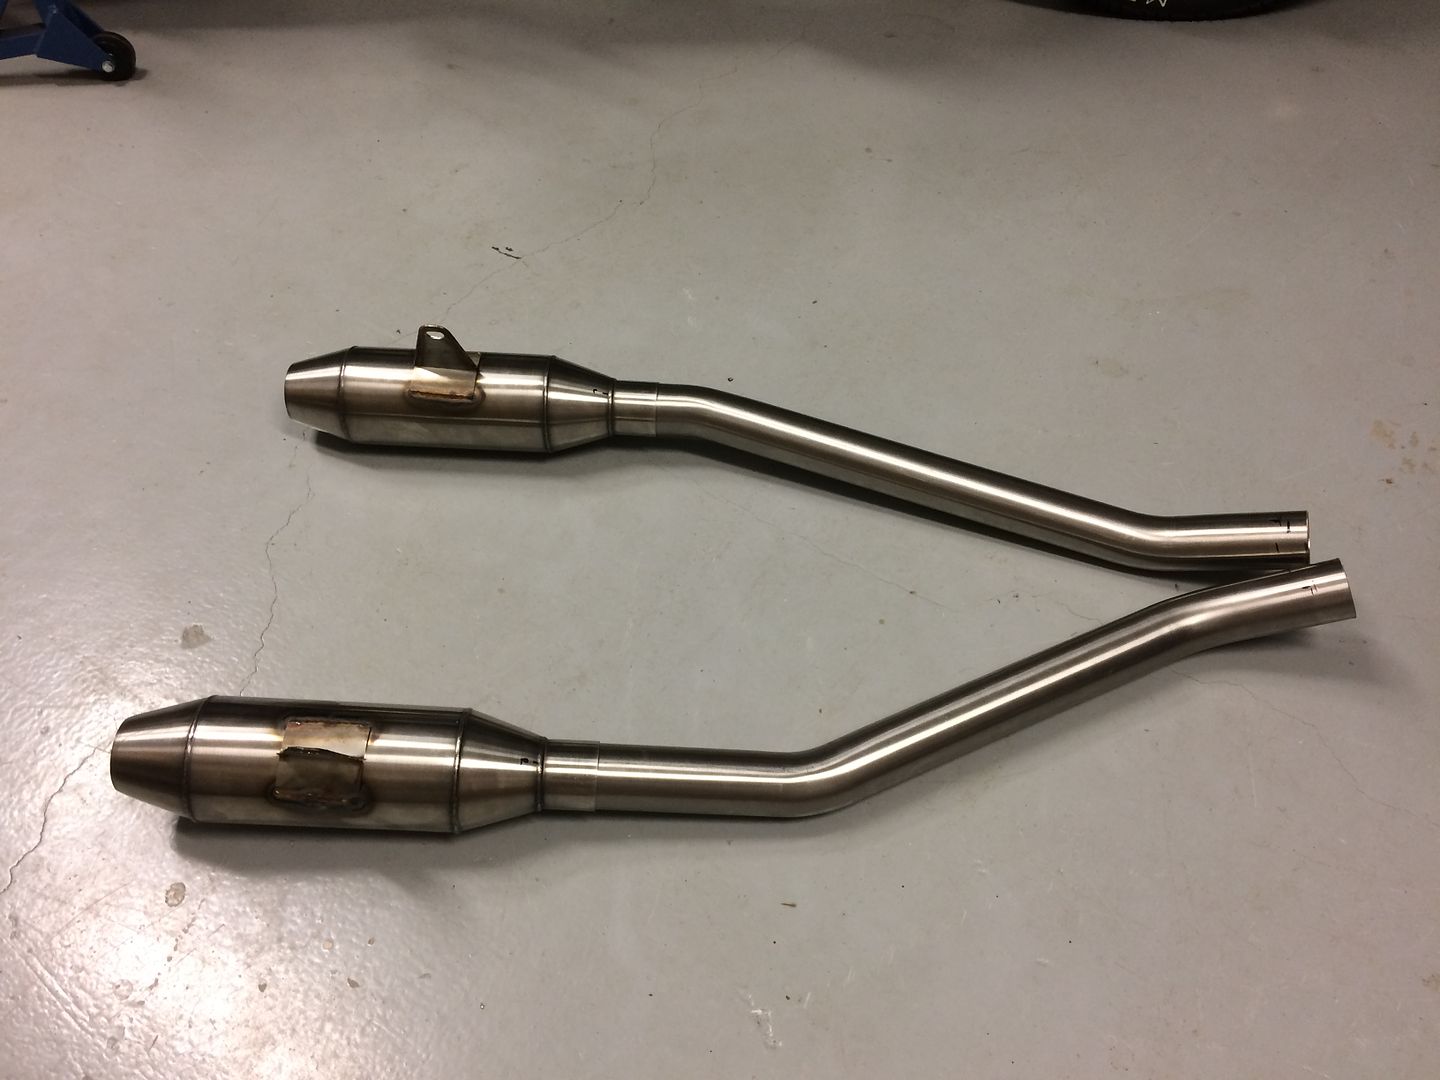
In the end I needn't have worried as the cuts came out super clean and after some touching up in the bench sander and a die grinder on the inside, I had some very clean ends. The fit on the mufflers is very tight and with the spring clips should be plenty to keep the mufflers where they should be:

FE7444DD-3EB3-4A2C-A149-84661B2D9B61_zpszwikoacq.jpg


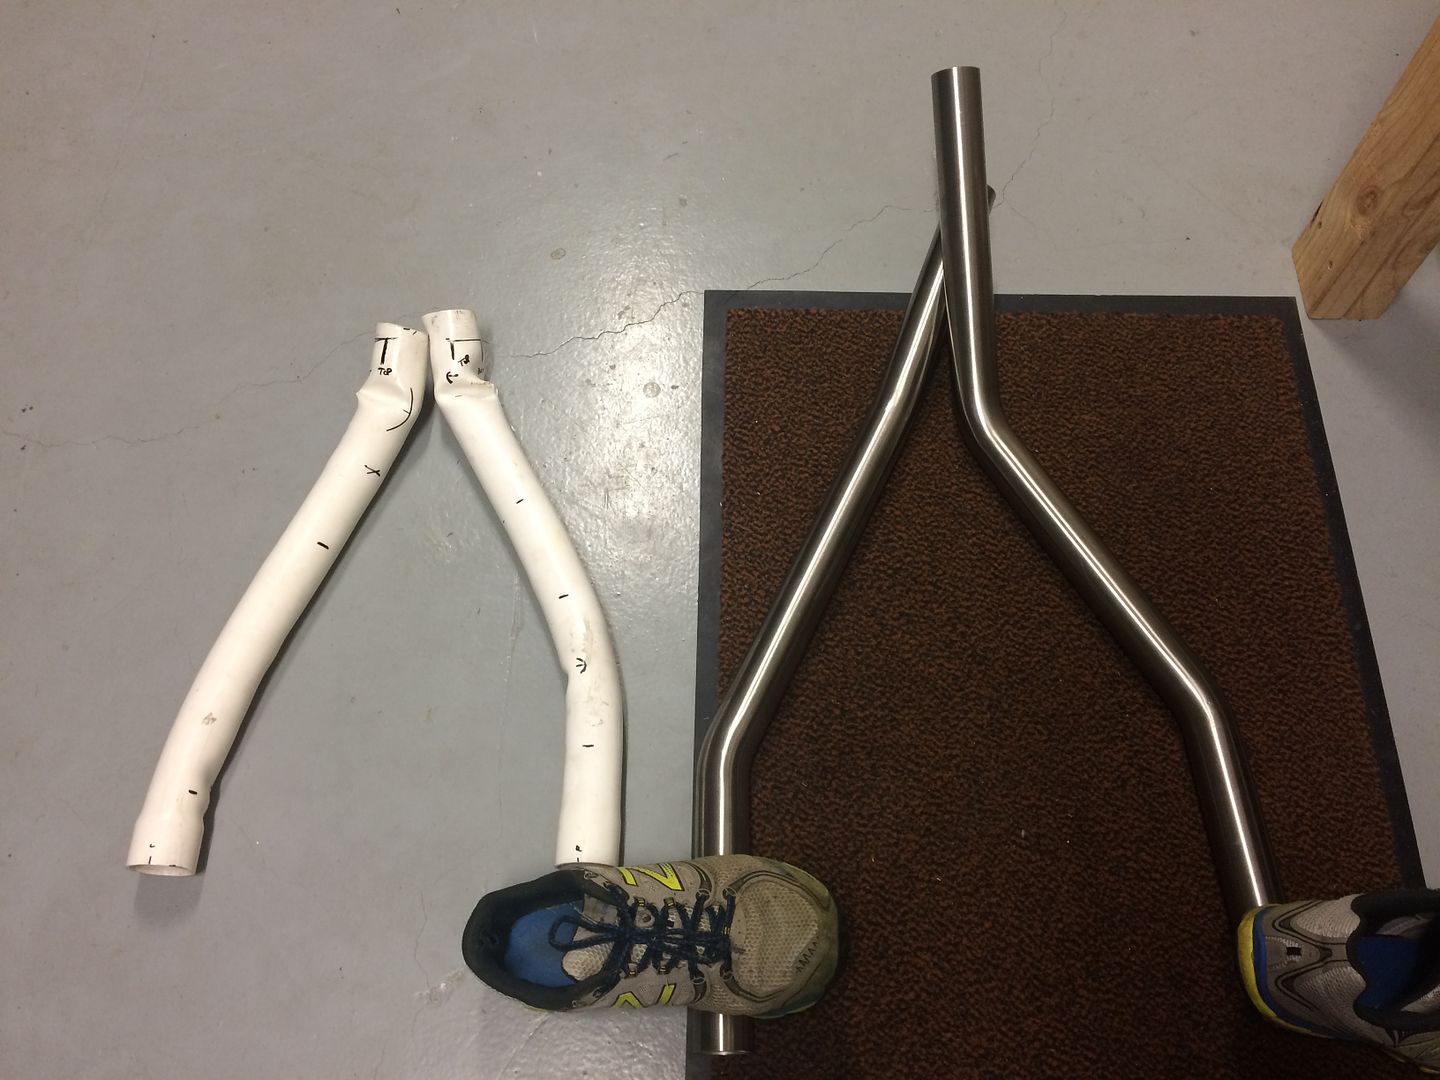
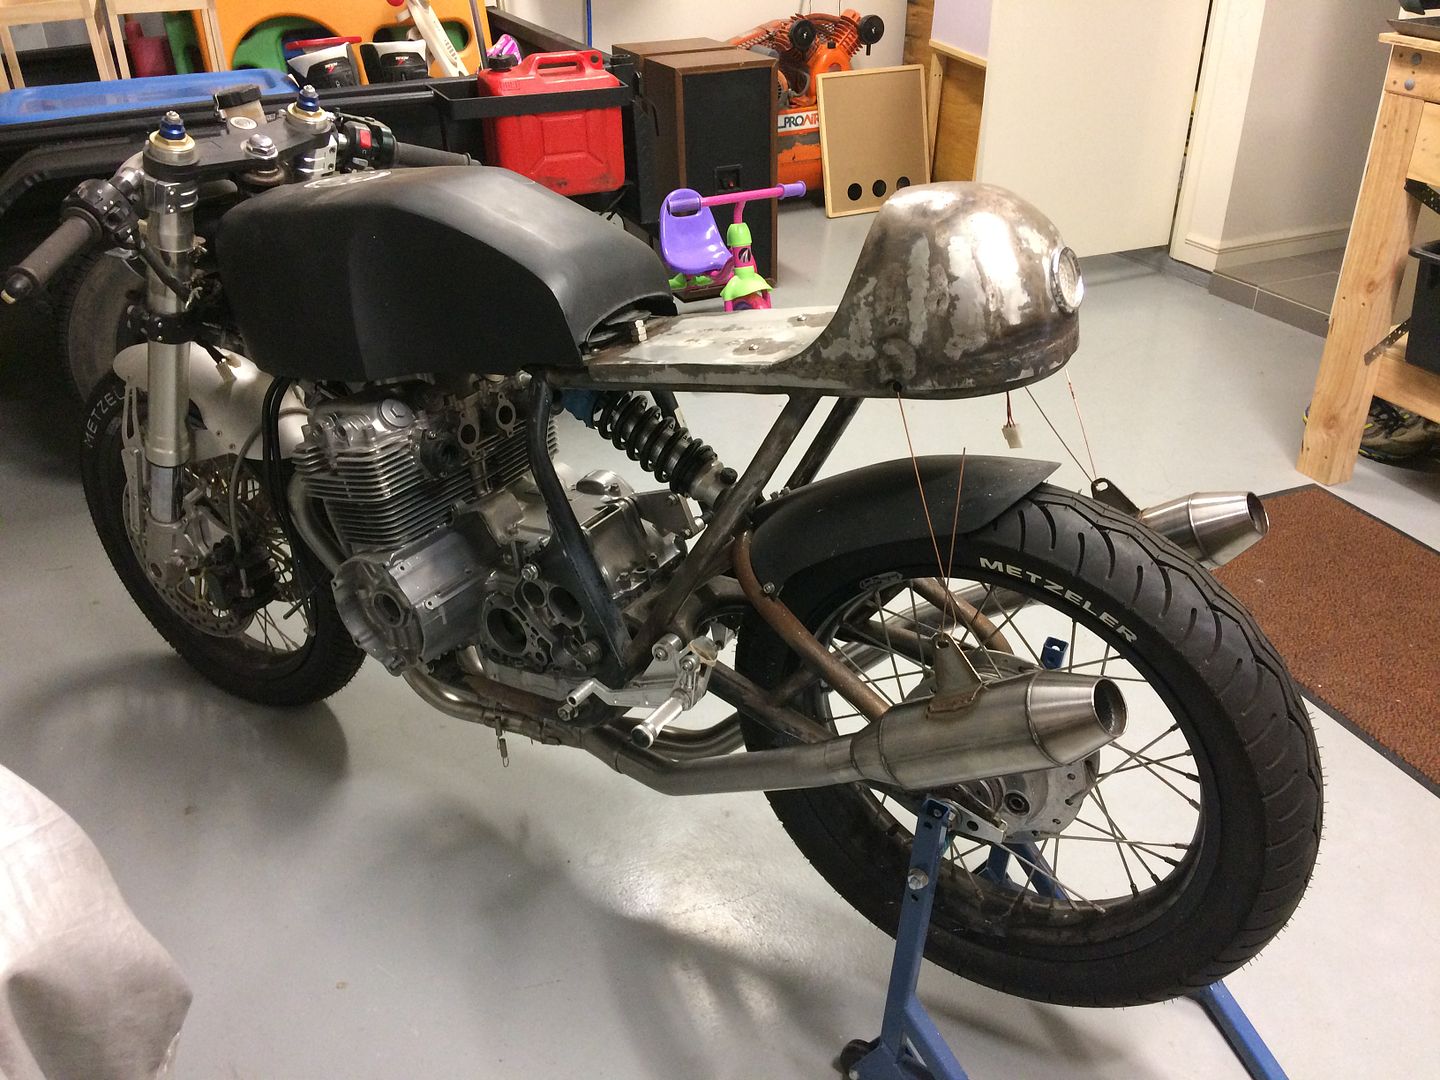
A little bit or tweaking with the angle in the collector and I had them mounted up perfectly. They're a perfect fit and the placement of the mufflers is bang on where I had them with the templates:

374FFD7D-A818-401B-A9D3-68C36BA6BEE9_zpscsrkspqp.jpg


B9C646CA-0E63-4745-9669-1A02A61C28BC_zpsn4nsfdyg.jpg


721CF2F4-037D-453D-93CC-8AC0031E760C_zpsze7bugje.jpg


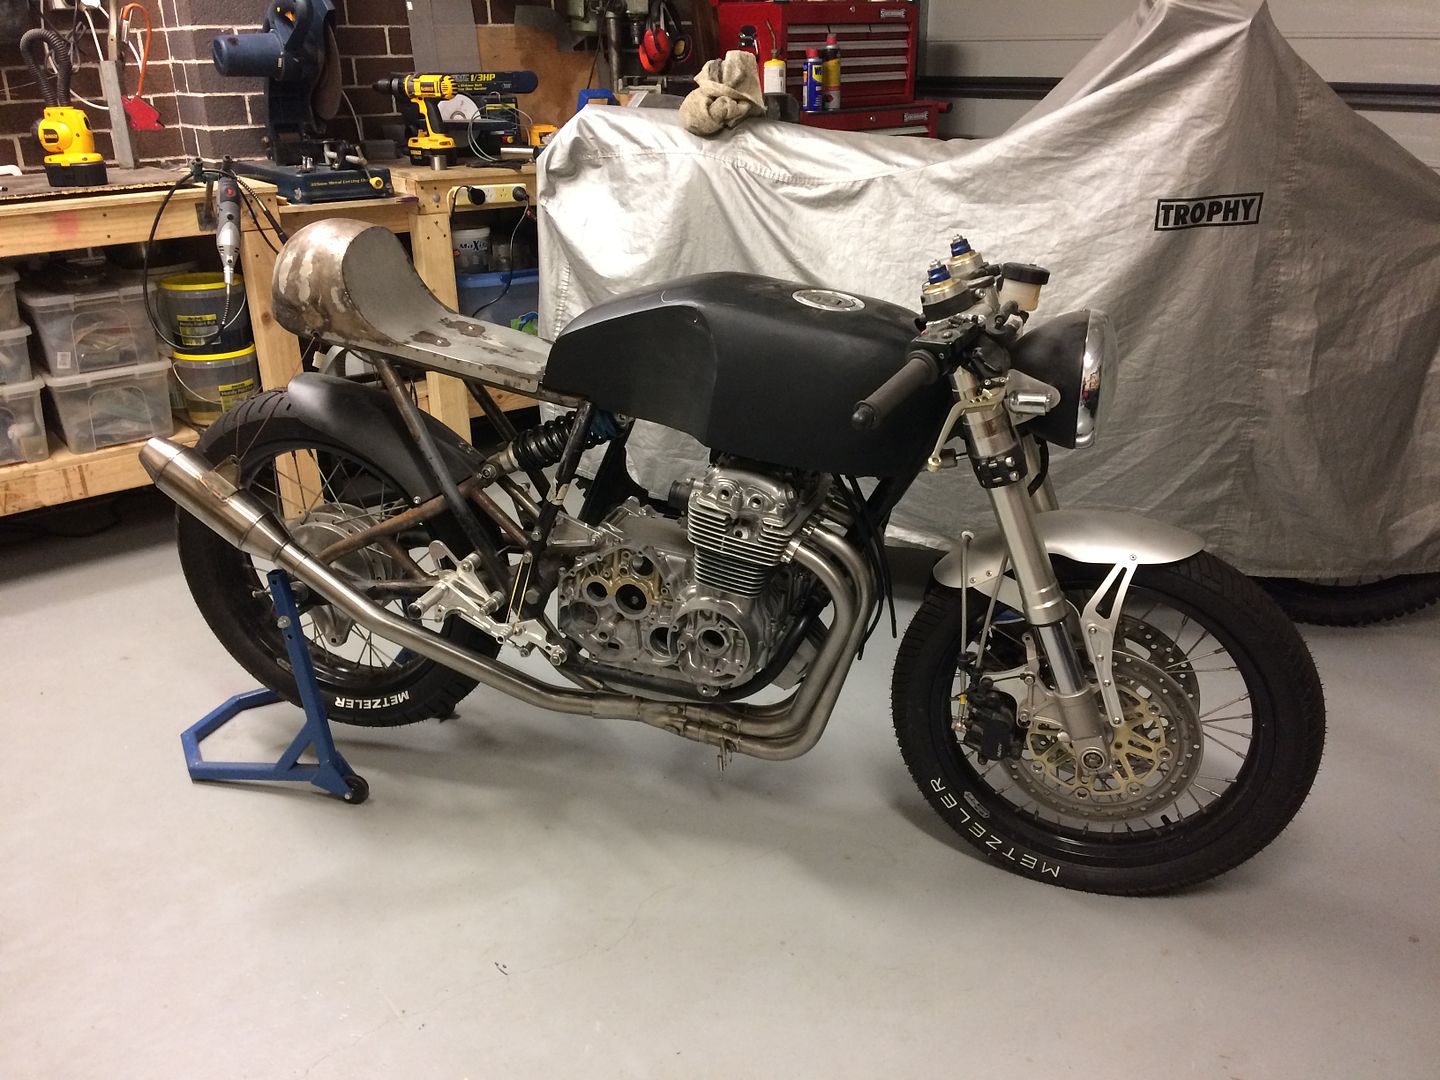
Checking this final shot I'm starting to see what people don't like about the rear end of the seat. So I'm going to tackle a new seat soon based on similar dimensions and shape but trying to remove the bulbous nature of the bump and make the transition from the rear to the seat a bit more angled. Watch this space. Only thing I need to be wary of is the clearance to the battery box, but hoping to get a battery soon so I can fully mock up all the electrics on the bike and therefore know what I can/can't adjust on the seat. It's probably a good thing anyway as I'm not happy with the bend lines on the current seat so I'll use a metal brake this time to get much better fold lines.

The only thing I'm toying with on the exhausts are:

1. Getting Carrington to add some opposing large radius bends on the straight sections of the mid pipes to break up the straight sections. Not large bends just very gradual ones to make the mid pipes a little more aesthetically flowing.
2. Having the ends expanded where they join the collector to get a better fit, as currently the fit is not tight enough.

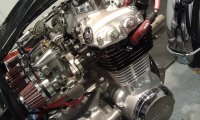
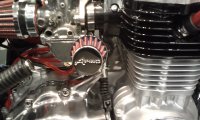
Whilst I was in the mood I thought I would try and get the advancer mechanism on the electronic ignition. It seemed solid and I have no idea how the bike would run as essentially the dried on grease had frozen the thing solid.

Some time in my turps bucket and a quick scrub had it free and after a spot of lube I had it free and moving beautifully:

066E3856-F175-425D-80CD-C9B055A7C74C_zpsgnz4wwhh.jpg
 
That exhaust looks absolutely killer! Nice one!

I remember you fabricating that seat, and it was a real ingenious and handy way of doing it, but I agree the general 'roundness' of it doesn't fit the rest of the bike perfectly. Something more angular would tie the whole thing in nicely, especially if it matched the rear of the tank, its got some nice lines on it.

Looking forward to what you come up with Neevo. :)
 
Nice work, looks the part.

I am struggling to visualize the hangars tho, lot of real estate between the seat hoop and those tabs.
 
Yeah that won't be enough to stabilize those long pipes, just take up a bit of weight. Maybe add a bolt on hanger under the rear sets to get those pipes solid.


Sent from my iPhone using DO THE TON
 
To be honest I haven't refined the idea of exhaust hangers yet but I'm playing with a few ideas based on some thoughts on what I need to achieve.

1. I was under the impression that I don't need a rock solid mount for the exhausts as I will have the secondaries welded together and therefore the lateral placement would be pretty firm. However they would need something to take up the weight, otherwise risk of sagging and potentially damaging the head where the headers are mounted.
2. Need a solution that looks slick and factory. Not a dogs breakfast afterthought.

Looks like there are plenty of solutions that simply manage the weight:

db115fbfcd7d9dd96fbaa55df2135c7a.jpg


221aeb398d17e765d11a2454937f7325.jpg


07c1c06bd8205b919480665430265edc.jpg


5111b71af9f49e80902cb5abbebb3e2d.jpg


However I understand that these won't help manage the lateral loads and therefore might have to resort to something more permanent if that's the case:

D9ACC7AB-A15B-4226-A4ED-3CB1859F9FF6_zps9tjxr2pe.jpg
 
Back
Top Bottom