1976 xl250 recycle

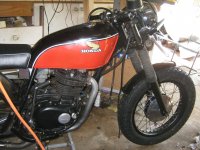
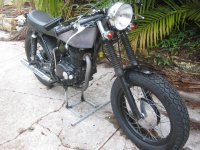
The trials and tribulations of owning a old bike. I ran it for a while and it was starting well but I was having troubles with throttle response. The mix was rich so the needle had to be dropped to lean out the mixture so then I had it running fine but could not start it well, at times it too about 30 kicks to fire it up. What had happen was that the points screw had loosened up so had to re-set the points gap and now all is well. It starts first kick as it should now which will aid in the healing of the bruise on the bottom of my foot.

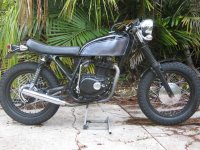
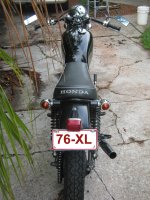
I am have a bit of a charging problem still so I have swapped the new regulator rectifier I installed to a old Honda one that they used on the last of the 6 volt xl250's and I think some of those CB's from around the same time and so far that seems to be better. Fingers crossed.
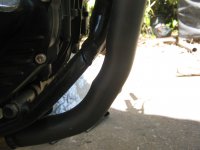
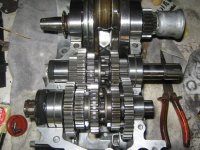
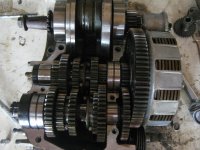
 
Laced up my future front rim today, 1974 CL360 hub and a 18 x 2.15 rim of a Suzuki of some sort. So far so good but still need to true it all up.

Edit. Today I learned that not all spoke patterns are the same.
 

Attachments

  • frontwheel.JPG
    frontwheel.JPG
    484.4 KB · Views: 317
Love the way your bike looks, very clean and i bet hell of a fun to ride. Looking forward to see what els you come up with.
 
oldnbroken said:
Been having a bit of a ride today, still lots to. Speedo has to change, fork boots on, tank change, the wheels done, number plate is hanging on with wire and am not happy with the pipe but it works fine for now.

I like it! The pipe is one of the best parts visually on the bike in my opinion.
 
Cheers Johnu. The overall shape of the pipe I do like, most pipes on these singles run down under the side case or frame but this one runs under the engine then bends out to the side sort of like the way a set of four into one's go(that is where I got the idea from) and I do like that about it. As you will be able to see from these closer pics the pipe was not bent on a mandril bender and has kinks in it as well as a weld where the tighter mandril bent pipe comes out of the head then is welded to the rest. In the end I would like to get another one made on a mandril bender so the curves are smooth(no weld seem) and the pipe remains the same diameter along all of its length, it will be the same shape but just lacking the kinks that those simple pipe benders leave.
 

Attachments

  • header1.JPG
    header1.JPG
    283 KB · Views: 376
  • header2.JPG
    header2.JPG
    272.9 KB · Views: 350
You're gonna love the extra stopping power of the streetbike hub's larger drum.

Why not take a flapper wheel to those header welds? A little grinding and a re-paint and nobody would notice the seam from 5+ feet away. This bike is coming along nicely and will be super sharp with the blacked out rims and polished hubs.
 
Thanks Hallin. I am looking forward to having some brakes as these old trail bikes are pretty damn slow to pull up. The new hub is larger and also has two leading shoes rather than one leading and one trailing like the original. Flushing that weld would be fine but that doesn't change the kinks from the basic type of pipe bender so still need to make a new pipe one day, no rush for now though.
 
Just getting ready to replace front shock seals. The ones that were in it were the wrong seal as they were only 11mm and the bike is supposed to have 13.5mm. The new seals I have look like they do a better job than the ones I took out.
 

Attachments

  • bareshock.JPG
    bareshock.JPG
    570.6 KB · Views: 352
I have mainly been riding lately but also slowly adding to the picture. Am rebuilding a second motor, more on that later. These originally painted cases take a bit to polish, not show but good enough for what I want.
 

Attachments

  • shinyright.JPG
    shinyright.JPG
    480.7 KB · Views: 367
I have started re-building a motor which is a first for me. These are pics of the first modification, I am changing from the XL250 gearbox to the XL350 gearbox. The 350 has a lower first, higher fifth and more even spacing so is a better box for on the road(so I am told). I will be dropping to a much lower rear sprocket so the lower first should be a very handy addition to that modification. There will be much finger crossing during this re-build.

Hard to tell the difference between them in the pics but it is there.
 

Attachments

  • 350 gearbox.JPG
    350 gearbox.JPG
    599 KB · Views: 350
  • 250 gearbox.JPG
    250 gearbox.JPG
    437.7 KB · Views: 365
After doing your first engine you'll wonder why you never bothered before :) The bottom ends of these things aren't all that complicated - simpler than the top ends in many respects.
 
So far it is simple Eric, I will let you know how it turns out once I ride it though. I bought a 77 box for my 76, the fifth gear on the main misses the crank by about half a mil but that is all it needs to miss by. One of the guys on the Xl forum mentioned that he had to take a shade off his crank but his is a K0 and he seemed to think that anything other than the K0 is simple.
 
A quick note on the gearbox modification, I decided I wanted to do something different and if you look closely at the 350 box you can see that I added a reverse gear to the bike.

After much thought and talking to more experienced bike fans I decided to go for Dunlop K70 18 x 4.00's. The Firestone ANS Military were my first choice but was told the Dunlop's would grip better.

Edit... The Dunlop's were also half the price of the Firestone's
 

Attachments

  • dunlop k70.JPG
    dunlop k70.JPG
    568.1 KB · Views: 680
Now I have new wheels and tires, the bike rides so much better on the road. The old trail tire and 21 inch rim were a bit lumpy and now it is as smooth as. Also the twin leader CL360 brakes pull me up so much better. The new tires and hub have added lots of weight but that seems to be to the benefit of its road handling.
 

Attachments

  • final wheels.JPG
    final wheels.JPG
    691.2 KB · Views: 528
Cheers and I have checked out your fish build Bro.

A few shots with the new tank. I am still undecided on this paint job and might try something else.
 

Attachments

  • side xl250.JPG
    side xl250.JPG
    763.3 KB · Views: 673
  • front xl250.JPG
    front xl250.JPG
    598 KB · Views: 388
  • skew xl250.JPG
    skew xl250.JPG
    721.4 KB · Views: 511
  • rear xl250.JPG
    rear xl250.JPG
    515.8 KB · Views: 373
Back
Top Bottom