78 KZ400B1 Scrambler To Be

diggerdanh

Been Around the Block
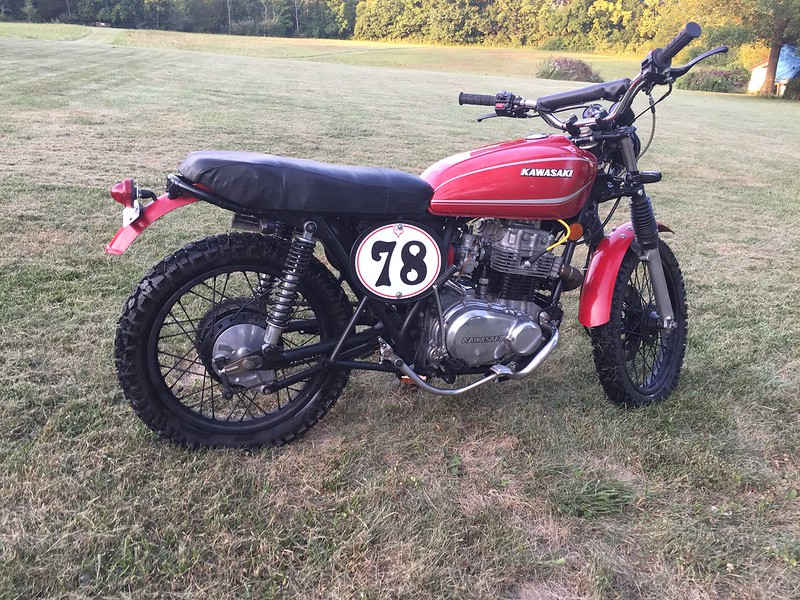
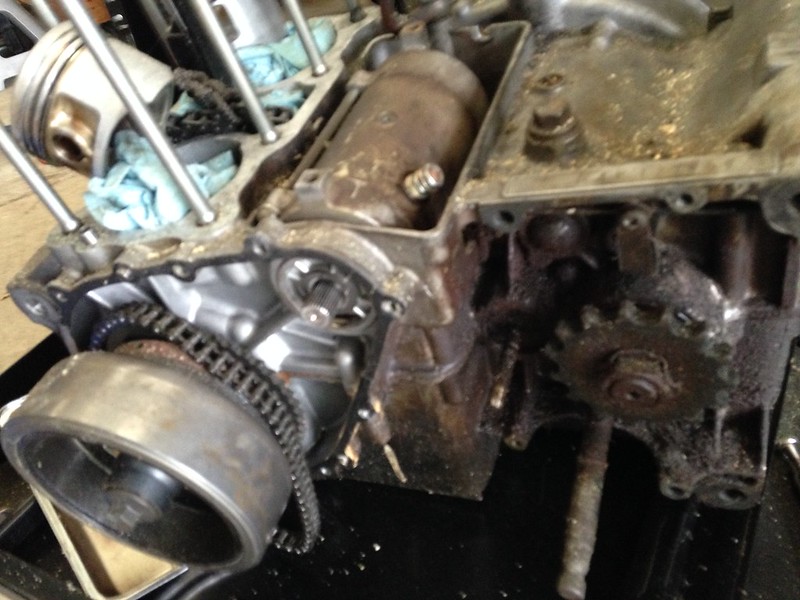
July 2014, ugh I cannot believe it has been 3 years, I bought a basket case 1978 KZ400 with a little over 17K original miles from a 17yo local kid who had bought it as his first bike to be a cafe project. It had run but he tore down the top end to fix some oil leaks and never got around to putting it back together. Everything was in a bunch of boxes and there were lots of baggies filled with nuts and bolts, some of them marked what they went to. He said he had the title but could not find it when I went to pick up the bike so I got the lot for dirt cheap figuring it would just be spare parts. I told him if he found the title to give me a call and I'd give him another $100. A few days later he called and said he found the title and a couple of other parts like the seat pan and some odds and ends.

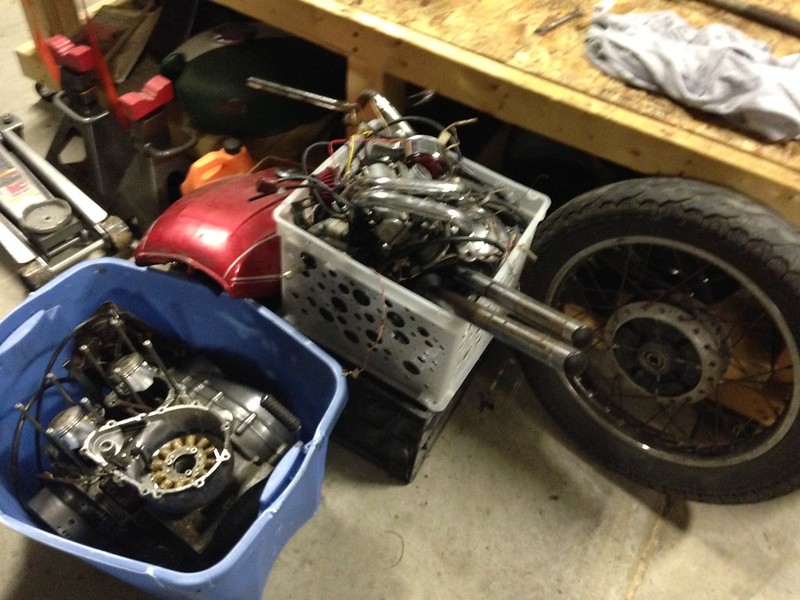
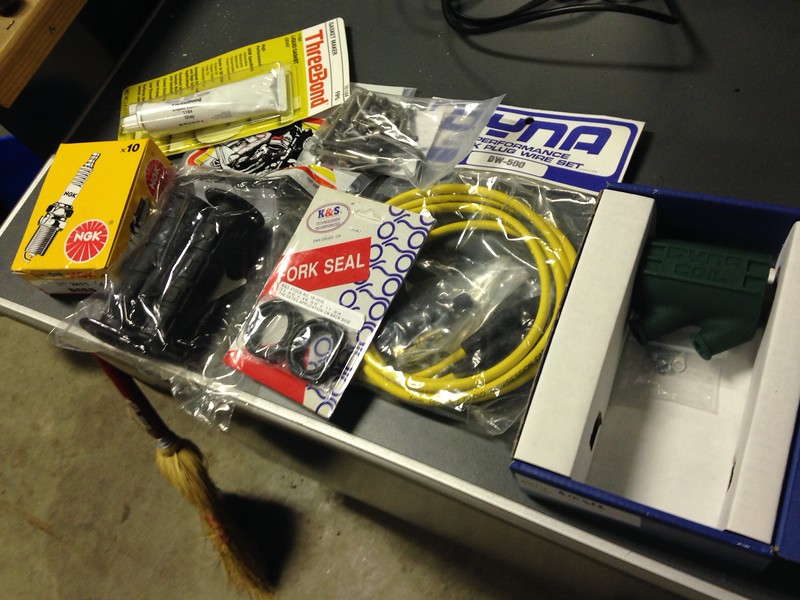
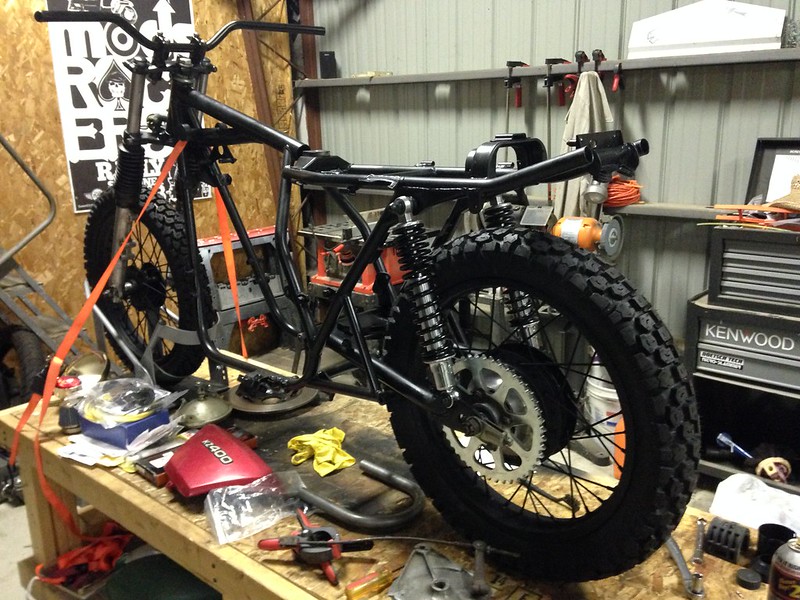
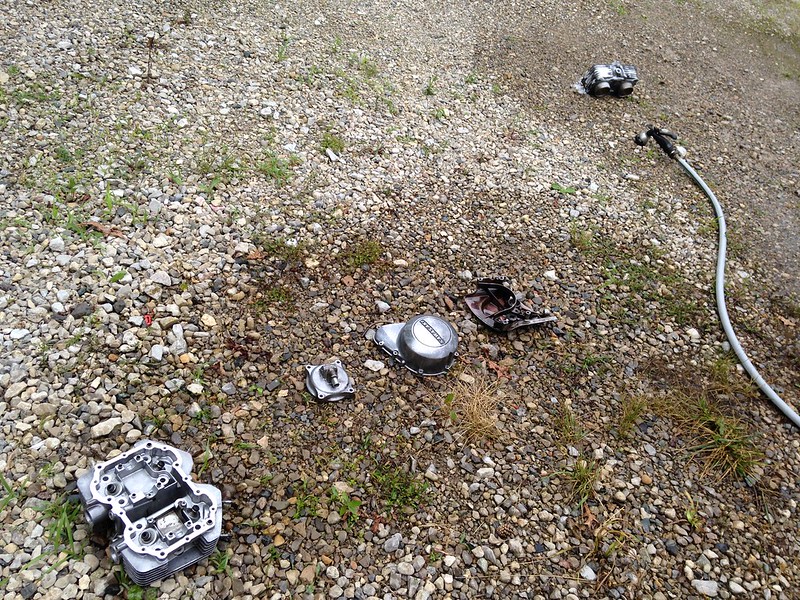
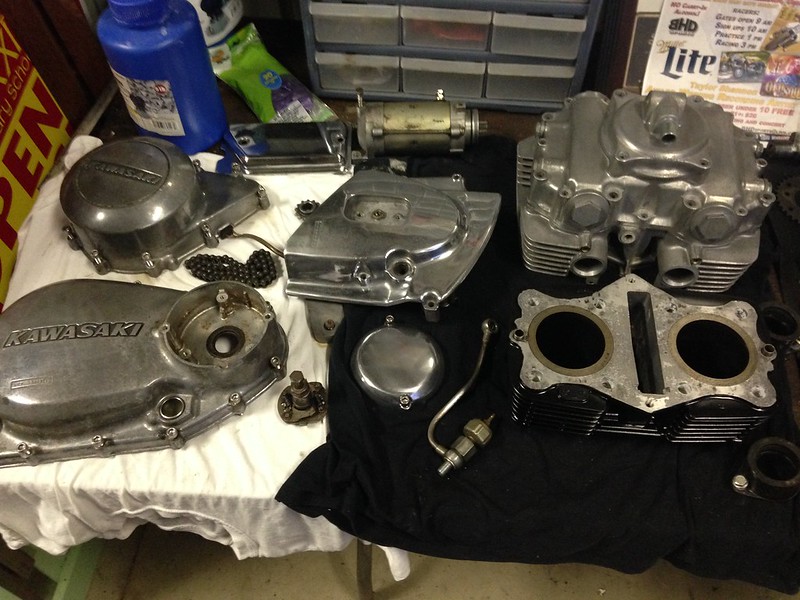
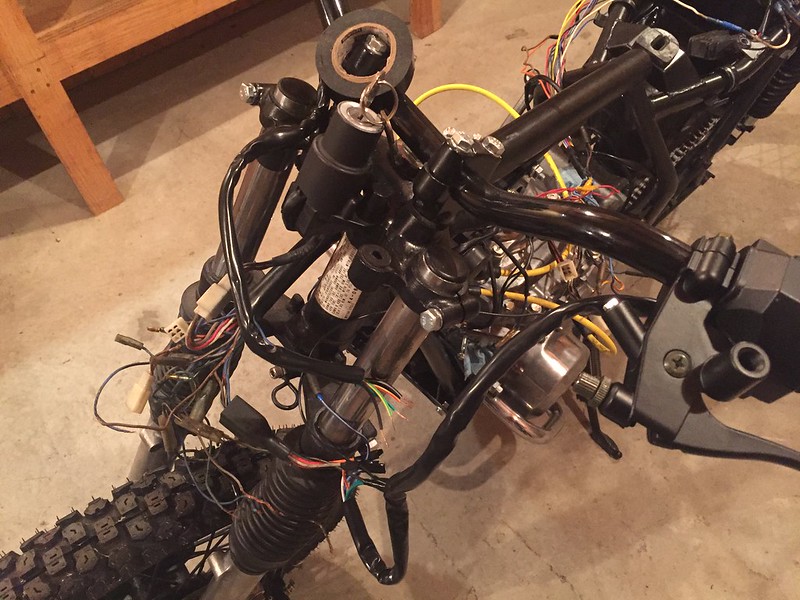
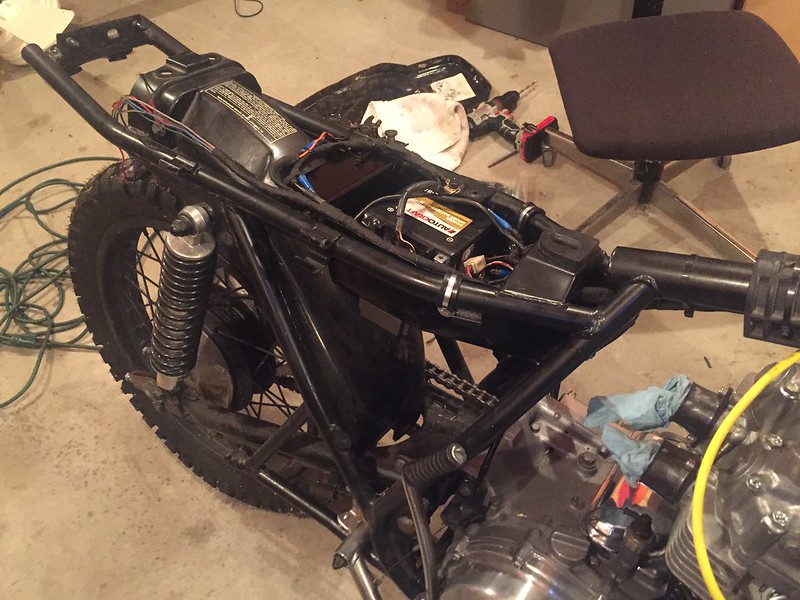
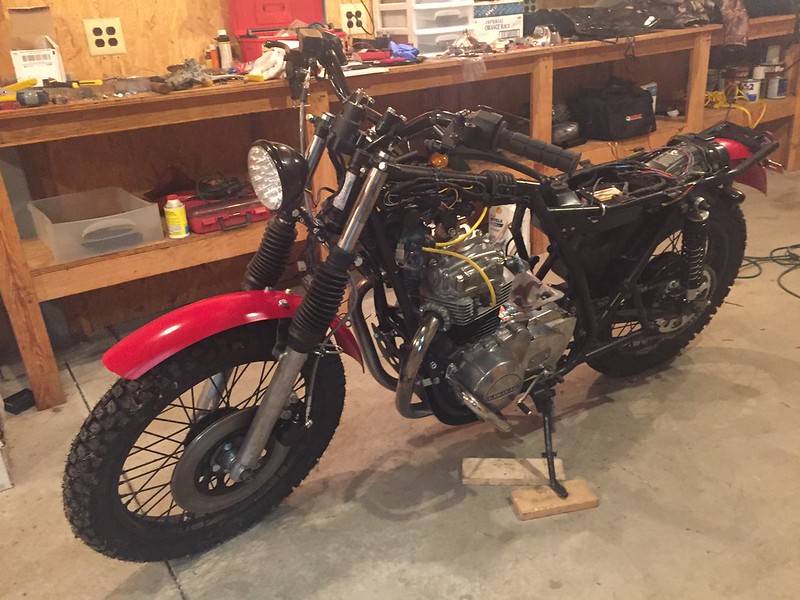
I truly was starting with a basket case:
14600581090_72e4b0096e_c.jpg


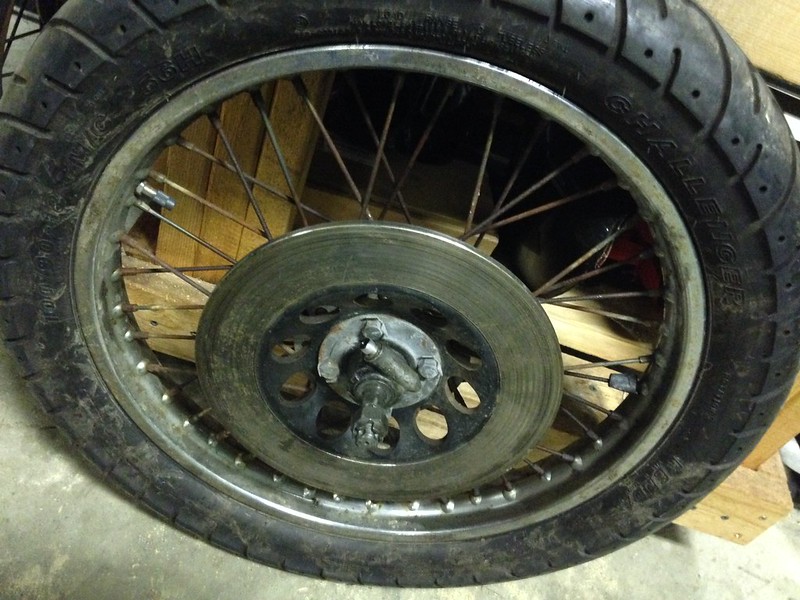
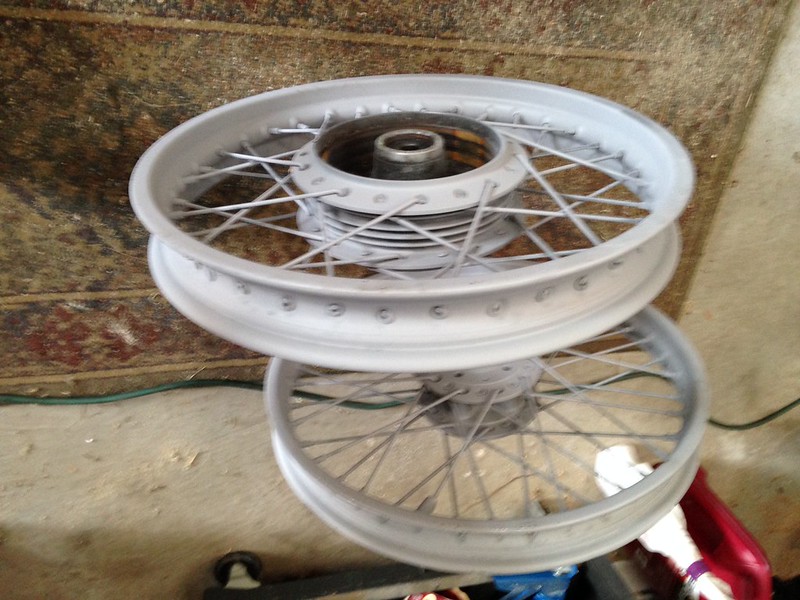
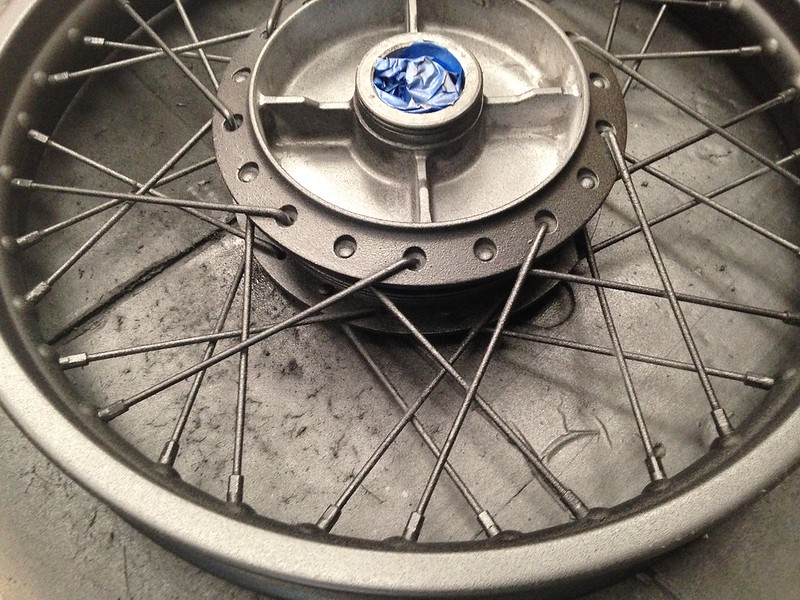
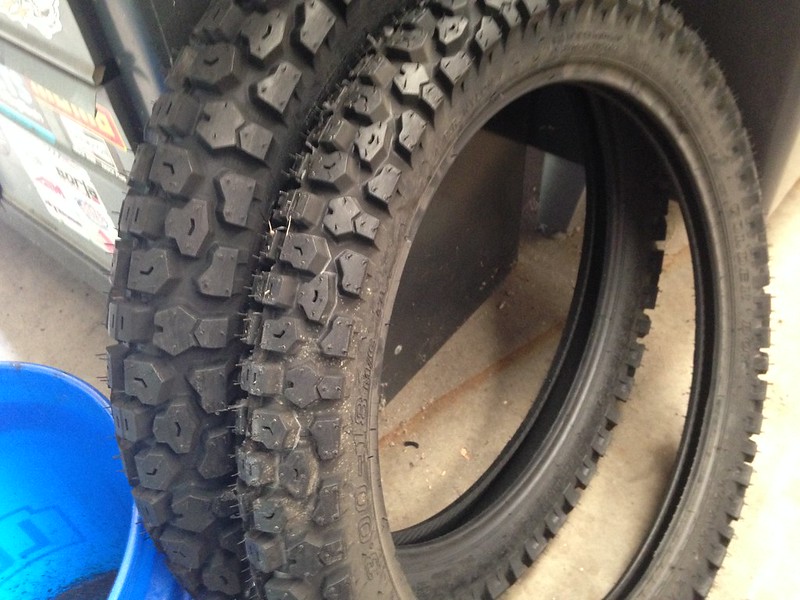
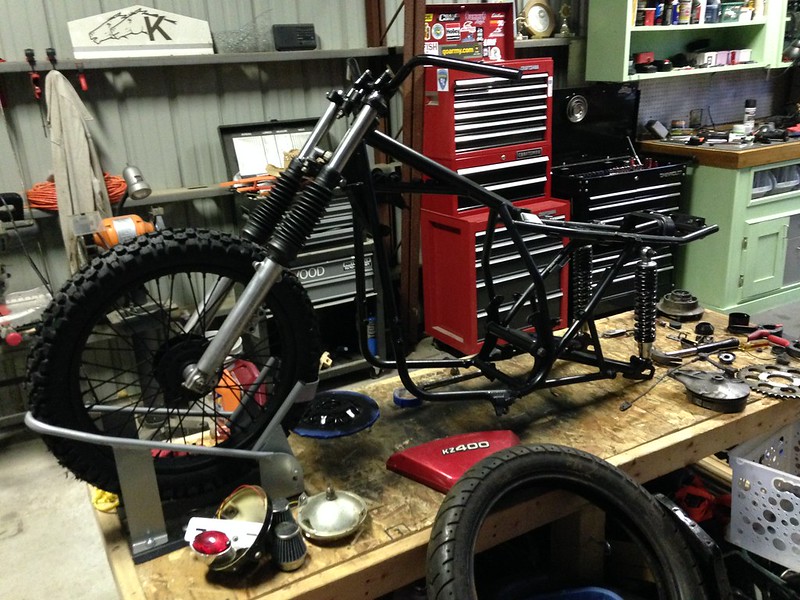
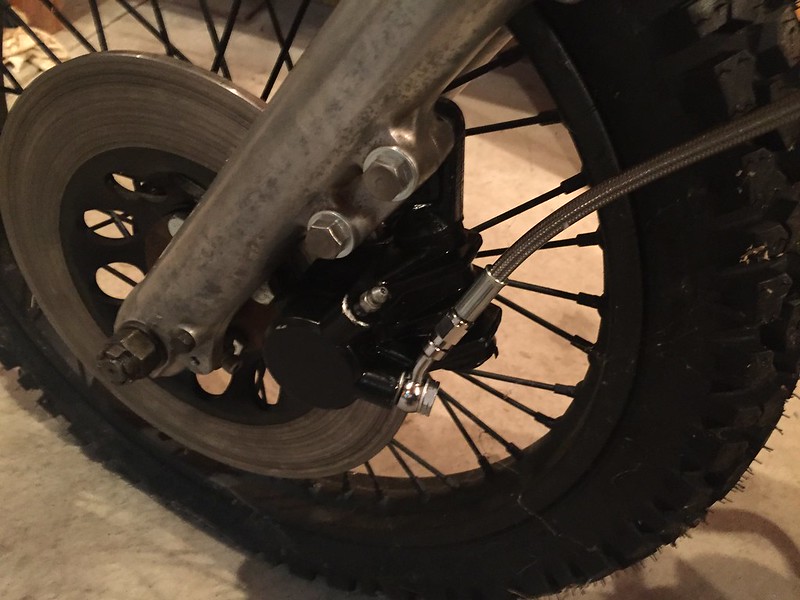
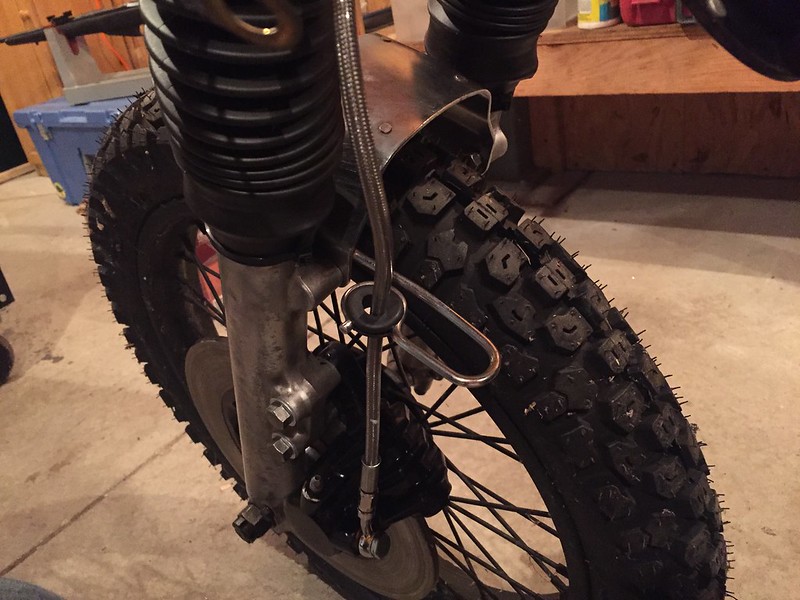
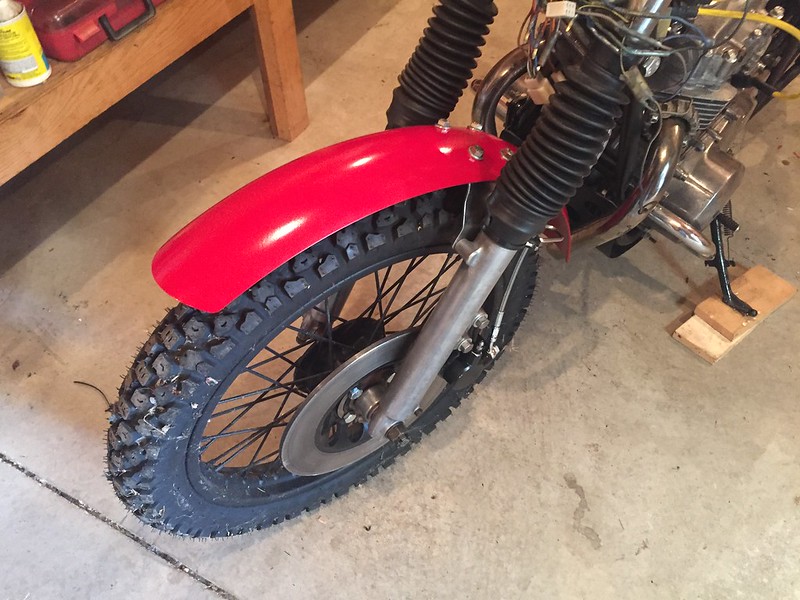
The tires were new though the rims were a little rough and the spokes were really rough:
14764295616_0d866634b2_c.jpg


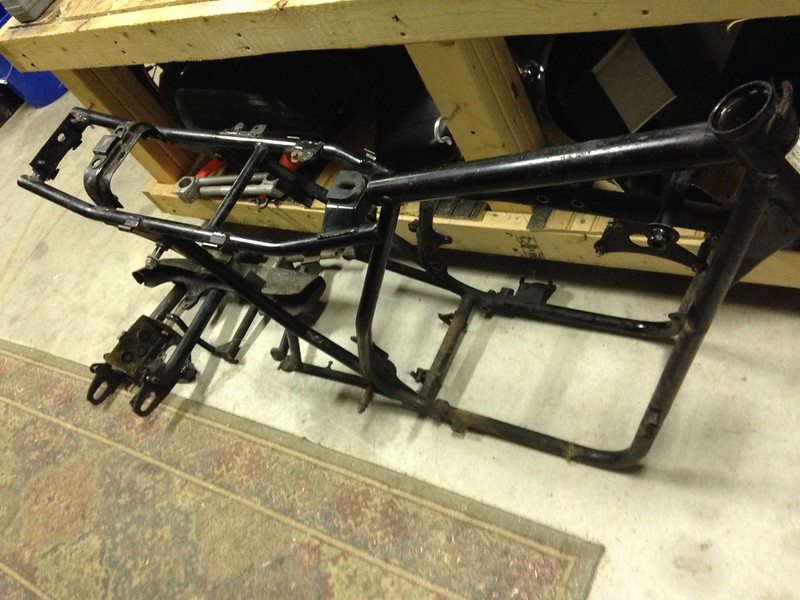
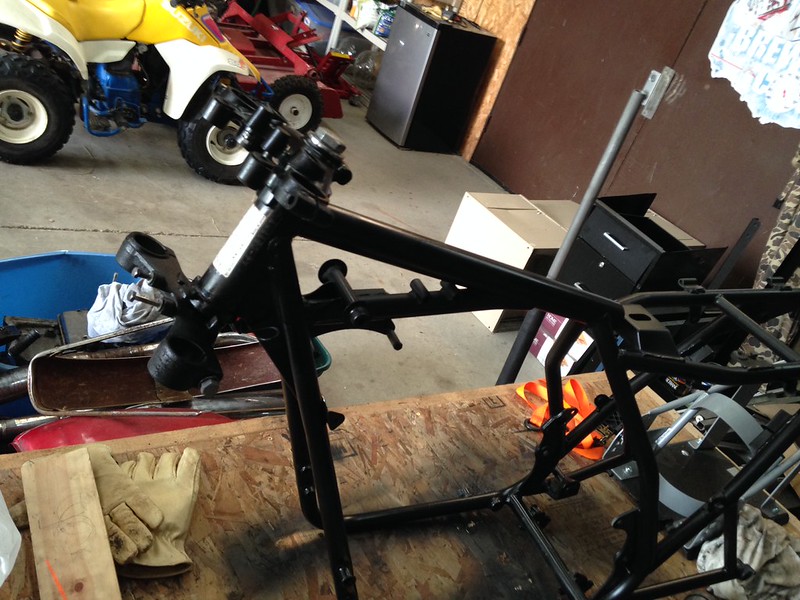
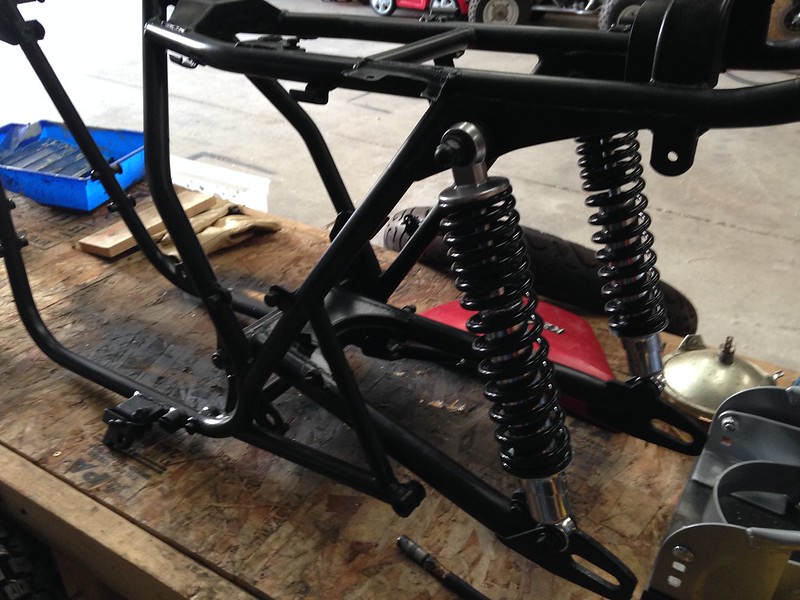
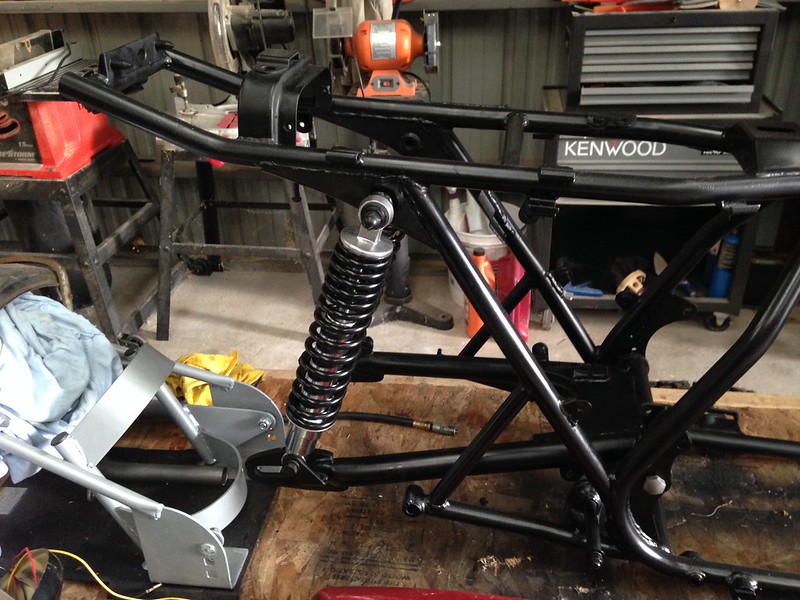
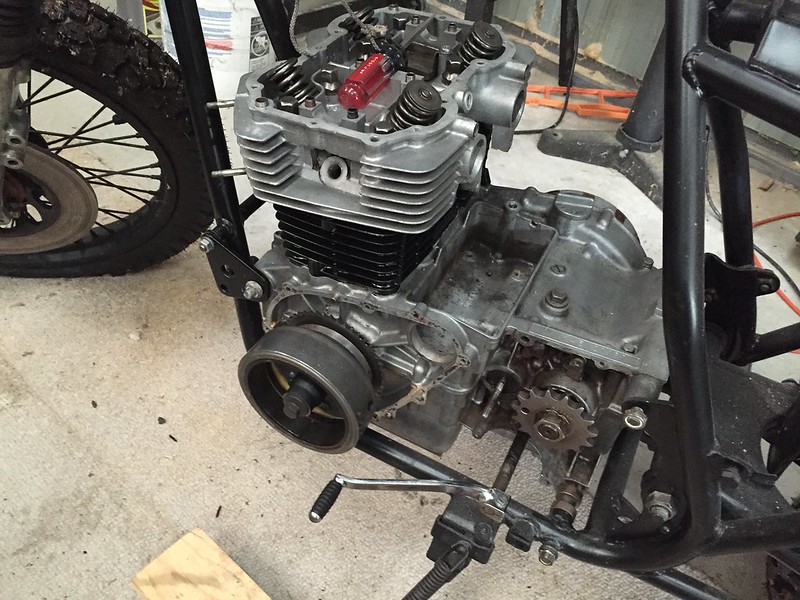
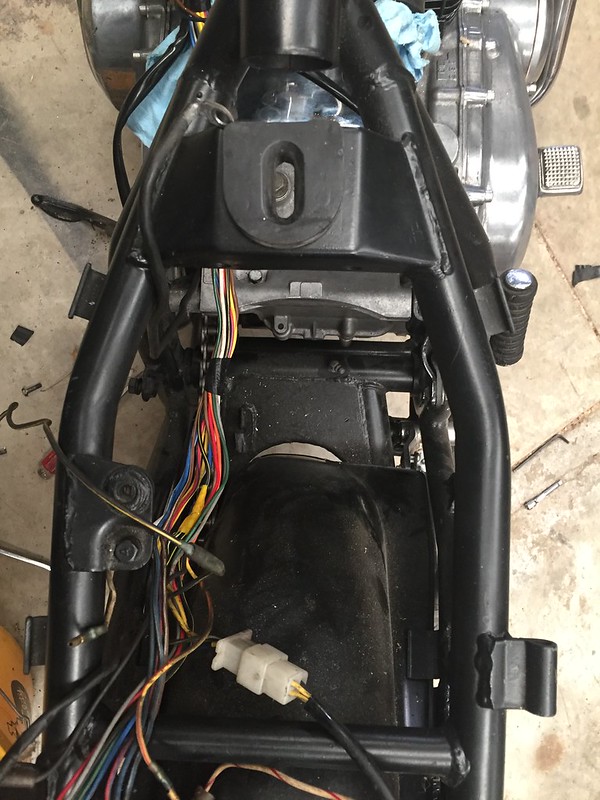
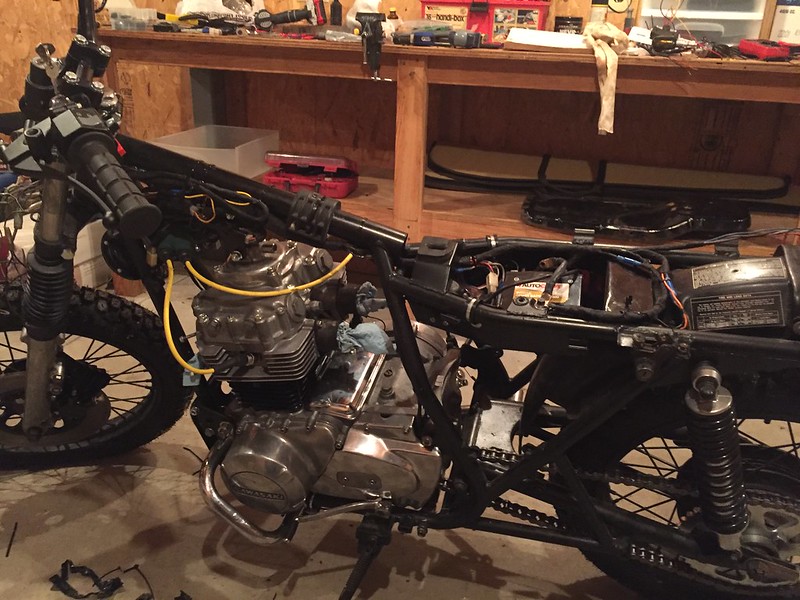
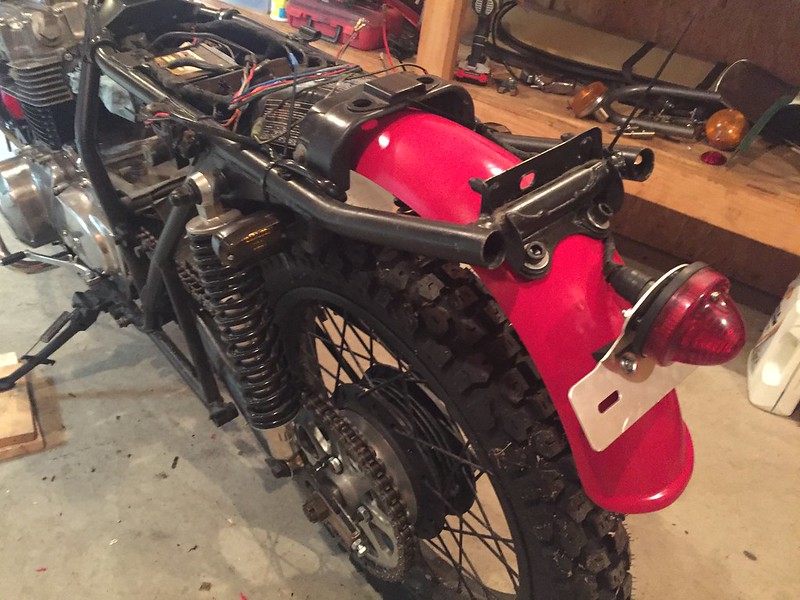
The frame was in good shape with only a little bit of surface rust here and there:
14600584970_bbdce51b94_c.jpg


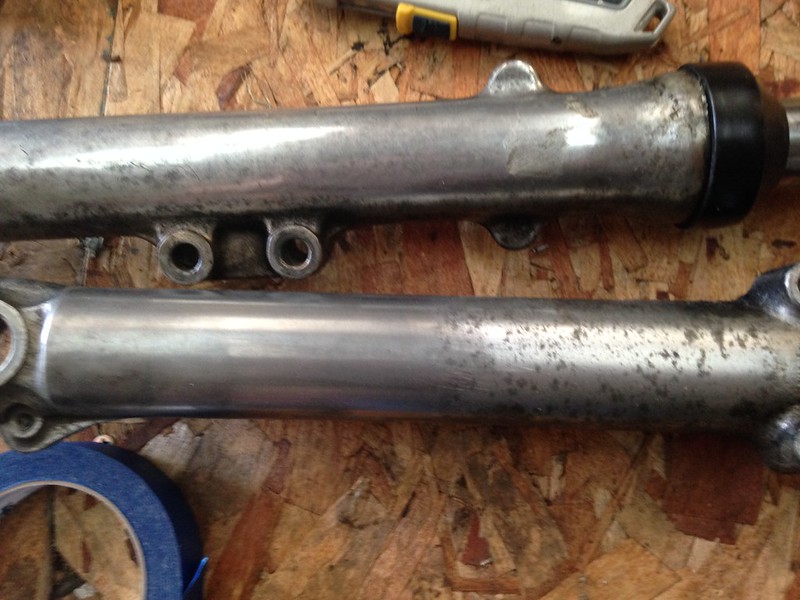
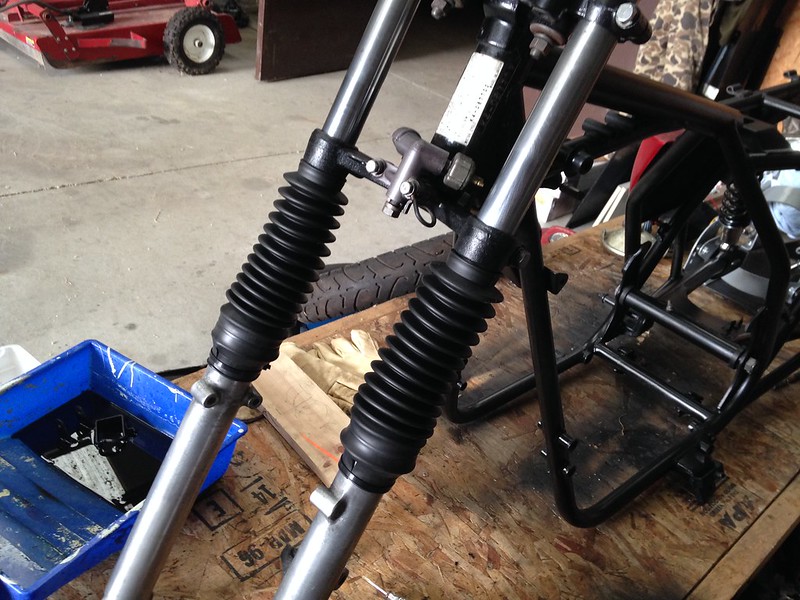
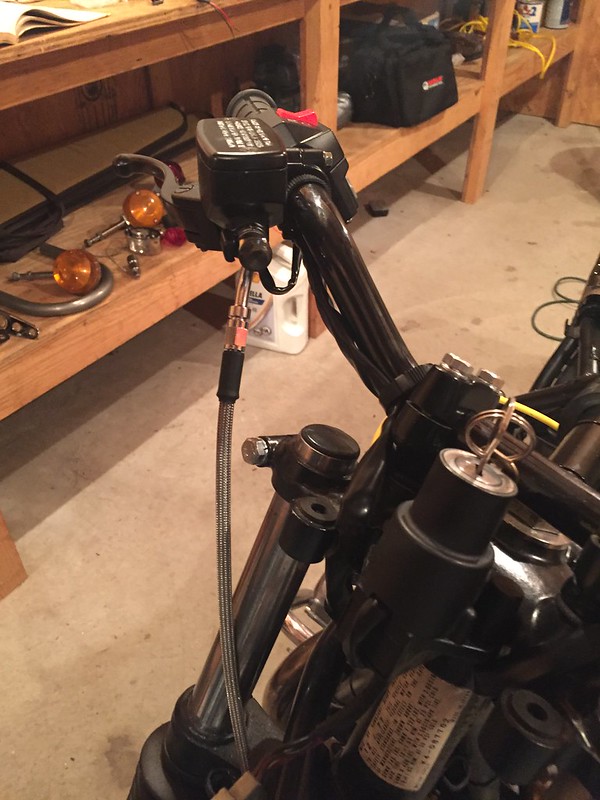
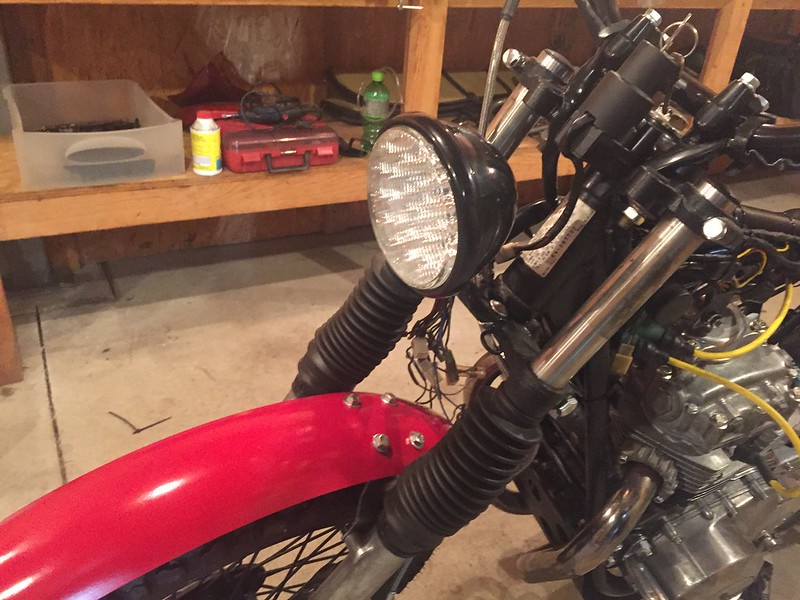
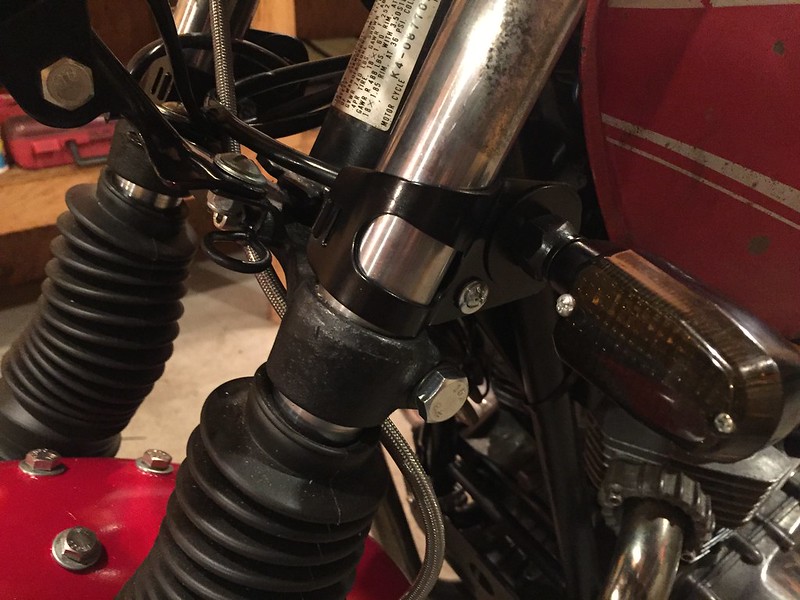
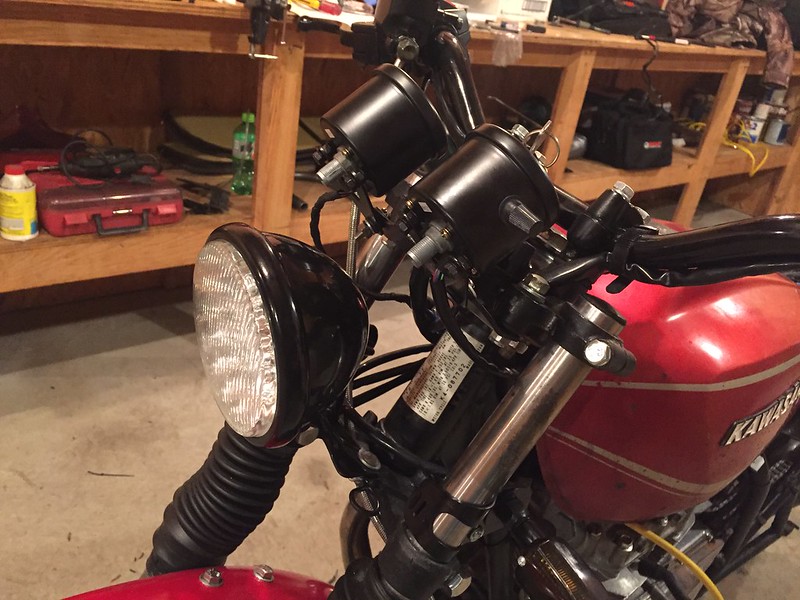
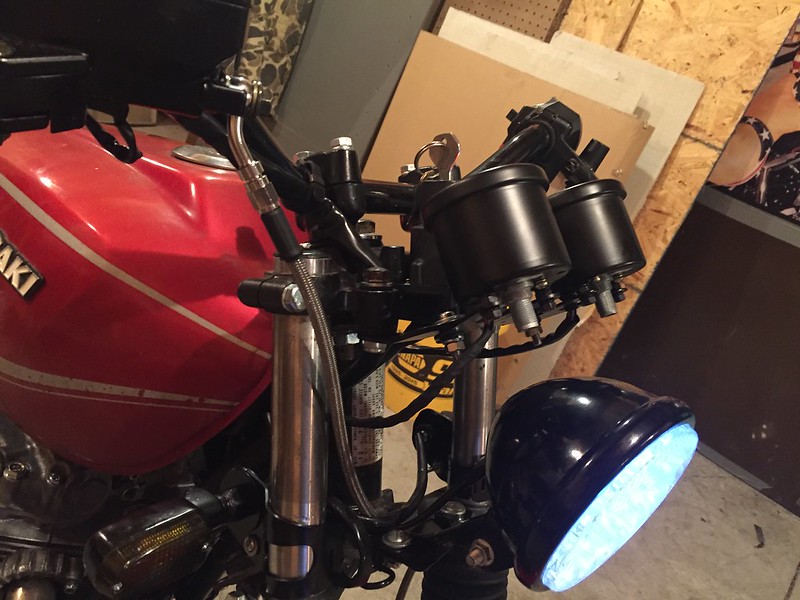
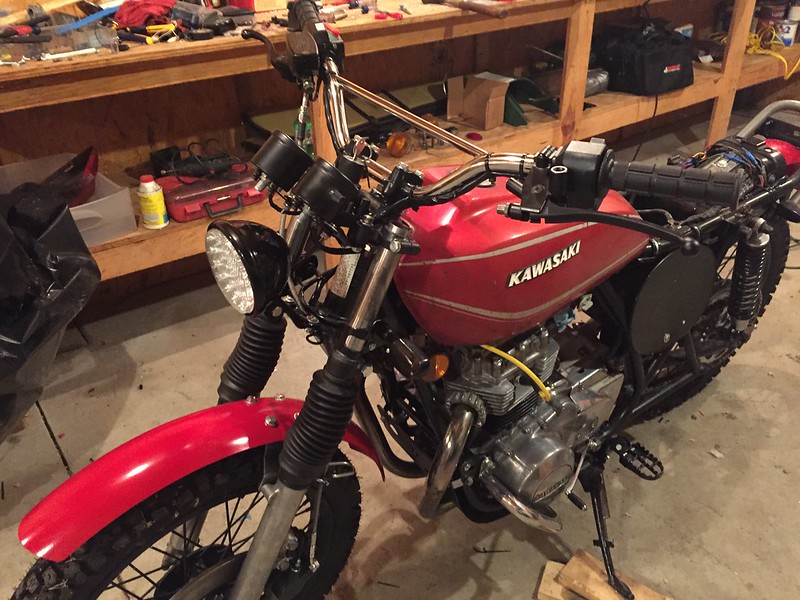
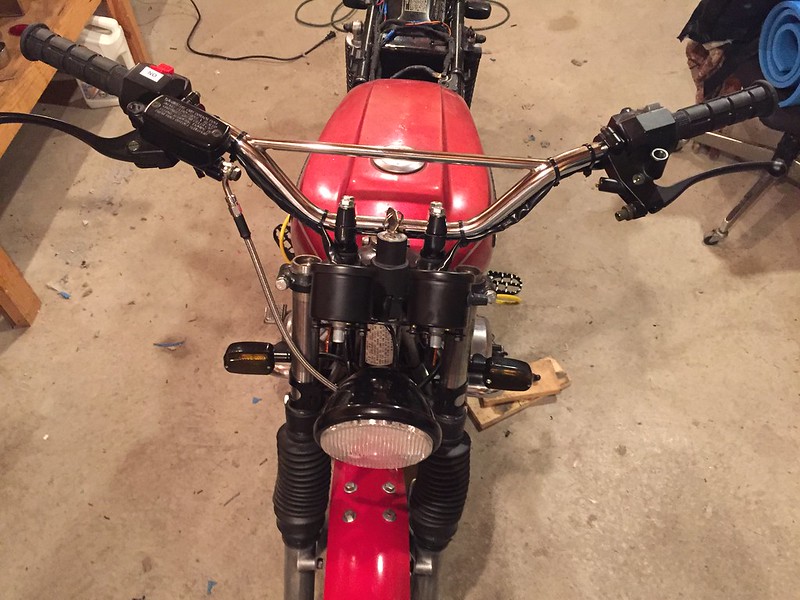
Forks were dirty and tarnished but looked like they would clean up:
14600646208_d91fc1d2f0_c.jpg


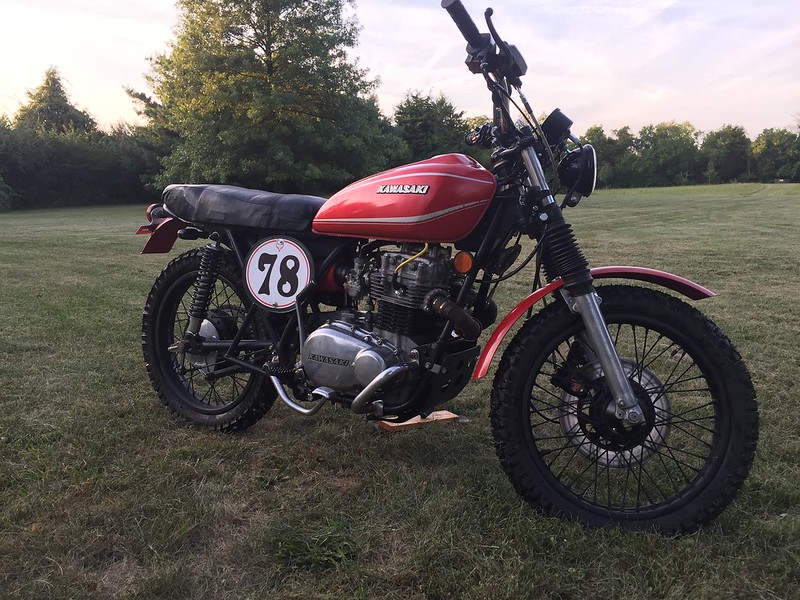
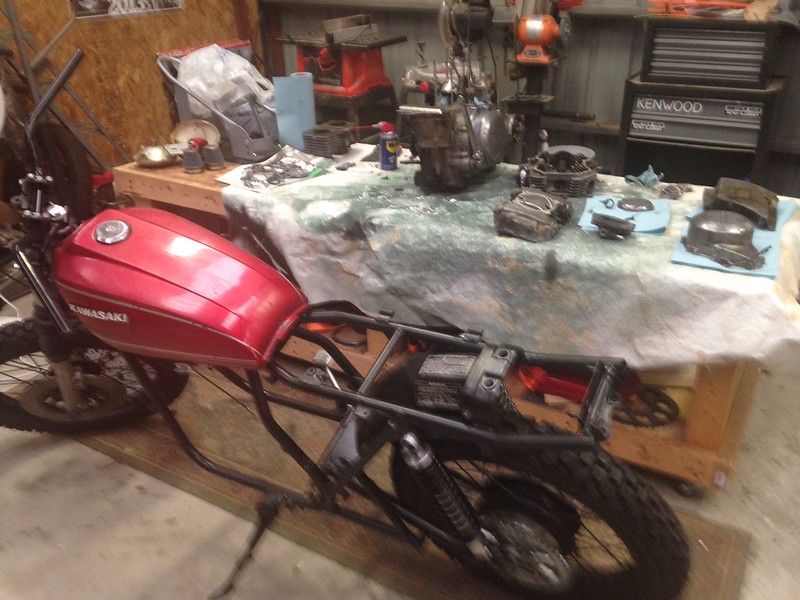
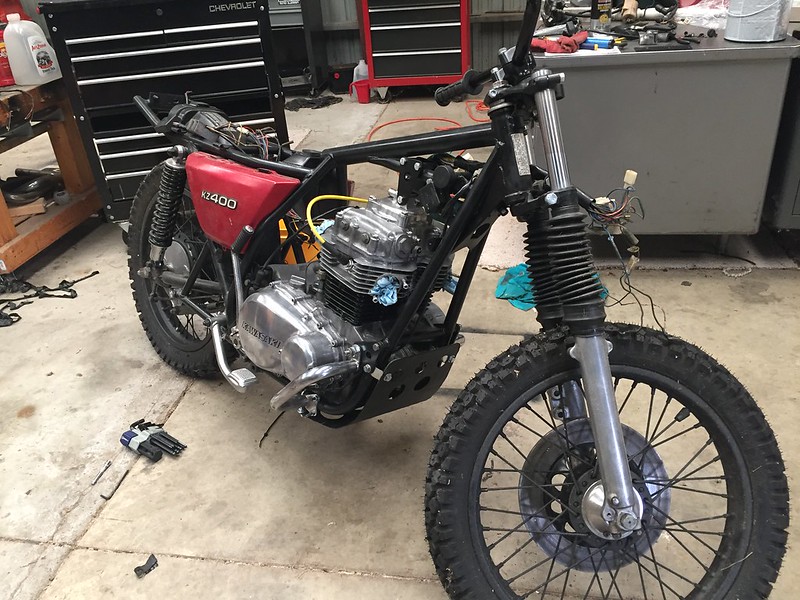
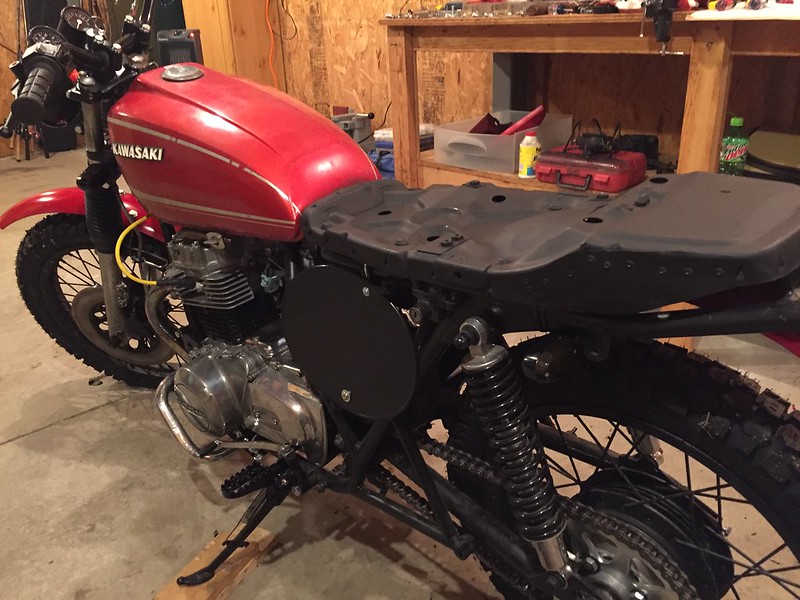
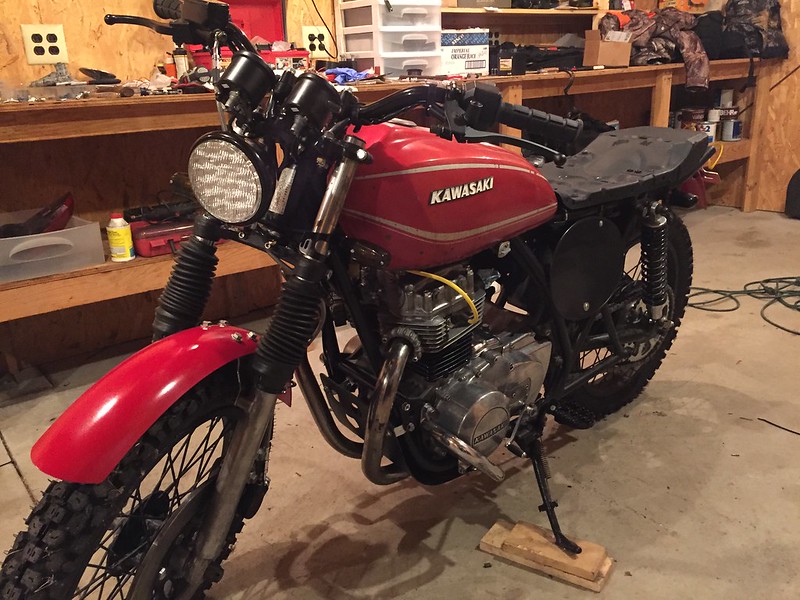
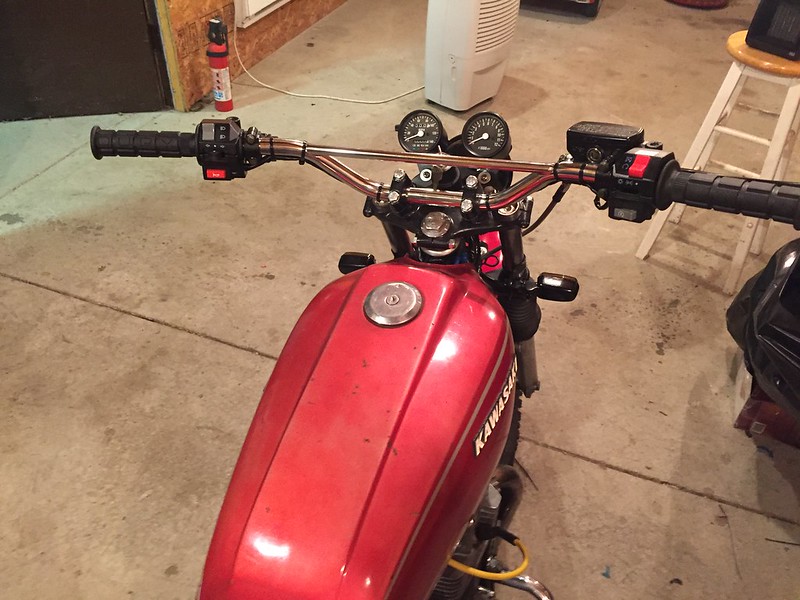
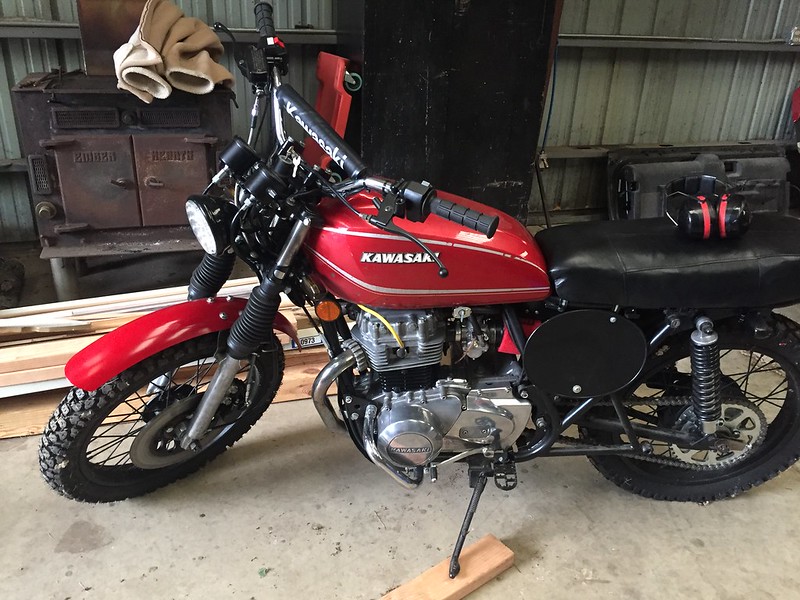
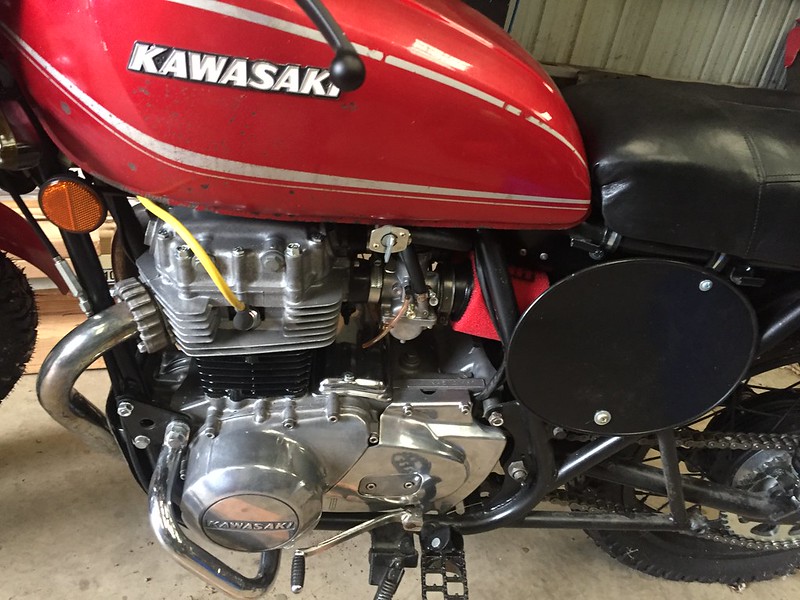
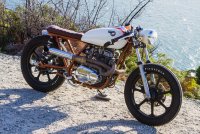
The tank had original paint and was in really good shape with some nice sun fading and only a couple minor dings. I planned on just using it as it was.

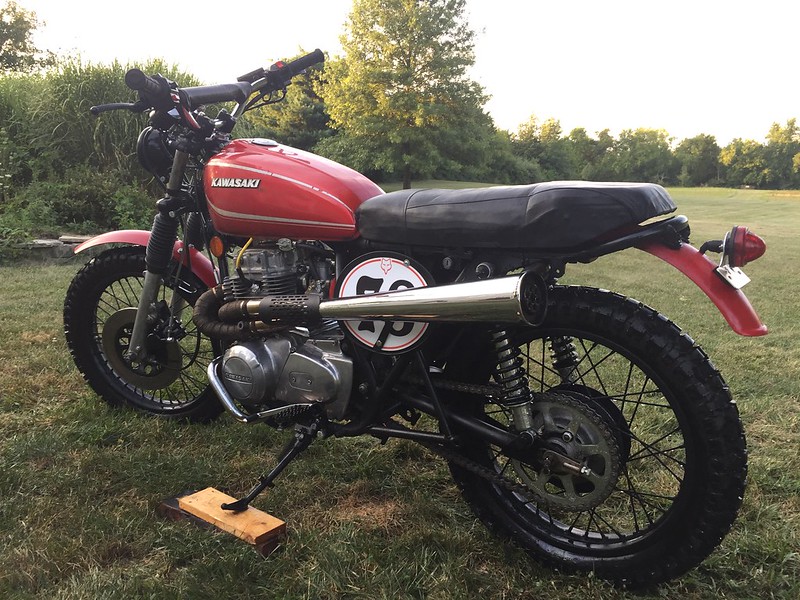
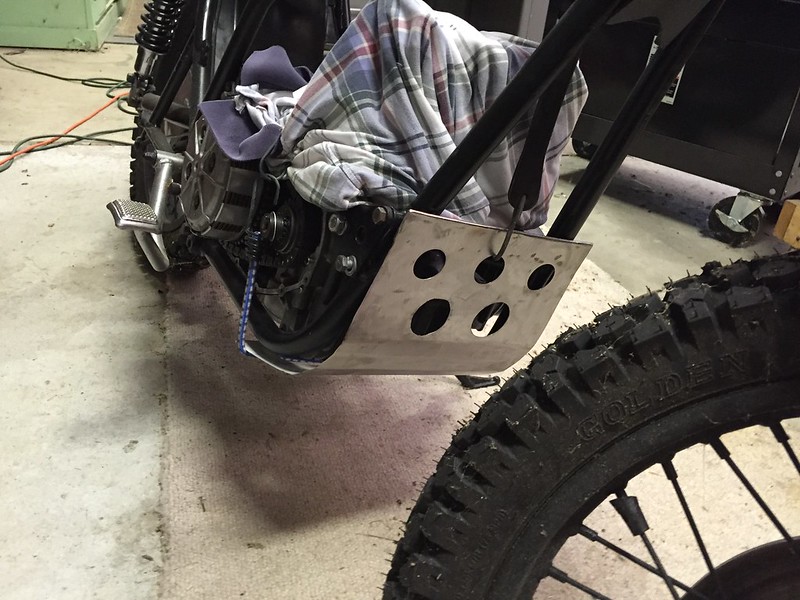
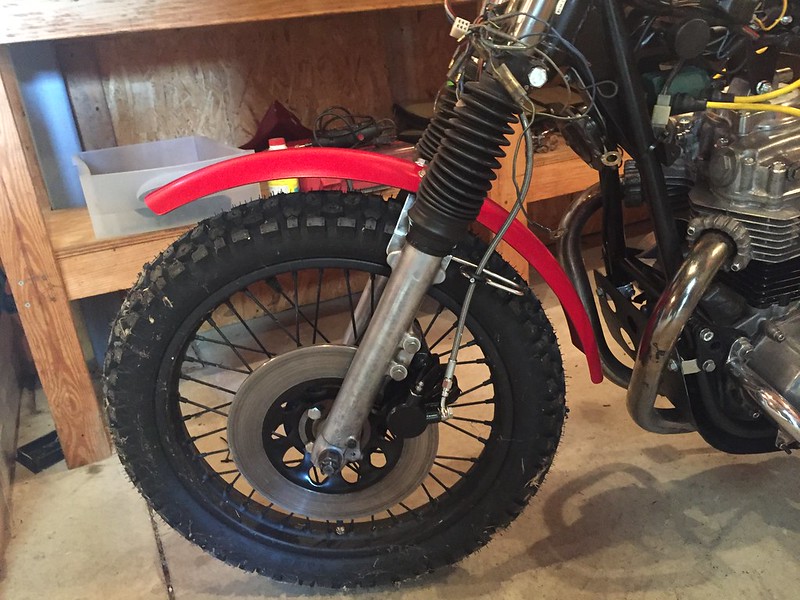
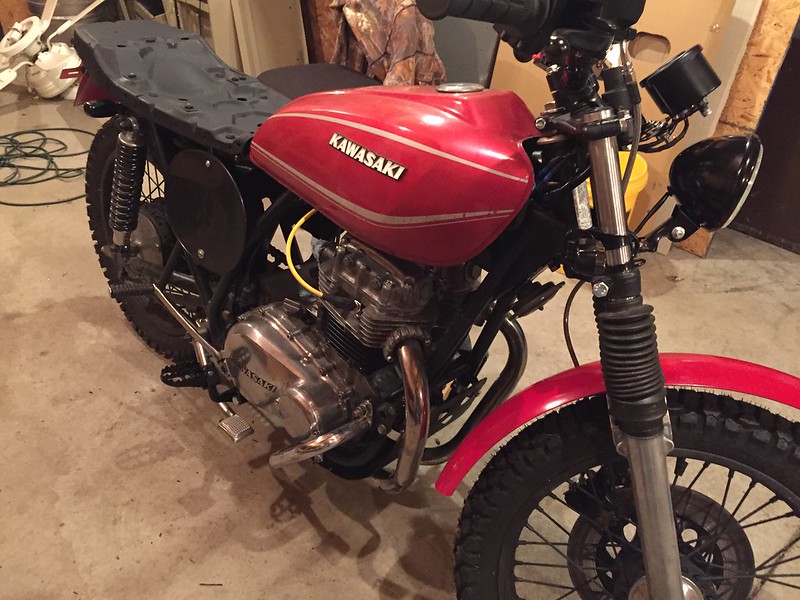
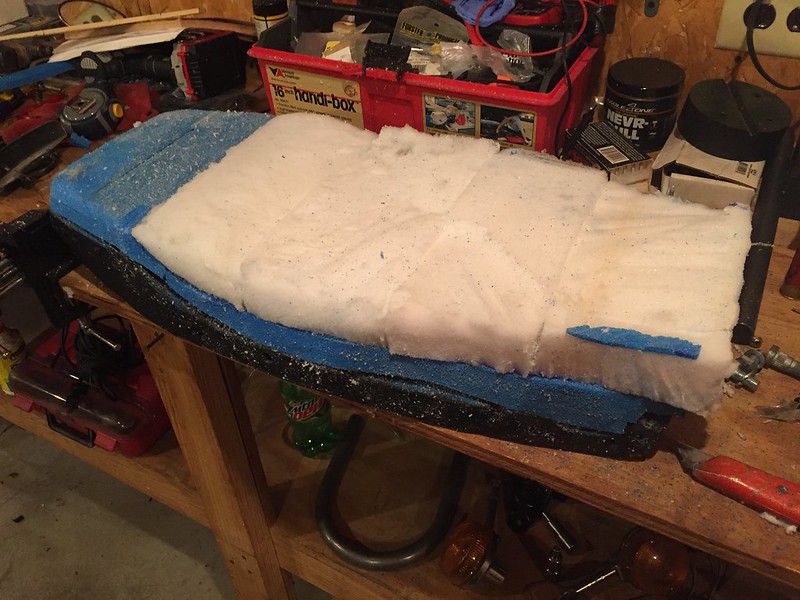
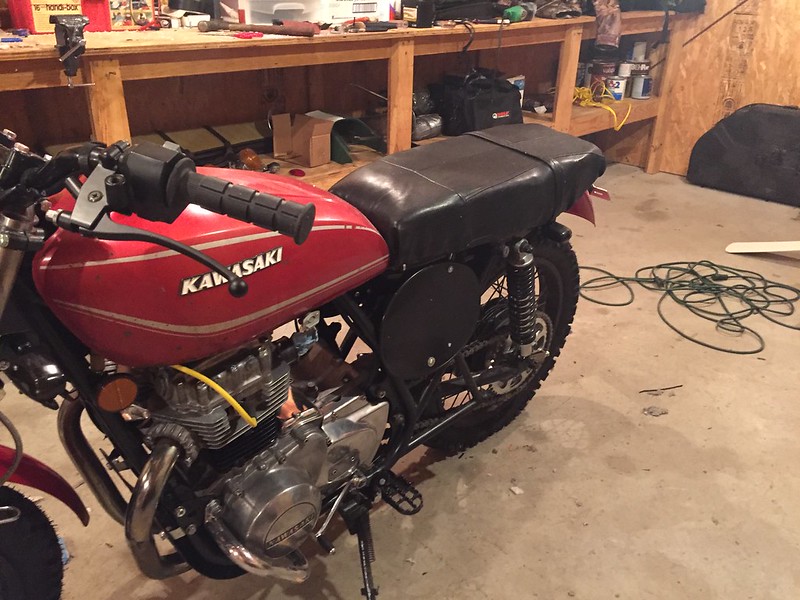
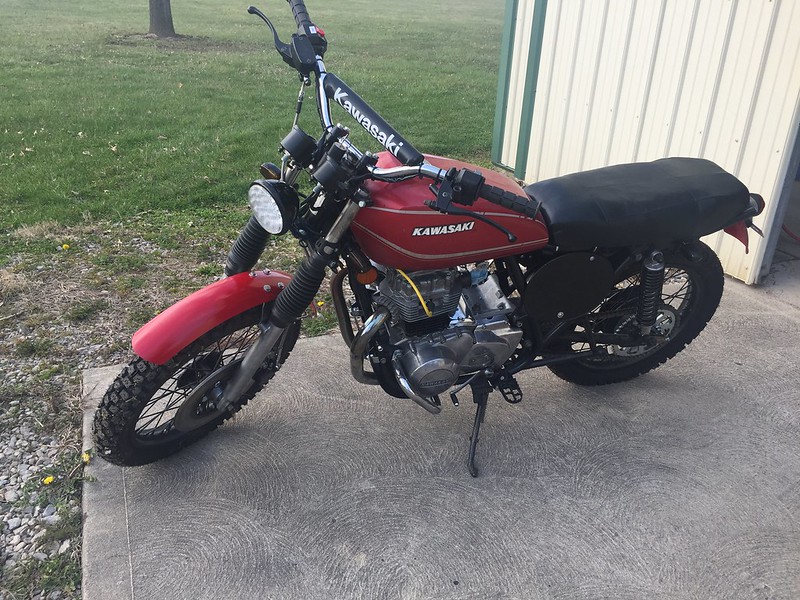
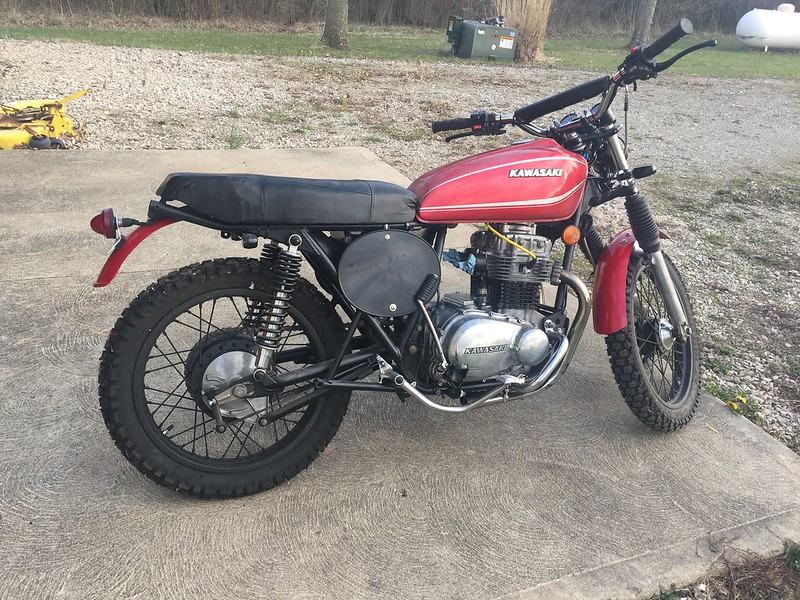
So what to do with it? I have a cafe seat and some spares from the previous KZ400 build. I know these bikes pretty well and have learned a lot of lessons so I ought to be able to build it pretty cheaply. So should I go cafe? Nope, let's build a scrambler. Kawasaki never built a factory enduro off the KZ400 platform (like a CL350/450) so I want to build one! I ought to be done before cold weather hits, right?
 
So I ordered parts: every seal, bearing, etc. to replace the originals, dyna coil, new plug wires, new tires, new shocks,new grips, and probably some other stuff I've forgotten.

Painted the frame a nice semi-gloss black:
14786947812_c13e9ed8e4_c.jpg


I know I was not going to be able to clean up the wheels and since this bike would see some dirt I didn't want to have to clean them if they did clean up so I went with truck bedliner on the wheels and spokes. The spokes are all ugly but seem to be solid. Primed first:
14600644919_017b105c2c_c.jpg


Not too bad - and now with new wheel bearings:
14886744925_e61f74775f_c.jpg


Parts started coming in:
14600603260_4dd4abafb8_c.jpg


New fork seals:
14886370892_6e361301ae_c.jpg


New tires:
14969281445_8c3fac98e9_c.jpg


New shocks (13.5" IIRC to raise the back end a little):
14782620229_98251c4079_c.jpg


Added fork gaitors (actually rancho shock boots, they are cheaper than fork gaitors and seem to last longer):
14946340616_c62309acd3_c.jpg


Swingarm mounted:
14946343886_f0c23cb270_c.jpg


New tires mounted:
14998400852_ff14f73873_c.jpg


New sprockets and chain and we finally have a rolling chassis:
15239822426_53d56a6c65_c.jpg


It has only been a little over a month and I have made some good progress. This thing will be finished up in no time.
 
A couple of months slip by (it is now November 2014) but it is time to get back into gear. I pull the bike off the bench and put the tank on to see how it may look one of these days. I put the engine on the bench and start tearing the top end apart.

15516409047_ef86e7a943_c.jpg


And then winter hits... and then spring comes back along with all the yard/home chores that need to be done.
 
Summer 2015 I find some motivation. The engine is getting degreased and cleaned.

This thing is filthy:
19496939825_b5f1f87974_c.jpg


Most parts were too dirty for the parts washer so they got spread out in the drive and hit with engine degreaser. Getting better:
19370730530_9d665bf9a8_c.jpg


Much better:
19502146501_2d708812ac_c.jpg


Someone has been in here before... and with a die grinder! I'm a little worried but also a little excited at what this might mean.
18874953784_7f982043fe_c.jpg


I should have replaced this oil seal at the time. I didn't realize how bad it was. Lesson learned (I had to take the cover off and replace it later because it was leaking):
19496921655_144f6d8a61_c.jpg


Getting closer:
20903905618_e05eb7a98e_c.jpg


A little bit of black paint on the barrels and engine is back in the bike:
28094104024_bbe9da0447_c.jpg


It is only Aug 1, 2015. Now that I am on a roll I might have it finished before the end of riding season this year!
 
Somehow a year passes... I really need to get going on this thing again.

So it's time to make a rock guard:
28244443281_8096d64c18_c.jpg


Mockup. I'll need a better solution than bungee straps to hold it in place permanently though.
28219088392_9335a17928_c.jpg


Engine covers on, rock guard in place:
30437363890_72afbbc4e7_c.jpg


30102430243_4bee791a29_c.jpg


Time to get a battery box/electrical pan in place:
30437358240_3da64f0386_c.jpg


It is now November (2016) again. Looks like I'm not going to get it done to ride this year. But I'm still making good progress so hopefully I'll have it done for the spring.
 
Battery box/wiring pan mockup with cardboard:
30706178456_973d74b39a_c.jpg


30626155942_2c79004aa4_c.jpg


The last bike I made the pan deeper than I needed. I'm not doing that this time.

30442369730_4ef3828717_c.jpg


30116916043_49ca92a6dd_c.jpg


Nothing fancy, just transferred the template to some lightweight scrap sheet metals, bent it up using some 2x4s and my vice as a brake, used some rivets to fasten it together and painted it. Attached it to the bike with P-clamps. I'll be using some type of side cover so there will not be much of it visible.

Later pic with pan in place:
31469985666_f3f8d8fea3_c.jpg


Winter is setting in but this year I want to keep working on the bike. So I move it to the back room of my barn where there is a couple of baseboard heaters and I can use a space heater. It will be warm enough to work on cold days. And to everyone's surprise I did get a lot of work done over the winter (coming soon).
 
Dec 2016 and I'm still chugging along. My initial impressions were correct, most of the parts were there, but man a lot of this stuff is just not in good shape. The left and right hand controls have some serious corrosion on them, the master cylinder is junk. I've already replaced every seal and bearing. It needs all new cables. I'm trying to keep this on a small budget but I have bought so many new parts and have yet to spring for the expensive stuff, a lithium battery, carbs, and having the exhaust fabricated. I want to go with high pipes, something very similar to the old CL350/450. I need to start trimming expenses where I can.

First cost cutting move, and it turns out probably not a good one, is going for a pair of cheaper universal handlebar controls from Ebay. These things were really cheap.

31471150276_1ffbb0dd3f.jpg


They wired up okay and work okay so far but they are made of thin cheap metal and one of the housings cracked on my probably 10th time of removing/reattaching them. I used some epoxy to put it back together but I'll eventually look to replace them. I'd like to buy the stock reproductions but I didn't want to spend $50/ea at the time. I cannot recommend them and would not use them again, they look okay and function okay so far though.

I also need a new master cylinder and clutch perch. I could have opted for something off a later model ninja but I went for a cheap set from ebay. I wanted something with an integrated brake switch so I could get rid of the splitter on the forks and a single stainless braided line from the MC to the caliper. So that limited my options a little. I later discovered that there are banjo bolts with an integrated switch - another lesson learned for the future.

31393411681_d8e77f7032_c.jpg


32109072425_b7aaf7c5b2_c.jpg


31298871753_fd0c6637f4_c.jpg


The factory wiring harness was in pretty good shape, not hacked up at all. I stripped off most of the tape and began getting it in place and wiring up the controls.

30698507893_4f20ef7254_c.jpg


30666589144_41751d89f4_c.jpg


It took quite a bit of work with a multimeter to figure out the wiring for the controls and lots of examining the stock wiring diagram but I eventually figured out how to wire the controls into the harness.

30698528953_545428167e_c.jpg
 
Still moving on with wiring. I'm going with a smaller lithium battery so I want to upgrade the reg/rect to make sure it doesn't overcharge my expensive battery. For the last bike I purchased a reg/rect from Rick's Electrics and it has worked well for several years. This time I purchased one from our buddy at Sparck Moto. It went in easily enough and has worked in the short test/tuning rides that I have done so far. Along with that I upgrade I ditched the stock fuse box and fuses for something a little more modern. I went with a 6-way fuse block though I only have 3 fuses, I may need to use another slot later and the extra slots allow for carrying onboard spares.

31469985666_f3f8d8fea3_c.jpg


31361140162_49ddea2931_c.jpg


Everything is starting to find its home. I'm using a small ATV battery (swiped from my son's LT80) in these pics for testing.

31298853333_ed07771efc_c.jpg


Reg/Rect installed underneath the tray:
32069559316_21b6ce9990_c.jpg


31733668890_e06f8a8449_c.jpg


32069933106_7d781e675d_c.jpg


32069569566_6d02fe1288_c.jpg
 
Single stainless braided brake line:
32329236856_894056edbc_c.jpg


32218102902_4640e1c601_c.jpg


31557278783_99b3bc7b94_c.jpg


I also ground off the rivets holding the front fender to the support/brace - you can see in the above pic. I'll be using something else for a front fender. I found an NOS universal fiberglass fender from the 80s still in the plastic that looked great after a couple coats of paint. Drilled some holes through the brace, added some rubber washers for spacers to give it a little more gap than the stock fender. Looks good.

32938852176_374c563aec_c.jpg


32825383922_08509bf59e_c.jpg


I also found a plastic fender that looks okay but I do not like it nearly as much as the front one. I used parts from a couple of lights that I had sitting around to build one tail/brake light. Not sure of the manufacturer of the lens/housing but it was on my Dad's 72 Triumph when he bought it. It wasn't original but it did say "made in France" on it. I tucked in some turn signals, just rear of the shocks, mounted with some angle brackets to the inner fender.

32855129931_7791807f27_c.jpg


32135947834_e4570d2924_c.jpg


Added an LED bottom mount headlight. So this bike has a little old, a little new. I'm cool with that. I made a small bracket from some scrap steel to mount to the holes where the splitter used to mount. The only issue I have now is what to do with all the wiring that used to sit inside the old headlight bucket.

32630962300_45aa390d58_c.jpg


It's starting to look like a motorcycle. I have to admit that I did sit on it at this point and make vroom-vroom noises... okay if we're being truthful I'd done it before and have done it since too.
32886886441_dbf4f8a3d6_c.jpg


Still going with wiring and lights. I cut down a pair of old headlight ears and painted them black to mount the front turn signals on the forks.
33205816055_95a7000fc6_c.jpg
 
New 2.5" mini gauges with integrated dummy lights. I used the same pair on my 76 KZ400 so I had an idea how to wire these things up.

32390860013_a3f37c1164_c.jpg


Everything works! Only issue I have is that I bought the tach and speedo from two different vendors saving myself several dollars. I assumed they would be exactly the same but you can see that the lighting between the two is quite different. In reality it does not bother me much. If I ever rode it at night it might but I usually don't ride at night.

33077897251_666de00e6d_c.jpg


Headlight works too:

33049103602_cdc74efa78_c.jpg


I used a combination of the stock gauge bracket, highly modified, and the small brackets that came with the gauges to mount them:

32823394020_830ae724d2_c.jpg


Stock seat pan, modified a little at the rear by bending it down and filling some of the gap so that it matches the frame better. And added some MX style side-covers. I wasn't sure if I was going to use the stock side covers or go with something like this. I think the bike looks slimmer and little more off-roady with these.

33293375326_13789bab52_c.jpg


32520261153_5677fb0631_c.jpg


32951916570_9f71f1b707_c.jpg


More sitting and vroom-vroom sounds. I've got the stock headers on for now but that's now where I want to end up. Time to do something with this seat. For my 76 KZ400 I kept the stock seatpan, shaved down the foam and added a cover from a leather coat. It turned out pretty good. I think I'll do something like that this time around too. If it doesn't work out I can always take it to a professional. Only issue is that the foam from this pan is long gone. Guess I need to turn to YouTube to figure out how to do this stuff.
 
After a trip to Walmart for a foam camping mat and some upholstery foam and a trip to Goodwill for a donor leather coat it is time to make a mess:

33454771395_f825d67597_c.jpg


And it did make a mess. After cutting and sanding this stuff I had pieces of foam everywhere. And the spray adhesive was everywhere too. I am still cleaning it off parts of the bike. I don't think I'll ever do this again.

Loosely fit to see how it will look. Ugly, looks like a big black brick.

33299118012_8123026867_c.jpg


Maybe it will look better after it is tightened down... a little better.

32819056923_26978389a9_c.jpg


Now that it is warmer outside the leather has stretched out a little and I need to remove the cover and re-stretch it over the pan. It may look better yet. We'll see, at this point I'm still thinking that it will need to go to a professional.
 
At this point I realized that I didn't like the superbike bars that I had chosen for this bike originally. They were a little too low and just did not have an enduro/scrambler look. Still under budget crunch and with lots of stuff left to buy I did not want to spring for expensive bars so I did a lot of looking and found some Emgo MX bars. They were chrome instead of black but this bike has a lot of black so a little chrome will be okay.

32744355734_7307f27ee4_c.jpg


33546642046_0542d36f88_c.jpg


32772928003_2367bd2dfe_c.jpg


Better. Now I just need a cool vintage Kawasaki crossbar pad that is not neon green. Then I found one on Ebay, NOS still in the packaging.

33476291022_e41e89be4e_c.jpg


33591886556_56bb785fd8_c.jpg


This thing is starting to look pretty good. It is now the end of March, 2017. I got quite a bit of work done over the winter for the first time and I am pretty proud of myself. Time to get it running and that means either using the stock carbs and creating some kind of airbox, since the original was shredded, or switching to Mikuni VMs.
 
I inspected the stock carbs, the PO said they were in good shape and the diaphragms were good, but both diaphragms had several small tears. The intake boots were in good shape though. The stock carbs on my 76 kZ400 worked pretty well and I had them sitting in a box so I pulled them out but they will not fit the 78 - the spacing is different. I would have to separate the carbs and build custom linkages. Not an attractive option.

So I could either order some new diaphragms and spend money fabricating an airbox and hope the carbs were in good shape and worked well otherwise. Or I could go with Mikuni VM carbs and K&N or Uni filters. I would need a new throttle cable either way and the difference in price between the two options was not that much. I swapped on VM30s on my 76 KZ400 and it took a while to get them dialed in but I am more than happy with them over the stock carbs. Pretty easy to tune, easy to get parts, etc. There is a guy active on the KZ400 FB group that runs Keihin PE 26s (IIRC, may be 28s) on his KZ400 race bike. That thing rips and is no way starved for fuel. I had read before that VM28s are probably the ideal size for a KZ400 but I had used VM30s before because they were a lot easier to find and others had blazed a trail before me. I decided that since this bike was a dual sport and I would probably need the bottom end grunt more then I would go for VM28s. I looked around for use PE carbs first but they are not super easy to find (especially not in a pair) and I would probably spend nearly the same amount of money for a used pair of those over a new pair of VM28s.

There is a guy that sells VM28s on Ebay for $75-80 ea. and I had them on my watch list for a long time and finally pulled the trigger. I also ordered a 2-1 throttle cable for VMs and Uni filters to fit. I did a lot of measuring for the filters and read the sizes many times and mocked up some cardboard prototypes before ordering to make sure I got something that would fit.

End result, everything fit well and looks pretty good.

33996229090_1c527fd76c_c.jpg


34222465002_15c601b0e1_c.jpg


34380813785_d520074cc8_c.jpg


34339600026_f1b4428a11_c.jpg


And it started. Took quite a bit of starting fluid but it started and idled for a bit. Oil light went out. This project may actually end one day. Time to order some main and pilot jets and get this thing dialed in. ... Wait, there are some drops of oil on the floor. Several drops at the front forks and a few drops on the right side of the engine. Uh-oh.
 
The VM28s came with 35 or 40 pilots and 190 mains. I thought the pilots might be a little too big, I run 30s in my VM30s on my 76 KZ400. My Dad runs 30s in his VM30s on his 72 Triumph Bonneville. So I ordered some new pilot and main jets from Niche Cycle. They were 2-day priority mail. Two weeks came and went and still nothing. Checked tracking and they appeared to be stuck in Tampa, FL. I emailed Niche Cycle and they sent another package immediately and 2 days later I had some jets to start playing with. It is now around the first of June.

In the meantime I set about checking all the fasteners and making sure that everything was tight and I'm glad I did, I had missed a few things here and there the first time through.

I also pulled the front forks off and found that they were leaking from the allen bolts in the bottom of the forks on both sides. One side looked to be okay, had a copper washer under it but still leaking. I happened to have some rubber o-rings sitting on my work bench. I replaced the copper washer with an o-ring and it sealed up well. The other side it seems I had forgotten the copper washer altogether. I put an o-ring in there and everything was good there too. I reassembled the forks and all appears fine now.

The leak at the right side of the engine was coming from behind the points cover. It appears that the RH crankshaft seal was leaking. Not a lot but enough to cause a drip. People want way too much for Kawasaki parts, I'm not paying $20 for a simple oil seal, so I found the dimensions and one of the auto parts stores sells a National seal of those dimensions for $5 shipped. A couple of days later it arrived in the mail. I drained the oil, changed the filter (I had run the bike a few times around the yard while trying to get the carbs dialed in), pulled off the right side cover and replaced the seal. No leaks since then. This engine now appears to be leak free and running pretty well.
 
Carb tuning started out a little rough. It was a bitch to get the thing started. I know from experience these things are cold-blooded. But once warmed up it ran well and it would start up fine afterward. I changed to 30 pilots and started with the air mixture 1.5 turns out. It ran pretty lean. At one turn out it was better. At 1/2 turn out it was even better and plugs look pretty good. Actually one looks pretty good, the other still looks a little lean but that could be for a couple of reasons. I've had to mess with the idle screws on both carbs because it wanted to surge, idle high and not return to idle when it was lean. I checked for air leaks and tightened up all the connections. I synced the carbs again and at only 1/2 turn out I need to go up a size on the pilots. Last weekend I pulled the carbs and changed to 32.5 pilots and got ready to begin chasing it again.

At this point my Dad reminded me that I'm going to have to do this all over again, maybe starting from scratch, once I get the exhaust in place and am not running open headers. So I stopped and this is how it sits now.

But man it was so much fun to ride around the yard with those 50/50 tires. I've ridden around the yard with my 76 with street tires and I'm always pretty careful. But this thing had some grip and I was really able to get on it, lean it over a bit and have some fun. I'm looking forward to getting this thing done and on the road.

So my next question is do I take it to someone, I know a guy who does custom exhausts for a living, and pay to have my high pipes done. Or do I buy the pieces (I think I can get what I need, minus muffler(s), for $100), but a cheap welder to tack it together and then take it somewhere to have it welded up. I've read of several guys doing it themselves and have encouraged me to do the same and I obviously am a DIY kind of dude. I'm leaning toward doing it myself but I will ponder it for a bit and save up some money.

I'm thinking something like the attached pic but on the left side of the bike. Not sure if I'll wrap it though. Might have it coated. Might just spray it with ceramic paint myself. And I'll probably use a heat guard or two as well.

In the meantime I had to tear down the top end of the 76 KZ400 to fix some oil leaks that have gotten worse over the last couple of years. That's in the process of going back together. I'd like to ride at least a little bit this year. I had hoped to have both bikes ready for the Cincy Cafe Racers / Garage Brewed tent for Vintage Motorcycle Days at Mid-Ohio, but neither will be.
 

Attachments

  • olVuHmH.jpg
    olVuHmH.jpg
    3 MB · Views: 338
Having a custom exhaust made will probably cost almost as much as a cheap TIG welder. Plus once you have a welder you can make all types of cool shit. There will be a learning curve and it will take some fucking up before you're able to make some good welds but you can always blend them out of they are not satisfactory.
 
Couple of other things I forgot: new brake shoes in back, new brake pads in front. New tapered bearings All Balls bearings in the neck. Both wheels got new bearings. I believe that all bearings, seals and gaskets have been replaced (other than in the bottom end, I did not split the crankcase).

I also swapped over the the electronic ignition from the later KZ440s. I'm pleasantly surprised that with all the electrical system changes I made with this thing all at once that it started right up and everything seems to work properly. (Knock on wood).

If I think of anything else I will update as I go along.

Oh yes, one thing I did forget. The first time I started putting the engine back together I broke an oil ring on one of the pistons. I had to pull the barrels back off and luckily I had a spare set of rings. I used the oil rings from the new set and everything went back together fine.

The bores measured a little on the large side but still within spec so I just honed them a bit with a nice crosshatch pattern and put the original pistons and rings back in (other than the oil rings that is). Pistons and rings all measured fine.
 
My indecision on what to do for the exhaust caused this project to sit untouched for 2 years. After watching some videos on YouTube I finally said screw it, I can do this and set about making my own pipes a couple of months ago. The welds started out super crappy but became less crappy and nothing a grinder and flap disc couldn't hide. Best part is that the metal stuck together. Added some high heat paint and some header wrap and the exhaust is done. I spent a long time trying to get the pipe that wraps around to be where it needed to be and be able to be removed. I could not get it to do both so I ended up buying a v-band clamp and flanges and creating a clamped union at the front of the engine. I figure it a v-band clamp will work for a turbo sitting downstream from a multiple cylinder car head then it ought to work for this KZ400 exhaust pipe.

Since finishing up the exhaust I have been working on getting the VM28s dialed in. I am at 32.5 on the pilots, current at middle notch of the stock needle (not sure of the stock jet needle and needle jet size, I'll have to look it up), and am at 180s for the mains but the mains are a work in progress. 180s are the smallest I have, I need to pick up more.

Only other issue I have right now is that I had a spill with the bike a couple of weeks ago at slow-ish speed and the right hand handlebar control housing was cracked leaving the throttle cable just hanging loose. I need to replace that before I can resume carb tuning. The spill that I had also led me down a path that found the clutch friction disks needed replaced. That has been completed.

This thing has come a long way. I am glad it is finally close to being plated and back on the road.

48468098501_0a7b2f5026_c.jpg


48468098436_ba29de4bf9_c.jpg


48468098676_4d7b76c032_c.jpg


48468099406_c22b92d0f7_c.jpg


48468142786_496bc7790d_c.jpg
 
Back
Top Bottom