
We noticed you are blocking ads. DO THE TON only works with community supporters. Most are active members of the site with small businesses. Please consider disabling your ad blocking tool and checking out the businesses that help keep our site up and free.
You are using an out of date browser. It may not display this or other websites correctly.
You should upgrade or use an alternative browser.
You should upgrade or use an alternative browser.
CB350 cafe, a mix of old school & new
- Thread starter K4
- Start date
K4
Active Member
Thanks guys
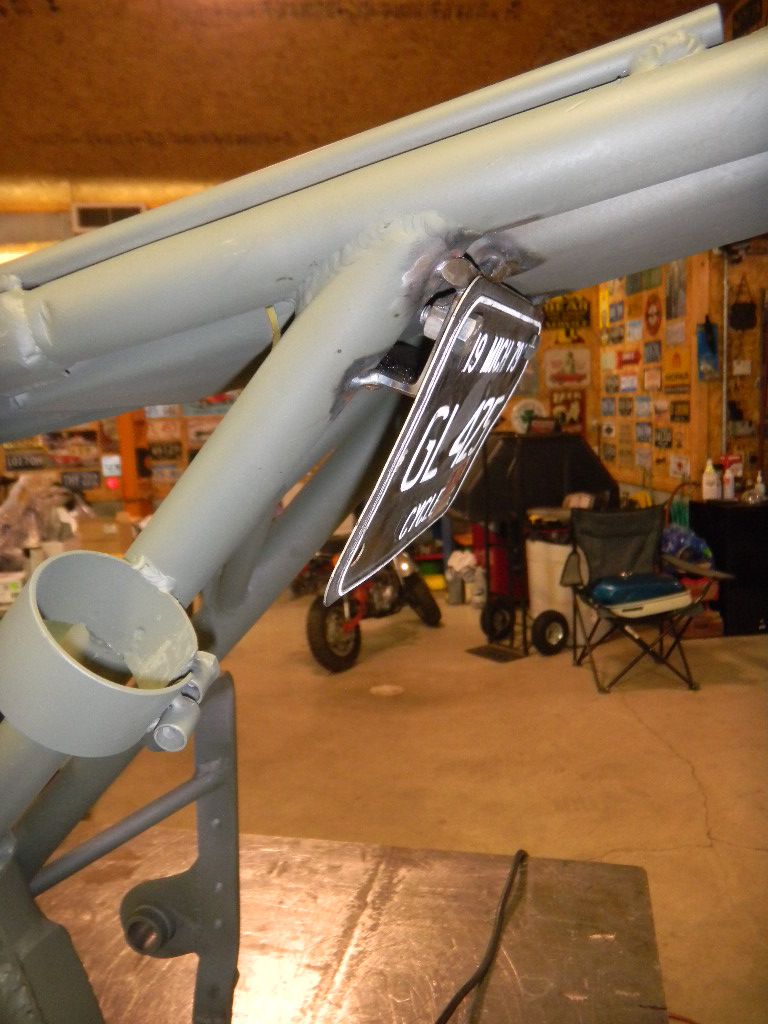
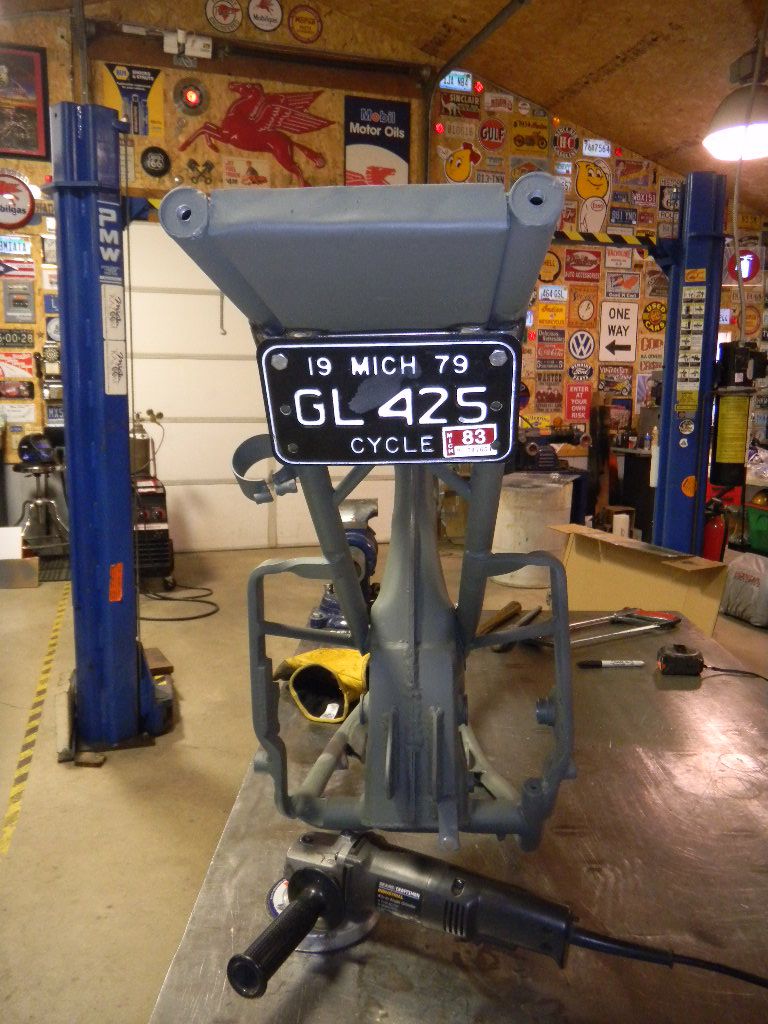
Decided to tackle the license plate bracket. First choice was mounting under the tail light, but it would have been at such an angle it wouldn't be seen from behind.
Second choice & not my favorite was to go with a vertical mount.
Bought generic unit, had to machine a bushing and washer. Also got a longer shaft which need to be shortened and rethreaded.

The vertical was working on me and with some added feedback decided to go another route.
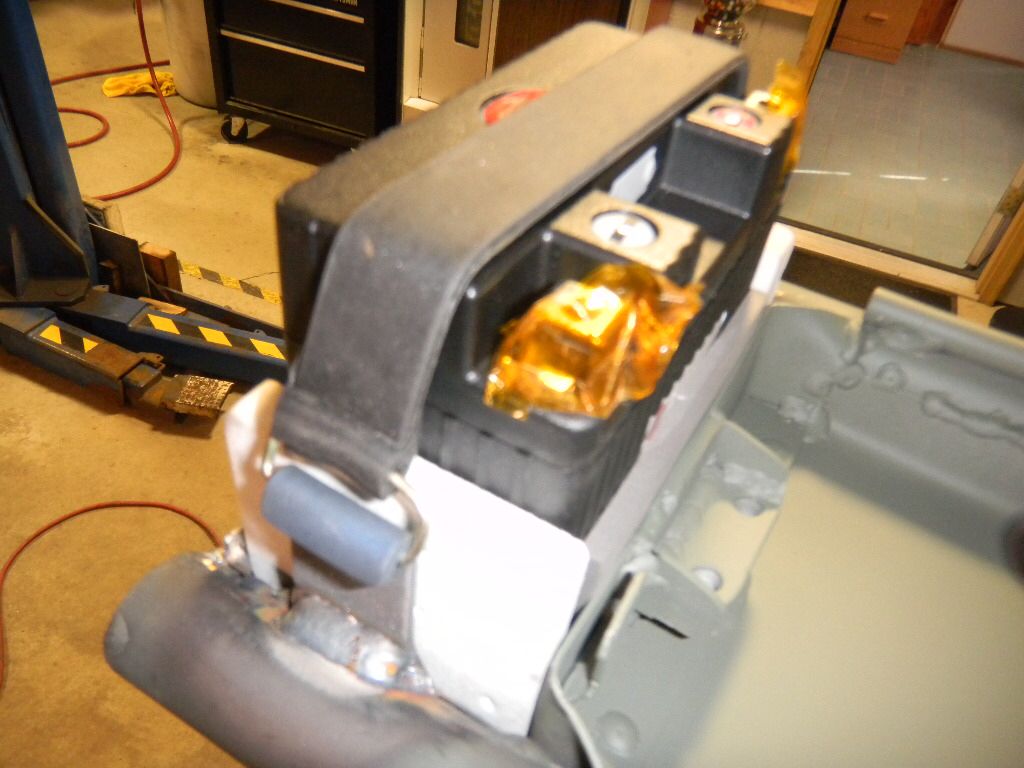
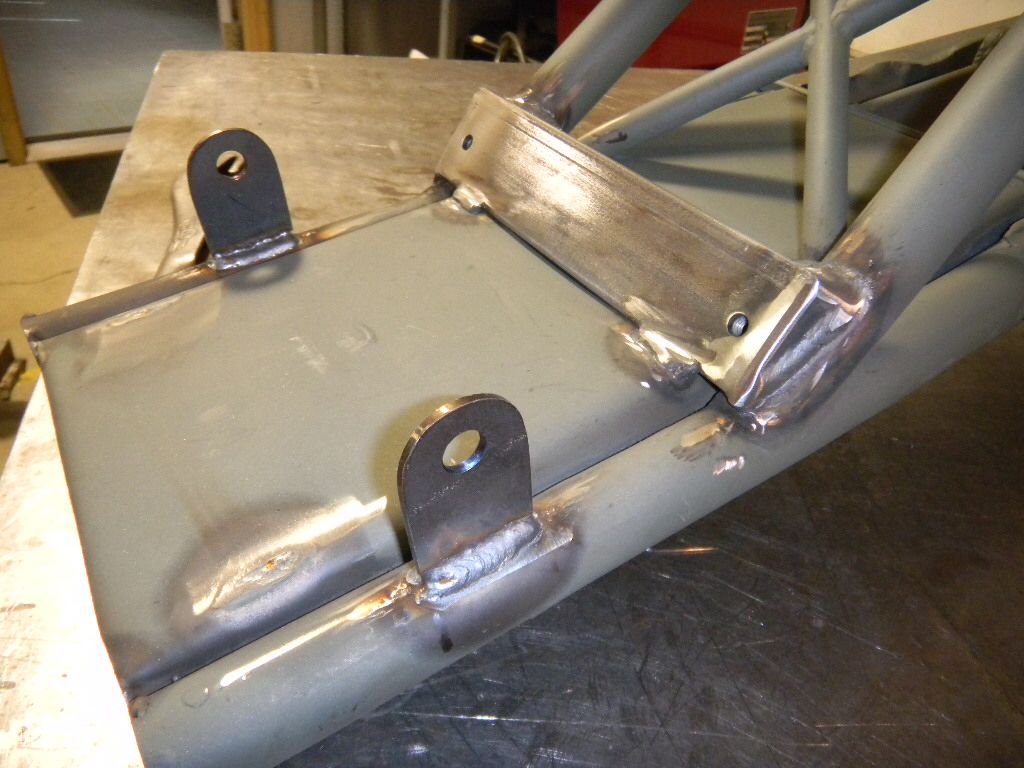
Thought the frame work was finished, then remembered I'd forgotten about the battery hold down brackets.
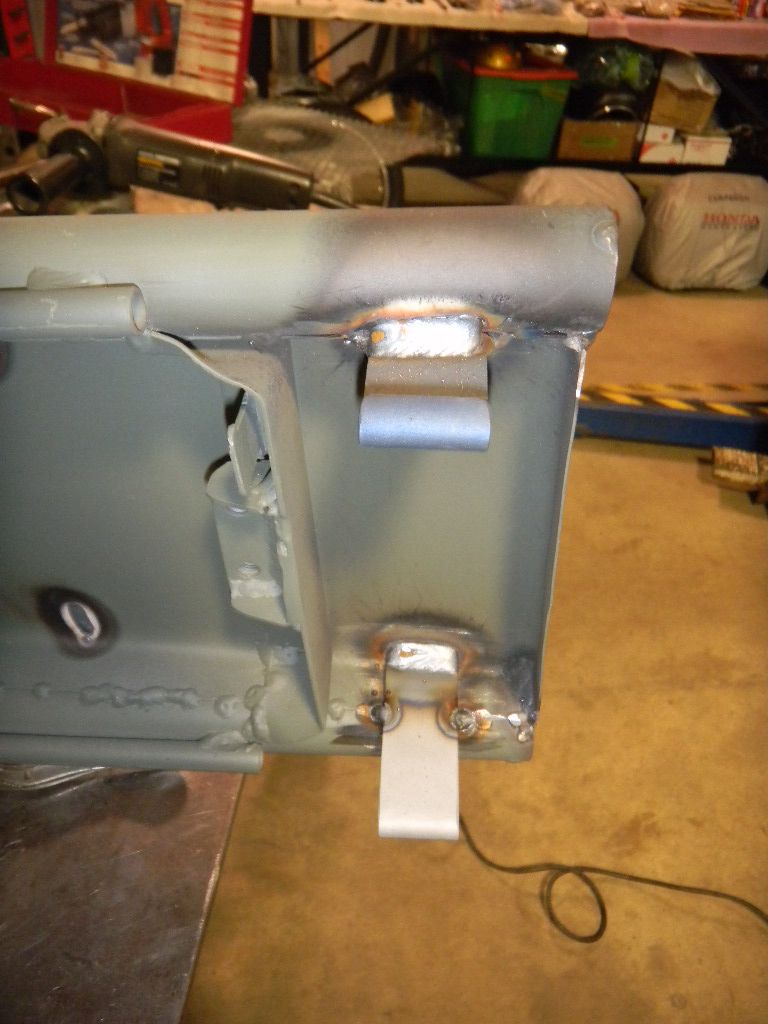
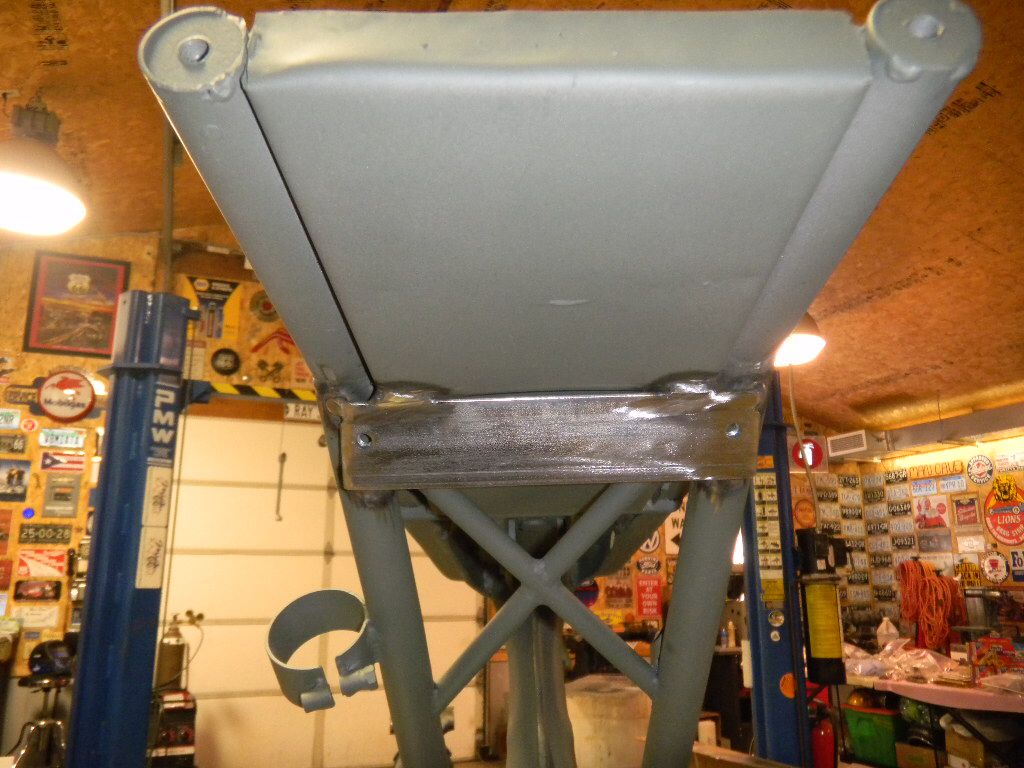
Decided to relocate the turn signals from the seat cowl to the frame. Also boxed in the license plate bracket.
Frame finally finished (I hope),
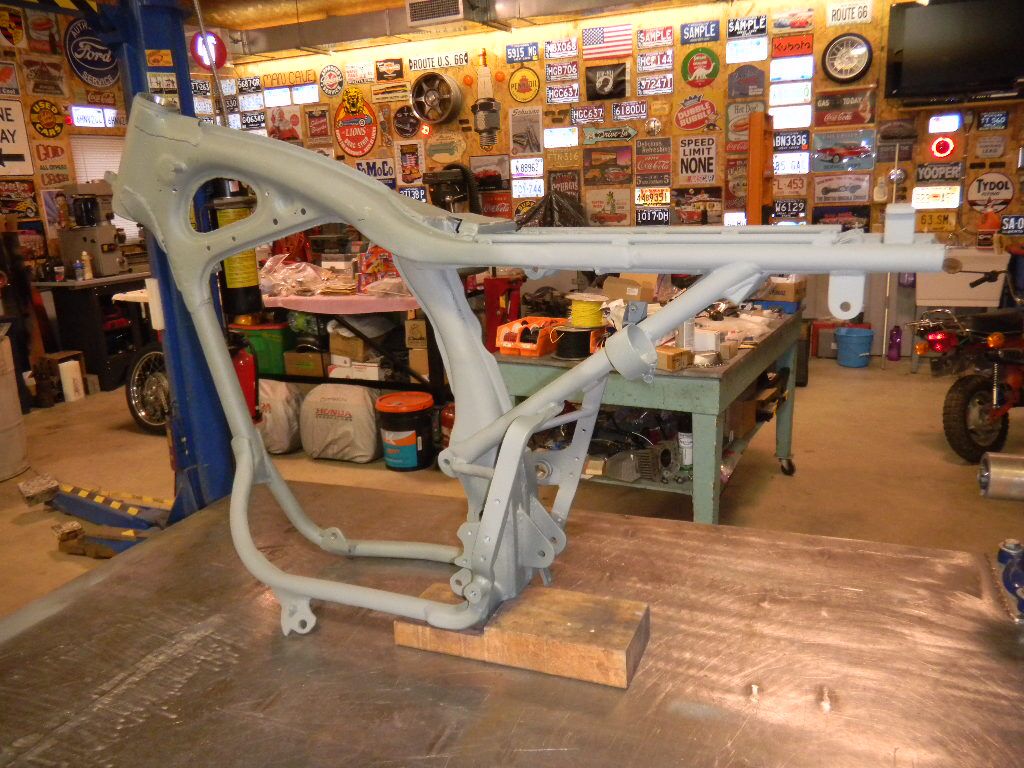
Frame on makeshift rotisserie. Painted it with 1 1/2 cans on Rustoleum epoxy appliance paint.
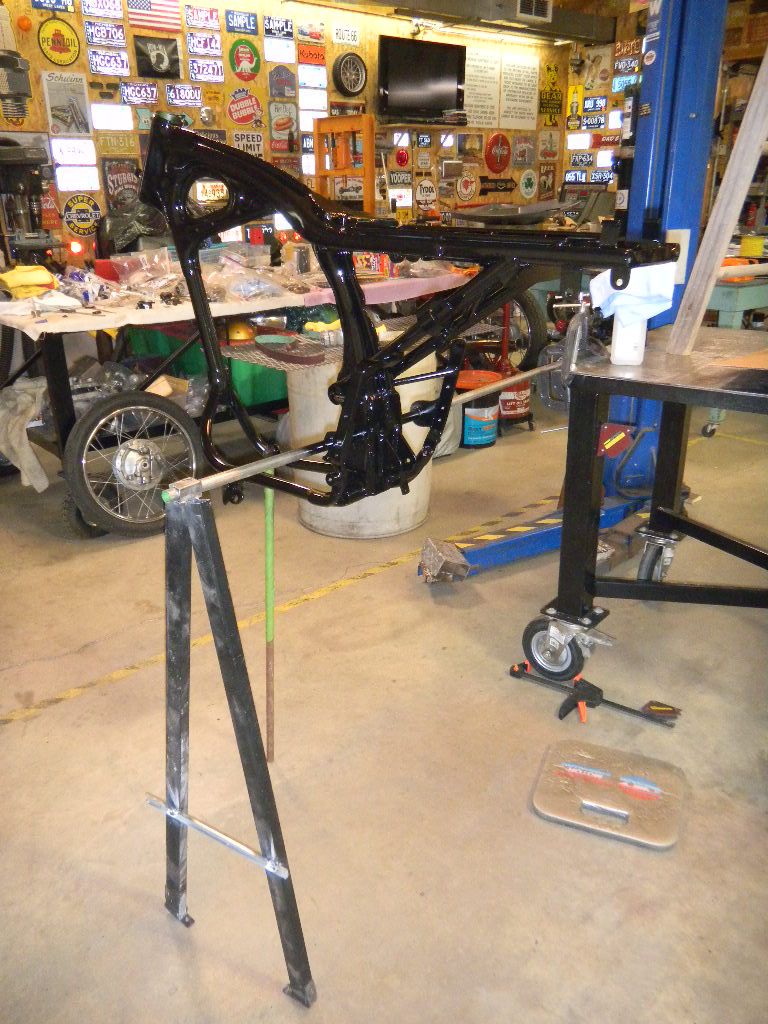
Lots more to do...
Decided to tackle the license plate bracket. First choice was mounting under the tail light, but it would have been at such an angle it wouldn't be seen from behind.
Second choice & not my favorite was to go with a vertical mount.
Bought generic unit, had to machine a bushing and washer. Also got a longer shaft which need to be shortened and rethreaded.
The vertical was working on me and with some added feedback decided to go another route.
Thought the frame work was finished, then remembered I'd forgotten about the battery hold down brackets.
Decided to relocate the turn signals from the seat cowl to the frame. Also boxed in the license plate bracket.
Frame finally finished (I hope),
Frame on makeshift rotisserie. Painted it with 1 1/2 cans on Rustoleum epoxy appliance paint.
Lots more to do...
K4
Active Member
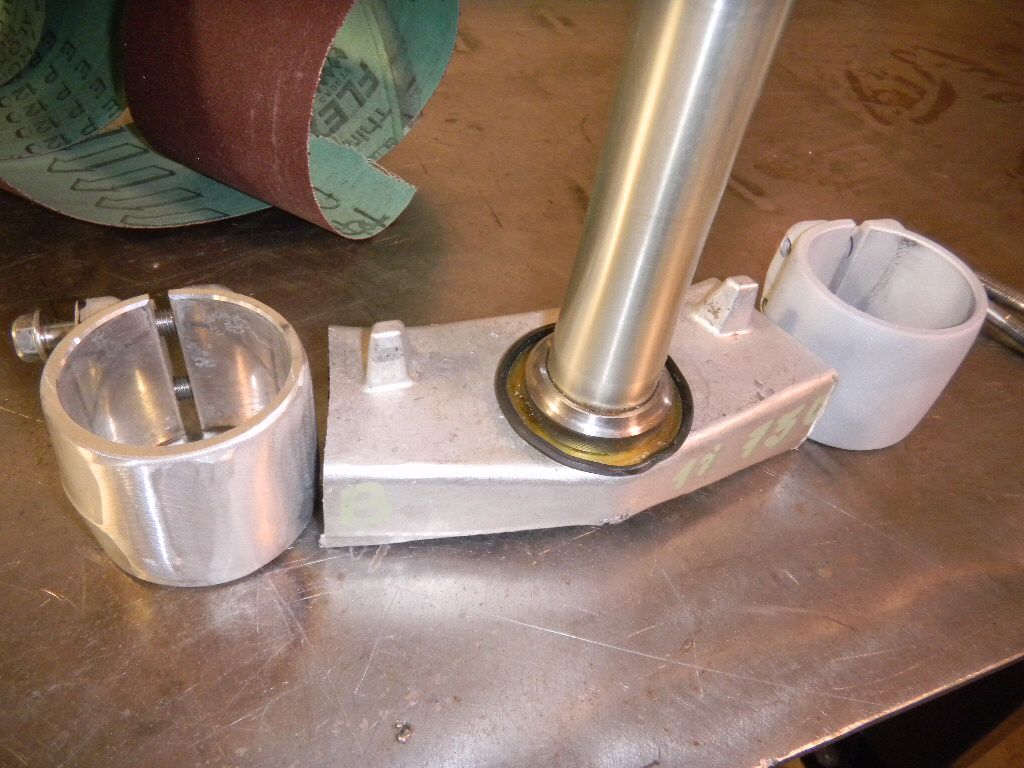
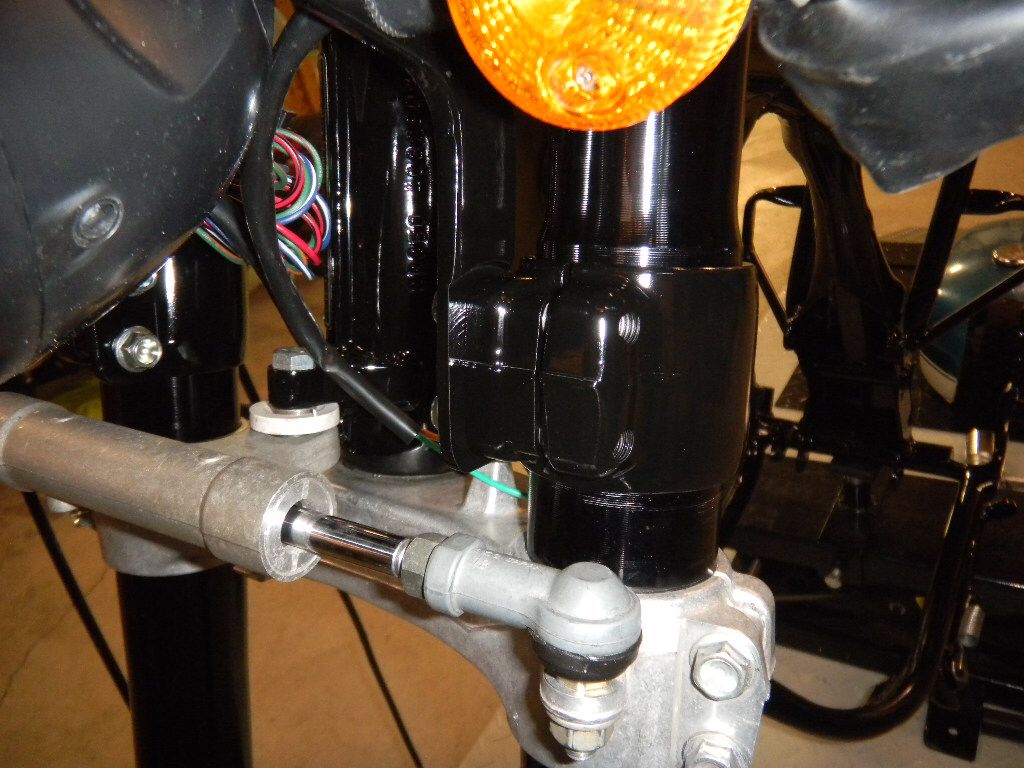
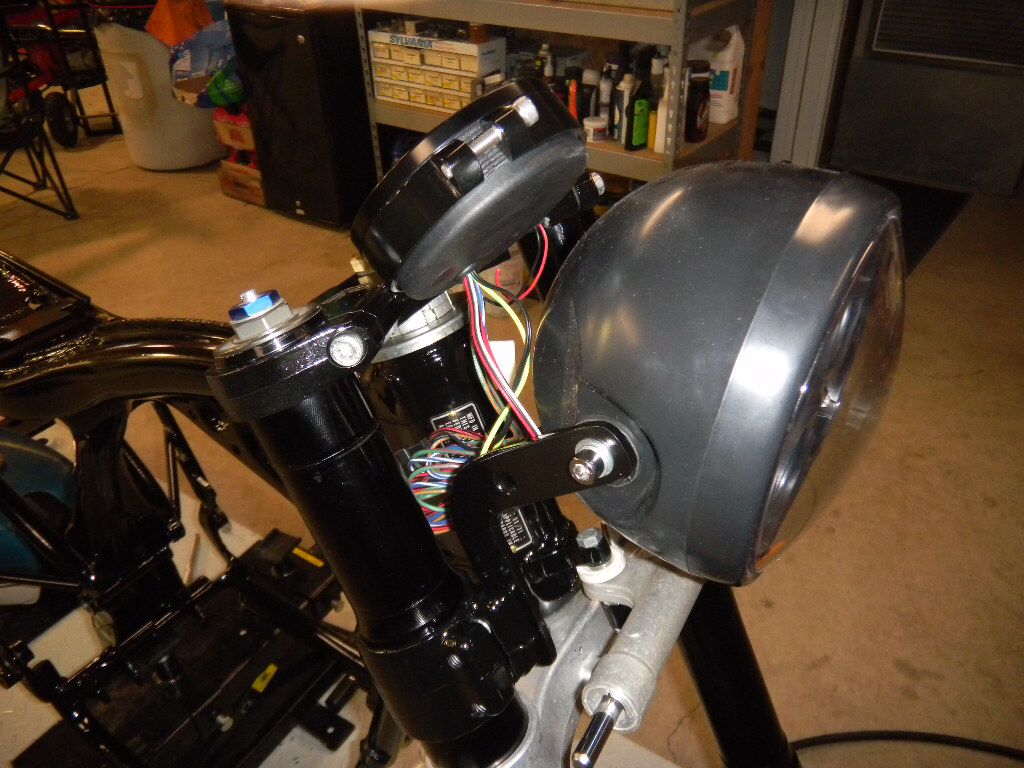
Had purchased a set of headlight brackets, but they hit the tank, lock to lock. Didn't want to reduce the turning radius, so went another route.
Got a used/damaged lower triple tree. Cut off the ends, took a flapper wheel to get the high spots, finished it with 120 grit paper and a trip through the bead blaster.
Left side is just after the flapper wheel, right after bead blasting.
Two coats of paint
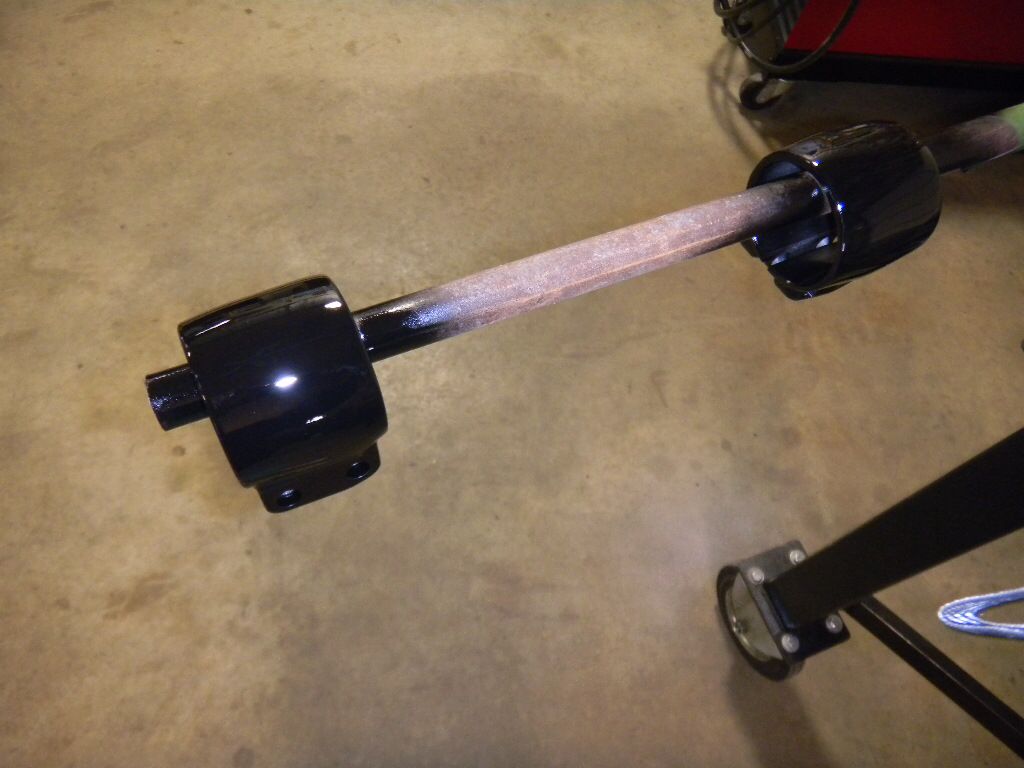
Installed
Misc
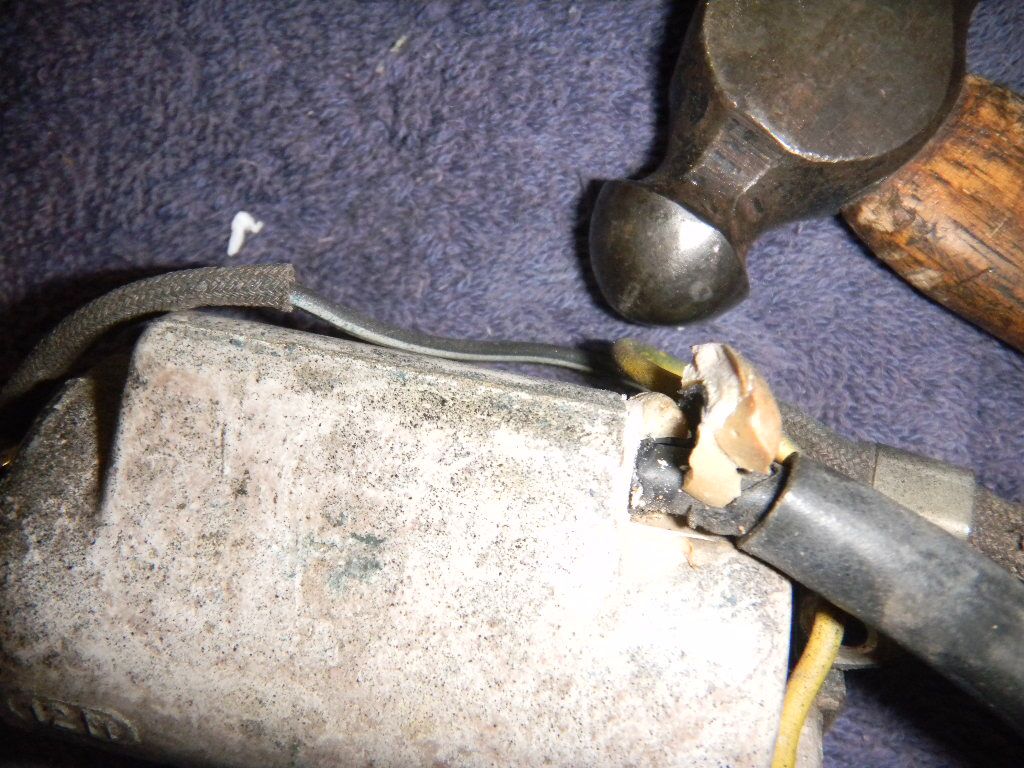
Had to replace the coil wires. Had seen where it had been done before, so thought I'd take a stab at it.
Started by knocking off the old epoxy with a screwdriver & hammer. Kinda surprised how easy it came off.
I used a "third" coil that I didn't know if it worked as a guinea pig. When I took the epoxy off, the wire broke and had to dig it out. Used a 7mm drill bit, and carefully got most of it until I felt the pin inside the bore. On the other two good ones; the wire came out whole.
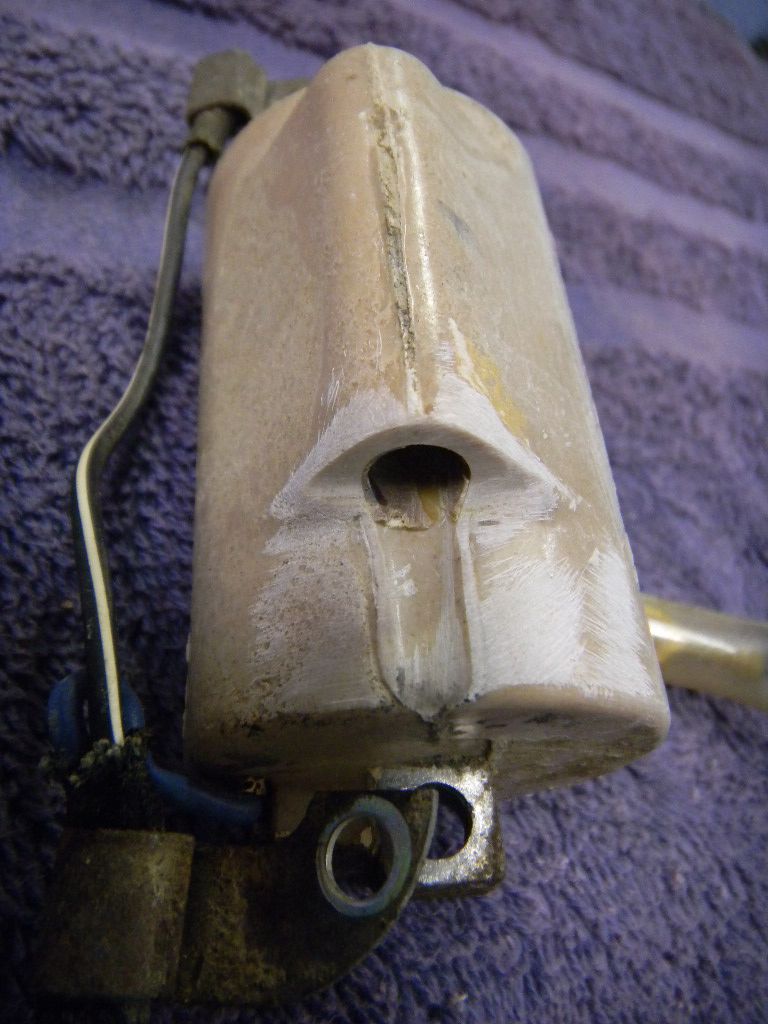
Here's a shot of the guinea pig coil after getting the old wire out. Note the metal pin in the center. It's where the new wire has to get stabbed into.
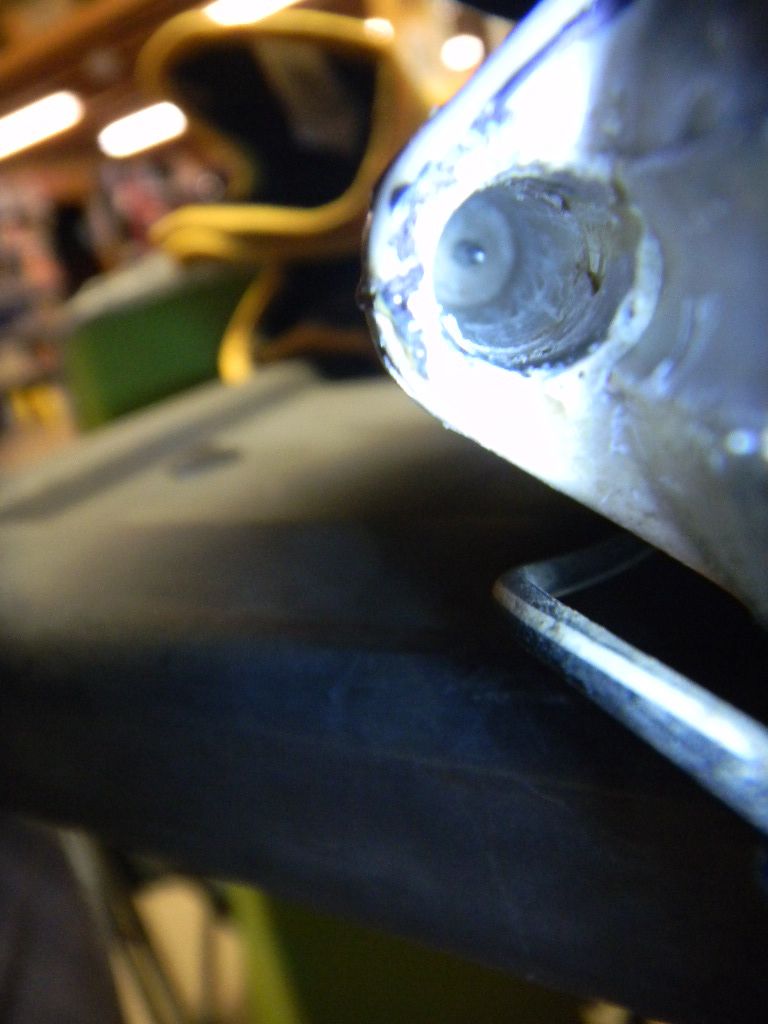
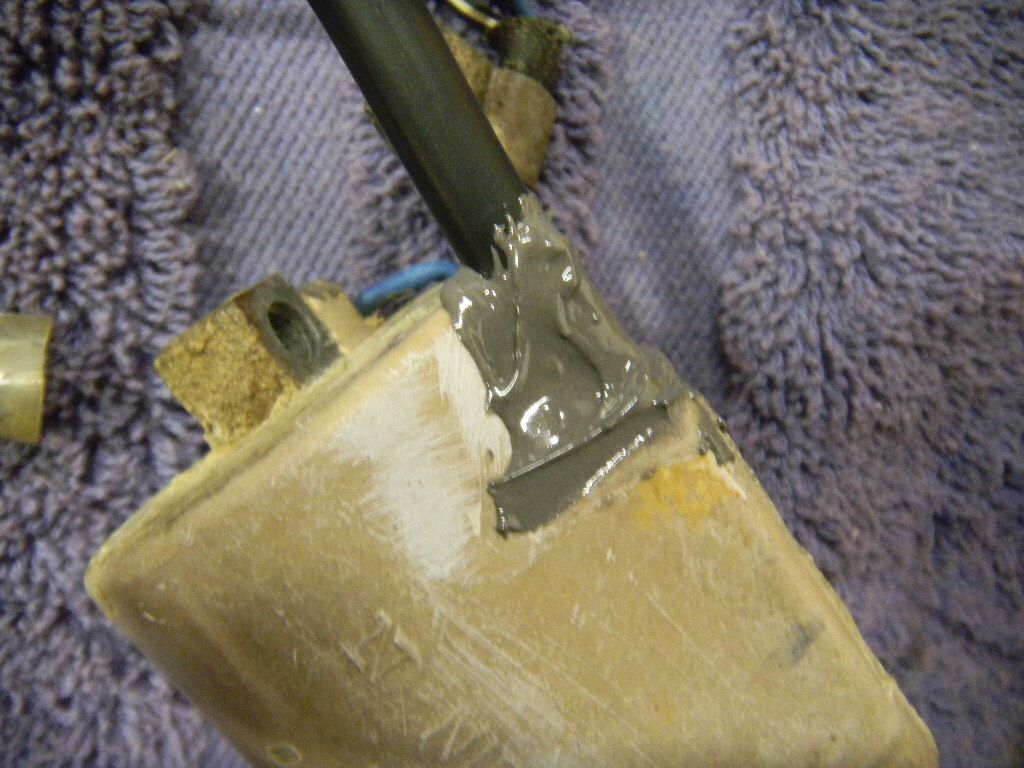
You'd think the new wire (7mm copper stranded core) would just go right in. Not the case, had to insert a very small sharp tool into the end of the wire to get it started. Then expoxied in place.
Got a used/damaged lower triple tree. Cut off the ends, took a flapper wheel to get the high spots, finished it with 120 grit paper and a trip through the bead blaster.
Left side is just after the flapper wheel, right after bead blasting.
Two coats of paint
Installed
Misc
Had to replace the coil wires. Had seen where it had been done before, so thought I'd take a stab at it.
Started by knocking off the old epoxy with a screwdriver & hammer. Kinda surprised how easy it came off.
I used a "third" coil that I didn't know if it worked as a guinea pig. When I took the epoxy off, the wire broke and had to dig it out. Used a 7mm drill bit, and carefully got most of it until I felt the pin inside the bore. On the other two good ones; the wire came out whole.
Here's a shot of the guinea pig coil after getting the old wire out. Note the metal pin in the center. It's where the new wire has to get stabbed into.
You'd think the new wire (7mm copper stranded core) would just go right in. Not the case, had to insert a very small sharp tool into the end of the wire to get it started. Then expoxied in place.
K4
Active Member
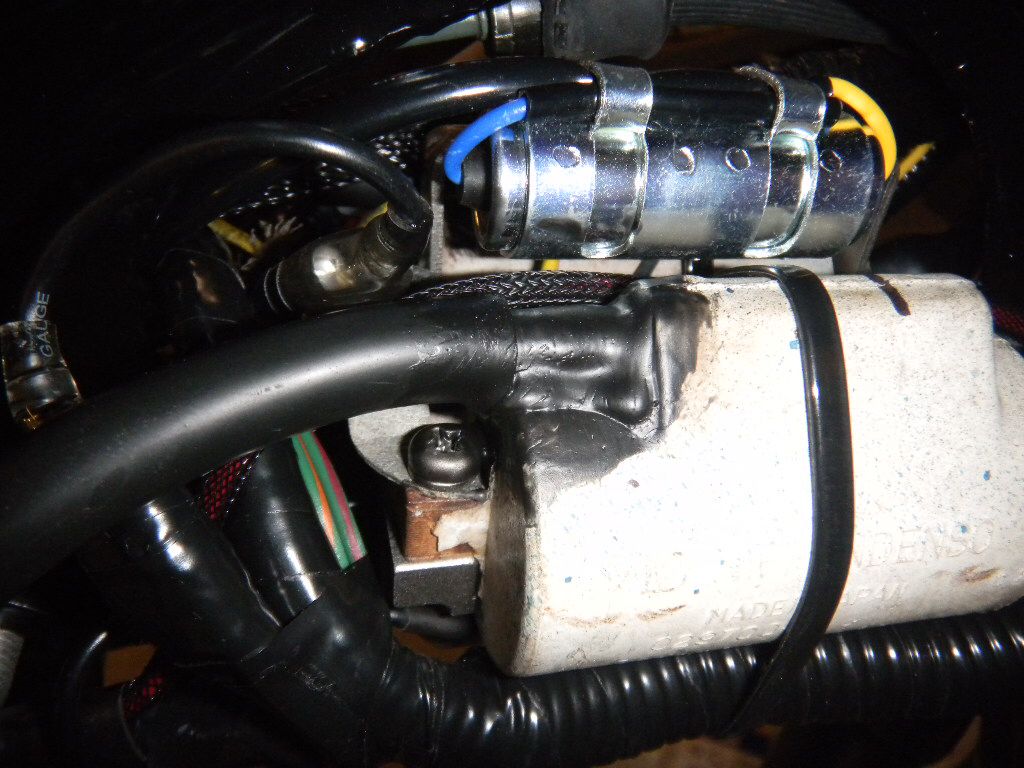
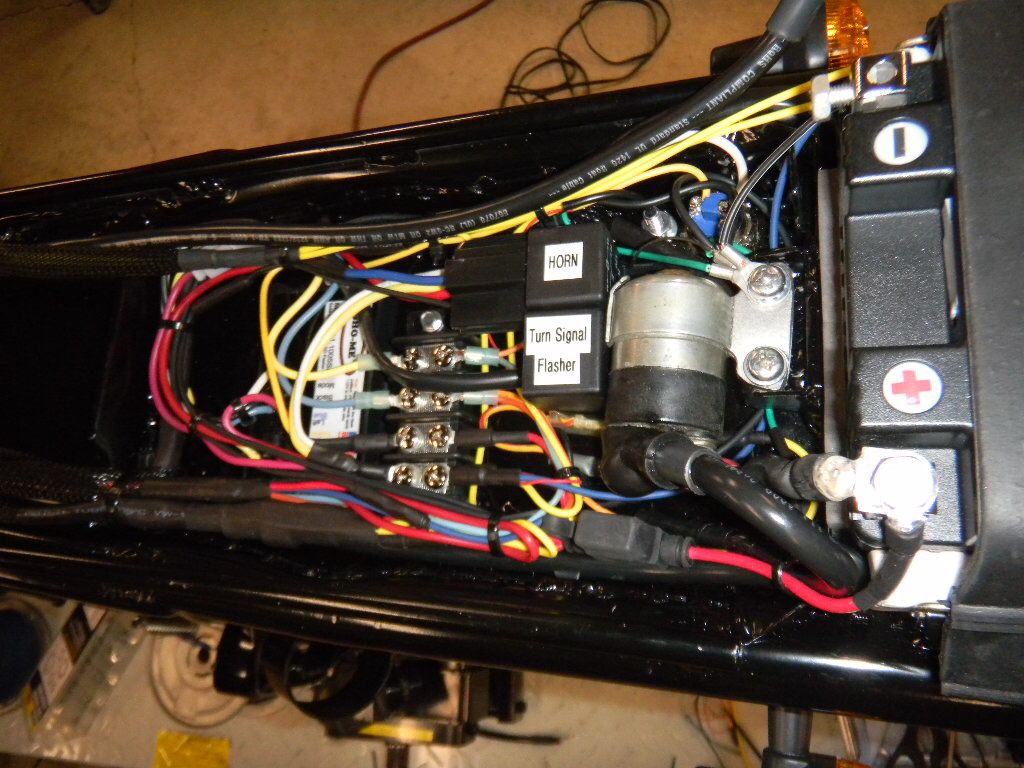
Electrical... not my favorite thing.
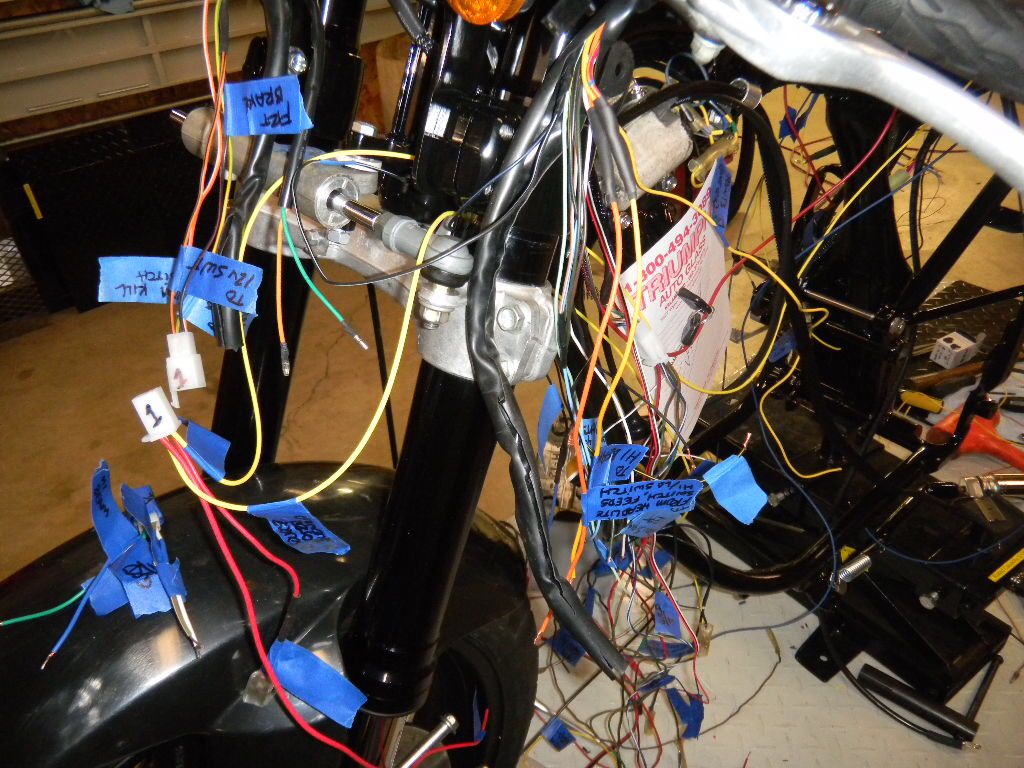
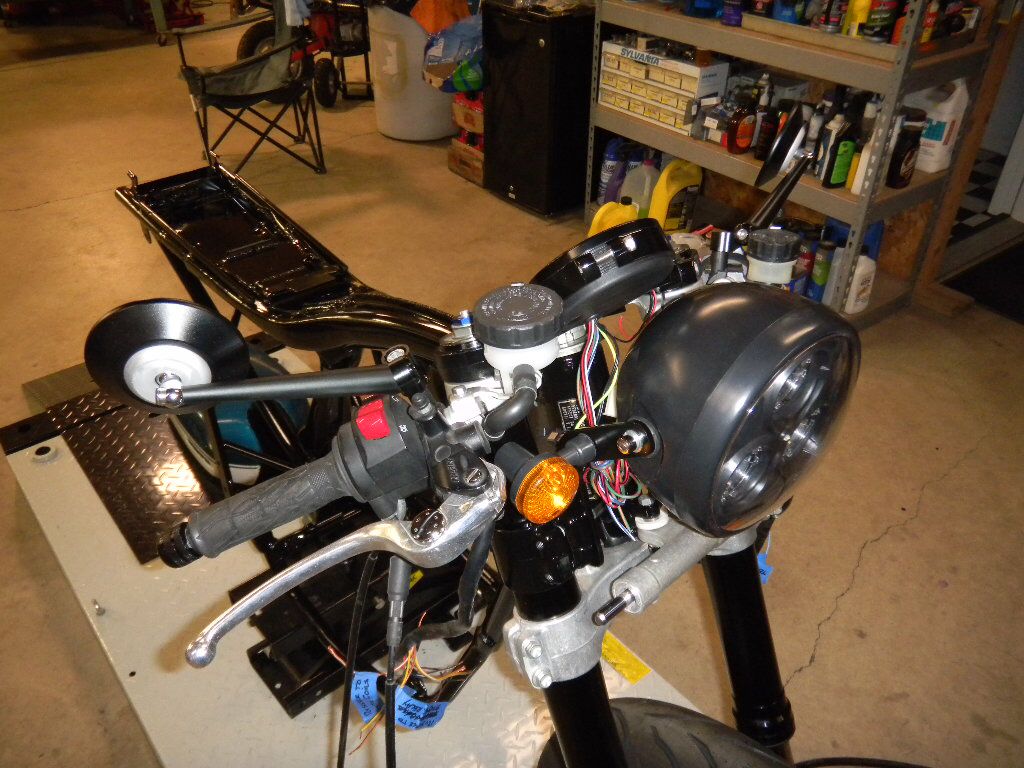
Right side finished
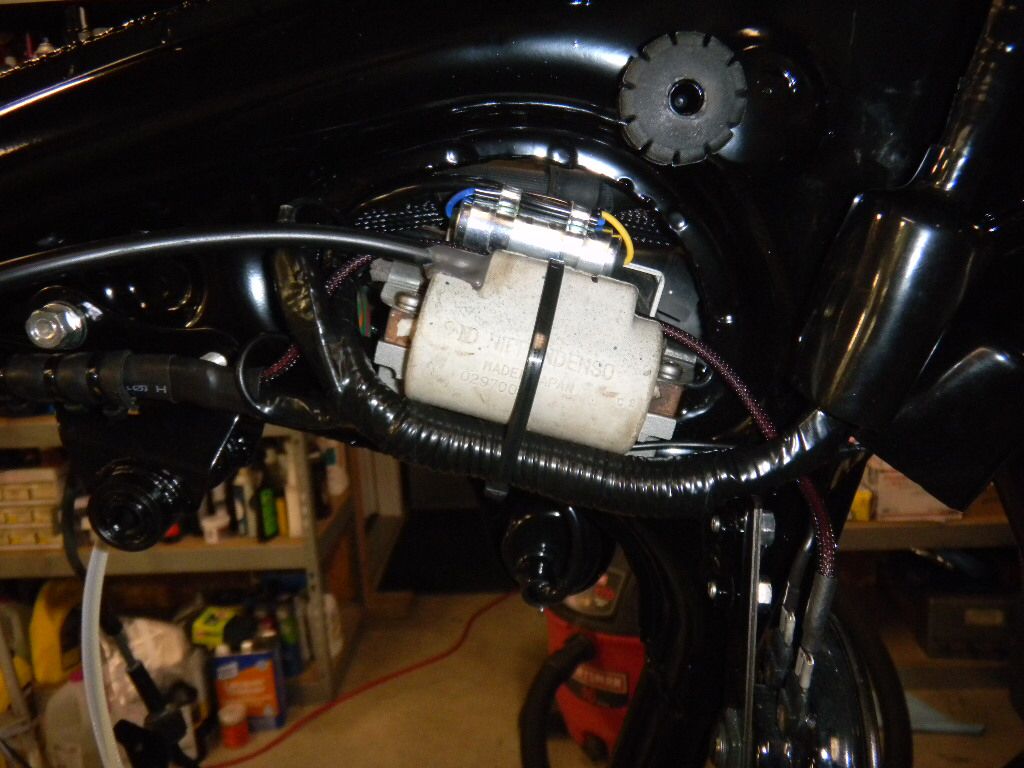
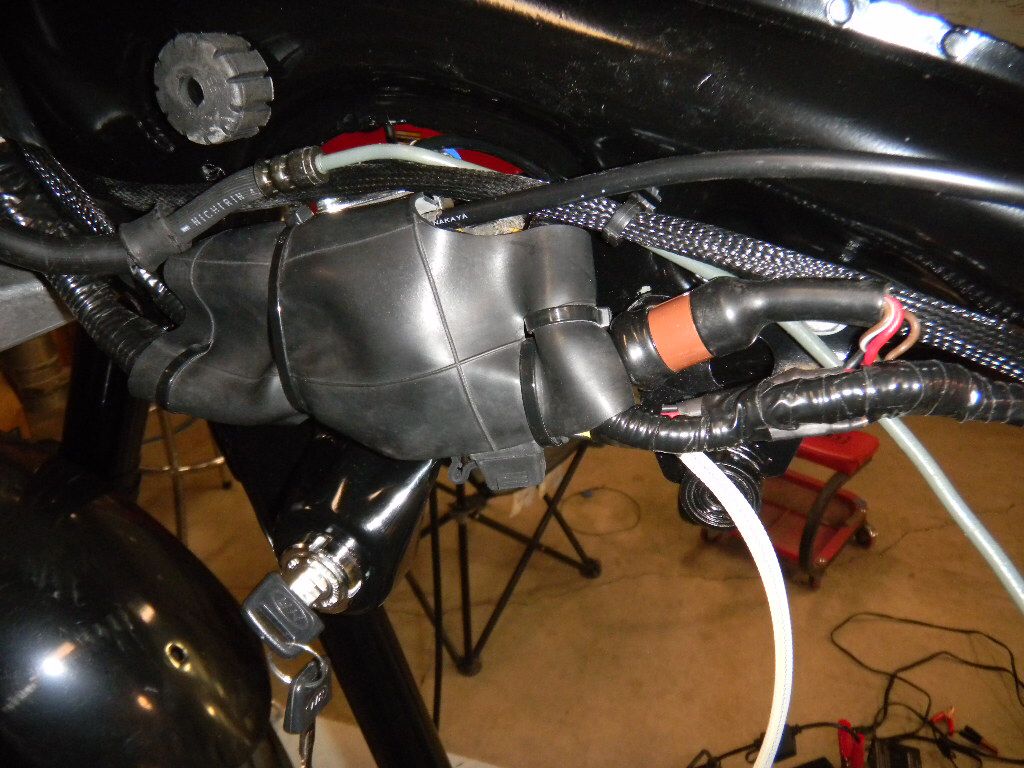
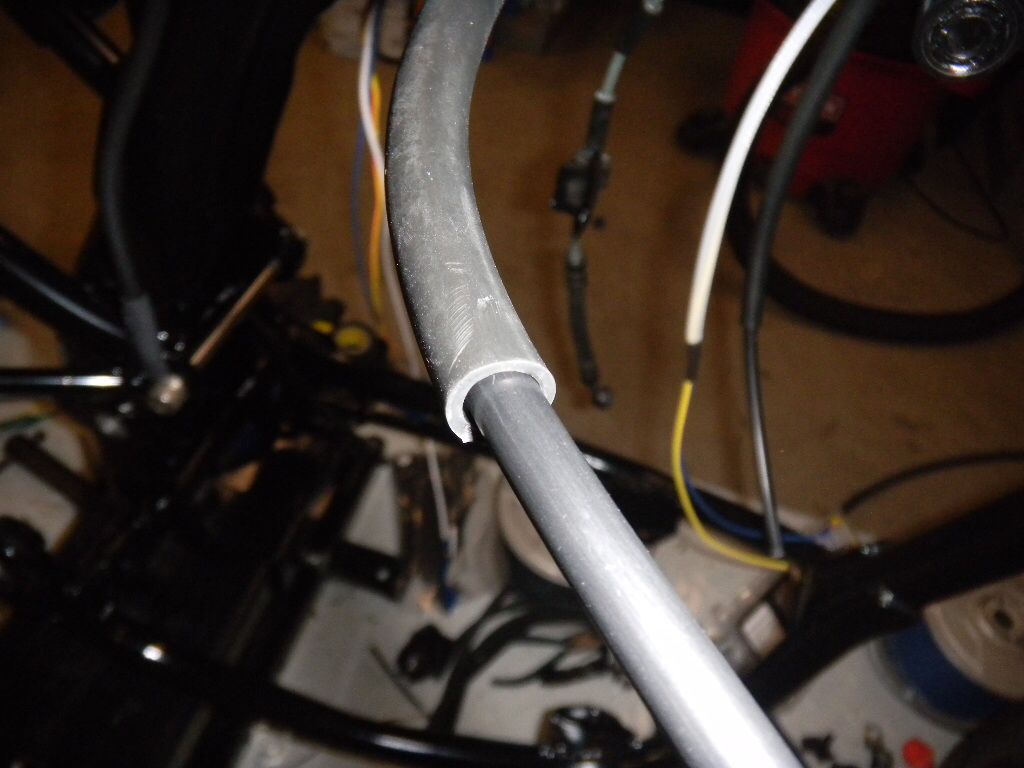
Left looks the same underneath, only more wires. Cleared the tank by 1/4", but felt more comfortable laying the inner tube around the harness.
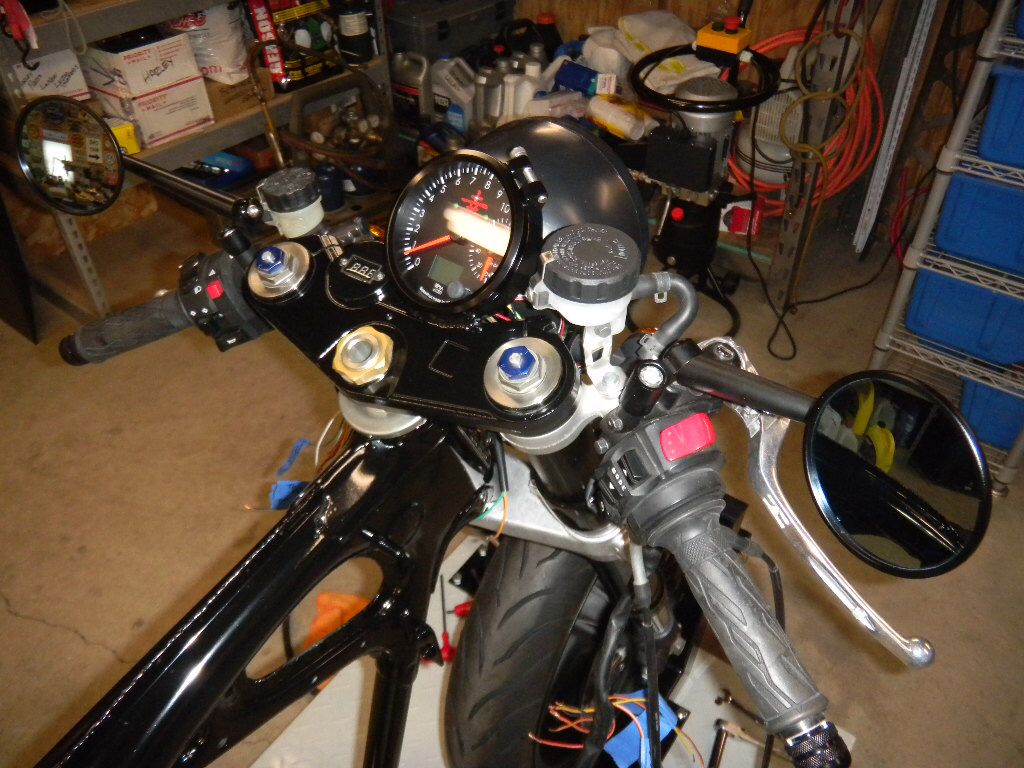
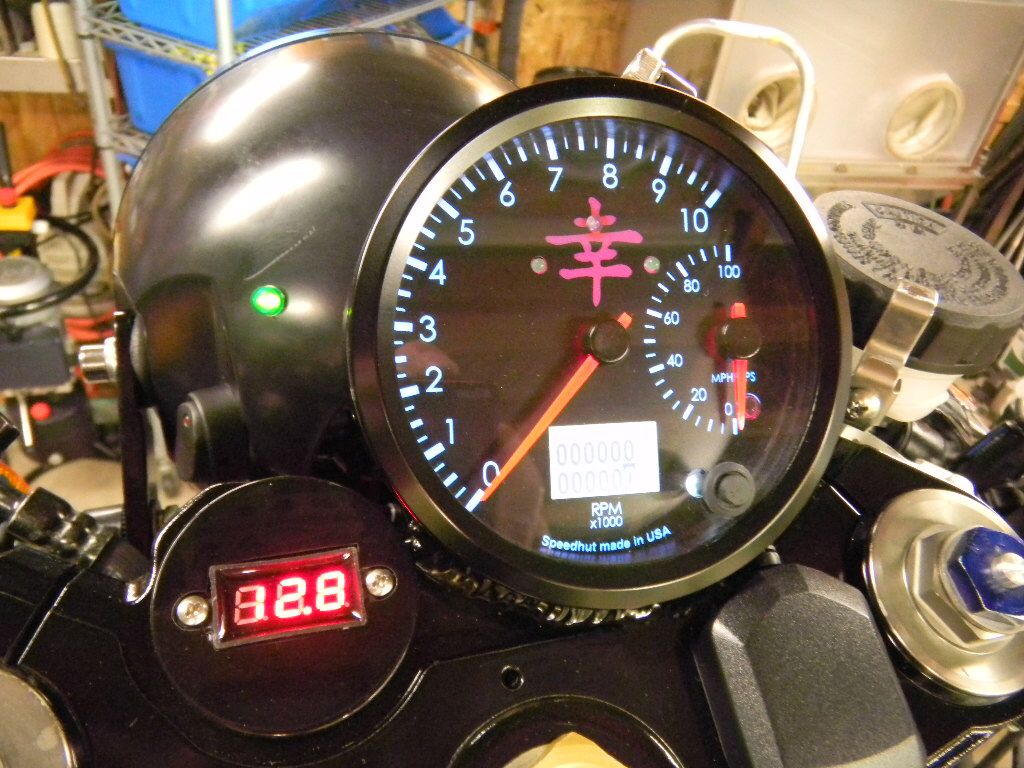
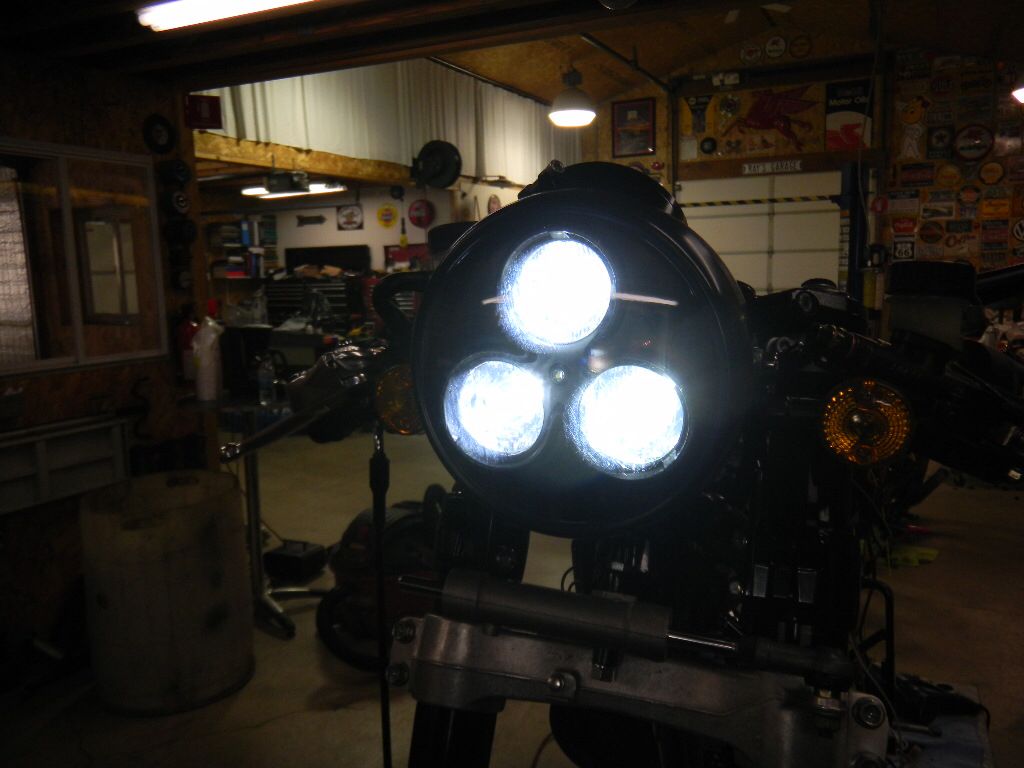
"Dash", GPS antenna (lower right), green LED on headlight is neutral indicator, switch on headlight is for the low beam. Hi beams are triggered through the hi/low switch or the pass switch.
Low beam
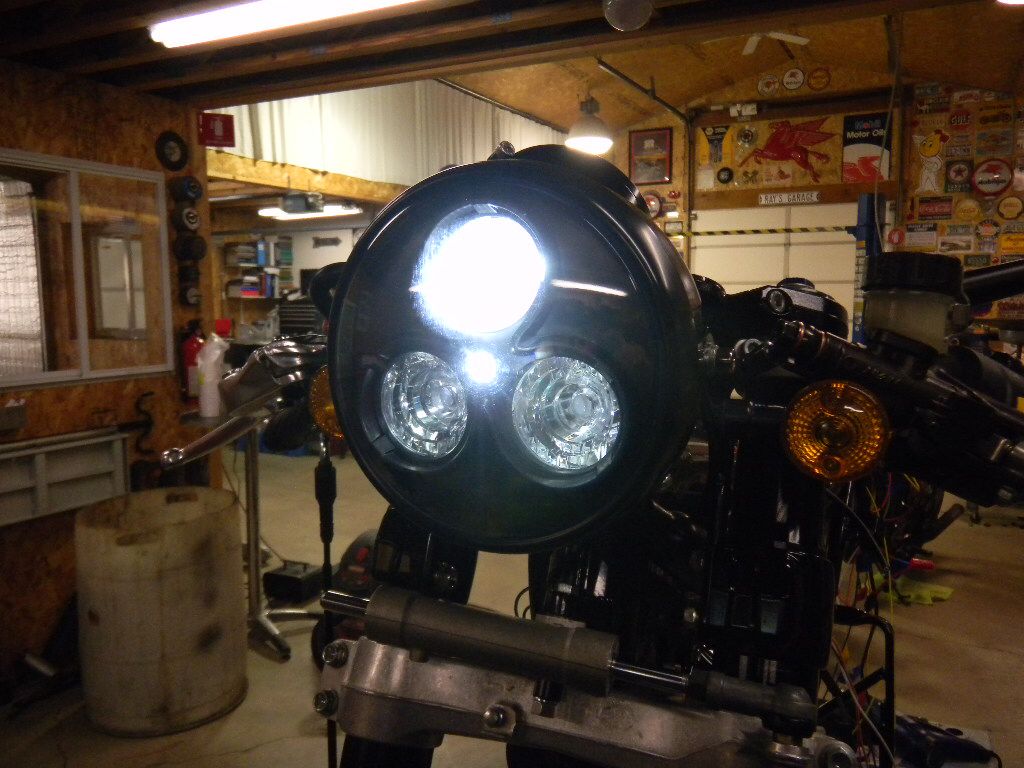
High beam
Waiting on an LED flasher, then finish wiring under the seat.
Much more to do.
Right side finished
Left looks the same underneath, only more wires. Cleared the tank by 1/4", but felt more comfortable laying the inner tube around the harness.
"Dash", GPS antenna (lower right), green LED on headlight is neutral indicator, switch on headlight is for the low beam. Hi beams are triggered through the hi/low switch or the pass switch.
Low beam
High beam
Waiting on an LED flasher, then finish wiring under the seat.
Much more to do.
K4
Active Member
More updates
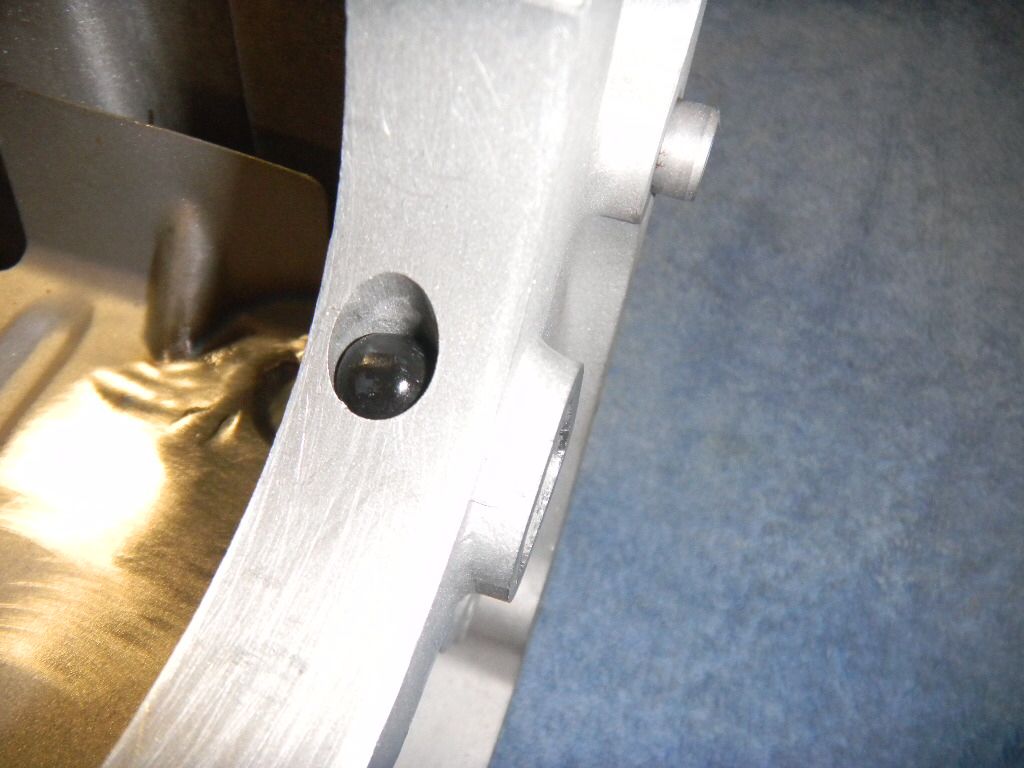
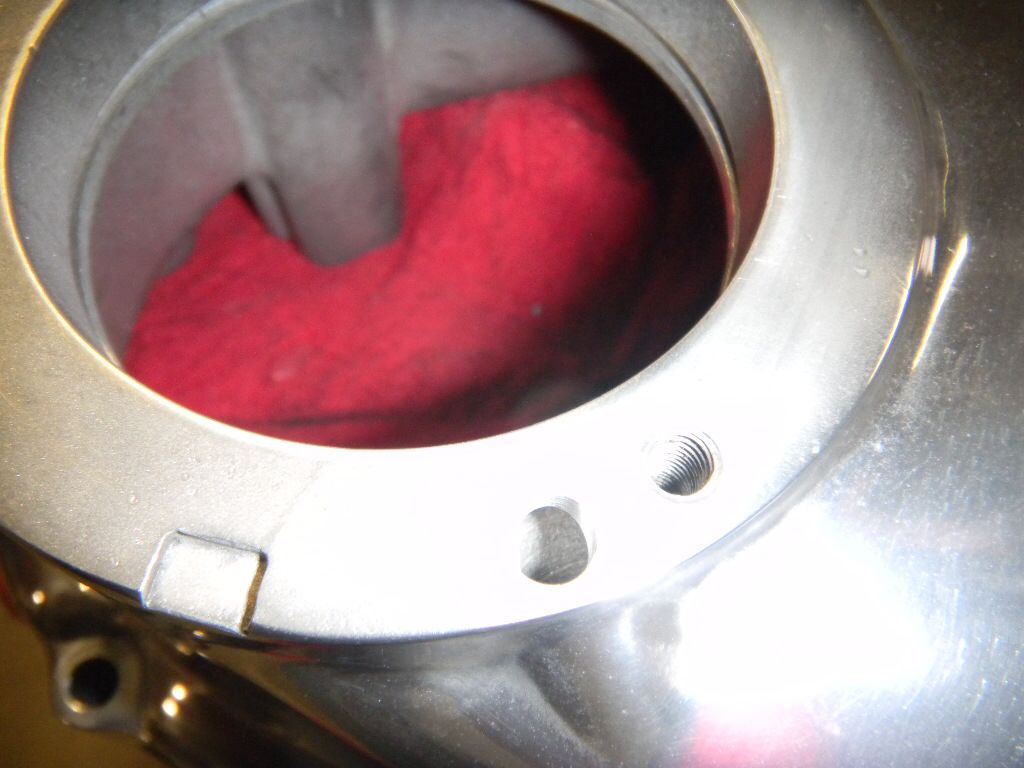
Got the lower end of the engine together. The next morning I woke questioning if I left out the "sealing ball".
Yup, it was waiting for me :-[
Splitting the cases wasn't bad, but cleaning the fresh Yamabond took a while.
Here's a pic of the ball in its recess. The sealing ball seals the oil galley from the outer race of the right side crank bearing. Some choose to leave it out, but mine had a flat spot indicating a bit of oil pressure behind it.
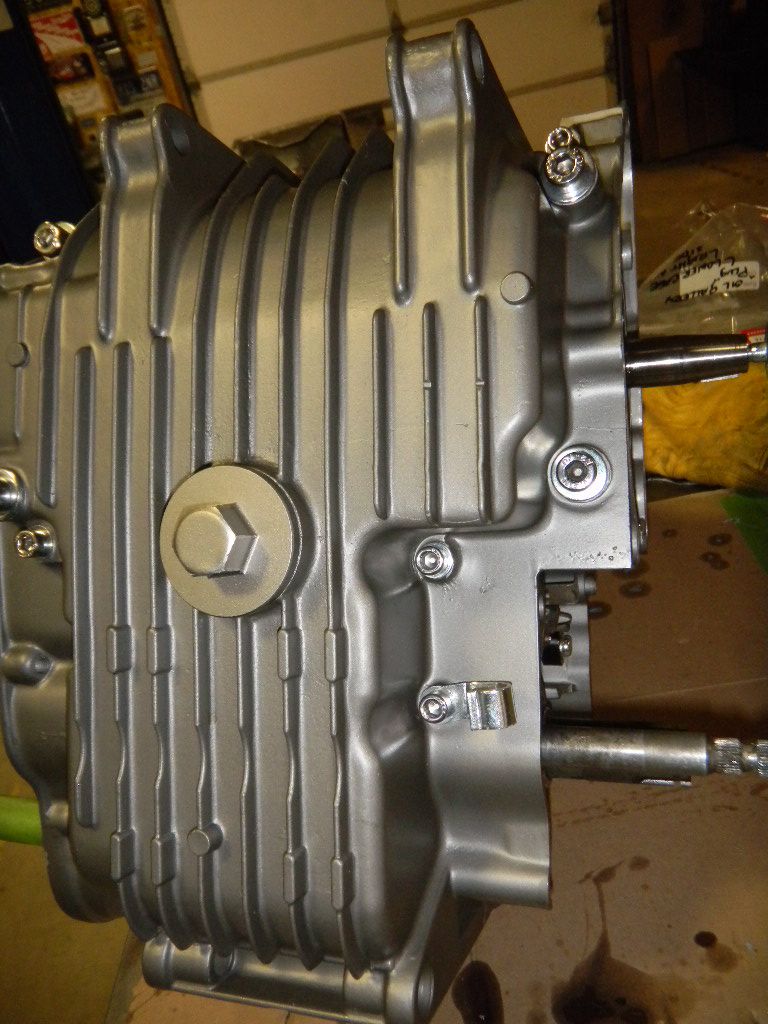
Purchased a set of Allen head bolts. They came with "extra large" flat washers. Ended up switching them out for standard size ones.
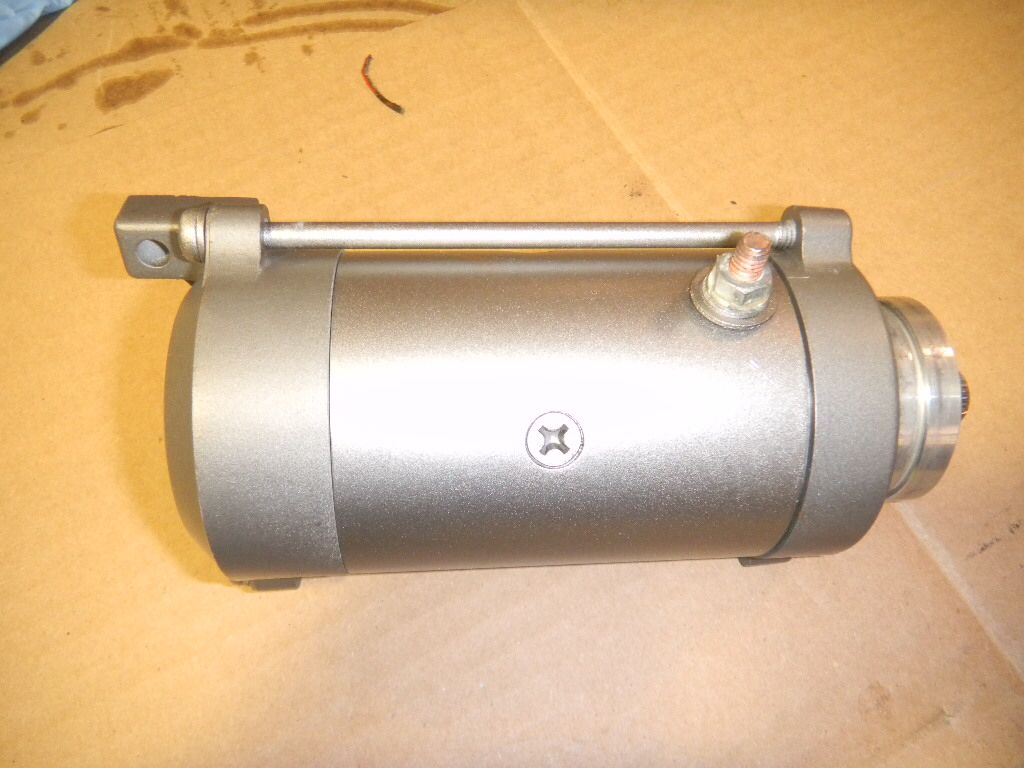
Some will give me a little flack for using a starter.
Here it is after taking it apart, cleaning and painting.
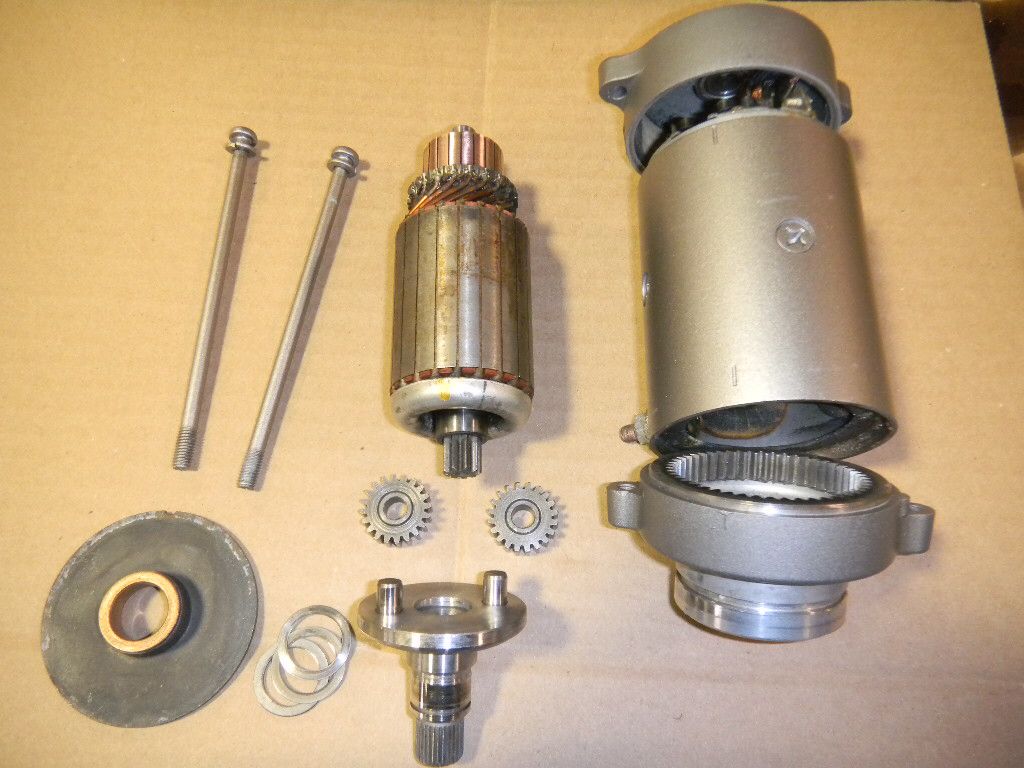
Assembled & tested
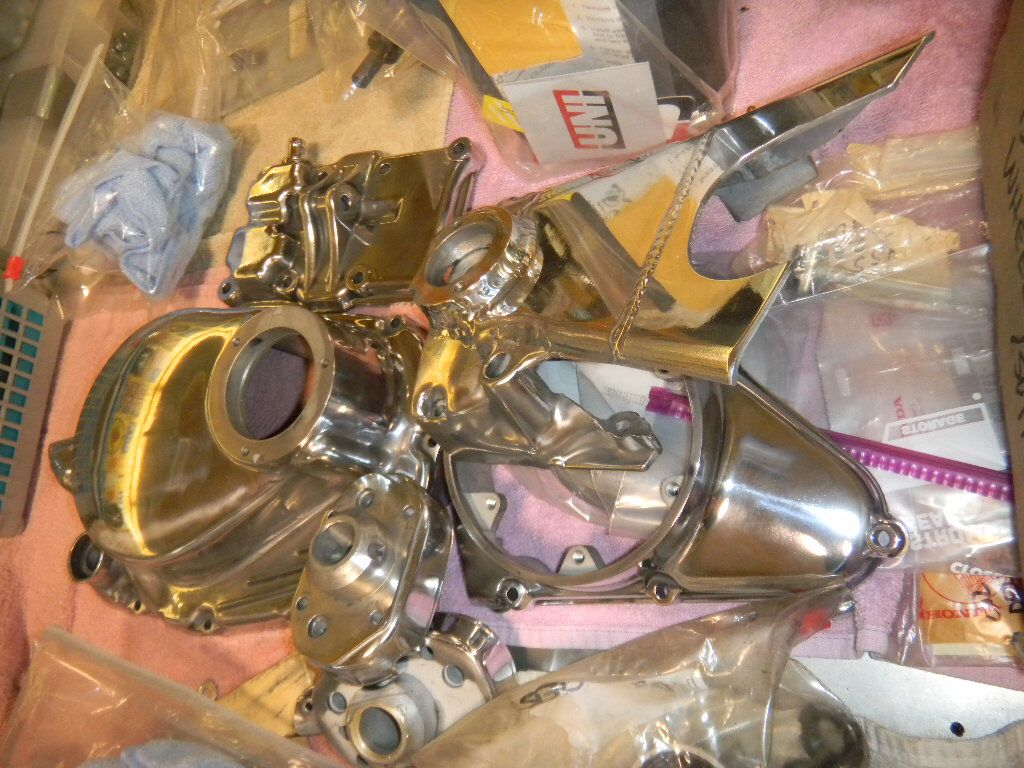
Had done some of the polishing previously. Got the rest of the parts almost done.
Got the lower end of the engine together. The next morning I woke questioning if I left out the "sealing ball".
Yup, it was waiting for me :-[
Splitting the cases wasn't bad, but cleaning the fresh Yamabond took a while.
Here's a pic of the ball in its recess. The sealing ball seals the oil galley from the outer race of the right side crank bearing. Some choose to leave it out, but mine had a flat spot indicating a bit of oil pressure behind it.
Purchased a set of Allen head bolts. They came with "extra large" flat washers. Ended up switching them out for standard size ones.
Some will give me a little flack for using a starter.
Here it is after taking it apart, cleaning and painting.
Assembled & tested
Had done some of the polishing previously. Got the rest of the parts almost done.
K4
Active Member
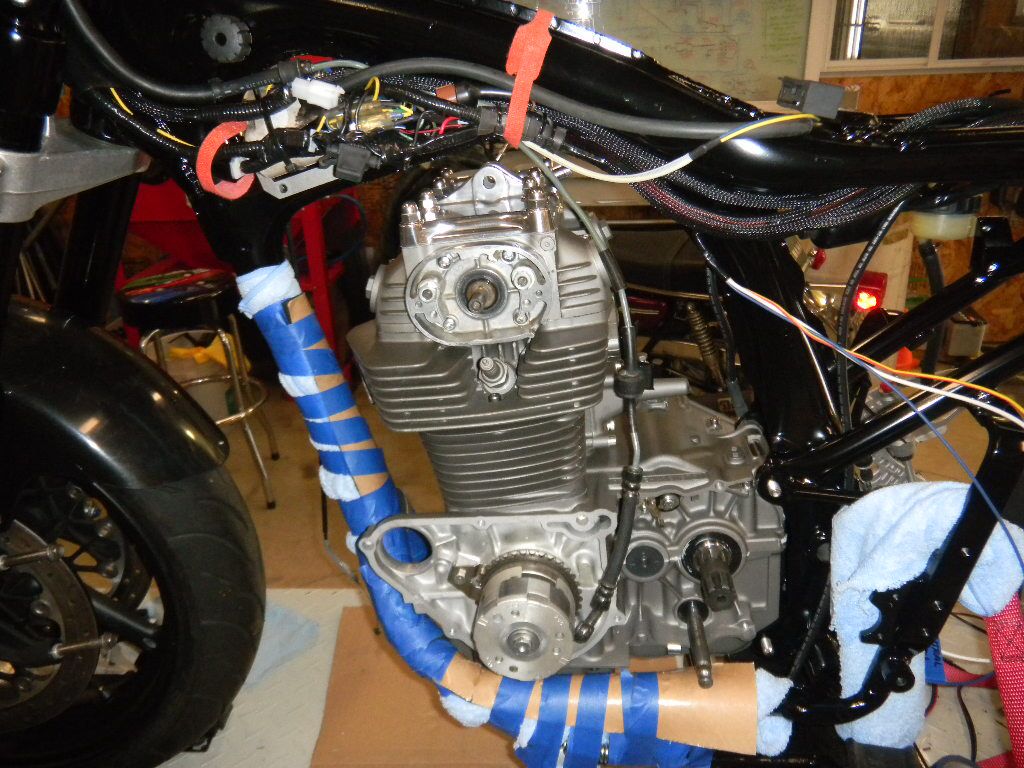
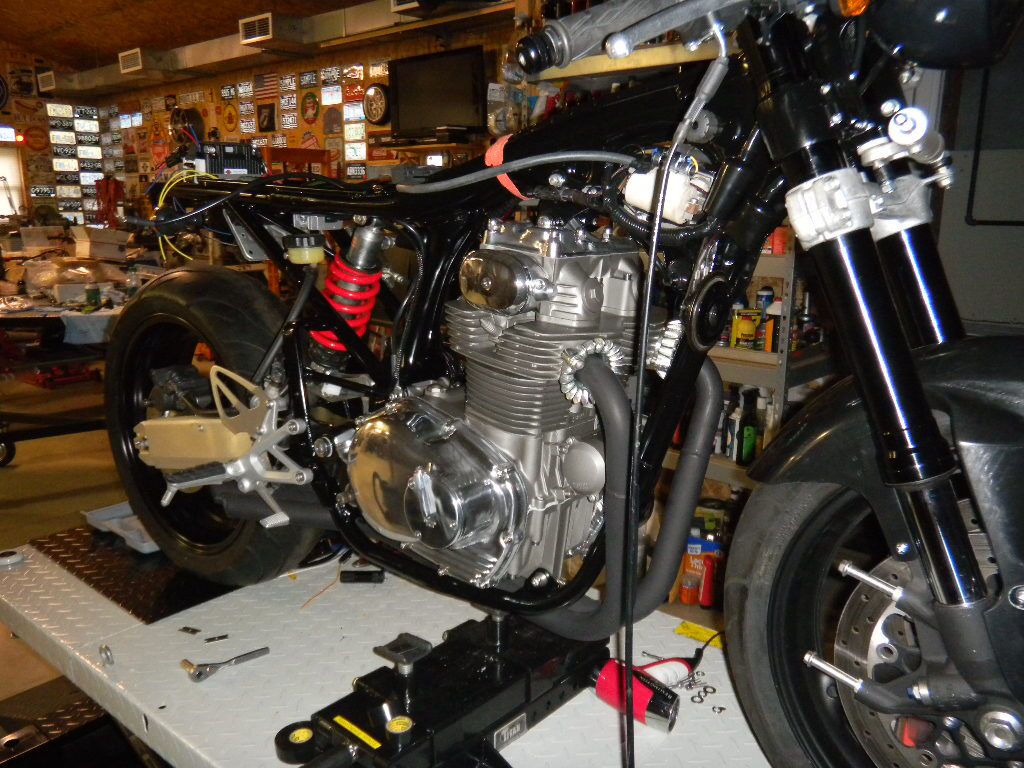
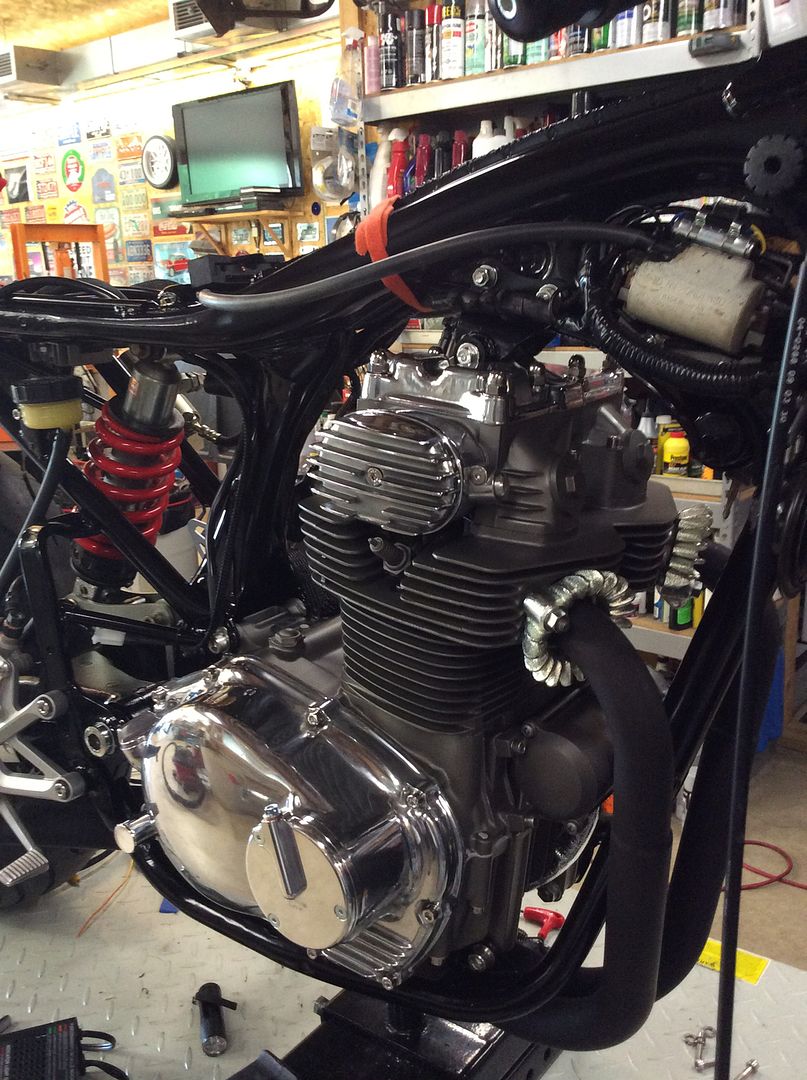
Brother stopped over and helped me put the engine in.
 t
t
Decided to go with a different oil filter.
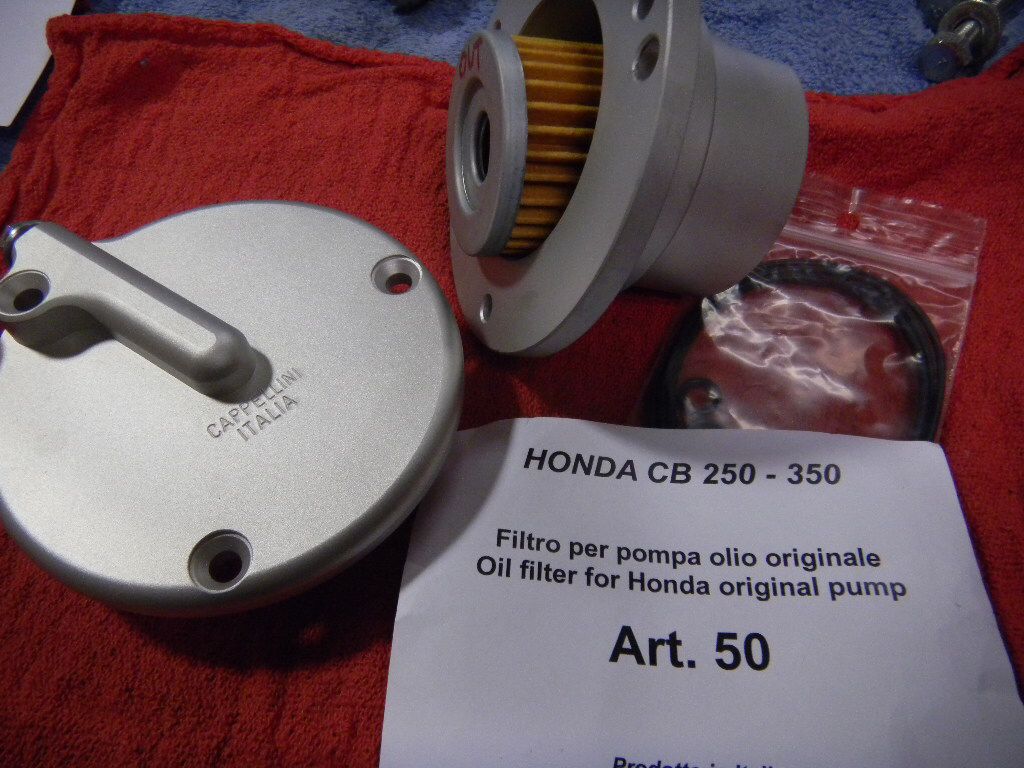
Require a hole be drilled in the case
Also had to machine the stock filter drum to 22mm.
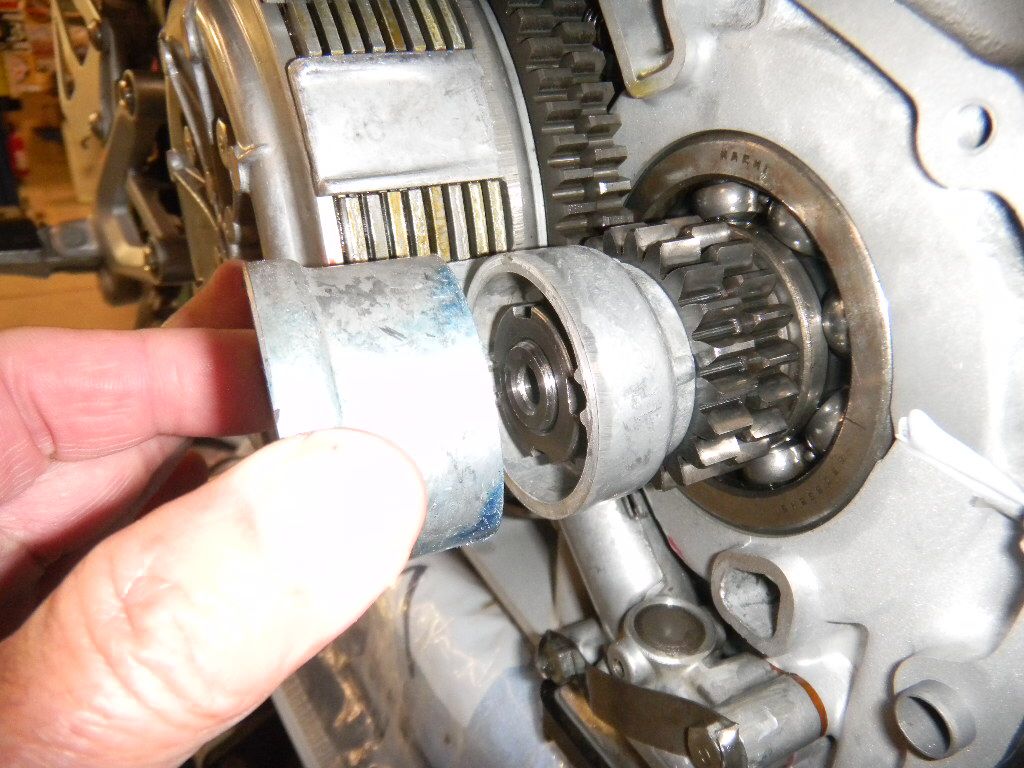
Polished & installed.
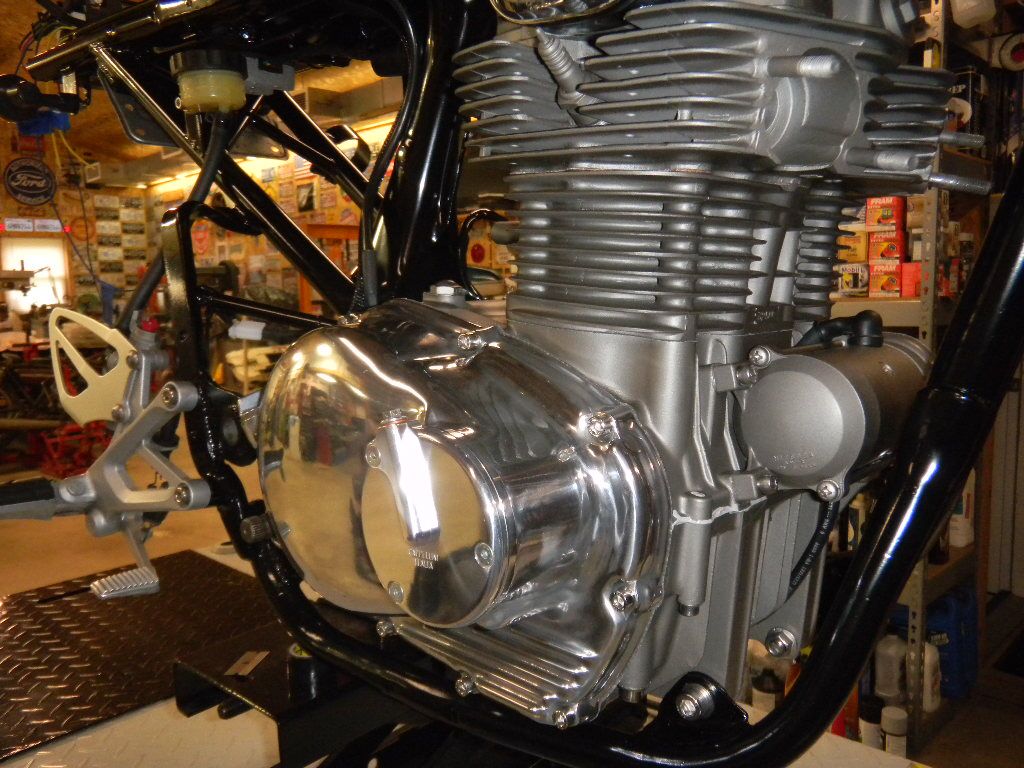
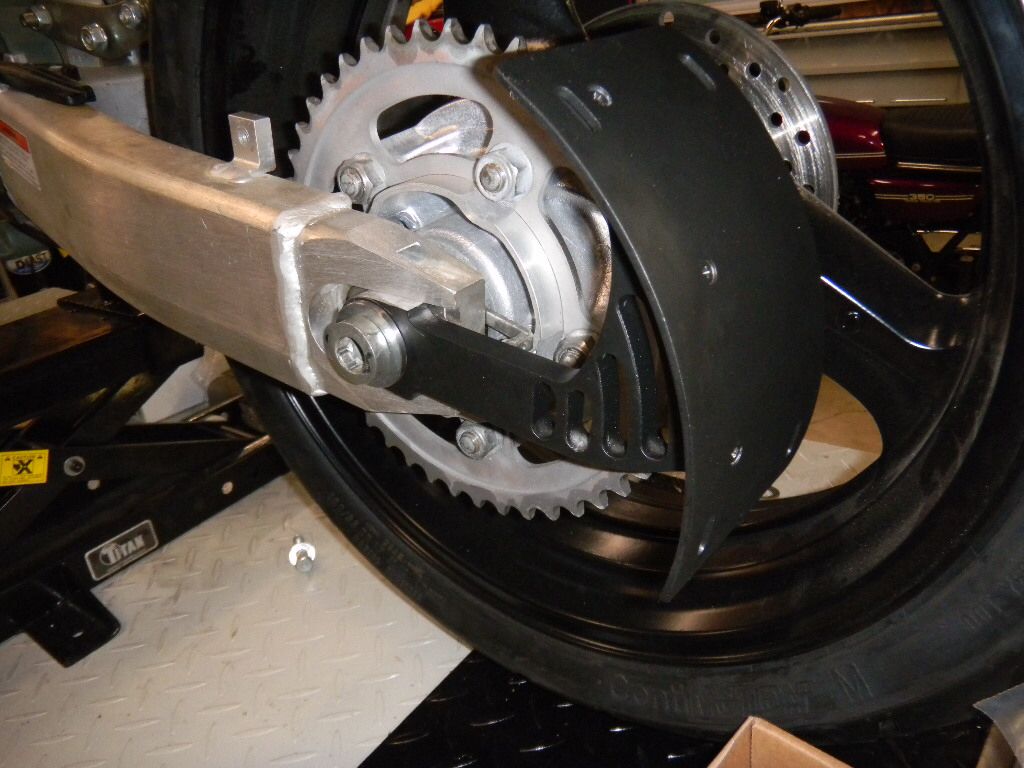
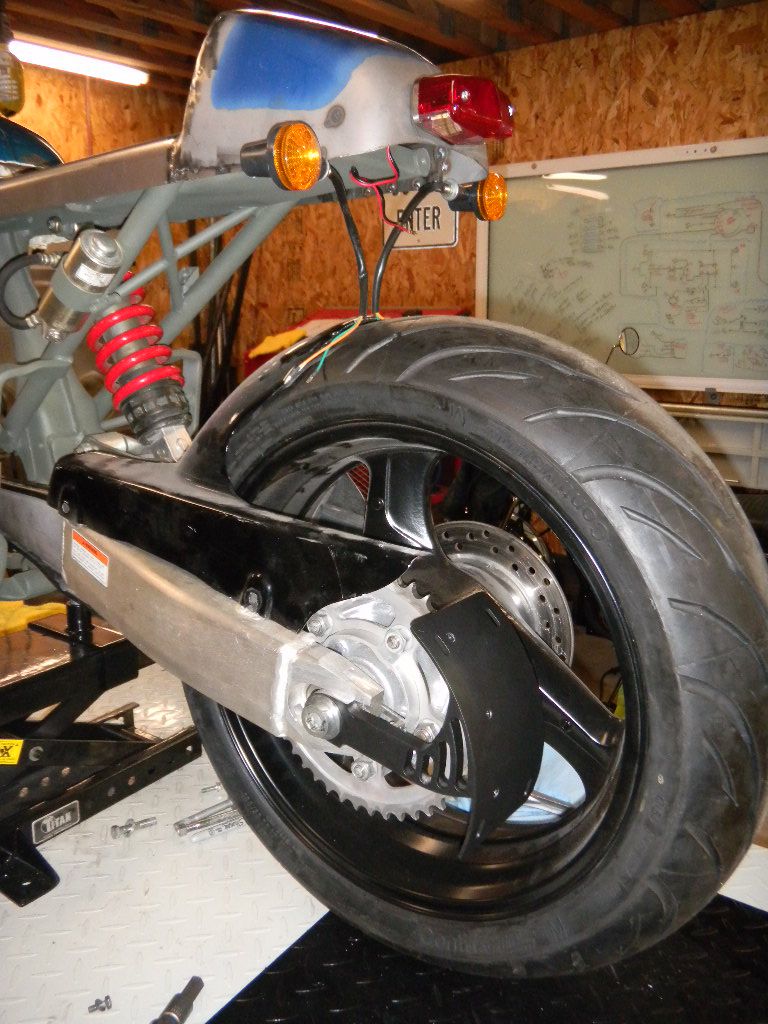
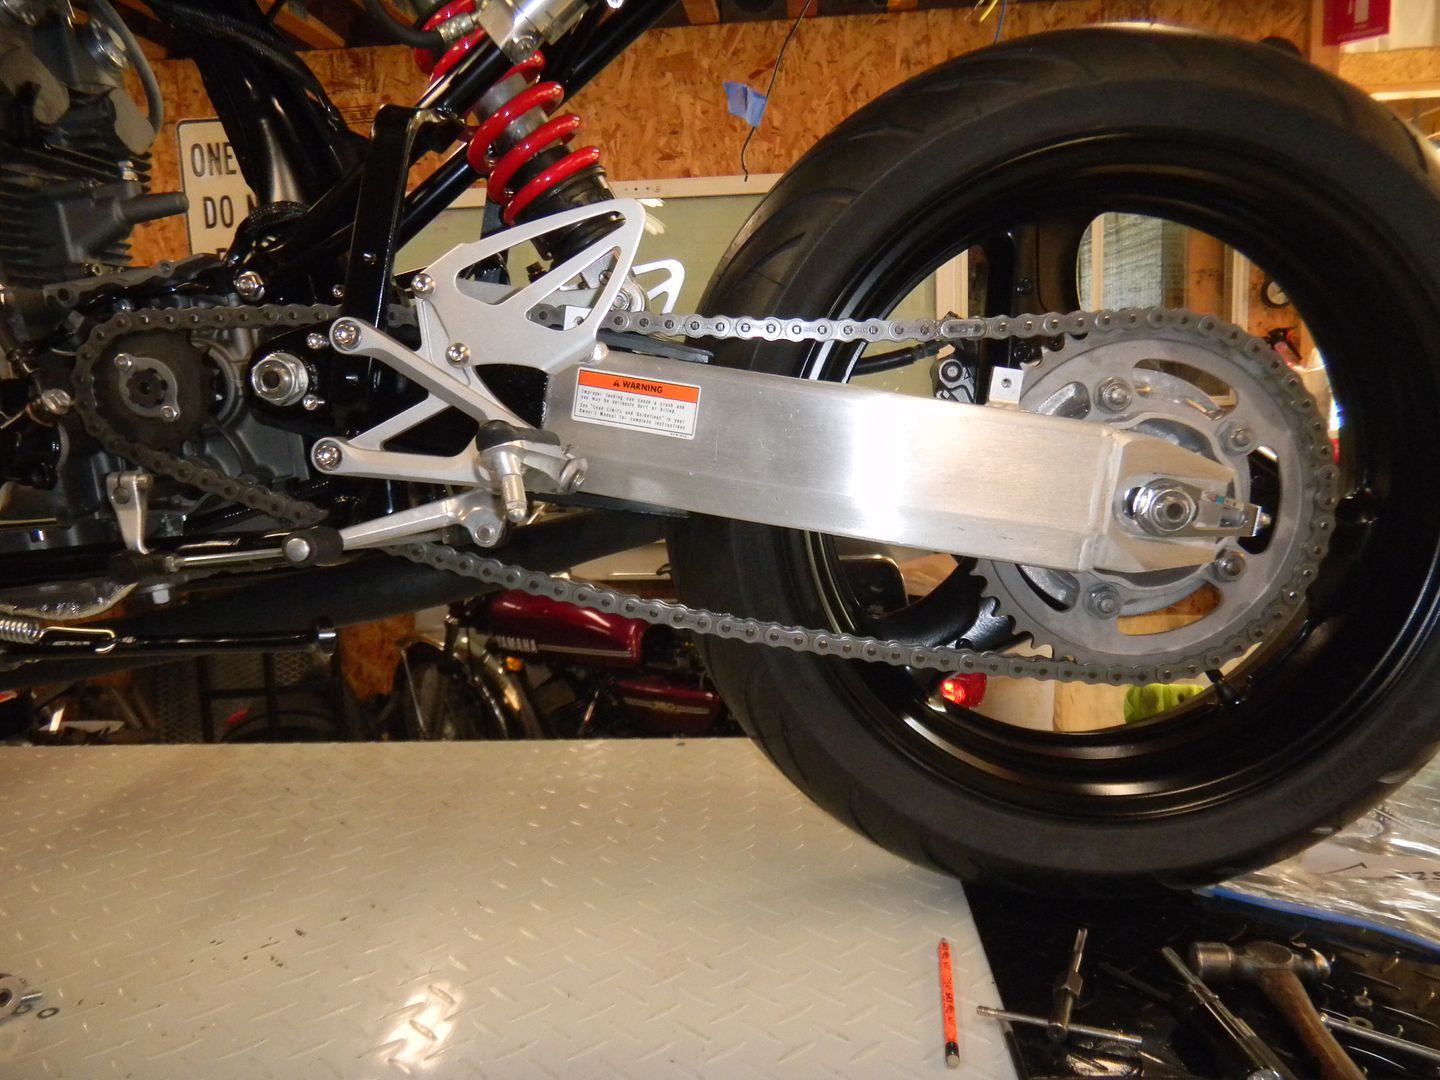
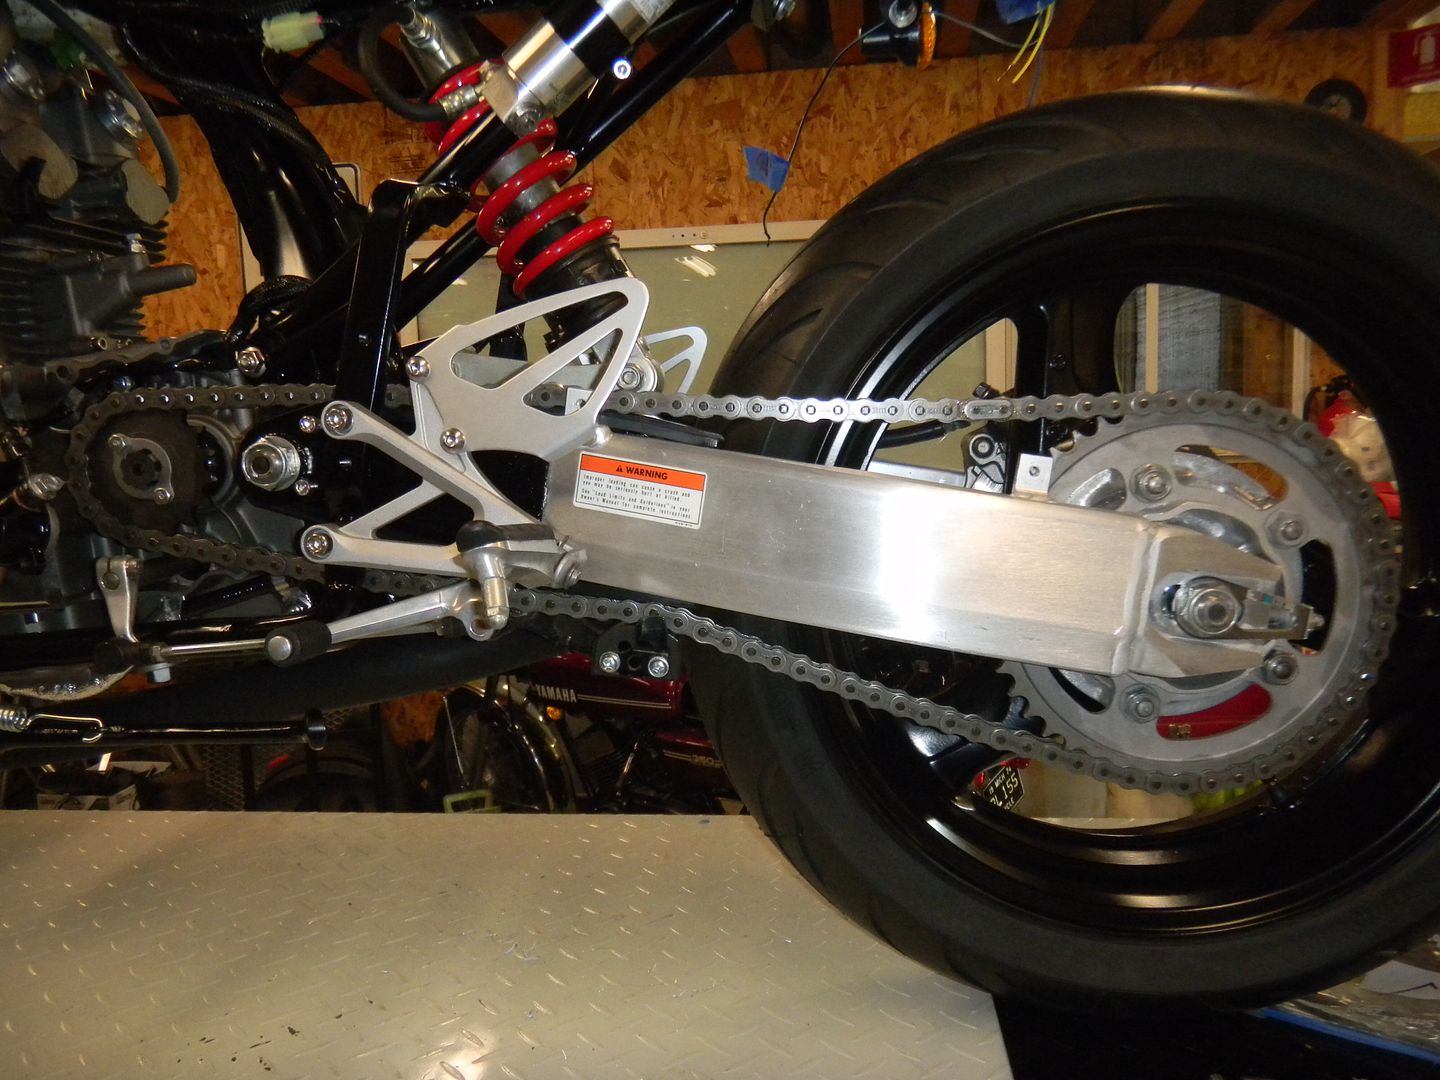
Swingarm & suspension in place
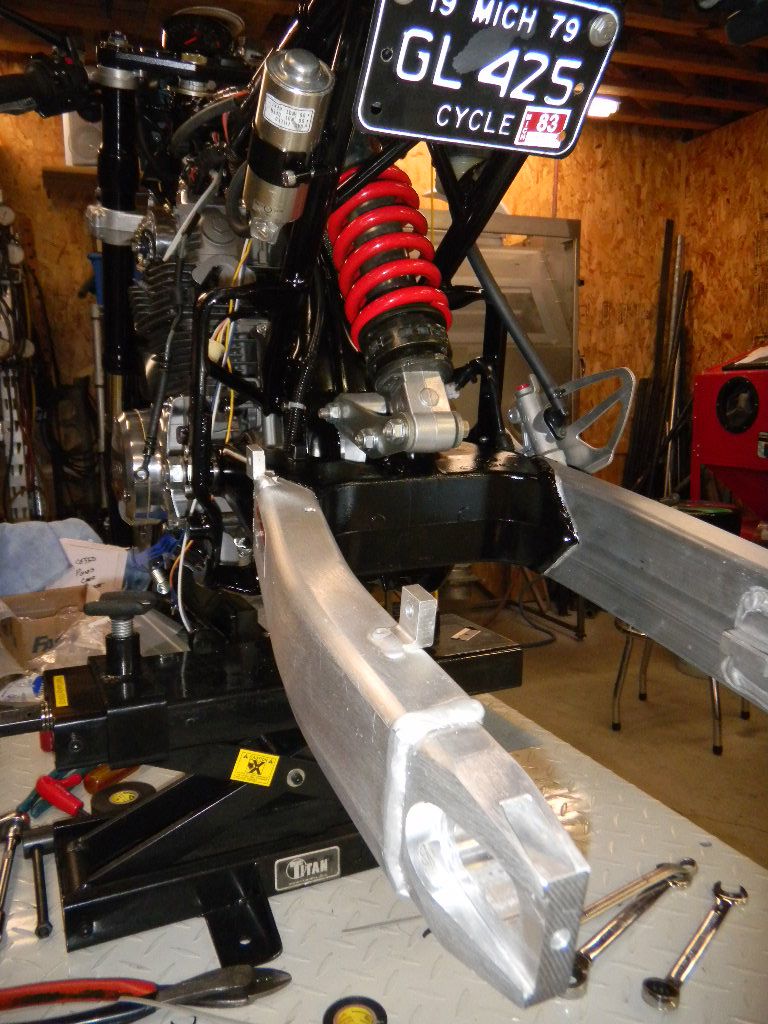
Put new bearings in the rear wheel, rebuilt the caliper, installed the exhaust.
Decided to go with a different oil filter.
Require a hole be drilled in the case
Also had to machine the stock filter drum to 22mm.
Polished & installed.
Swingarm & suspension in place
Put new bearings in the rear wheel, rebuilt the caliper, installed the exhaust.
Thats a CB350? ;D
Great read. Pretty inspiring fab work going on here. Good to see you're back on it after a while off. Looks like she's almost ready to ride!
Great read. Pretty inspiring fab work going on here. Good to see you're back on it after a while off. Looks like she's almost ready to ride!
Barnburner
Coast to Coast
Mmmmmm...cappellini
K4
Active Member
Thanks guys!
Cleaned the swing arm with green Scotch-Brite pads. It does look shinier in the photo than real life.
-----------------------
Got lucky and found these")
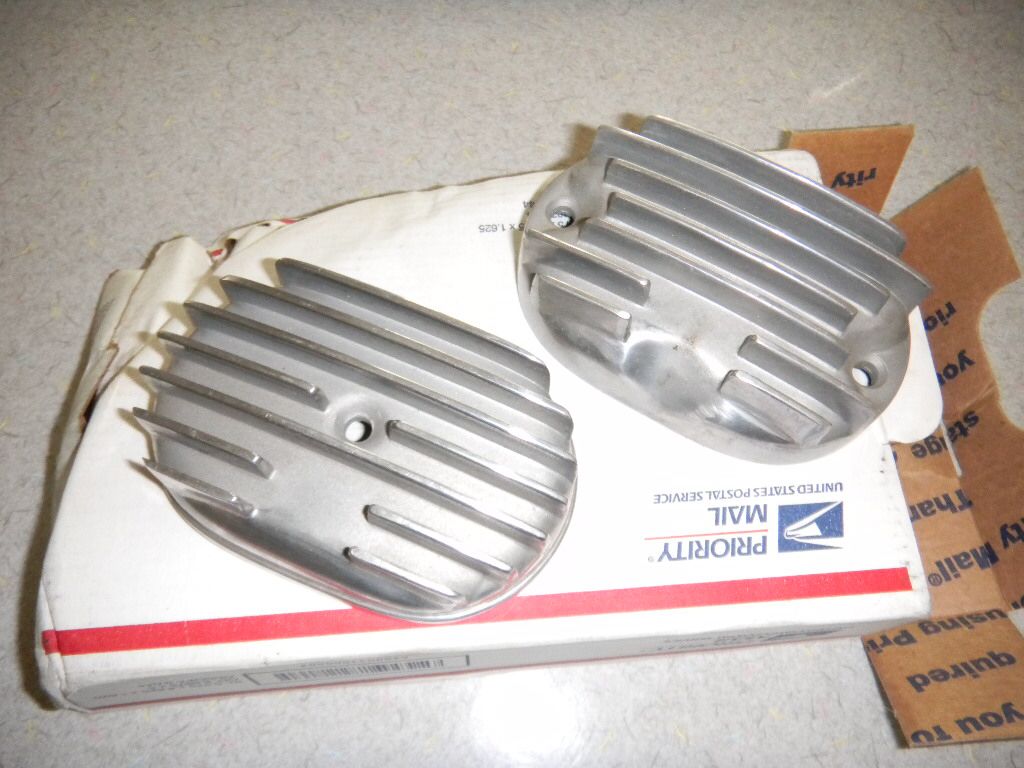
On the bike
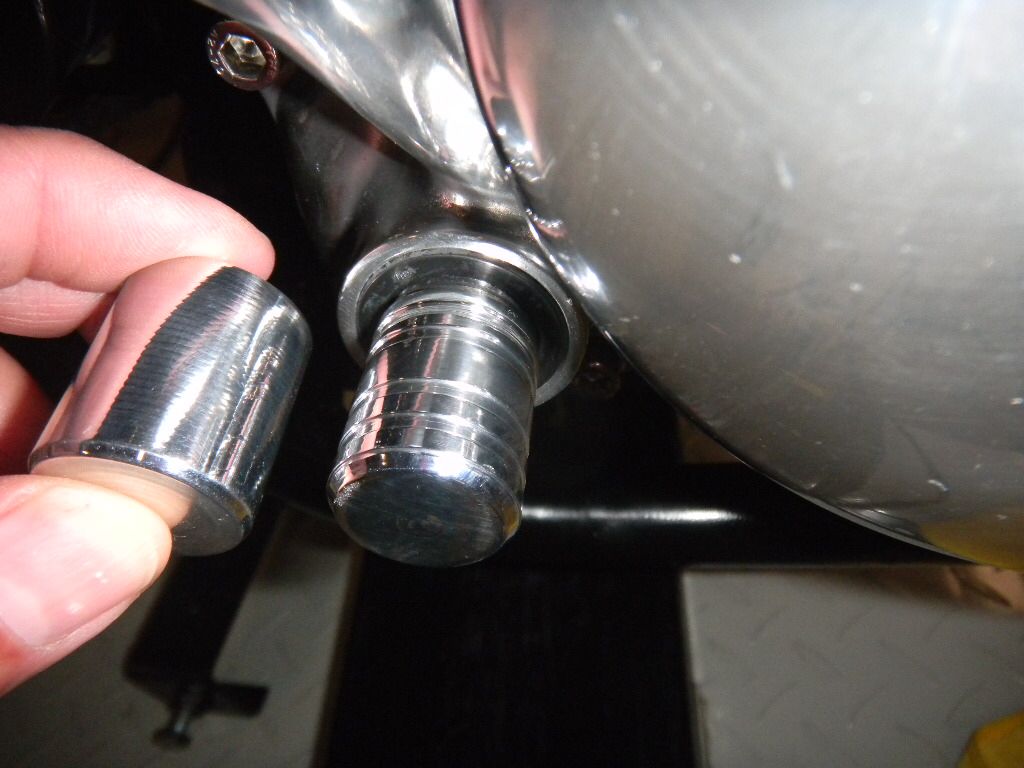
Won't be using a kick starter for now (needs to be extended, more fab work)
Made a couple of covers to go over the shaft. Probably go with the right one.
Getting closer to having a hydraulic clutch.
jpmobius said:Exceptionally nice work. How did you get the swing arm looking so new - It looks freshly fabricated or at least freshly anodized. Did you process it or is the camera just being especially friendly?
Cleaned the swing arm with green Scotch-Brite pads. It does look shinier in the photo than real life.
-----------------------
Got lucky and found these
On the bike
Won't be using a kick starter for now (needs to be extended, more fab work)
Made a couple of covers to go over the shaft. Probably go with the right one.
Getting closer to having a hydraulic clutch.
K4
Active Member
hurco550 said:wow beautiful work! gonna be a nice looking piece when its all buttoned up. Do you think offsetting the drive sprocket that much will put excessive stress on that bearing and transmission assembly?
The outer bearing is a double roller bearing (stock, new), very stout, and rated for more load than will be placed upon it. The inner is a needle type, should be good. Considering the engine will produce something less than 40hp, and the quality of modern oils; I don't think I'll have a problem. Time will tell.
bravo Sir!bravo, count me in!K4
Active Member
I'm finally back on this. Here's some recent updates.
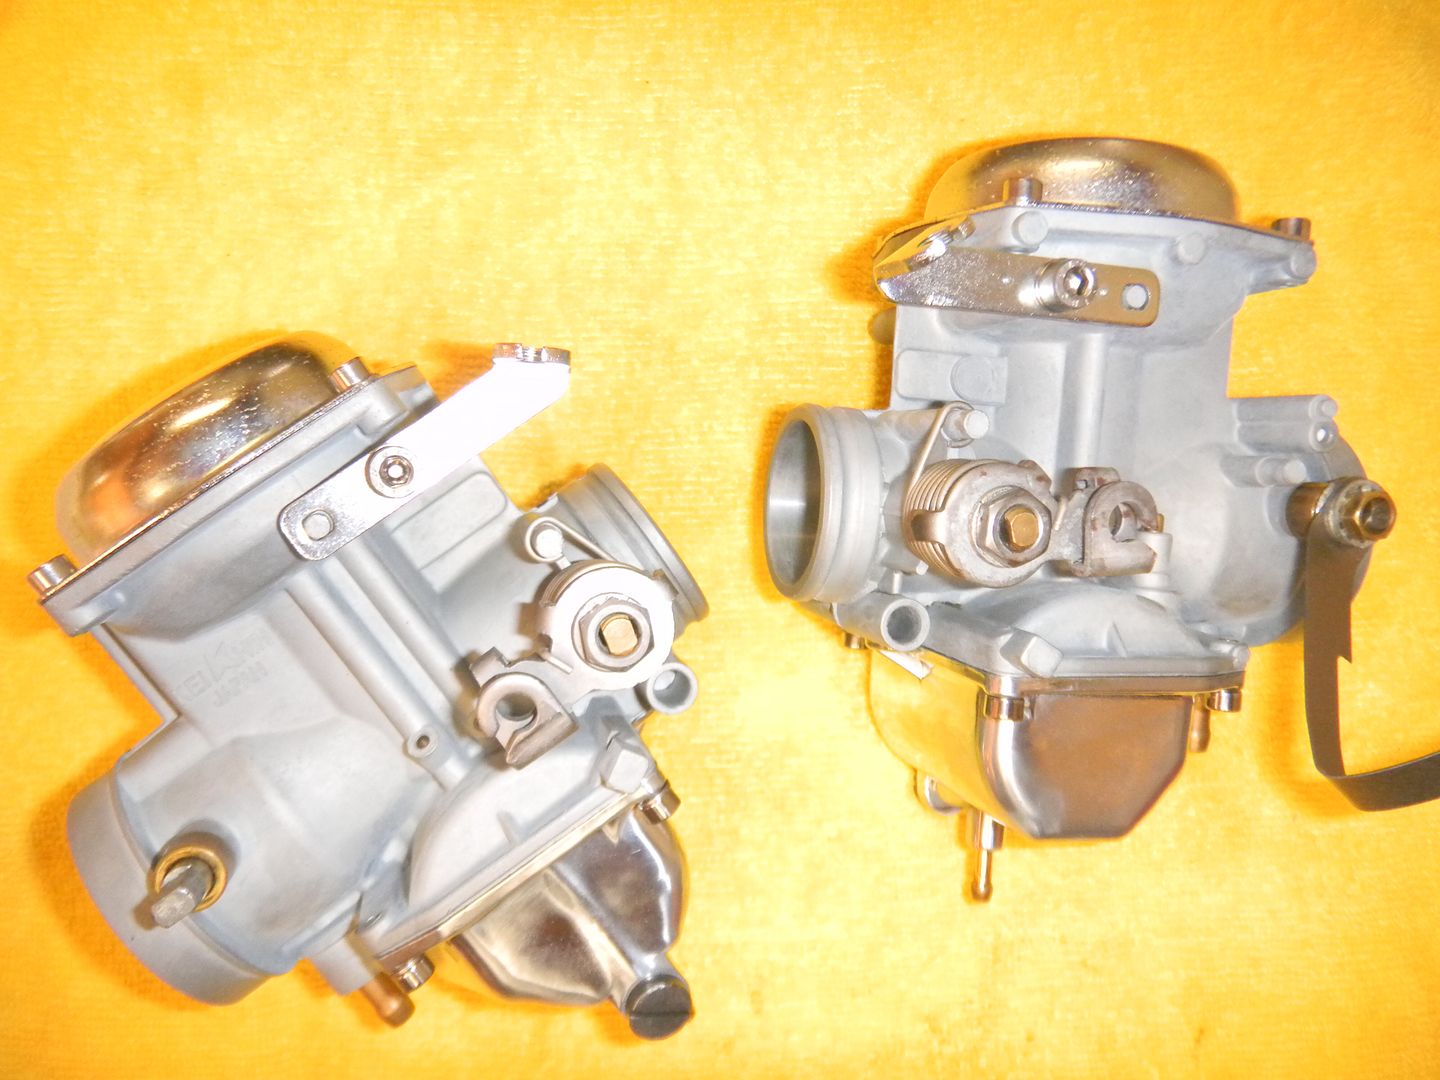
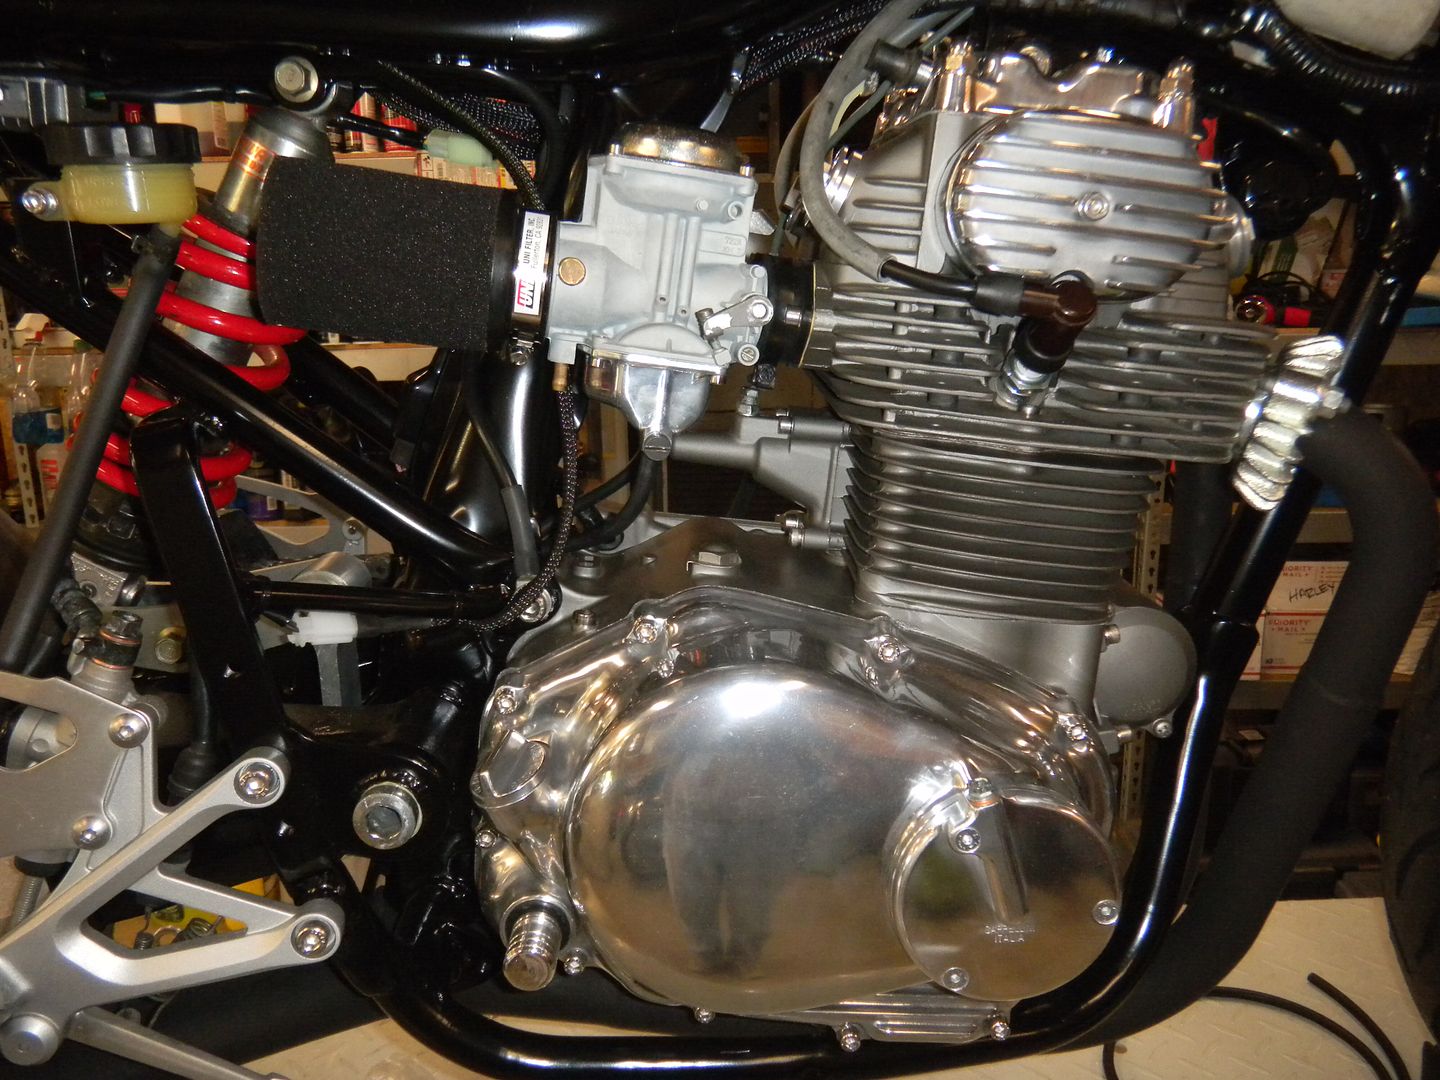
Before ordering the custom throttle cable from Motion Pro; had to clean & rebuilds the carbs.
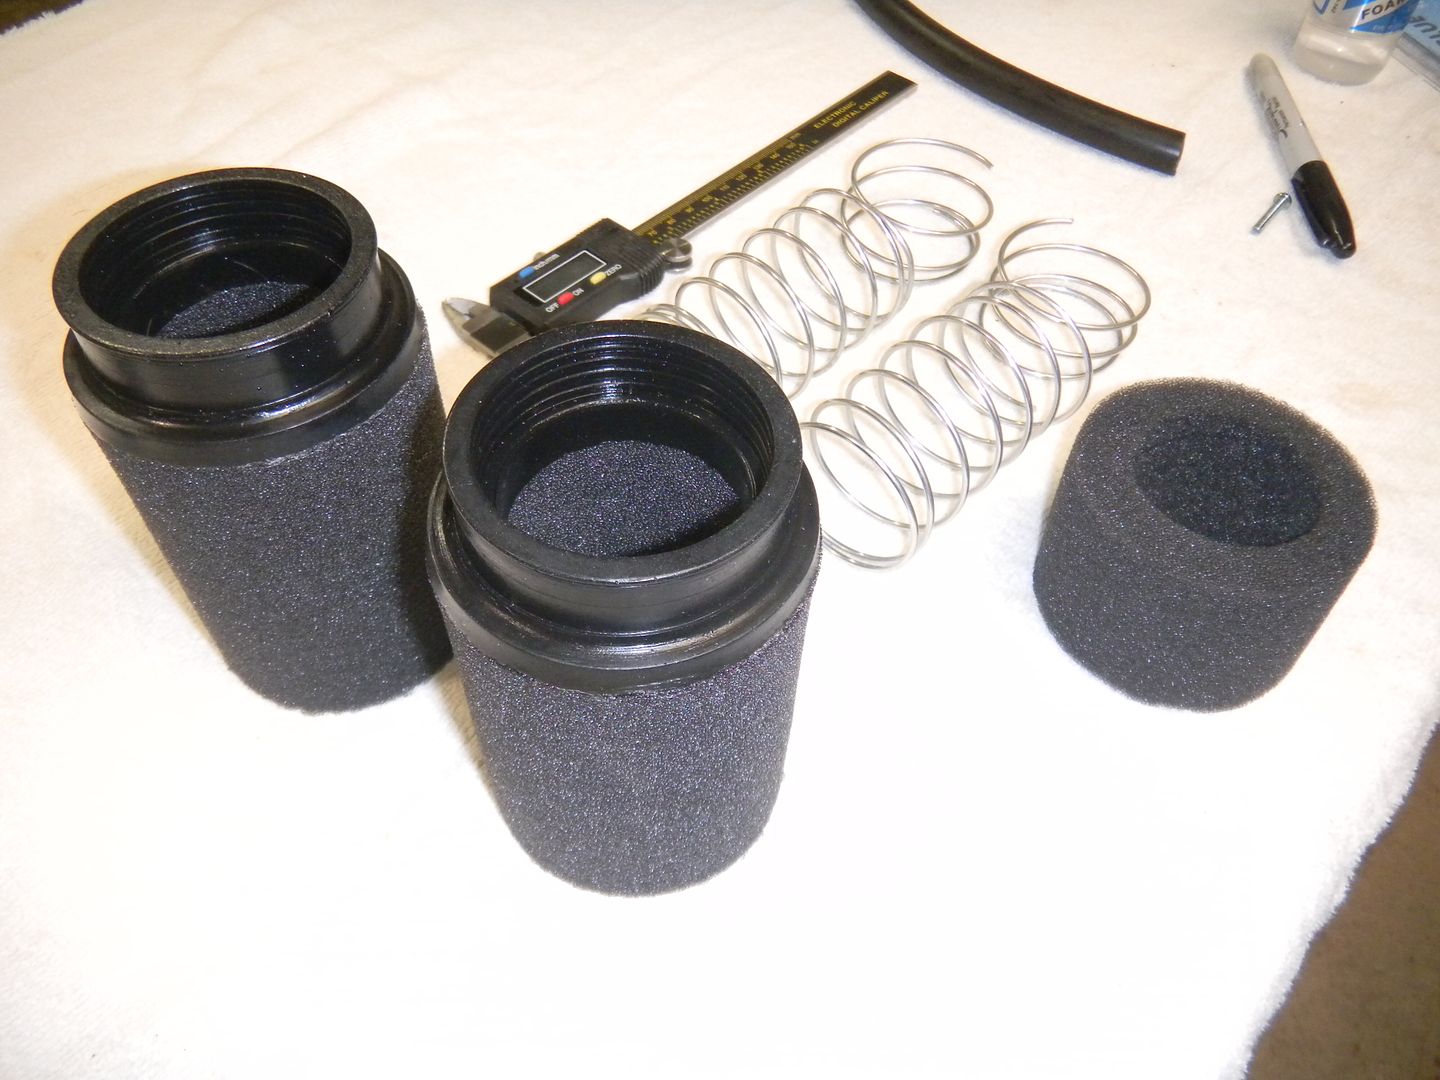
I knew the air filters were too long when I ordered then. The shorter ones just didn't seem to fit.
Ended up cutting a section off of each and gluing it back together. Springs were cut down also.
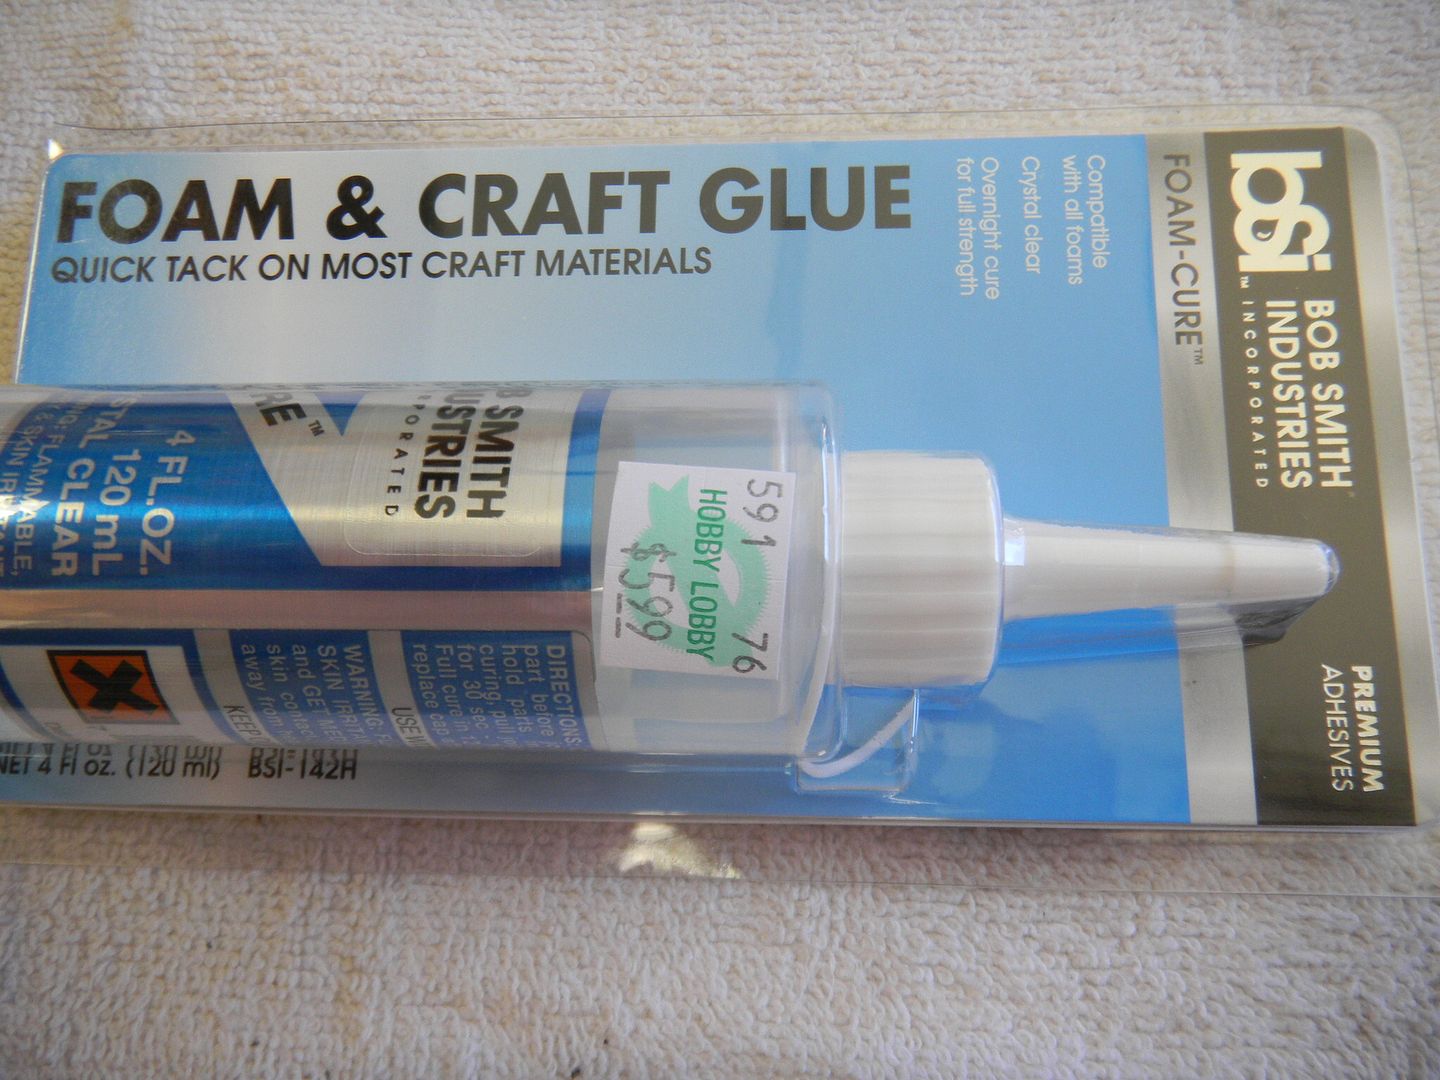
Here's the glue I used. Worked really well!
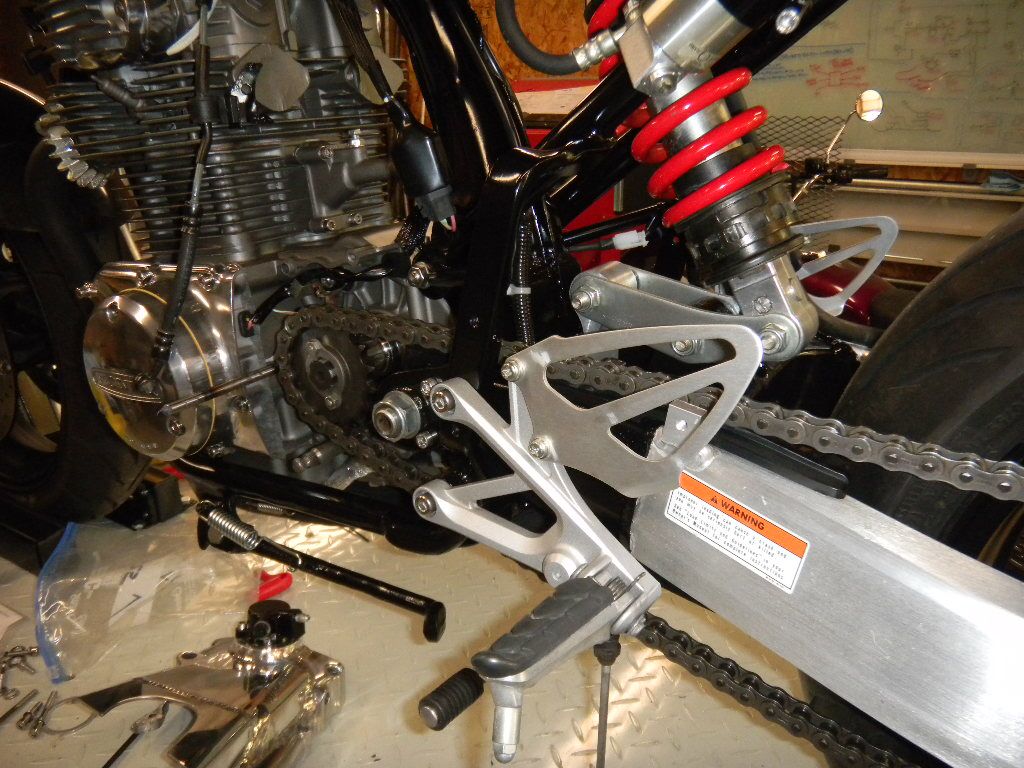
Took the rear shock off again and cycled the swingarm about an inch beyond the stated travel. Adjusted the chain, and although it was'nt hitting the frame; it was too loose.
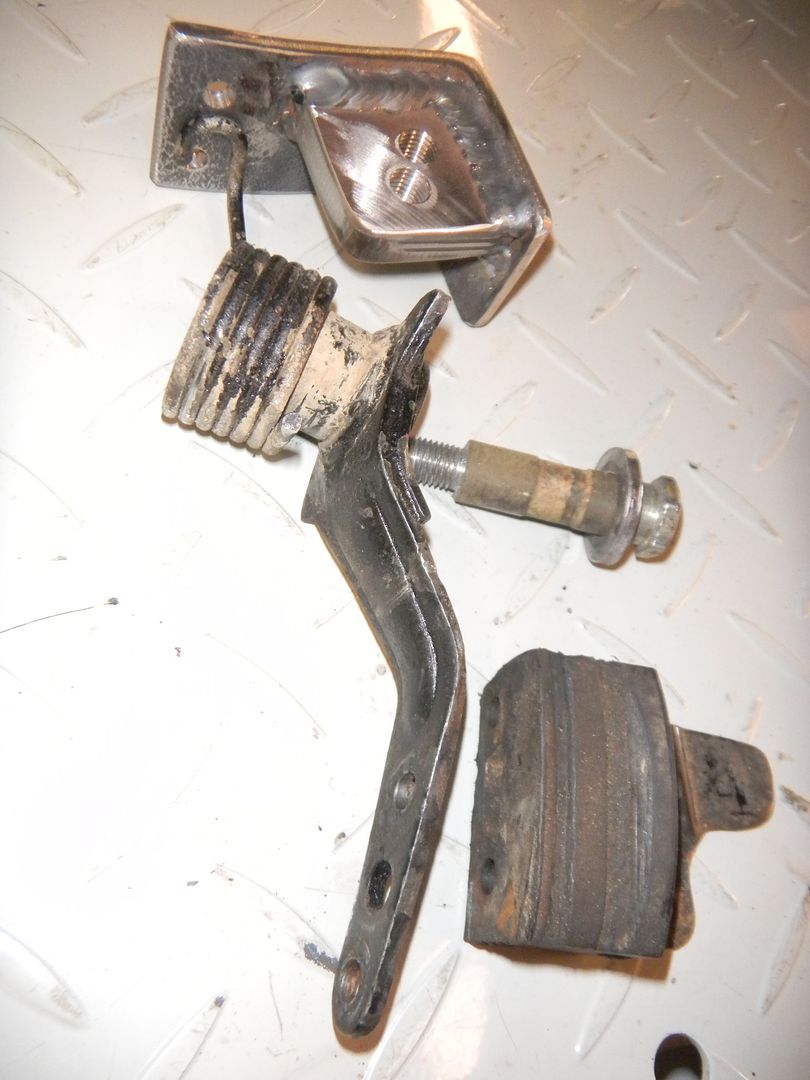
Bought a used tensioner at a swap meet. Don't know which bike it came from.
Here's the parts and the bracket I made.
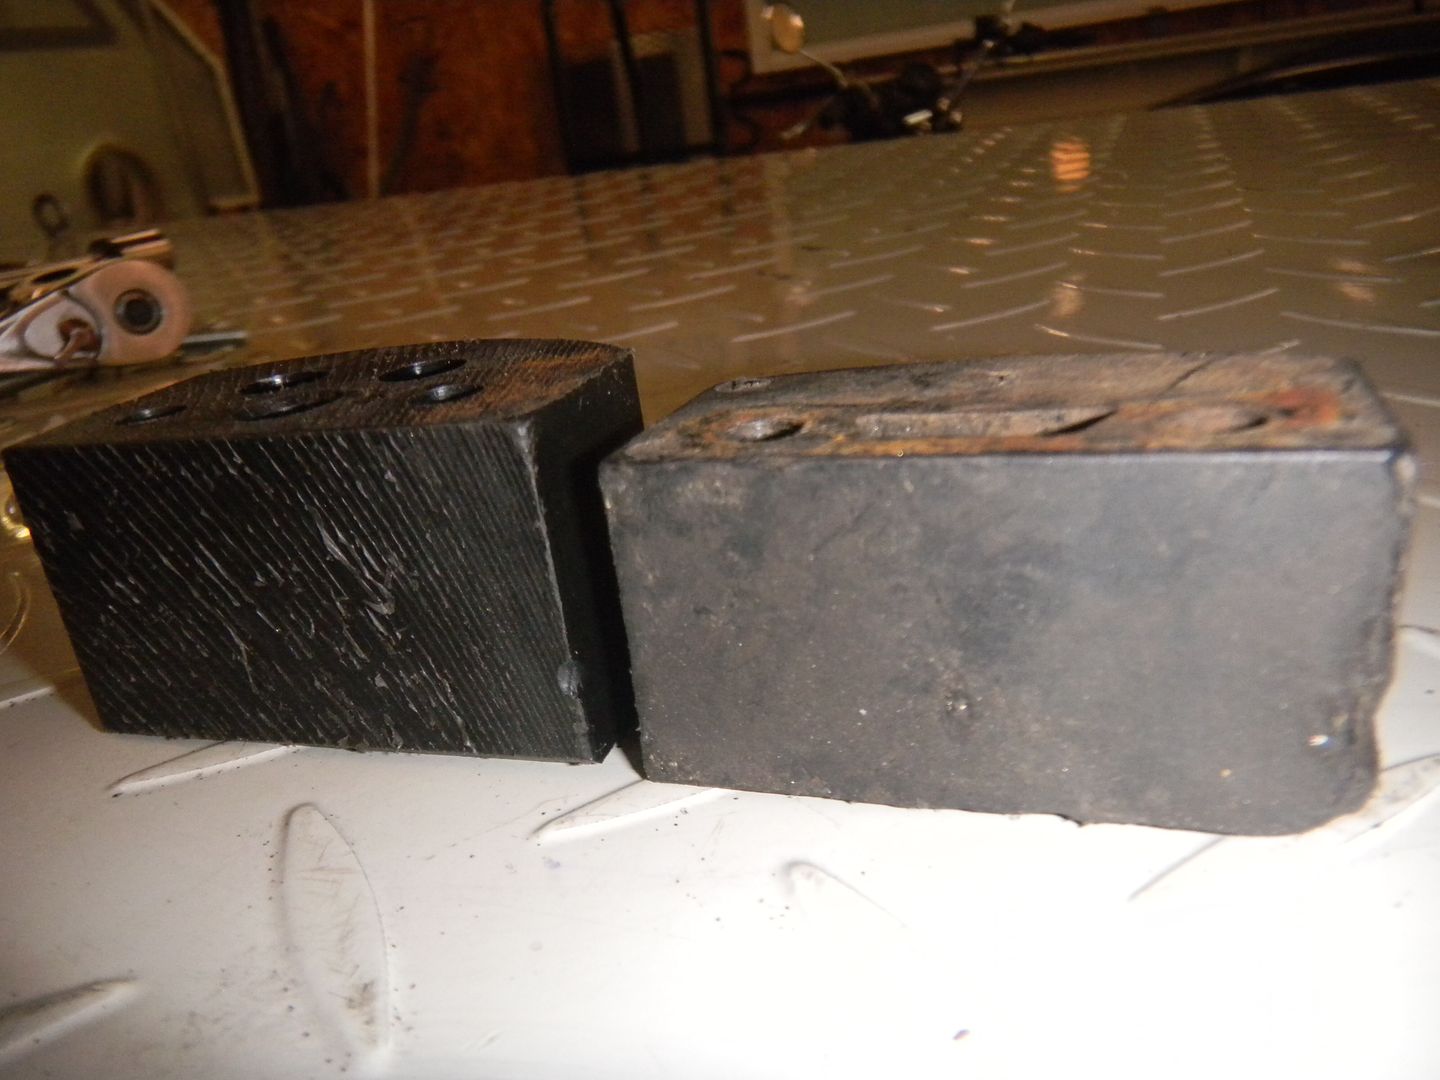
Made a new rubbing block out of Delrin. It's a bit wider than the original.
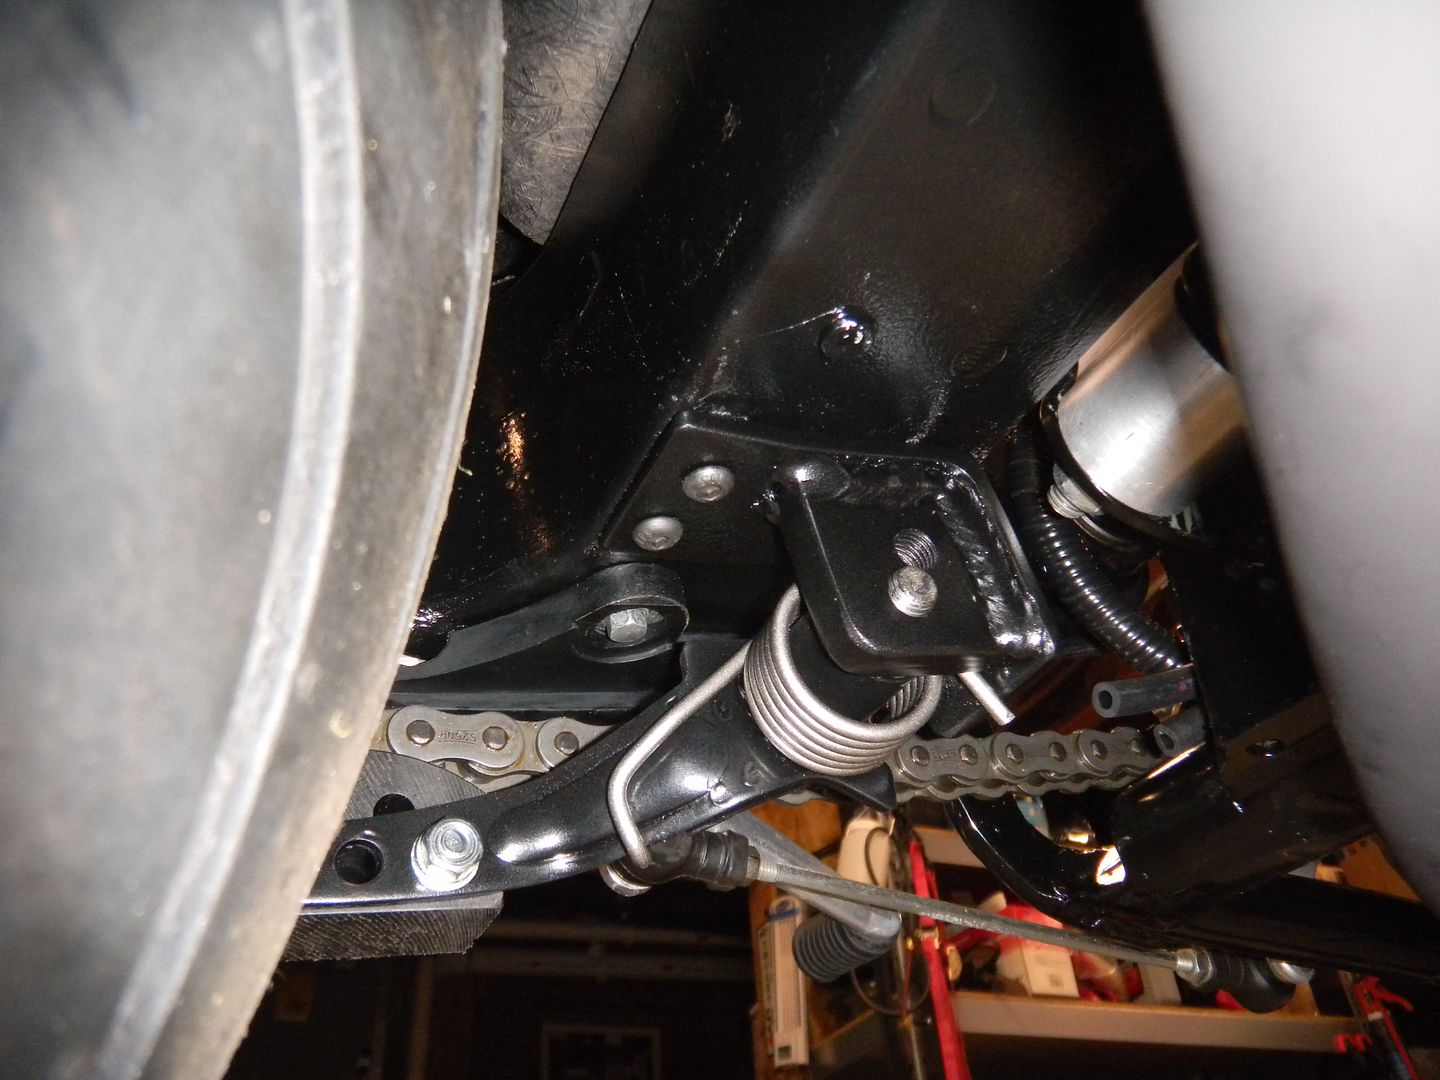
On the bike, bolted to the lower side of the swingarm
Before
After
Before ordering the custom throttle cable from Motion Pro; had to clean & rebuilds the carbs.
I knew the air filters were too long when I ordered then. The shorter ones just didn't seem to fit.
Ended up cutting a section off of each and gluing it back together. Springs were cut down also.
Here's the glue I used. Worked really well!
Took the rear shock off again and cycled the swingarm about an inch beyond the stated travel. Adjusted the chain, and although it was'nt hitting the frame; it was too loose.
Bought a used tensioner at a swap meet. Don't know which bike it came from.
Here's the parts and the bracket I made.
Made a new rubbing block out of Delrin. It's a bit wider than the original.
On the bike, bolted to the lower side of the swingarm
Before
After
revel.motorcycles
Been Around the Block
Cool Build!
sharperdill
Been Around the Block
Very cool build.
www.precisionmoto.com
www.timeinthegarage.com
www.precisionmoto.com
www.timeinthegarage.com
Great build. Pretty psyched, I never thought of doing this:
K4 said:I knew the air filters were too long when I ordered then. The shorter ones just didn't seem to fit.
Ended up cutting a section off of each and gluing it back together. Springs were cut down also.
Here's the glue I used. Worked really well!


