1983 KZ1000P build ... MUTT #3

Mean Green Z28

New Member
Hello to all you happy people!

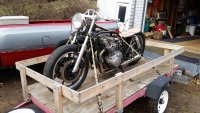
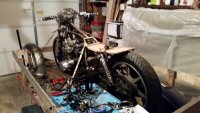
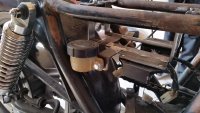
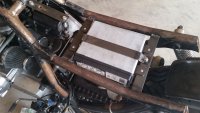
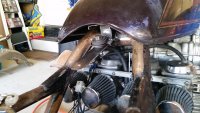
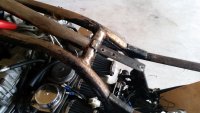
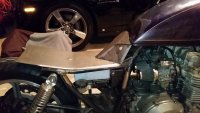
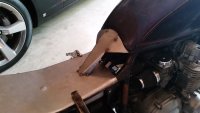
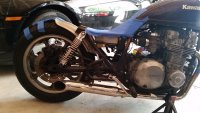
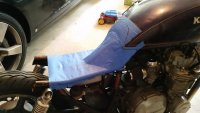
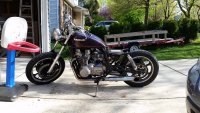
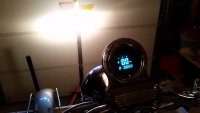
Eager to share my new project. it's a 1983 Kawasaki KZ1000 Police bike that I bought off of Craigslist for a few hundred bucks. For that money came an engine on a frame that was already cut up and set up to be a bobber and a some of the rest of the parts in boxes. I'm a bit along on the build so I'll make my posts to coincide with a few milestones... First post, how I got it.
 

Attachments

  • 2015-03-27 18.02.15.jpg
    2015-03-27 18.02.15.jpg
    2.4 MB · Views: 369
  • 2015-03-28 19.44.21.jpg
    2015-03-28 19.44.21.jpg
    1.7 MB · Views: 376
  • 2015-03-28 19.44.26.jpg
    2015-03-28 19.44.26.jpg
    1.7 MB · Views: 352
  • 2015-04-02 18.28.44.jpg
    2015-04-02 18.28.44.jpg
    1.5 MB · Views: 391
Did that money include a title? Looks like a great project you got goin on.
 
Cleaned out the carbs and figured out the wiring and temporarily rigged stuff to start the engine ... it fired up!

All the mounting tabs and brackets had been cut off as well as the frame behind the rear shock mounts. everything has to be fabricated. Mounted the tank and coil packs using one bracket off of the center and ran the wires forward to the plugs. Made a battery bracket under seat.
 

Attachments

  • 2015-04-21 16.25.17.jpg
    2015-04-21 16.25.17.jpg
    467.7 KB · Views: 342
  • 2015-04-20 16.12.14.jpg
    2015-04-20 16.12.14.jpg
    1.5 MB · Views: 338
  • 2015-04-17 11.21.16.jpg
    2015-04-17 11.21.16.jpg
    1.8 MB · Views: 404
  • 2015-04-17 11.17.59.jpg
    2015-04-17 11.17.59.jpg
    1.5 MB · Views: 356
Had to rebuild/clean all the brake calipers as they were seized. Cleaned out the rust and was finally able to roll her out. Engine runs on choke, dies when not.

Then, while waiting for the rear hoop to come in (thank you eBay), I started messing around with the seat pan design and rear fender placement. Ofcourse I still can't complete the rear of the seatpan 'cos the hoop is "in Transit". At first, I was going to try my hand at fiberglass ... but decided against it and started doing it in sheetmetal ... would have been much easier if I trusted myself with fiberglass; messed up two projects before and a third was just asking for trouble, haha.
 

Attachments

  • 2015-05-28 23.36.23.jpg
    2015-05-28 23.36.23.jpg
    1.6 MB · Views: 337
  • 2015-05-27 14.32.35.jpg
    2015-05-27 14.32.35.jpg
    1.3 MB · Views: 337
  • 2015-05-19 15.44.42.jpg
    2015-05-19 15.44.42.jpg
    1.6 MB · Views: 326
  • 2015-05-19 11.03.45.jpg
    2015-05-19 11.03.45.jpg
    1.5 MB · Views: 344
  • 2015-04-28 17.18.56.jpg
    2015-04-28 17.18.56.jpg
    2.6 MB · Views: 341
  • 2015-04-28 17.18.39.jpg
    2015-04-28 17.18.39.jpg
    2.4 MB · Views: 328
If your plan is to put struts in place of the shocks I have a KZ1000 project coming up I could use those on.
 
^ yet to complete the front section of the seat pan where it kinda flanks the sides of the tank; I kinda liked that look. Still awaiting the rear hoop.

Next completed the ignition and hi/lo selector switch relocation mount.

Also, modified the hand control clamps with momentary switches for the signals, horn and maybe a kill switch or headlight dip circuit (haven't decided yet). I could've gotten the clamps from the manufacturer, but they were $250 for the pair. Upon looking at pics and what I had with me, I got sub-mini switches from Radioshack and was able to get a similar result. Ofcourse not as neat, but with no machine shop handy and only basic tools, I'm pretty happy with the way they turned out.

The bike came with 1" Harley spec handlebar/controls and a Dakota Digital Gauge, got that working too ... it's been a pain in the a** finding 1" handlebar control stuff that isn't for a Harley.
 

Attachments

  • 2015-05-25 14.47.48.jpg
    2015-05-25 14.47.48.jpg
    582.7 KB · Views: 326
  • 2015-05-29 20.05.20.jpg
    2015-05-29 20.05.20.jpg
    442.3 KB · Views: 315
  • 2015-05-26 16.49.22.jpg
    2015-05-26 16.49.22.jpg
    1.4 MB · Views: 330
  • 2015-05-26 22.04.20.jpg
    2015-05-26 22.04.20.jpg
    1.6 MB · Views: 327
  • 2015-05-26 22.28.24.jpg
    2015-05-26 22.28.24.jpg
    1.6 MB · Views: 336
  • 2015-03-30 19.01.39.jpg
    2015-03-30 19.01.39.jpg
    1.2 MB · Views: 346
Tune-A-Fish said:
If your plan is to put struts in place of the shocks I have a KZ1000 project coming up I could use those on.
Still new to the bike world, you're talking about the fronts? What's my options on Struts? I guess I have the shocks due to the air valve on top?
 
The back. I see the pan is almost zero clearance to the tire so it won't need much if any shock travel and those shocks are kinda nice lookin.
 
Tune-A-Fish said:
The back. I see the pan is almost zero clearance to the tire so it won't need much if any shock travel and those shocks are kinda nice lookin.
oh! The hoop I'm getting has a slight kick-up to it and although my initial plan was to mount the fender to the swingarm, I may just mount it to the hoop/frame.
 
xb33bsa said:
you need to check wheel travel clearannce,dude, dont paint yerself into a corner
That's definitely a concern. The shocks are Progressive Suspension 418's with 90/130 springs (4 pre-load and 4 damping levels). I plan to take the shocks off and drop the bike down as far as it would go and then mount the fender to the frame, then raise the bike back up. This will give me about 2" of travel. I'm about 180lbs. so hopefully there's enough adjustment/pre-load to keep me from bottoming out. If this all fails, I'll go with a slightly longer shock or get the stiffer springs.
 
no you are doing it wrong :D
take one shock off .put a ratchet strap next to the remaining shock and ratchet it down hard against the bottom out bumper.(have the shock spring set soft )
then design in at least 1" clearance to fender
any other method is just $%*U^&IO( rigging it
 
xb33bsa said:
no you are doing it wrong :D
take one shock off .put a ratchet strap next to the remaining shock and ratchet it down hard against the bottom out bumper.(have the shock spring set soft )
then design in at least 1" clearance to fender
any other method is just $%*U^&IO( rigging it
Well then I'm wayyyy off haha
 
ha !!
it looks like you are lowering the bike ? why ? it ruins the handling and ridability of any motorctycle to lower it you know
 
xb33bsa said:
ha !!
it looks like you are lowering the bike ? why ? it ruins the handling and ridability of any motorcycle to lower it you know
Well, my initial plan was to go Cafe style, but after much thought (and checking wallet for any coins to fall out) I decided to continue the project the previous owner started. All the expensive parts you see on the bike was already purchased and on the bike (or in a box) and much of the original stuff thrown away or cut up. Maybe I could have sold the shiny bits and replaced them with what I wanted and even been up on the deal, but it'll do for now I guess ... hindsight
 
Those 90/130 springs are very soft for a bike that big with a 180 lb rider. For comparison, I have 170/200 on my XS1100. I don't like dragging hard parts in the corners. I'm in the camp with xb33.
 
Back
Top Bottom