1978 CB750K Clutch

tmtrebor

Active Member
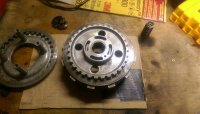
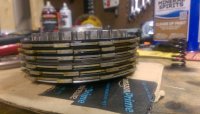
So I just replaced all the clutch plates in my cb750k (78). This bike has the thicker metal ring, which I placed in the center of the pack.
Now, after installing, I have a problem, the bike's clutch does not disengage. I can confirm the bike is shifting gears, as the neutral lights turns on when it's in neutral, the bike doesnt start outside of neutral, and there is a small lurch forward when I shift the bike into first when it's running.
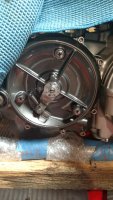
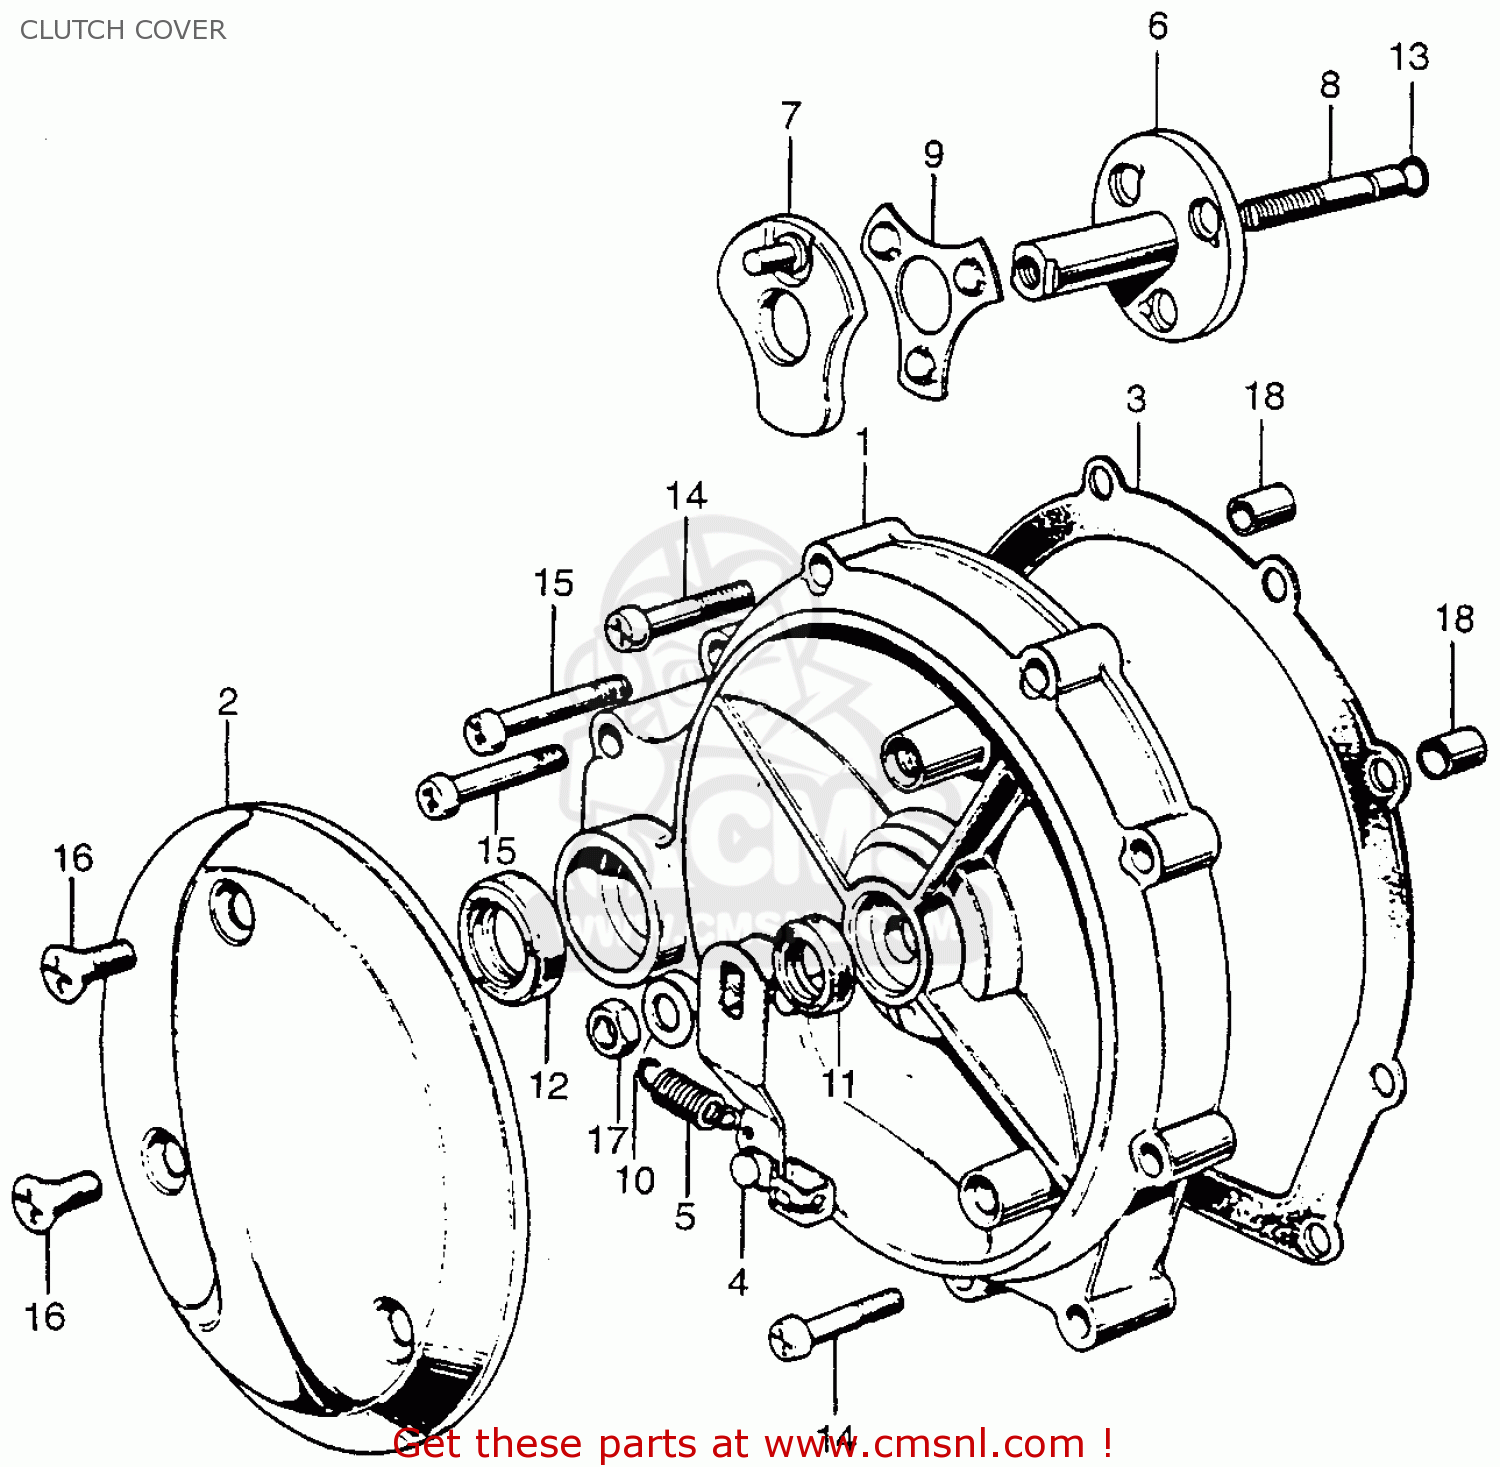
Now, here is what is weird. When I have the clutch side plate on (the main one that connects to the block and has the gasket behind it), and everything attached, the bike rolls forward and backwards in first. When the same plate is OFF, and the bike is in first, the bike does not roll.
This leads me to believe there is an adjustment error on either the screw on the clutch plate, or with the lifter plate itself.
One thing I notice is that there is absolutely NO play on the adjustment screw in the middle of this clutch plate. When you turn it, it is either easy to turn, or becomes VERY stiff, I do not feel any "slight resistance" that would prompt me to turn out 1/4 turn.
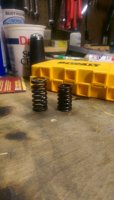
It's my understanding (from looking at it and turning things) that this mechanism presses into the lifter plate, presses the clutch springs, and allows there to be free play in the clutch pack, allowing the clutch to spin.
SO, this leads me to believe that the lifter plate is not seated correctly and too far out currently, placing the clutch plate back onto the bike presses the mechanism into the lifter plate, reducing tension on the plates.
Am I on the right track? If not, any input?
 
Pics are a great help, but take the cable out of play (off the arm) for a moment and tell us what clock position the clutch arm is in.
 
thats what I was getting to on the chat board

and have you adjusted the throw out so that you have tension and the back it off a 1/4 turn
 
Kamn said:
thats what I was getting to on the chat board

and have you adjusted the throw out so that you have tension and the back it off a 1/4 turn

Stopped by to see whats up, I won't confuse things... carry on
 
thats what I was thinking
but I thought that was just standard procedure
New clutch pack, springs, then adjust throw out and cable or just cable if its that kind of setup
 
Yep no funy biz at all,

7,9,8,6,13 need to be sure the balls are on the cage right also

honda-cb750-four-1973-cb750k3-usa-clutch-cover_bighu0105e1308_0b4b.gif
 
Almost certainly the adjuster (#8) is incorrectly adjusted. This part is needed because the assembled clutch stack and various case parts and gaskets etc. all have a small tolerance in their dimensions, so it is likely the end dimension between the case where the actuating ramp (the jobbydoo with the three balls)and the pressure plate will have a large variance between any two given assemblies - hence the adjuster!. That is why the old clutch worked fine and the new one is too tight. By the way, the clutch is engaged when you pull the lever in to the bar and disengaged while it is locking the engine to the trans and you are driving. The new clutch pack is evidently thinner than the old one, so the mechanism that operates it is now too "long". That is why there is an adjustment. The extra length from the "old" adjustment position is partially engaging the clutch. The cable itself and any adjustment at either end should not come into play. Obviously the clutch should be totally disengaged when you release the hand lever.

If you have everything assembled correctly, not an issue if you didn't take the assembly apart, the cable should have a small bit of slack in it like it normally does. You should only have to remove the top cover (#2), loosen the jam nut (17), and then adjust the adjuster screw (#8). It should be completely free at some point when you back it out. At his point the clutch should be completely disengaged and you should not be able to roll the bike when it is in gear. All you need to do is screw it back in until you detect that it is starting to move the pressure plate, which likely will be more like bottoming the screw out than "some resistance". Once you determine this point, give it about a 1/4 turn looser, and while holding it in place, snug up the jam nut. When you are done, you should have a little free play at the operating arm when you move it by hand. Note that you want to see the whole mechanism having the play - watch the nut for slight rotation not just the arm. The arm has two flats on it that can be loose and allow some motion of the arm without actually rotating the whole assembly.
 
hey guys, sorry for no pics or anything. I posted that while at work. I'm still here, but I will be home (hopefully by 7pm EST... stupid meetings /deadlines).

I didnt get to see chat as I was pulled into a meeting. Again, pics will be coming shortly. Thanks for your help guys.


Also, I did take the entire assembly apart. I replaced all friction discs, two were missing giant pieces of the friction surface (the front disk with the "swirl pattern" and the one next to the steel plate next to it).

On the friction stack, I used 6 plates instead of 7 due to the double steel plate (they are also all "square" style and no "swirl style"), and I saw on some other forum that it was smart to do so. I had thrown the friction plates away like a smart guy prior to receiving my friction plates in the mail (yeah, i'm an idiot). I found some internet picture from a honda update, which i have linked below. I followed those instructions... I'm assuming I will probably need to install the new friction plate.

http://i233.photobucket.com/albums/ee84/RxmanGriff/Honda/ClutchRattleUpgrade.jpg
 
tmtrebor said:
hey guys, sorry for no pics or anything. I posted that while at work. I'm still here, but I will be home (hopefully by 7pm EST... stupid meetings /deadlines).

I didnt get to see chat as I was pulled into a meeting. Again, pics will be coming shortly. Thanks for your help guys.


Also, I did take the entire assembly apart. I replaced all friction discs, two were missing giant pieces of the friction surface (the front disk with the "swirl pattern" and the one next to the steel plate next to it).

On the friction stack, I used 6 plates instead of 7 due to the double steel plate (they are also all "square" style and no "swirl style"), and I saw on some other forum that it was smart to do so. I had thrown the friction plates away like a smart guy prior to receiving my friction plates in the mail (yeah, i'm an idiot). I found some internet picture from a honda update, which i have linked below. I followed those instructions... I'm assuming I will probably need to install the new friction plate.

http://i233.photobucket.com/albums/ee84/RxmanGriff/Honda/ClutchRattleUpgrade.jpg
In traffic now. Lookin at 1.5 hours due to a wreckm

Sent from my HTC6525LVW using Tapatalk
 
Ok i got two pics of the clutch cover and lifter plate. Does it look too deep? I am taking it off now

http://imgur.com/a/qUyZf

Sent from my HTC6525LVW using Tapatalk
 
Holy shit. Just noticed something.... so is the lifter plate only able to go on one way? I jusy noticed that the holes dont line up

Sent from my HTC6525LVW using Tapatalk


Nevermind..... it was just loose from where i took it off
 
In the first pick was the adjuster jam nut missing or just removed seems a washer is missing also (see pic:), the stack looks right but cant see further.
 

Attachments

  • IMG_20150707_204700596.jpg
    IMG_20150707_204700596.jpg
    5 MB · Views: 216
Tune-A-Fish said:
In the first pick was the adjuster jam nut missing or just removed seems a washer is missing also (see pic:), the stack looks right but cant see further.
This is correct. I had removed it. I have some more pics here. Took the clutch pack out and measured. Plates are 3.5mm

As you can see in the pic, i only have 6 in. It came with seven. Also, i have . Set of springs i bought which are significantly smaller than stock. What gives there?

What else should i take pics off?

Sent from my HTC6525LVW using Tapatalk
 

Attachments

  • uploadfromtaptalk1461890941590.jpg
    uploadfromtaptalk1461890941590.jpg
    74.1 KB · Views: 187
  • uploadfromtaptalk1461890947059.jpg
    uploadfromtaptalk1461890947059.jpg
    64.5 KB · Views: 186
  • uploadfromtaptalk1461890955583.jpg
    uploadfromtaptalk1461890955583.jpg
    57.2 KB · Views: 543
The springs are likely the problem, those heavy springs suck unless your drag racing the pull is hand numbing.

7 friction and 6 drive (steel) start and end with friction, put it together with tha cable off and adjust until the screw is out further than the nut a ways when all done the cable/lever should have 1/8th" of play
 
Tune-A-Fish said:
The springs are likely the problem, those heavy springs suck unless your drag racing the pull is hand numbing.

7 friction and 6 drive (steel) start and end with friction
So which one are the drag springs? The small ones?

Sent from my HTC6525LVW using Tapatalk
 
Yeah those short springs if you look are a thicker coil and take less rate to provide pressure cant remembe stock spring rate but the tall ones are comparable to stock... not the best thing but check to see they are all the same height with a caliper
 
Tune-A-Fish said:
Yeah those short springs if you look are a thicker coil and take less rate to provide pressure cant remembe stock spring rate but the tall ones are comparable to stock... not the best thing but check to see they are all the same height with a caliper
Yes. They are all 39.8. Putting the clitch pack in now. Step daughters asleep so ill provide an update tomorrow. Thanks!

Sent from my HTC6525LVW using Tapatalk
 
Back
Top Bottom