1971 CB750 K1 Rider Resto (On the road again!)

Re: 1971 CB750 K1 Rider Resto

Well, I spent the weekend tearing the engine down. The cases are now split. It is not looking good, I don't know if this is worth fixing or not. The top end looks good, but there is a little wear on the rocker pivot shafts. I will mic these later.

I may need to get a replacement parts engine for the cases.

I found this bunch of crud in the oil pan. This is where all the big pieces from the hole in the case ended up.

_DSC3989a_zps96d70c73.jpg


Here is a picture of the top case. On initial inspection I thought it might be ok....not so after splitting the cases.

_DSC3994a_zpse1daf2f7.jpg


And finally, the lower case. A fair amount of damage here, including one of the threaded case bolt holes. Not insurmountable, but definitely some machining to do here. you can see where the case actually got pushed into the transmission and was ground down by one of the gears. I can't believe that they just patched this up with some fiberglass and glue back when the chain let loose.

_DSC4001_zpsd025cede.jpg


_DSC4003a_zps52776989.jpg


Jon, would you ask Pat if this is something that he would be willing to tackle? Or should I start looking for cases?

Ed
 
Re: 1971 CB750 K1 Rider Resto

Pat can weld anything. He said he would do it for you as long as it was clean.
 
Re: 1971 CB750 K1 Rider Resto

swan said:
Pat can weld anything. He said he would do it for you as long as it was clean.

That is really awesome that Pat will do this Jon! Did he machine the mating surfaces as well? I do have access to a small mill if I need to give it a go. I have to head off to work again on Tuesday for a week. You can bet I will be cleaning those cases when I get back. Is there any problem if soda blasting is part of the cleaning process? I'm thinking degrease with kerosene then soda blast then soap and water then acetone.
 
Re: 1971 CB750 K1 Rider Resto

Ed, sounds like a good process. Even when parts are clean, he uses acetone just prior to welding. He does not mill them but you or Skip could do it.
 
Re: 1971 CB750 K1 Rider Resto

Damn the torpedos....Full speed ahead. I'm not going to let a little thing like busted cases deter me. Just another bump in the road.

I have a book called "My CB750 Book" by Mark Parish. I have to say, for the tear down, the Hondaman book is the bomb.....so much simpler than the manual. He can get the point across to boneheads like me. :)

Over the weekend I disasembled the top end and split the cases to see what I was dealing with. Since I know everybody likes pictures, I will post a few random disassembly photos.

DISCLAIMER: I am a complete amatuer, so if you see any improper techniques, please point them out :)

Valve cover removed. Don't forget those two screws under the timing chain tower cover. I backed off all the tappet adjuster screws for easy removal of the rocker pivot shafts. I also rotated the engine to relieve all pressure from the rocker arms for each individual tower that I was working on. Here, I am removing the retaining bolt for the pivot shaft.

_DSC3965_zpsc4948199.jpg


Very lightly tapping out the shaft with an aluminum drift (an old exacto knife handle :) )

_DSC3966_zps2f66d6c6.jpg


one more set of rocker arms to go

_DSC3967_zps645db8ae.jpg


After removing all of the rockers, cam bearing caps, and the camshaft, the rocker towers just lift off the engine. Of course, I labeled everithing as it came off so that it all goes back together the same way.

_DSC3971_zpsebf0cbdd.jpg


Head and cyclinders removed. The pistons and bore look really good. I don't have a bore guage so I will need to have them measured. I have a feeling a light hone might still keep me within acceptable limits for a stock bore. I cannot believe how little wear there is on the bore.

_DSC3974_zps6372f56b.jpg


_DSC4011a_zpsfb0678e6.jpg


Disassembling the shifter mechanism to get at the bearing retainer so I can split the cases.

_DSC3977_zps2cc6ffae.jpg


_DSC3984_zpsf5e72683.jpg


I had one stubborn bolt on the front of the case. I tried heat. I still snapped it off....grrrrrr. I will have to try an easy out later on.

_DSC3987_zps78d55810.jpg


Everything bagged and tagged for assembly later on. Here are just a few pieces.

_DSC4005a_zps8813cee1.jpg


Primary chains color coded with zip ties to mark left and right as well as rotation direction.

_DSC3997_zpsa266731a.jpg


Thats all for a week or so.
 
Re: 1971 CB750 K1 Rider Resto

Here comes a long post with a lot of pictures. It's been quite a while since I posted anything due to lack of progress and to much work. Where to begin...... I soda blasted the cases in preparation to have them welded up. Right now, the cases are welded and have been transferred over to the machinist to have the case halves mated and one of the case bolt holes re-drilled and tapped. I don't have any pictures of the welds because I have not seen the cases since they have been welded. So far I have $30.00 and three six pack invested in the welding. Friends of Swan from this forum are doing the welding and machining work.

My high tech soda blasting setup.

_DSC4026a_zps367ef73e.jpg


Ready to go to Pat the welder.

_DSC4028a_zps6c4797fc.jpg


I pretty much finished up the rear wheel. This should have been finished a long time ago but the after market rim from David Silvers would not work. To their credit, Davis Silver Spares refunded my money and told me not to send the rim back. I noticed they no longer sell these particular rims either. I assume they pulled them from the inventory because of problems with the rims. I know that IW from SOHC had the same issues.

First, I reassembled the rear brakes with new shoes.

_DSC4039a_zpsd7b485c3.jpg


When I had removed my bearing retainer on the drive side, I ruined the threads on the retainer, so I had to buy a new one from Service Honda. I had drilled out the punch marks, but the threads in the hub were messed up in another area which in turn ruined the retainer.

_DSC4043a_zps7e48a6b0.jpg


I had read somewhere on this forum about using a tap to work out the thread imperfections on the hubs so I tried it. It worked really well, and by the time I was done, I could thread the retainer all the way in by hand. I ended up clamping the tap in my vice and working the threads by holding the hub in both hands. This seemed to be the only way I could get enough force and still maintain control of what I was doing.

_DSC4046a_zpsf96a1116.jpg


Got that done.

_DSC4047a_zpse053ac38.jpg


I'm getting better at installing the Tubles Kits from Outex Japan

_DSC4056a_zps3d0e4d04.jpg


My new seat cover arrived today from EBay seller gumtwo. It seems to be a nice cover. I worked on that this afternoon and pretty much got it done.

_DSC4058a_zps4126224b.jpg


_DSC4060a_zps16a904d1.jpg


_DSC4076a_zps2096d21a.jpg


_DSC4077a_zps715cb83d.jpg


AND, with the rear wheel done, I have a roller!!!!!

_DSC4071a_zpsdb6fa2cf.jpg


_DSC4070a_zpsa51cca34.jpg


_DSC4074a_zpsfeb25bdf.jpg


_DSC4083a_zps5c896ad4.jpg
 
Re: 1971 CB750 K1 Rider Resto

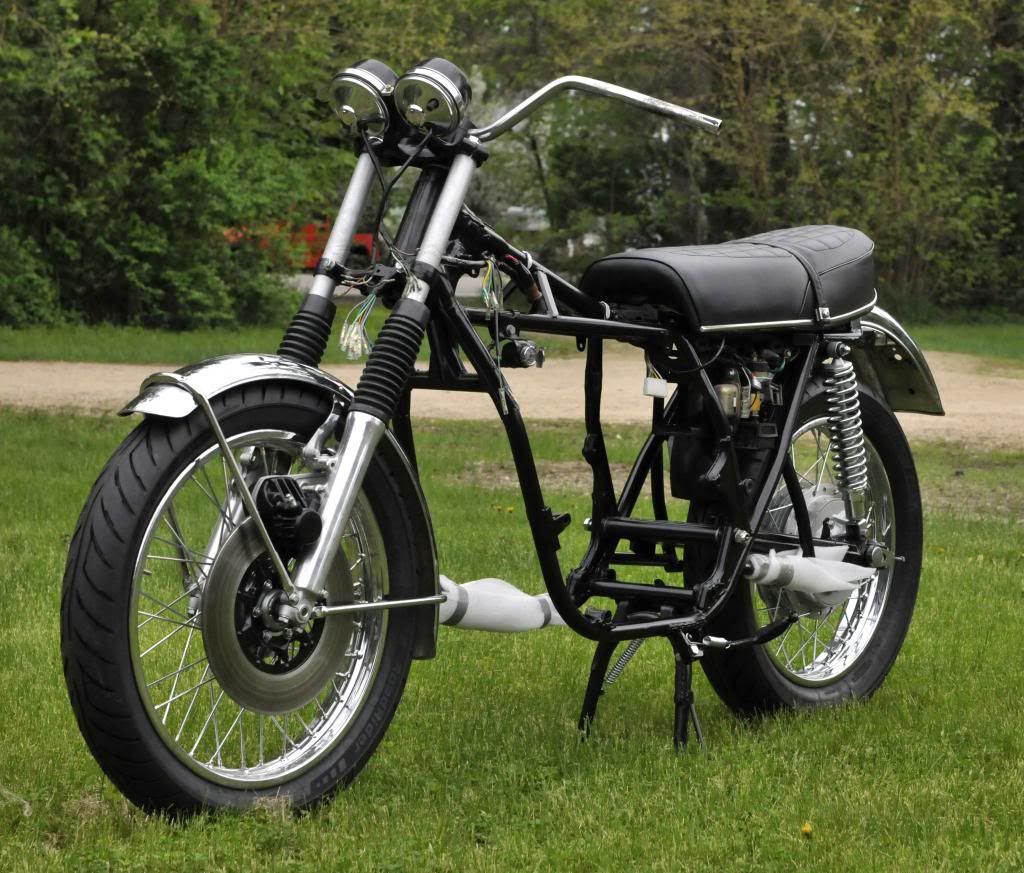
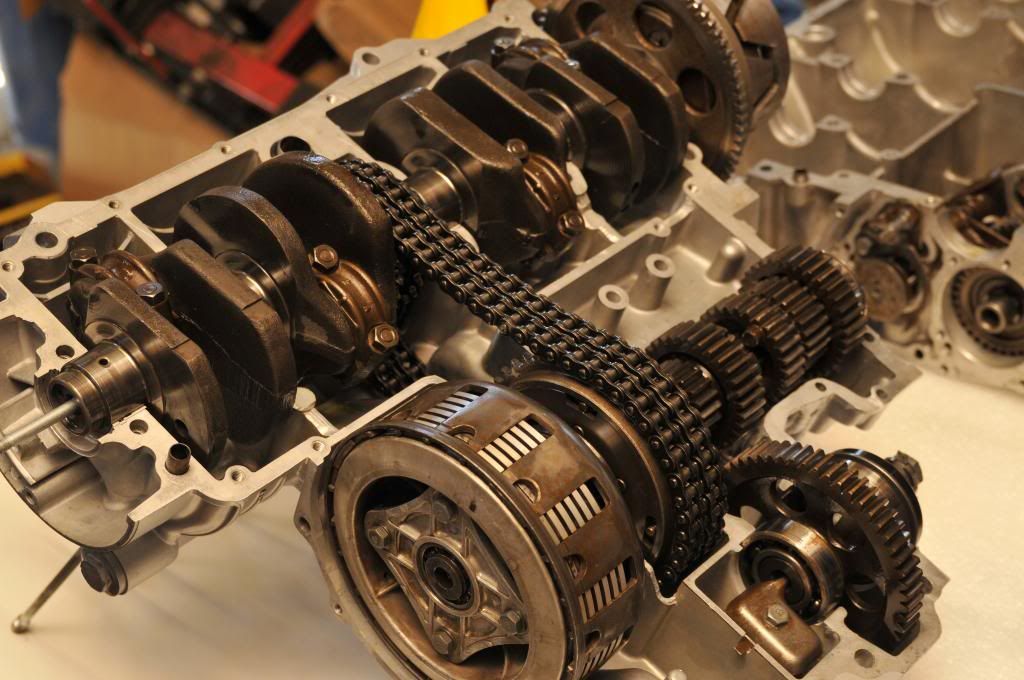
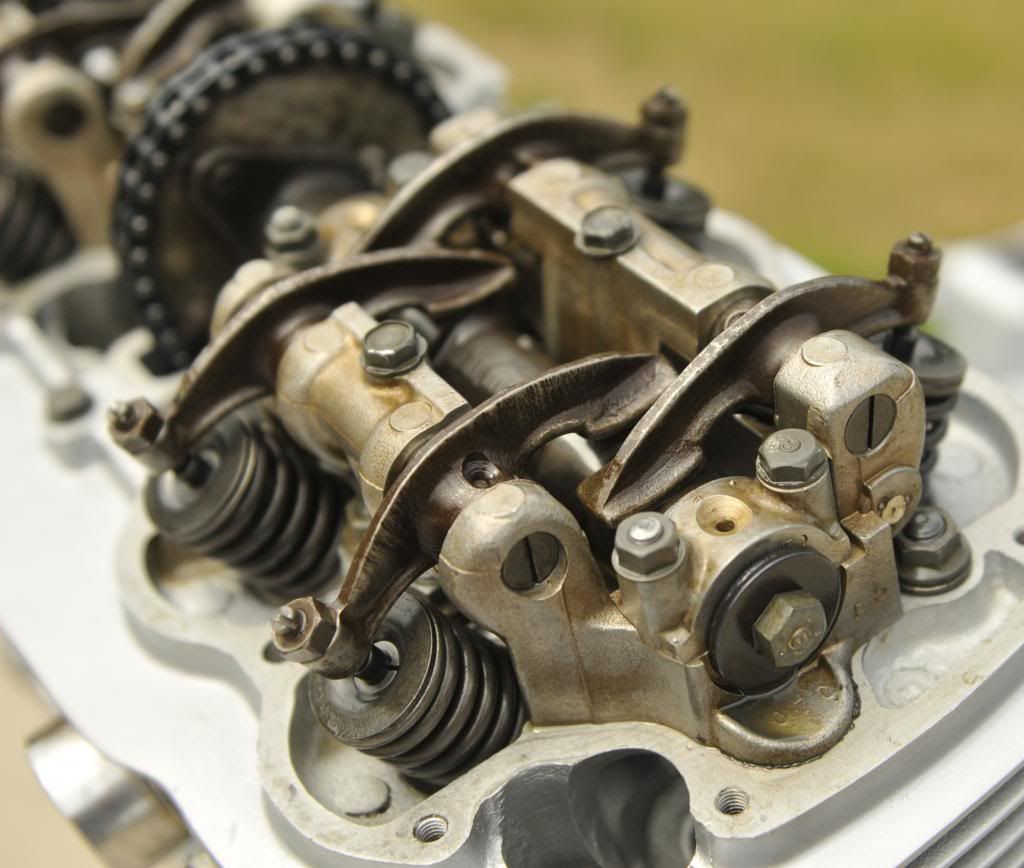
Well, progress has slowed again, but I am plugging away from several directions. Mostly, I am concentrating on engine stuff now.

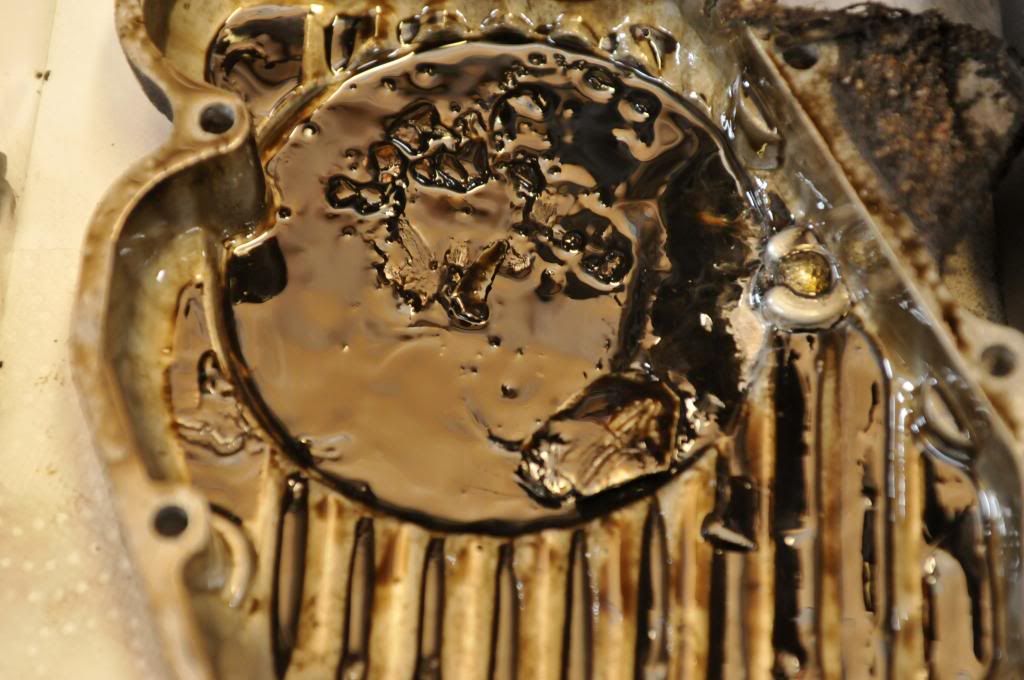
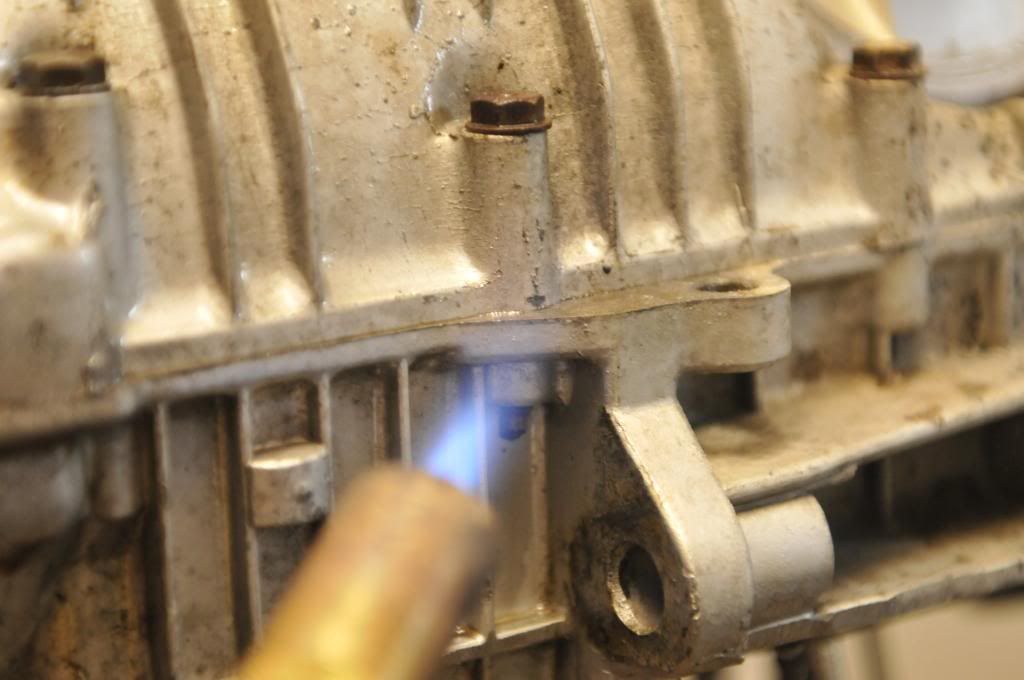
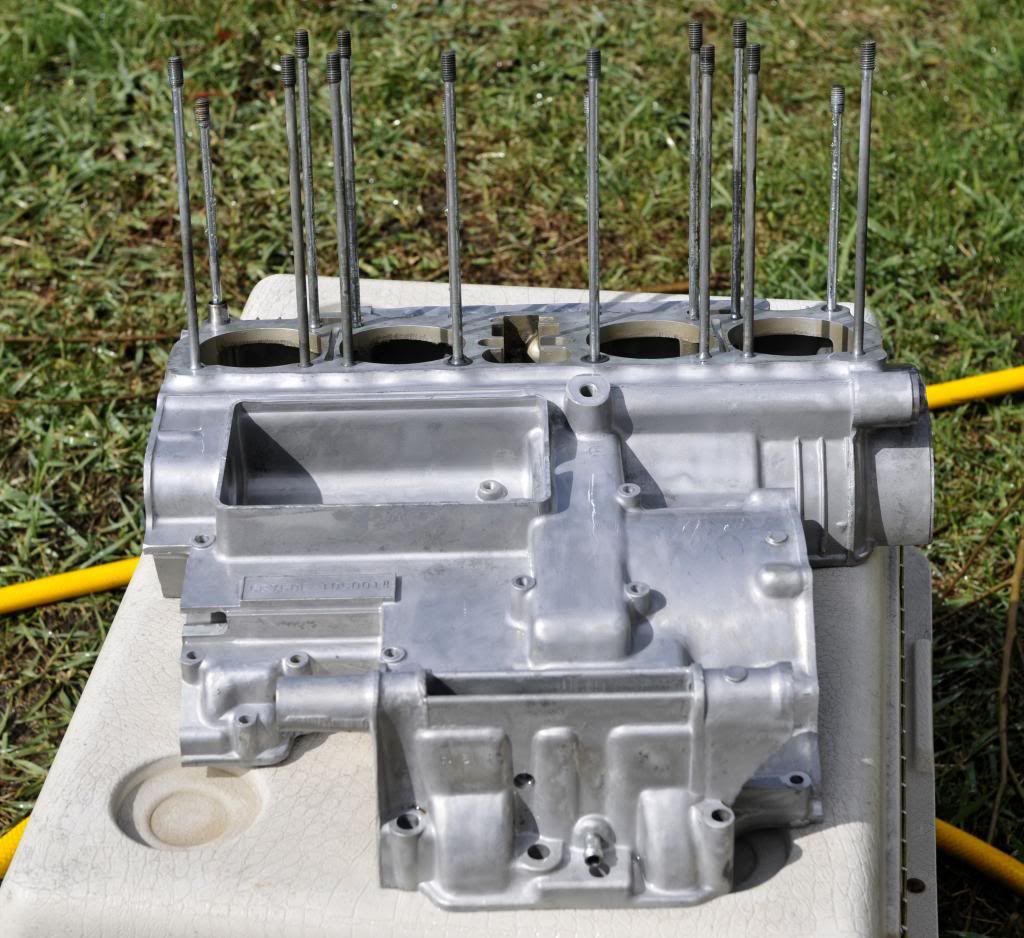
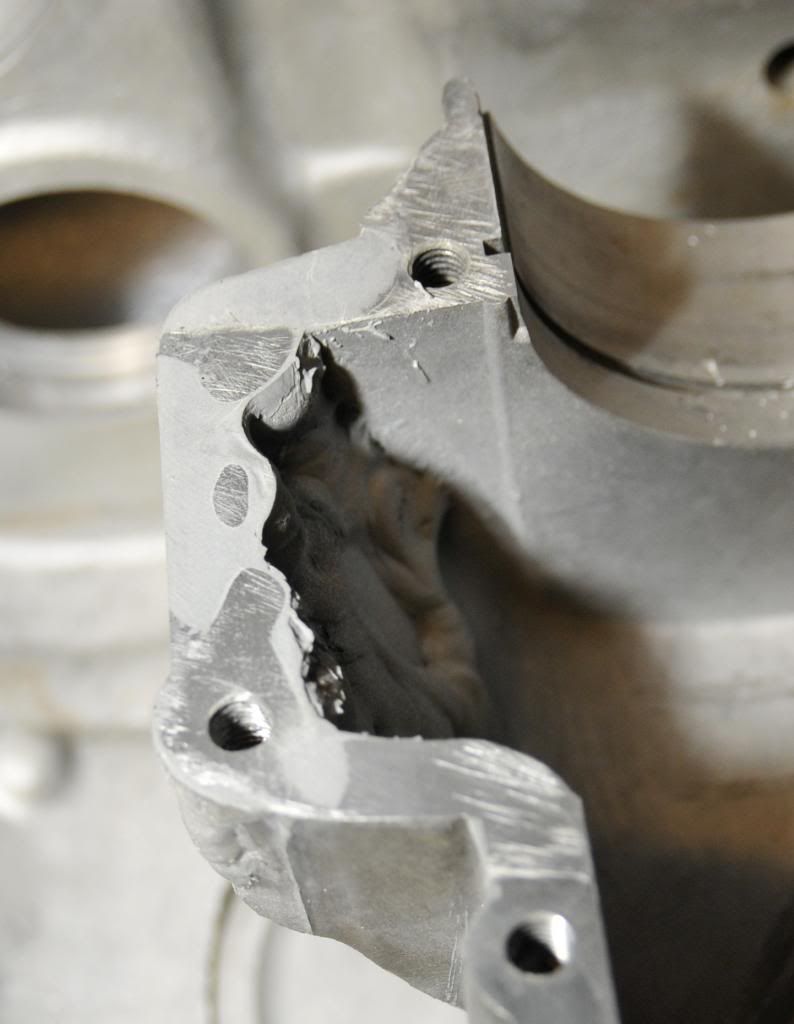
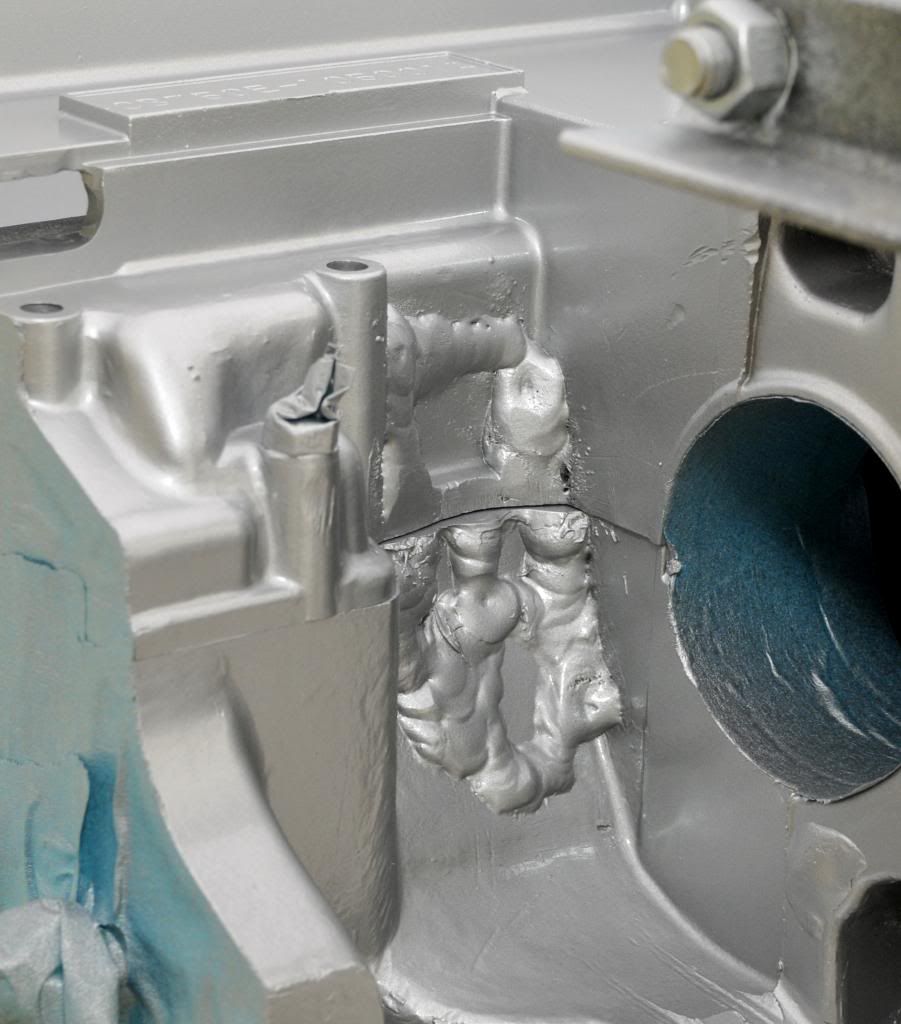
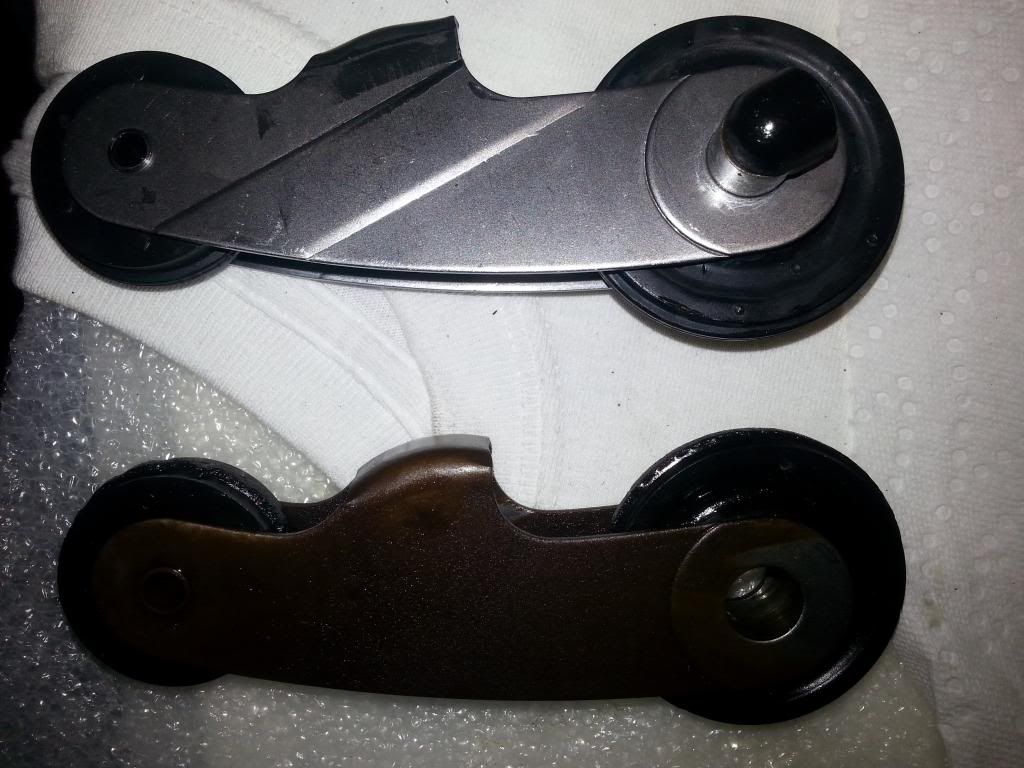
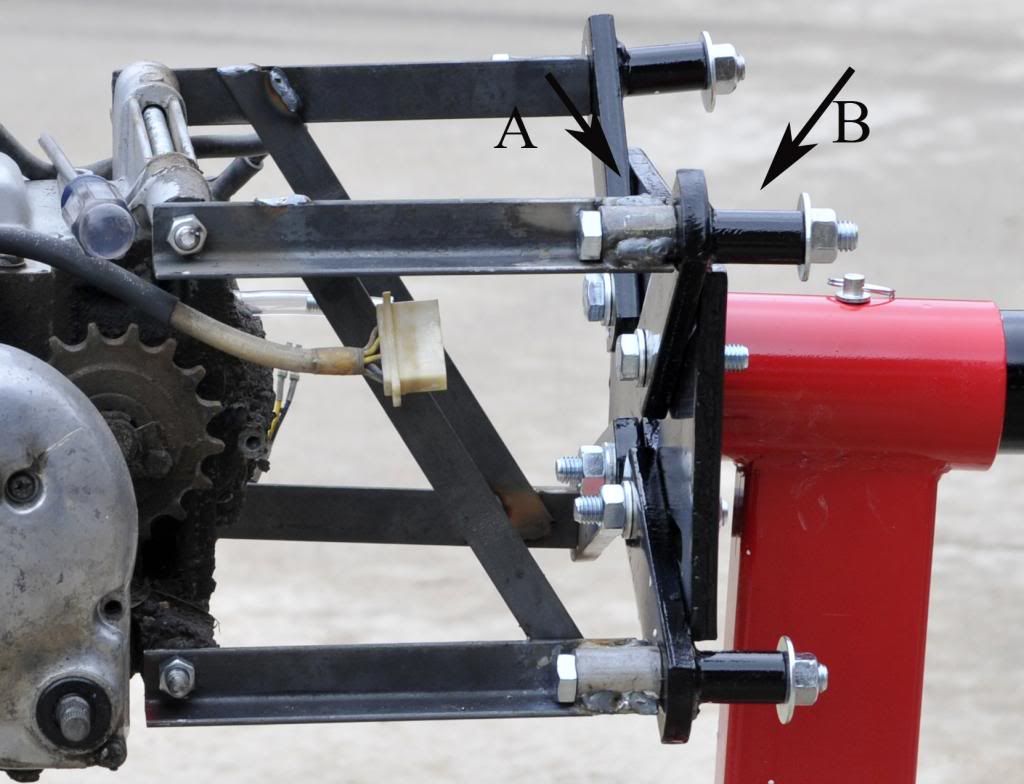
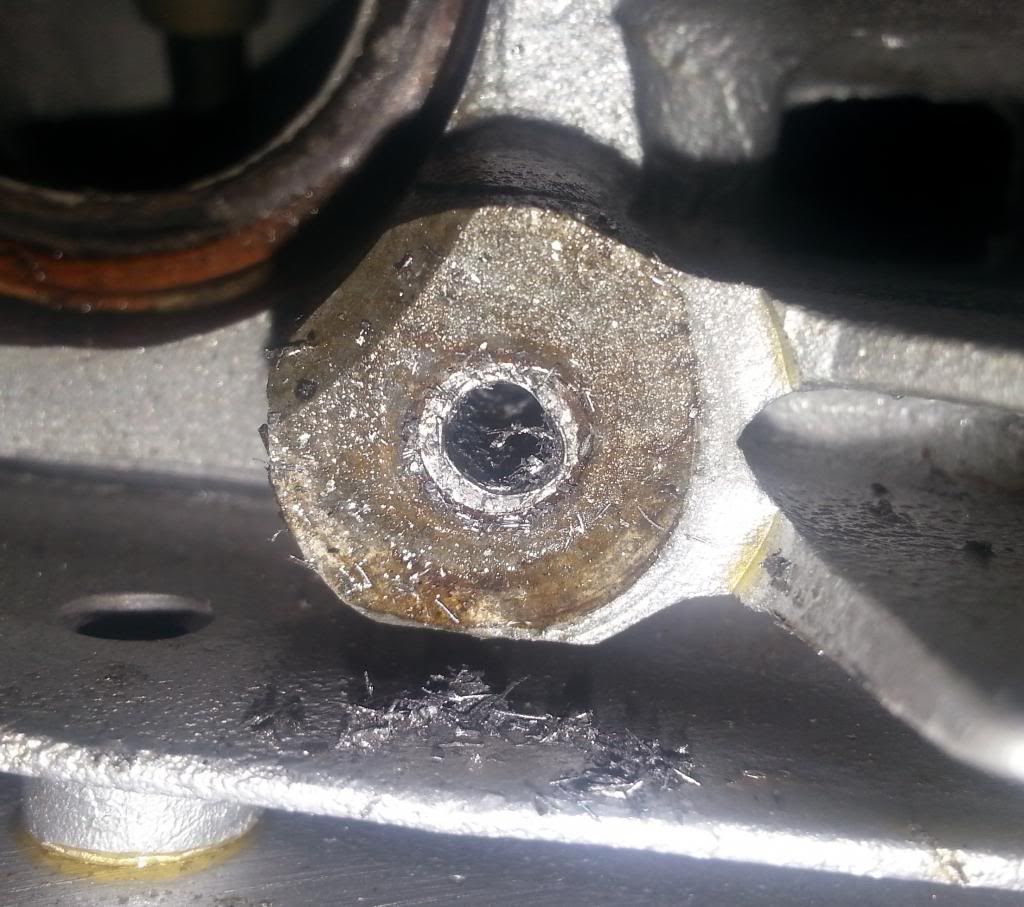
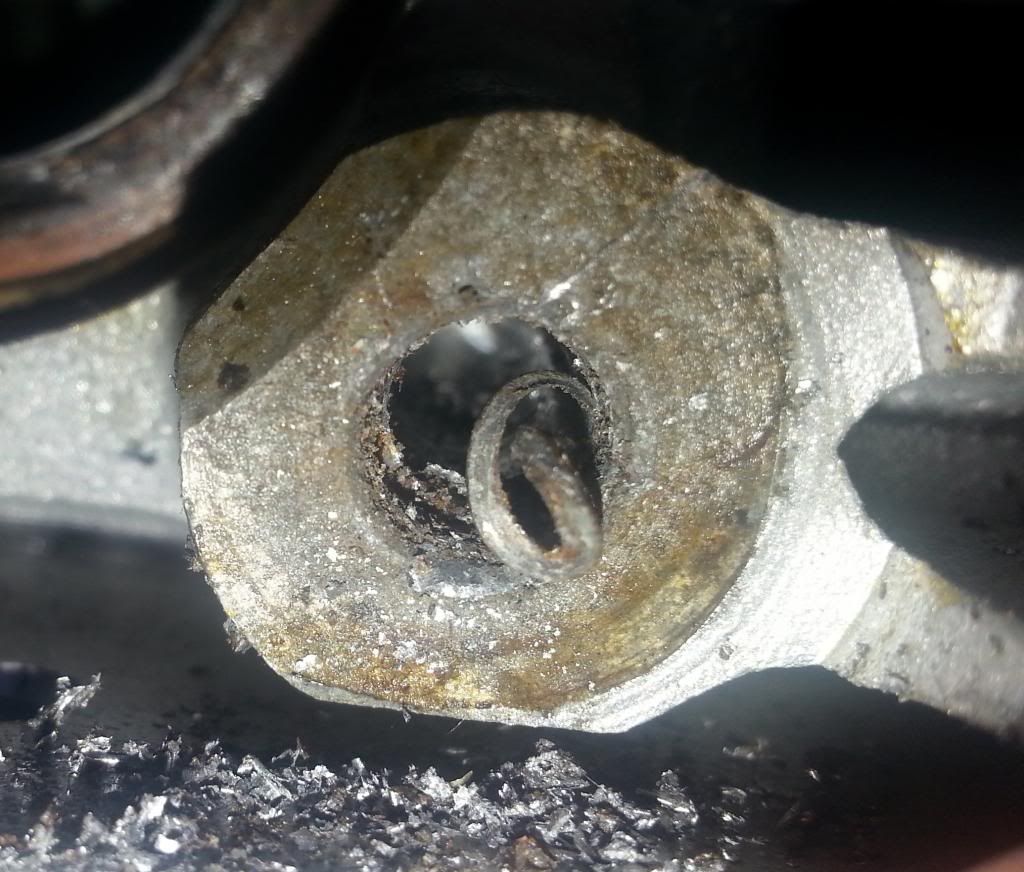
When I left off, the cases were off getting some welding and machining. That is done, and although not perfect, it will be functional. I do not believe there will be any leaks. The machinist said if he were to do it again, he would have liked to get the cases first, and machine out a perfectly square area, and replace with new metal that was machined to fit. As it was, the cases went to the welder first and he patched the area up the best he could, using what was left of the damaged pieces. There were a few spots that were about 4 thousands low. Skip, the machinist said he could send the cases back to the welder to have a little more built up on the mating face, but recommended that I just use a small amount of metalset epoxy to bring that area up. The reason he thought the epoxy would be better is that he has worried about another heat cycle warping the cases more than they already are. I elected on the epoxy and it worked out fine. when I bolt up the cases, everything pulls right together. It's not like there is a lot of warpage.....maybe about 4 thousands or so over about a six inch span. All in all, I am happy with the results. especially since I thought I would have to find another set of cases. Thanks for setting me up, Swan!!! Pat, If you are reading this...thanks a lot for the great deal on the welding! Skip, I will see you soon about the head work.

_DSC4161a_zps8e2fc814.jpg


_DSC4163a_zps47bd3e58.jpg


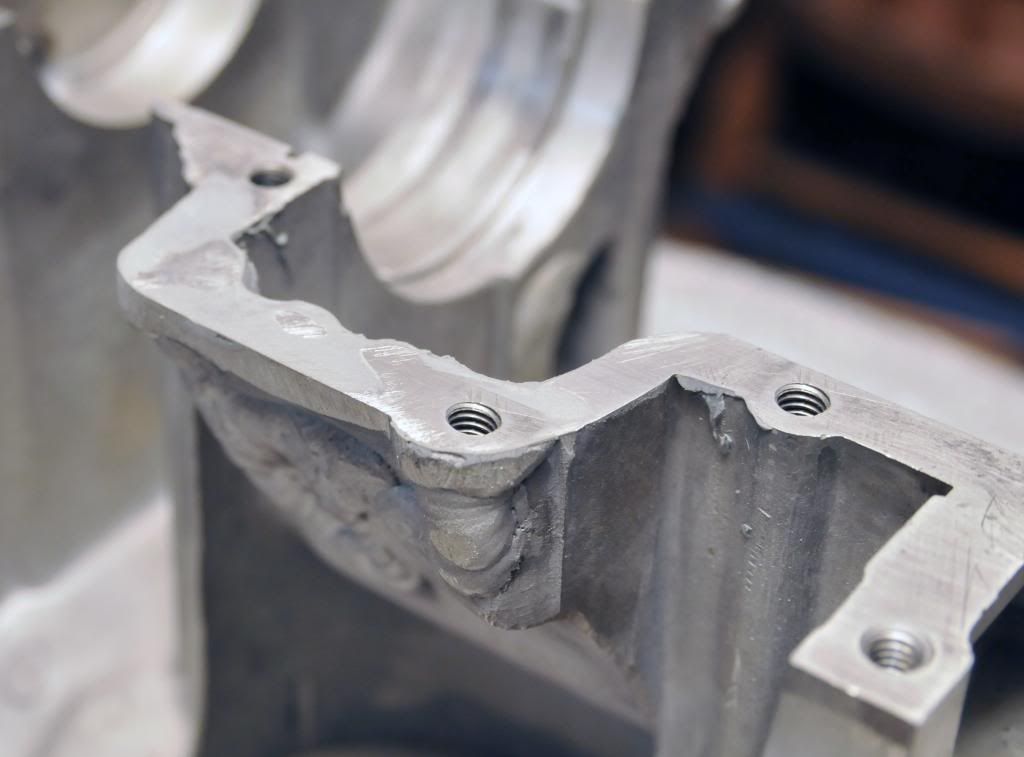
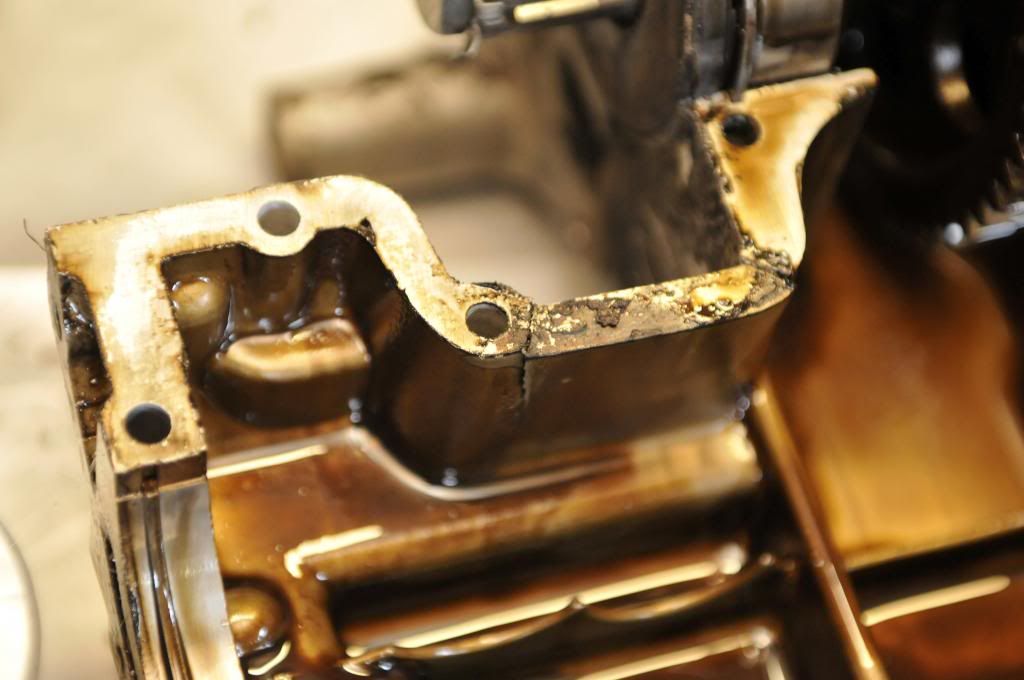
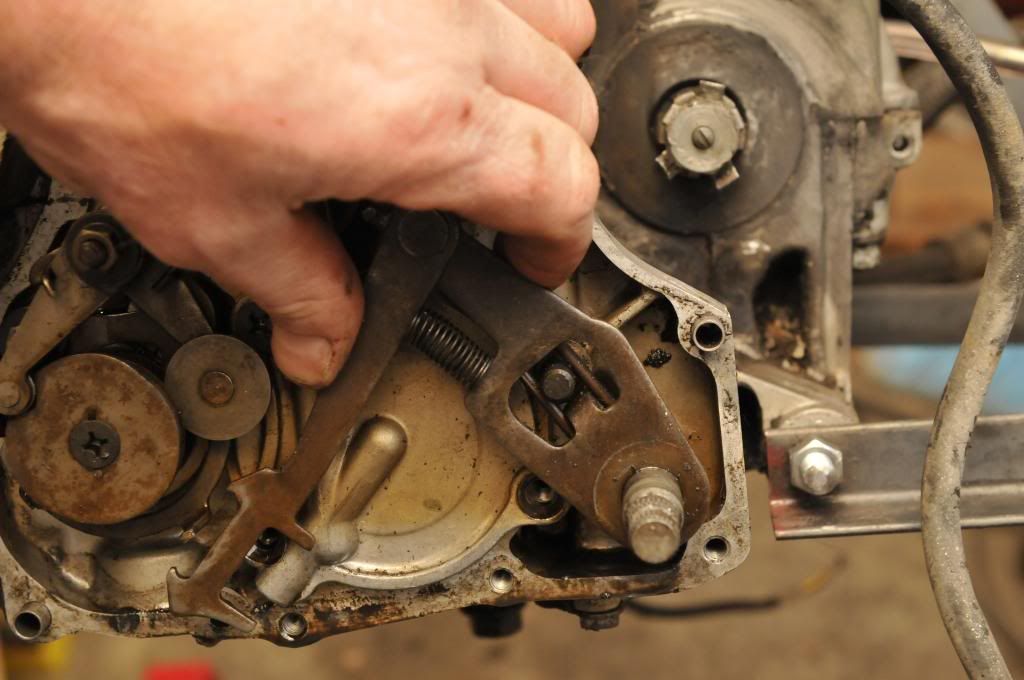
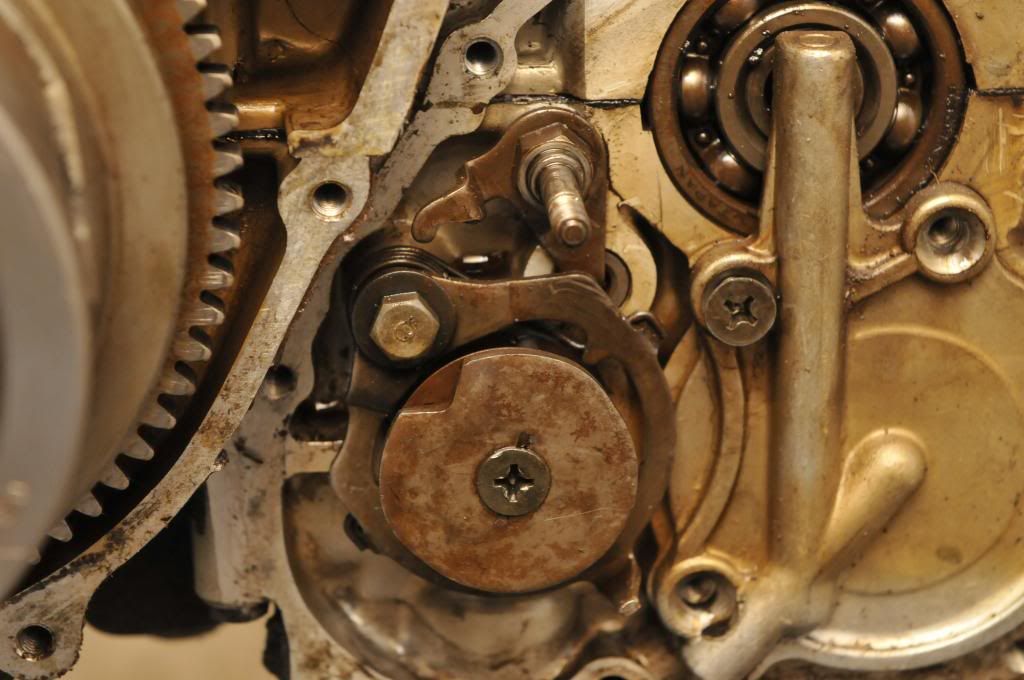
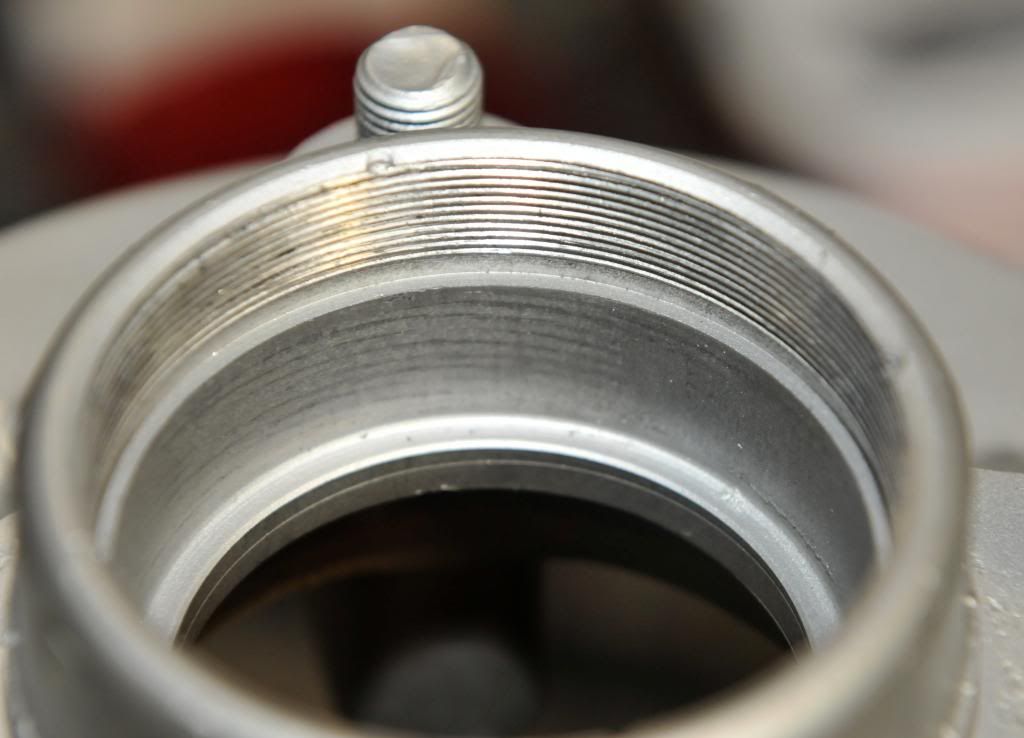
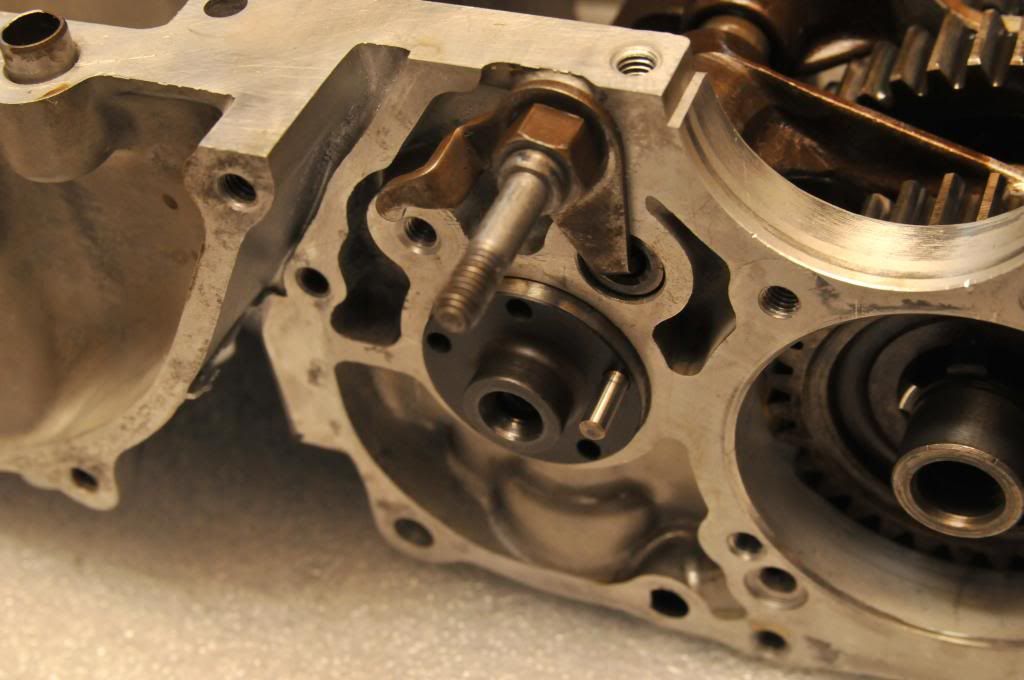
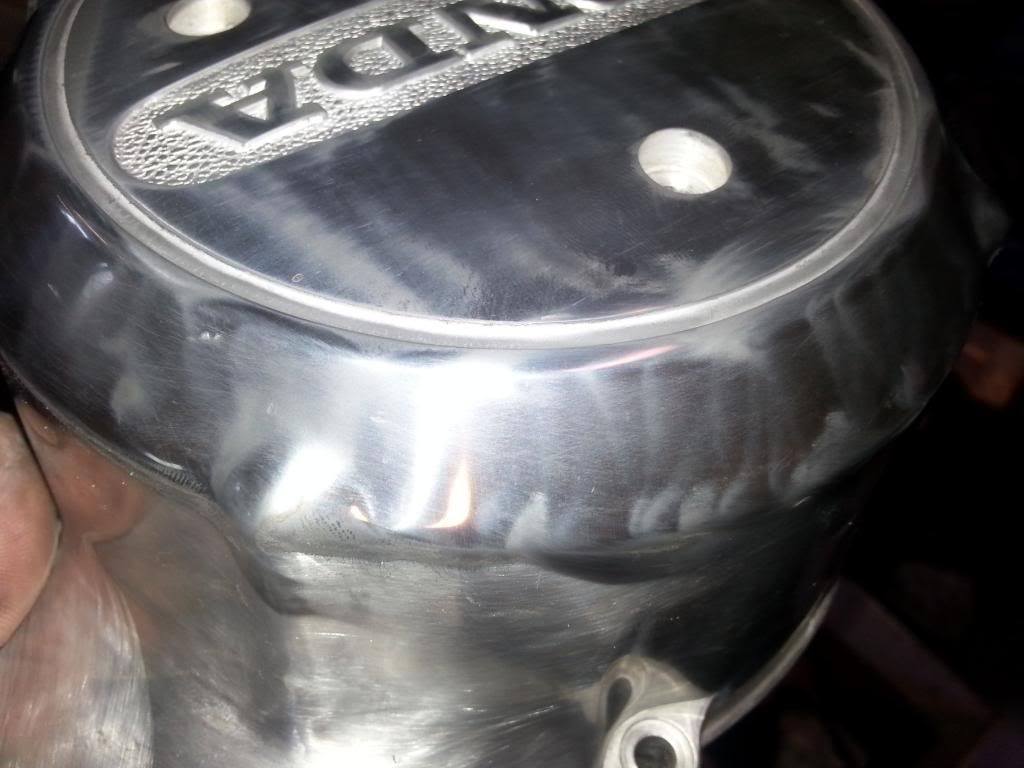
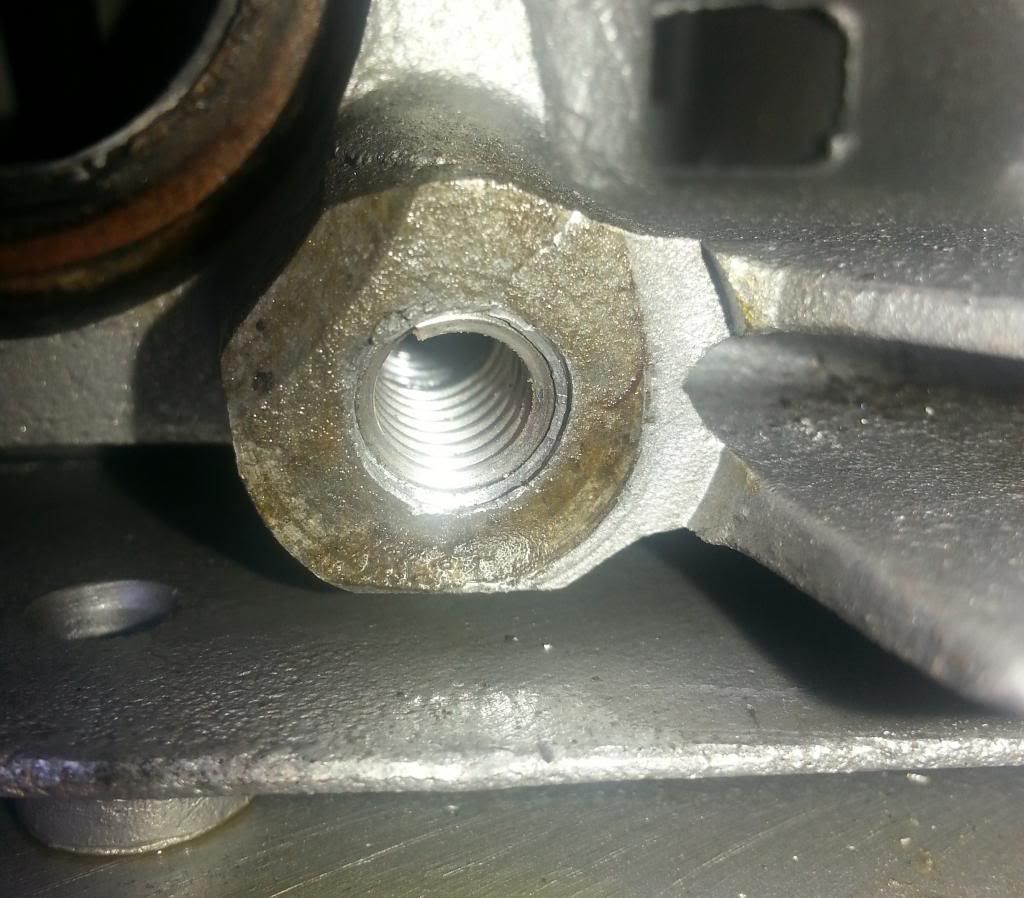
The hole to the left had to be re-drilled and tapped

_DSC4172a_zps06e1ca0b.jpg


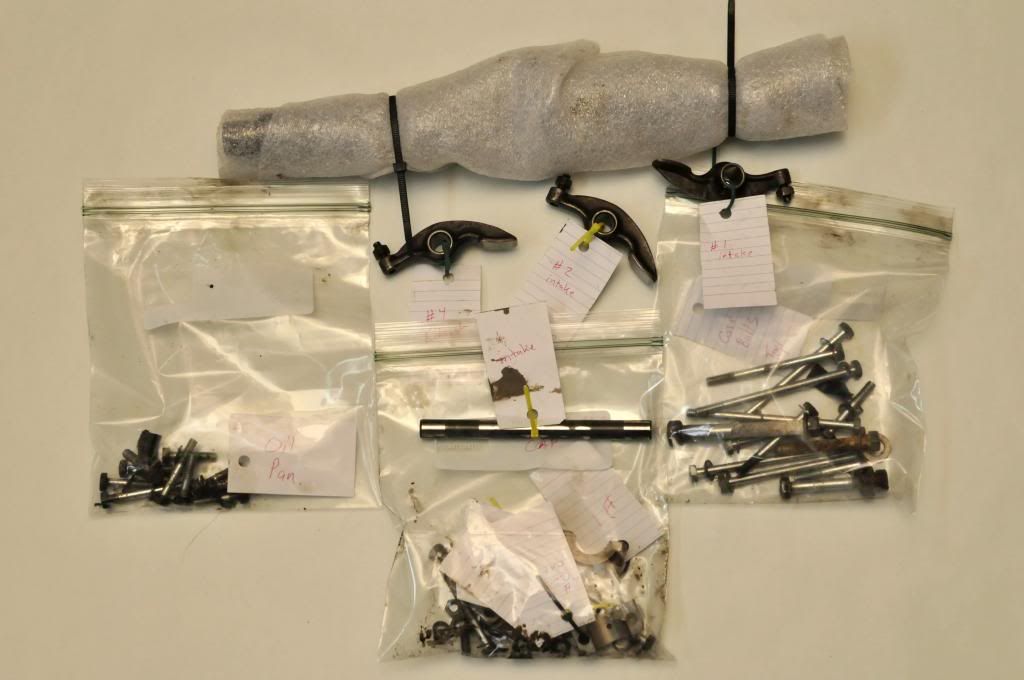
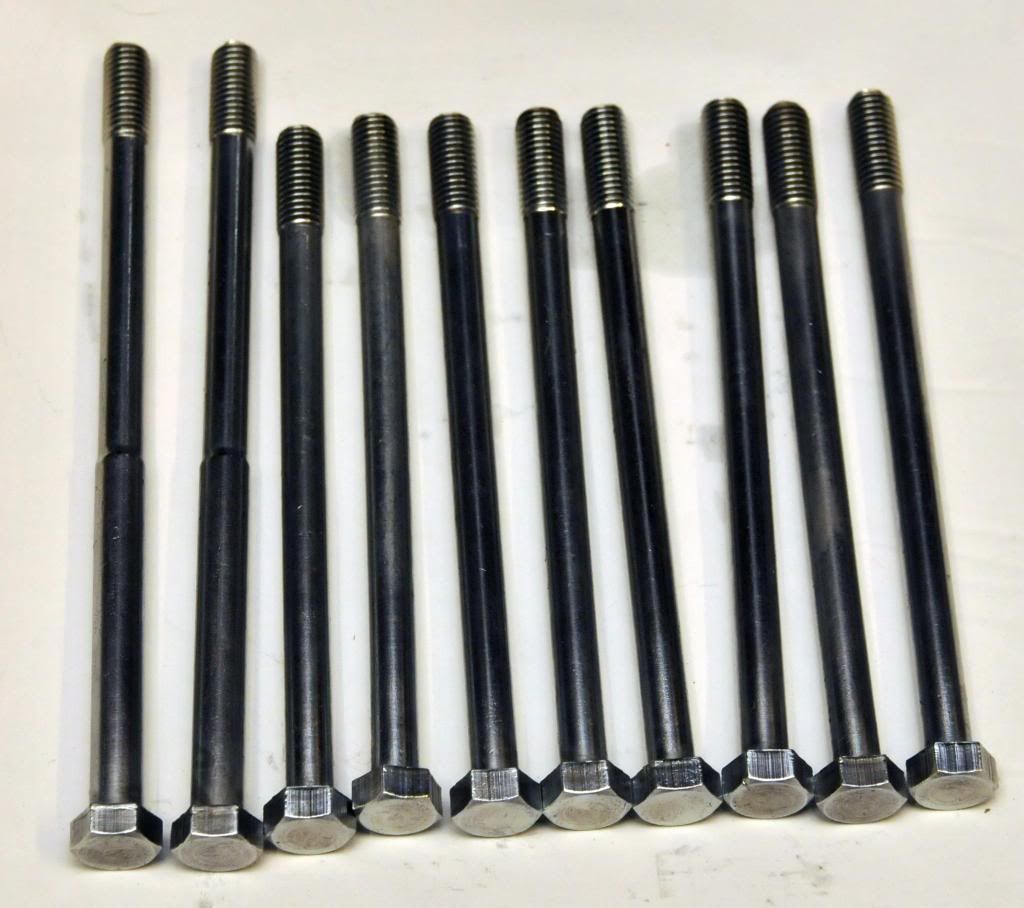
What does one do on a rainy day? Why, plate some nuts and bolts of course.

When I sent off all my parts to the plater, I was not expecting to rebuild the engine. So.....what to do with the crusty engine hardware. I checked online with Service Honda to check out prices and availability of various nuts and bolts. Some are available and others are not. And some are available and just too expensive to buy (at least for my cheap ###). So I decided to plate all the top case bolts, as well as the crankshaft bearing bolts. I decided to purchase new bottom case bolts since they were not too expensive, if they do not have the proper markings, no one will see them anyway. New washers are on the way also......I get really annoyed with prepping washers for plating.

My prep process for plating is:

1. Thorough degreasing with acetone or lacquer thinner
2. Bead blast old plating and rust off
3. buff up the part on a wire wheel
4. degrease again in a hot soapy solution
5. rinse and plate

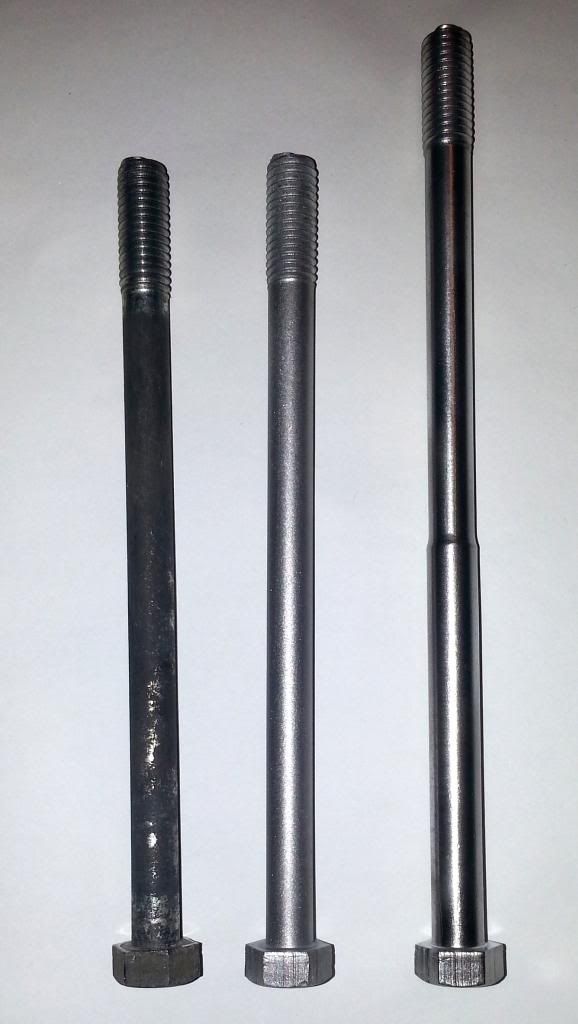
From left to right. Degreased, bead blasted, and buffed

20130605_101218a_zpsf5201a5b.jpg


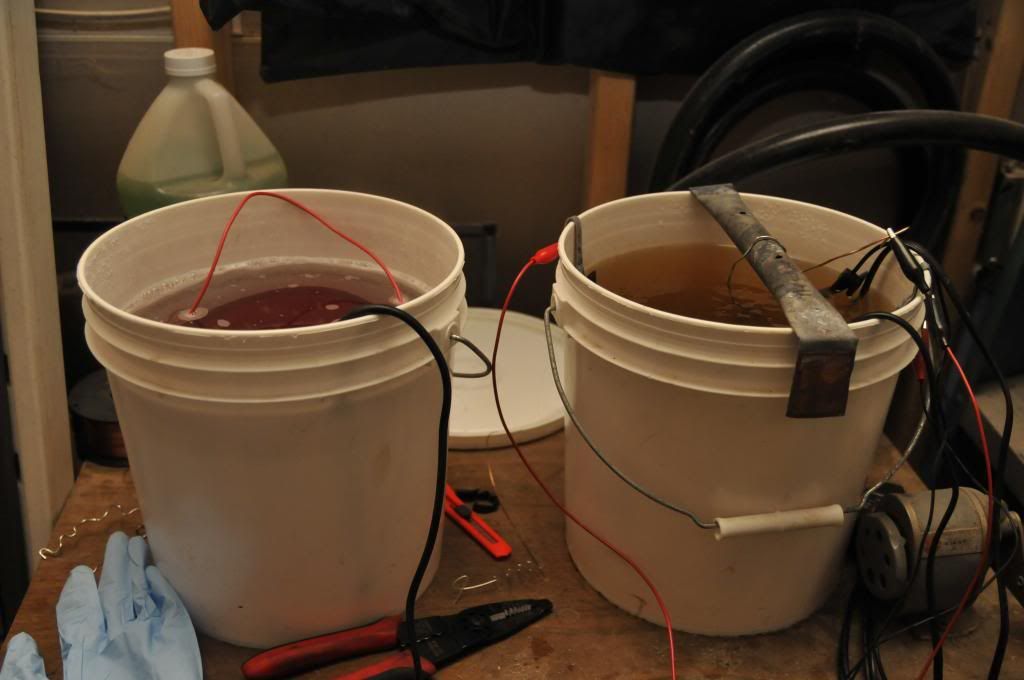
Plating with my Caswell Copy Cad kit. Degreasing on the left, plating on the right
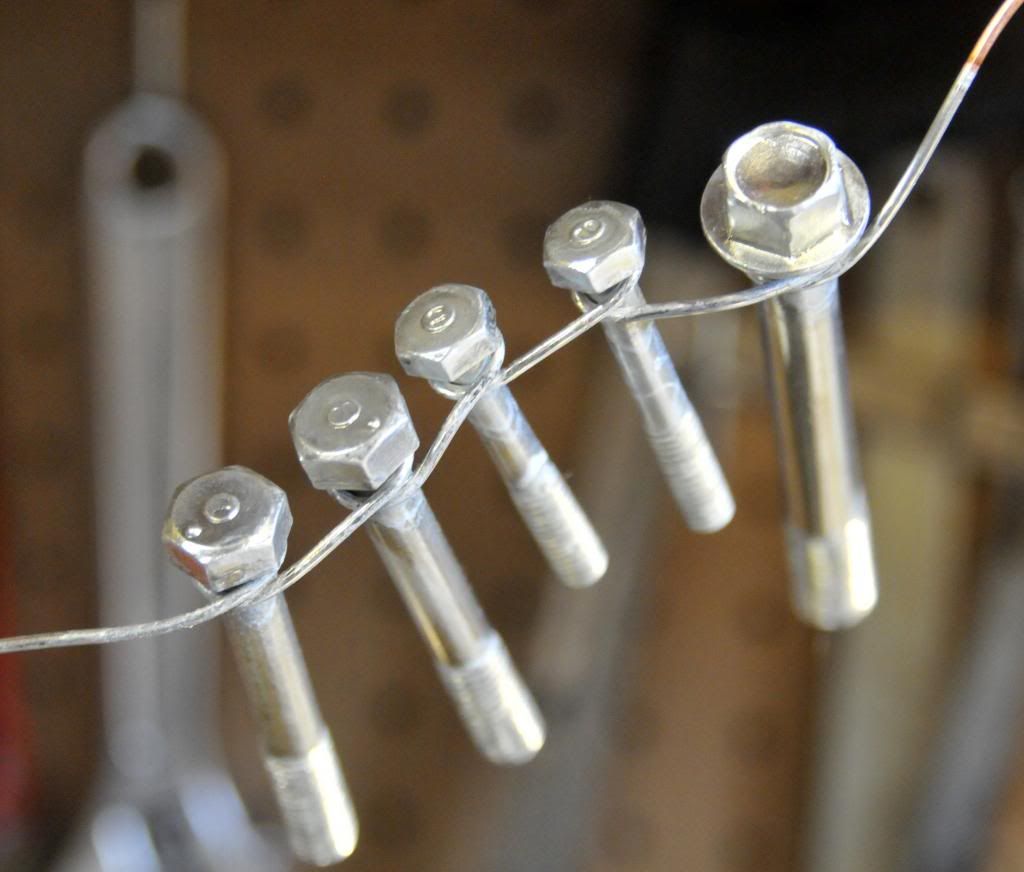
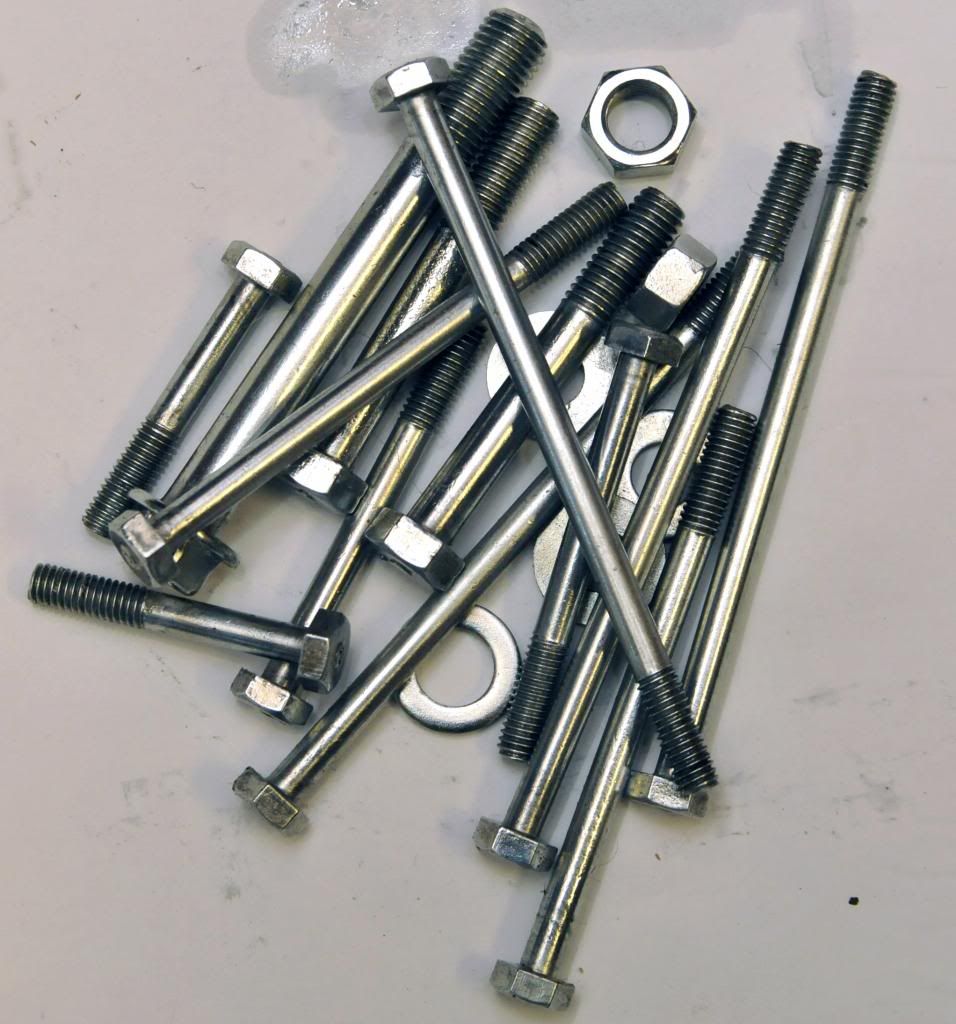
_DSC4152_zpsca9f2d65.jpg


Finished Parts

_DSC4147a_zps340efae0.jpg


_DSC4158a_zps6f481da1.jpg


_DSC4154a_zps50630f40.jpg


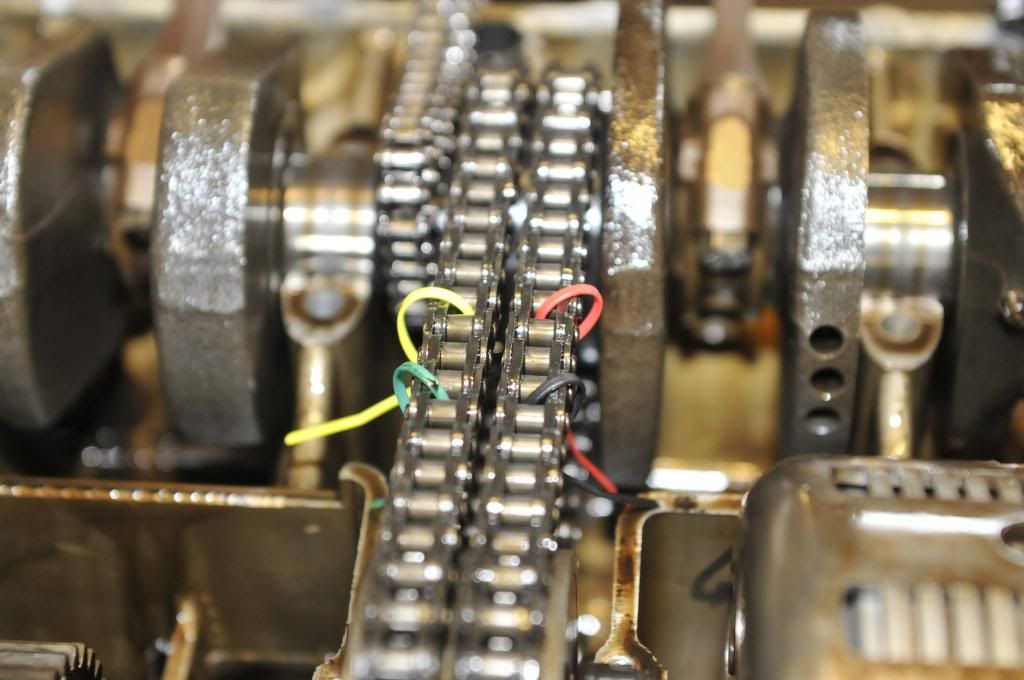
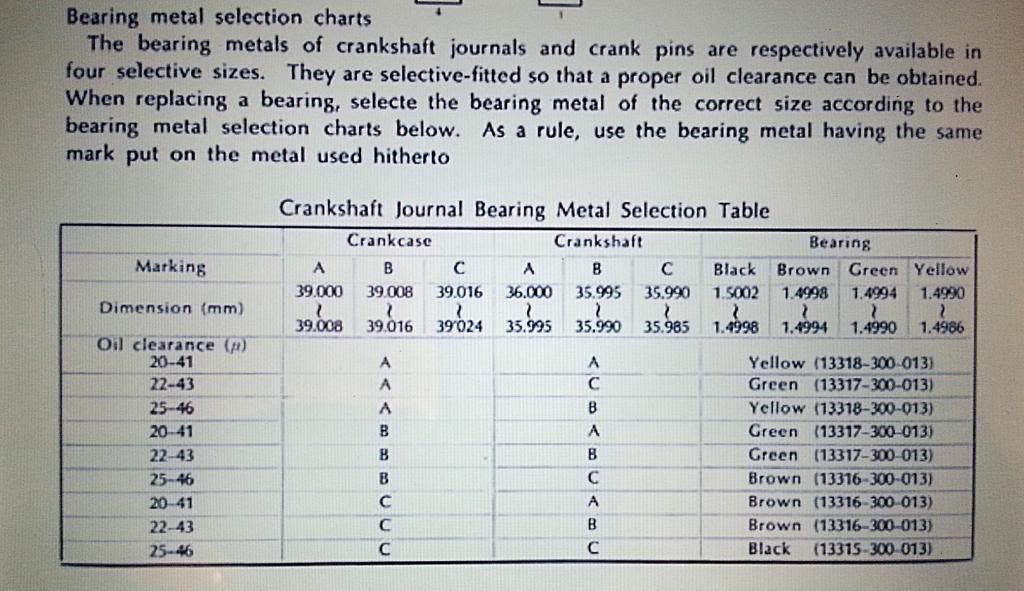
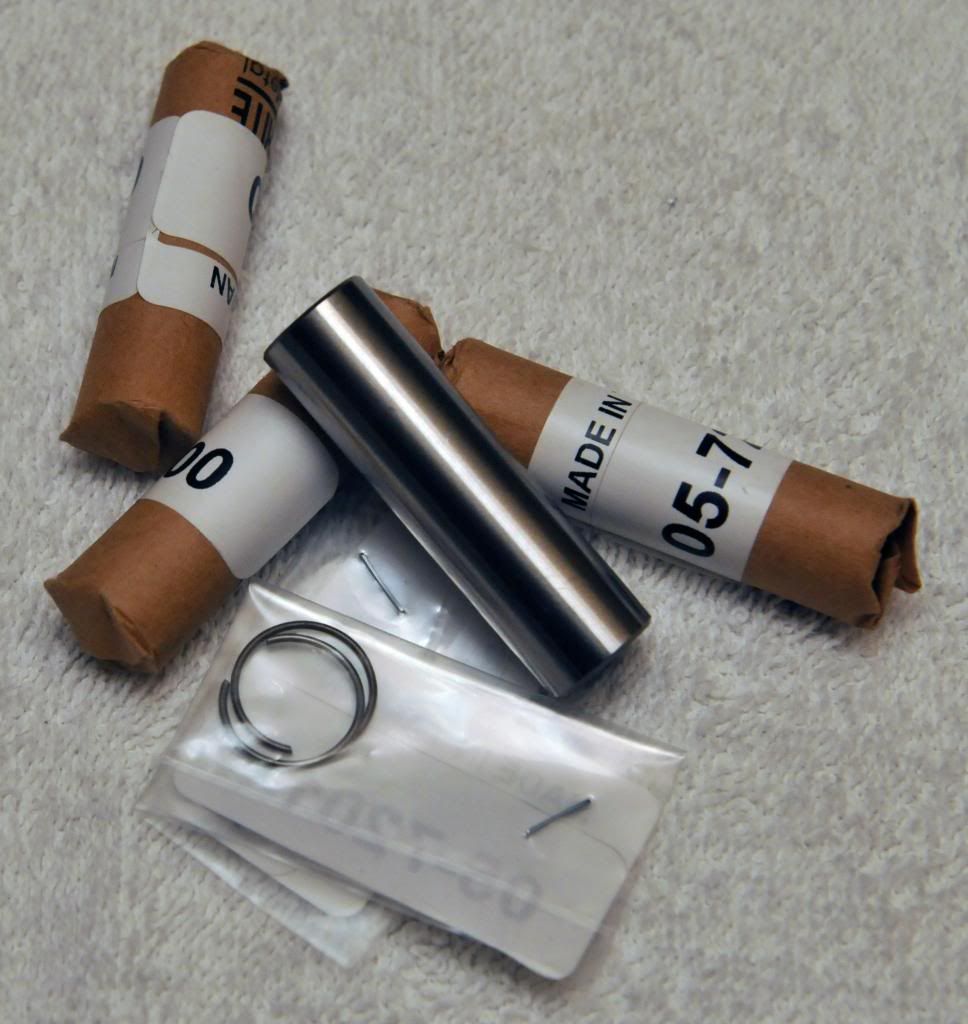
Next up is to try and figure out Honda's convoluted bearing selection process. I elected to replace all the main bearings, as they were marginal. Why not, it's already apart. Honda has four different thickness bearing shells just for "standard" size journals. One has to figure out which "color" shell to order depending on the case bore size and the crankshaft journal diameter for each of the five bearings. They supply this chart to help figure it out.

20130605_221452a_zpsc4afc7d6.jpg


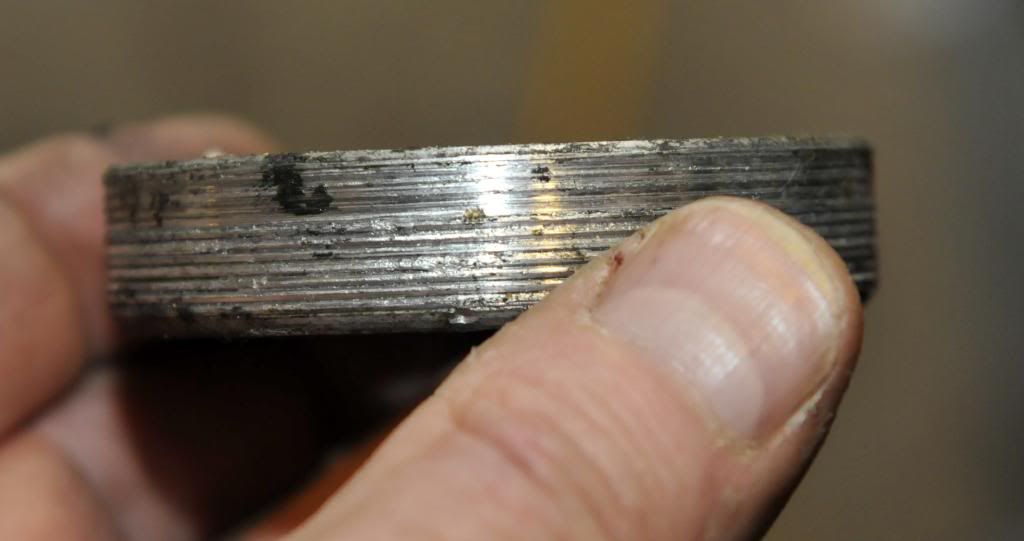
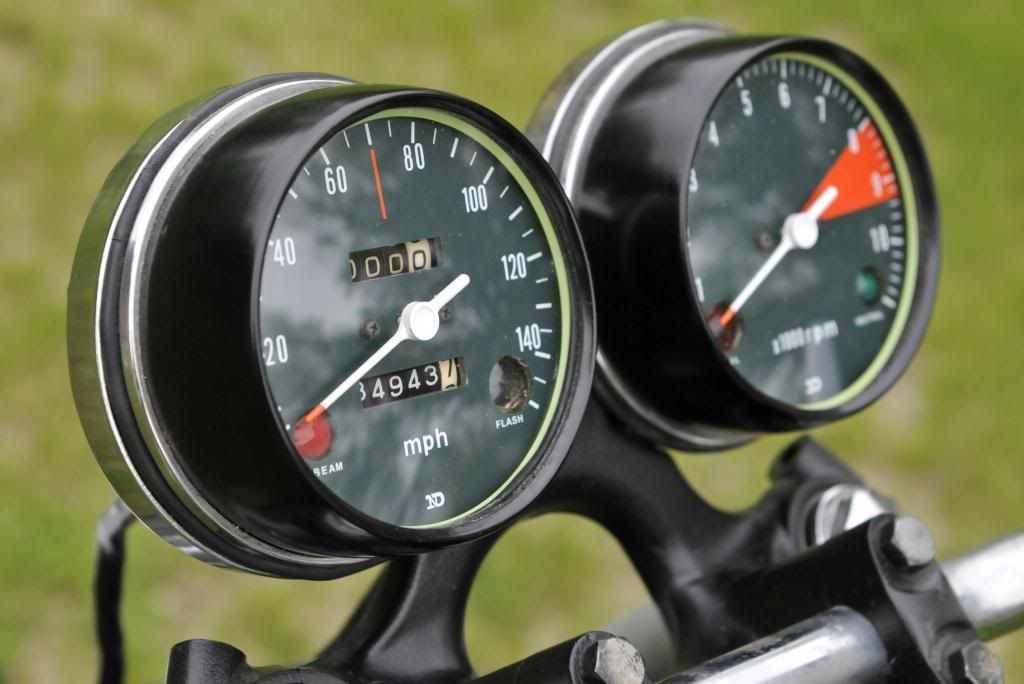
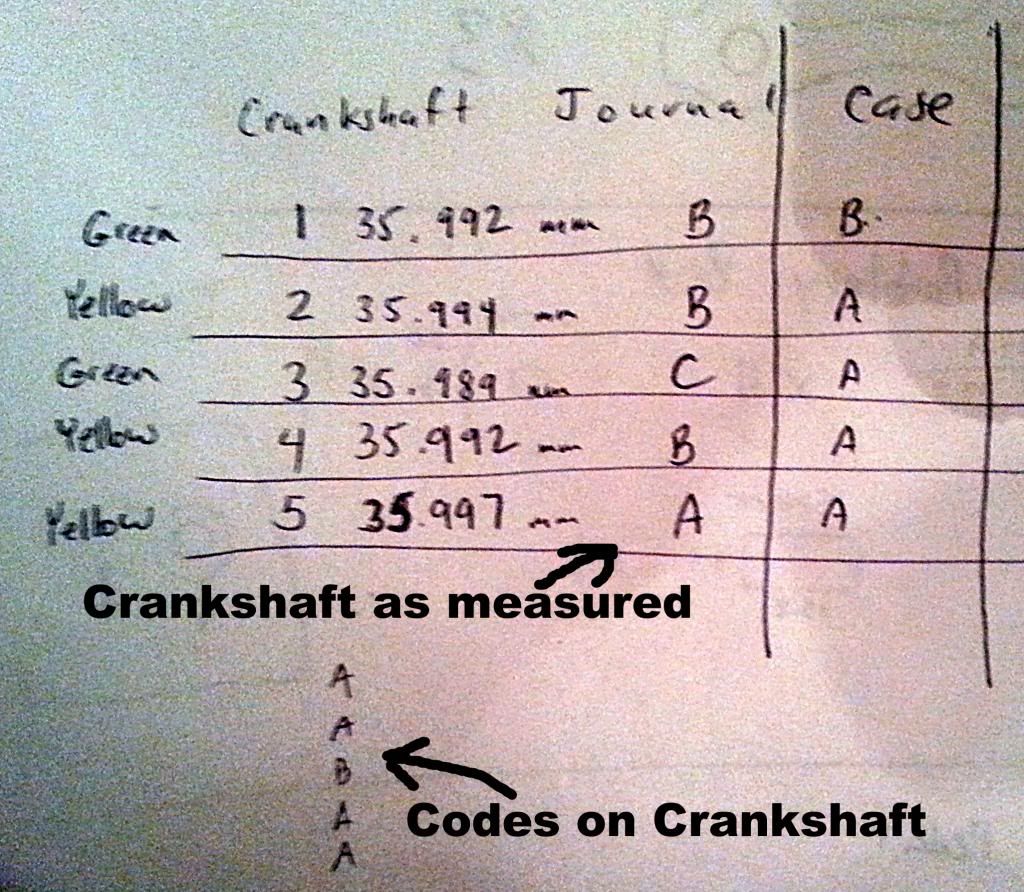
I used the letter markings from the case to get the case bore sizes. I'm hoping that they are still valid as I did not have easy access to a bore gauge. The crankshaft has letters stamped in it too, but four of the five journals had worn down one letter size.

The photo shows what I came up with for measurements on the crankshaft as compared to how it measured at the factory. Using these numbers and letters, I was able to figure out which bearings to order. I hope I did not mess it up. Hopefully, when the bearings come, everything will measure right on spec.

1d11f70b-8fdf-4b50-b9c9-b069f68aa8a9_zpsc84ac2e0.jpg


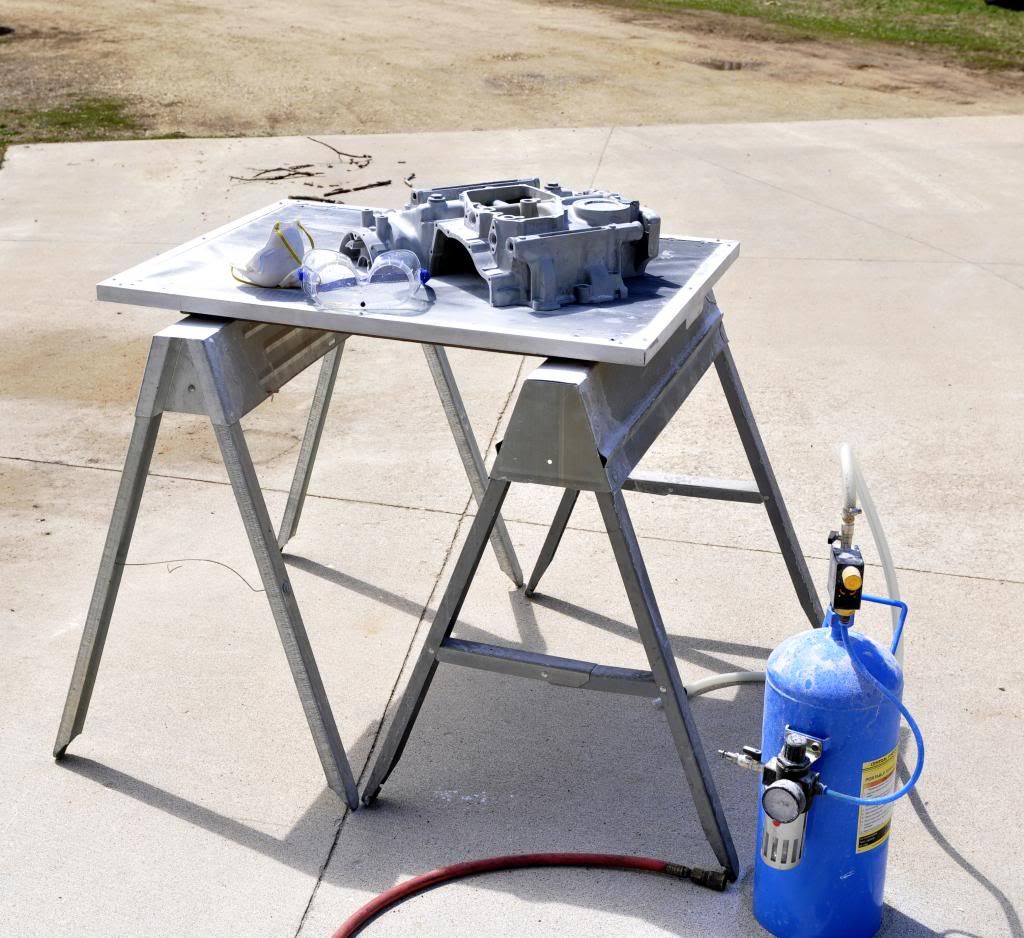
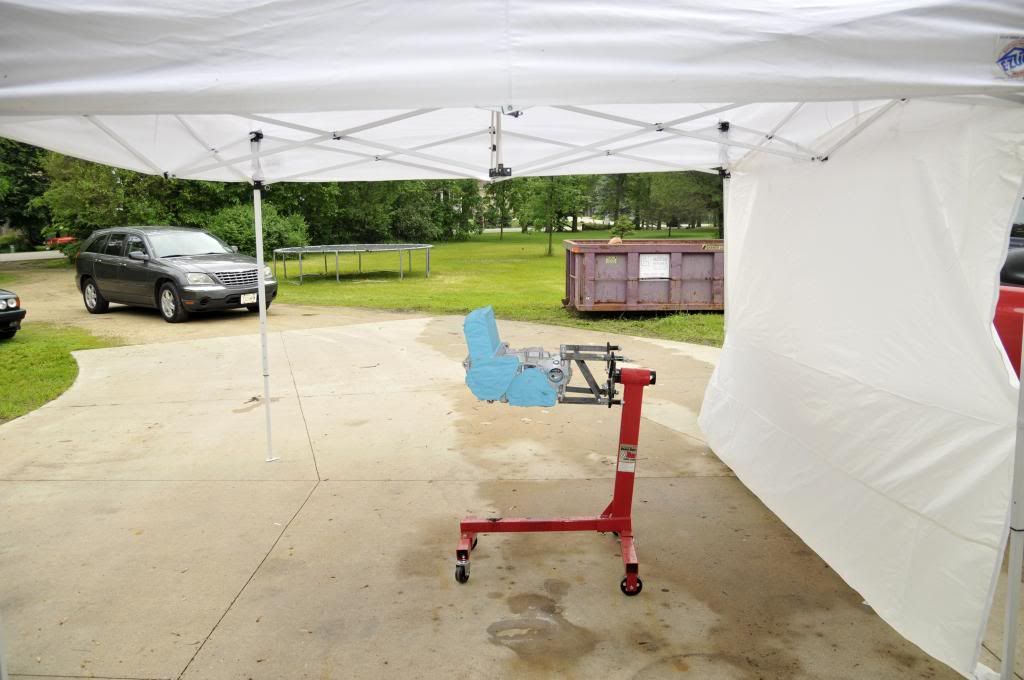
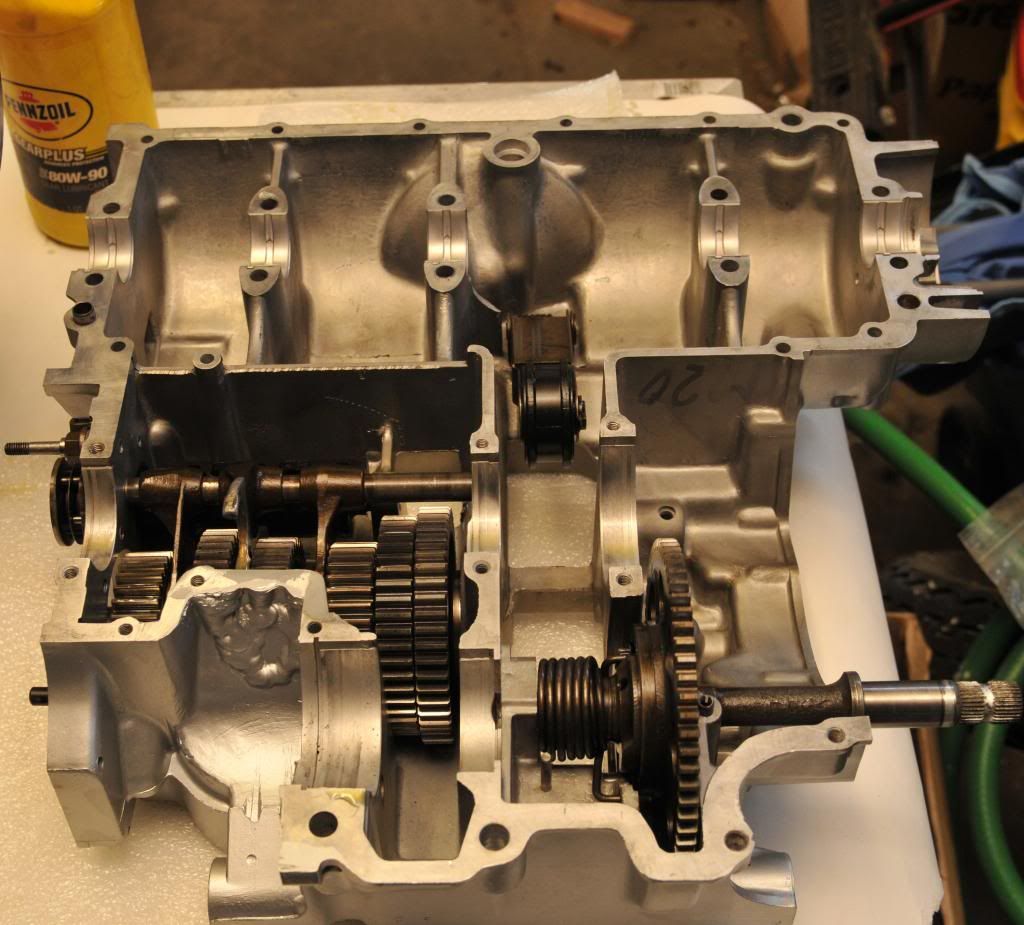
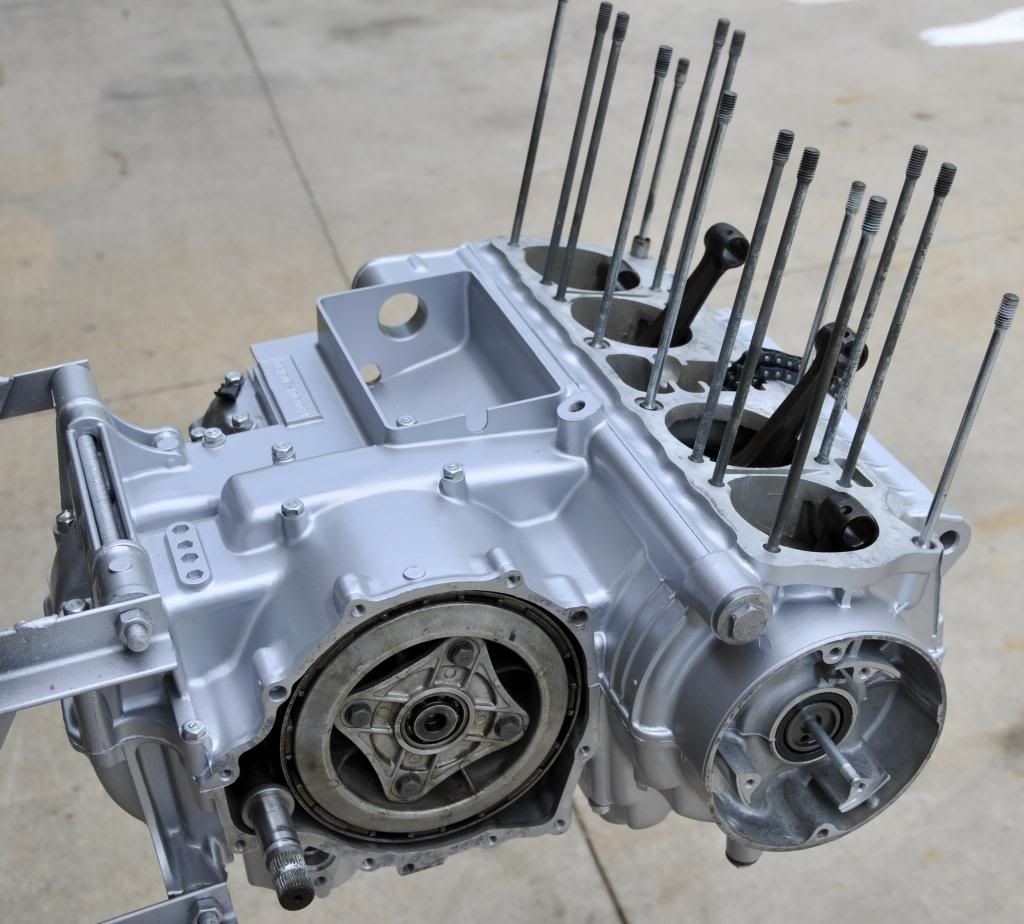
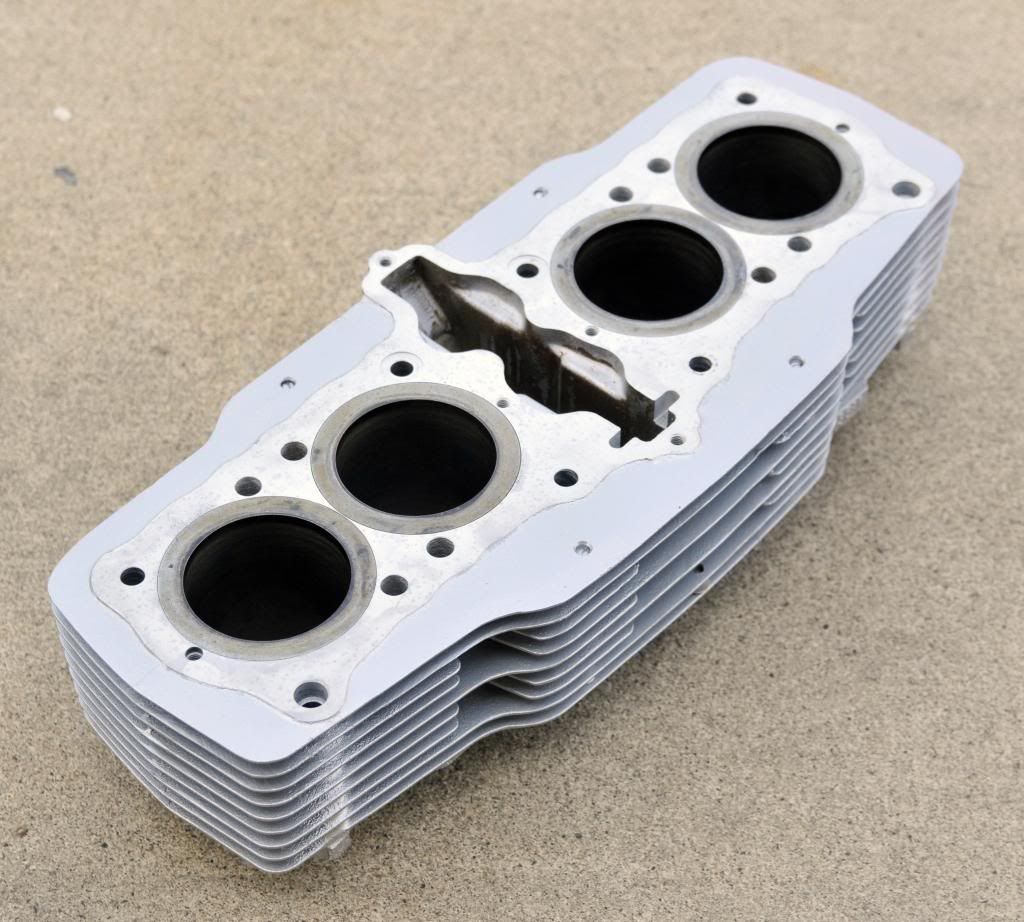
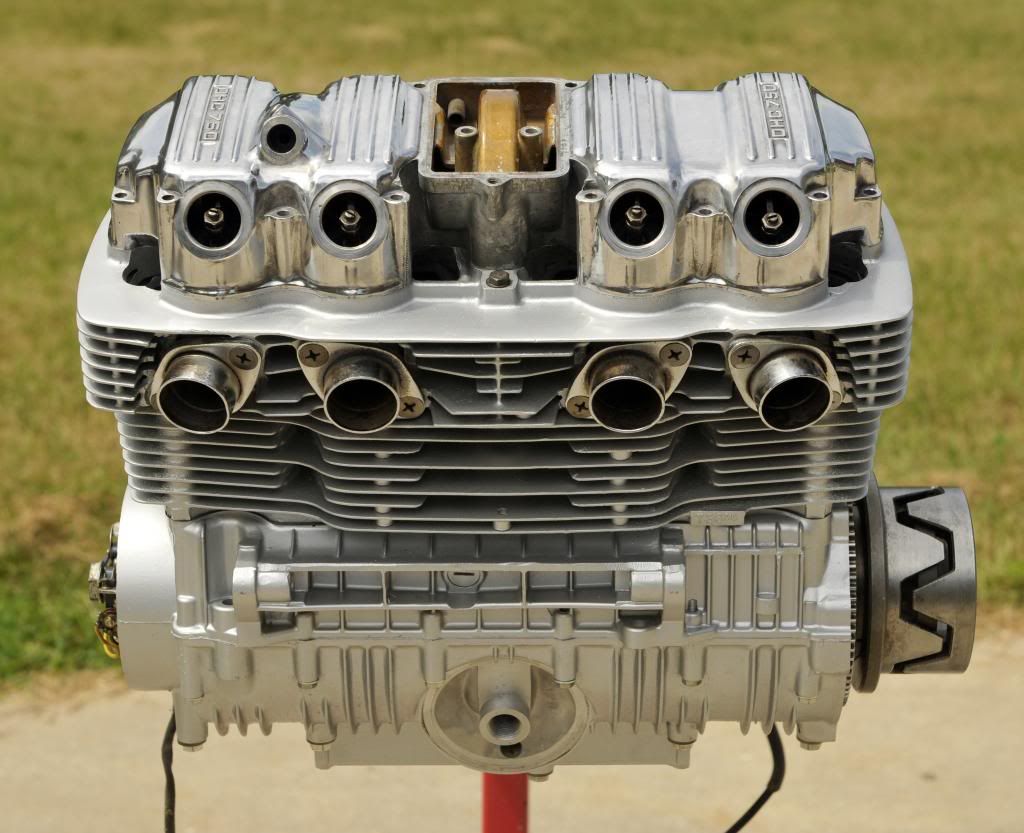
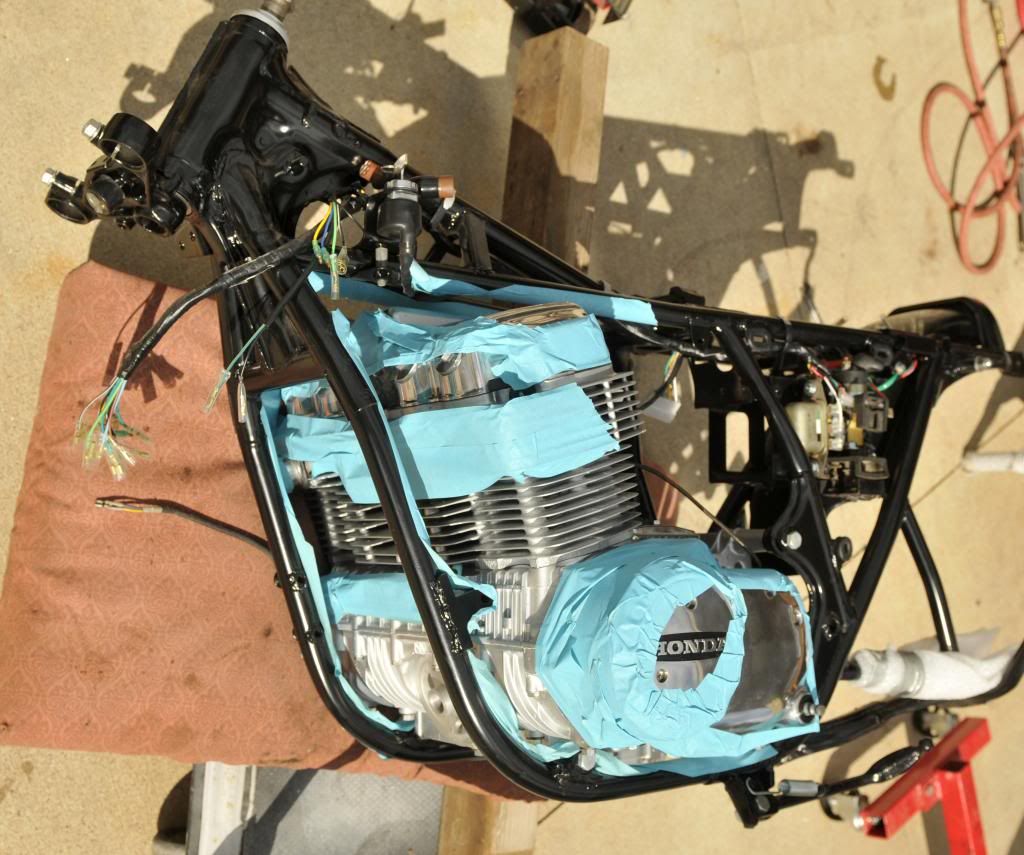
Next up is a few photos of the engine painting process.

I had to set up my "easy up" paint booth because it was threatening to rain. I put one side on to block the wind.

I really dislike painting with a rattle can...there is no control over pattern and amount of paint. I was going to just bleed off the pressure from the can, and drain the paint into my paint gun for painting. Alas...it was not to be as my regulator decided to crap out on me. Oh well, rattle can it is.

_DSC4173a_zps00a22d40.jpg


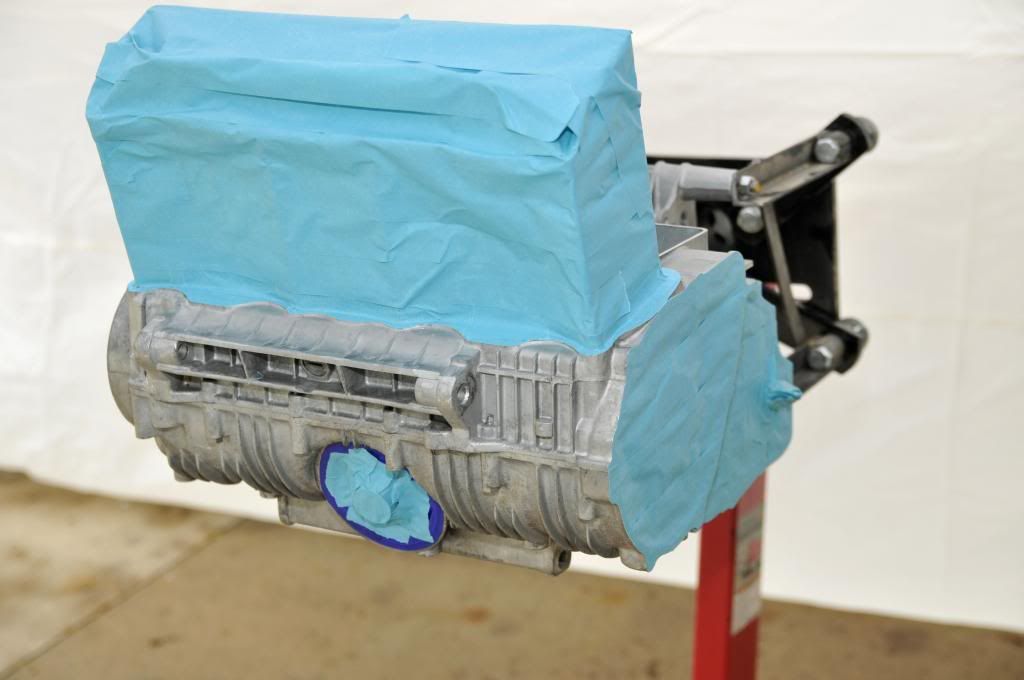
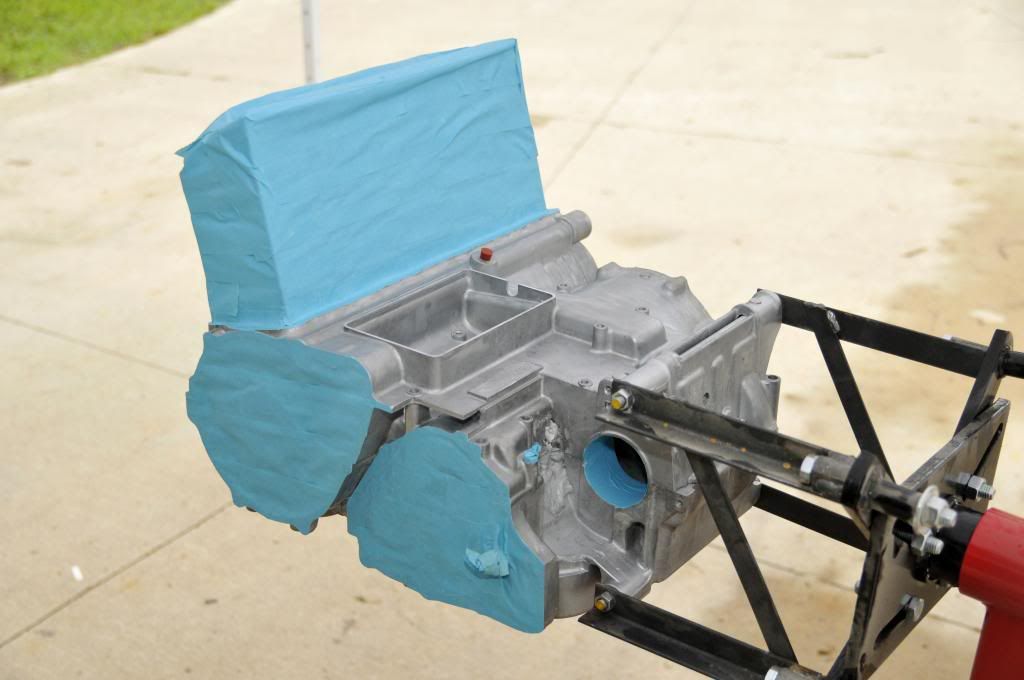
A couple of before pictures

_DSC4174a_zpsed35e43d.jpg


_DSC4175a_zpsc3e9b6bb.jpg


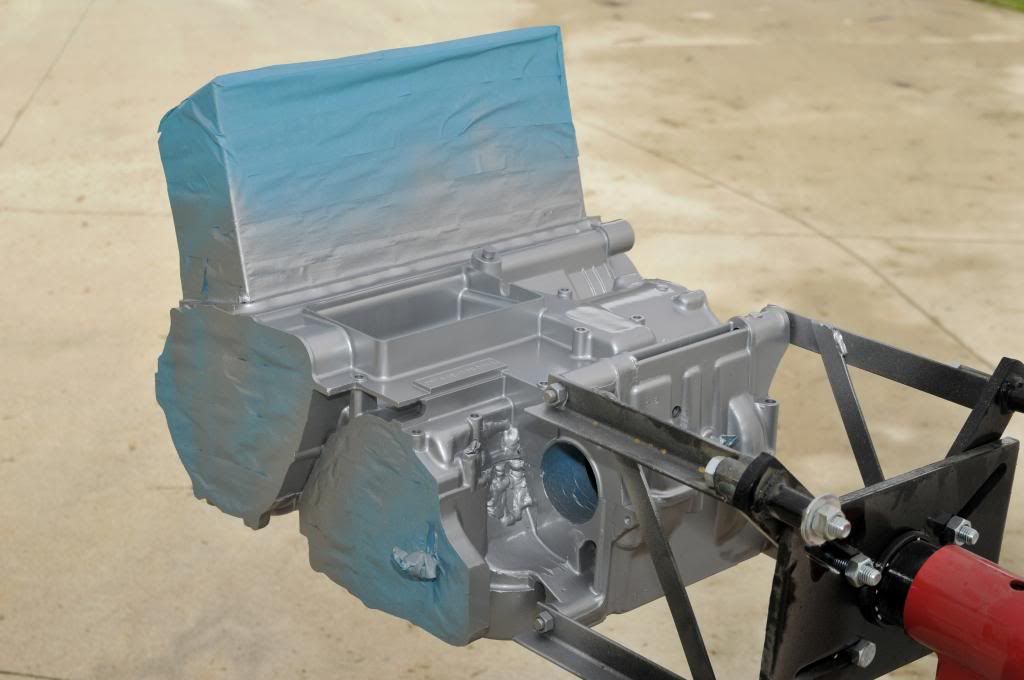
After the deed is done :) 
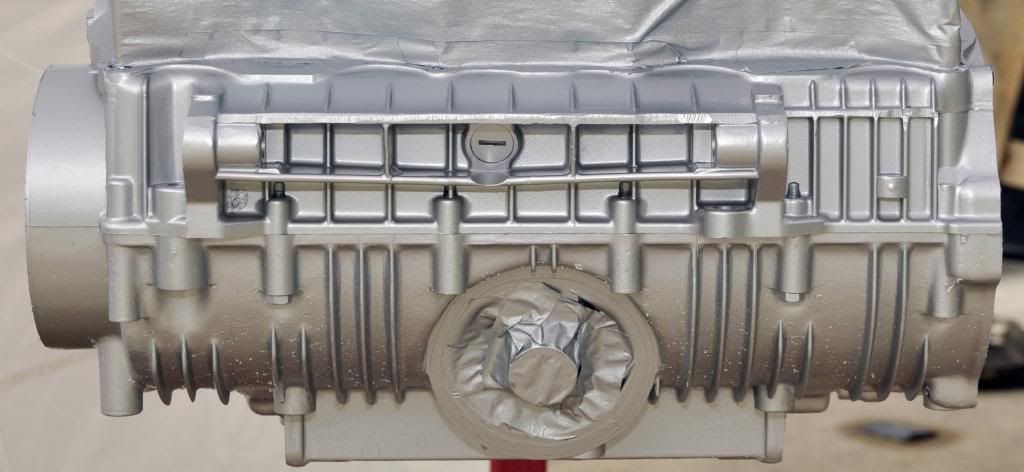
Painted with Duplicolor 1615 ceramic engine enamel.

_DSC4177a_zps3cbfb666.jpg


_DSC4187a_zpsc8ec246b.jpg


_DSC4180a_zps67c53f5d.jpg


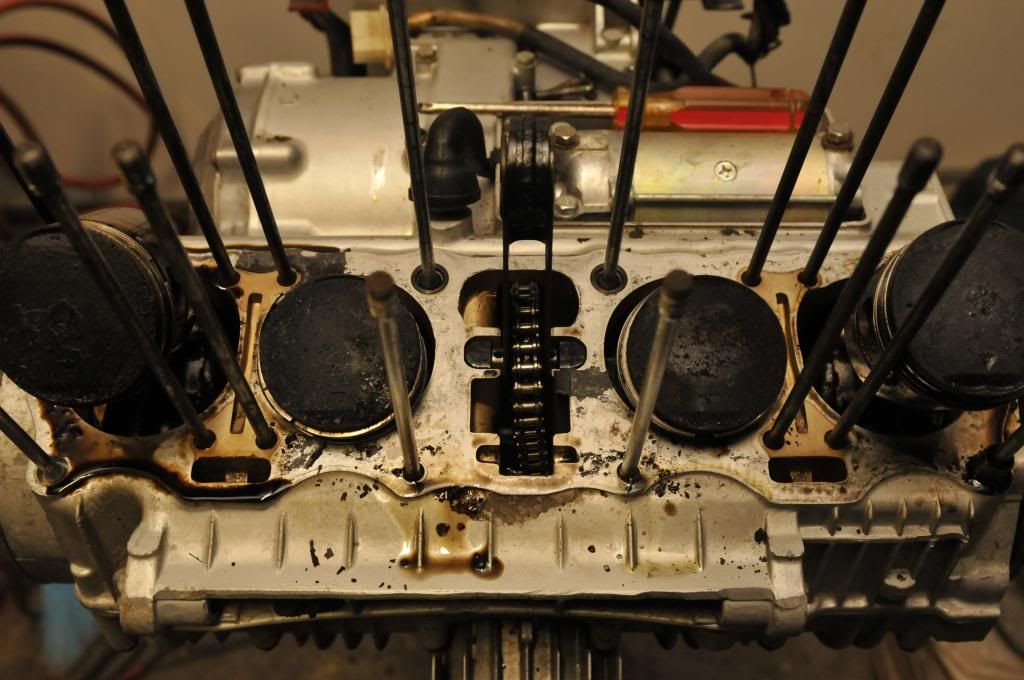
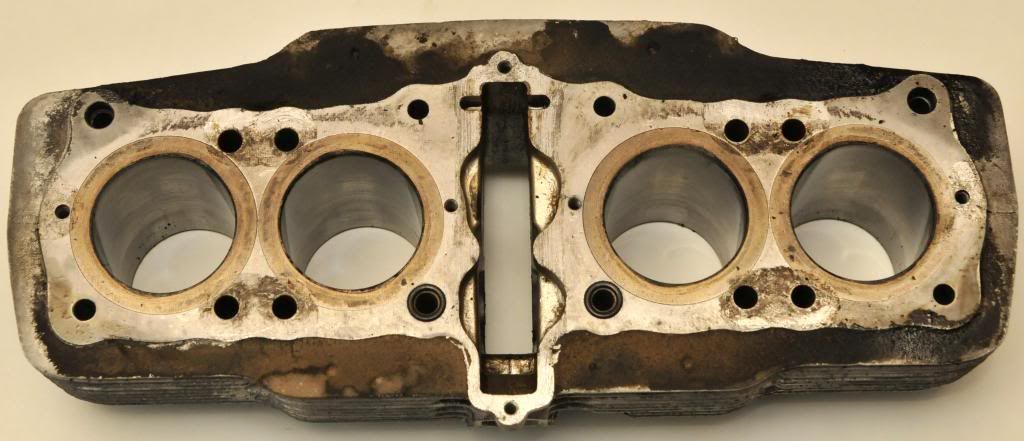
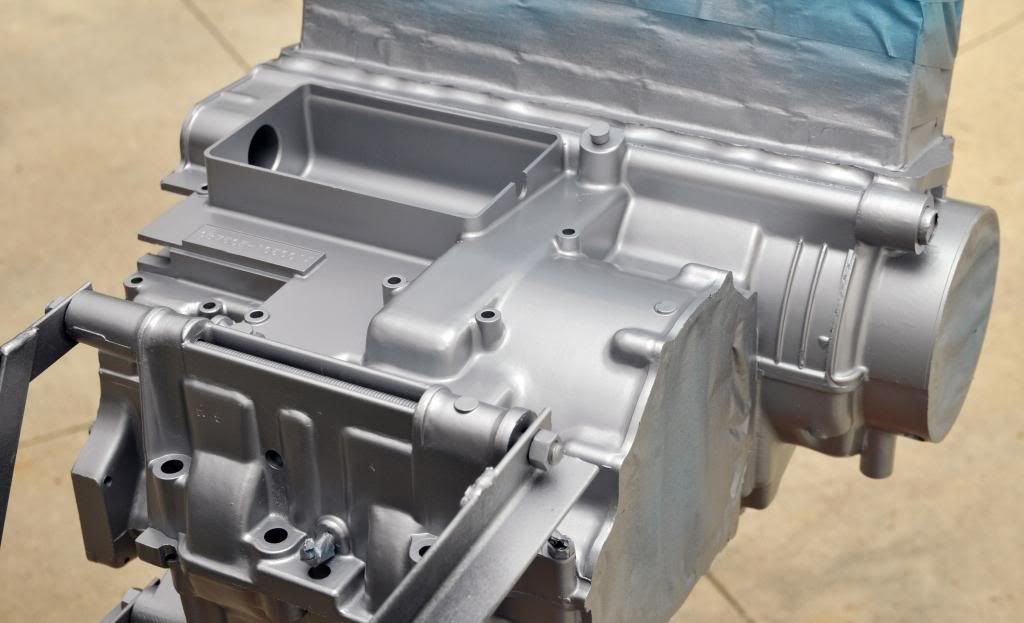
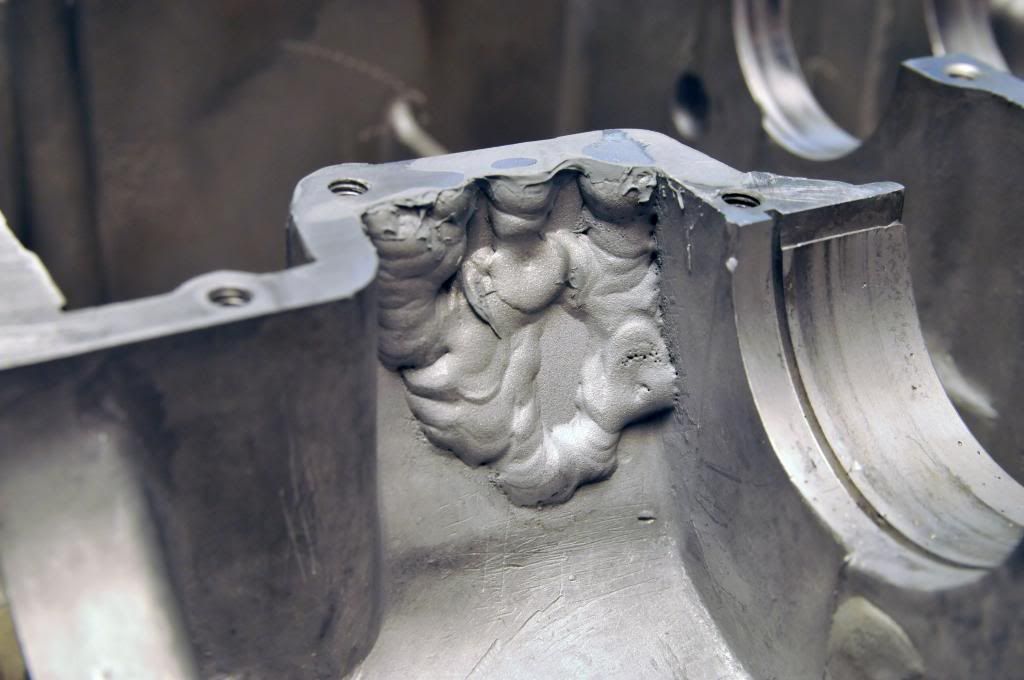
A close up of the repaired area. It looks like there is a gap, but that is because there are only four bolts holding the cases together for painting. It closes up tight with all the bolts in.

_DSC4178a_zpsa5414e0e.jpg


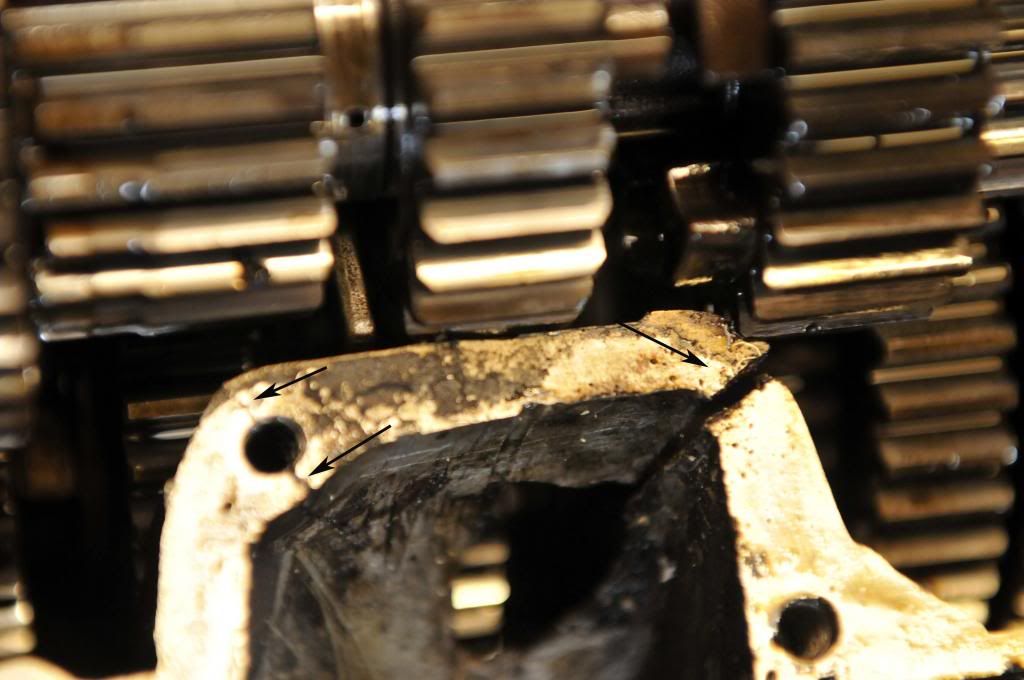
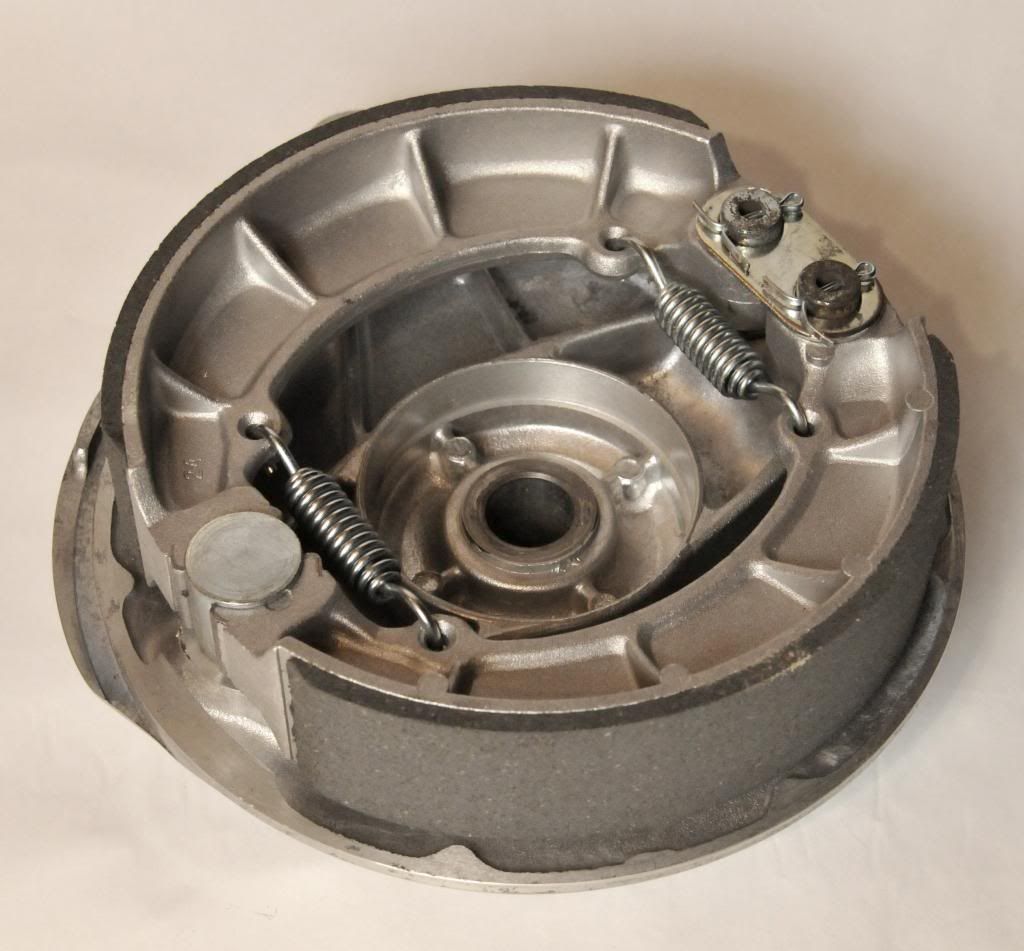
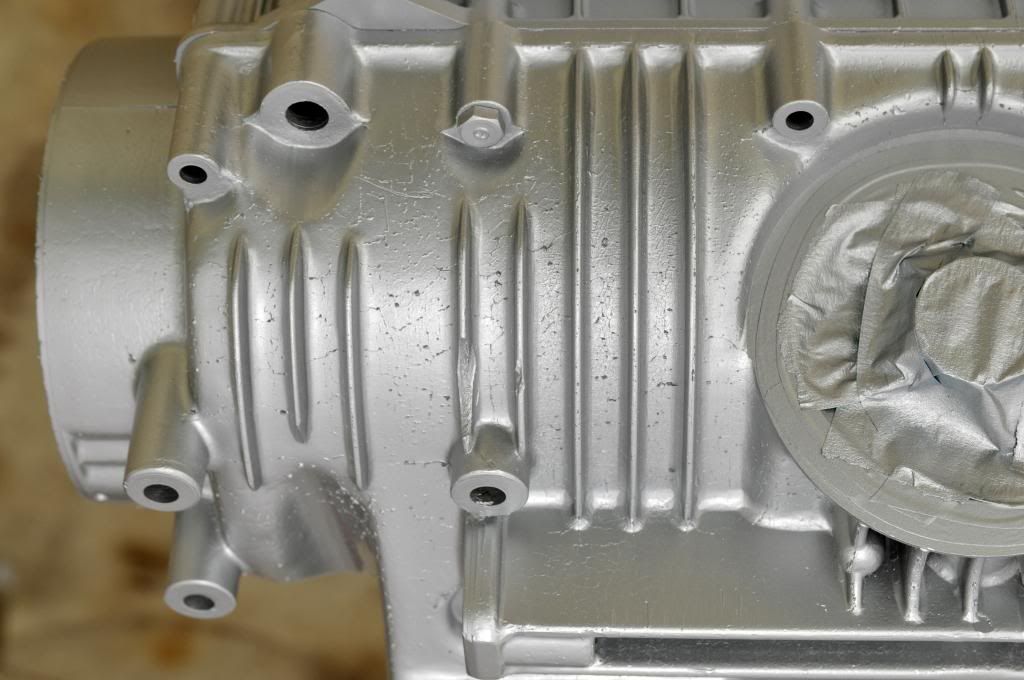
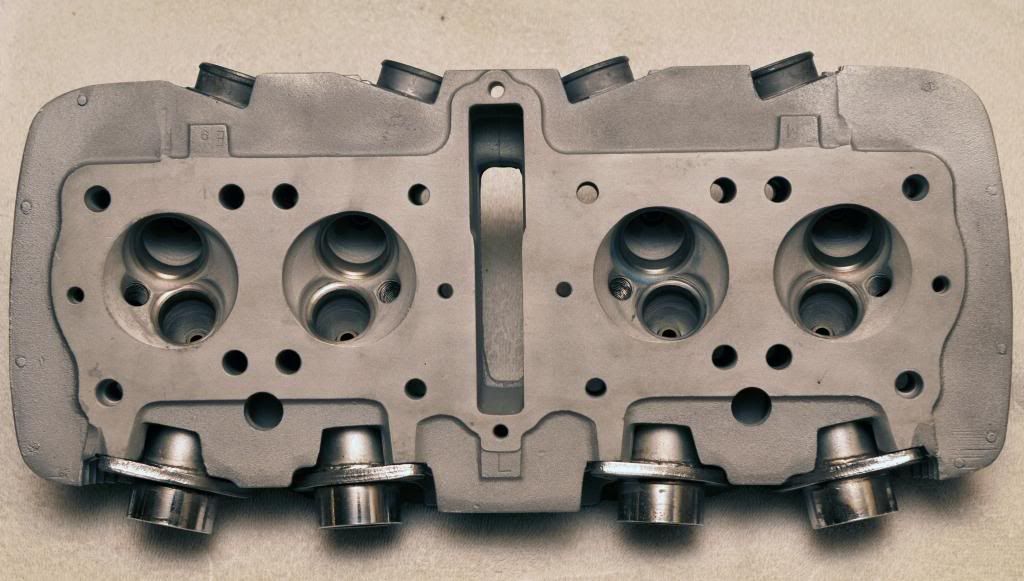
I have a question. Do all 750 cases have this rough texture on the bottom??????

_DSC4181a_zps1f1eb0c0.jpg


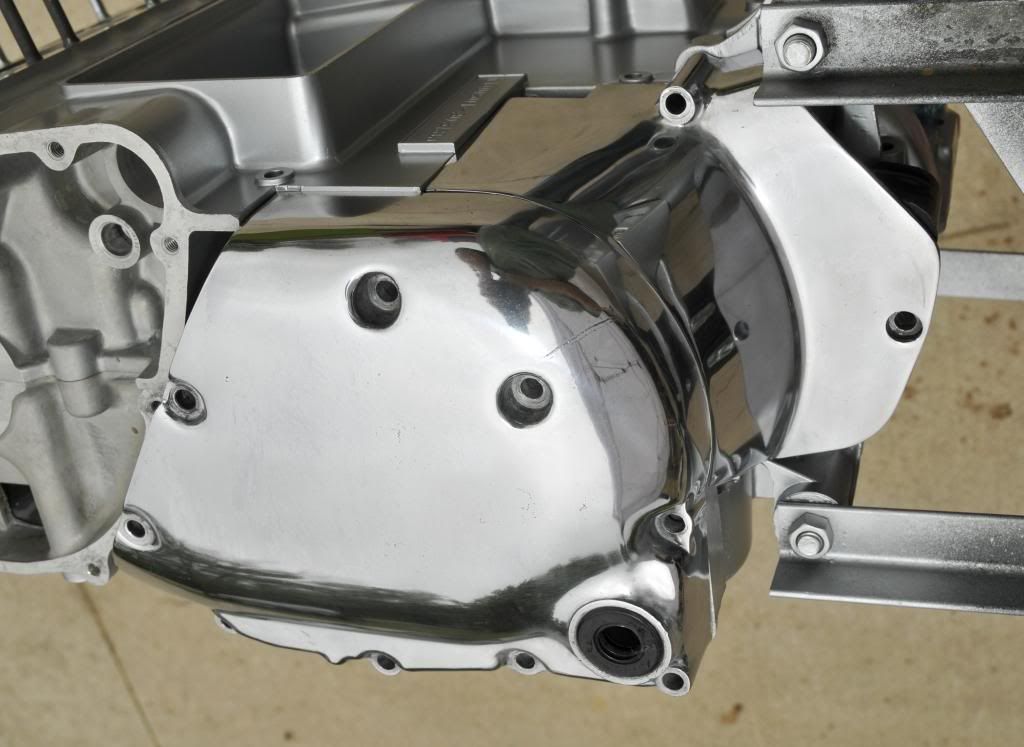
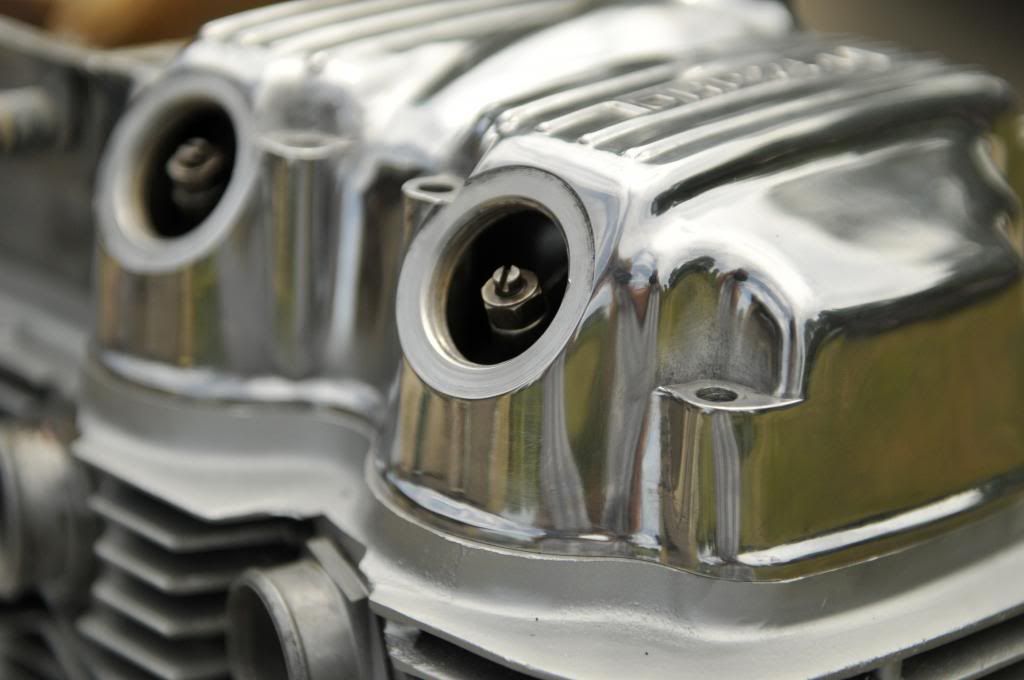
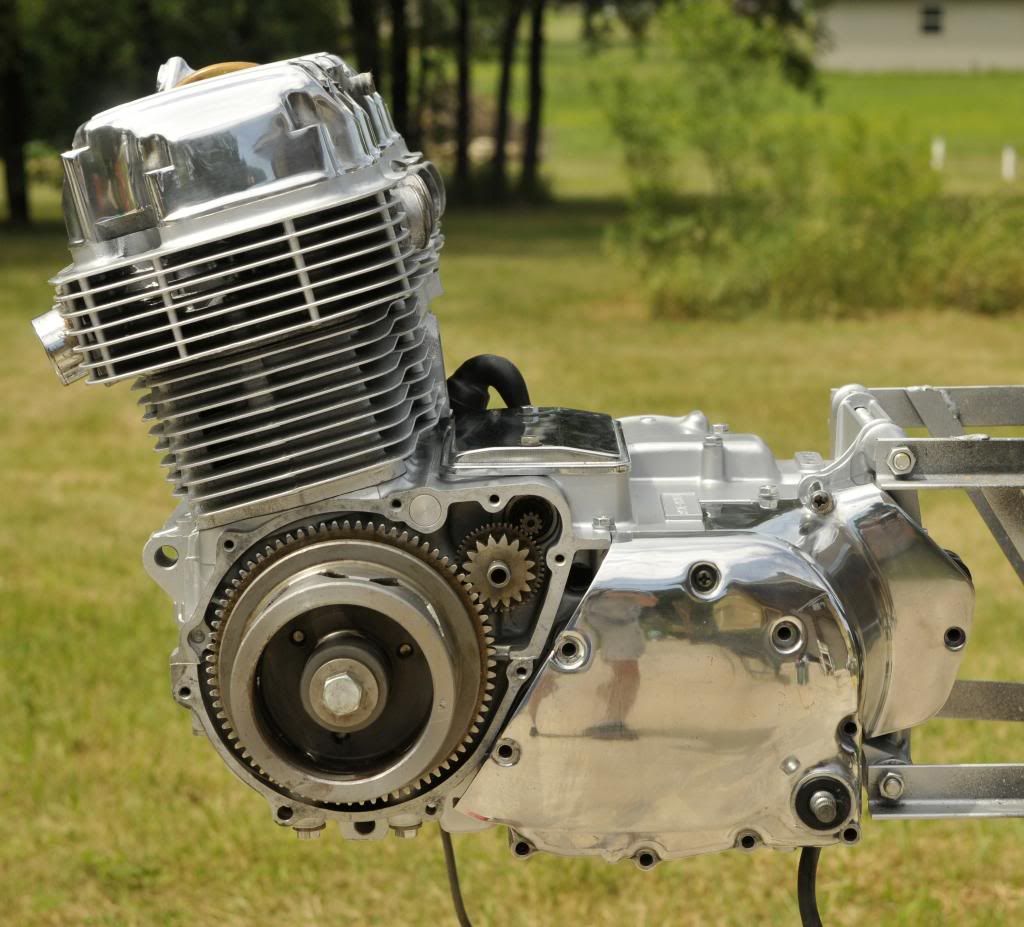
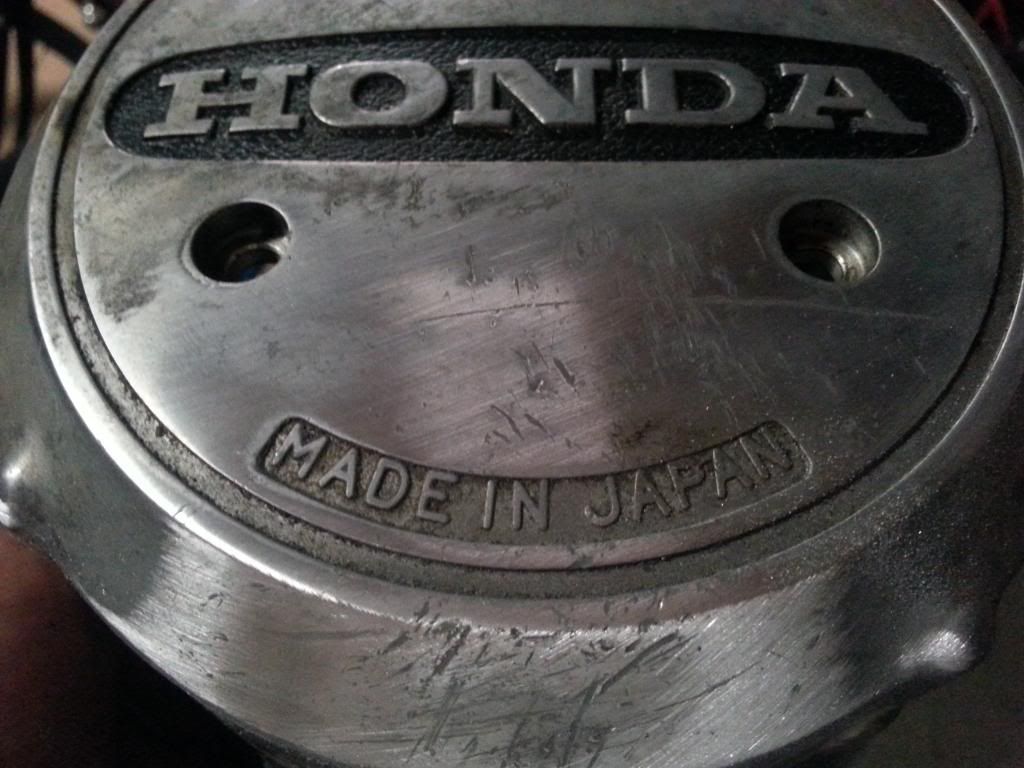
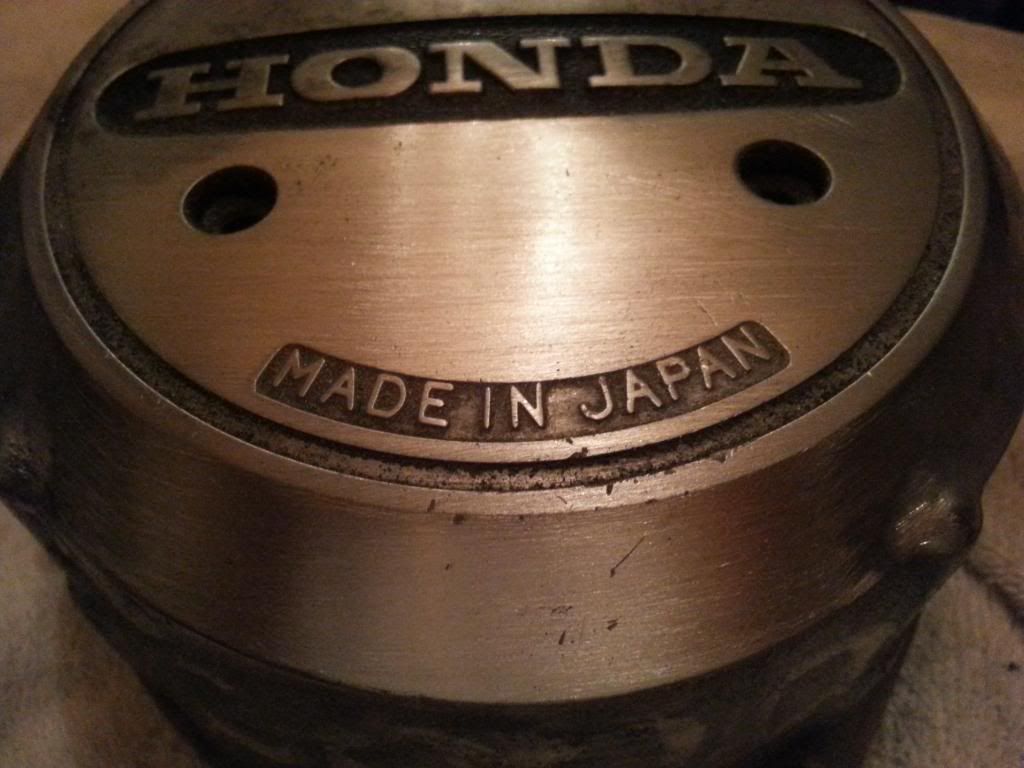
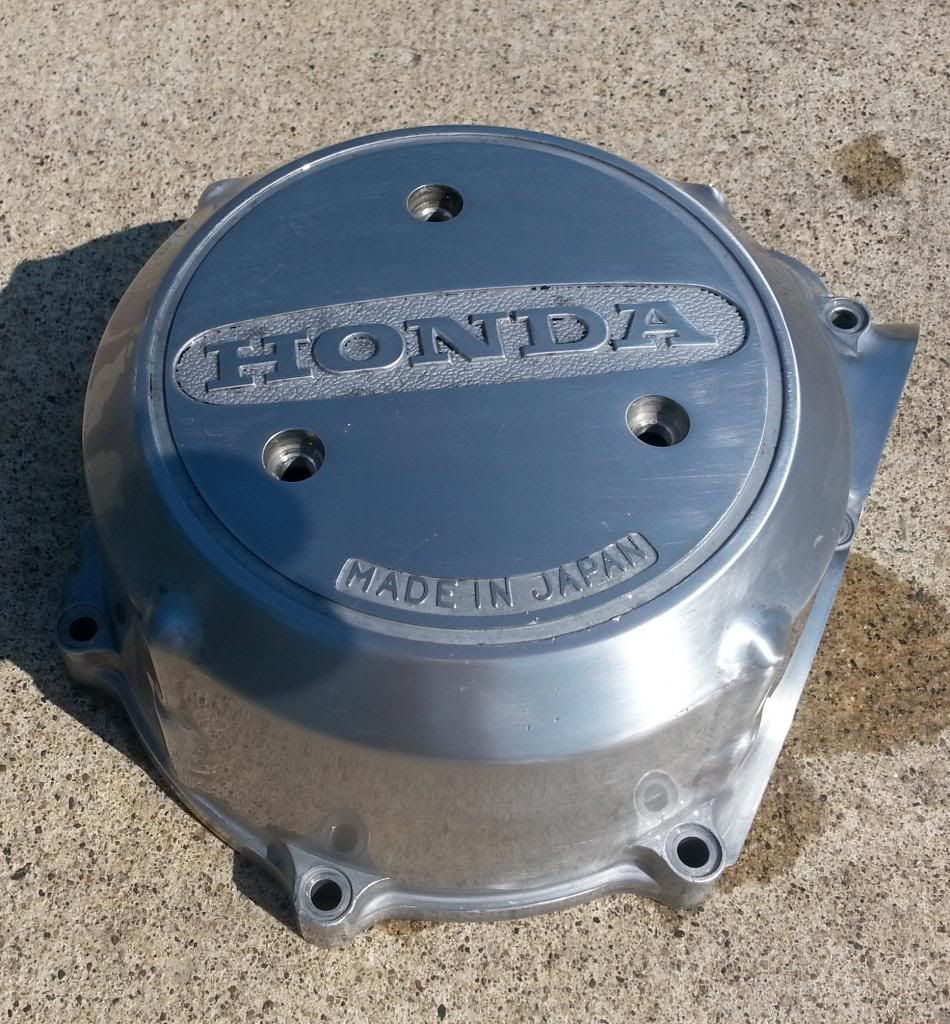
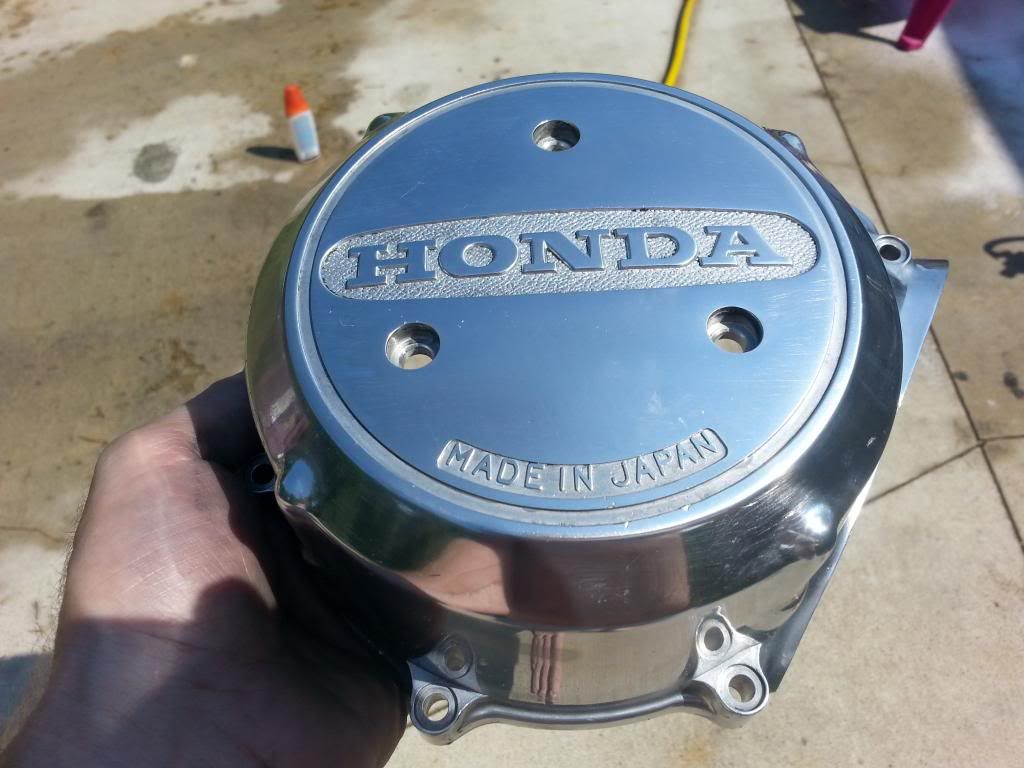
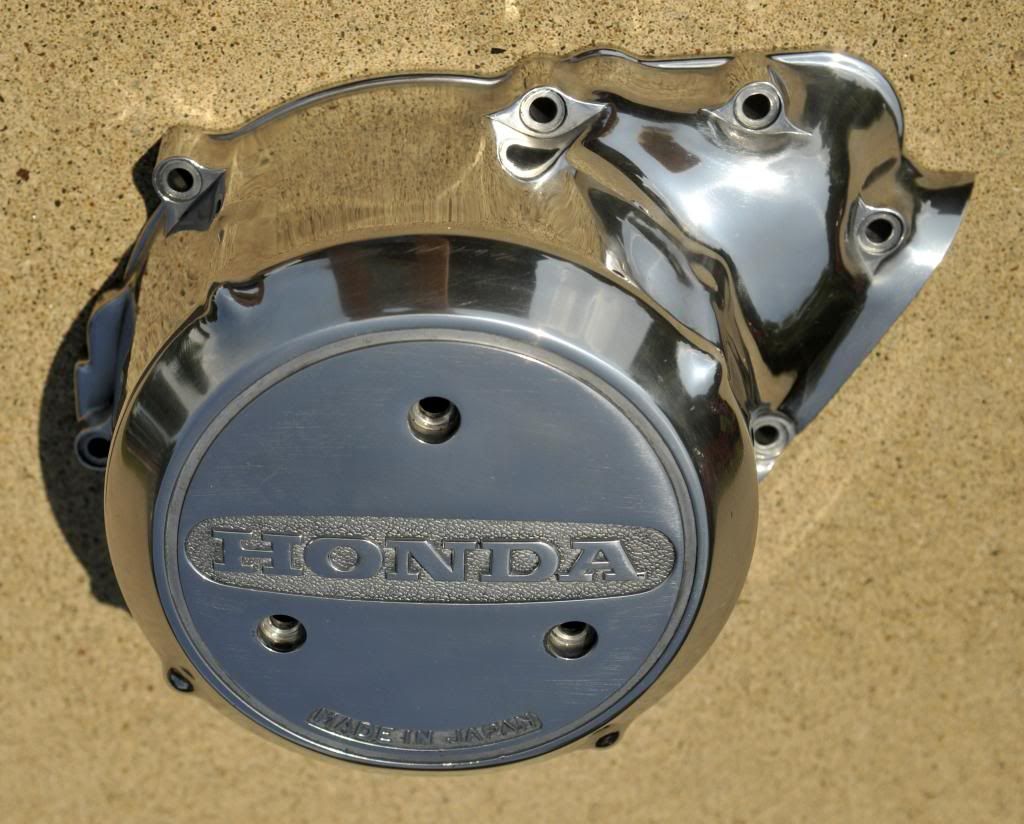
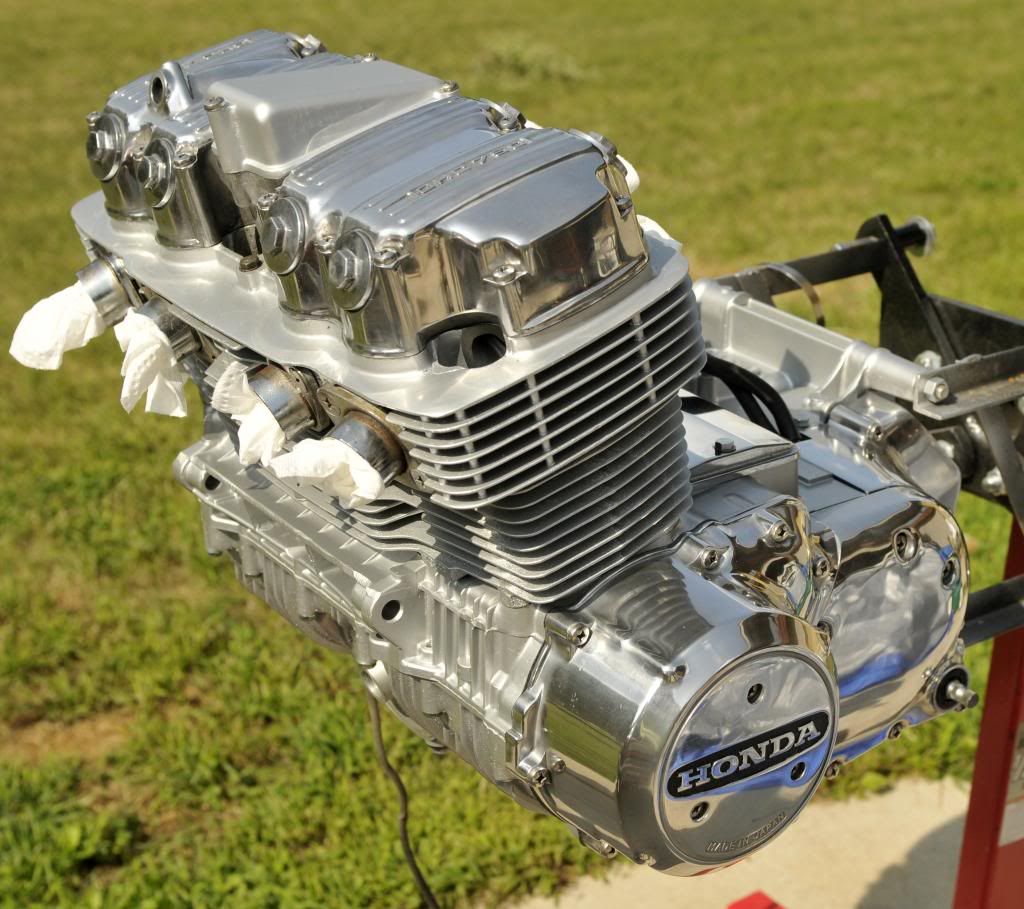
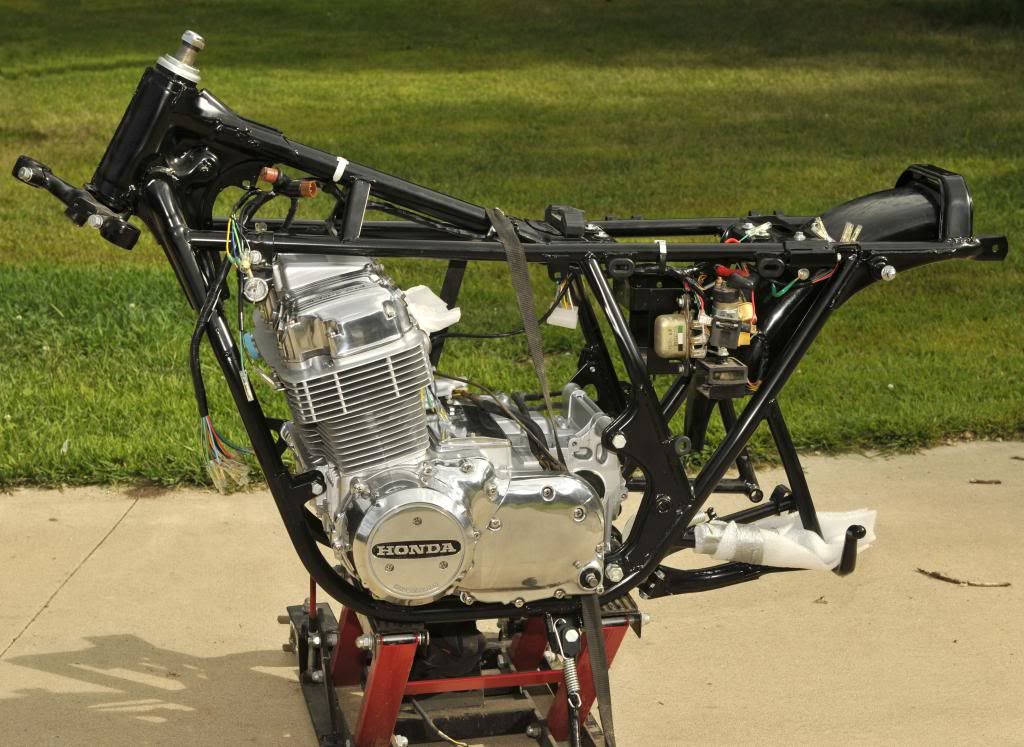
I managed to get two of the side covers polished up this morning. I still have a little work to do on them, but I just had to turn the engine on its side, and lay the covers on there!!! Yeah!!

_DSC4190a_zpsafa6fab5.jpg
 
Re: 1971 CB750 K1 Rider Resto

Ed, looks great and I am glad you are taking the time and doing everything right, it will all be worth it once you are riding a mechanically sound and beautiful bike. I use Yamabond between crank case halves and it seals up any slight imperfections and gaps. You may need to grind off some the interior weld beads. Test fit your transmission to make sure it does not strike the weld beads.

Keep the images coming and I cannot wait to see this bike complete.
 
Re: 1971 CB750 K1 Rider Resto

swan said:
Ed, looks great and I am glad you are taking the time and doing everything right, it will all be worth it once you are riding a mechanically sound and beautiful bike. I use Yamabond between crank case halves and it seals up any slight imperfections and gaps. You may need to grind off some the interior weld beads. Test fit your transmission to make sure it does not strike the weld beads.

Keep the images coming and I cannot wait to see this bike complete.

Jon, I already layed the tranny in the case and everything looks Good! The lower case is baking in the oven right now. Hopefully I will make some engine rebuild progress in the next week. I am mostly worried about getting the transmission and shift mechanism assembled correctly. Everything else is pretty much universal type assembly. I have a tube of Hondabond in my tool box...pretty much identical from what I understand.
 
Re: 1971 CB750 K1 Rider Resto

Some more progress pics.

Just a little story about issues that I had that may or my not help another newbie like myself.

I started the engine reassembly process with some trepidation. This is my first Honda rebuild. I got a couple of manuals from a friend, the factory manual online, and the Hondaman book. I read the steps in the different manuals. It surprised me that there are different approaches to assembling the cases. Haynes says to set the upper case over the lower, Clymer, Hondaman, and the Honda manual I have says to set the lower case on top of the upper. Well, on my first try, I set the lower case onto the upper case. Everything slipped together nicely. I installed all the lower bolts, including the crankshaft bolts, and torqued everthing down. Then I flipped the cases over and saw that oil had spilled out of the lower countershaft area and contaminated the mating surface. So, I put a few of the top case bolts in, flipped the engine over, took out all the bottom bolts, flipped the engine again. removed the top bolts and separated the cases again. Now I had the lower case sitting on the table with all the internal parts sitting in place, except for the final drive shaft, which remained in the top case. I recleaned the mating surfaces with lacquer thinner and a rag, making sure I got all the oil off for another go at it.

I got it together the second time with no contamination. It was much more difficult to deal with the fitting the timing chain and connecting rods through the upper case, all while trying to lower the case and try to keep everything clean. My son helped to guide everything through.


Here are a few photos of the process if anyone is interested.

Countershaft, shift drum. and shift arms installed in the lower case.

_DSC4195a_zps7dfc9b92.jpg


It took a little head scratching to figure out how the shift mechanism went back together. A visit to the parts diagram on the Service Honda site was a great help

_DSC4198a_zps25131265.jpg


_DSC4199a_zpsc037a76c.jpg


_DSC4200a_zpsaffdae4d.jpg


_DSC4201a_zps349c4487.jpg


Pretty much everything in the upper case for assembly the first time around.

_DSC4273a_zps265dc4c2.jpg


Lower case to be dropped over the upper

_DSC4274a_zps857bd102.jpg


And as it sits now....after the second try.

_DSC4278a_zps488784eb.jpg


Cylinders painted and honed. They measured out within new specs so a hone was all they needed.

_DSC4284a_zps5dd06891.jpg


Oh, a huge thanks to Swan (member here) for coming up with a bearing retainer at the last minute so that I could get this thing buttoned up this weekend!!!! I lost it somewhere in my garage.

I am waiting for new piston circlips and valves from Cycle Exchange so that I can keep going.
 
Re: 1971 CB750 K1 Rider Resto

Ed, you are welcome and it is coming together nicely! Take your time and do it right.
 
Re: 1971 CB750 K1 Rider Resto

Here is another picture heavy update.

A few highlights as to what I have done with the engine:

case hole repair

new main bearings

new timing chain

new tensioner

honed the cylinders (still within new tolerance)

new rings

new wrist pins

recut valve seats

new valves

just ordered new stainless screw set for engine covers from James Spillane, a member from the SOHC forum...stock style, not allen screws

some new engine case bolts and some I replated myself

Basically, a stock rebuild....nothing fancy as this is my first Honda engine


new tensioner from Cycle X, the old one was pretty chewed up

20130618_210051_zps9780e547.jpg


new wrist pins

_DSC4326a_zps81ff6a57.jpg


cyclinders on

_DSC4297a_zps01386952.jpg


three angle valve seats

_DSC4316a_zps242de0a4.jpg


new valves from Cycle X

_DSC4320a_zpsd5d67695.jpg


valve train back together

_DSC4376a_zps0c7a3596.jpg


I polished up the valve cover....did I mention how much I dislike polishing...ugh. It is not perfect, but it will do.

_DSC4359a_zps73588096.jpg


_DSC4371a_zpseee1d17a.jpg


_DSC4360a_zps2bc6adaf.jpg


I was hoping to get the engine back in the frame before I have to leave for work again early next week, but I decided to order the new cover screws, rather than re-use the old ones. So, I need to wait for the screws before I attach the valve cover.
 
Re: 1971 CB750 K1 Rider Resto

Freaking love the detail in this thread. I just got a 750 ohc motor myself and will look on here for details when i get stuck.

How did you rig the motor to the motor stand?
 
Re: 1971 CB750 K1 Rider Resto

Finnigan said:
Freaking love the detail in this thread. I just got a 750 ohc motor myself and will look on here for details when i get stuck.

How did you rig the motor to the motor stand?

Thanks!

Not a pretty job on the stand, but it works. I wanted extra long arms so I would have plenty of room for painting the engine.

I cut off some sections of pipe and welded them to angle iron. (Arrow A) If I were to do it again, I would weld them a little further to the left and flip the standoffs on the engine stands around. (Arrow B). The reason for this is that those black standoffs will hit the vertical square tube on the stand if I want to rotate the engine upside down. Not a huge deal as I can just pull the rotating part out a little to clear. I welded on the angled to give the whole mount some strength. Threaded rod through existing engine mount holes on the engine to secure to the stand.

_DSC3951aa_zpse98ee1dc-1.jpg
 
Re: 1971 CB750 K1 Rider Resto

Pretty good idea, i'd do that if I could weld :-\

Any chance you're interested in making another one?? :D
 
Re: 1971 CB750 K1 Rider Resto

Finnigan said:
Pretty good idea, i'd do that if I could weld :-\

Any chance you're interested in making another one?? :D

Sorry, I've got more on my plate than I can handle now. Maybe we could do a lend program after I don't need it anymore. Of course, I would have to have it back for future use.


I have one last small update before I head off to work for three weeks. I turned on the Tour De France last night to watch yesterdays stage. I figured I would get a little done on the bike while watching the race. I decided I would do one of my favorite things. (not) More polishing. Except, this piece was really rough. The stator cover had seen better days.

I started out with this scratched up, dented piece. First, I block and hand sanded the deep scratches out with sand papaer. I started with 80 grit because there were some reall nasty gouges. From there I worked through 120, 400, 600, and 1000 grit. I only used the 80 and 120 on the really bad areas. After sanding, I used emery, tripoli, and finally white rouge buffing compounds with my bench grinder. With each compound I went to progressively softer wheels.

The start...actually I guess that I had started a little sanding with 80 grit by this point.

20130714_221025_zpsc3dd0d27.jpg


I'm pretty sure this is after sanding out the scratches through 120 grit. I did not get every scratch out, but most are gone.

20130714_222403_zps6f4919df.jpg


It's a dirty job, but someones got to do it.

20130714_231335_zpsff96faf3.jpg


I'm pretty sure this is after wet sanding 400, 600, and 1000

20130715_100328_zpscc5dceb0.jpg


First cut with emery compound...before cleaning for the next step.

20130715_101043_zpsda3dd20b.jpg


after the tripoli compound. All cleaned up and ready for the white rouge.

20130715_104003_zps876da71d.jpg


After white rouge....all done, except for maybe a little hand polishing if I really feel like it.

_DSC4385a_zps8911b737.jpg


I don't know if this is the right way to polish....I think I got this technique off the Caswell site. Once again, not perfect, but pretty good. It seems I always have a few errant sanding scratches that I don't get out. Of course, considering that I had to use 80 grit to get the gouges out, it looks good. There were scratches all over this thing.
 
Re: 1971 CB750 K1 Rider Resto

Aww yeah....
 
Re: 1971 CB750 K1 Rider Resto

Here is my engine a few days ago, it is pretty much ready for installation. Probably as clean as it will ever be ::) I had some black urethane auto paint on the shelf, so I used that for the HONDA on the stator cover.

_DSC4400_zps5e99cd34.jpg


It was suggested that I remove the exhaust spigots for easier fit in the frame. I remembered how tight it was to remove with them on, so I decided to follow the advice. Unfortunately, one of the studs was stuck tight. I thought it was starting to turn, but it turned out the head of the screw snapped off. I guess I was just a little enthusiastic with the impact driver. My machinist Friend abhors easy outs, so I tried his method of using reverse drill bits to try to coax it out. I drilled using progressively larger bits until I could try to coax what was left if the bolt threads out of the grooves in the hole. It almost worked, but I could only get about half of the bolt out. So, I then tried to use a tap to loosen the rest of the bolt threads. That was working until the very last bit. Then the remaining bolt threads got hung up on the tap so that when I removed the tap, the threads from the bolt mucked up the threads in the hole as I was backing it out. Oh well, time for the fallback of a helicoil. That worked out great, and I have a really nice fit again.

Drilling out the bolt

20130812_231708_zps4a27a3a8.jpg


Removing the threads with a pick

20130813_121132_zps607c7b78.jpg


helicoil insert installed after the other methods failed....these things are great!!!

20130813_124735_zps65d3bf93.jpg


Now that the broken bolt issue is resolved it is time for the engine installation. My 15 year old son helped me out on this. I used the typical method of lowering the frame over the engine.

_DSC4401_zps58881491.jpg


And it is in!!!!!! Milestone achieved!! The fitting of the frame over the engine was fairly easy and only took about 5 minutes once everything was arranged and ready to go.

Only two or three months behind schedule with the unexpected engine tear down and rebuild. But since it is so late in the summer now, I am shooting for an early spring finish date. That gives me time to locate those elusive stock (or repro for that matter) HM300's or HM341's. Patience Grasshopper.

_DSC4407_zps33eab766.jpg
 
Back
Top Bottom