Follow along with the video below to see how to install our site as a web app on your home screen.
Note: This feature currently requires accessing the site using the built-in Safari browser.
We noticed you are blocking ads. DO THE TON only works with community supporters. Most are active members of the site with small businesses. Please consider disabling your ad blocking tool and checking out the businesses that help keep our site up and free.
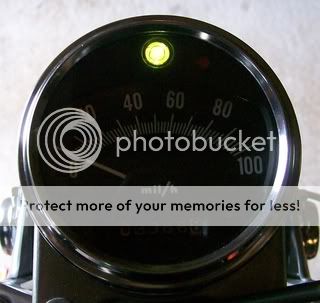
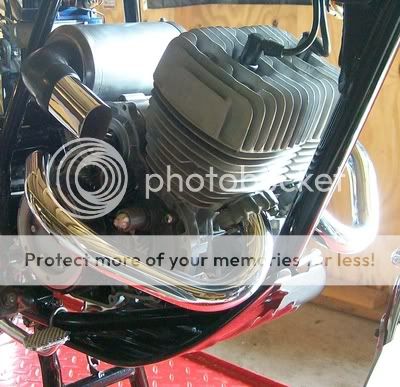
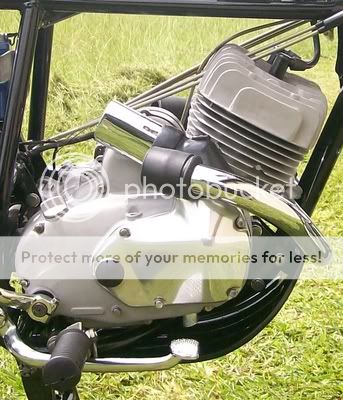
We have been working on the Bridgestone a lot this week and have completed all of the wiring with the exception of one new switch for the front brake lever that we need to replace however Brother casi has located one so we will have it soon. I cleaned the exhaust studs and installed them into the cylinder heads and mounted the chrome exhaust pipes with new gaskets and the exhaust collars that we had already restored. We adjusted the neutral switches so now that we have the neutral, head light high beam, and the speedometers back light all working properly we installed the speedometer and the speedometer cable. I also installed the skid plate, tool box, and the kickstand on the motorcycle.
This photo shows the neutral working.
And this photo shows the neutral light and the head light high beam light working.
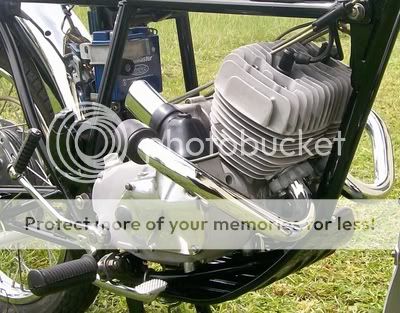
Here is a photo that shows the exhaust pipes and the skid plate mounted.
The parts look like you poured wet paint on them a few seconds before you took the photo they look so smooth! And the lights on the speed are cool as anything... I have always wondered what lights it had in the speedo as it never worked when I had it at my house for a few weeks. I miss having a neutral light on my vintage bikes... I wish I could send you all of my vintage bikes for a neutral light surgery. Keep up the great work Joe can't wait to see her light up and rev up!
Thank you Brother, I really love the black color that we used on this bike and the silver is really pretty as well however the paint work that my Brother Jason did on the tins is really going to make her look beautiful! Adjusting the neutral light was fun as there are two neutrals and two different neutral switches as well! Hopefully we will be able to hear her take her first breath in about a week!
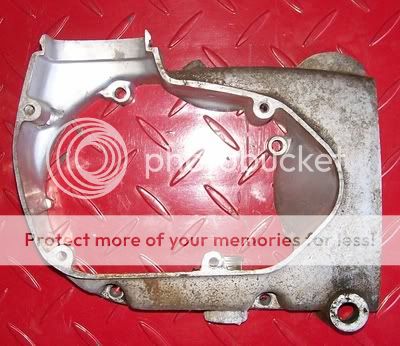
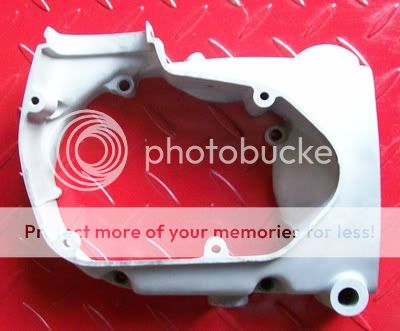
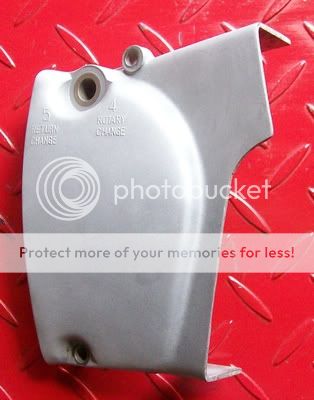
We have been working on finishing the restoration work on the engines side covers and we were able to mount the left side covers late this afternoon!
Now that is the perfect look for me on this bike... no polish just raw metal as it came from the factory! Great job Joe bringing my vision to life. I love the way the wording for the transmission switch show on the casted cover. Looks awesome!
Now that is the perfect look for me on this bike... no polish just raw metal as it came from the factory! Great job Joe bringing my vision to life. I love the way the wording for the transmission switch show on the casted cover. Looks awesome!
I love the look of clean cast aluminum as well and think it was the perfect choice for the Bridgestone, you definately have a beautiful vision for this bike Brother and I am honored to be working with you to make it a reality!
deepwaterimports said:
you always impress me joeyputt, it blows my mind how you do some of the stuff you do. well done. not long now until its done.
Thank you Brother, I really appreciate your kind words and they truly mean more to me than you know. If we are able to stay on schedule we should be able to see her take her first new breath of life in about a week!
I have completely missed this rebuild until now. Joe, you do beautiful work, this Bridgestone looks damn fantastic.
What are you doing to the zinc plated parts that were rusted and not rezinced or chromed. You say that you've cleaned them up and it looks like they have been given a sanding and polishing, what are you doing to prevent rust from returning? I'm just wondering if I'm going overboard when I do a restore and have all the zinc plated parts stripped and rezinced.
Thank you so much for the compliments Brothers, as always you are too kind and I hope you all know that your nice words truly are my inspiration!
Brother John there are only a few pieces of steel that we left a natural finish on however to prevent them from rusting we sealed them with Shark Hide metal protectant.
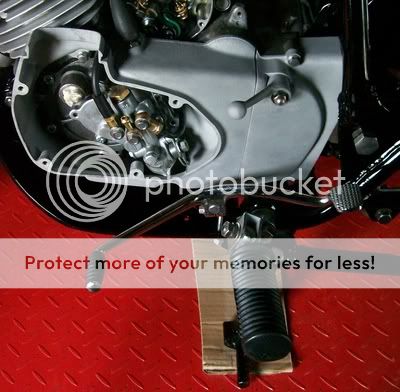
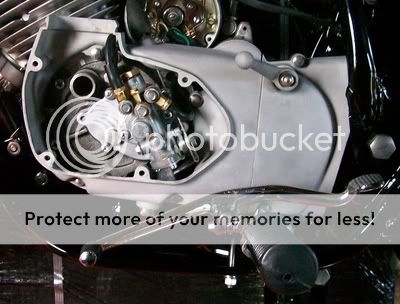
Here are a couple photos of the right side of the engine with the clutch cover on, I still need to rebuild the carburetors however I bolted the carburetor cover on the engine to see how it would look. I also installed the new air intake rubber with its new bracket and spring and assembled the kick starter with its new rubber and installed it. The carburetor and choke cables are just sitting on the head until we mount the carburetors, they will not be running through the fins.
This has been a very enjoyable restoration for me and I am very happy that you are enjoying it as well, thank you so much for all of your loyalty and support for me and DWMS Racing!
The tins should be here today or tomorrow and I can not wait to see them on the bike!
Thank you Brother! I really want to see her all together as well so I worked on her some more this afternoon!
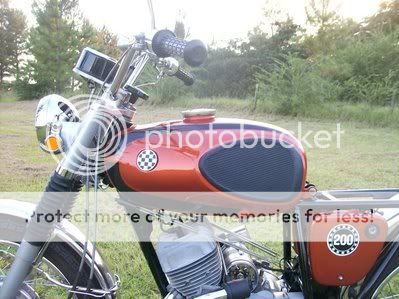
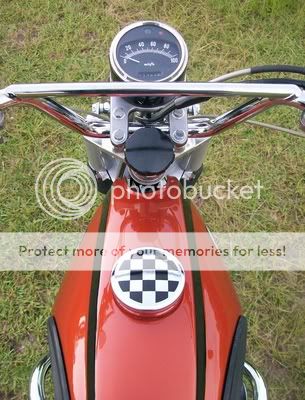
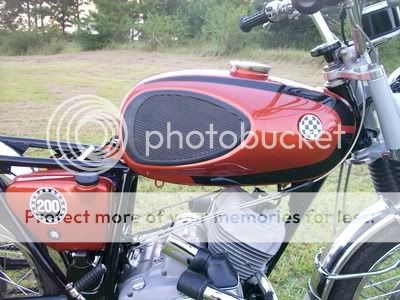
My Brother Jason finished the paint work on the tins and as usual his work looks amazing! This afternoon I mounted the gas tank and installed the new strainer, gas cap, gas cap checkered decal, badge plates, badge checkered decals, and the new rubber knee pads. I also mounted the side cover with a new ignition switch rubber seal and the oil tank with a new cap, rubber mount, and sight window.
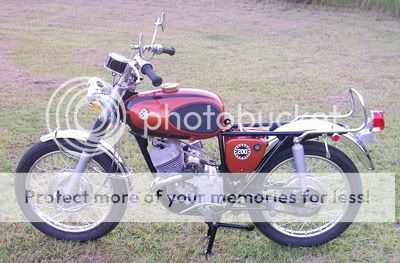
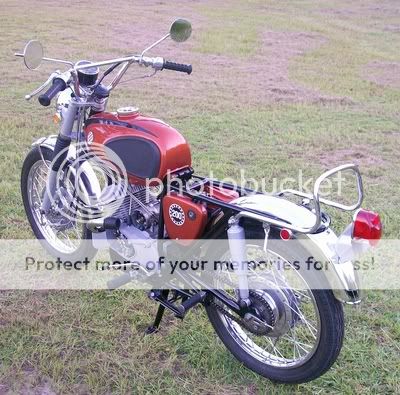
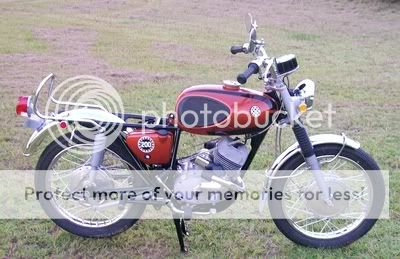
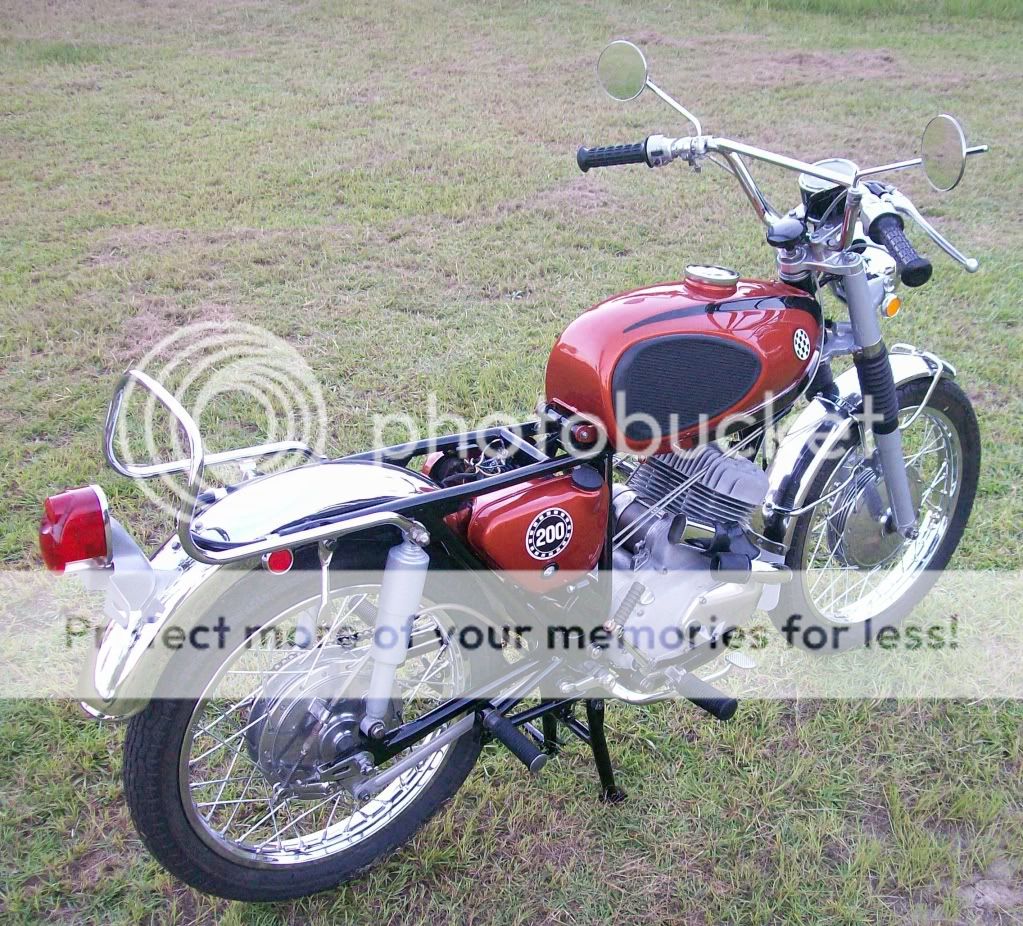
It has been a while since I have shown the whole motorcycle and now that I have the tins on I thought she looked really nice so I rolled her outside and took a few photos, it was just before dark when these photos were taken in the shade with no sunlight so the paint looks a lot darker than it actually is as there was no sunlight shining on the paint to show the gold colors, metallics, and the pearls however I thought she looked so nice I wanted to go ahead and post some photos! I will take some more photos with her in the sun and add them soon however you can see what the paint looks like in the sunlight in earlier photos I posted from when my Brother Jason was painting these parts.
What a unbelievable transformation!!!! A far cry from how she looked when CASI sent it to you.
You are unbelievably talented!!!!!!!Thanks for sharing her transformation. ;D 8)
Pete, the seat is on it's way. CASI wanted to restore the seat with the original type of materials that she came with. That has been a trek but it is finally coming together. Joe should be receiving it a few weeks. The pictures that I have see on the seat are very impressive, it will really finisher her off beautifully. I am sure you will like it.
Patience my friend, patience Christmas is coming soon!!!! ;D
This site uses cookies to help personalise content, tailor your experience and to keep you logged in if you register.
By continuing to use this site, you are consenting to our use of cookies.