Wheel conversion kit is ready to go!
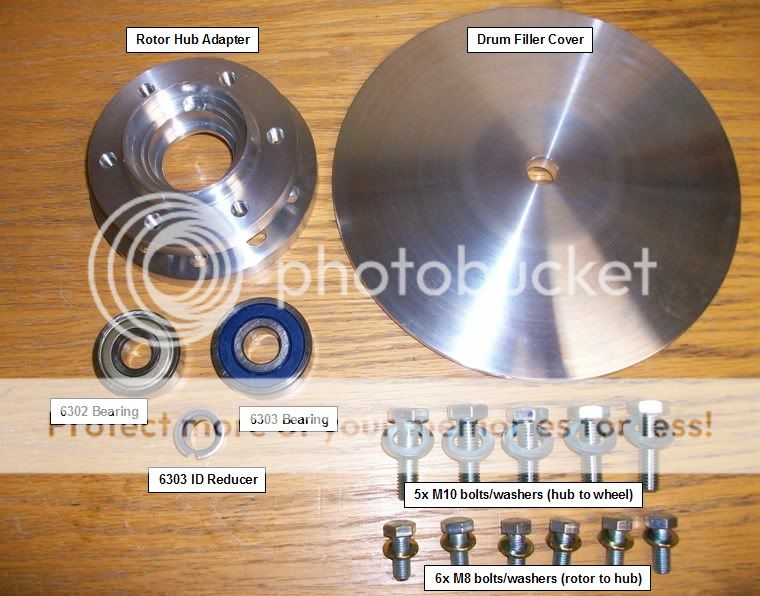
Here is what comes in the shipped kit
Hub adapter and drum filler cover are as-machined aluminum - so you can choose to anodize, paint, or powdercoat to your color choice. M10 bolts are grade 10.9 and M8 bolts are 8.8.
You need to supply a suitable '81-83 16" rear wheel. I snagged one off eBay for $4 with drive hub & trim, full brake hub, axle, and lousy tire! I suggest you remove the tire and degrease the wheel before starting on the conversion. If you are going to paint it, wait until you are done and/or put the tire on.
Remove the wheel bearings (1 on drum side and 2 on drive side). I suggest tapping in the drum side bearing a bit to use the inner spacer sleeve to push out the 2x drive side bearings a bit. Once there is a little clearance, a long drift can be used thru the ID of the bearings/spacer sleeve to drive the opposite side bearings out. Because the bearings are being driven out via the ID races, they will be ruined and cannot be reused. That is why I supply new bearings in the kit.
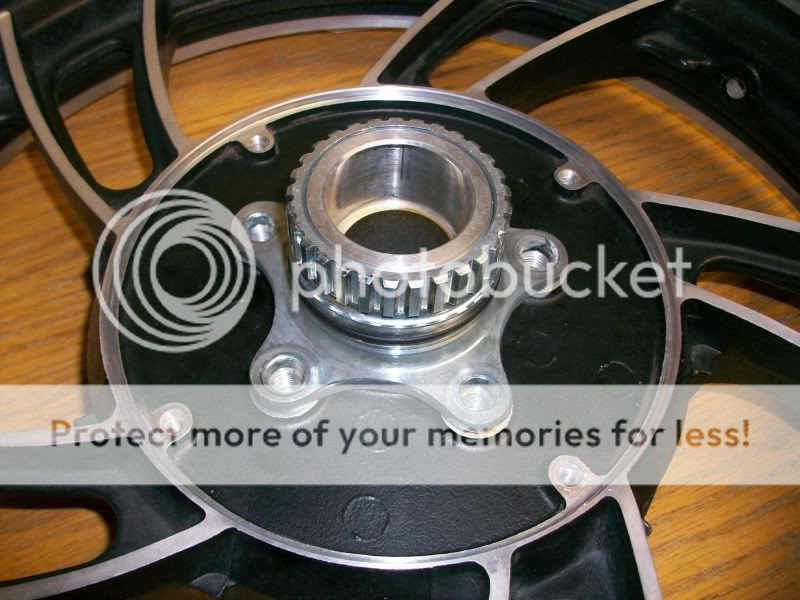
Step 1 - Drive side: remove the 4 Philips screws that hold on the drive side outer trim ring and remove the ring (keep if you plan to reuse - your choice).
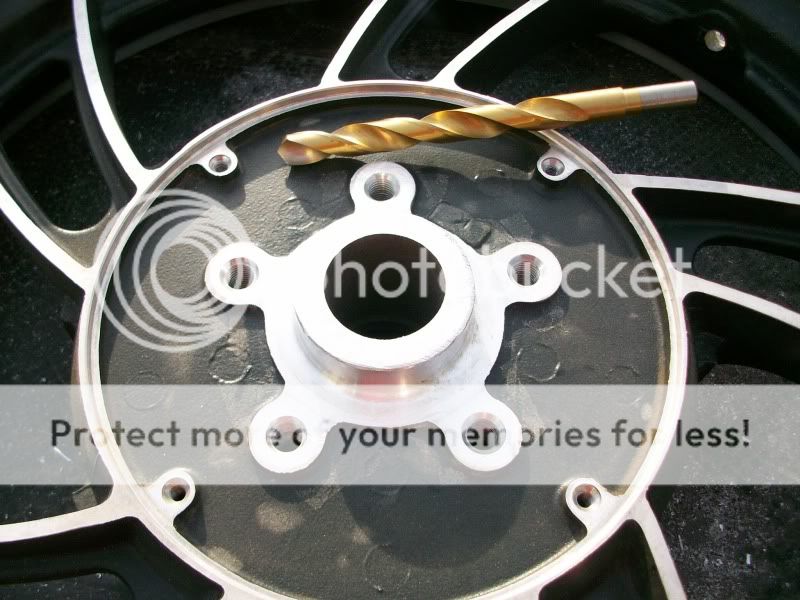
Step 2 - Drive side: remove the 5x M10 bolts holding on the spline-drive hub and remove the hub (discard or save as a spare).
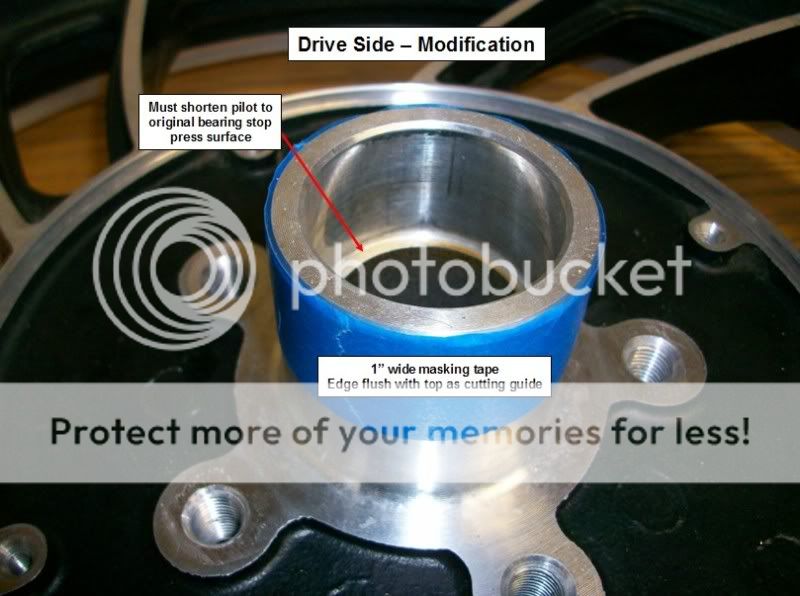
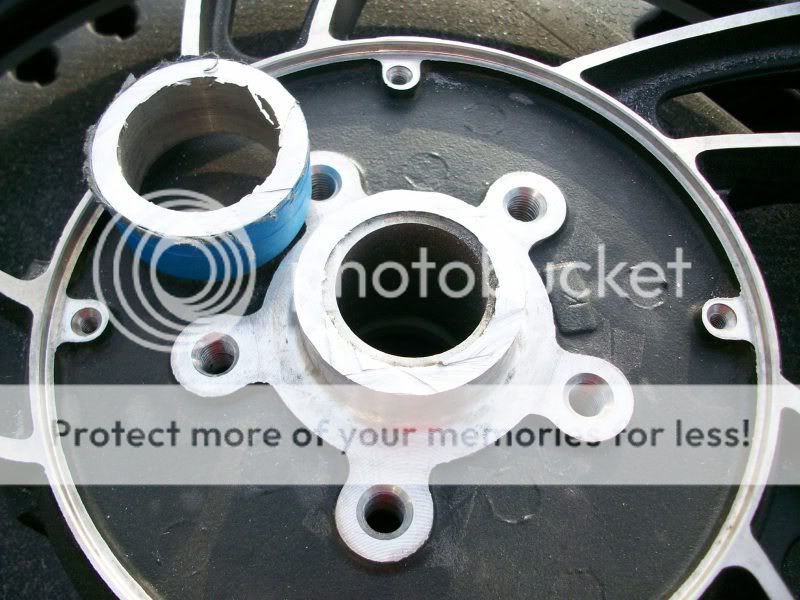
Step 3 - Drive side modification plan
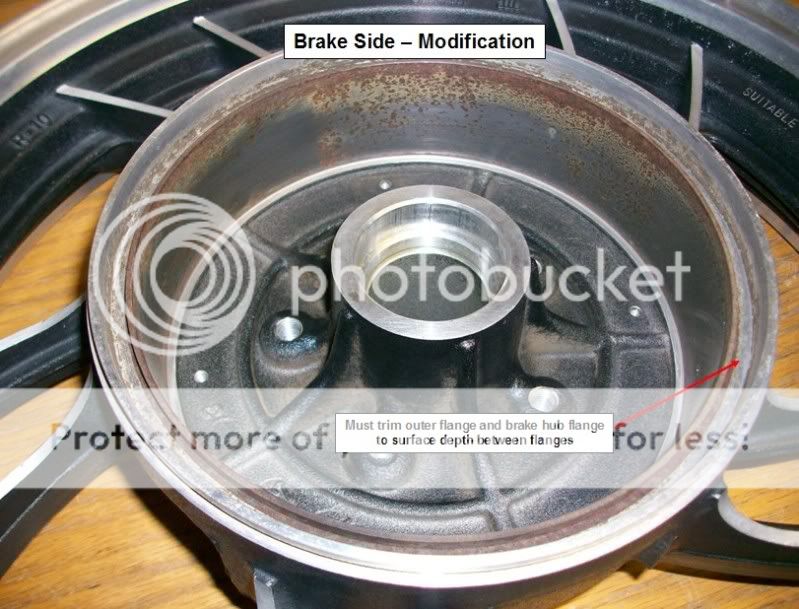
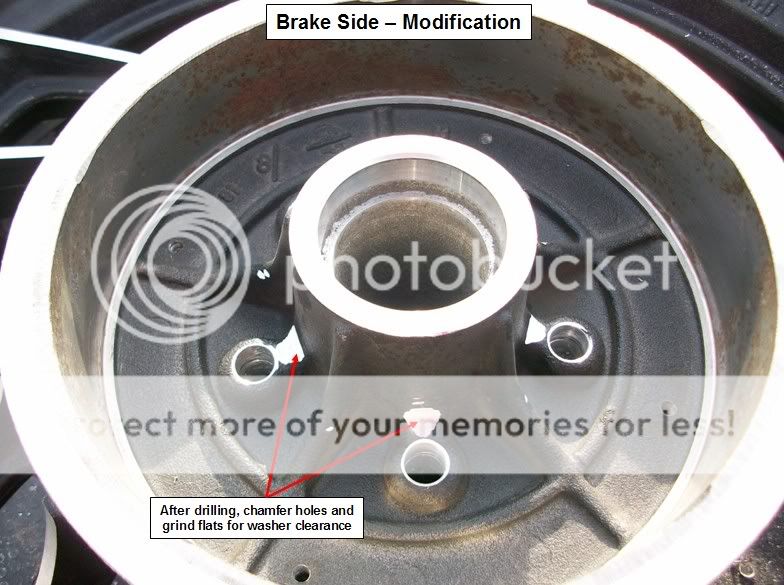
Step 4 - Brake side modification plan
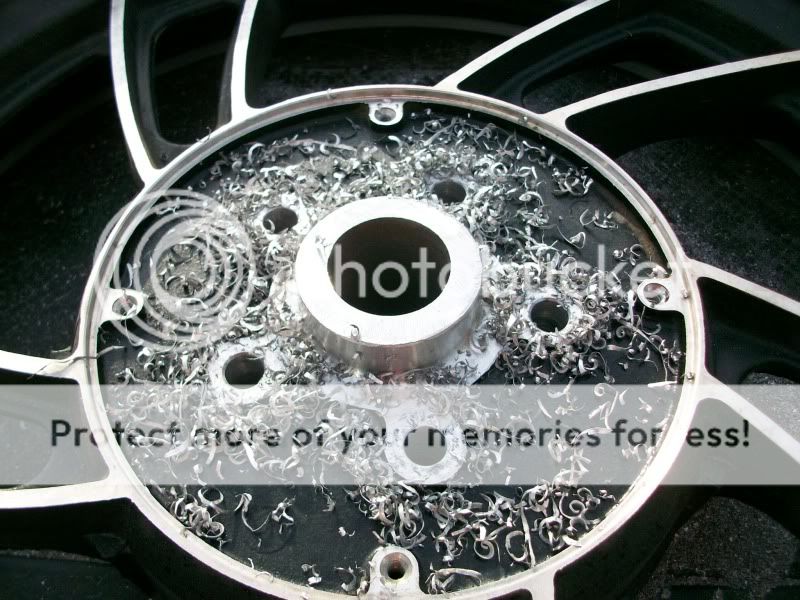
Step 5 - Remove drive side material. I used a body grinder with a 4.5" cutoff and grind wheels. This is a clearance cut and part mating surfaces aren't affected - hence lathe-type accuracy isn't required.
Drive side pilot cut off ...
And ground flush to original bearing press stop surface
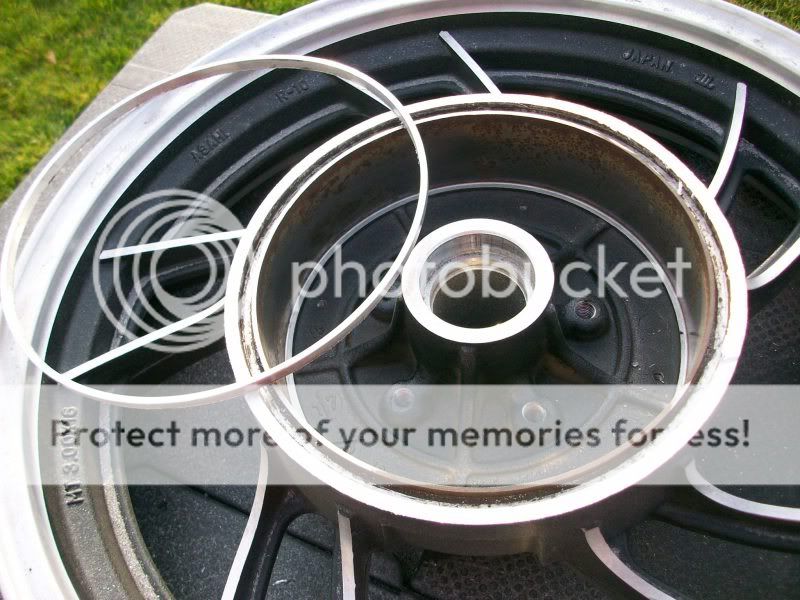
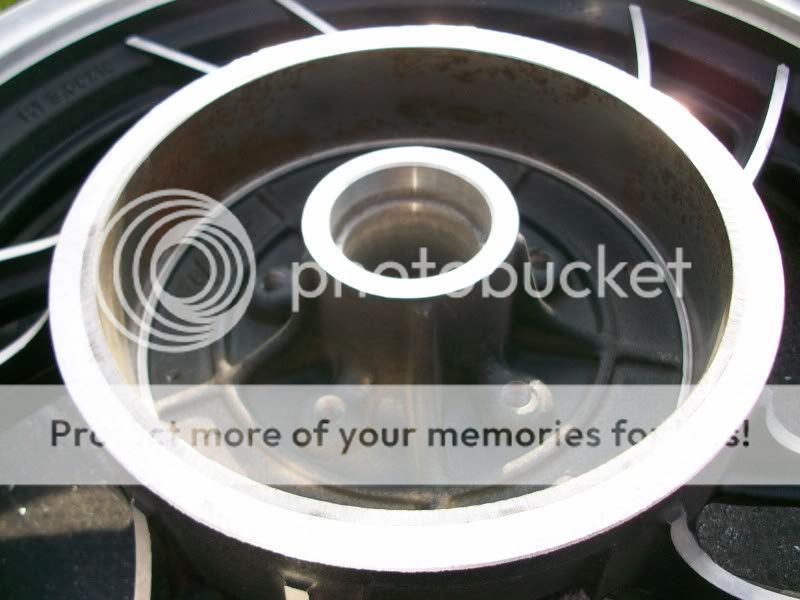
Step 6 - Remove brake side material. Again I used a body grinder setup. Again a clearance cut to the drum filler cover, but some fine tuning may need to be made once the wheel is installed (the drum filler cover doesn't turn with the wheel so it needs ~1-2mm clearance to the final surface).
Remove the outer flange ...
Grind down the remainder of the outer flange and the brake hub flush with the surface that is between them
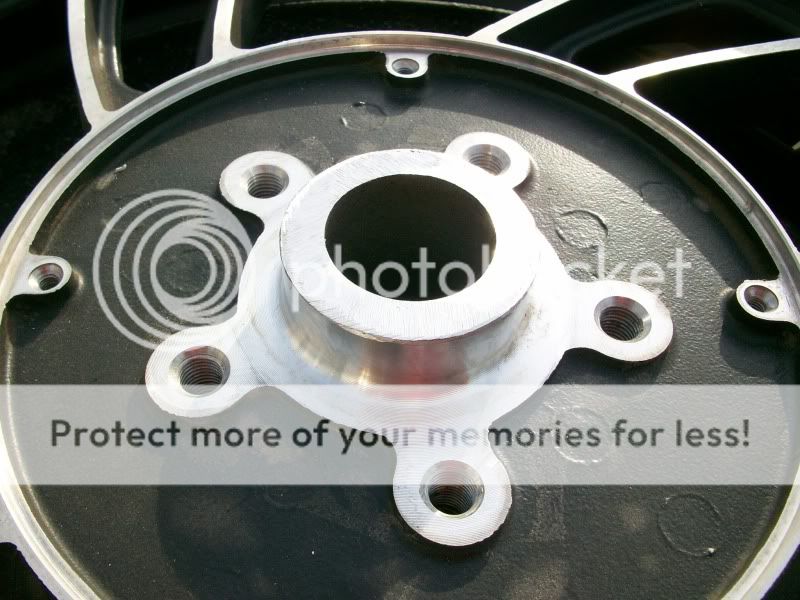
Step 7 - Clearance drill the original spline-drive hub mounting holds ... 7/16" drill bit works well
Step 8 - Brake side hole cleanup ... chamfers and washer clearance grind (body grinder fit if careful)
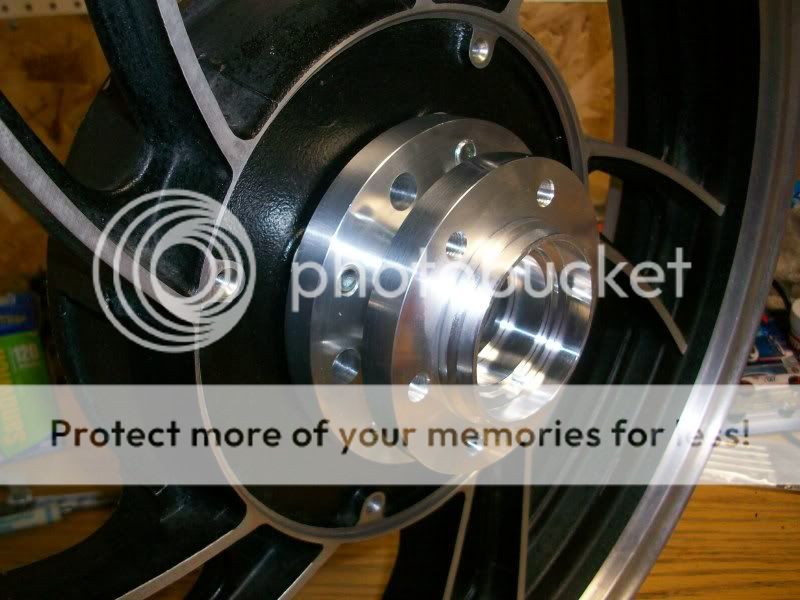
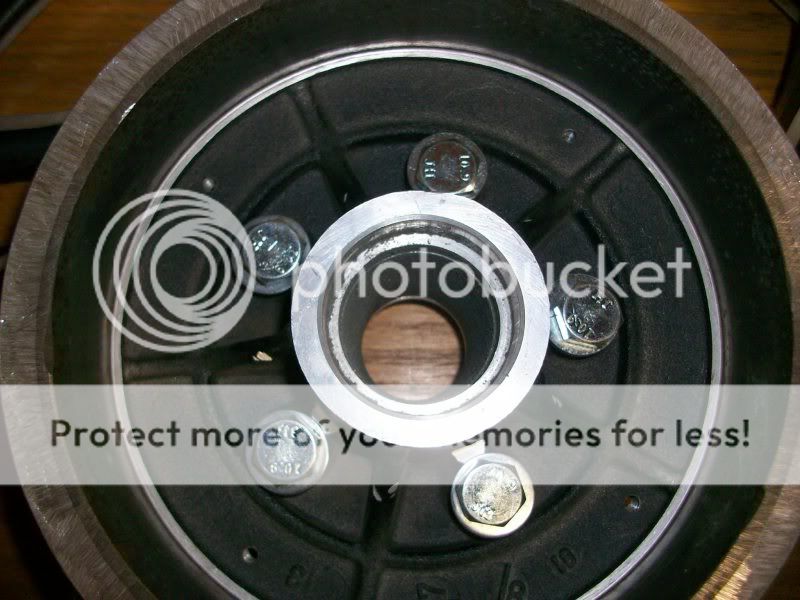
Step 9 - Install rotor hub adapter over drive side pilot and insert 5x M10 bolts/washers from drum side. I suggest a bike trial fit before final assembly that should include blue threadlocker and a final torque.
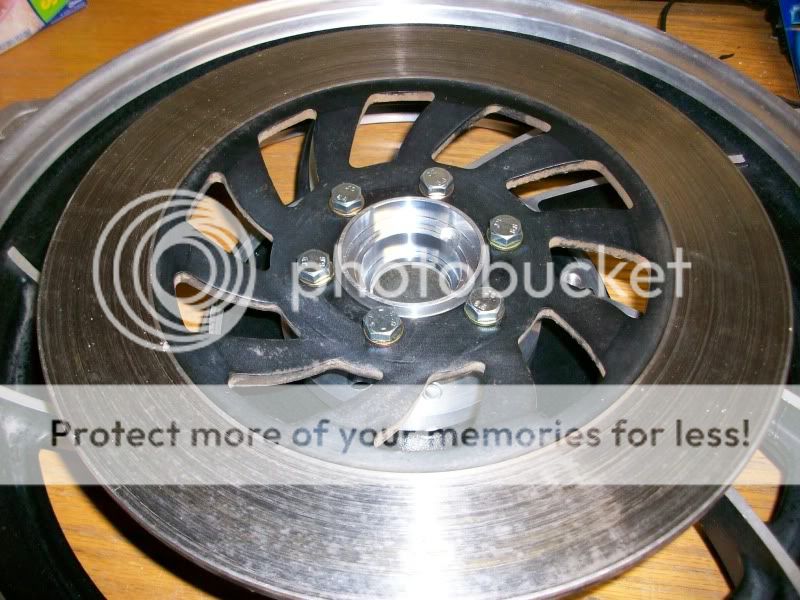
Step 10 - Install rotor onto hub adapter with 6x M8 bolts/washers (or original strap tabs under original rotor bolts). Again, this is a trial fit, but final assembly will include blue threadlocker and a final torque.
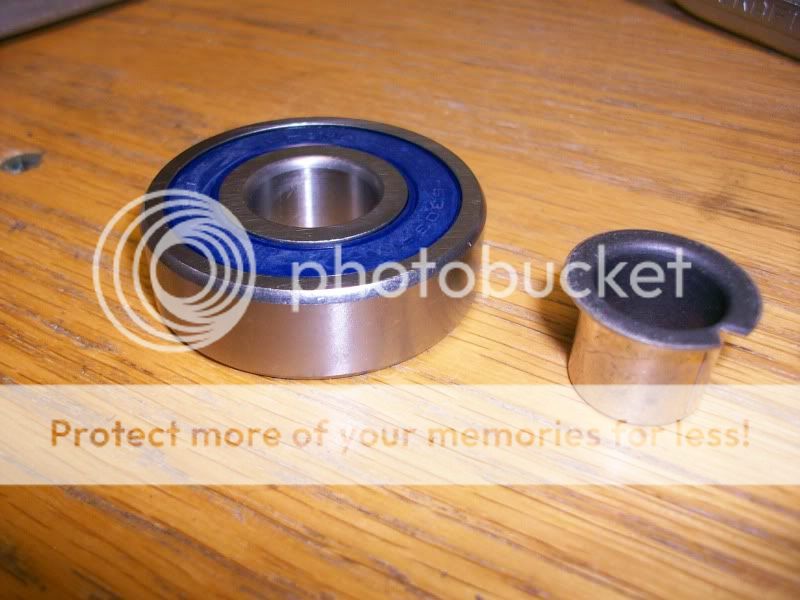
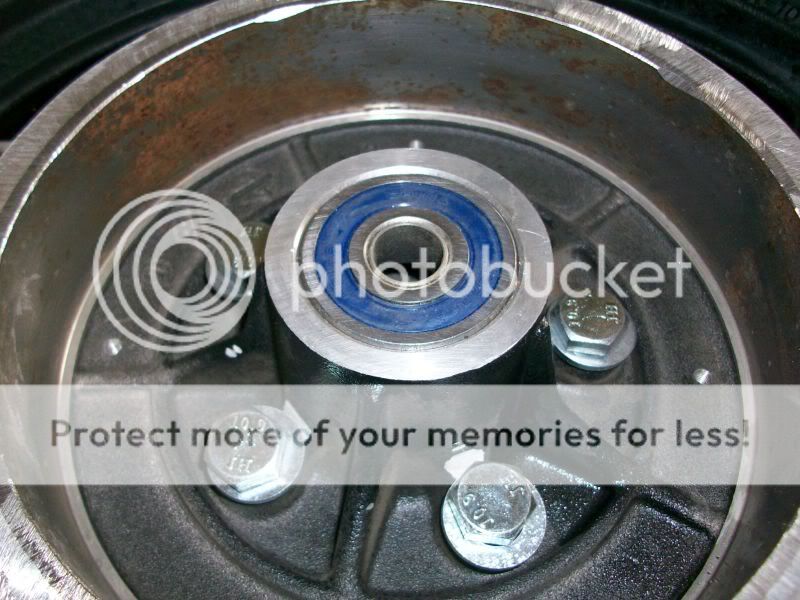
Step 11 - 6303 drum side bearing. Install flanged ID reducer into bearing and then install bearing into drum side of wheel with the flange of the ID reducer towards the center of the wheel. A press is ideal, but a 32mm socket and hammer works well.
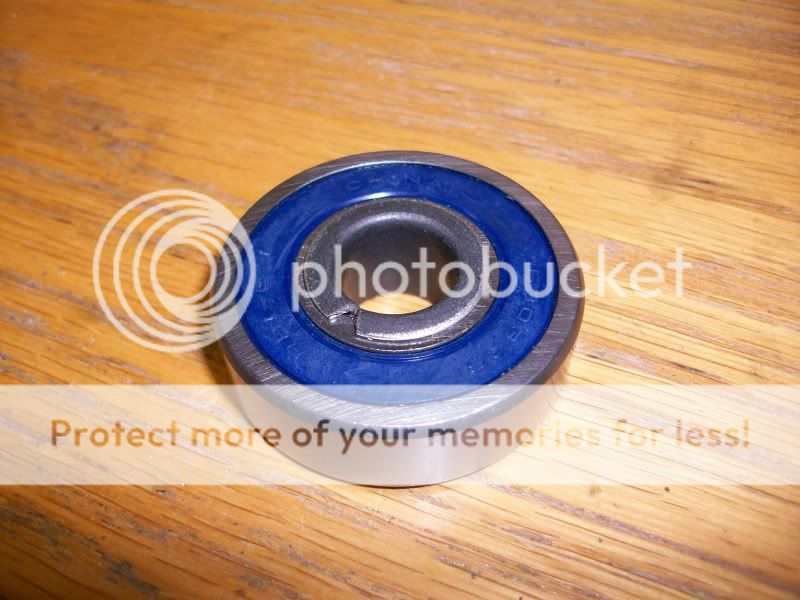
Step 12 - 6302 hub side bearing install into rotor hub adapter. Again, a press is ideal, but a 30mm socket and hammer works well.
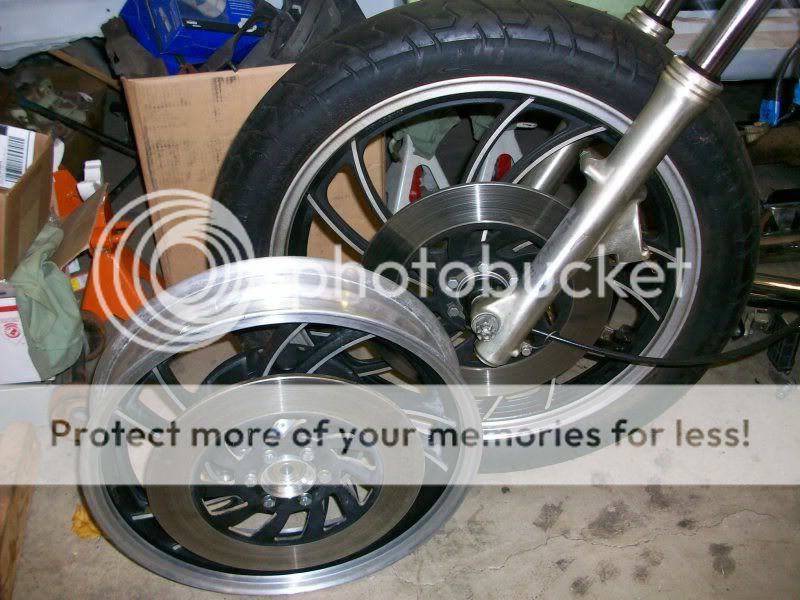
At this point the wheel is ready for a trial fit ...
Pre-trial comparison LH side
Pre-trial comparison RH side
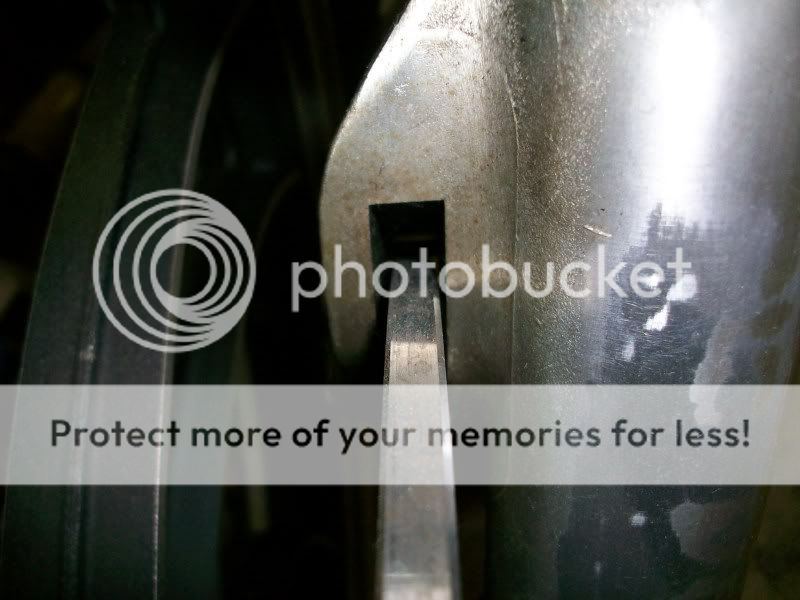
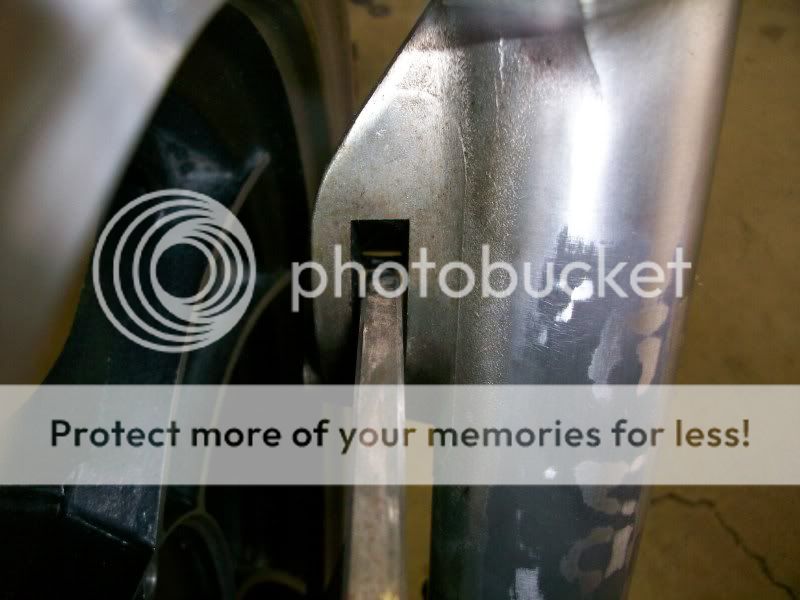
Original front wheel brake rotor to LH fork groove clearance
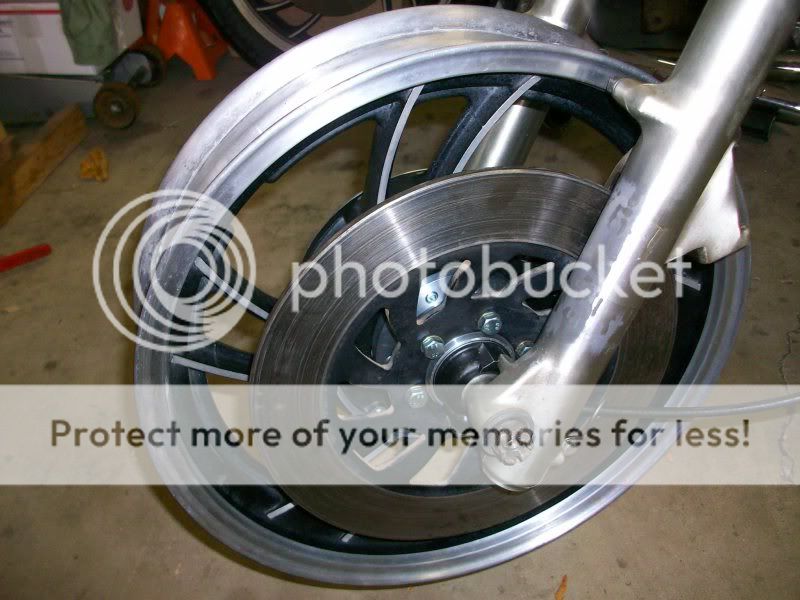
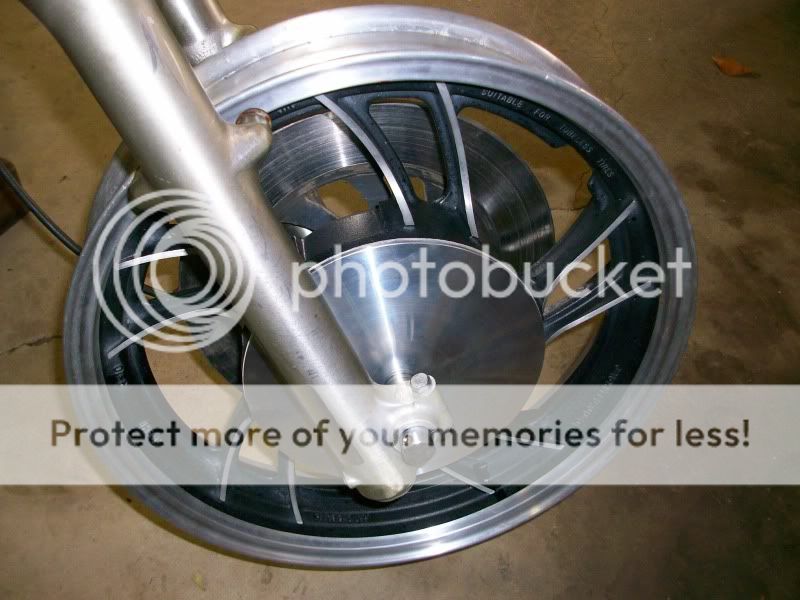
Converted wheel installed (still needs inner spacer sleeve, speedo drive/seals installed in rotor hub adapter - provisions are there). Inner spacer sleeve may be a modified front wheel original or a new one made from 3/4" OD x 1/16" wall tube.
LH side
RH side
Brake rotor to LH fork groove clearance
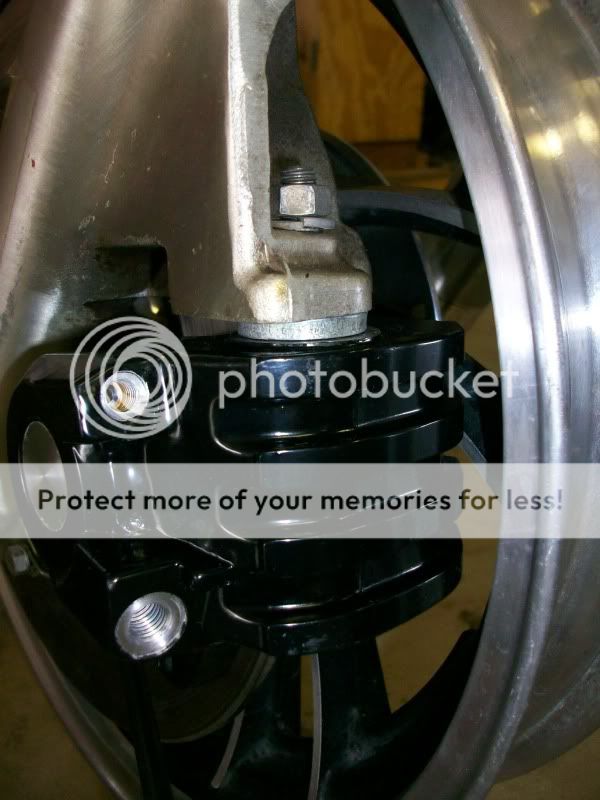
Caliper clearance is fine and the drive side outer trim ring should clear too
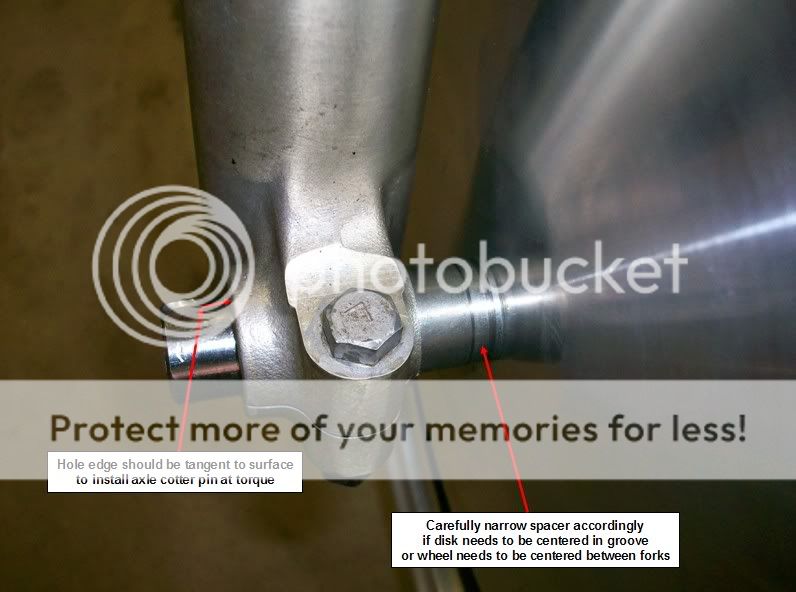
The wheel is nicely centered between the forks - perhaps favors the LH side by ~1mm, but I'm not going to worry about it since the rotor in the LH fork groove is perfect. The following shows how adjustments can be made to the axle and the RH axle spacer to center the wheel and to properly reposition the axle for final torquing and cotter keying.
Axle installed - looks like I need to grind down the RH side axle end ~3-4mm per the mod description below
Axle minor mods
Since this was the first trial, I still need to final fit my inner spacer sleeve and finish the install of the LH side speedo drive and seals (all parts can be easily pulled from your original front wheel and be reused). You can have the hub adapter and drum cover anodized, painted, or coated prior to final assembly ... I'm probably going to paint before final assembly.
Next up I'll get a tire on the wheel and try this with some lowered forks.
So who's interested in a kit?

")