Follow along with the video below to see how to install our site as a web app on your home screen.
Note: This feature currently requires accessing the site using the built-in Safari browser.
We noticed you are blocking ads. DO THE TON only works with community supporters. Most are active members of the site with small businesses. Please consider disabling your ad blocking tool and checking out the businesses that help keep our site up and free.
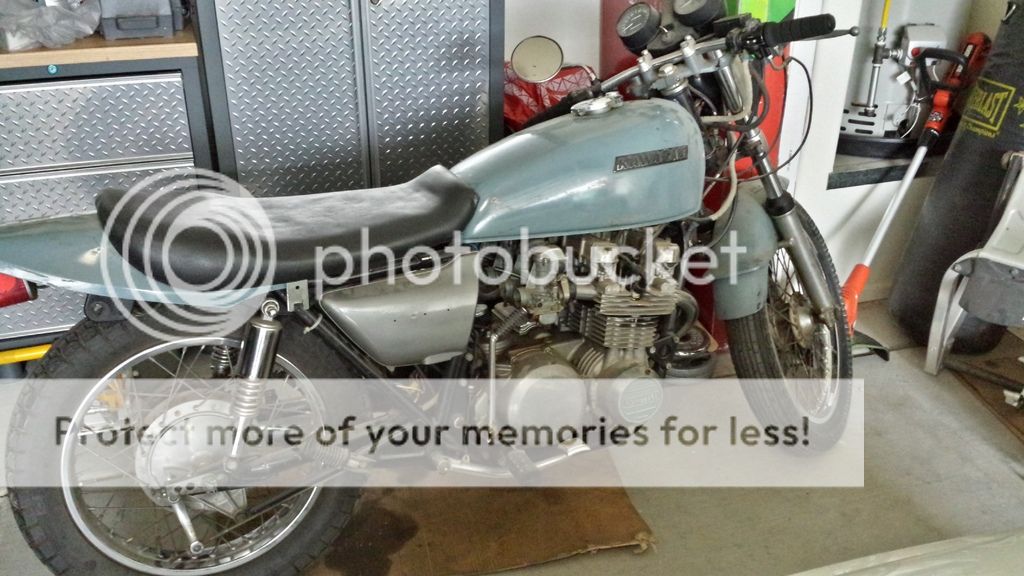
Here's the bike as it sits, a 1977 Kawasaki KZ650B1. I bought it from a guy who wasn't able to do what he wanted to it, but it looks like the PO before him attempted to customize it somewhat, e.g. unmatching bolt sizes all over, bits and pieces missing, plastic fender, dropping the tree to give it the impression of a lowering, etc. Nonetheless, I plan to keep most of the original parts and pieces, with a few upgrades here and there. I've always wanted one since riding my friend's as a teenager (many years ago), and I'm excited to get it on the road!
More pics. I've begun the parts-stripping process, and I figured I'd start from front to back and refurb all that needs it as I go. The bike has just under 25000 original miles, and it shows as you would expect in some places.
Front wheel and forks removed... awaiting a tool to remove the fork piston from the tube. I read a number of posts where there were suggestions to use an impact wrench to remove the lower fork bolt, but I was able to get it to turn without one. As I'm sure many of you know, and I'm finding out, the bolt will keep spinning until you put the Kawasaki tool or some kind of substitute to allow it to loosen. The rotor miked out to 7mm which is within spec, but I may still replace it with a lighter one.
One thing I failed to mention - I've never done this before! I have turned a few wrenches on cars with simplistic stuff like oil, tune-ups, brakes, etc. so I have a ton to learn. Therefore, I am open to any and all suggestions. I'm envisioning a 'metals' theme, using different metal colors and types throughout the bike. I'm not a big fan of glossy, I rather prefer the brushed look.
i have not done it personally yet. take a broom stick or similar and wittle down the end to fit into the place that tool your waiting on goes into. Ive seen done on other forums.
Thanks Beaner. I had read that before, but one thing I'm not sure of is the shape that the tip needs to be. Do you know if it matters, if you're just shoving a broomstick down there?
Got the steering stem out... the lock nut was only finger tight! Looks like the bike had the original bearings/grease. The steering was fairly ratchety from left to right, so I ordered some tapered roller bearings.
Race removal sucks at best... Be sure to tap it out evenly to avoid stretching the frame metal and making it oval instead of circular... Busted fingers and knuckles easy on that job... Double check your order of gasket, washer, bearing when reassembling with the tapered ones.. Not fun at all to get it back off the stem again.
Thanks man!! I am about to upload some pics on the FB page of some restored gauges. Sonreir on here made the faces for me and they turned out perfect... Feel free to like the FB page if you like.
...the cups didn't fit inside the frame. I took the steel rod and was able to tap out the races. Took about two minutes!
Apologies for the blurry pic, low-light w/a cell phone.
While I'm waiting for the shipment to come in, wheel bearing removal. One down,
one to go. This one is quite a bit more wedged in there. I tried with an old screwdriver (what I had on hand) and again with a thicker bolt, but it isn't budging. It'll have to wait for later, and the parts won't be here for a few days anyway.
Yes... A screwdriver and hammer... Grind a flat head down if you don't have a very thin one. Hit it lightly in between the two from one side then the other. Once it starts to go then you should be able to use 2 screwdrivers and wedge them in at 12/6 and 3/9 o'clock positions and twist and pry evenly. Its not easy but take your time and use a mounted vise if you have one. The tree itself is not super durable so avoid clamping it or hitting it. Don't worry about damaging the race. If it is dimpled and ruined no one can use it anyways.
Another tip is with the new stuff DO NOT hit it with anything metal. You will damage the new races and be angry at yourself... Go to Lowes or a hardware store of your liking and get a 2' section of 1 1/2" pvc pipe. Just regular schedule 40 or whatever. Should only be a couple bucks. Cut off about 6", use that to tap in the races into the frame. Use the longer piece to tap the new rollers onto the steering stem... Just be sure to triple check your order of parts on the stem before tapping it on. It will be near impossible to get it back off without damaging it. I think it only uses the seal and rollers, no washer on that one. Should be easy to remember... Use tons of grease, don't get pvc shavings into the grease, and only torque the stem nut to 26 lb ft. I think the manual calls for 40 or so. That's not correct for roller bearings, that too tight and they will fail.
This site uses cookies to help personalise content, tailor your experience and to keep you logged in if you register.
By continuing to use this site, you are consenting to our use of cookies.