PRIMEWORKS
New Member
So just to clarify, this build thread was started on another local forum. However, it lacked any traffic and interaction which is why I'm posting here! ") . The build started on May 20th 2016 and the following shows updates I've posted since then all in one. The next update I have will be a different post.
. The build started on May 20th 2016 and the following shows updates I've posted since then all in one. The next update I have will be a different post.
So I bought "Auxiliadora" (OWSSSS-E-LEE-A-DOR-DA) just before the start of this last winter with the help of my friend Chris because I wanted to start a proper project. While I really wanted a car (aka a Supra <3(I'll get her one day :'()) my student budget limited me and there were no other cars that I was really interested in. So I took a look at some bikes that might be good candidates for a cafe racer build because Chris's build really intrigued me and I'd always wanted a bike so I figured I'd give it a shot. That's when I came across Auxiliadora, a pretty much all original 1981 CB750K with under 6500 km on it. At first glance, she was ugly as ****, but I saw potential in her after seeing a couple of amazing looking builds so I picked her up.
To clarify the name, Auxiliadora is my mothers original name prior to her immigrating to Canada. She's the person who has made me the man I am today and plays a huge part in my life. I felt the name appropriate given how original it is. Plus she hates the fact that I got a bike and I thought it might make her hate it less. She still hates it. ;Dation:

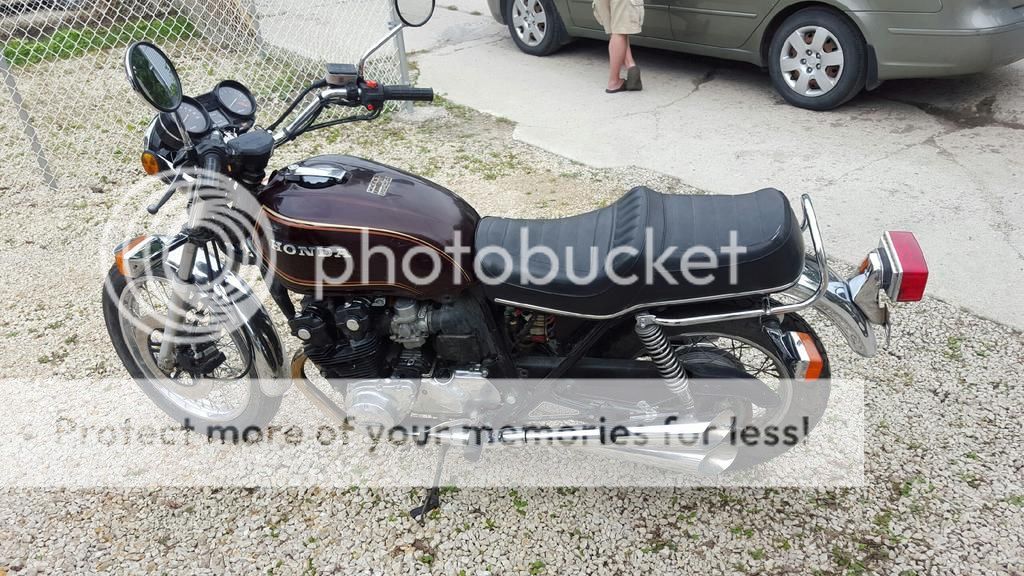
This is what she looked like the day I picked her up with Chris
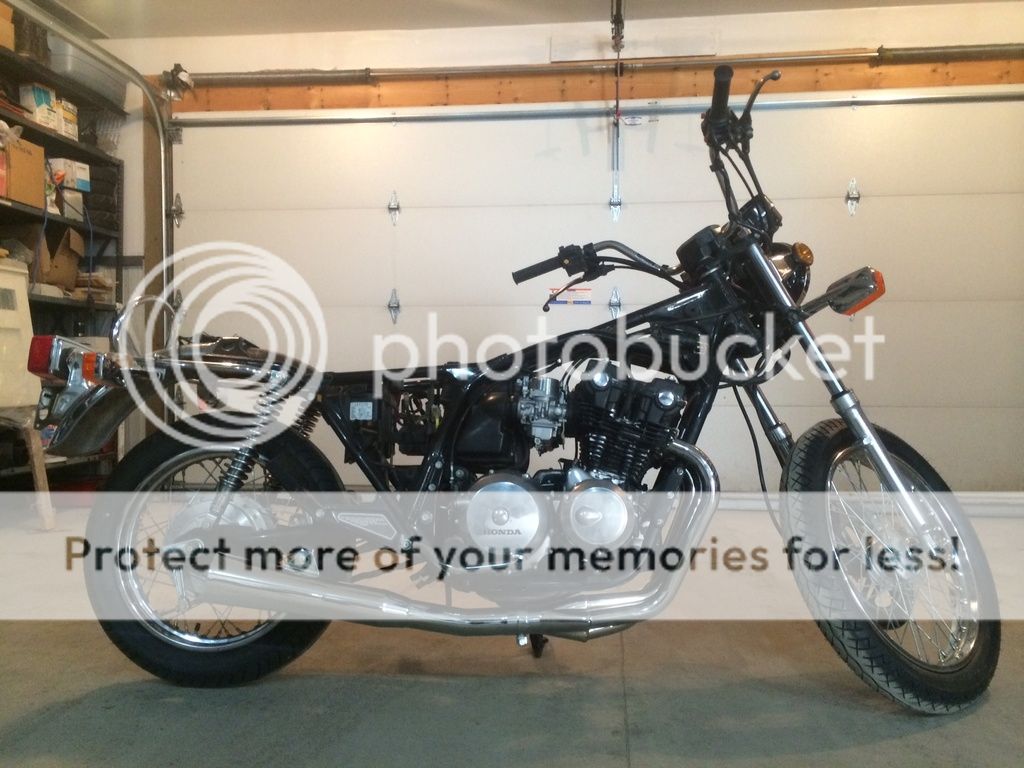
How the bike looks as of 05/20/16
01/03/17
03/30/17

04/24/2018

07/23/2018


She started but ran pretty poorly and consistently stalled out on Chris while he rode it home for me (didn't have my bike license at the time). The first time my parents saw the bike Chris and I were pushing it home from about a block and a half away because it stalled and wouldn't start back up :hurr: :lol:. After a bit more of an inspection when the bike got home I found she really needed some love. The tires were shot (thanks Chris for the front tire again <3), the carbs really needed a rebuild, the spark plugs were garbage, etc. So over the winter I ordered a number of parts and just recently really started to dig into the build process and am currently just attempting to get the bike started right now after sitting all winter.
Current Job List
Rebuild carbs
Replace spark plugs
Replace front and rear tires
Replace exhaust system
Oil change
Strip tank paint
Remove inner tank rust
Red Kote tank
Get the bike started
Tune Carbs/Get bike running properly
Safety
Insure
Remove ugly stock parts
Reseal/lower front forks
Upgrade electronics
Completely clean up wiring and tuck everything for a cleaner look
Rear frame loop
Seat cowl and pan
Custom seat
Rebuild engine
Powder coat frame
Strip chipped engine paint and refinish
Replace ugly air box
Install new parts
Parts List
NGK Iridium spark plugs
4" Chrome shorty mirror
MAC 4-1 exhaust
New Starter relay
New OEM tank Petcock
New OEM carb boots
Motogadget m-Blaze disc turn signals (polished)
POSH waffle grips
Nissin master cylinder 14mm
Polished aluminium throttle
JT Z1R X-ring chain
JT 46 tooth rear sprocket
JT 18 tooth front sprocket
Keiti license plate bracket
Chome clip ons
320mm rear shocks
Bridgestone Battlax BT-45 100/90-19 Front tire
Bridgestone Battlax BT-45 120/80-17 Rear tire
Motogadget M-unit V2
Motogadget Cable kit
Motogadget M-button V2
Motogadget 3-button M-switch x2 (polished)
Rear frame loop
Custom Dynamics TruFlex 2 LED Brake light
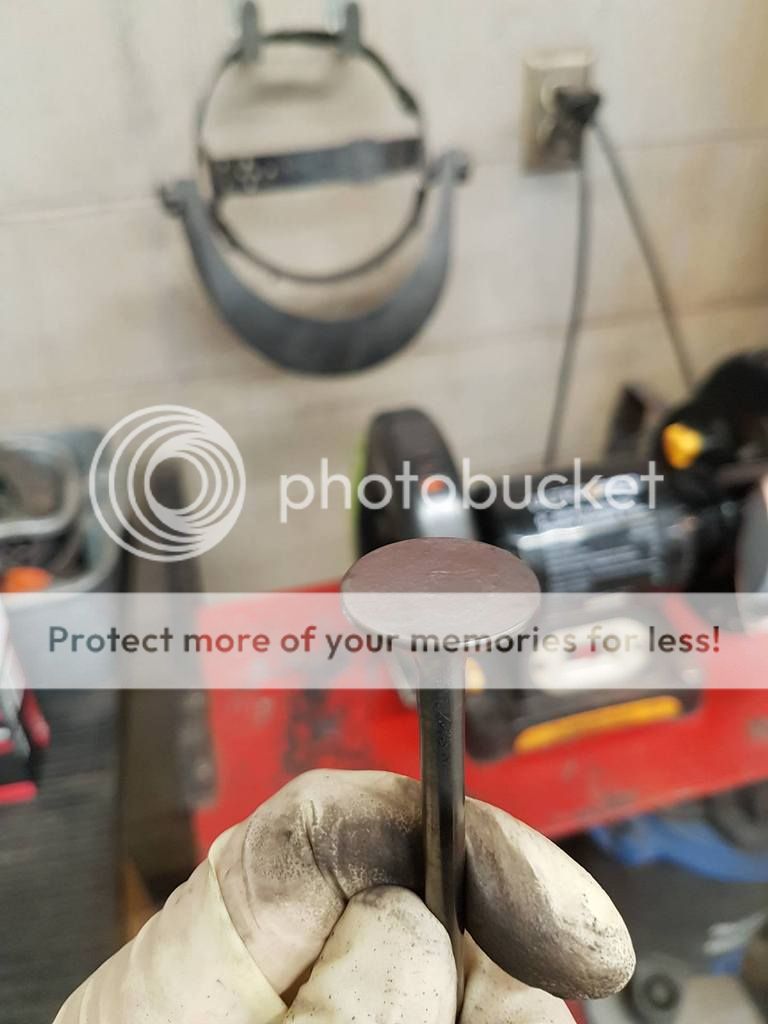
OEM piston rings
Braided front brake line
Motogadget M blaze pin turn signals (Black)
New cables (Push, Pull, Clutch, Choke)
Custom seat
CB750 K(Z) Rear sets
Parts to be ordered/Wish list
Oil Cooler
Engine/crash guard from F
New cleaner triple tree top
Aux/fog light
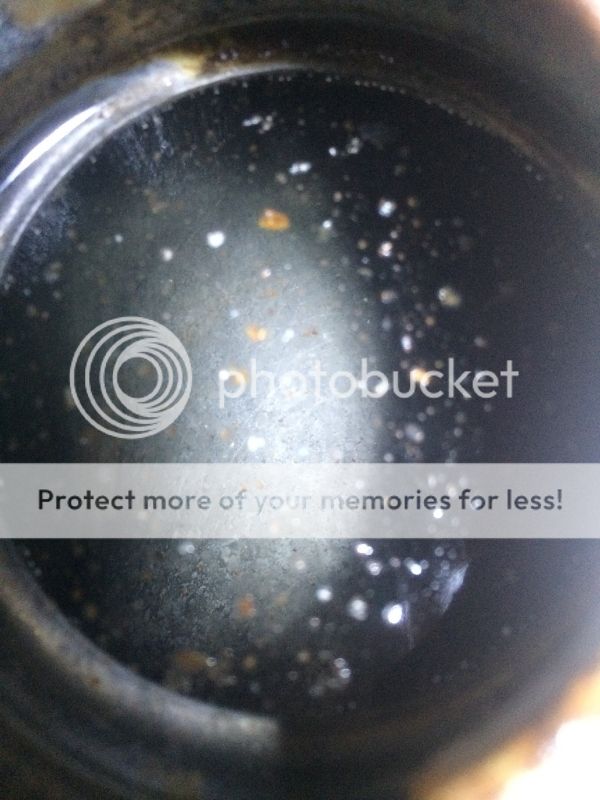
Paint stripped tank
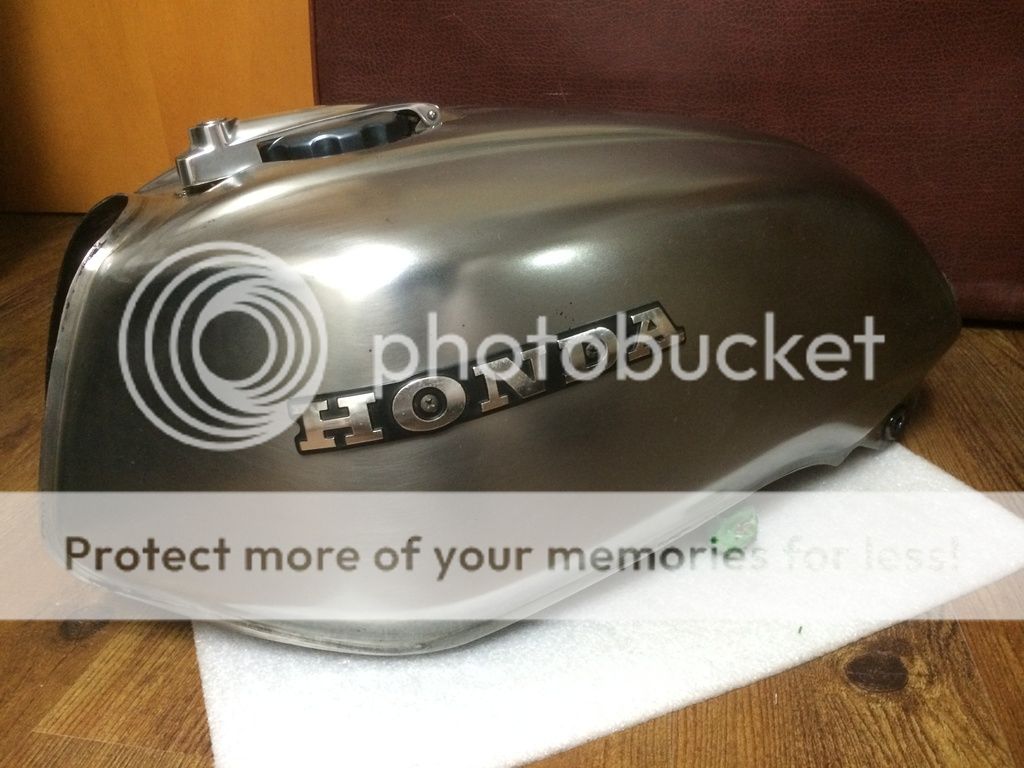
Picture of the tank filled with a ton of white vinegar. Let the tank sit for about a week. Flushed the tank. Then repeated the process. To say the least it worked great removing all the interior rust and and made it look like new!
Next update will be when the starter solenoid I ordered comes in and I attempt to start her up!
Just got my starter relay in the mail today so hoping after my exam today I can try and get the bike started! Will update later today granted I attempt to do so.
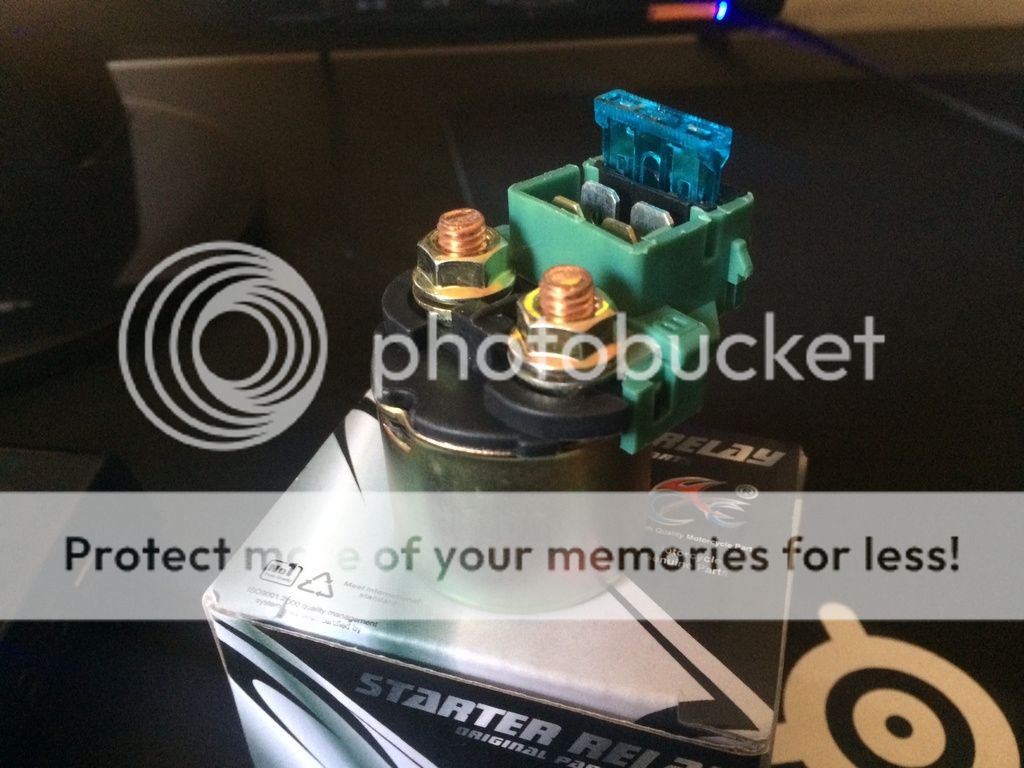
So I installed the new starter relay and she had power WOOO :banana:
BUT sadly, there is bad news. As I got the bike ready to start, I was putting gas into the tank annnd the petcock started to leak and just wouldn't stop regardless of the position I had it in. So needless to say I need a new petcock and boy was I surprised how much one was lmao. Regardless, ordered a new one and I'm just hoping it comes in next week.
So, I finally got my tank petcock in

Installed it on the tank with some thread sealing tape to ensure a leak wouldn't occur and I tried to start her up. Sadly I ran into a bit of a problem. The bike would turn but just wouldn't fire up. After some head scratching, I removed the tank and just poured in some gas to the fuel line directly and saw that the gas just didn't go anywhere and just sat in the line. So at this point I'm thinking I've messed up with routing the fuel lines properly. So I've posted on some CB750 forums and am waiting for some responses. Going to attempt to see if I can figure this situation out tomorrow hopefully cause at this point I'm dying to get this project "finished".
So, slight update. She started. But not for long lmao. Got some advice from some people on some CB750 forums to fill the bowls with some gas so I did that and she started right up. After letting it idle, I turned her on and off a couple times just to make sure it would then I decided to hook up my carb sync, turned her on, she idled high, then went steady, then died. Now she wont start back up and the bowls have gas in them still. I'm thinking I maybe flooded the engine but I'm not 100% sure. So I'm going to try and start her later and see what happens otherwise Ill have to try again tomorrow.
On the bright side... SHE STARTED
So no update regarding how the bike is running due to the fact that I don't currently have time to work on her with my summer class coming to an end and with work. However, DDC just had a sale go live today so I put in an order for some Motogadget goodies! Ordered the Motogadget M-unit, Motogadget M-button, Cable kit for the M-unit, and two 3-button polished/stainless steel M-switches!
Update time. So got the bike running a little better and starting more reliably with the help of some people from a cb750 forum.
The first thing I did was uninstall the exhaust due to an exhaust leak. Due to poor instructions from the exhaust manufacturer, a lack of information on the web, and my dumbass not taking pictures when I removed the original exhaust I had the metal exhaust flanges
 facing the wrong direction. So I flipped them around, reinstalled the exhaust, and the bike sound 10 times better then before (obviously).
The second thing I did was remove the vacuum operated fuel shutoff valve from the carbs.
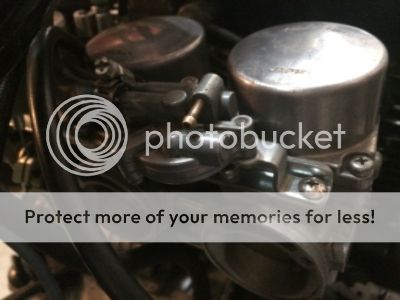 (The part on top of the carbs) This little bugger seems to cause people a ton of trouble regarding fuel delivery to the carbs. So I completely removed the valve and ran a fuel line directly to the carbs. The pros to doing this was that I got rid of a TON of tubing making the area a lot easier to work around and it made the area look a lot cleaner. The cons to doing this is now I have to make sure that I always turn off the fuel from the tank when the bike isn't running, and I have to purchase some vacuum caps to ensure there is no vacuum leaks from the carbs.
Currently the bike still stalls after a while and the rpms oddly go up when I disengage the choke but this is due to the vacuum leak. So Ill be picking up some vacuum plugs this week hopefully. I Also ordered some OEM carb boots because the ones currently installed on the bike seem dried up/cracked and when they are like that they tend to cause vacuum leaks as well.
Motogadget goodies came in :hurr: Still waiting on the carb boots before I can really give a further update on the bike.

So, got my new carb boots in a while ago but just didn't have the time to install them up until now. So I removed the old boots and compared them to the new ones. Turns out (or so I at least believe) the boots that were on the bike were wrong. When comparing the old boots to the new boots, the news boots were a lot longer in length making it easier for the carbs to be installed. I also attempted to seal off 2 vacuum lines on the carbs with a bolt and some silicon. Then started her and she seemed to run great! However the bike is still ****ing dying on its own. So I'm going to install the air box and attempt to tune the carbs to see if she'll stay on/run a bit better. Should have an update a little later today!
So I installed the air box, turned her on, and nothing has really changed. Still wont idle on it's own and I noticed that the bike seemed to sound funny so i decided to touch the pipes to make sure each cylinder was firing and go figure that the pipe for cylinder #2 wasn't that hot yet all the other pipes were. So at this point I'm gonna have to do some reading and figure out what the **** is going on. #oldbikeproblem
OK it's been a while I think it's time for an update lol.
Since last writing in this thread I believe I was having trouble with getting the bike to run properly due to some carb issues. Since then quite a bit has been figured out/done.
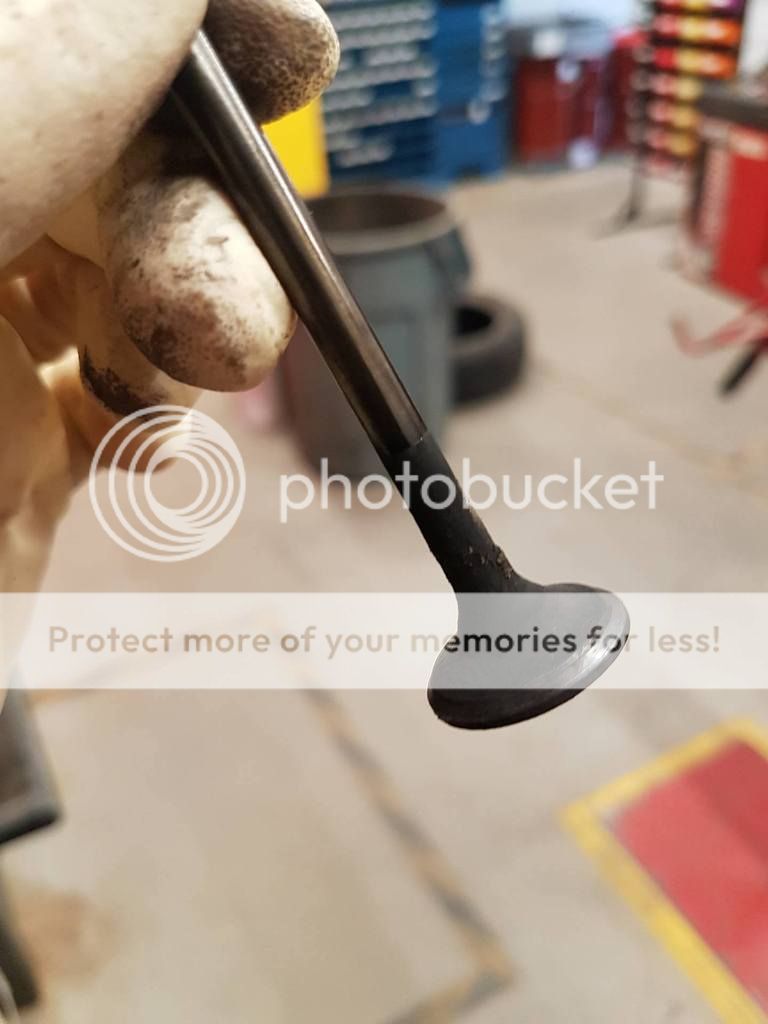
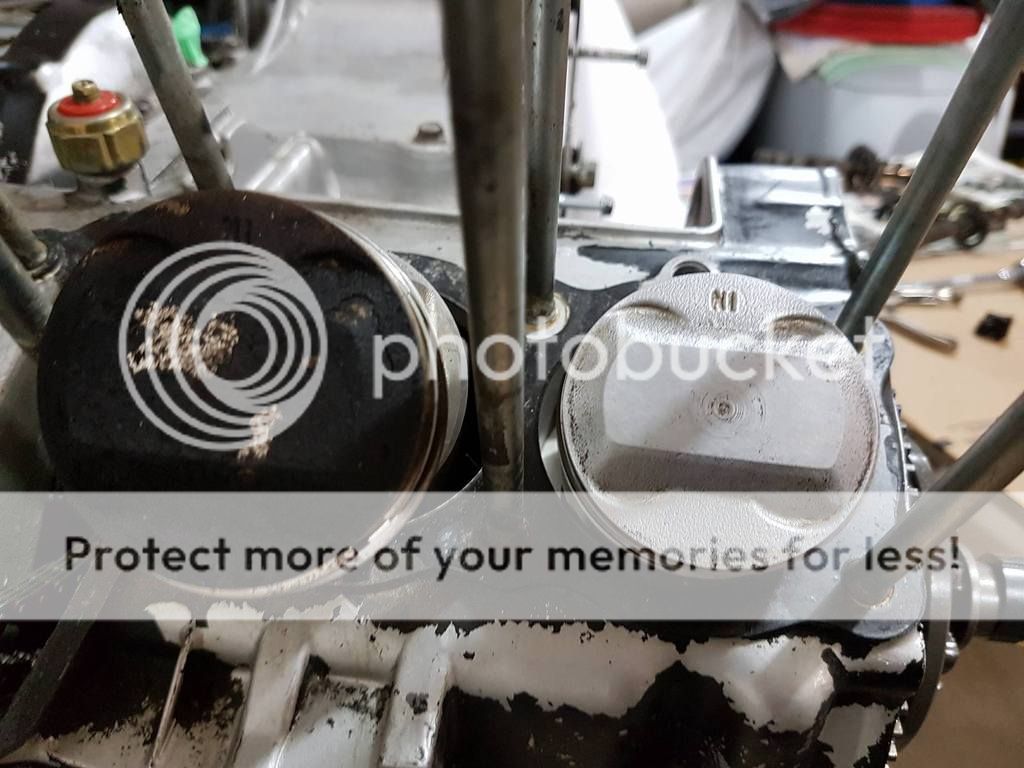
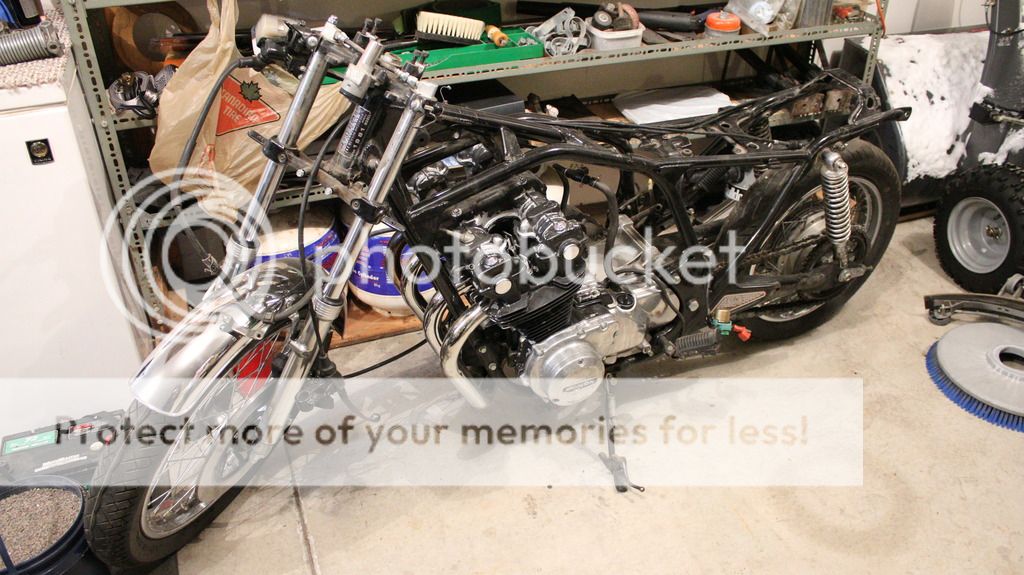
The first thing I ended up doing since the last post was replace the bike with some cheaper plugs due to the iridum plugs I had always fowling due to tuning the carbs to run properly and my lack of experience lol. After doing so I actually manged to get the bike to run properly and found that I was letting the bike run WAY to rich causing the fowling of the plugs. Once the tuning was figured out the bike ran like a dream. So, before I ran into anymore issues I scheduled it to get a safety at Capitol Motorsports on St. Anne's. During the safety it failed due to the throttle tube not operating properly (felt as if there was a bunch of dirt/sand in it causing it not to turn smoothly). Luckily I had ordered a new throttle tube due to that exact reason and the guys down at Capitol were cool enough to let me work on the bike in the back quickly, get the part replaced, and then I was golden and passed the safety. Sadly I didn't stay golden for to long as a day or two later when taking the bike for a little ride up and down my back lane one of the carb floats decided to stick and when that happens fuel will pour out of that carb constantly, both being a waste of money/safety concern. Not wanting to deal with the problem right away I decided that would be the point where I would start to completely disassemble the bike to get it ready for its final form.
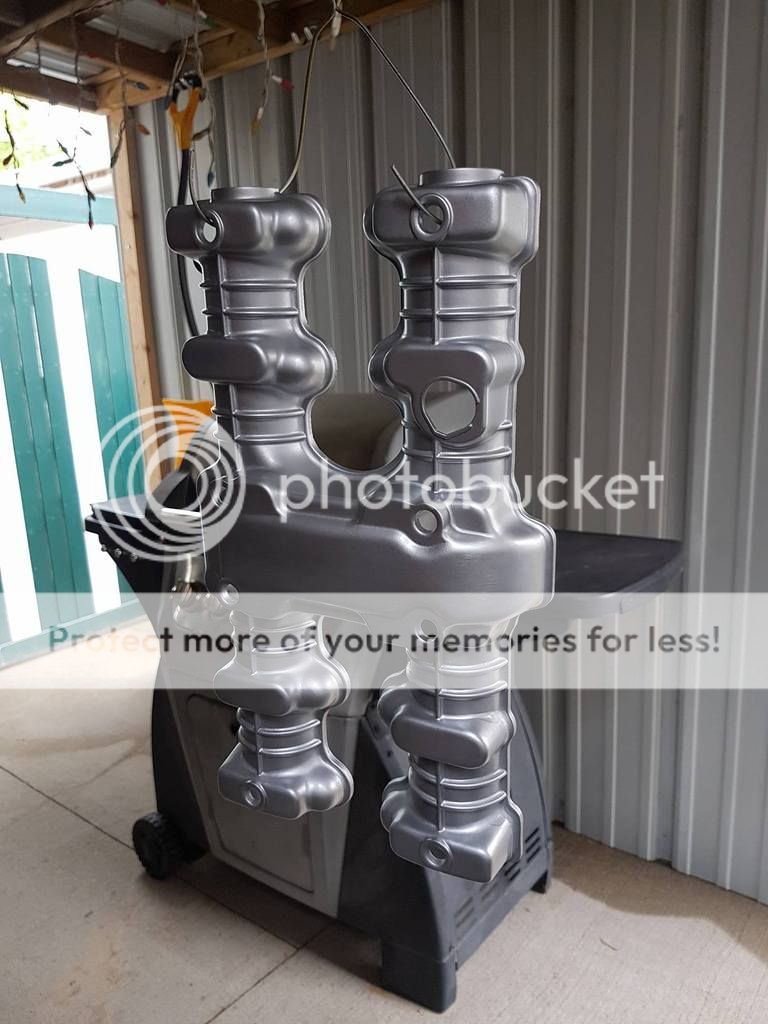
And that's basically where the progress with the bike has since been left. I got the bike down to its bare frame almost being before the winter came and I've since neglected to work on it cause I don't want to freeze in my garage. At this point I want to insure it for the shortest amount of time possible so I can actually have plates for it and make it easier to insure in the summer once it's done. The next thing on the job list once the weather starts to warm up is to pull the engine, rebuild it (hopefully, otherwise just replace some gaskets), Get the frame stripped of paint, modify the frame a little by adding the frame loop (which I ended up already getting) and shaving some stuff off to make it look a bit cleaner/make it easier for me to tuck wiring, get a seat cowl/pan fabricated (which I'm still looking for someone to do. As of right now Speed factor might be doing it), Powder coat the frame, put it all back together, and she'll hopefully be done. There are a couple of other small things that need to be ordered but other then that she should be done this summer as long as I have the spare money to do so.
In the case I do decide to work on the bike (which I probably will) expect more updates soon! Until then I'll leave you with this picture of the almost bare naked lady.
Update
:

Alright its been a while sue me. Since I last posted a couple of things have happened.
I finally got the bike a plate which was waaaaaaaaaay harder then it needed to be. To keep it brief, I attempted to get the bike insured roughly 4 times, constantly got turned away because the bike hadn't been insured for years and the clerks didn't seem to know what to do so they just kept turning me away. Just when i was about to
 I remembered my friend Chris worked for HUB at one point. So I explained the situation to him and he came down to a local hub with me to basically walk the clerk through what to do. Low and behold once that happened I got my plates. I don't know why it was a pain but it just was. Regardless I got a plate.
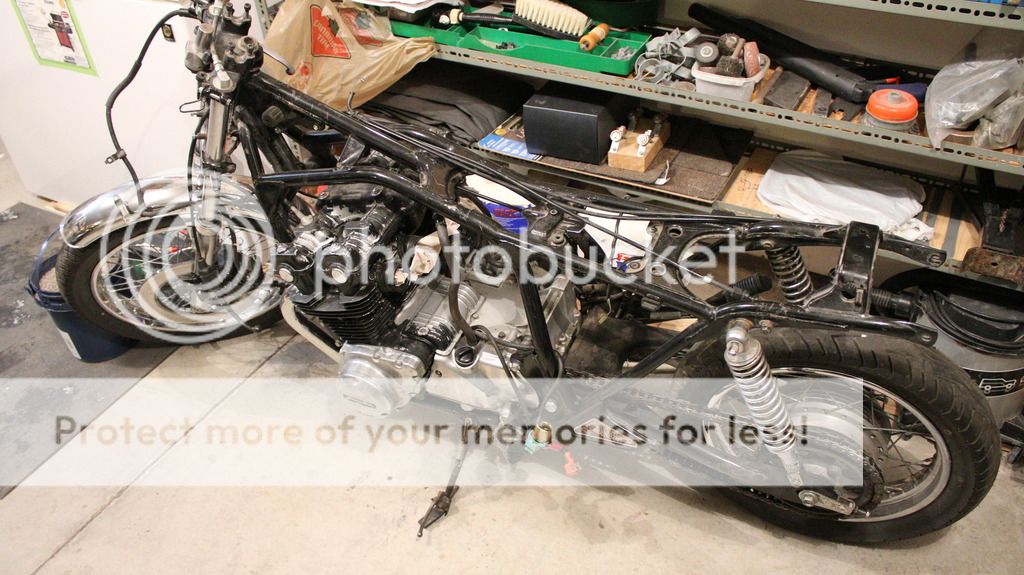
Today I decided to do the final tear down and completely strip the bike down to the frame. So as of right now the bike looks like this
The current things on the to do list are:
- Cut rear frame
- Fabricate rear cowl from sheet metal (My friend Matt who is in engineering with me at the U of M is going to be helping me fab this :banana: )
- Weld on rear loop
- Buy Motogadget M blaze pin's for rear turn signals
- Buy a LED strip to act as my stop light that will be integrated into the rear cowl (Look at picture below for reference)
- Buy any small bits like bearings or bushing in the case they are needed once I fully inspect everything
- Get seat made (I'm either going with a leather or alcantara)
- Powder coat the frame and swing arm
- Install all the parts
- Rideeeeeeeeeeeeeeeeeeeeeeeeeeeeee
- Whatever I missed lol

Motivation
https://youtu.be/IMDkNtRdPDc
I'm determined to finish this bish.

Tomorrow I'll be bringing my frame over to my friend Matt's house for us to start modifying the frame (fab cowl and weld loop) and shaving off any unnecessary bit's. Unlikely that everything is going to be done in one day however. In the mean time I figured I'd work on the wheels just to get some things out of the way.
The first thing I wanted to do was make sure that the wheel bearings were still in good condition, which thankfully they were. So I decided Id clean the wheels up as they were full of old dirt/grease and prep them for some polishing (I didn't end up polishing them cause I didn't realize how big of a pain it was actually going to be. Ill polish the wheels to a mirror finish when the bike is in it's final assembly.)
Note: I'm trying to make the journal more picture heavy but some times forget to take my phone out before I get to work, soooooo you'll only be seeing pictures of the rear wheel as I forgot to take pictures of the front wheel but it was the same process. Rinse, degrease, clean with mineral spirits/ use brake clean and clean small sports by hand with a cloth.
BEFORE


Note the disgusting grease ^^^^^^... Don't worry i repacked it with new grease :mo:
AFTER[/b][/u]


Till next time

Oh hello
So since last posting quite a lot of work has been done. My friend Matt and myself went about installing the rear frame loop and have fabricated the cowl :banana: . The process of installing the loop and fabricating the cowl was a first for both of us and definitely wasn't an easy one, but the final result was exactly what I was looking for. Hand made, hand crafted components made from raw material. I'm not going to be posting any pictures regarding the frame work now as we still aren't done yet but once we are I'll make sure to post about it.
(You after reading that last line)

What I'm here to post about is what else I've done. Which isn't much because I've just come back from a trip to Orlando ( :'( GIVE ME BACK THAT WARM WEATHER :'( ). But I've basically gone about completely rebuilding/refreshing the front forks.
Front Forks

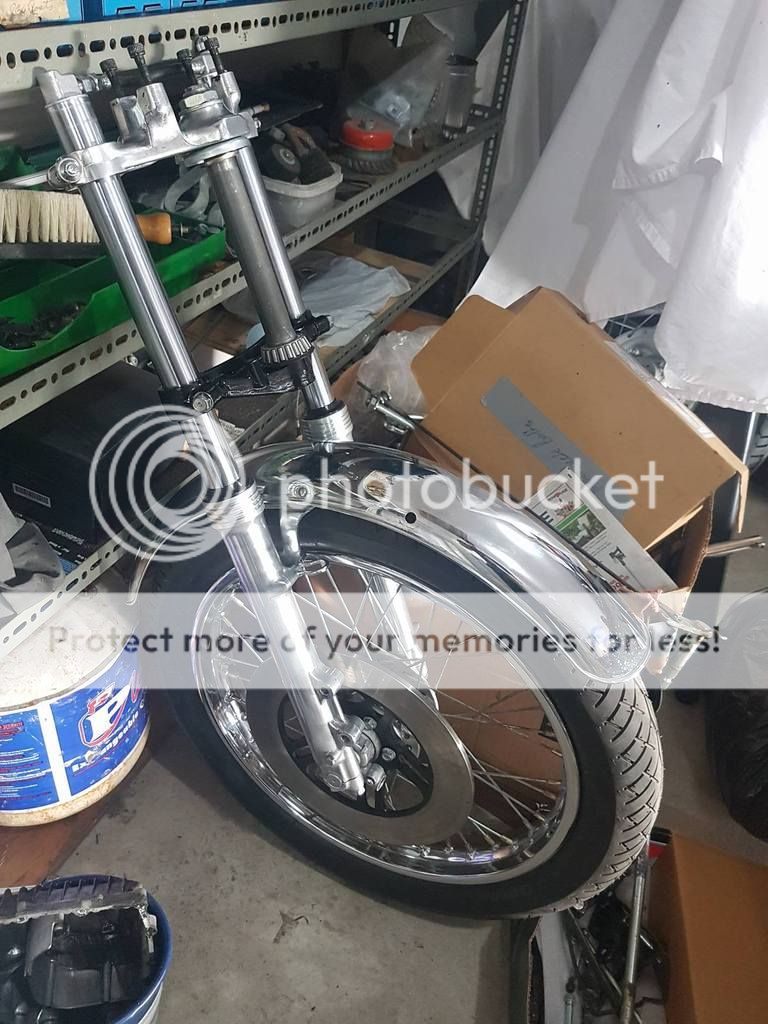
Forks before being lowered

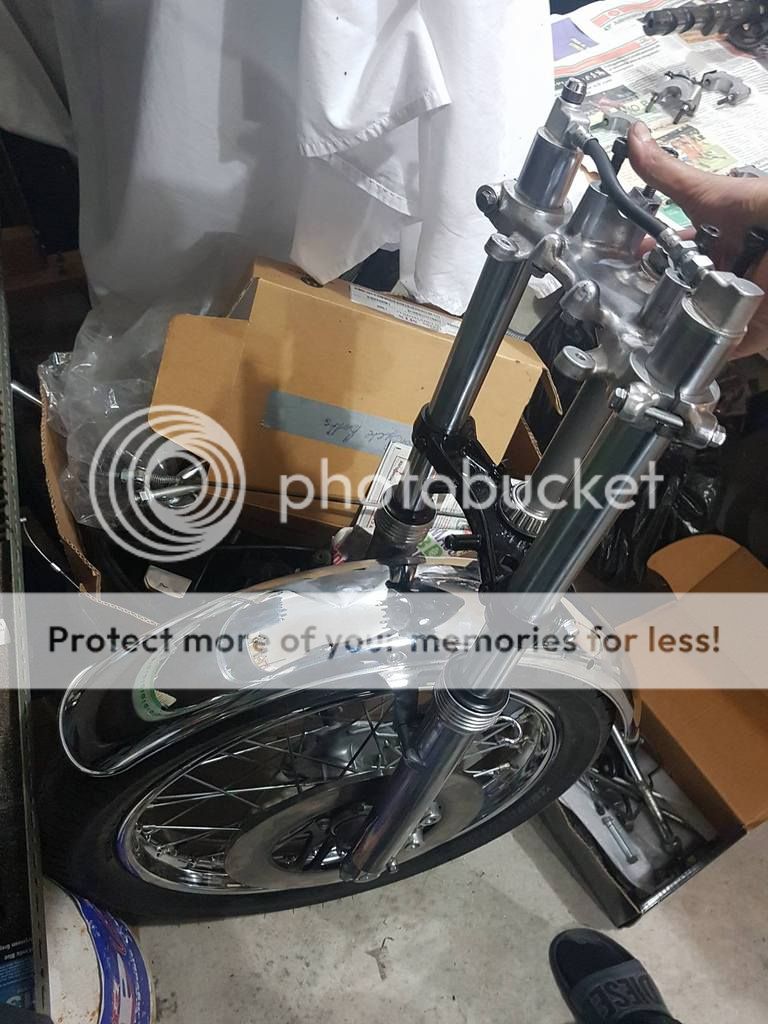
Forks after being lowered
Might be hard to see the difference in the pictures but I lowered the forks 3 inch's. Some might say that's a lot but this bike is going to be more form oriented and be more of a cruiser then anything. If I wanted a performance oriented bike I would just get an S1000RR or something. Lowering the forks in general was pretty easy though.
The process was essentially as follows:
1. Drain fork oil
2. Remove bolt at the bottom of each fork
3. Remove dust seal at top of fork housing
4. Remove locking clip with washer
5. Using force, slide bottom housing of forks like a hammer
6. TADAAAAA Forks are apart
7. Undo top part of forks to release spring
8. Cut spring to remove length that you want (In my case 3 inch's)
9. Add a spacer of removed length to prevent bottoming out
10. Replace anything that could wear aka new seals
11. reassemble, add new oil (Recommended oil for this bike was 10W-40 but i decided to go with a straight 30 weight oil as it's stiffer and will help with preventing any bottoming out.)
The following pictures show the process roughly.

Dirty old oil

One of the forks had a rusted/worn bolt on it that was stripping and I really didn't want to reinstall it so I ordered a new one. (New on left, Old on right)

Dust seal, locking clip, and washer


Hammer slide action to reveal the good stuff aka the fork seal

Forks completely apart


Spacers were made from a 3/4'' piping that were ground and wire brushed on a bench grinder

Cut springs. I made sure to grind down and make the cut end of the spring as smooth as possible on the bench grinder

Forks with spacers
Then put it all back together.
Last thing needed to be done to the forks in polishing, but that will be done on final assembly of the bike
Till next time m8's
I'M BAAAAAAAAAAAAAAAAAACK

Here's some music to play while you read. Recently discovered Logic after a viral video of him waking his wife up to couple of musicians playing the Curb Your Enthusiasm theme song.
https://www.youtube.com/watch?v=O601PVTd0g8
So not much of an update regarding anything major (aka the frame or engine) but those will be coming soon hopefully as I don't have anything else to be working on after this update.
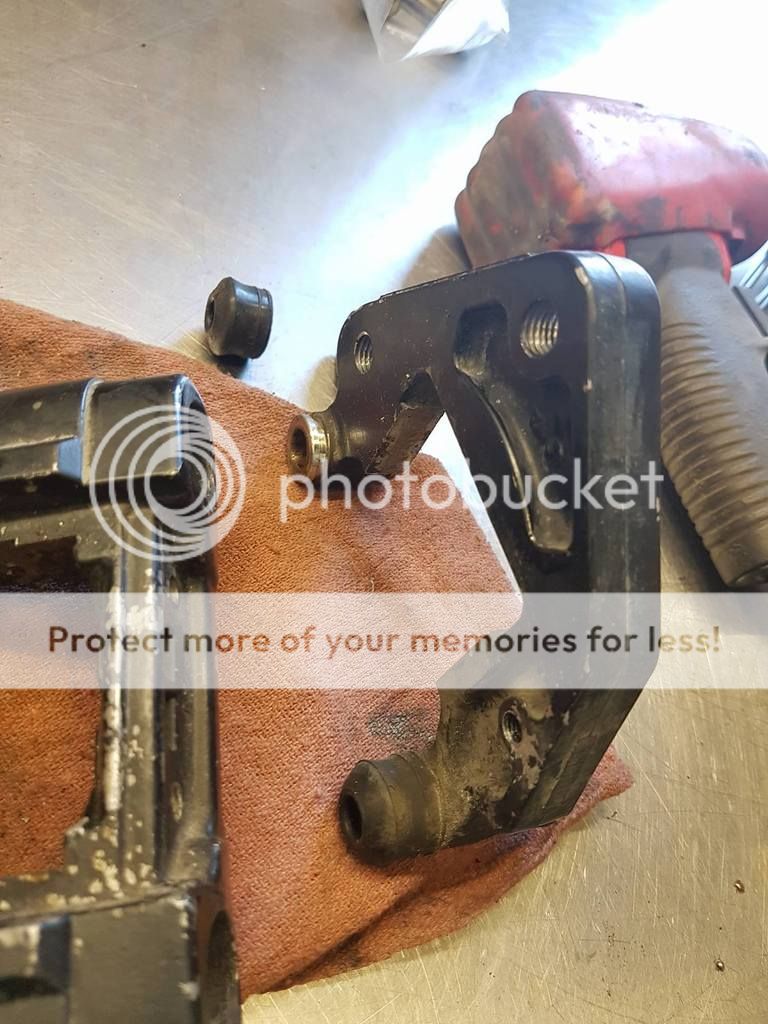
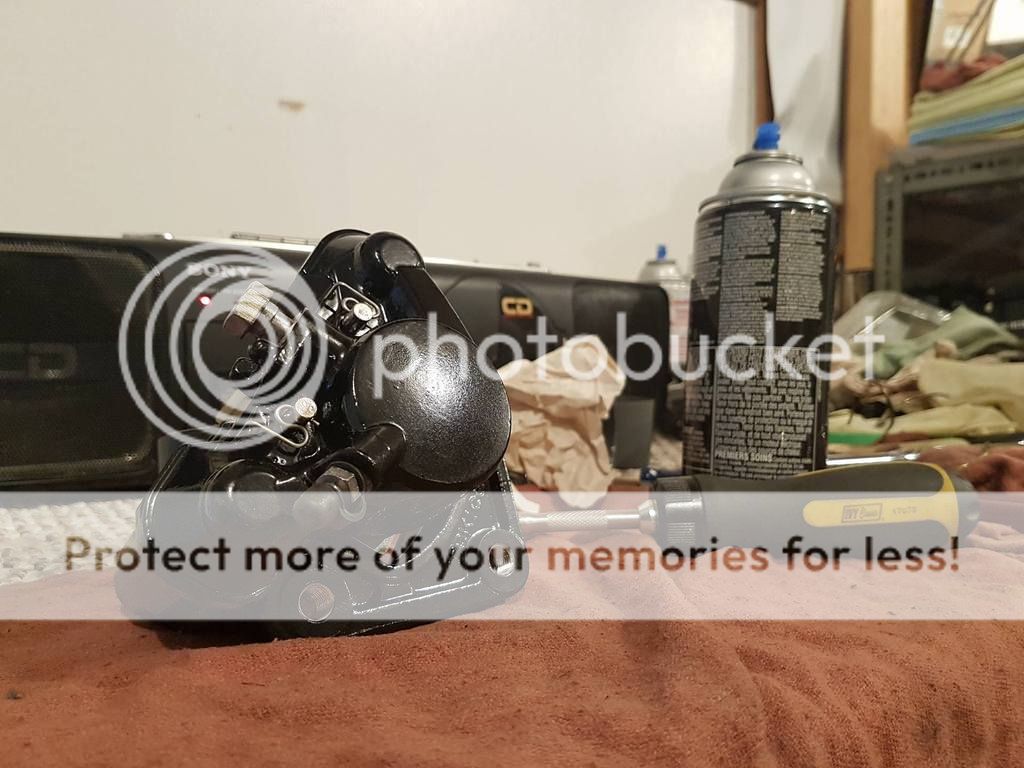
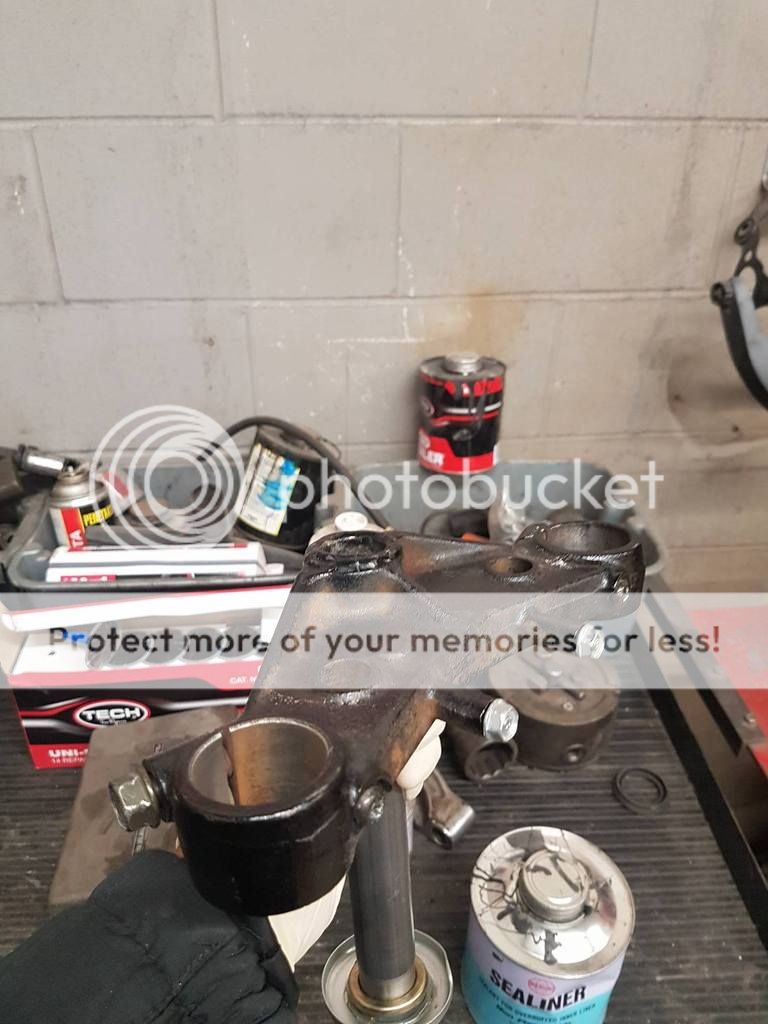
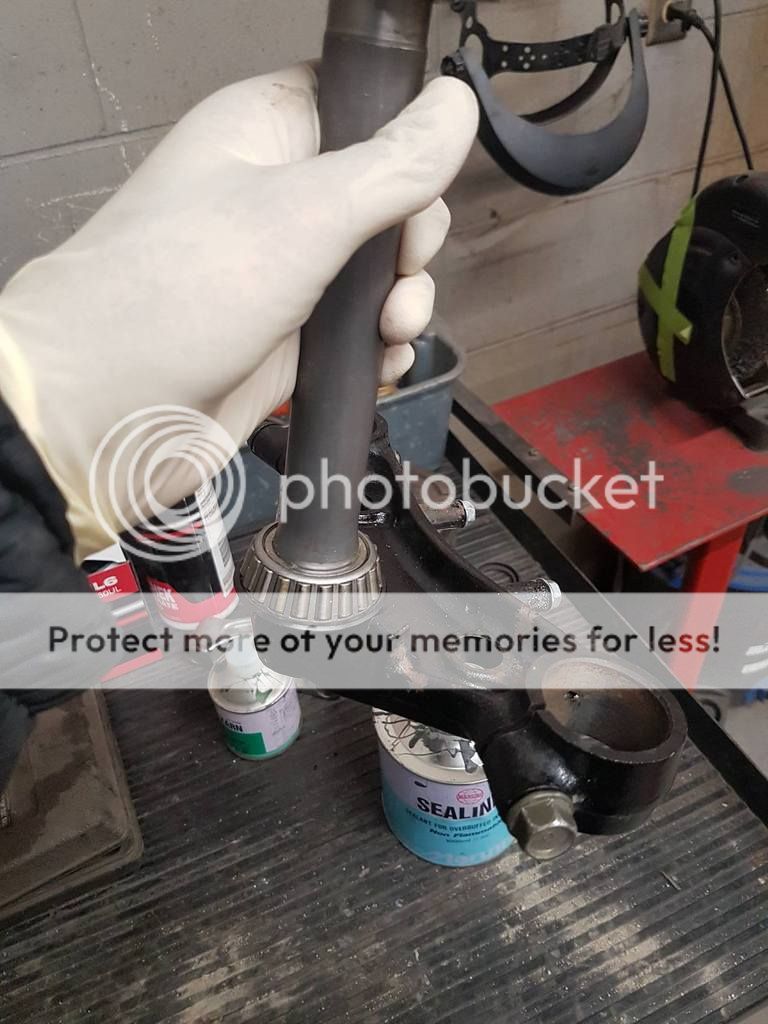
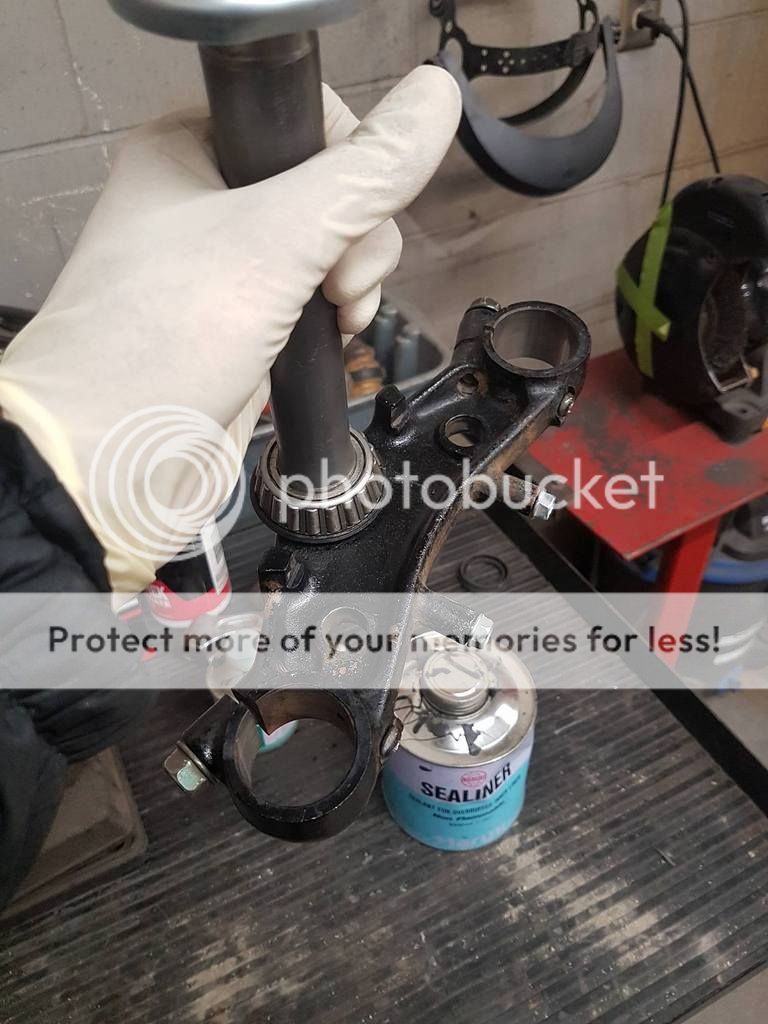
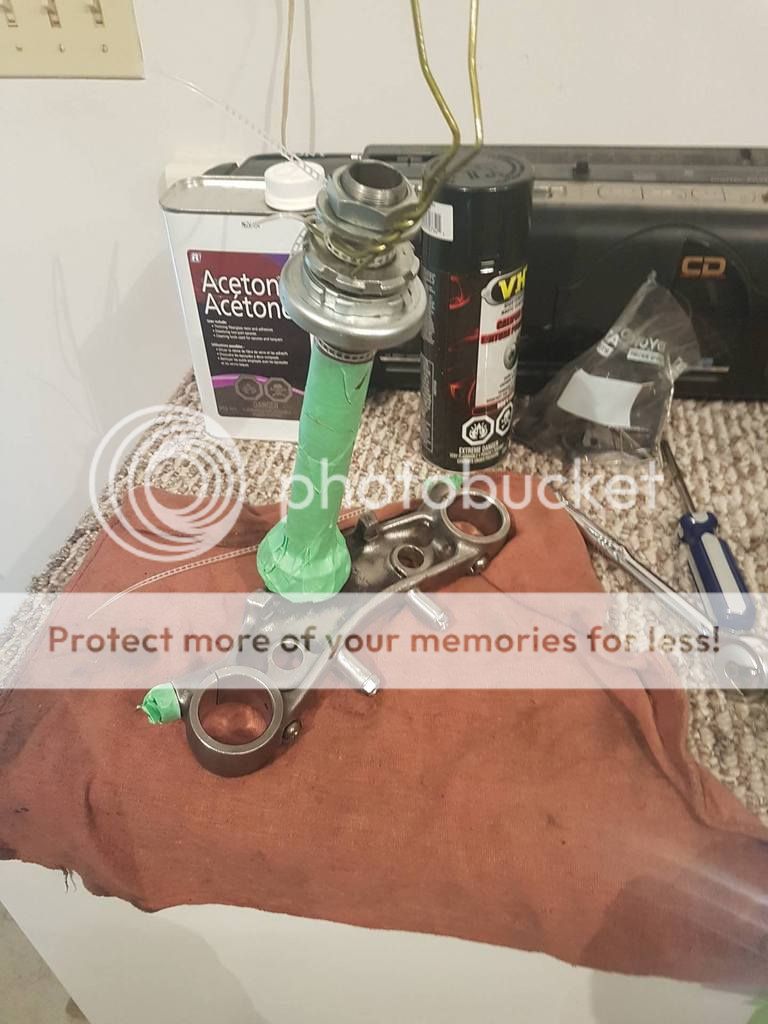
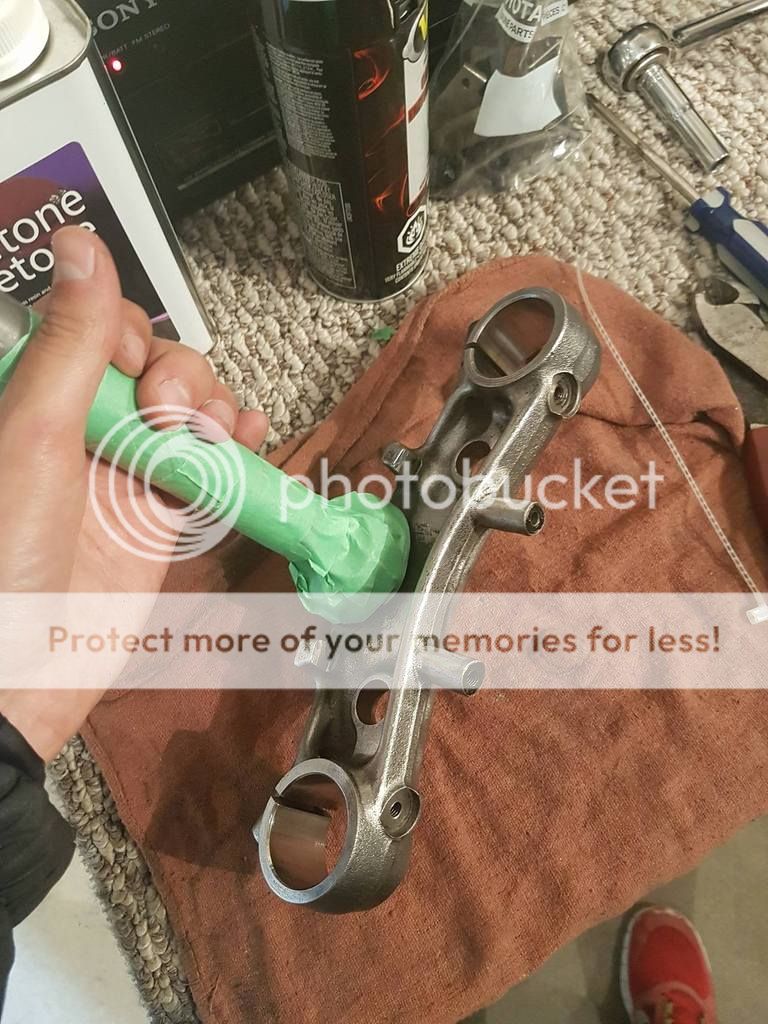
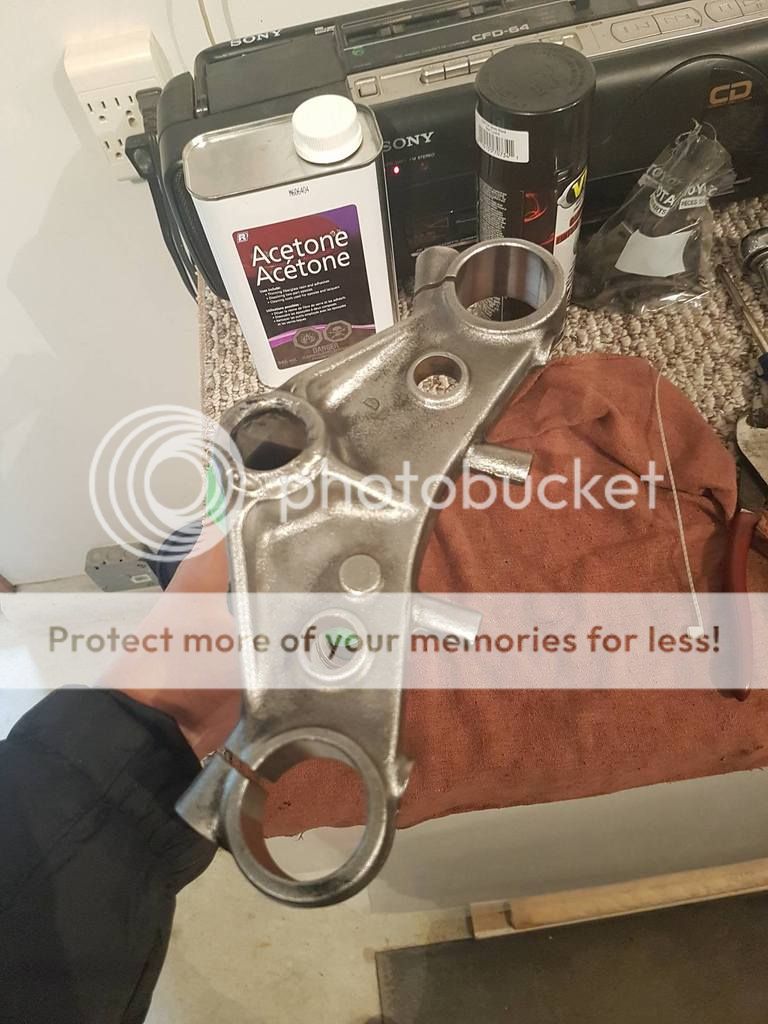
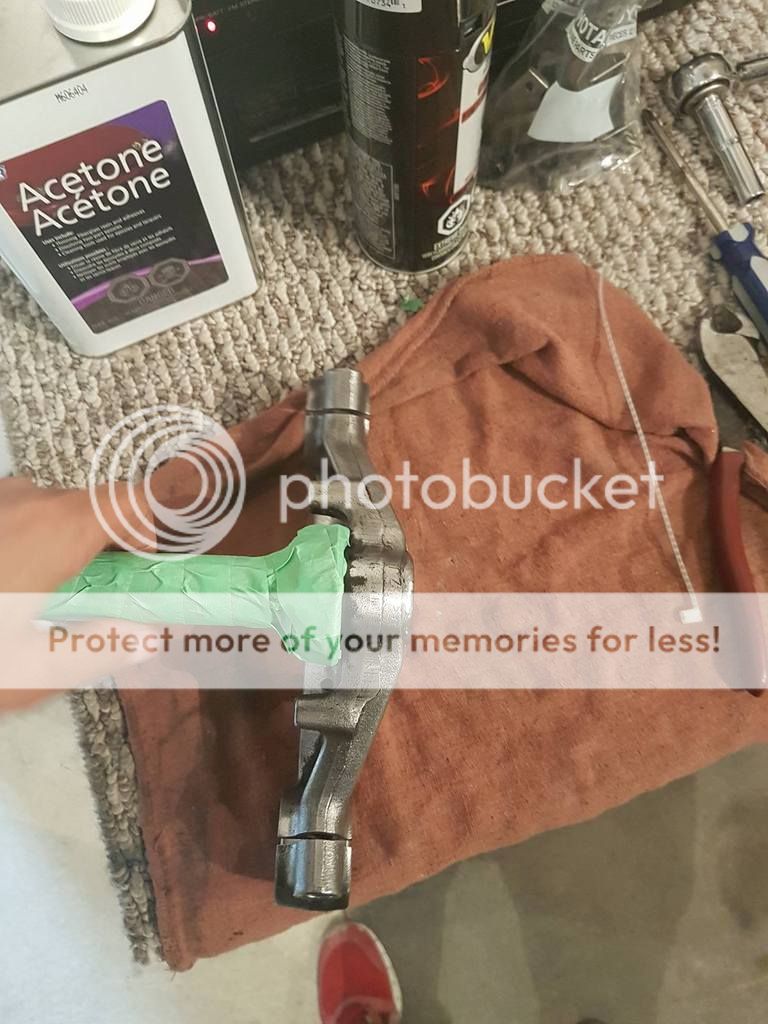
So what the hell am I here to talk about? Refreshing/rebuilding/repainting the front brake caliper and lower portion of the triple tree. But I'm not going to bother typing anymore just go ahead and look.
Brake Caliper
Basic run down of what I did
1. Used a bench grinder with a wire wheel to remove all the paint and got into the tight spots with a drill bit wire wheel
2. Cleaned the bare metal with acetone
3. Painted using high temp black paint
4. Cleared with high temp paint
5. Heat treated the paint by baking it in the oven at 200 F for an hour
6. Rebuilt/greased

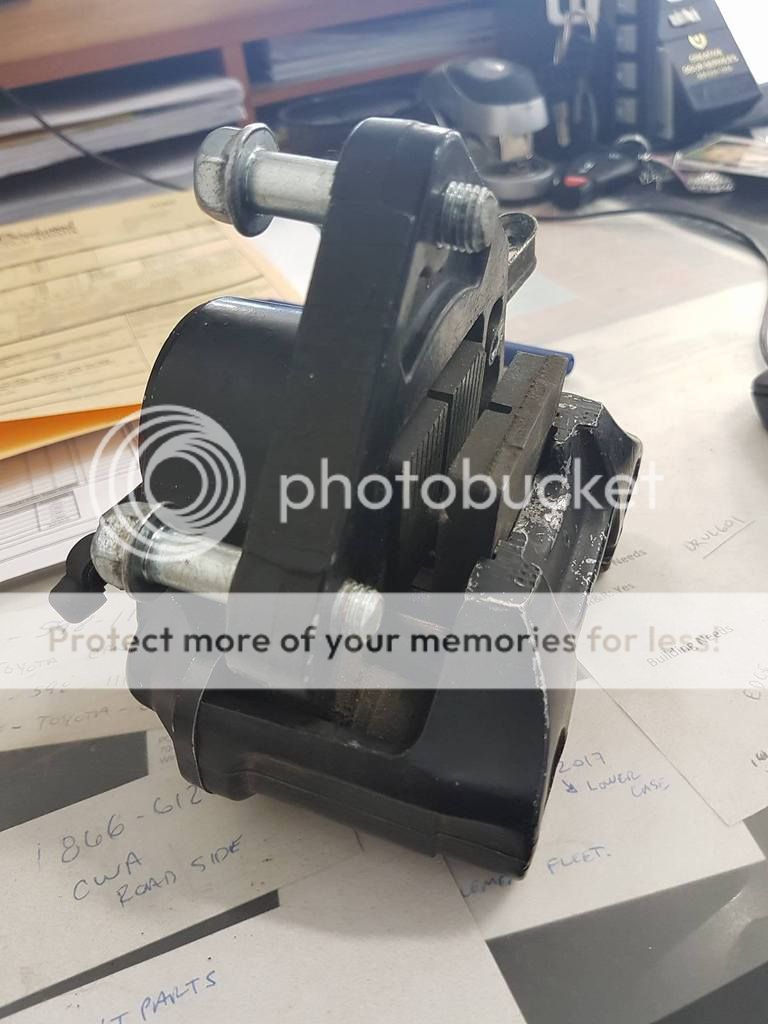
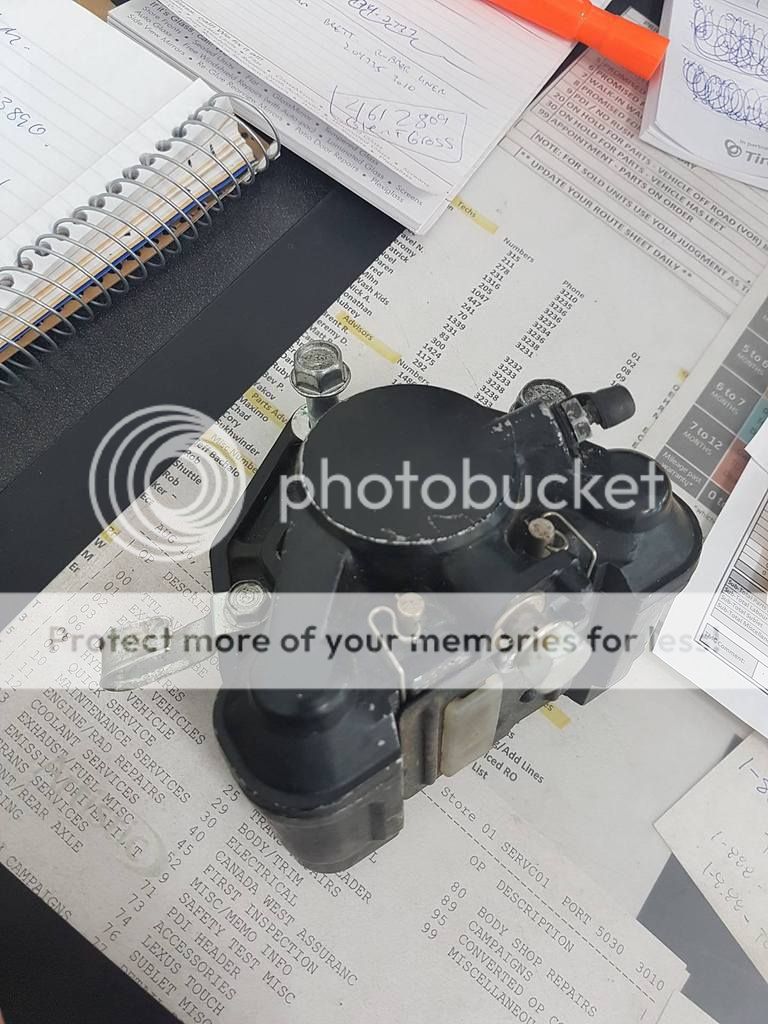
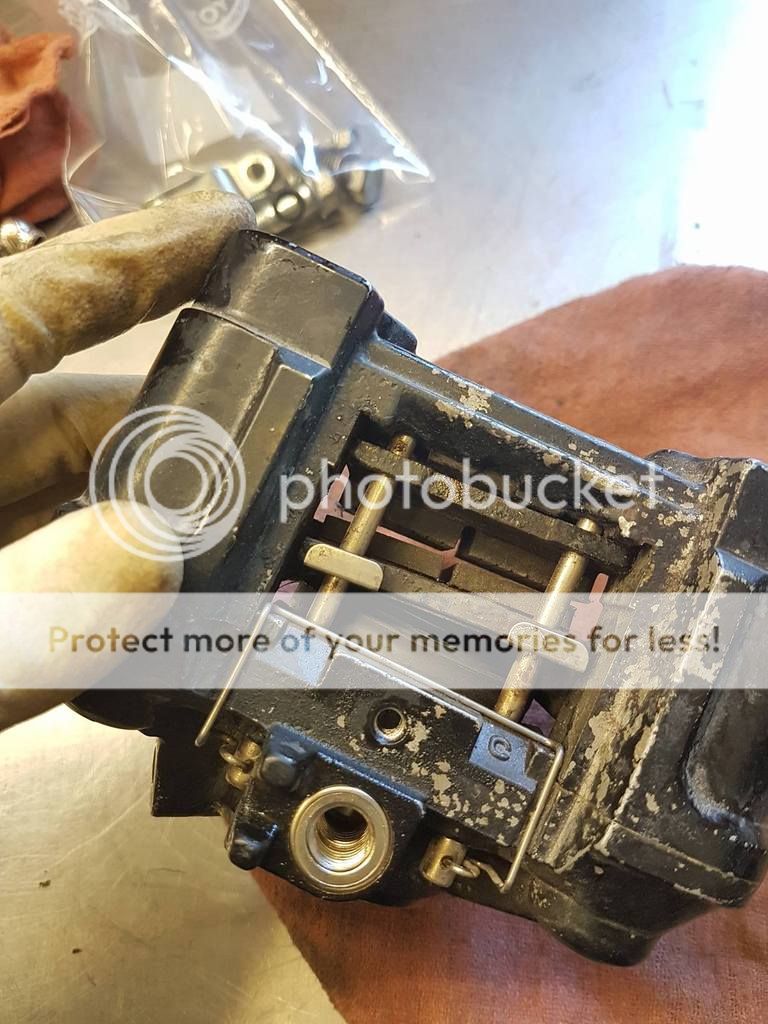
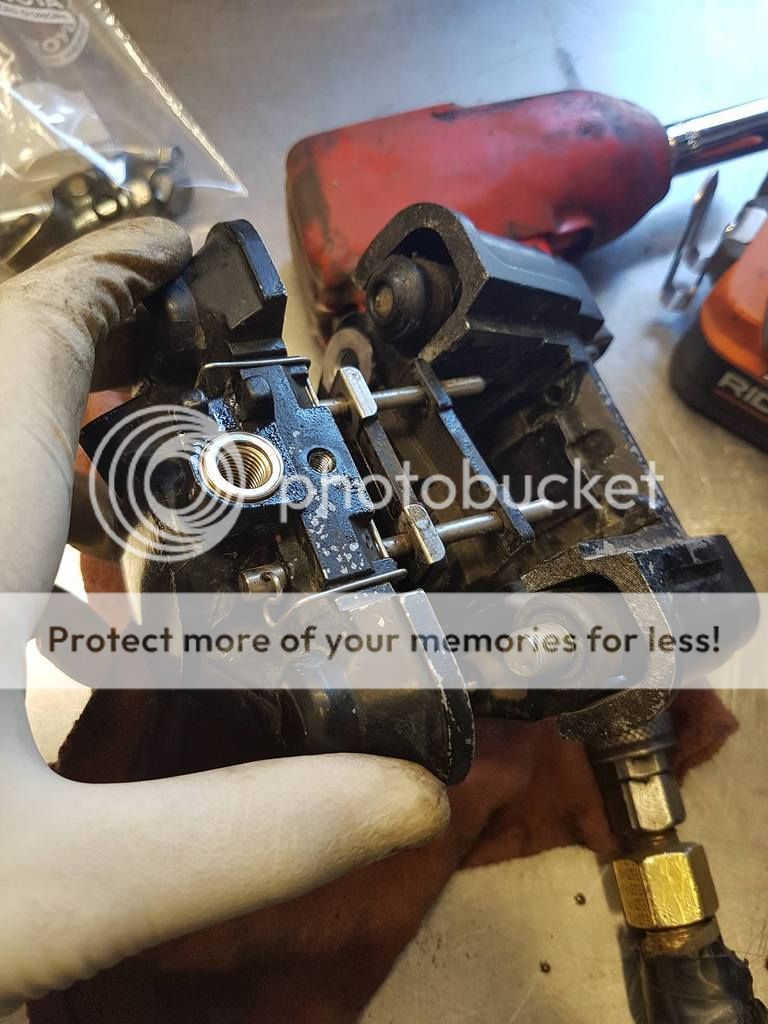
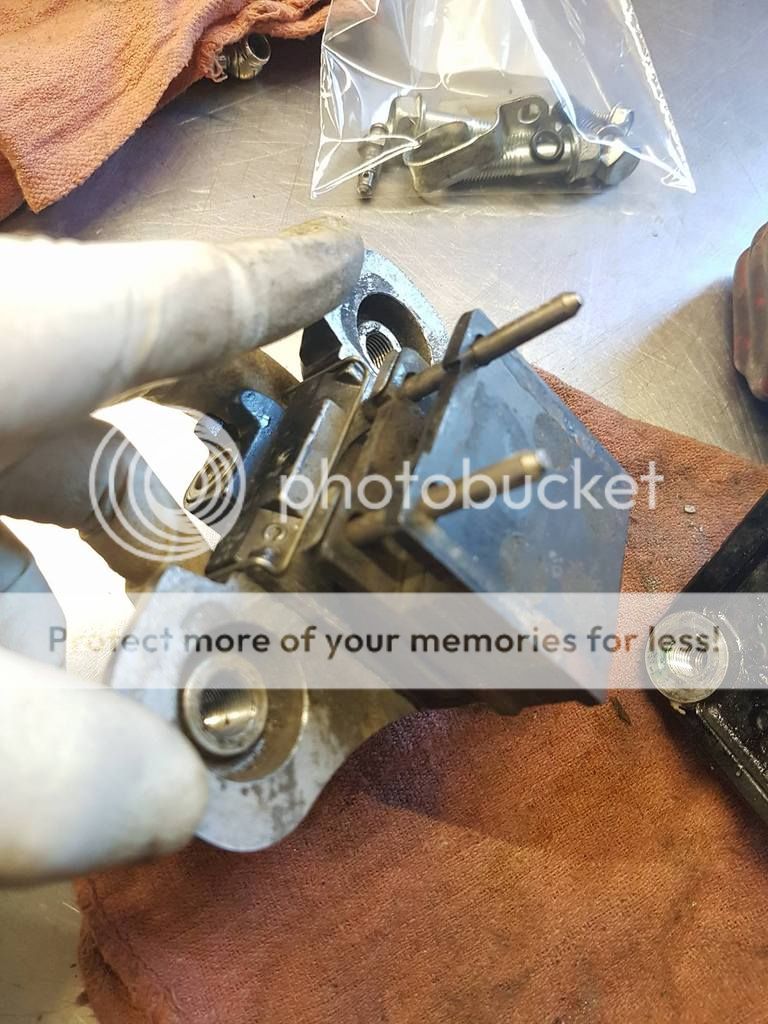
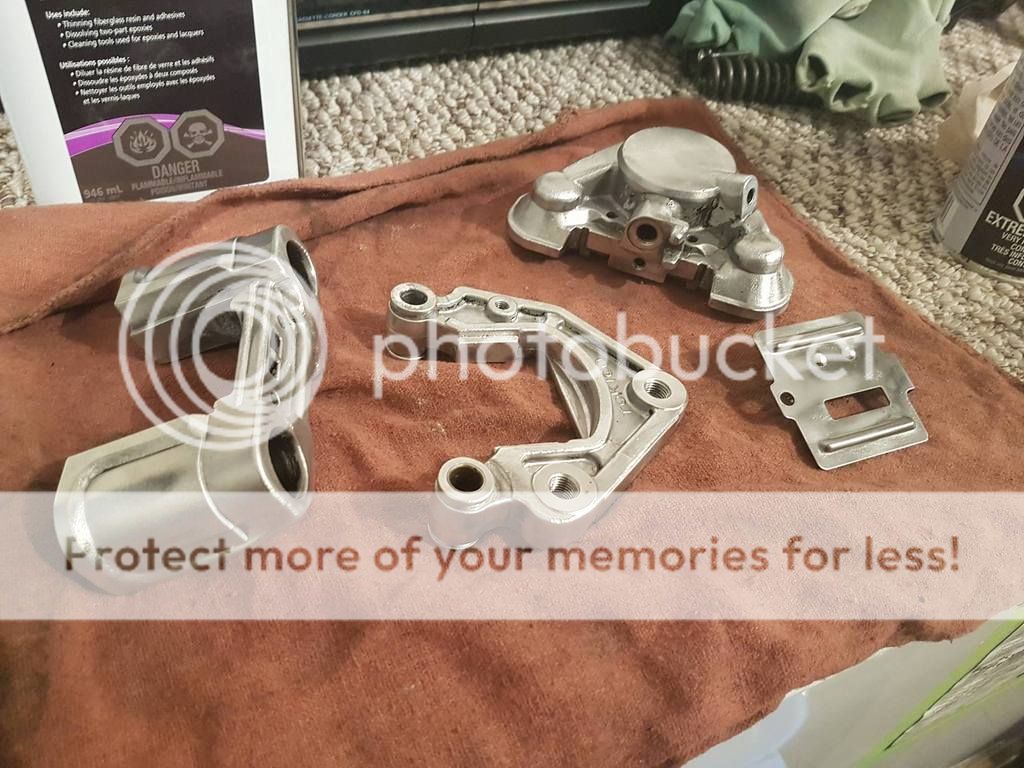
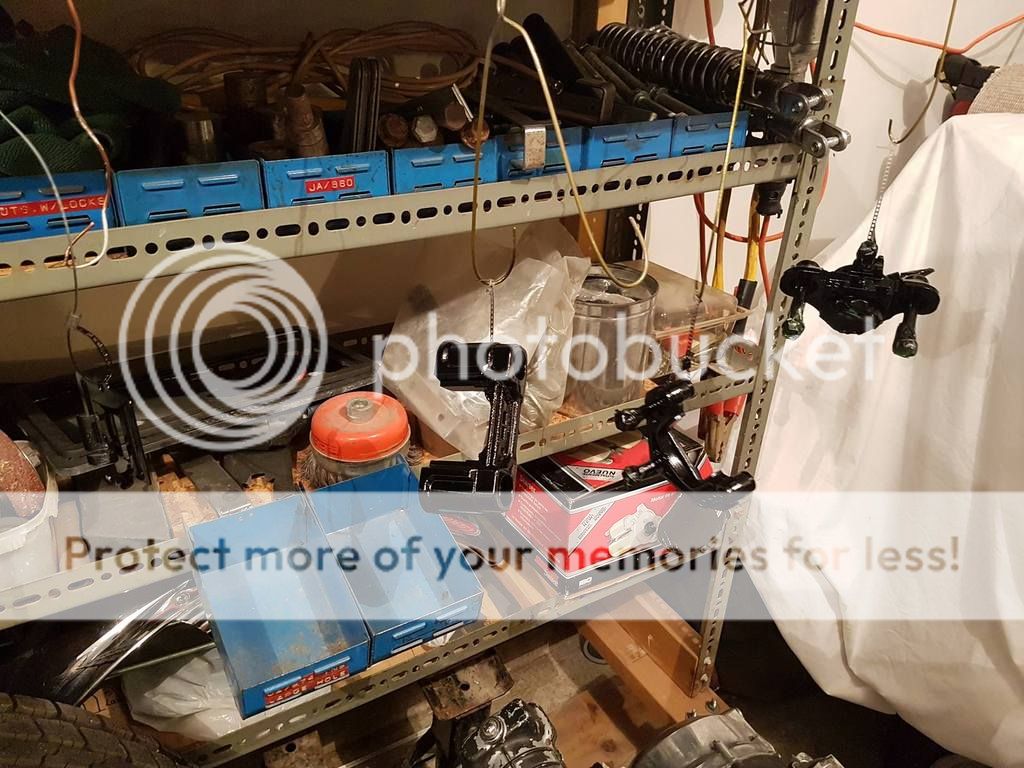
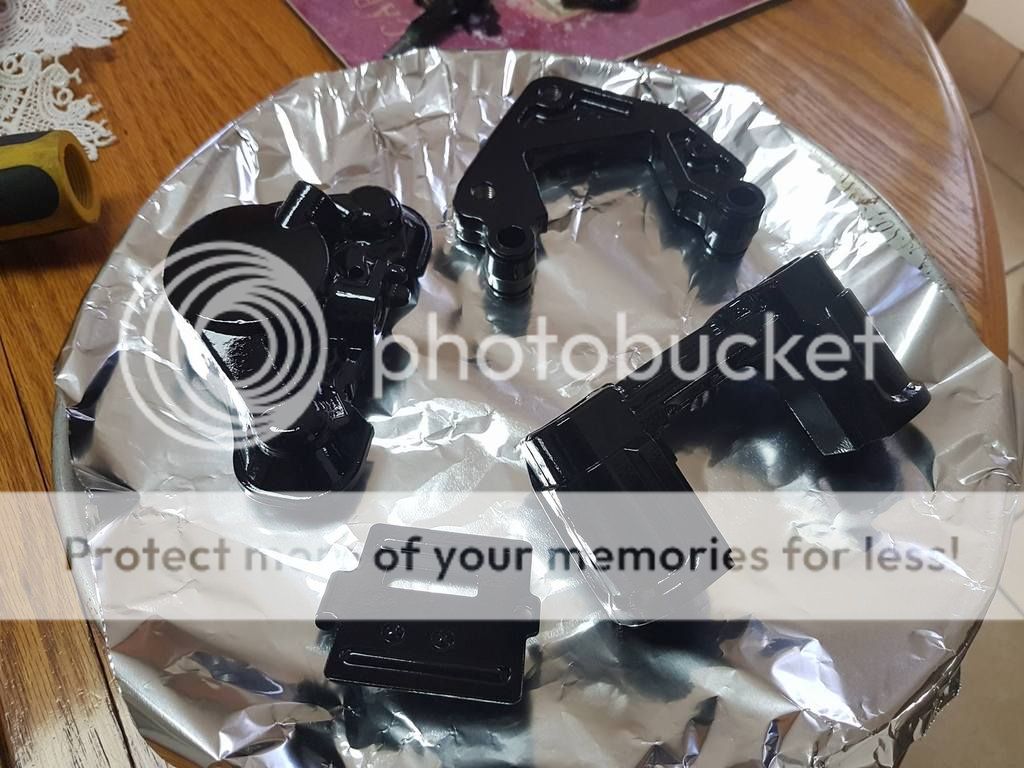
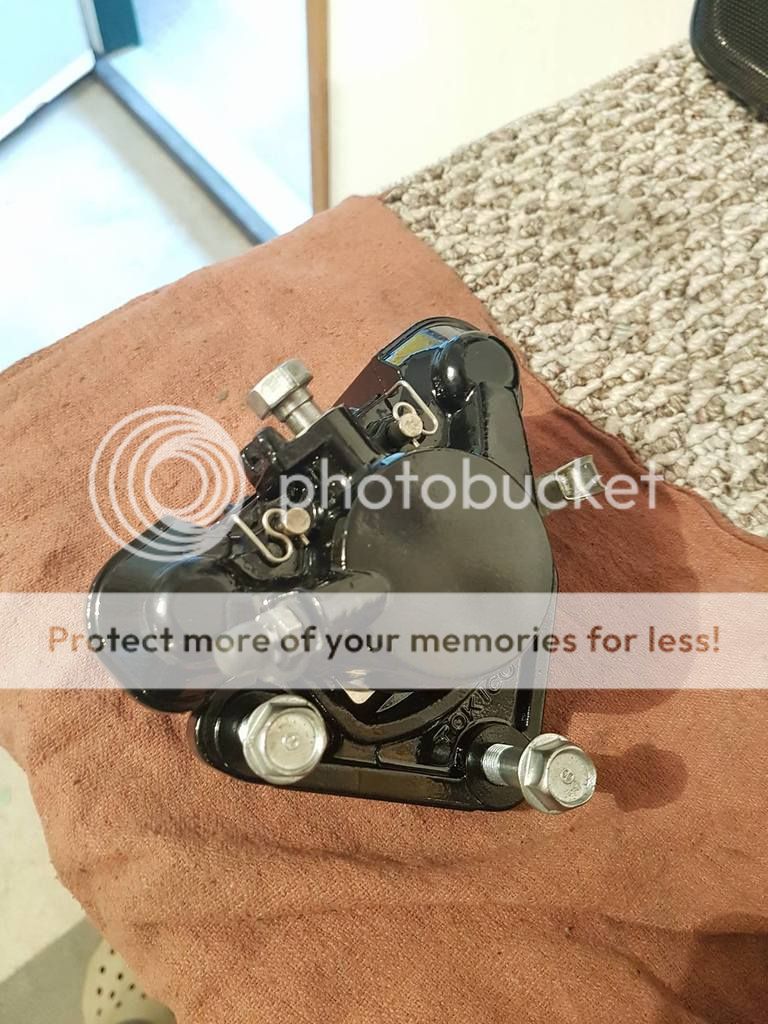
SO NICE AND NEW :banana:
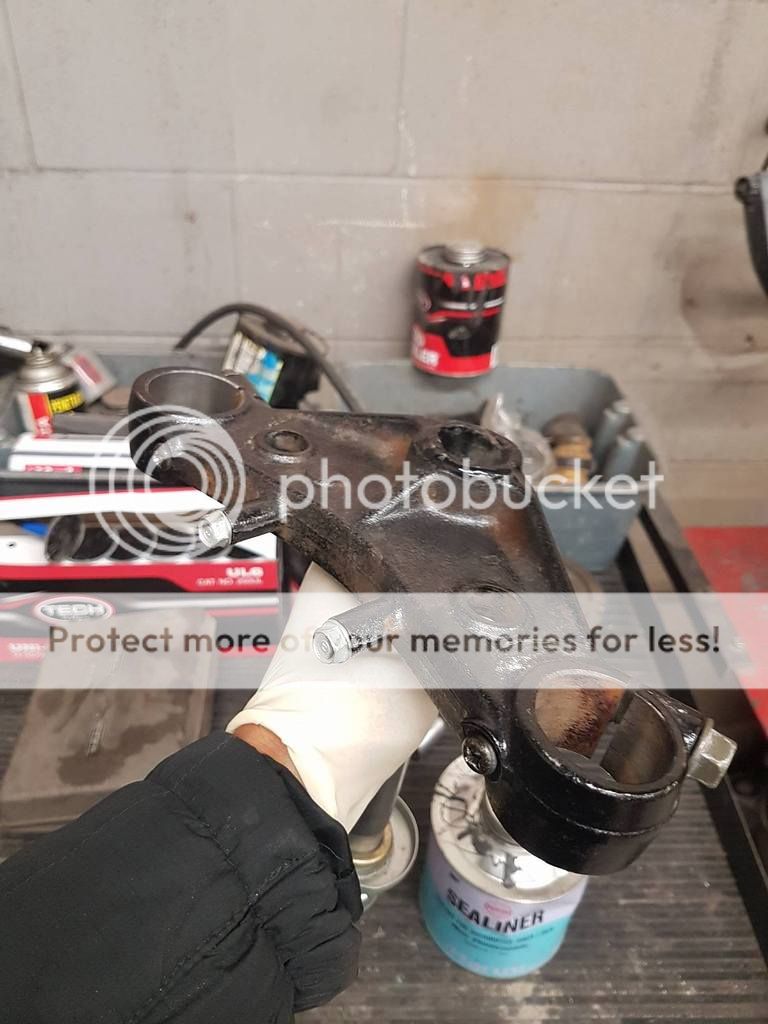
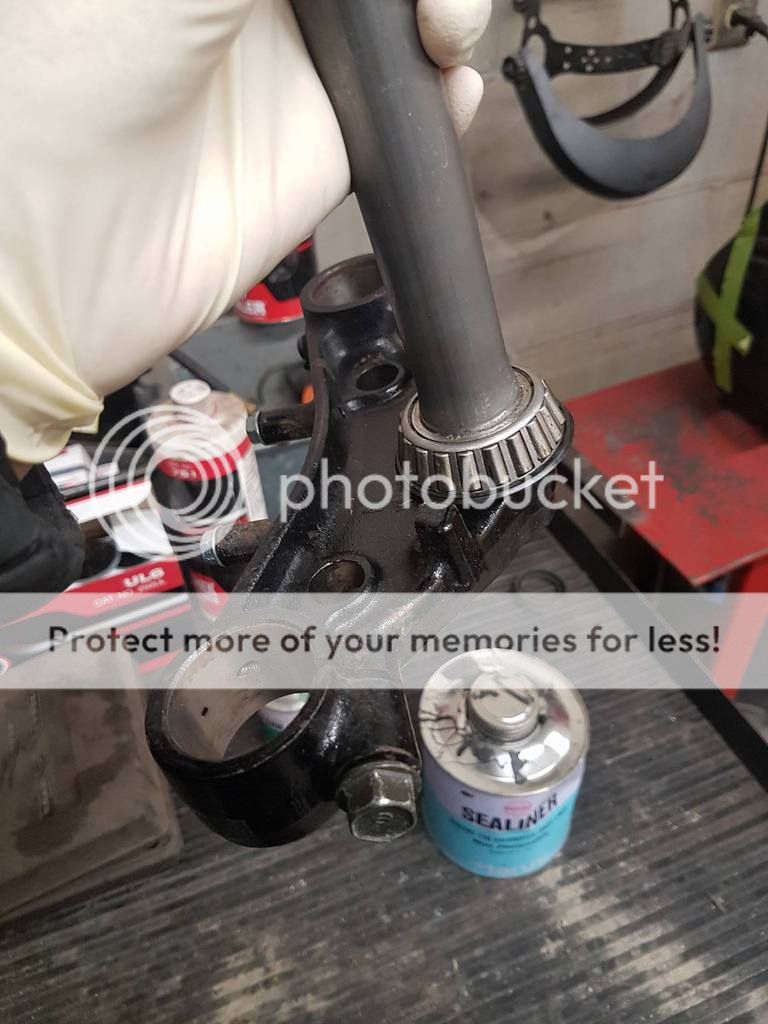
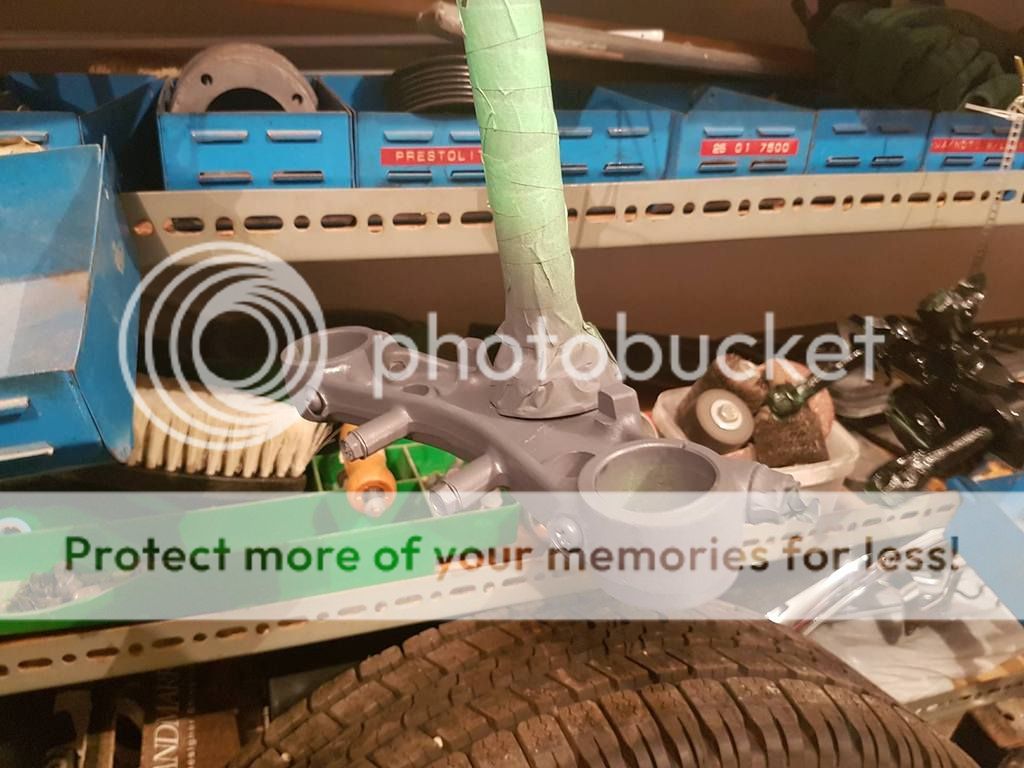
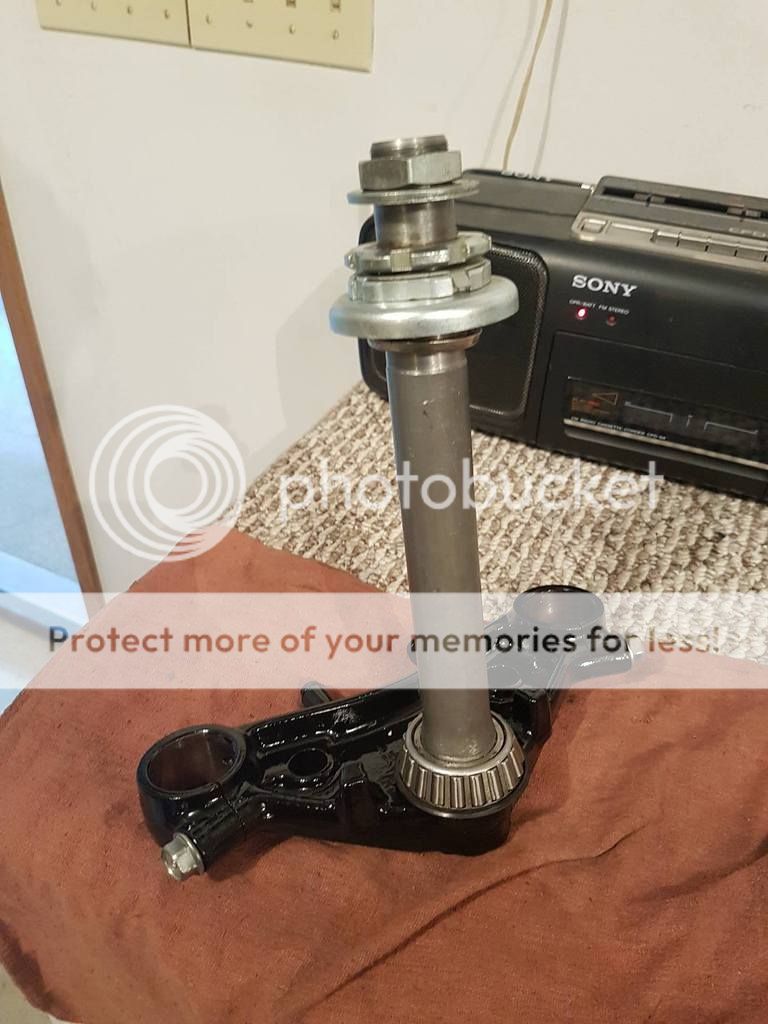
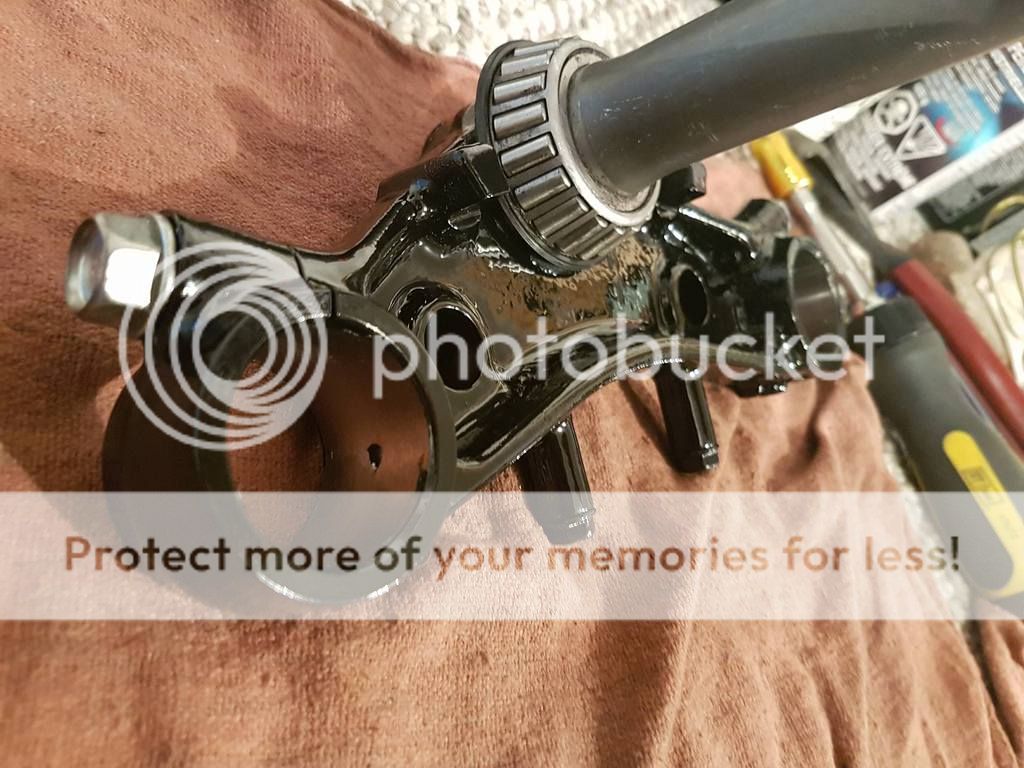
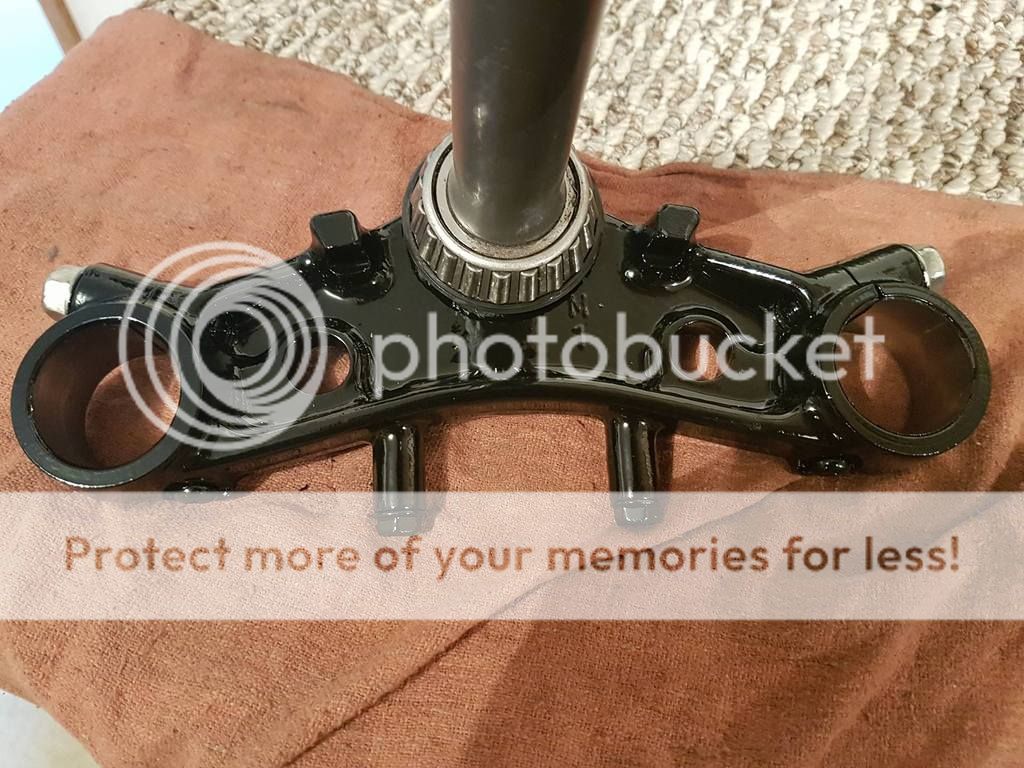
Lower Triple Tree
Basic run down of what I did
1. Used a bench grinder with a wire wheel to remove all the paint and got into the tight spots with a drill bit wire wheel
2. Cleaned the bare metal with acetone
3. Primed
4. Painted using black paint
5. Cleared
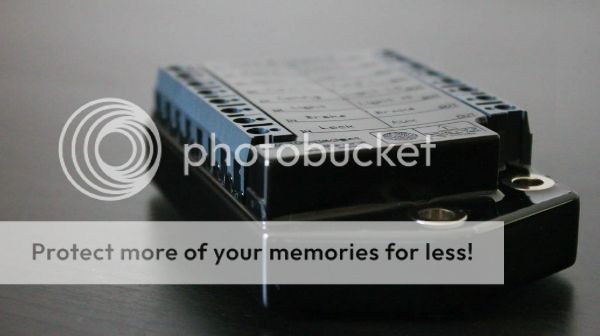
Also got this in the mail recently heheh
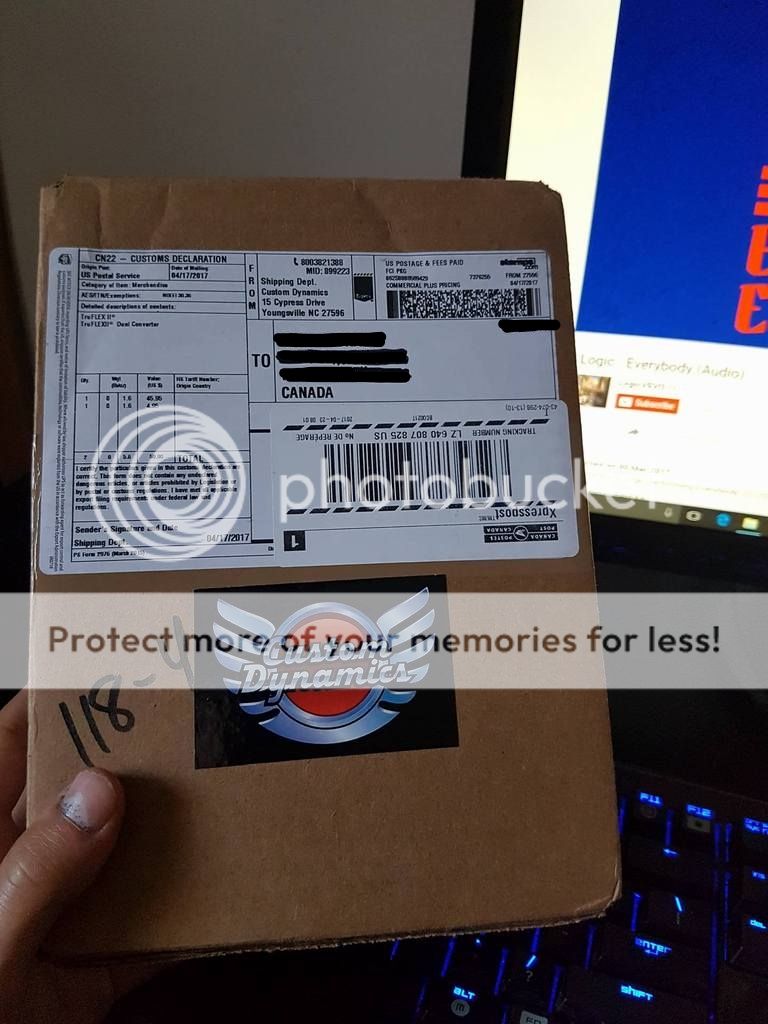
It's contents will be shown in the future, although you could probably just look up what it is to lmao.
Anyway till next time!
. The build started on May 20th 2016 and the following shows updates I've posted since then all in one. The next update I have will be a different post.So I bought "Auxiliadora" (OWSSSS-E-LEE-A-DOR-DA) just before the start of this last winter with the help of my friend Chris because I wanted to start a proper project. While I really wanted a car (aka a Supra <3(I'll get her one day :'()) my student budget limited me and there were no other cars that I was really interested in. So I took a look at some bikes that might be good candidates for a cafe racer build because Chris's build really intrigued me and I'd always wanted a bike so I figured I'd give it a shot. That's when I came across Auxiliadora, a pretty much all original 1981 CB750K with under 6500 km on it. At first glance, she was ugly as ****, but I saw potential in her after seeing a couple of amazing looking builds so I picked her up.
To clarify the name, Auxiliadora is my mothers original name prior to her immigrating to Canada. She's the person who has made me the man I am today and plays a huge part in my life. I felt the name appropriate given how original it is. Plus she hates the fact that I got a bike and I thought it might make her hate it less. She still hates it. ;Dation:
This is what she looked like the day I picked her up with Chris
How the bike looks as of 05/20/16
01/03/17
03/30/17
04/24/2018
07/23/2018
She started but ran pretty poorly and consistently stalled out on Chris while he rode it home for me (didn't have my bike license at the time). The first time my parents saw the bike Chris and I were pushing it home from about a block and a half away because it stalled and wouldn't start back up :hurr: :lol:. After a bit more of an inspection when the bike got home I found she really needed some love. The tires were shot (thanks Chris for the front tire again <3), the carbs really needed a rebuild, the spark plugs were garbage, etc. So over the winter I ordered a number of parts and just recently really started to dig into the build process and am currently just attempting to get the bike started right now after sitting all winter.
Current Job List
Parts List
NGK Iridium spark plugs
4" Chrome shorty mirror
MAC 4-1 exhaust
New Starter relay
New OEM tank Petcock
New OEM carb boots
Motogadget m-Blaze disc turn signals (polished)
POSH waffle grips
Nissin master cylinder 14mm
Polished aluminium throttle
JT Z1R X-ring chain
JT 46 tooth rear sprocket
JT 18 tooth front sprocket
Keiti license plate bracket
Chome clip ons
320mm rear shocks
Bridgestone Battlax BT-45 100/90-19 Front tire
Bridgestone Battlax BT-45 120/80-17 Rear tire
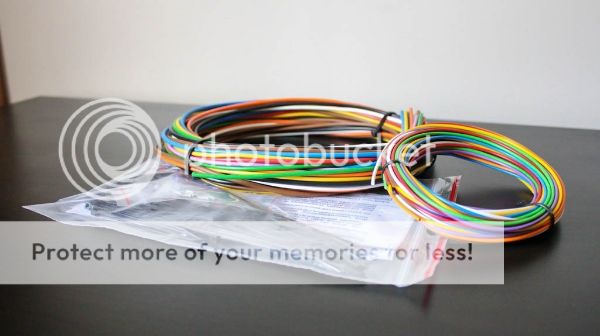
Motogadget M-unit V2
Motogadget Cable kit
Motogadget M-button V2
Motogadget 3-button M-switch x2 (polished)
Rear frame loop
Custom Dynamics TruFlex 2 LED Brake light
OEM piston rings
Braided front brake line
Motogadget M blaze pin turn signals (Black)
New cables (Push, Pull, Clutch, Choke)
Custom seat
CB750 K(Z) Rear sets
Parts to be ordered/Wish list
Oil Cooler
Engine/crash guard from F
New cleaner triple tree top
Aux/fog light
Paint stripped tank
Picture of the tank filled with a ton of white vinegar. Let the tank sit for about a week. Flushed the tank. Then repeated the process. To say the least it worked great removing all the interior rust and and made it look like new!

Next update will be when the starter solenoid I ordered comes in and I attempt to start her up!
Just got my starter relay in the mail today so hoping after my exam today I can try and get the bike started! Will update later today granted I attempt to do so.
So I installed the new starter relay and she had power WOOO :banana:
BUT sadly, there is bad news. As I got the bike ready to start, I was putting gas into the tank annnd the petcock started to leak and just wouldn't stop regardless of the position I had it in. So needless to say I need a new petcock
and boy was I surprised how much one was lmao. Regardless, ordered a new one and I'm just hoping it comes in next week.So, I finally got my tank petcock in
Installed it on the tank with some thread sealing tape to ensure a leak wouldn't occur and I tried to start her up. Sadly I ran into a bit of a problem. The bike would turn but just wouldn't fire up. After some head scratching, I removed the tank and just poured in some gas to the fuel line directly and saw that the gas just didn't go anywhere and just sat in the line. So at this point I'm thinking I've messed up with routing the fuel lines properly. So I've posted on some CB750 forums and am waiting for some responses. Going to attempt to see if I can figure this situation out tomorrow hopefully cause at this point I'm dying to get this project "finished".
So, slight update. She started. But not for long lmao. Got some advice from some people on some CB750 forums to fill the bowls with some gas so I did that and she started right up. After letting it idle, I turned her on and off a couple times just to make sure it would then I decided to hook up my carb sync, turned her on, she idled high, then went steady, then died. Now she wont start back up and the bowls have gas in them still. I'm thinking I maybe flooded the engine but I'm not 100% sure. So I'm going to try and start her later and see what happens otherwise Ill have to try again tomorrow.
On the bright side... SHE STARTED
So no update regarding how the bike is running due to the fact that I don't currently have time to work on her with my summer class coming to an end and with work. However, DDC just had a sale go live today so I put in an order for some Motogadget goodies! Ordered the Motogadget M-unit, Motogadget M-button, Cable kit for the M-unit, and two 3-button polished/stainless steel M-switches!
Update time. So got the bike running a little better and starting more reliably with the help of some people from a cb750 forum.
The first thing I did was uninstall the exhaust due to an exhaust leak. Due to poor instructions from the exhaust manufacturer, a lack of information on the web, and my dumbass not taking pictures when I removed the original exhaust I had the metal exhaust flanges
The second thing I did was remove the vacuum operated fuel shutoff valve from the carbs.
Currently the bike still stalls after a while and the rpms oddly go up when I disengage the choke but this is due to the vacuum leak. So Ill be picking up some vacuum plugs this week hopefully. I Also ordered some OEM carb boots because the ones currently installed on the bike seem dried up/cracked and when they are like that they tend to cause vacuum leaks as well.
Motogadget goodies came in :hurr: Still waiting on the carb boots before I can really give a further update on the bike.
So, got my new carb boots in a while ago but just didn't have the time to install them up until now. So I removed the old boots and compared them to the new ones. Turns out (or so I at least believe) the boots that were on the bike were wrong. When comparing the old boots to the new boots, the news boots were a lot longer in length making it easier for the carbs to be installed. I also attempted to seal off 2 vacuum lines on the carbs with a bolt and some silicon. Then started her and she seemed to run great! However the bike is still ****ing dying on its own. So I'm going to install the air box and attempt to tune the carbs to see if she'll stay on/run a bit better. Should have an update a little later today!
So I installed the air box, turned her on, and nothing has really changed. Still wont idle on it's own and I noticed that the bike seemed to sound funny so i decided to touch the pipes to make sure each cylinder was firing and go figure that the pipe for cylinder #2 wasn't that hot yet all the other pipes were. So at this point I'm gonna have to do some reading and figure out what the **** is going on. #oldbikeproblem
OK it's been a while I think it's time for an update lol.
Since last writing in this thread I believe I was having trouble with getting the bike to run properly due to some carb issues. Since then quite a bit has been figured out/done.
The first thing I ended up doing since the last post was replace the bike with some cheaper plugs due to the iridum plugs I had always fowling due to tuning the carbs to run properly and my lack of experience lol. After doing so I actually manged to get the bike to run properly and found that I was letting the bike run WAY to rich causing the fowling of the plugs. Once the tuning was figured out the bike ran like a dream. So, before I ran into anymore issues I scheduled it to get a safety at Capitol Motorsports on St. Anne's. During the safety it failed due to the throttle tube not operating properly (felt as if there was a bunch of dirt/sand in it causing it not to turn smoothly). Luckily I had ordered a new throttle tube due to that exact reason and the guys down at Capitol were cool enough to let me work on the bike in the back quickly, get the part replaced, and then I was golden and passed the safety. Sadly I didn't stay golden for to long as a day or two later when taking the bike for a little ride up and down my back lane one of the carb floats decided to stick and when that happens fuel will pour out of that carb constantly, both being a waste of money/safety concern. Not wanting to deal with the problem right away I decided that would be the point where I would start to completely disassemble the bike to get it ready for its final form.
And that's basically where the progress with the bike has since been left. I got the bike down to its bare frame almost being before the winter came and I've since neglected to work on it cause I don't want to freeze in my garage. At this point I want to insure it for the shortest amount of time possible so I can actually have plates for it and make it easier to insure in the summer once it's done. The next thing on the job list once the weather starts to warm up is to pull the engine, rebuild it (hopefully, otherwise just replace some gaskets), Get the frame stripped of paint, modify the frame a little by adding the frame loop (which I ended up already getting) and shaving some stuff off to make it look a bit cleaner/make it easier for me to tuck wiring, get a seat cowl/pan fabricated (which I'm still looking for someone to do. As of right now Speed factor might be doing it), Powder coat the frame, put it all back together, and she'll hopefully be done. There are a couple of other small things that need to be ordered but other then that she should be done this summer as long as I have the spare money to do so.
In the case I do decide to work on the bike (which I probably will) expect more updates soon! Until then I'll leave you with this picture of the almost bare naked lady.
Update
:
Alright its been a while sue me. Since I last posted a couple of things have happened.
I finally got the bike a plate which was waaaaaaaaaay harder then it needed to be. To keep it brief, I attempted to get the bike insured roughly 4 times, constantly got turned away because the bike hadn't been insured for years and the clerks didn't seem to know what to do so they just kept turning me away. Just when i was about to
Today I decided to do the final tear down and completely strip the bike down to the frame. So as of right now the bike looks like this
The current things on the to do list are:
- Cut rear frame
- Fabricate rear cowl from sheet metal (My friend Matt who is in engineering with me at the U of M is going to be helping me fab this :banana: )
- Weld on rear loop
- Buy Motogadget M blaze pin's for rear turn signals
- Buy a LED strip to act as my stop light that will be integrated into the rear cowl (Look at picture below for reference)
- Buy any small bits like bearings or bushing in the case they are needed once I fully inspect everything
- Get seat made (I'm either going with a leather or alcantara)
- Powder coat the frame and swing arm
- Install all the parts
- Rideeeeeeeeeeeeeeeeeeeeeeeeeeeeee
- Whatever I missed lol
Motivation
https://youtu.be/IMDkNtRdPDc
I'm determined to finish this bish.
Tomorrow I'll be bringing my frame over to my friend Matt's house for us to start modifying the frame (fab cowl and weld loop) and shaving off any unnecessary bit's. Unlikely that everything is going to be done in one day however. In the mean time I figured I'd work on the wheels just to get some things out of the way.
The first thing I wanted to do was make sure that the wheel bearings were still in good condition, which thankfully they were. So I decided Id clean the wheels up as they were full of old dirt/grease and prep them for some polishing (I didn't end up polishing them cause I didn't realize how big of a pain it was actually going to be. Ill polish the wheels to a mirror finish when the bike is in it's final assembly.)
Note: I'm trying to make the journal more picture heavy but some times forget to take my phone out before I get to work, soooooo you'll only be seeing pictures of the rear wheel as I forgot to take pictures of the front wheel but it was the same process. Rinse, degrease, clean with mineral spirits/ use brake clean and clean small sports by hand with a cloth.
BEFORE
Note the disgusting grease ^^^^^^... Don't worry i repacked it with new grease :mo:
AFTER[/b][/u]
Till next time
Oh hello
So since last posting quite a lot of work has been done. My friend Matt and myself went about installing the rear frame loop and have fabricated the cowl :banana: . The process of installing the loop and fabricating the cowl was a first for both of us and definitely wasn't an easy one, but the final result was exactly what I was looking for. Hand made, hand crafted components made from raw material. I'm not going to be posting any pictures regarding the frame work now as we still aren't done yet but once we are I'll make sure to post about it.
(You after reading that last line)
What I'm here to post about is what else I've done. Which isn't much because I've just come back from a trip to Orlando ( :'( GIVE ME BACK THAT WARM WEATHER :'( ). But I've basically gone about completely rebuilding/refreshing the front forks.
Front Forks
Forks before being lowered
Forks after being lowered
Might be hard to see the difference in the pictures but I lowered the forks 3 inch's. Some might say that's a lot but this bike is going to be more form oriented and be more of a cruiser then anything. If I wanted a performance oriented bike I would just get an S1000RR or something. Lowering the forks in general was pretty easy though.
The process was essentially as follows:
1. Drain fork oil
2. Remove bolt at the bottom of each fork
3. Remove dust seal at top of fork housing
4. Remove locking clip with washer
5. Using force, slide bottom housing of forks like a hammer
6. TADAAAAA Forks are apart
7. Undo top part of forks to release spring
8. Cut spring to remove length that you want (In my case 3 inch's)
9. Add a spacer of removed length to prevent bottoming out
10. Replace anything that could wear aka new seals
11. reassemble, add new oil (Recommended oil for this bike was 10W-40 but i decided to go with a straight 30 weight oil as it's stiffer and will help with preventing any bottoming out.)
The following pictures show the process roughly.
Dirty old oil
One of the forks had a rusted/worn bolt on it that was stripping and I really didn't want to reinstall it so I ordered a new one. (New on left, Old on right)
Dust seal, locking clip, and washer
Hammer slide action to reveal the good stuff aka the fork seal
Forks completely apart
Spacers were made from a 3/4'' piping that were ground and wire brushed on a bench grinder
Cut springs. I made sure to grind down and make the cut end of the spring as smooth as possible on the bench grinder
Forks with spacers
Then put it all back together.
Last thing needed to be done to the forks in polishing, but that will be done on final assembly of the bike
Till next time m8's
I'M BAAAAAAAAAAAAAAAAAACK
Here's some music to play while you read. Recently discovered Logic after a viral video of him waking his wife up to couple of musicians playing the Curb Your Enthusiasm theme song.
https://www.youtube.com/watch?v=O601PVTd0g8
So not much of an update regarding anything major (aka the frame or engine) but those will be coming soon hopefully as I don't have anything else to be working on after this update.
So what the hell am I here to talk about? Refreshing/rebuilding/repainting the front brake caliper and lower portion of the triple tree. But I'm not going to bother typing anymore just go ahead and look.
Brake Caliper
Basic run down of what I did
1. Used a bench grinder with a wire wheel to remove all the paint and got into the tight spots with a drill bit wire wheel
2. Cleaned the bare metal with acetone
3. Painted using high temp black paint
4. Cleared with high temp paint
5. Heat treated the paint by baking it in the oven at 200 F for an hour
6. Rebuilt/greased
SO NICE AND NEW :banana:
Lower Triple Tree
Basic run down of what I did
1. Used a bench grinder with a wire wheel to remove all the paint and got into the tight spots with a drill bit wire wheel
2. Cleaned the bare metal with acetone
3. Primed
4. Painted using black paint
5. Cleared
Also got this in the mail recently heheh
It's contents will be shown in the future, although you could probably just look up what it is to lmao.
Anyway till next time!