1980 CM400 cafe'ish style

jinxdog

You ain't sayin nothin slick to a can of oil baby!
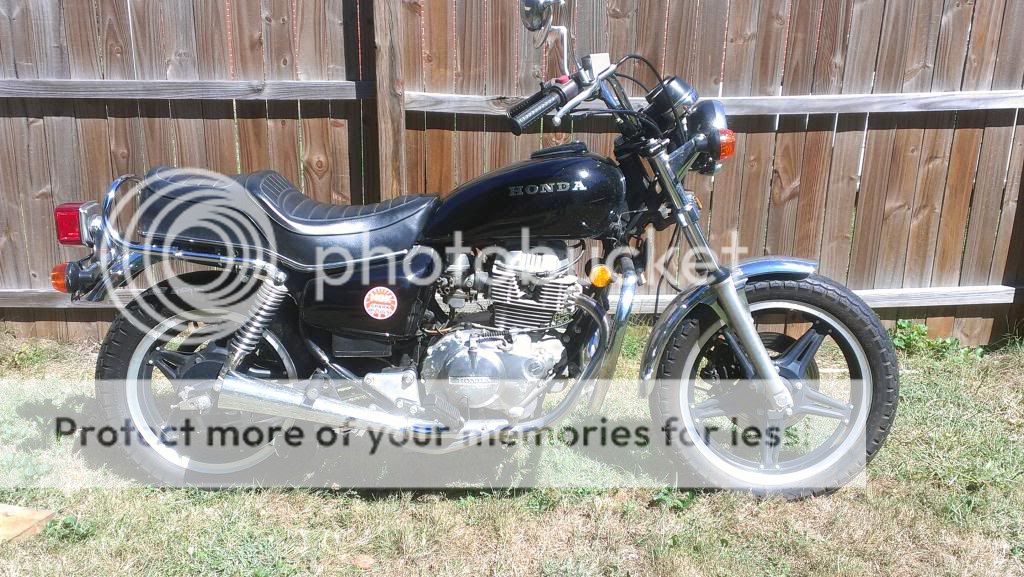
So I bought a CM400 last summer as I wanted something cheap to tinker around with.
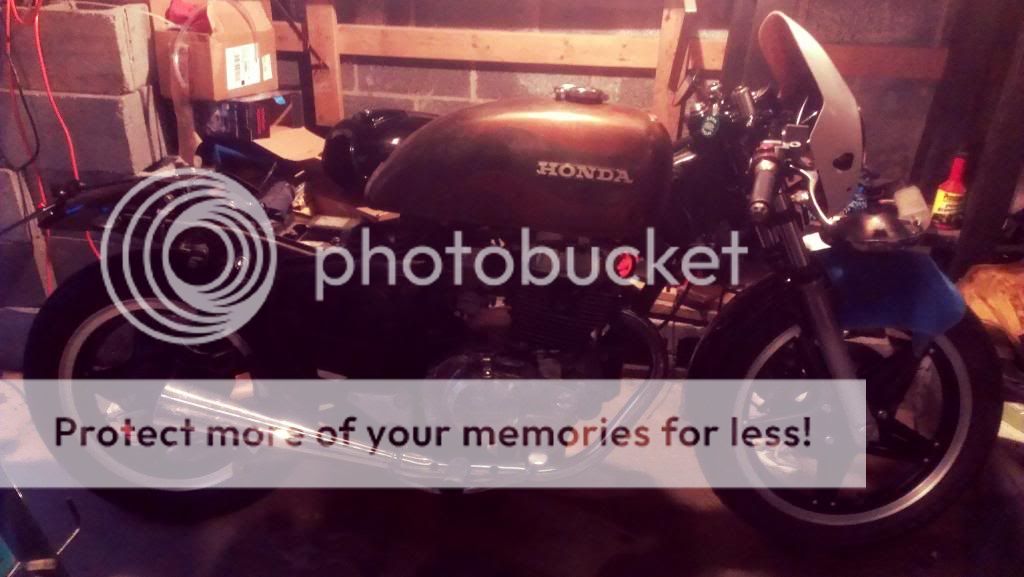
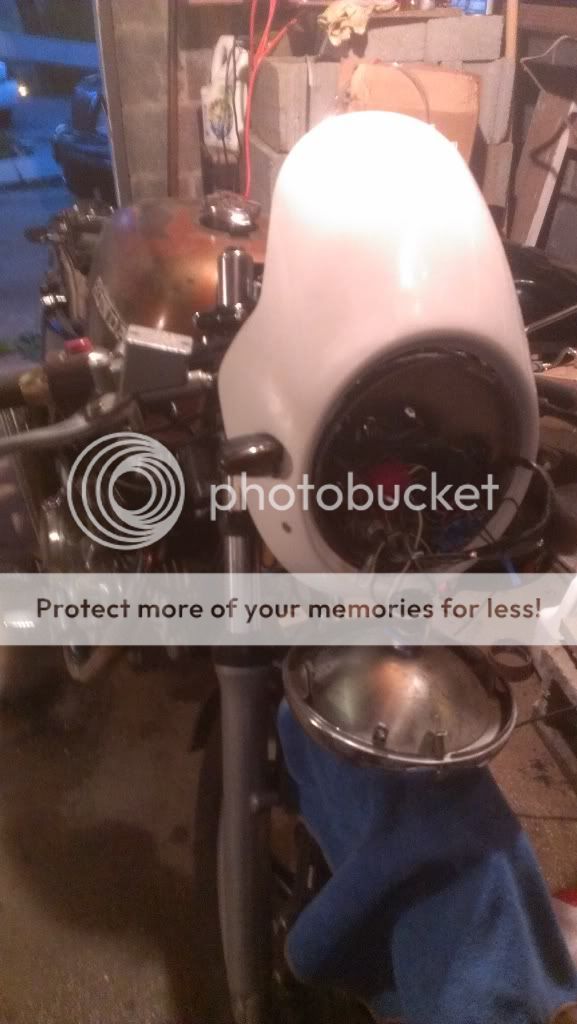
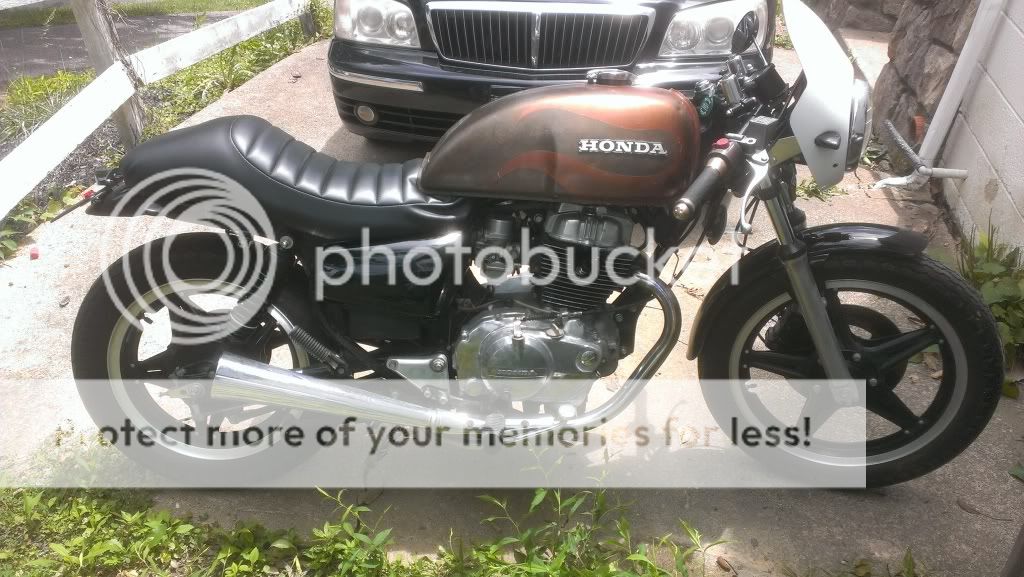
I have a few pics of the process I've started going through with it... I wanted to give it somewhat of a cafe feel even though the frame doesn't really lend itself to that style.

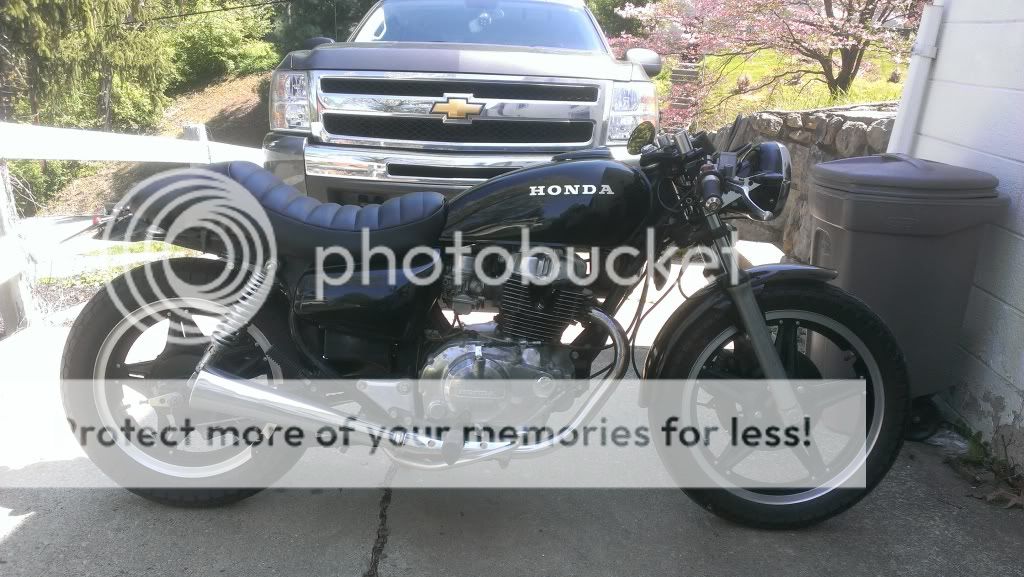
I've seen some beautiful CM400 builds on this site so I know what kind of potential is there... I just don't know that I have the skill to realize that potential - however, it will give me something fun to toy with until I can get a more proper bike to go all out on.

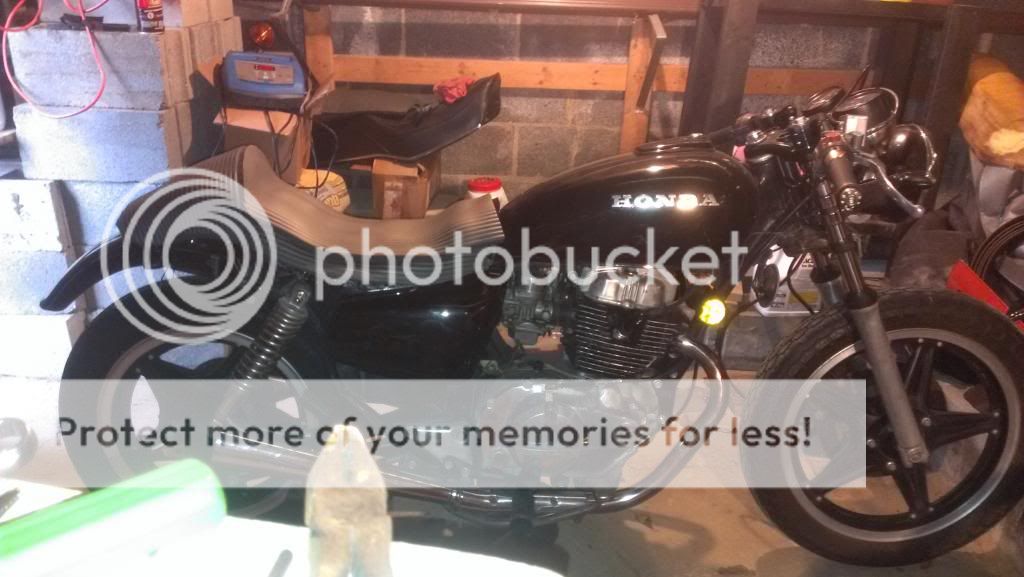
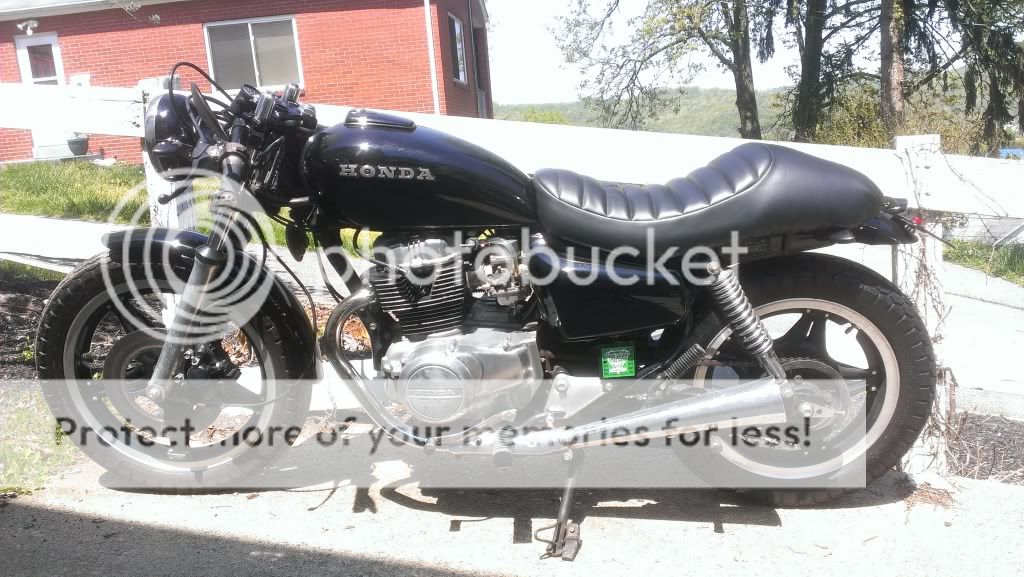
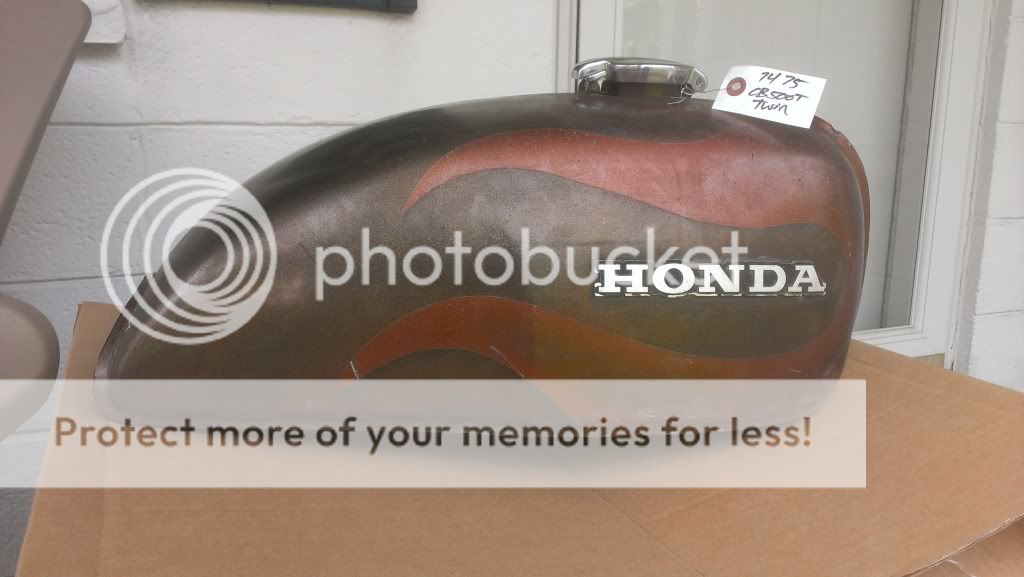
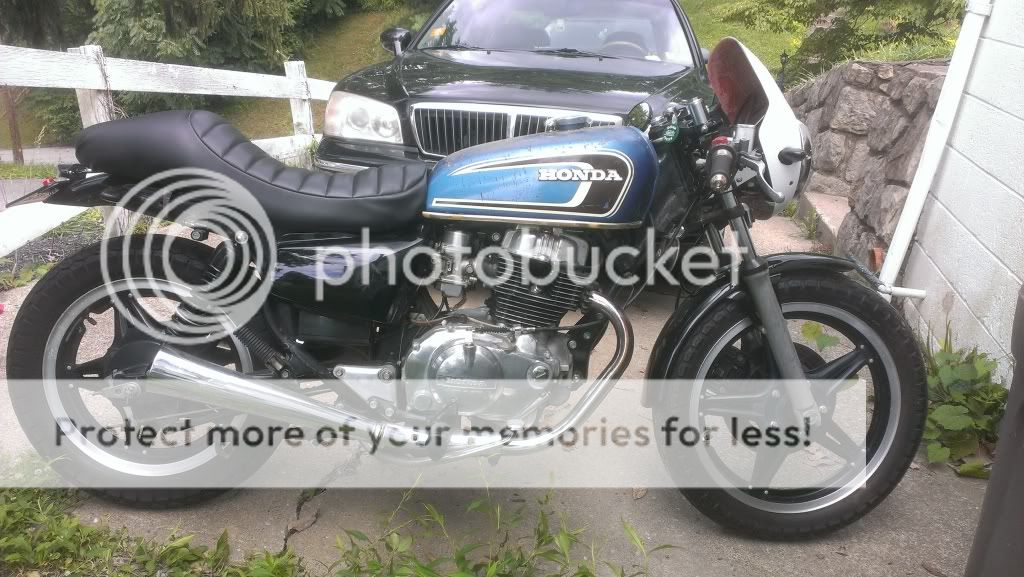
Here is what I am starting with... a solid runner that appears to be in pretty decent shape.

IMAG0003.jpg


IMAG0002-1.jpg
 
So to get started I did the obvious which was to strip off all of the extras and add some clip ons.
I dropped my forks through the triples enough to attach the clip ons over the triples.

I also lowered my headlight and used some long bolts with some metal sleeves to drop my guage cluster a few inches.

It was at this time that I started to realize just how much of a problem the frame was going to present. I thought about cutting the frame so I could straighten it out and go with a traditional cafe seat.

I ended up leaving the frame alone and bought a second seat so I could strip it down and modify the stock seat pan.

IMAG0036_BURST001.jpg


This is not my first choice of direction but my girlfriend made it very clear that she wanted me to be able to ride 2 up with her. To avoid argument I caved in - with this setup I can remove the shortened / modified seat and put the stock seat on in just a few seconds.

In the picture - I am using a yoga pad cut into strips to try to shape what I want the seat to look like.
 
Good call on not slamming the bars if you are planning on riding two. I'm thinking you could build a two tier seat with a removable rear cover that would create some decent lines. Those frames make it difficult to achieve the flat tank-seat lines that is some common to cafe bikes but I can see it working and looking good.
 
fresh_c said:
Good call on not slamming the bars if you are planning on riding two. I'm thinking you could build a two tier seat with a removable rear cover that would create some decent lines. Those frames make it difficult to achieve the flat tank-seat lines that is some common to cafe bikes but I can see it working and looking good.

fresh_c,
First let me say that I have read through your build thread several times and it was a very big influence on how I initially handled dropping my gauges - you will also see later when I post pics of my triple tree that I borrowed heavily from your ideas. They say that imitation is the sincerest form of flattery so I hope you will forgive my biting your style ;-)

As for the seat... I have already been thinking of a removable cowl / seat cover and trying to figure out if I would be better served to make it out of fiberglass or metal. I have no experience working with either - I am assuming fiberglass would be the easier route? I am also unsure of what to use to fasten it to the seat. Any ideas would be greatly appreciated.
 
Thank you, but I've borrowed heavily from others before me so no forgiveness needed from me. Unless you work somewhere with the correct tools for working metal, or you're personally invested in such tools, I would suggest fiberglass. It's pretty easy to work with after a little practice and there are tons of online tutorials about working glass. My only advise is keep your hands clean. Maybe start with a custom seat pan and then figure out a rear hump from there? Good luck!
 
Operation "Clean up the front end":

Even with the gauges and dummy lights lowered, I really felt like that area was very cluttered. I decided to do away with the tach and dummy light box, move the ignition and choke to the tree and replace the speedo with a mini version that had the dummy lights built in.

While I had the tree off to drill it out for the ignition switch, I wen't ahead and prepped it and gave it few coats of rattle can.

Before:

IMAG0073_BURST003.jpg


After:

IMAG0075_BURST003.jpg


I think it cleaned up nicely... as you can see, I went ahead and moved the clip ons under the tree just to try it out... I do think it looks better that way but does feel a little harder on my legs with those mid controls.

Here it is with the speedo lit up:

IMAG0078_BURST002.jpg


I broke the plastic bottom on the choke cable when putting it in the tree so I have a new cable on the way.

Obviously one of my next jobs is going to be taming the cables... mainly the clutch cable and brake line - Any recommendations or tips would be GREATLY appreciated.

Here is a side view of the new gauge and my cabling mess:

IMAG0076_BURST002.jpg


I have new blinkers and tail light wired up as well as the new gauge - with the exception of the blinker indicator... since going from two indicators to one, I have to add some diodes to keep all 4 blinkers from flashing.

If anyone has any comments or recommendations, I am all ears.
 
Thought I would go ahead and throw this pic up here as well because I really like how it shows just how "thin" these honda twins are:


IMAG0077_BURST004.jpg


Just thought it was a cool pic in general.
 
One more question for anyone reading this and might have any ideas...

Since I removed the tach, i need to plug the hole that the tach cable runs into... any ideas? All i have come up with so far is either trying to find a rubber plug that happens to fit, or cutting the end off of the tach cable - grinding it down and filling it with something then just using that to plug it.
 
crazypj here makes them. Nice work with the gauges! If your cables are in good shape and don't need replacing, an old-school bike shop can shorten them.
 
JinxeD said:
One more question for anyone reading this and might have any ideas...

Since I removed the tach, i need to plug the hole that the tach cable runs ......... cutting the end off of the tach cable - grinding it down and filling it with something then just using that to plug it.

If there is an acceptable option for a piece you can make IMO do it...to me the more pieces made by the more it's "yours" and is the essence of "building" vs "assembling" hand the more it's yours.

Nice work cleaning up the upper fork area. Is that a mechanical or electric speedo? if electric, how did you handle the sensor?
 
Frankenfe said:
If there is an acceptable option for a piece you can make IMO do it...to me the more pieces made by the more it's "yours" and is the essence of "building" vs "assembling" hand the more it's yours.

Nice work cleaning up the upper fork area. Is that a mechanical or electric speedo? if electric, how did you handle the sensor?

Thanks Frankenfe!
It's a mechanical speedo that I picked up from Dime City - normal Honda ratio so I just plugged the stock cable right in. The dummy light wiring on it is pretty straight forward except for the need to add diodes to the signal indicator light.
 
So I wired in the diodes to make my blinker indicator blink without firing all four of my blinkers. For anyone interested in the style of gauge I used - all of the indicator lights wire up nice and straight forward with the exception of the blinker indicator. The reason for this is that the original dummy light pod had separate blinker indicators for right and left. The gauge I installed only has one blinker indicator. If you run both the left and right blinker positive (+) to the indicator... it back feeds voltage to the other side causing all of your blinkers to flash instead of right or left separately - thus the need for diodes to block that back feed.

For anyone that runs into this problem... I took some pictures of how I wired the diodes in.
I used 1.5 amp 1000v rectifier diodes from Radio Shack costing a dollar and some change.

IMAG0085_BURST002.jpg


The side of the diode with the stripe (barely visible in my picture) is the side that passes voltage... voltage will not flow in the other direction. This is how it stops the voltage from backfeeding to the other blinkers. I used one diode for right blinker and one for left blinker.

IMAG0086_BURST002.jpg


Next I slid some shrink wrap over each diode to isolate it from the other (and to cover up my horrible solder job). Since voltage will only flow in one direction - it is important to remember which side has the stripe on it... since that is the side that will feed the indicator light, I twisted them together and put my wire end on.

IMAG0087_BURST002.jpg


Then I added some larger shrink wrap to hold everything together and provide a little more rigidity to the diodes and crimped on my feed ends. The two feed ends will accommodate the right and left blinker positive (+) wires and the end with the wires twisted together will go to my indicator light.


After pulling my headlight off (I really HATE trying to stuff all of that wiring back in, hope that is the last time I open up the headlight but I know it won't be) I wired all up and now the single blinker indicator flashes whether I run the left or right blinkers.

I hope that this helps anyone that happens to run into a similar situation.
 
Fenders painted
Rear fender chopped
Tail light mounted and wired
Seat finished
Tach and Speedo cable swapped (not pictured)


IMAG0080_BURST002.jpg


Fenders -
I'm debating whether or not to chop the back of the front fender some. I think it would look better however, it would do it's job quite as well and I don't think it is very noticeable because of the color. Any thoughts?

Speedo cable -
I removed the speedo cable and replaced it with the tach cable which is significantly shorter... almost too short as there really is no slack in it now. I'm assuming it should work just fine but are there any concerns I should have about it? I can post a picture when I get a chance if anyone is curious.

Seat -
I cut about 2 inches off of a stock seat pan and reshaped the back into a down slope then had it upholstered. I think it looks MUCH better than the stock seat... however, i'm not totally floored with it. I didn't want to fight the frame on this thing but I do wish the seat was a little more minimal. It's very comfortable but still seems a little big on the bike. Any thoughts or comments?

Possible future brainstorming:

The tank - I really don't like the tank... it is too small and doesn't feel much like a cafe style. Having said that - i'm not really trying to make this bike into a super traditional cafe... just borrowing heavily from that style. I do feel that the tank flows well with the lines of the seat but I would like to try something else... maybe a CB500 or CX500 (standard cafe style) tank. I really don't want to spend the money on a tank just to find that it doesn't fit / look decent with the seat. Any thoughts on this?

The airbox - I am very torn on the idea of removing the airbox. On one hand I believe it would look so much better with airbox and electronics out and pods in. On the other hand I am not after any kind of performance boost and I highly suspect it would be the opposite along with major tuning to get it running smooth. I don't want to try to outsmart Honda's engineers... I'm sure the airbox they designed is probably optimal for feeding this engine.. oh yeah and I know NOTHING about tuning carbs. Any thoughts on this?

Mufflers - I HATE the sound of these stockers... but see above. Would replacing them with dunstall replicas require much tuning / affect performance?
 
If anything I would find a front fender that extends further over the front as well to balance out the fairly large tailsection...and on that note, if you could bring the rear curve of the tail forward an inch or two, I think it would look just a bit cleaner.

The EMGO dunstall pipes can be packed with enough batting to make only a negligible change in flow.
 
Rich Ard said:
If anything I would find a front fender that extends further over the front as well to balance out the fairly large tailsection...and on that note, if you could bring the rear curve of the tail forward an inch or two, I think it would look just a bit cleaner.

The EMGO dunstall pipes can be packed with enough batting to make only a negligible change in flow.

I considered trying to find a more balanced front fender then switched to the idea of shortening the rear of the front fender to match... still undecided on that.

The primary reason for leaving a few inches of rear fender was to have a location to mount my tail light / license plate... if I move it in my seat will interfere however I do agree that it would look cleaner.

Thanks for the info on the EMGO Dunstalls... I really want to get some of those but I'm trying to prioritize my $$ right now - hopefully those will be purchased in the very near future.

Thanks for all the input Rich!
 
So my tach hole problem has been resolved compliments of CrazyPJ. Thanks man, it fits great and should keep my oil in and dust out :D

IMAG0093_BURST002.jpg
 
Ok - Update time!

I haven't had much time for the past month or so but I took a few days off this week (hope everyone had a great 4th and be safe this weekend!) and have some new stuff to share.

First off - look what UPS brought today....

IMAG0134_BURST004.jpg


It's a tank off of a 74/75 CB500T. I thought that I could make due with the stock CM400 tank but the more I looked at it, the more it bothered me.
Not to mention you have to gas up every hour or two with that tiny tank.

Here is a pic of it on the bike for fitting... Once I open up the tunnel a little and cut down my front tank mounts - the tank will sit a few inches lower and several inches forward of where it sits in this picture:

e3e18484-324f-460d-952b-87e2f322a0b2.jpg


Sorry about the lighting... my work area seriously needs more lighting. Any opinions? I am loving how I *think* it's going to look but I wouldn't mind some outside opinions. Once I cut the front mounts down - the stock tank is no longer an option (without welding them back on).

Also - you may have noticed a side view of the fairing I'm trying to work into the front. Here is a pic facing it but the light is pulled out along with all of the spaghetti wiring:

IMAG0138_BURST001.jpg


Any thoughts / opinions / input? I'm kind of back and forth with the fairing. I still don't have my throttle / clutch / brake cables tamed and the fairing does a great job of concealing all the extra.

Oh - I also got some 13.5" shocks to raise the rear end up just a bit... it's not that noticeable in the picture but it is when you sit on it.

That's about it for now. I have a LOT of prep work to do on the tank and fairing and then it will be time for paint. I'll post again once I have the tank mounted in it's true position.
 
Had a fairly productive day before I get cleaned up and head to a cookout.

I cut the front tank mounts down on the frame to accommodate the CB500T tank. Even after cutting them down as far as I could, I still had to spread the C brackets on the tank a little to slip them over the frame. I did this with a wood wedge and hammer. I also had to open the tunnel quite a bit in one section (if you look at the CM400 frame you will see where it widens halfway down the tank rail). Really the only other modifications were to drop the ignition coil down two inches and I'm going to have to modify the front of the seat pan a bit.

The pictures are much more interesting than anything I have to say so here you go... I will post pictures of the stock CM400 tank, a 74 CB360 tank and finally the CB500T tank for reference as I know there aren't many pics floating around of these bikes with different tanks on them.

1980 CM400 Twin Tank (2.5 gallons):

IMAG0079_BURST002.jpg


Just posted this for reverence - everyone knows what this tank looks like - in my opinion, this tank is MUCH too small in comparison to the seat.


1974 CB360 Tank (2.9 gallons):

IMAG0143_BURST002.jpg


This tank is quite an improvement over the stock tank in my opinion. Has a more classic look, more fuel capacity and it provides a pretty good fit for the frame and stock seatpan.


1975/75 CB500 Twin Tank (3.5 gallons):

IMAG0140_BURST002.jpg


The biggest of the three and in my opinion the best looking for the style of tank that I'm going for. It requires quite a bit of banging and cutting to get it to fit and as you can see - it is going to take some modification of the seatpan. This tank holds more fuel than the others and the size of it seems to balance out the large seat pretty well. Unlike the standard CB500 and CB550 tanks, this tank has almost a knee dent built in but the tank is actually a little more narrow in the back. When sitting on the bike it does allow your legs to kind of grab the tank a little more comfortably.


Here is a top view of the tank... due to the lighting and the faded paintjob on the tank - you really can't see the profile of where the tank dips in for your knees - the large size of the tank also provides a bit of surface area for laying forward.

IMAG0142_BURST002.jpg


That's it for now... Hopefully some more updates soon.
 
One more thing to mention that might be of interest to some - petcock location...

As you can see in this picture, the petcock clears the CM400 carbs just fine... it is butting into my seat because I haven't shortened the seatpan yet.
However, even after that - I think it is going to but up against my battery cover (if you aren't using your airbox and covers this will not be an issue).
Just thought I would show that as it is always a consideration when thinking about swapping tanks.

IMAG0144.jpg


And now a question for anyone out there that might be reading this... as you can see in the picture - the CB500t petcock has dual outputs. Am I correct in assuming that I can just cap off one of the outputs? I wouldn't think that it would affect fuel flow that much but I really have no clue. I believe the petcock is 16mm (inside thread) btw.

Also - you can see old gas (varnish) on the outputs of the petcock... the selector moves just fine - what would be the best way of cleaning the petcock without rebuilding (which I will do if it is needed)? I was thinking maybe soaking it in gas for a few days then taking a toothbrush to it. Let me know if you know of anything that works well.
 
Back
Top Bottom