
We noticed you are blocking ads. DO THE TON only works with community supporters. Most are active members of the site with small businesses. Please consider disabling your ad blocking tool and checking out the businesses that help keep our site up and free.
You are using an out of date browser. It may not display this or other websites correctly.
You should upgrade or use an alternative browser.
You should upgrade or use an alternative browser.
1982 Virago 920 engine up build
- Thread starter Knifemaker87
- Start date
Ringo said:I've seen that cbr600 before. Jesus man, great work! THIS is what turns me on...very much looking forward to more updates.
thanks so much! i am really glad that you like it especially after i consumed your racer build amazing work!
Well,
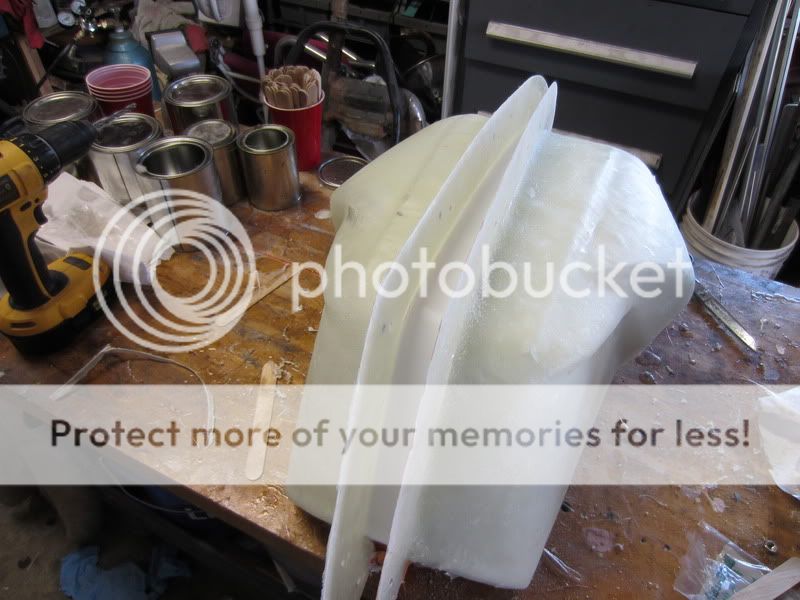
I used every spare moment to sand... sand.. and more sanding. i am honestly about sick of these things.
I got the epoxy sanded more or less smooth and then put bondo glaze on the worst patches, where i had dips or where i sanded through the epoxy into the foam. at this point i am suing 50-180 grit paper

After sanding that back to the correct shape i coated the whole parts in a very thin layer of glaze.
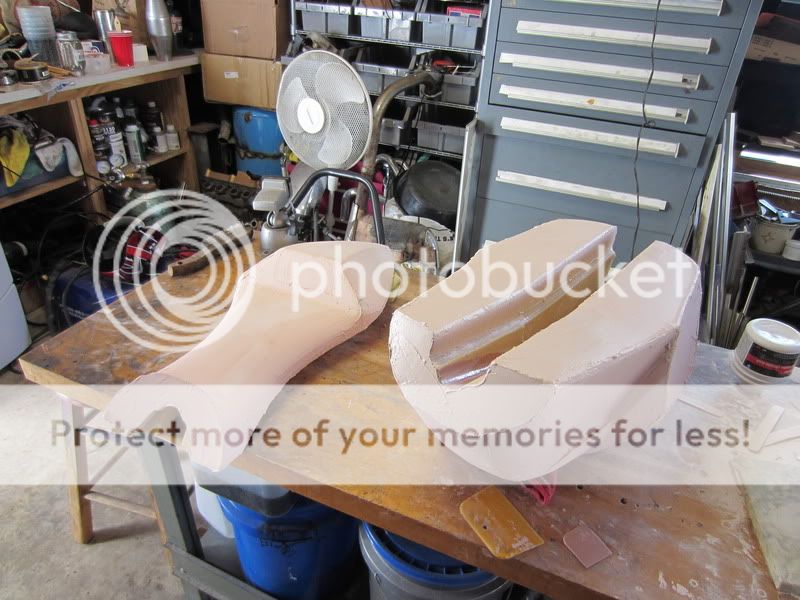
sanded smooth... and more touch up. I used a sharpie to signify areas that needed fixing with each coat, using a different color each time.
at this point i switched to 220 and 320 paper. this thing is very smooth.
it seems that whenever i patched and fixed one place another spot would turn up... but after about 4 series of coating and sanding i have the whole thing at a good place. it wont be perfect but it is time to paint for the first time.
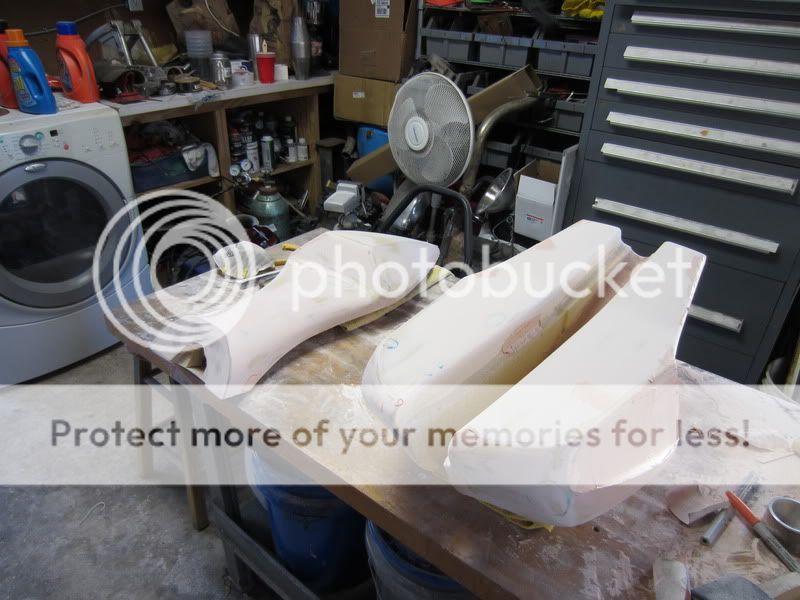
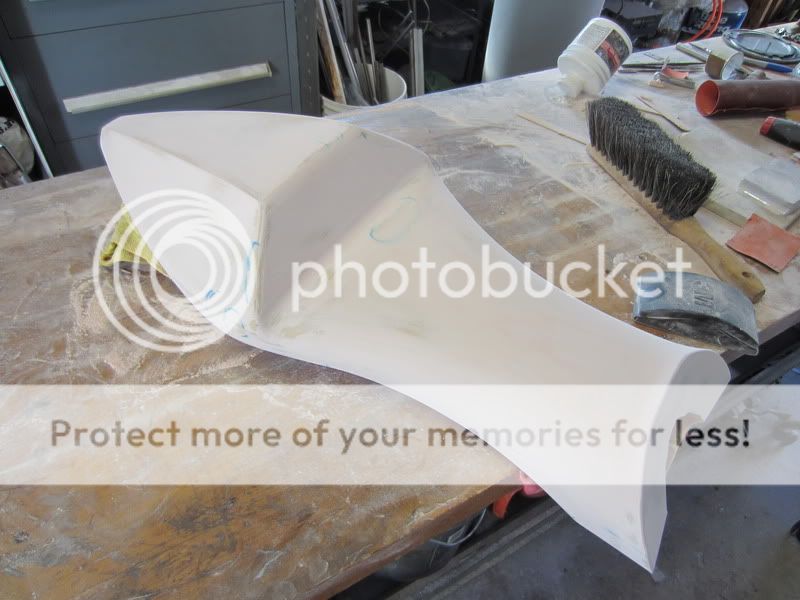
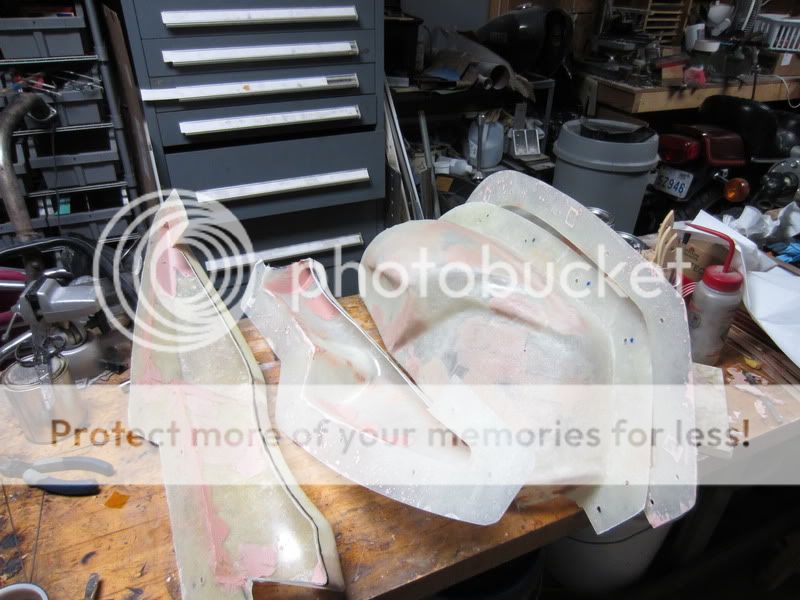
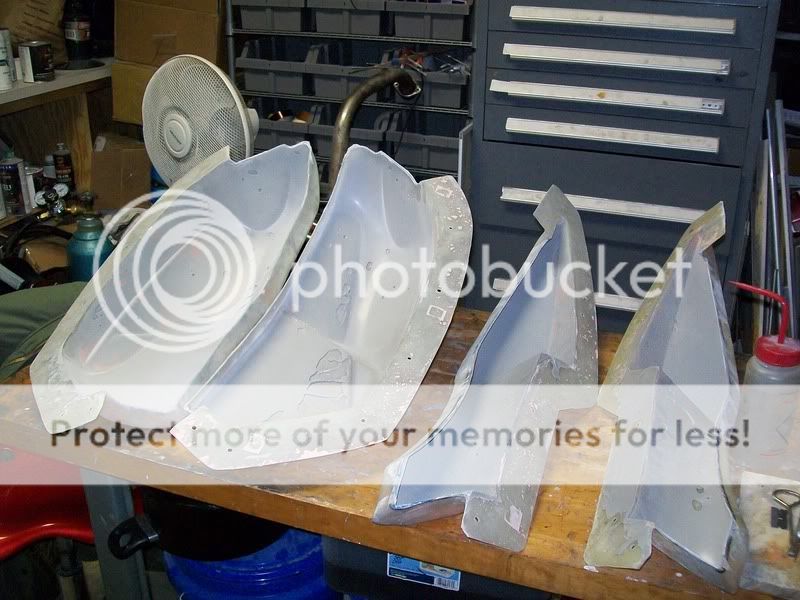
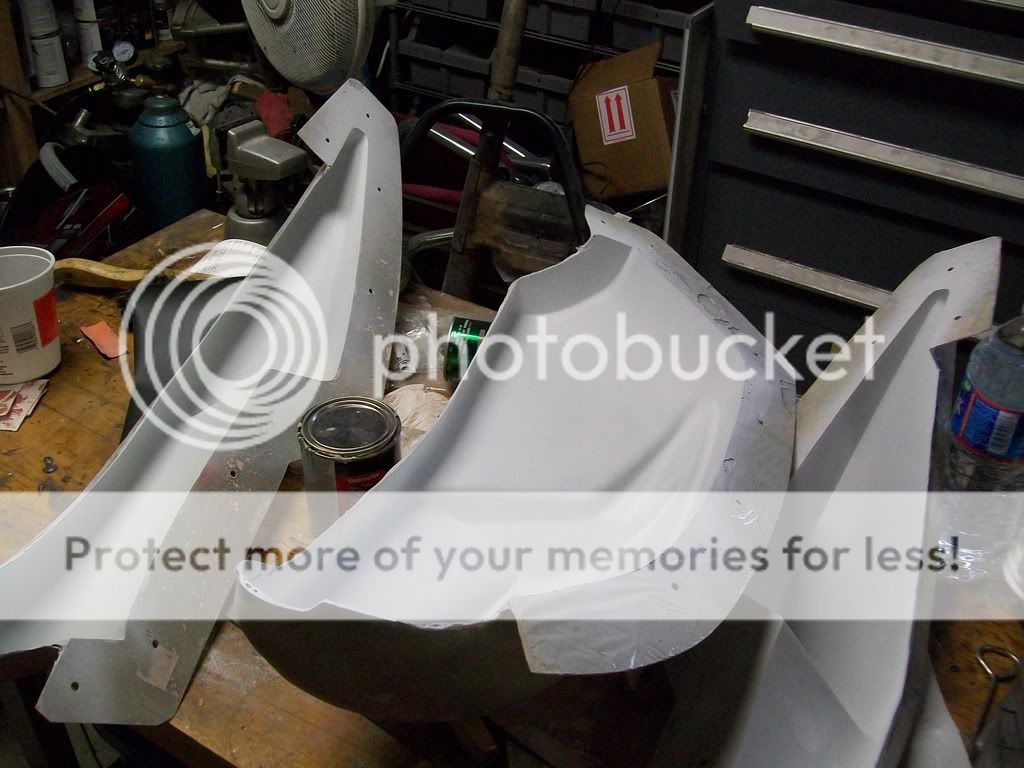
i used a 2 part epoxy sealer/primer. this reveals and little undulations and irregularities that are almost impossible to see with the multi colored surface i had before. it also accentuates any pin holes (which there where quite a few)
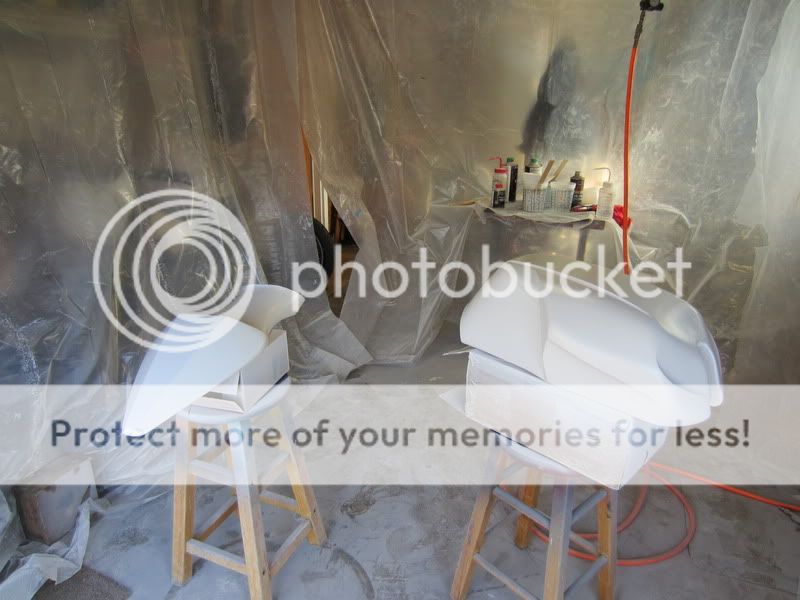
then i flipped the parts over and did the underside
now i will wait for the paint to cure and will do another round of filling and sanding but switch to 400 grit paper. then i will paint it again and cut and buff it to a high shine for the final surface of my plug. and i can start making the molds!
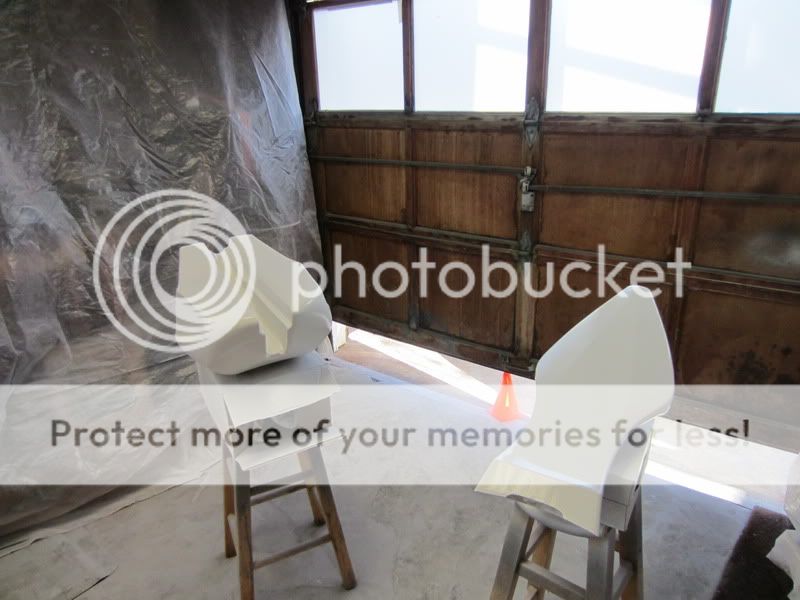
now.. these are not in chronological order.. but i thought you would like to see,
I made my clip-ons and and only need to spot weld the bars to the adapters. i also made a really long hex driver for the bolts. these will be getting hand-worked before they are done. this is right off the machine
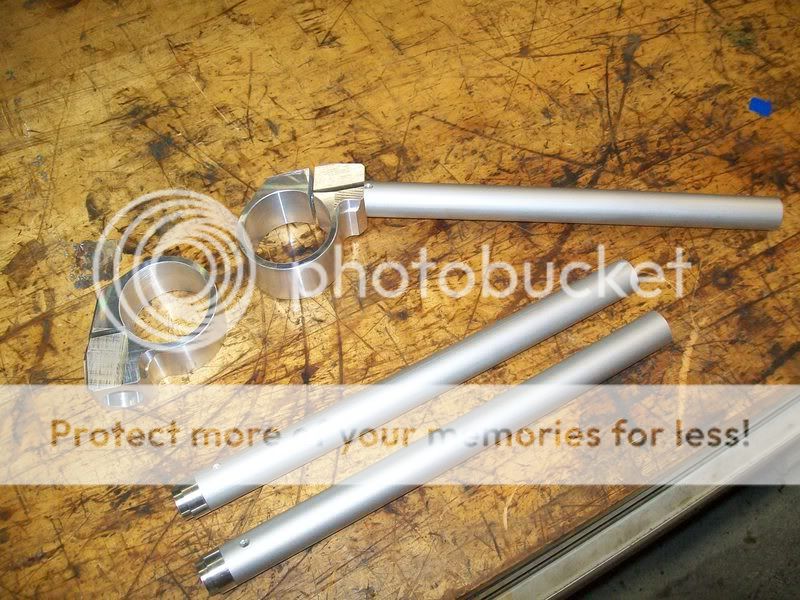
and am pretty happy with them, and i think they will be a lot better than the once i made for the CBR. they have 6 degrees of down angle.

i also made a new side cover as i wanted to update the bike a bit..
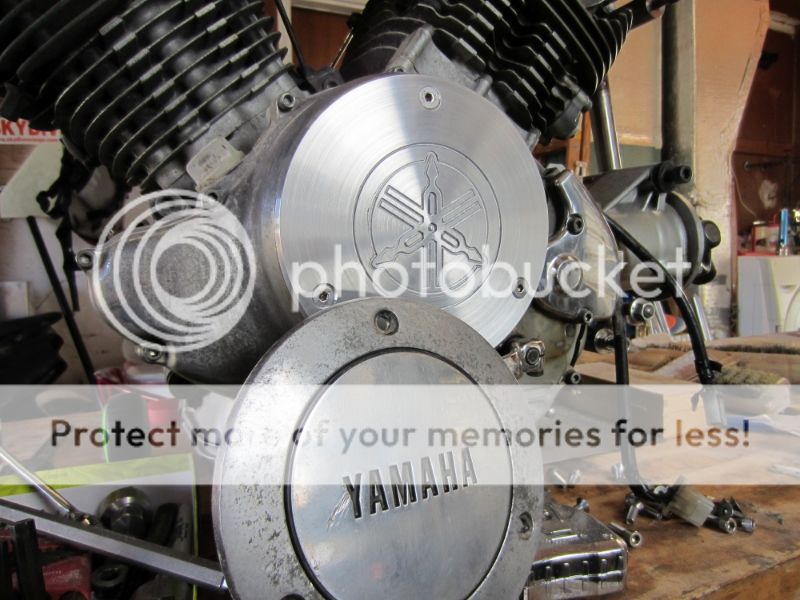
it has a rubber gasket on the back to isolate any vibration. i am also making a custom one with my logo. this one was for a friend who also has a 920.

thanks for looking! more soon!
~Chris
now i will wait for the paint to cure and will do another round of filling and sanding but switch to 400 grit paper. then i will paint it again and cut and buff it to a high shine for the final surface of my plug. and i can start making the molds!
Are you doing this so that you can make multiples to recoup your investment or so that you are able to replace bodywork if something goes wrong later?
Either way, thanks for sharing this part, I've not seen it done before.
Rich Ard said:Are you doing this so that you can make multiples to recoup your investment or so that you are able to replace bodywork if something goes wrong later?
Either way, thanks for sharing this part, I've not seen it done before.
these are just the plugs. You want them to be a perfect "example" of what you want your part to look like. Then, you lay up fiberglass over it and the "inside" of the fiberglass is a perfect negative copy of the plug. the better the surface on your plug the better the surface on the mold. Then, you make your parts off of the negative mold. If all goes according to plan you should have a nice smooth finish on the "outside" of your part now.
You could just lay up the carbon fiber parts on the outside of the plug but then you would have a rough uneven surface on the side that showed. You could sand it down smooth or fill it with bondo, but when you are making it from carbon fiber you cant fill it with bondo, and you want the weave pattern even and smooth. Sanding would cut through different layers and different levels leaving a very uneven looking pattern.
this is a whole heck of a lot of work for two parts.. but once you have the molds made you shouldnt have to do any bodywork once the parts are out of the mold. you do all the hard tedious work up front.
i hope that makes sense?
Rich Ard said:> carbon fiber
Makes sense now, hadn't considered that. So what do you do with the negative molds when you're done? Stack them up on a shelf and agonize about what to do with them?")
pretty much... lol. with the last molds i actually sold them with the bike. just in case. i will most likely hold onto these and made any new parts if i ever need them. once you have the molds you can make as many parts as you like. so i could pick up another virago....
Knifemaker87 said:thanks so much! i am really glad that you like it especially after i consumed your racer build amazing work!
I think you have me mixed up with someone else.... or are you talking about a build thread I did on another site?
Greg-NWO said:I think you have me mixed up with someone else.... or are you talking about a build thread I did on another site?
oops! i am really sorry. i may have seen your builds on other sites, however i misquoted. i am still getting used to the "quote" button being on the top of the reply.
Sorry for the long intervals between updates... i have been working, but i have been really busy at work and most of the stuff i have been doing hasn't been picture worthy... and i know how yall hate updates with no pictures.
So.. major picture dump.
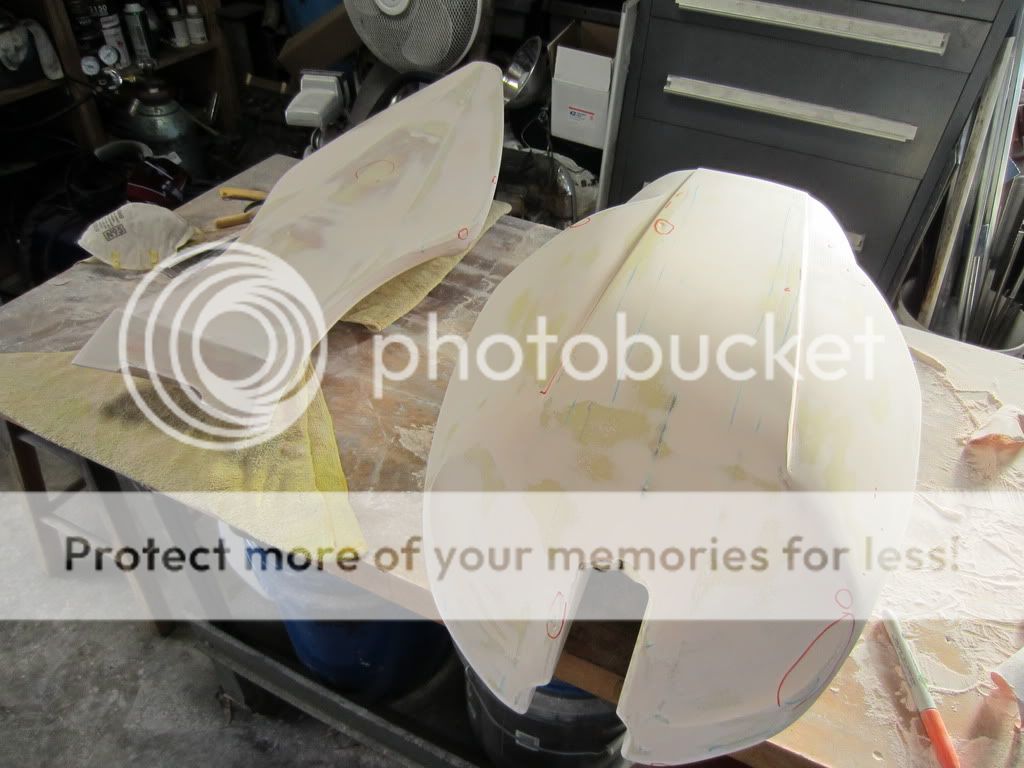
First off, after the first coat of primer/sealer there were still some pinholes and spots i missed with the putty that i couldnt see, so i used even finer/thinner putty to fill the pinholes.
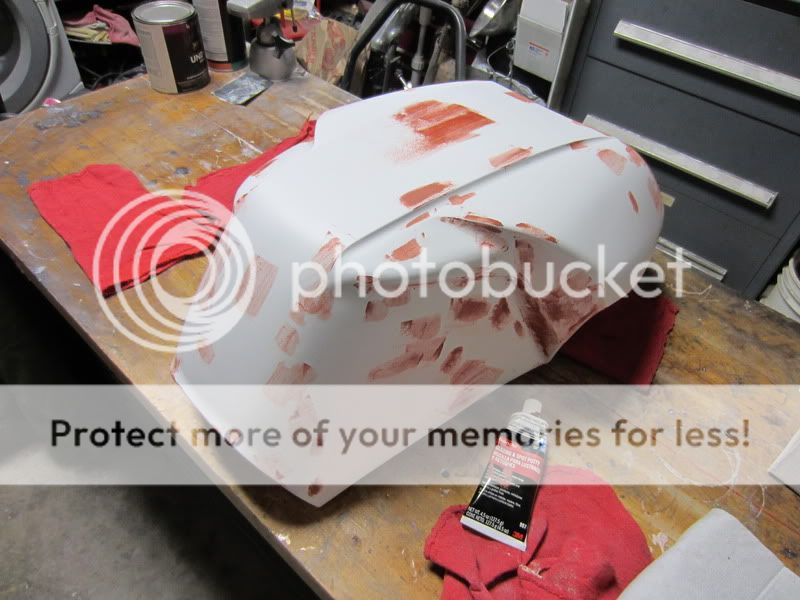
it looks like major surgery.. but it really isnt. this stuff is awesome.. flows into the holes and doesnt add to the surface at all.

Once that was done i sanded it all smooth again, and gave the plugs another coat of primer. honestly the hold up has been the weather it has either been too wet or too cold to paint in the garage. but i finally got it done.
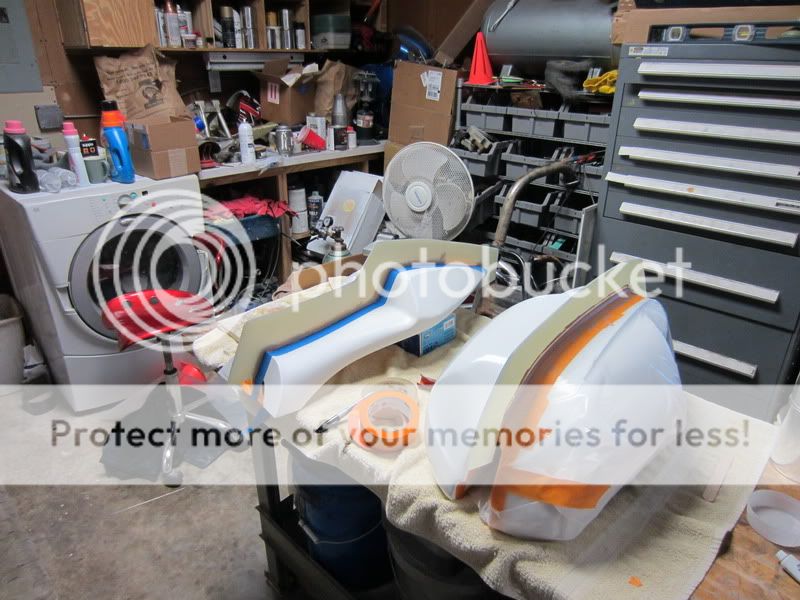
The top coat of paint was sanded with 800 grit paper and polished to a nice shiny finish, and then i started on my splitter plates. it is easier to get the profile with sections of cardboard, so my wife helped me out while we were watching a movie. here they are done:
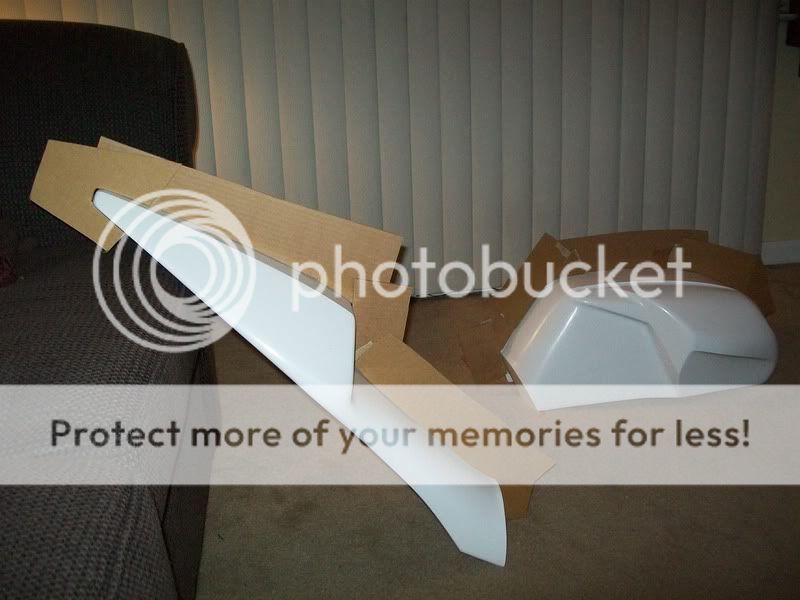
those cardboard templates got transferred onto some G10 sheet. Normally Masonite is used for this, but i didn't have any and i had a nice sheet of G10.
Now, you need to attach the splitter plates securely but you don't want to mar the mold, so i ran a line of tape just on once side of the center-line so the side of the splitter plate is on the tape sitting on the center-line.
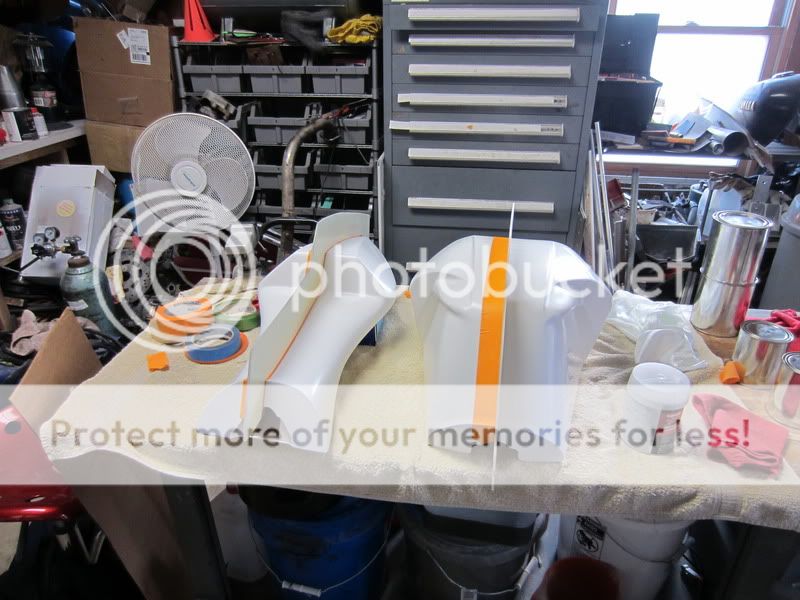
then the other side is wrapped up so no stray resin gets on it and outlines the extent of the mold. you have to make sure that once the fiberglass is cured it wont be stuck on there because it goes around corners that lock it in place.
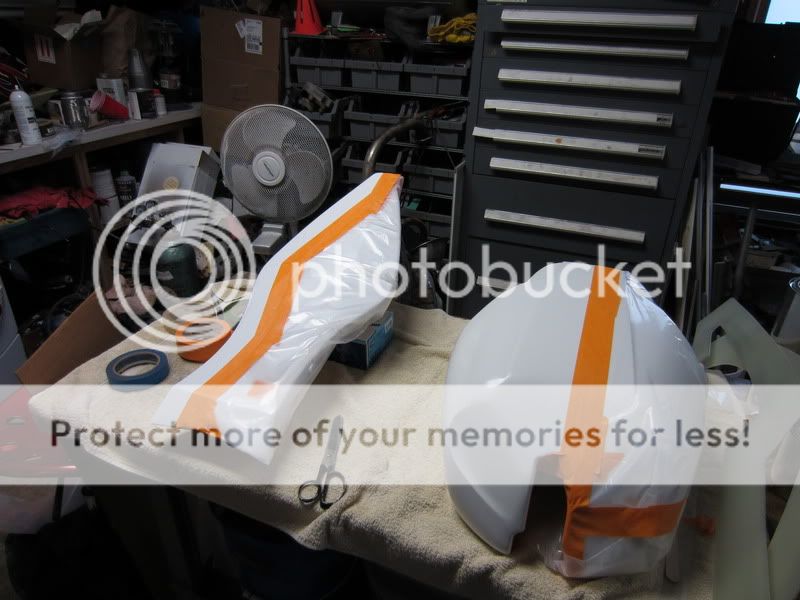
then, after masking off the OTHER side of the splitter plate for any push-through i set the plate vertical and used bondo to hold it in place. now the bondo is sticking to the tape so once the first side of the mold is done i can pop the splitter plate off without having to re-sand and polish the plug
the masking tape also allows you to fill any gaps between the splitter plate and the plug that were not filled with bondo (and then cleaned up) i used soft modeling clay, press it into the gap and then trim it flush with a razor blade. then you remove your masking tape and hey, presto you have once half of the plug ready to be cleaned and released.
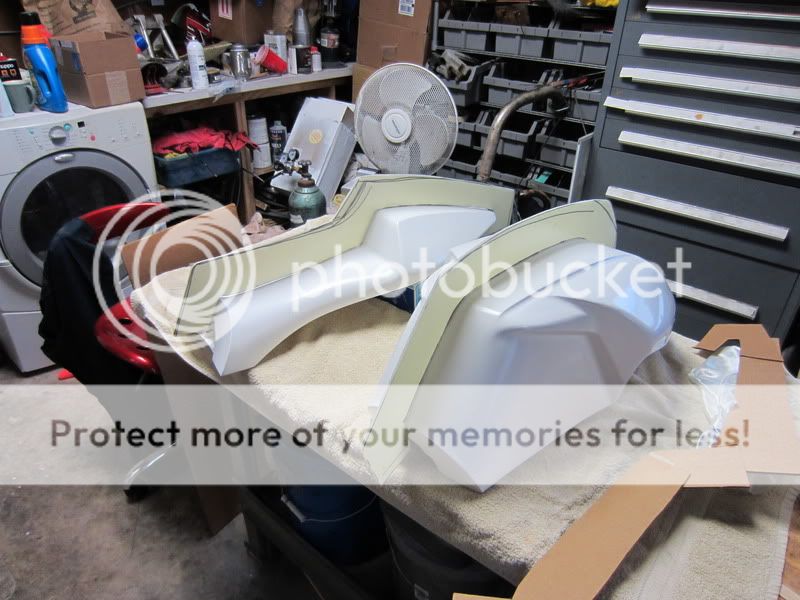
i will be using gel-coat for the first time on these molds and you are supposed to lay up your first layer of fiberglass as the gel-coat gets tacky for maximum adhesion. I am using a really find flexible layer of fiberglass for this and it is best to measure and cut it beforehand.
That brings us up to last night. my plan today is to release the mold (not into the wild) spray the gel-coat and lay up at least the first layer of glass on both molds. that way if i run out of time i should still be able to lay up the rest of the layers on Friday and do the other side on Saturday.
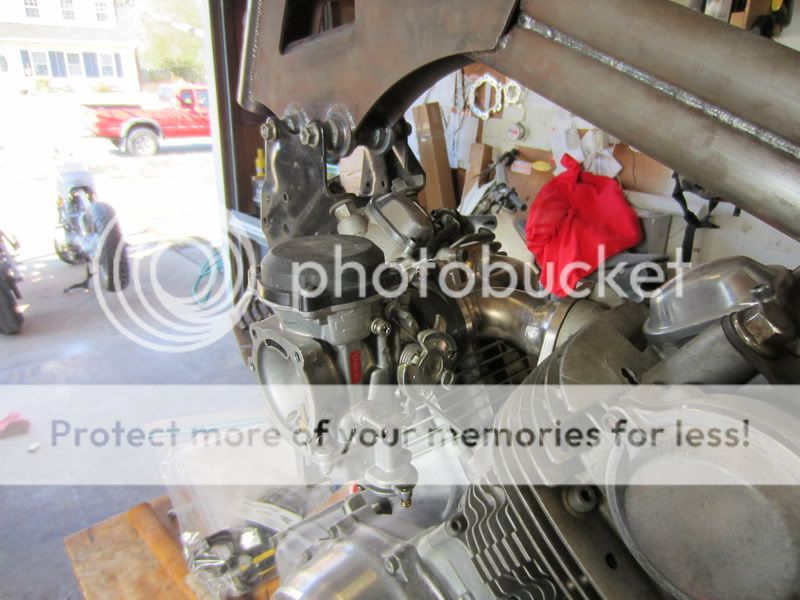
Now.. i also got my carburetor. i got a Keihin 40mm CV carb off of a 2001 Sportster 1200. i got it for $40 shipped and it included all the tubing and cables.
but, you get what you pay for and it was rather corroded. thankfully all the jet passages are free, the float is sound and the diaphragm is in good condition, however the float valve was a total lose as was the enricher/choke slide.
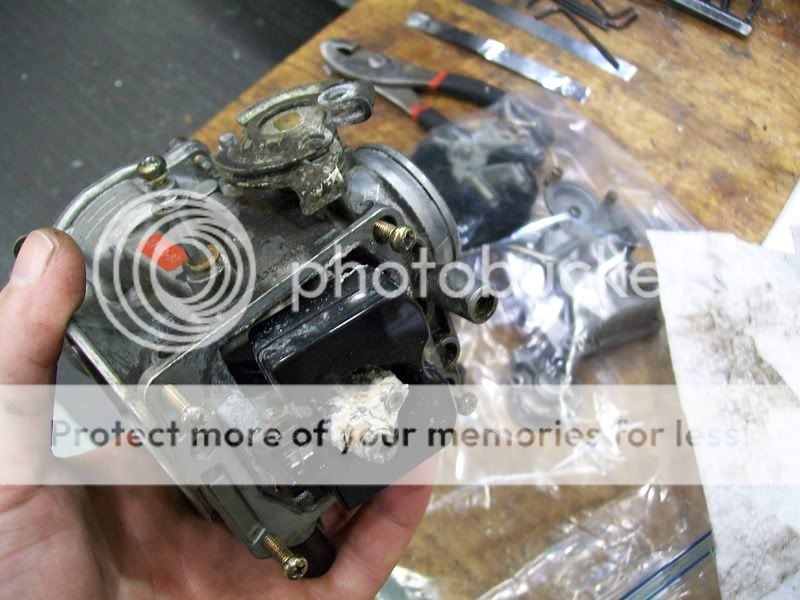
this is after i cleaned it up a little (i was too excited to take pictures)
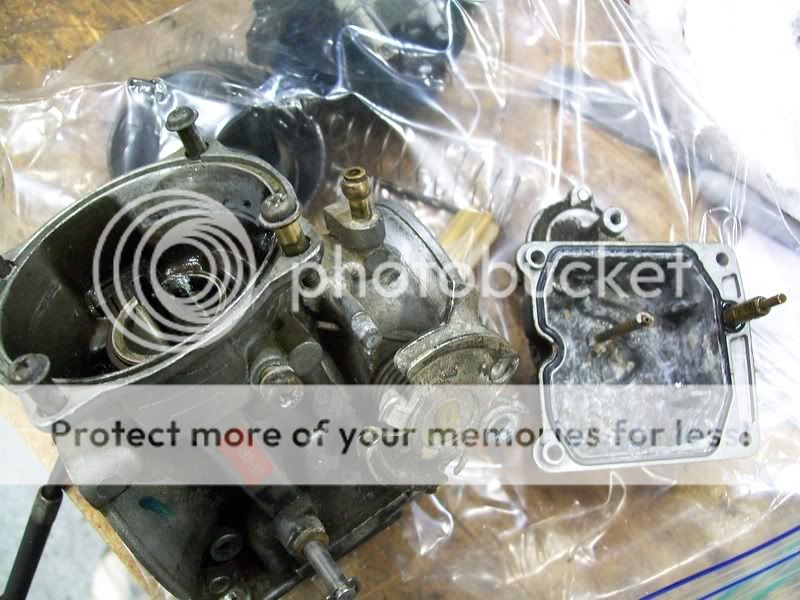
and i ended up having to remove the choke slide with an easy-out it. there is almost no pitting however and all the internals are smooth and the slide bore is still shiny. so i ordered a rebuild kit, a new choke slide and a re-tuning kit all for $60.
anyway... more next time!
~Chris
So.. major picture dump.
First off, after the first coat of primer/sealer there were still some pinholes and spots i missed with the putty that i couldnt see, so i used even finer/thinner putty to fill the pinholes.
it looks like major surgery.. but it really isnt. this stuff is awesome.. flows into the holes and doesnt add to the surface at all.
Once that was done i sanded it all smooth again, and gave the plugs another coat of primer. honestly the hold up has been the weather it has either been too wet or too cold to paint in the garage. but i finally got it done.
The top coat of paint was sanded with 800 grit paper and polished to a nice shiny finish, and then i started on my splitter plates. it is easier to get the profile with sections of cardboard, so my wife helped me out while we were watching a movie. here they are done:
those cardboard templates got transferred onto some G10 sheet. Normally Masonite is used for this, but i didn't have any and i had a nice sheet of G10.
Now, you need to attach the splitter plates securely but you don't want to mar the mold, so i ran a line of tape just on once side of the center-line so the side of the splitter plate is on the tape sitting on the center-line.
then the other side is wrapped up so no stray resin gets on it and outlines the extent of the mold. you have to make sure that once the fiberglass is cured it wont be stuck on there because it goes around corners that lock it in place.
then, after masking off the OTHER side of the splitter plate for any push-through i set the plate vertical and used bondo to hold it in place. now the bondo is sticking to the tape so once the first side of the mold is done i can pop the splitter plate off without having to re-sand and polish the plug
the masking tape also allows you to fill any gaps between the splitter plate and the plug that were not filled with bondo (and then cleaned up) i used soft modeling clay, press it into the gap and then trim it flush with a razor blade. then you remove your masking tape and hey, presto you have once half of the plug ready to be cleaned and released.
i will be using gel-coat for the first time on these molds and you are supposed to lay up your first layer of fiberglass as the gel-coat gets tacky for maximum adhesion. I am using a really find flexible layer of fiberglass for this and it is best to measure and cut it beforehand.
That brings us up to last night. my plan today is to release the mold (not into the wild) spray the gel-coat and lay up at least the first layer of glass on both molds. that way if i run out of time i should still be able to lay up the rest of the layers on Friday and do the other side on Saturday.
Now.. i also got my carburetor. i got a Keihin 40mm CV carb off of a 2001 Sportster 1200. i got it for $40 shipped and it included all the tubing and cables.
but, you get what you pay for and it was rather corroded. thankfully all the jet passages are free, the float is sound and the diaphragm is in good condition, however the float valve was a total lose as was the enricher/choke slide.
this is after i cleaned it up a little (i was too excited to take pictures)
and i ended up having to remove the choke slide with an easy-out it. there is almost no pitting however and all the internals are smooth and the slide bore is still shiny. so i ordered a rebuild kit, a new choke slide and a re-tuning kit all for $60.
anyway... more next time!
~Chris
Hey everybody,
sorry for the long delay. I have had several major set-backs that have put me behind... however i do have a nice long picture-filled update.
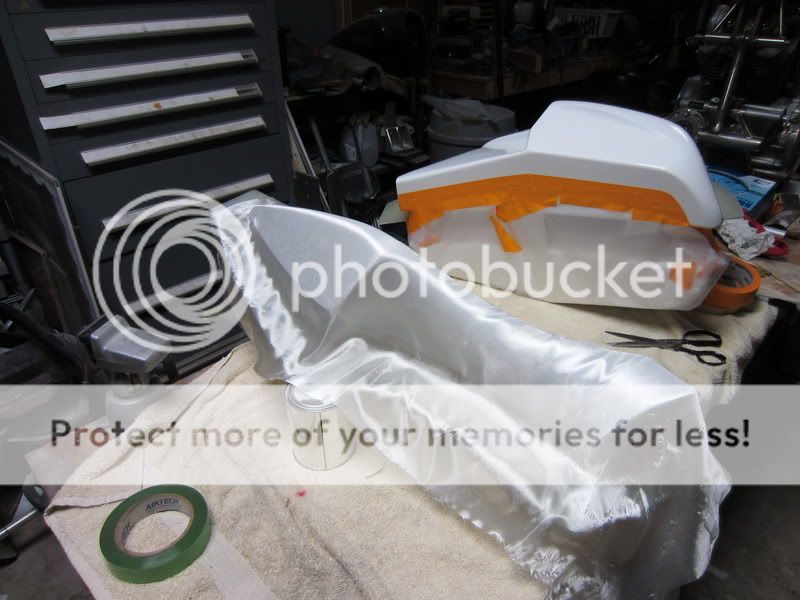
The cold has really hijacked my composite work. The day after my last post, i spayed the gel-coat and it is supposed to set up to a gel in about 25-30 min after mixing. No dice. 32 hours later it was still a liquid. it looks nice here, but i had to cut my losses as scrape it all off.
so i had to re-do all the splitter plate set-up and re-release the parts. huge pain in the butt, not only frustrating but because of the MEK in the gel-coat sitting on the molds for so long uncured it damaged the surface finish on the plugs so i had to re-do even more work. that set me back almost a week.
I eventually did get the first side made, but due to an inoperable camera i did get any pictures of it. once that side set up i pulled off the splitter plate, and released the other side and the splitter section before laying up the other side

Once that side set up i marked and drilled bolt hols so i could put the sides back together, then i got the molds off the plug. The mold released perfectly.
and then disaster. I put all this work into making the b=plugs perfect and the surface finish flawless, and the molds had a bunch of spots where the fiberglass didn't adhere to the plug. major disappointment. so.. out comes the bondo and i started to spot-fill the flaws
then i had a brilliant idea. why not use some thick resin, brush it over the whole inside of the mold and then pop the molds back on the plugs? then i have a perfect smooth match to my flawless plugs. But... once again the cold got me. the resin doesn't set up as quickly when it is cold and even getting the parts inside where it was warm didn't allow the resin to set up fast enough not to get some pockets..
so... out came the bondo and the sand paper again. the molds are much better now with no inclusions in the fiberglass showing. this is after one round of filling and sanding then primer to show where is am low or missing air-bubble pin-holes. one more round of filling sanding, primer/sealer and then sanding again and the molds should be ready.
i have been so fed up with the setbacks with the molds that i have had to step away for a bit and work on other things.
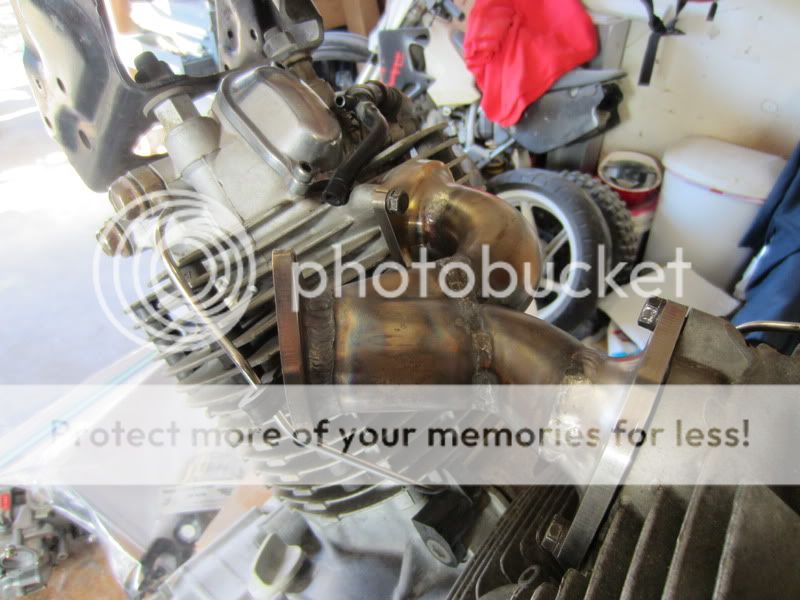
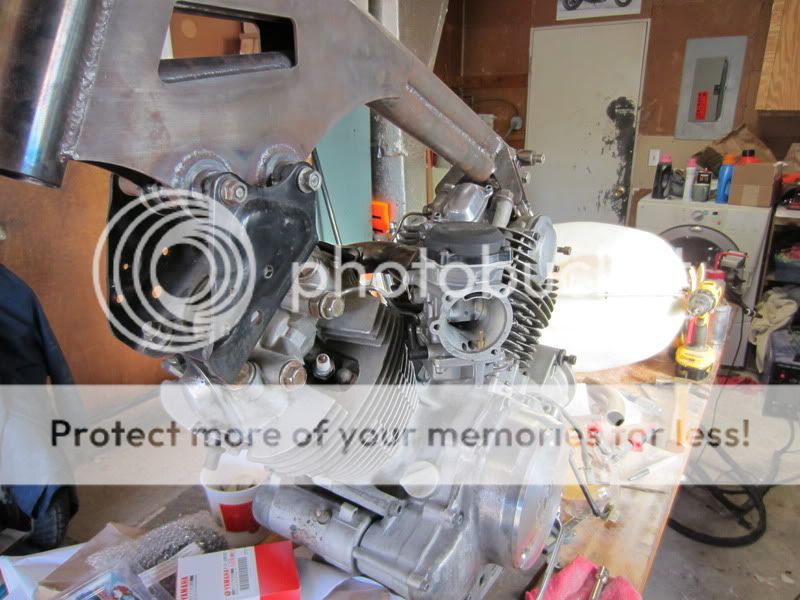
the first thing on my list is my intake manifold. i am converting from the two crappy carbs to a single 40mm CV carb off a Harley. So i cut all my pipes and fittings before welding anything. i have sealing gaskets in between the manifold and the head. Do you think there is going to be a problem with heat expansion?
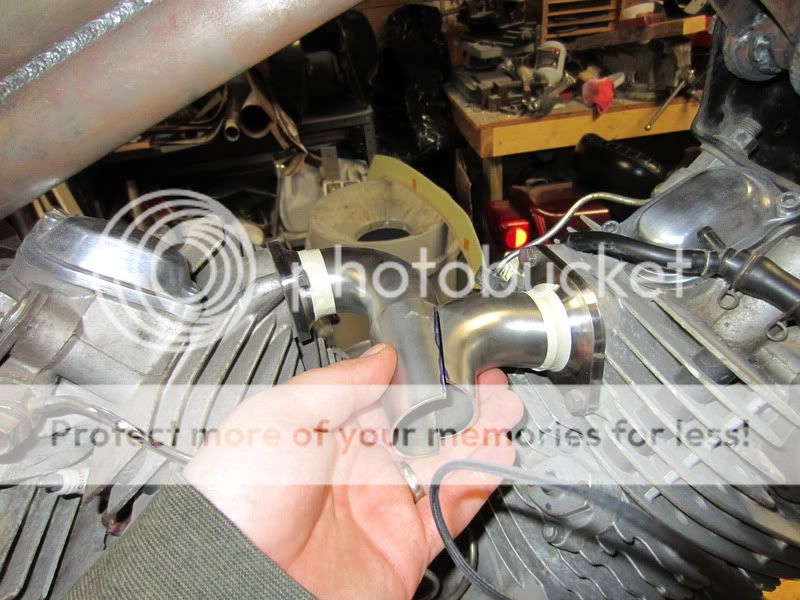
then i tacked them up on the bike before taking off to finish the welding
Welded the mounting flange in...
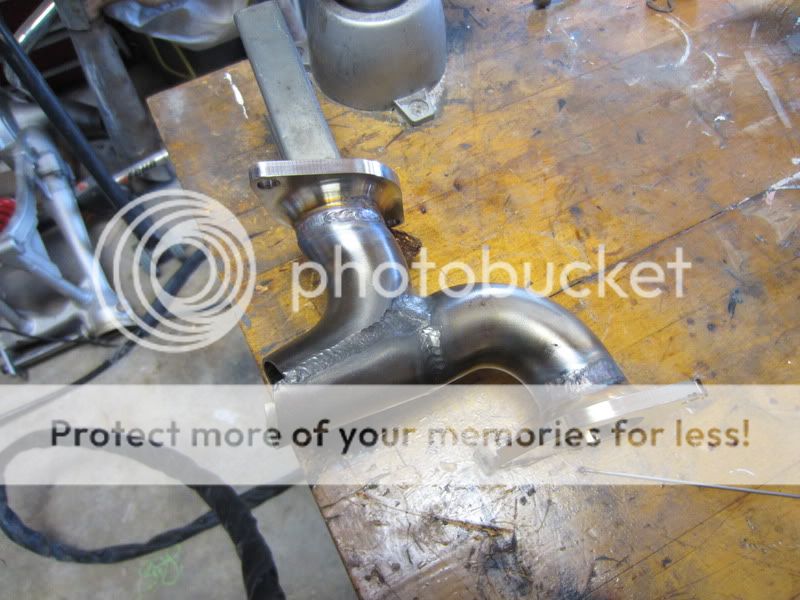
and viola! but the more i looked at it the more i didnt like how much it stuck out. especially as it didnt even have the filter on it yet..
so... i chopped it up and re-welded it.
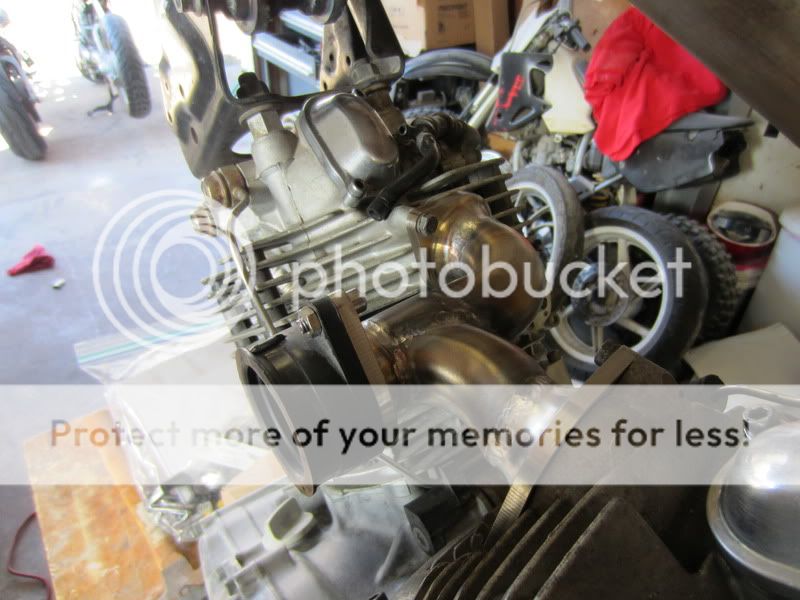
i like this set-up much better it fit a little closer to the engine and the routing for the pipes is better in my opinion.
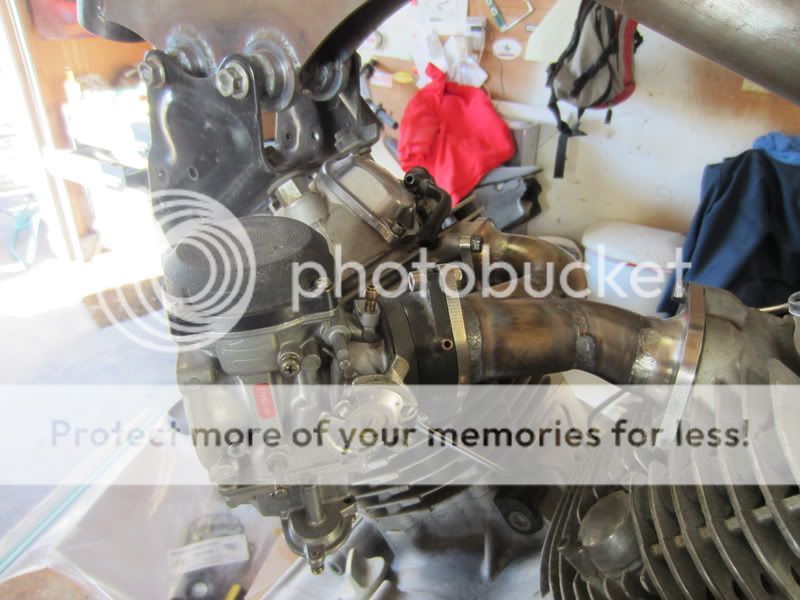
now i will make a custom intake tube and mount a cone filter facing forward. i still need to do some touch up grinding on the inside of the manifold to make it nice and smooth... but otherwise i am pretty happy with it.
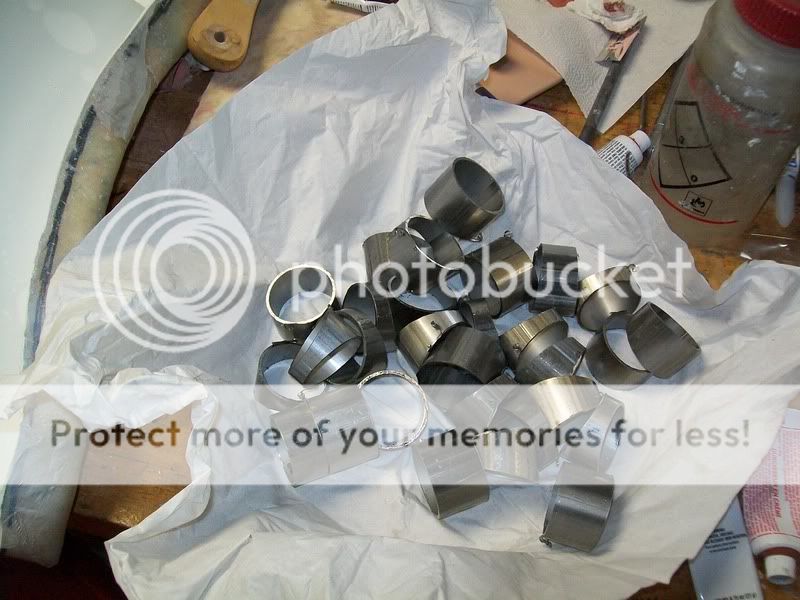
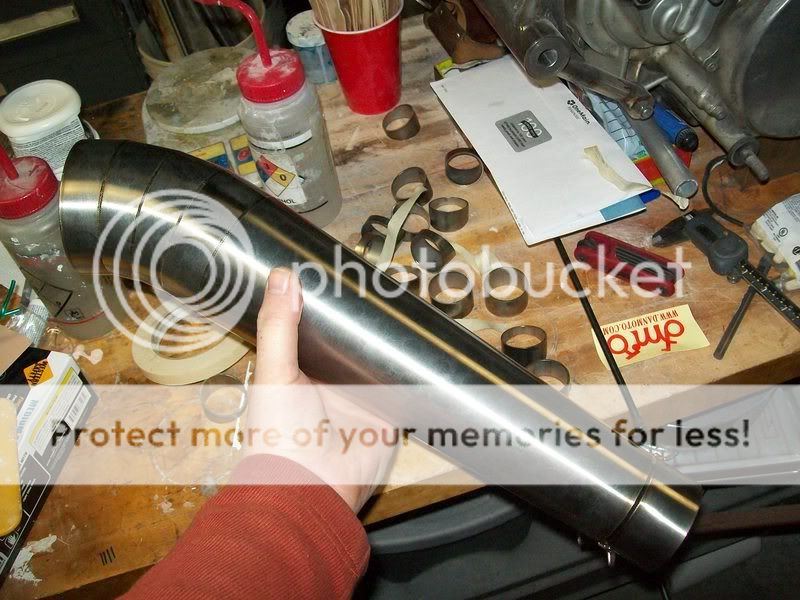
I also started work on my exhaust. i got some PVC pipe insulation to mock up the routing of the header. i routed my rear pipe first and then cut another piece of insulation the same length to figure out how that was going to route.
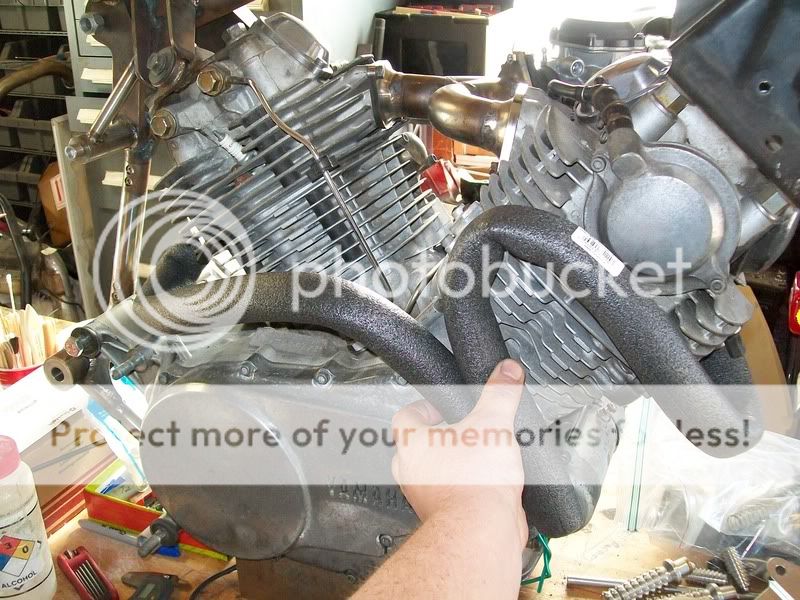
and then... in the night someone cut up all my exhaust tubing! who would do such a thing?! oh yeah... me. with no tube bender available i am going to do a full sectioned exhaust.
and... i also got some goodies!
got my DanMoto exhaust. i think it will be too loud so i am going to build in an integrated baffle/expansion chamber in the section of tubing that will go under the engine. i am going to try and transition to a 2" OD pipe after the 2-1 and run 1.5" pipe inside it to hide the expansion/contraction and make it look smooth.
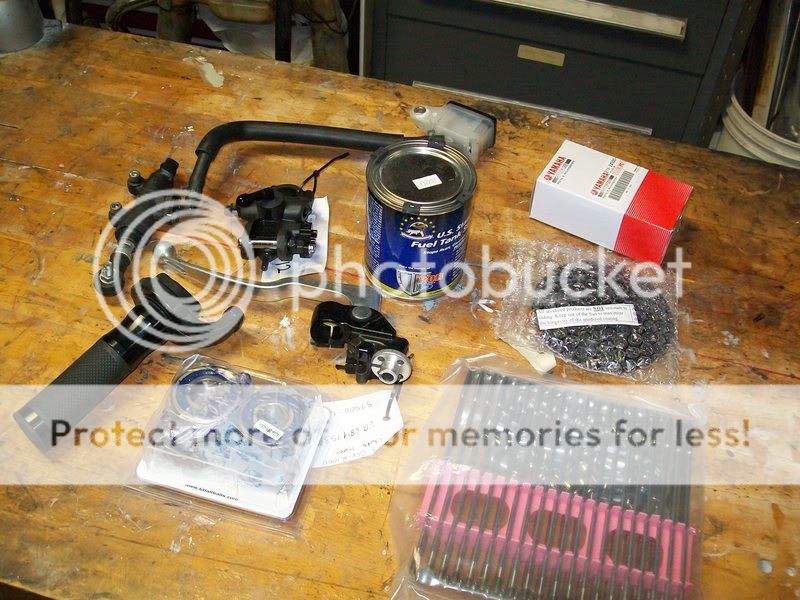
I also got some little stuff. i got a radial master and matching clutch mount taken off gsxr 1000, YZF throttle and cables, stainless steel brake lines, chazzos, grips, gas cap, petcock, rear master, new spokes for the rear wheel, rear wheel bearings, and some tank sealer.
well, that's it for now, but hopefully i will have another update soon.
thanks!
~Chris
sorry for the long delay. I have had several major set-backs that have put me behind... however i do have a nice long picture-filled update.
The cold has really hijacked my composite work. The day after my last post, i spayed the gel-coat and it is supposed to set up to a gel in about 25-30 min after mixing. No dice. 32 hours later it was still a liquid. it looks nice here, but i had to cut my losses as scrape it all off.
so i had to re-do all the splitter plate set-up and re-release the parts. huge pain in the butt, not only frustrating but because of the MEK in the gel-coat sitting on the molds for so long uncured it damaged the surface finish on the plugs so i had to re-do even more work. that set me back almost a week.
I eventually did get the first side made, but due to an inoperable camera i did get any pictures of it. once that side set up i pulled off the splitter plate, and released the other side and the splitter section before laying up the other side
Once that side set up i marked and drilled bolt hols so i could put the sides back together, then i got the molds off the plug. The mold released perfectly.
and then disaster. I put all this work into making the b=plugs perfect and the surface finish flawless, and the molds had a bunch of spots where the fiberglass didn't adhere to the plug. major disappointment. so.. out comes the bondo and i started to spot-fill the flaws
then i had a brilliant idea. why not use some thick resin, brush it over the whole inside of the mold and then pop the molds back on the plugs? then i have a perfect smooth match to my flawless plugs. But... once again the cold got me. the resin doesn't set up as quickly when it is cold and even getting the parts inside where it was warm didn't allow the resin to set up fast enough not to get some pockets..
so... out came the bondo and the sand paper again. the molds are much better now with no inclusions in the fiberglass showing. this is after one round of filling and sanding then primer to show where is am low or missing air-bubble pin-holes. one more round of filling sanding, primer/sealer and then sanding again and the molds should be ready.
i have been so fed up with the setbacks with the molds that i have had to step away for a bit and work on other things.
the first thing on my list is my intake manifold. i am converting from the two crappy carbs to a single 40mm CV carb off a Harley. So i cut all my pipes and fittings before welding anything. i have sealing gaskets in between the manifold and the head. Do you think there is going to be a problem with heat expansion?
then i tacked them up on the bike before taking off to finish the welding
Welded the mounting flange in...
and viola! but the more i looked at it the more i didnt like how much it stuck out. especially as it didnt even have the filter on it yet..
so... i chopped it up and re-welded it.
i like this set-up much better it fit a little closer to the engine and the routing for the pipes is better in my opinion.
now i will make a custom intake tube and mount a cone filter facing forward. i still need to do some touch up grinding on the inside of the manifold to make it nice and smooth... but otherwise i am pretty happy with it.
I also started work on my exhaust. i got some PVC pipe insulation to mock up the routing of the header. i routed my rear pipe first and then cut another piece of insulation the same length to figure out how that was going to route.
and then... in the night someone cut up all my exhaust tubing! who would do such a thing?! oh yeah... me. with no tube bender available i am going to do a full sectioned exhaust.
and... i also got some goodies!
got my DanMoto exhaust. i think it will be too loud so i am going to build in an integrated baffle/expansion chamber in the section of tubing that will go under the engine. i am going to try and transition to a 2" OD pipe after the 2-1 and run 1.5" pipe inside it to hide the expansion/contraction and make it look smooth.
I also got some little stuff. i got a radial master and matching clutch mount taken off gsxr 1000, YZF throttle and cables, stainless steel brake lines, chazzos, grips, gas cap, petcock, rear master, new spokes for the rear wheel, rear wheel bearings, and some tank sealer.
well, that's it for now, but hopefully i will have another update soon.
thanks!
~Chris
50gary
Under the Limelight
Sad happening about the cold weather disrupting the progress on the fiberglass work. I would buy (I know that's a dirty word) an infra-red heater, usually about $125.00 at Menard's that could have saved weeks of work and huge frustration, plus it's a more comfortable work environment, plus they're cheap to operate.
Cheers, 50gary
Cheers, 50gary


