
We noticed you are blocking ads. DO THE TON only works with community supporters. Most are active members of the site with small businesses. Please consider disabling your ad blocking tool and checking out the businesses that help keep our site up and free.
You are using an out of date browser. It may not display this or other websites correctly.
You should upgrade or use an alternative browser.
You should upgrade or use an alternative browser.
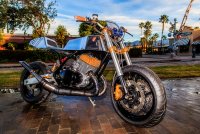
1971 Suzuki T500 cafe racer build....
- Thread starter Benjo@EKCMC
- Start date
Benjo@EKCMC
63 Rickman metisse 500, 71 suzuki t500, 66 T20
Benjo@EKCMC
63 Rickman metisse 500, 71 suzuki t500, 66 T20

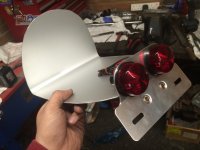
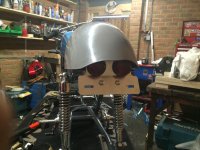
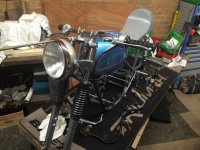
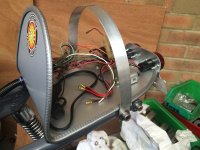
It's probably better than the original for sure, I do like that the original is a unique shape though. I am thinking about putting the original back on my 500 instead of the custom twin set up I made. I don't ride at night very often so no big deal.Benjo@EKCMC said:Old head light was cream crackered. I couldn't source a new lens in Uk. So I went with Paul's idea of a gs 500 headlight. £12 delivered, bargain and I should think a bit brighter!
It's probably better than the original for sure, I do like that the original is a unique shape though. I am thinking about putting the original back on my 500 instead of the custom twin set up I made. I don't ride at night very often so no big deal.Benjo@EKCMC said:Old head light was cream crackered. I couldn't source a new lens in Uk. So I went with Paul's idea of a gs 500 headlight. £12 delivered, bargain and I should think a bit brighter!
Benjo@EKCMC
63 Rickman metisse 500, 71 suzuki t500, 66 T20
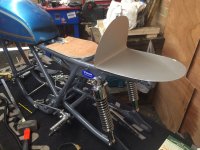
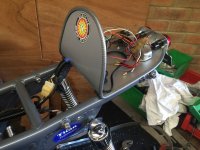
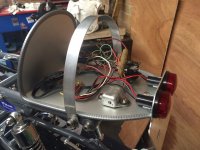
That's the trouble not being readily available... Let's see a pic with twins...
Benjo@EKCMC
63 Rickman metisse 500, 71 suzuki t500, 66 T20
Wow that's customised! Nice work
Titan performance
Titan cafe racer builders.
John's bike is certainly radical, to say the least !
Your's is coming on in leaps and bounds Ben....great work mate. Can't wait to rock up together. Tim on the scrambler too....heads will turn !
Your's is coming on in leaps and bounds Ben....great work mate. Can't wait to rock up together. Tim on the scrambler too....heads will turn !
Benjo@EKCMC
63 Rickman metisse 500, 71 suzuki t500, 66 T20
Benjo@EKCMC
63 Rickman metisse 500, 71 suzuki t500, 66 T20
Benjo@EKCMC
63 Rickman metisse 500, 71 suzuki t500, 66 T20
Benjo@EKCMC
63 Rickman metisse 500, 71 suzuki t500, 66 T20
")
Benjo@EKCMC
63 Rickman metisse 500, 71 suzuki t500, 66 T20
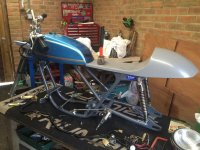
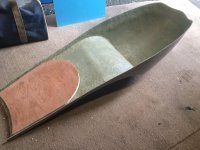
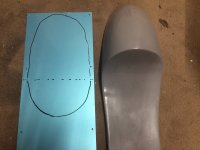
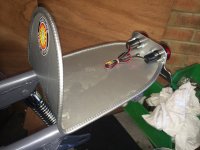
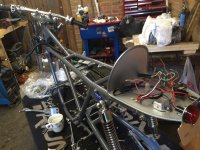
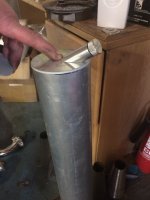
If I could weld Ali I'd love to have made this myself. I did think about making a steel tank and painting it in colour scheme but you can't beat polished Ali....
I am going to fit a sight glass pipe to it also.
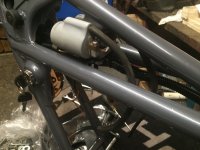
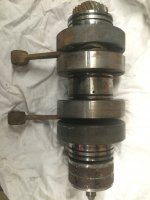
After chatting with a few of the guys I have decided to leave the crank as it is as the bearings seem good. I will replace outer I oil seals and maybe use o ring kit and replace centre o rings also....
I am going to fit a sight glass pipe to it also.
After chatting with a few of the guys I have decided to leave the crank as it is as the bearings seem good. I will replace outer I oil seals and maybe use o ring kit and replace centre o rings also....
Attachments
Benjo@EKCMC
63 Rickman metisse 500, 71 suzuki t500, 66 T20
Benjo@EKCMC
63 Rickman metisse 500, 71 suzuki t500, 66 T20
Well I was planning on fitting the outer o rings as normal, but then the idea for the centre ones was to use an o ring kit I have and slice the new centre o ring then fit it in place and secure it with the adhesive in the kit...
The theory is that it will sit in place just the same and will be pressed in place by the cases.
The theory is that it will sit in place just the same and will be pressed in place by the cases.
CarbsAndCylinders
Careful With That Axe Eugene
Does that really work well and last?


