
We noticed you are blocking ads. DO THE TON only works with community supporters. Most are active members of the site with small businesses. Please consider disabling your ad blocking tool and checking out the businesses that help keep our site up and free.
You are using an out of date browser. It may not display this or other websites correctly.
You should upgrade or use an alternative browser.
You should upgrade or use an alternative browser.
RestoCycle restomods a 1981 Honda CB750F
- Thread starter NobleHops
- Start date
NobleHops
Recovering geek
A customer has commissioned me to build him a bike he's always lusted after - a DOHC 750 from the early 80s, in this case an 81 Honda CB750F. Going to try to entertain you guys with the build, getting your help in spots along the way, and hopefully contribute some interesting and referenceable content as we go. Let me just say in advance that I appreciate your contributions, advice, help troubleshooting, or just your encouragement as I go.
Here's the bike:
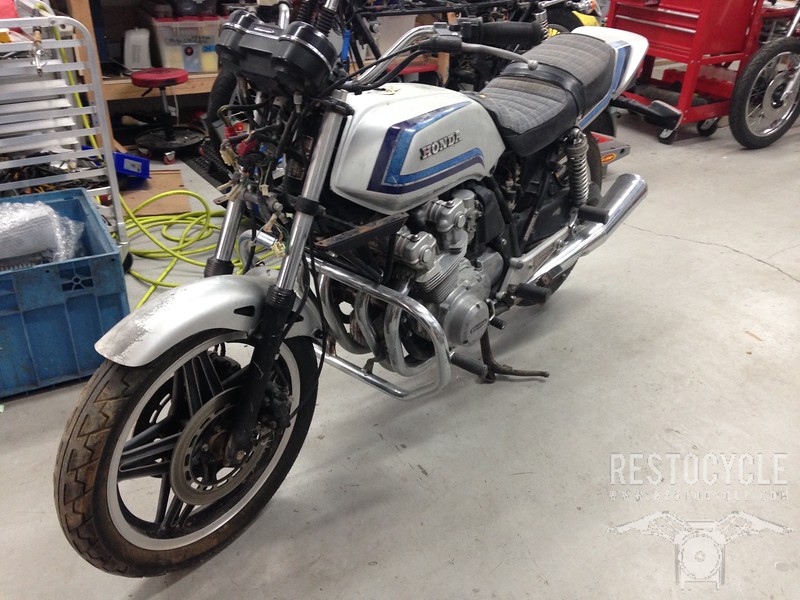
We're going to build something that looks pretty much correct for the era, but not stock. Performance upgrades engine-wise will be limited to the installation of a 900F cam, and possibly exhaust and jet changes to suit. The engine will be rebuilt with new OEM seals and gaskets and a re-ringing at the least, new cam chain and tensioners, valve/head refresh, etc. depending on exactly what we find when we get in there. We're doing all of my usual chassis upgrades - steering head and swingarm bearings, wheel bearings, rebuilt fork with RaceTech cartridge emulators and springs, upgraded rear shocks.
Bodywork is already done, we've adopted the color scheme and graphics of a 900F, and the seat will be re contoured and covered. We've got lattice footrest plates and we'll go with superbike bars up front. May possibly source some Lester wheels or similar, see what we can find. Frame and stands are about to get sent out for powdercoat.
And with that, I have a bunch of catching up to do on this project and this thread, so I'm gonna get to it.
Here's the bike:
We're going to build something that looks pretty much correct for the era, but not stock. Performance upgrades engine-wise will be limited to the installation of a 900F cam, and possibly exhaust and jet changes to suit. The engine will be rebuilt with new OEM seals and gaskets and a re-ringing at the least, new cam chain and tensioners, valve/head refresh, etc. depending on exactly what we find when we get in there. We're doing all of my usual chassis upgrades - steering head and swingarm bearings, wheel bearings, rebuilt fork with RaceTech cartridge emulators and springs, upgraded rear shocks.
Bodywork is already done, we've adopted the color scheme and graphics of a 900F, and the seat will be re contoured and covered. We've got lattice footrest plates and we'll go with superbike bars up front. May possibly source some Lester wheels or similar, see what we can find. Frame and stands are about to get sent out for powdercoat.
And with that, I have a bunch of catching up to do on this project and this thread, so I'm gonna get to it.
NobleHops
Recovering geek
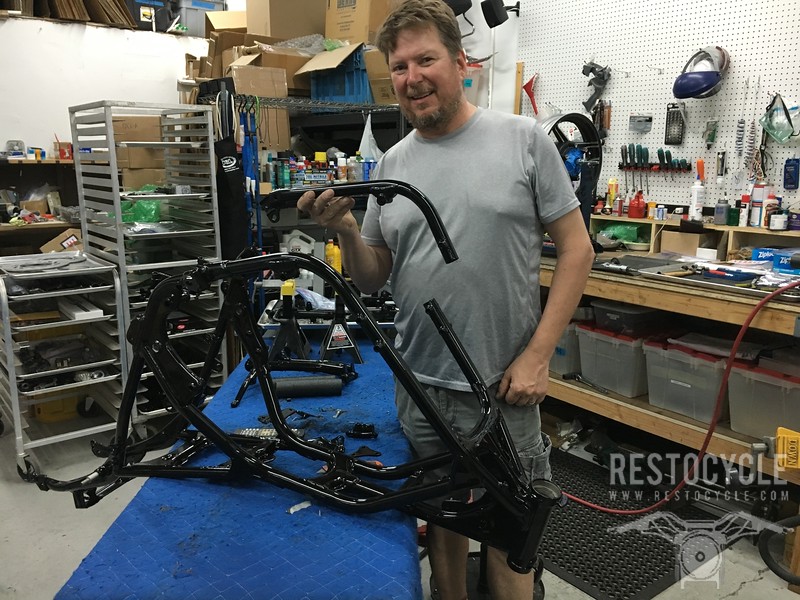
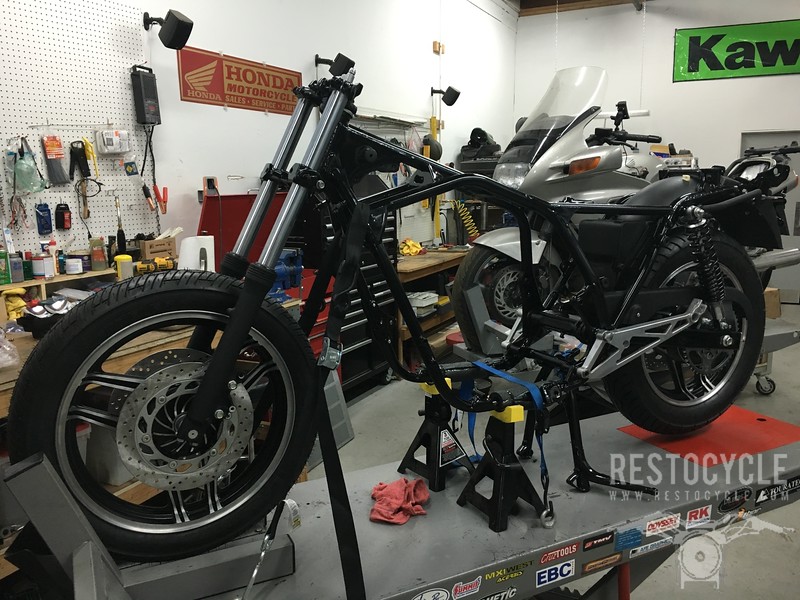
The owner and I had a great teardown session a month or so ago, got the bike pretty much apart. Engine is on a stand and all the black bits are off to powdercoating.
The bodywork is actually already done - we adopted the style of the CB900F but had <the great company that makes these graphics but can't advertise it> cut the CB750F side graphics instead, and my painter filled in the badge recess and we used decals in place of the 750F raised badges. Looks great, like a period bike, but it is 5% unique in that regard.
I found a nice deal on a pair of CB1100F wheels, and I had a complete 1100F swingarm, pivot, axle, adjuster in my own hoard, so that is going to be used in place of the stock 750 rear end.
NobleHops
Recovering geek
Alright, we are teetering on the slippery slope at this point.
Going to disassemble the engine as we go and was anticipating honing and re-ringing at a minimum, and lapping the valves, replacing all the seals and gaskets, a few bearings, etc. But then again, we have this option, you know, WHILE WE'RE THERE:
http://www.ebay.com/itm/79-82-HONDA-CB900F-0-5mm-OVERSIZE-PISTONS-SET-65mm-4-PISTONS-10-CB900FPS-1-/131663332765?vxp=mtr&hash=item1ea7bf059d
Several guys I know have had great results with these Cruzinimage kits, and I do in fact have the 900 cam in hand already, and an 1100 oil cooler setup is inbound. Somebody talk me into or out of making this 750 a 900cc sleeper") .
.
...
Going to disassemble the engine as we go and was anticipating honing and re-ringing at a minimum, and lapping the valves, replacing all the seals and gaskets, a few bearings, etc. But then again, we have this option, you know, WHILE WE'RE THERE:
http://www.ebay.com/itm/79-82-HONDA-CB900F-0-5mm-OVERSIZE-PISTONS-SET-65mm-4-PISTONS-10-CB900FPS-1-/131663332765?vxp=mtr&hash=item1ea7bf059d
Several guys I know have had great results with these Cruzinimage kits, and I do in fact have the 900 cam in hand already, and an 1100 oil cooler setup is inbound. Somebody talk me into or out of making this 750 a 900cc sleeper
. ...
NobleHops
Recovering geek
...
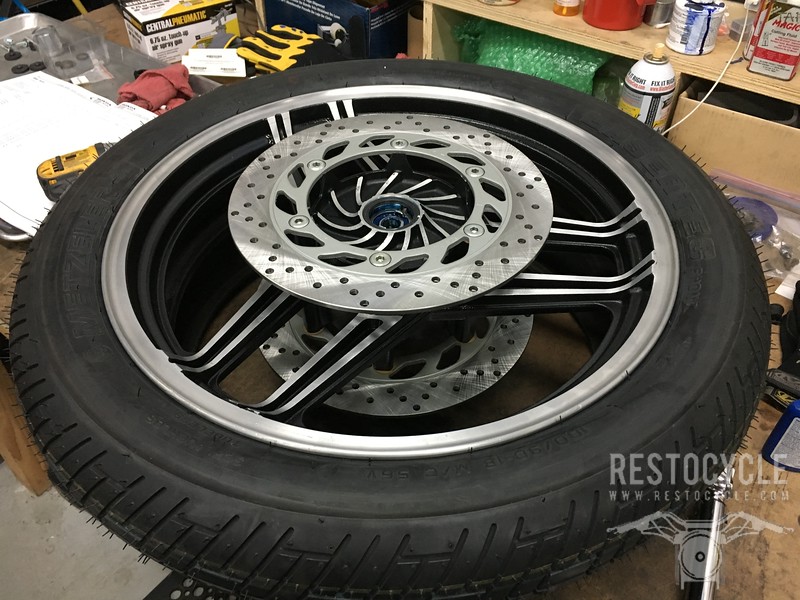
The 1100F wheels were in excellent condition, straight and nearly nick free, but of course they are 40 years old so they got a going over.
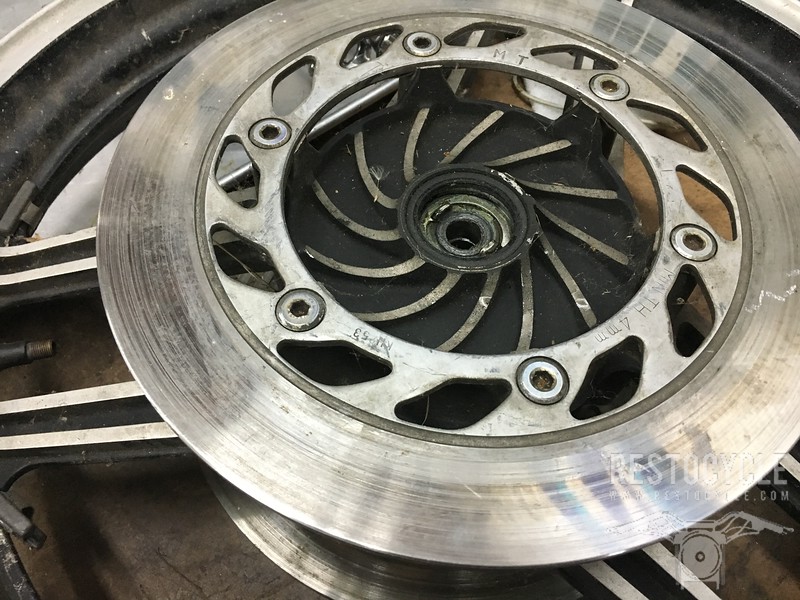
We pulled the rotors off and gave the wheels a good cleaning, rolloc'ed the bright edges, then masked the lip and edges, and repainted them.
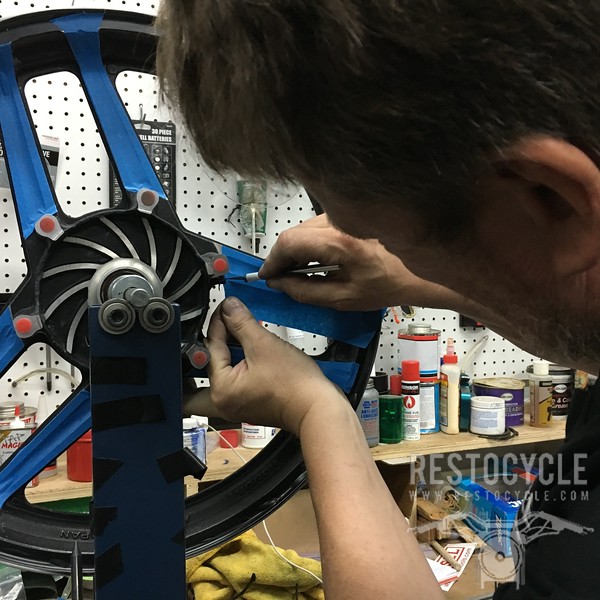
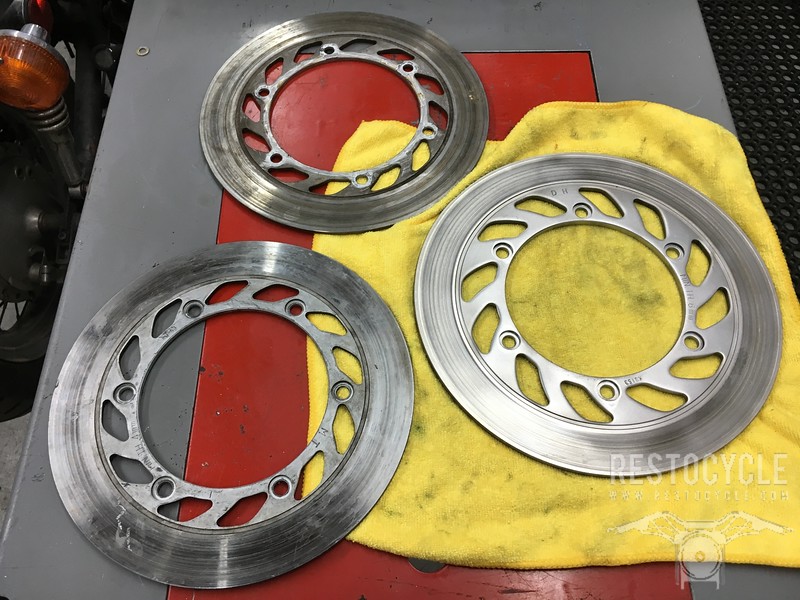
The rotors were also repainted and baked and then sent off to my friend Tom at TrueDisk, who reground them flat and true and drilled them, making them 1% lighter I suppose, but they look a little cooler this way, to me.
Once those came back, we mounted up new tires, R&Red the wheel bearings and seals, installed new 90-degree valve stems and replated the rotor bolts. Bolted that all up and now we have newish wheels under us. Bueno!
The 1100F wheels were in excellent condition, straight and nearly nick free, but of course they are 40 years old so they got a going over.
We pulled the rotors off and gave the wheels a good cleaning, rolloc'ed the bright edges, then masked the lip and edges, and repainted them.
The rotors were also repainted and baked and then sent off to my friend Tom at TrueDisk, who reground them flat and true and drilled them, making them 1% lighter I suppose, but they look a little cooler this way, to me.
Once those came back, we mounted up new tires, R&Red the wheel bearings and seals, installed new 90-degree valve stems and replated the rotor bolts. Bolted that all up and now we have newish wheels under us. Bueno!
NobleHops
Recovering geek
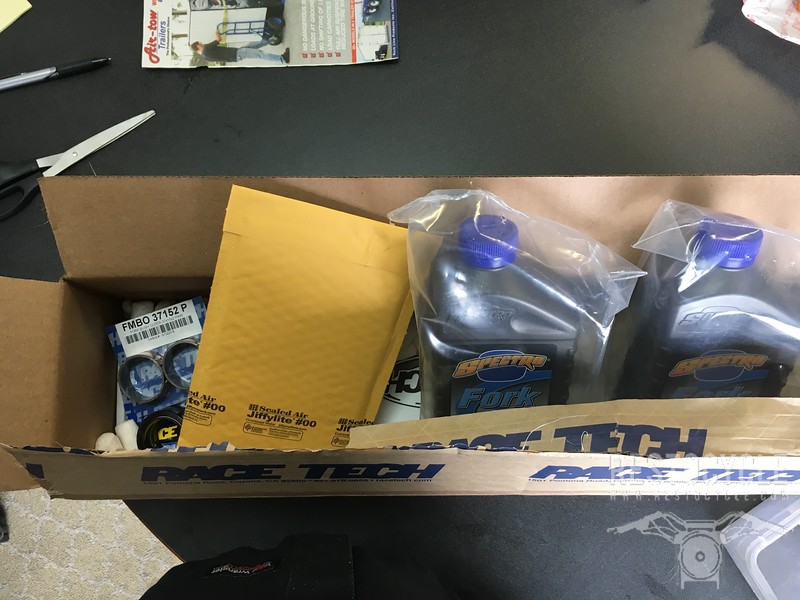
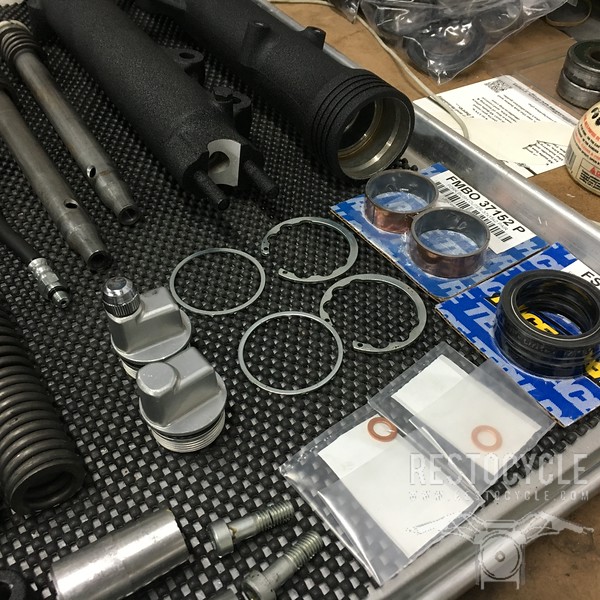
Fork parts came in, minus one set of inner bushings that are becoming scarce, so we put that aside for the moment and moved onto Other Things.
Sent out some odds and ends for re-chroming...
Dug out an 1100F swingarm I had been hoarding and git it sent off for powdercoat and replated the steel.
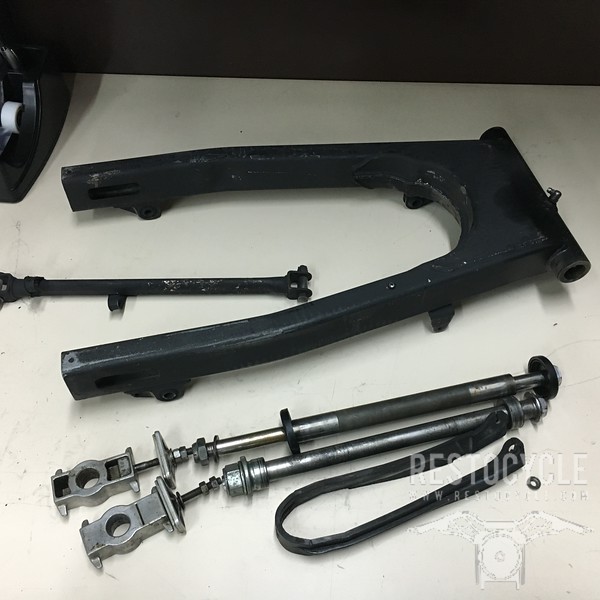
Installed new bearings as prior and mounted that up.
There is always a moment when the tide turns from disassembly to reassembly, and this was it
...
Sent out some odds and ends for re-chroming...
Dug out an 1100F swingarm I had been hoarding and git it sent off for powdercoat and replated the steel.
Installed new bearings as prior and mounted that up.
There is always a moment when the tide turns from disassembly to reassembly, and this was it
...
NobleHops
Recovering geek
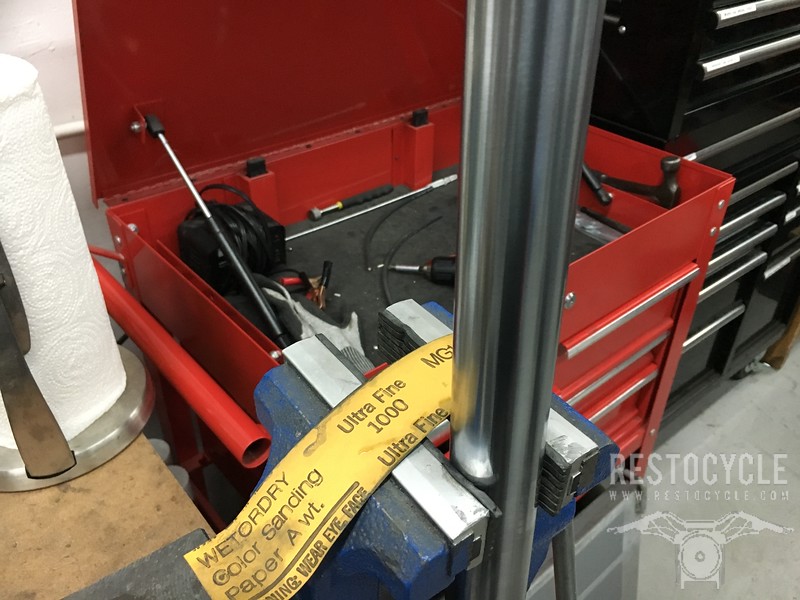
Did a little prep to get the fork ready for reassembly. I like to polish the tubes with fine wet/dry paper and a few drops of oil. These tubes are original and in great shape, this is all they needed.
Everything else by now was cleaned, replated, re-powdercoated, and re-ordered, so we got it ready to go, just waiting for those NOS bushings.
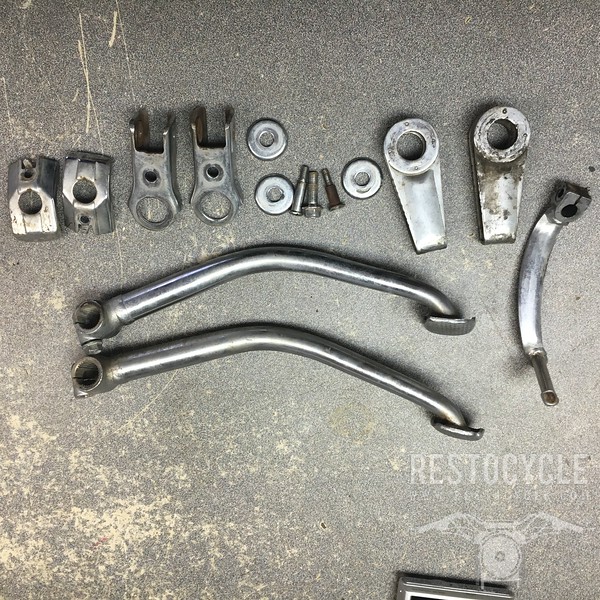
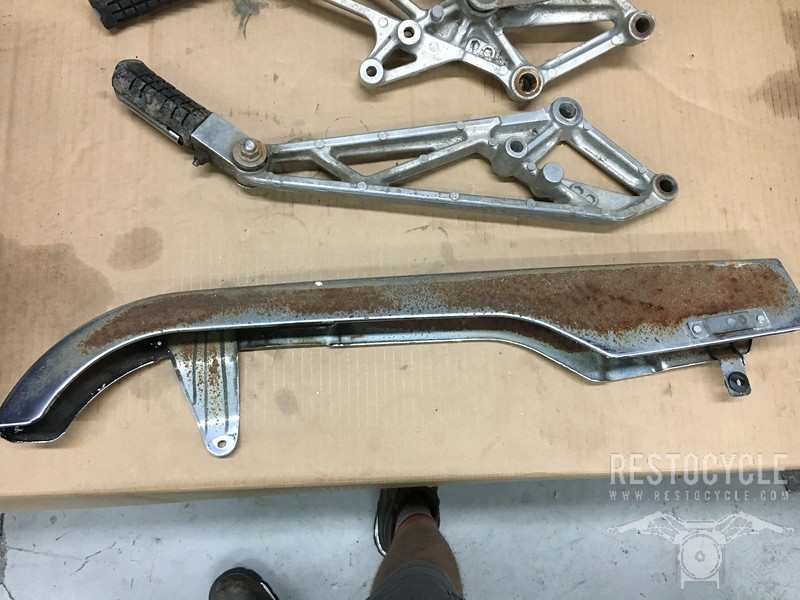
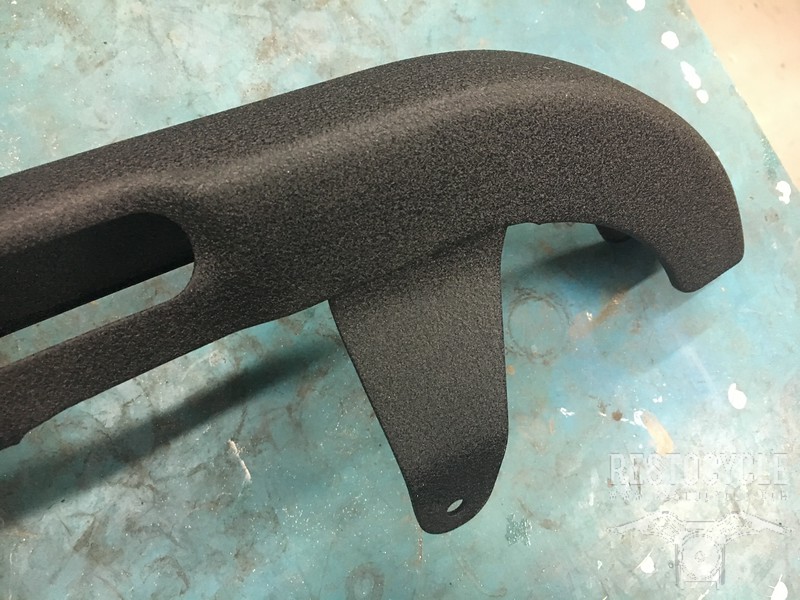
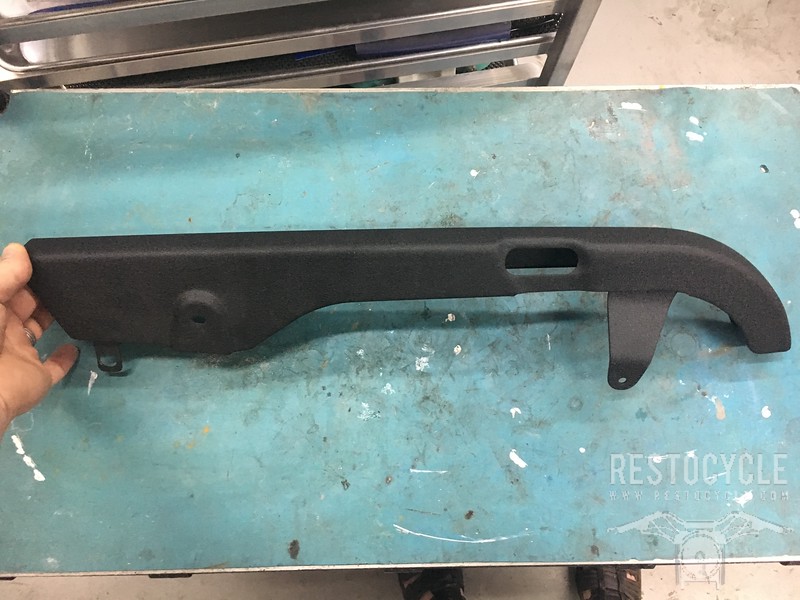
Got some more needed parts from members here, some tasty lattice footrests and a rusty but solid chain guard.
We vapor blasted the footrests and then gave them an hour in the vibratory polisher to put a little more twinkle on them, and that was the perfect finish for the look we are going for on this bike.
The chain guard took a quick trip to my plater to strip the rust and chrome, and then on to the powdercoat folks, who coated it in that same wrinkle black I used on the fork stanchions. This looks fantastic, will be practical in this location, and was a good way to repurpose an otherwise homely part without $pending a bunch of money and time on expensive rechroming.
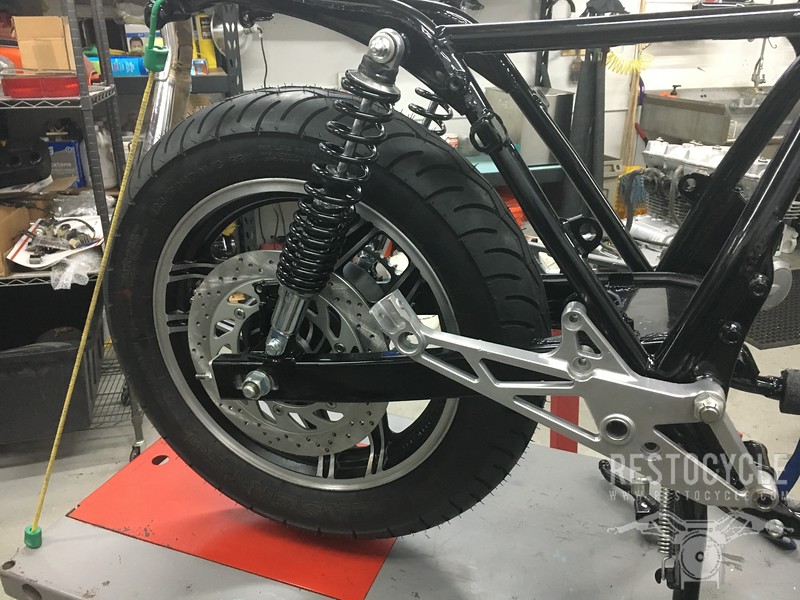
We put the footrests on when we installed the swingarm, installed some new Ikon 7610 shocks, and then the refurbished rear wheel. It's always a great boost when it starts to look a lot like a motorcycle again, isn't it? 1100 wheel is in the 1100F swingarm and axle, so of course no issues getting this to bolt up, and as up front the brake caliper bracket looks like it lines right up.
Finally the bushings arrived, and we got to reassemble the fork. This got the full RaceTech treatment: New springs and spacers, GoldValve cartridge emulators, oil seals, dust seals, inner and outer bushings, and damper rod bolt crush washers. And so with that done and installed it was time to fool around with the alignment of the front 1100F wheel and brakes in the 81 750 fork.
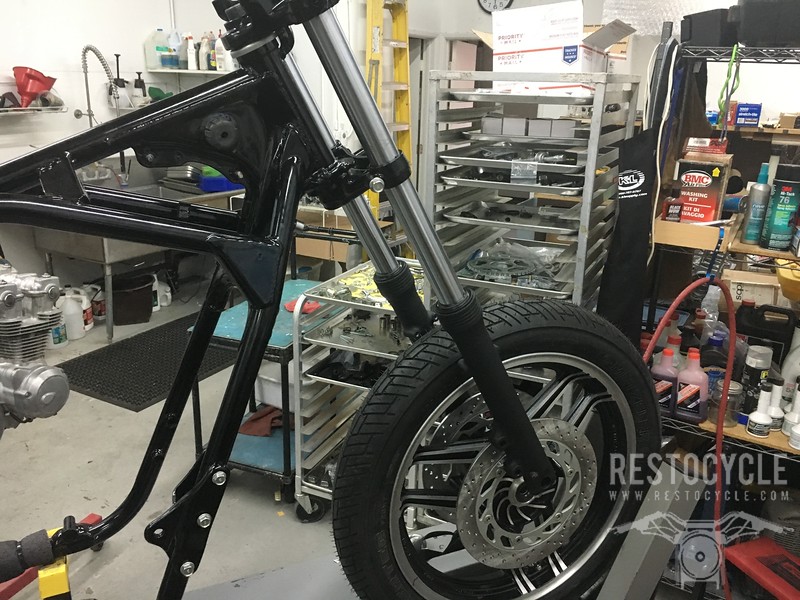
This is still a bit of a work in progress, but here is what I have learned so far: The bad news is that the 1100F wheel is actually EDIT 15mm narrower at the bearing surfaces then the 750F wheel so it won't bolt up with the 750 axle and spacers. The good news is that the brake rotors look like they will line right up with the calipers once the wheel is centered (you knew that already, didn't you). My machinist pal is whipping me up a set of spacers - one to replace the right-side that is (EDITED - these are the right sizes) +2.5mm longer, and a second one at 7.5mm that will have to sandwich between the speedo drive and the axle nut on the left. We'll also try an entire 1100F axle that is inbound including its drive and spacer setup and see if that lets me do away with these spacers (EDITED - no, that doesn't work), which would be better. I'd hate to think of the owner of the bike getting new tires one day and having that non-standard 7.5mm spacer go missing.
LAST EDIT: I was being a knucklehead with this entire issue. Just get a complete 1100F axle setup, INCLUDING the speedo drive and spacer, and don't install it backwards as I did at first. You'll have to use an 1100 speedo cable too as they install differently. Do this and it almost lines up using the 750 brake calipers and brackets. I did have to clearance the left caliper bracket a couple of MM with a file, which took about 3 minutes.
Everything else by now was cleaned, replated, re-powdercoated, and re-ordered, so we got it ready to go, just waiting for those NOS bushings.
Got some more needed parts from members here, some tasty lattice footrests and a rusty but solid chain guard.
We vapor blasted the footrests and then gave them an hour in the vibratory polisher to put a little more twinkle on them, and that was the perfect finish for the look we are going for on this bike.
The chain guard took a quick trip to my plater to strip the rust and chrome, and then on to the powdercoat folks, who coated it in that same wrinkle black I used on the fork stanchions. This looks fantastic, will be practical in this location, and was a good way to repurpose an otherwise homely part without $pending a bunch of money and time on expensive rechroming.
We put the footrests on when we installed the swingarm, installed some new Ikon 7610 shocks, and then the refurbished rear wheel. It's always a great boost when it starts to look a lot like a motorcycle again, isn't it? 1100 wheel is in the 1100F swingarm and axle, so of course no issues getting this to bolt up, and as up front the brake caliper bracket looks like it lines right up.
Finally the bushings arrived, and we got to reassemble the fork. This got the full RaceTech treatment: New springs and spacers, GoldValve cartridge emulators, oil seals, dust seals, inner and outer bushings, and damper rod bolt crush washers. And so with that done and installed it was time to fool around with the alignment of the front 1100F wheel and brakes in the 81 750 fork.
This is still a bit of a work in progress, but here is what I have learned so far: The bad news is that the 1100F wheel is actually EDIT 15mm narrower at the bearing surfaces then the 750F wheel so it won't bolt up with the 750 axle and spacers. The good news is that the brake rotors look like they will line right up with the calipers once the wheel is centered (you knew that already, didn't you). My machinist pal is whipping me up a set of spacers - one to replace the right-side that is (EDITED - these are the right sizes) +2.5mm longer, and a second one at 7.5mm that will have to sandwich between the speedo drive and the axle nut on the left. We'll also try an entire 1100F axle that is inbound including its drive and spacer setup and see if that lets me do away with these spacers (EDITED - no, that doesn't work), which would be better. I'd hate to think of the owner of the bike getting new tires one day and having that non-standard 7.5mm spacer go missing.
LAST EDIT: I was being a knucklehead with this entire issue. Just get a complete 1100F axle setup, INCLUDING the speedo drive and spacer, and don't install it backwards as I did at first. You'll have to use an 1100 speedo cable too as they install differently. Do this and it almost lines up using the 750 brake calipers and brackets. I did have to clearance the left caliper bracket a couple of MM with a file, which took about 3 minutes.
NobleHops
Recovering geek
We are in the midst of refurbing a nice 900F oil cooler and a friend is doing his magic making new oil lines, using stainless hose and black fittings. We're a ways off from needing any of this so that's all set in motion while we move on to other areas.
Calipers were of course crusty and dirty and tired, so they get the full strip. Ditto the master cylinders.
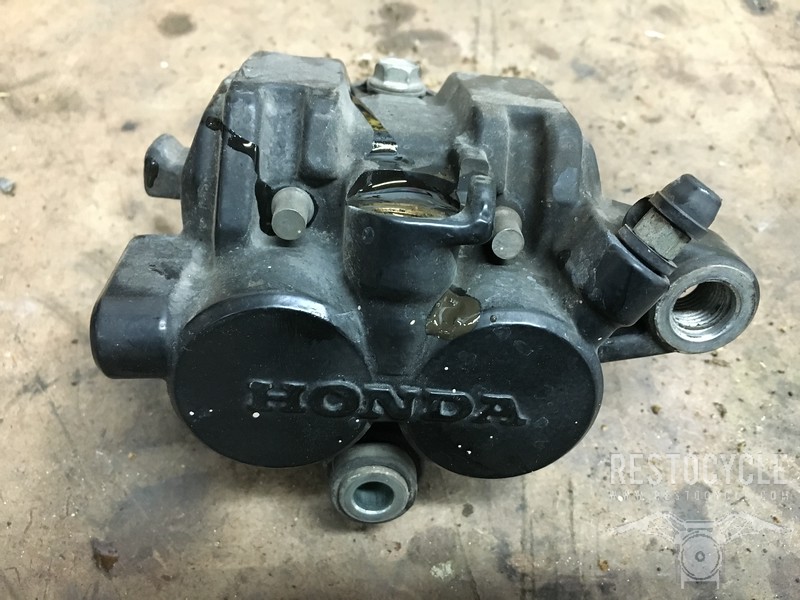
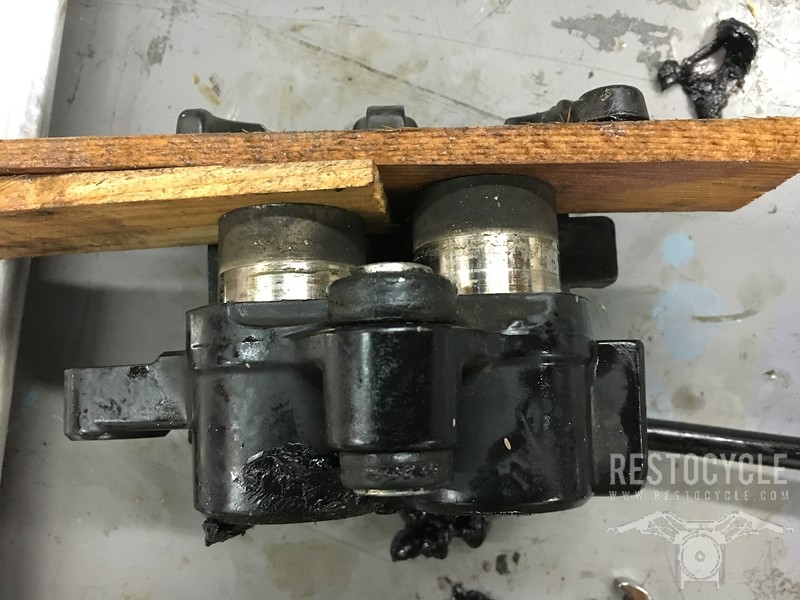
One of the caliper pistons was...reluctant to move to we resorted to the grease-gun method, blocked the one piston with carpenter's shims while we pumped out the other. Kind of a mess when you have to do this but it is 100% successful when a puff of air won't move them, and a lot less explosive. Usually*.
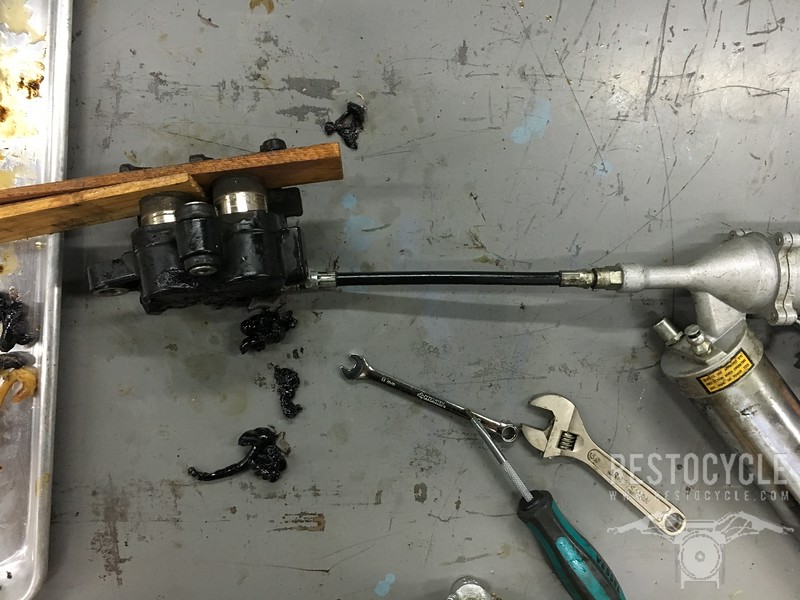
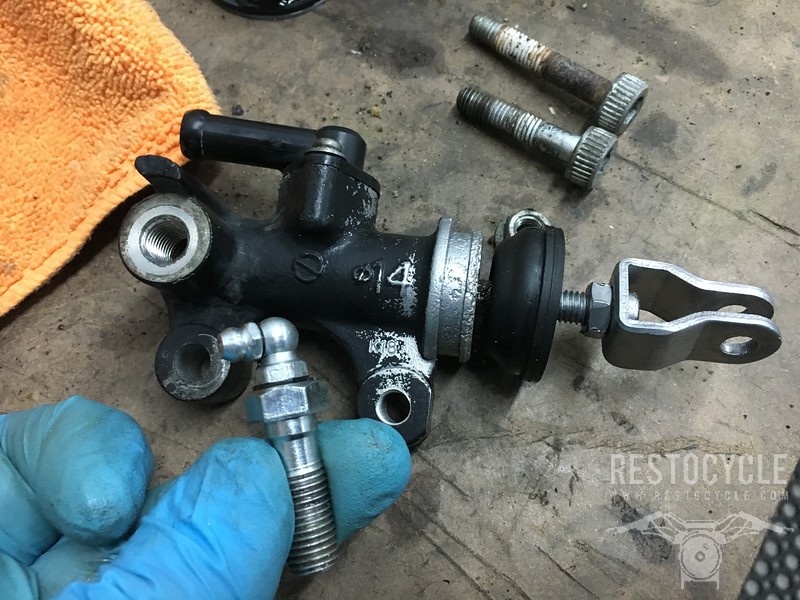
The rear master cylinder was it's usual PITA too - for this we used a "Lil Persuader" made from a banjo bolt and a Zerk fitting. I will buy the originator of this idea a beer anytime. Just tell me who it was please.
Removed all the paint and crusty brake spooge with the vapor blaster...
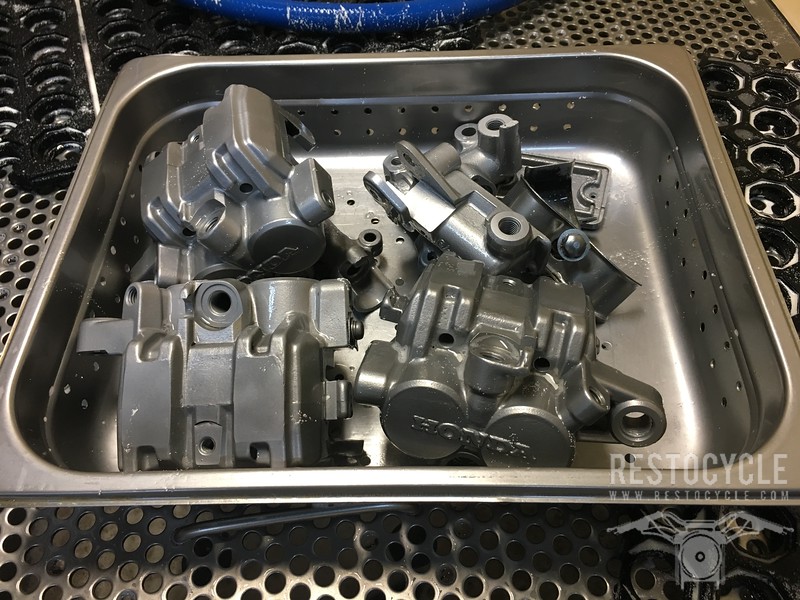
...dried the calipers and then gave them 3 minutes each in AlumaPrep. Rinsed and dried them again, masked and plugged them and then they were ready for paint. Three light coats of VHT caliper paint followed by a few days to cure, then a trip through the oven for an hour to finish curing the paint.
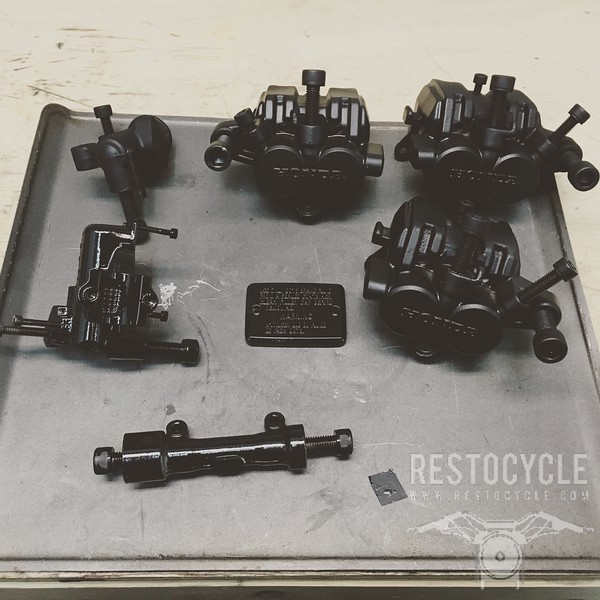
The front master cylinder and splitter were done in Eastwood Chassis Black, carefully chosen for its gloss because it was what I had. I'm not in love with those yet. May work on the paint a little to see if they will look right, on the fence for the moment.
Soon week we will finish the calipers, rebuild them all and get them ready to install.
* This story only gets told over beers.
Calipers were of course crusty and dirty and tired, so they get the full strip. Ditto the master cylinders.
One of the caliper pistons was...reluctant to move to we resorted to the grease-gun method, blocked the one piston with carpenter's shims while we pumped out the other. Kind of a mess when you have to do this but it is 100% successful when a puff of air won't move them, and a lot less explosive. Usually*.
The rear master cylinder was it's usual PITA too - for this we used a "Lil Persuader" made from a banjo bolt and a Zerk fitting. I will buy the originator of this idea a beer anytime. Just tell me who it was please.
Removed all the paint and crusty brake spooge with the vapor blaster...
...dried the calipers and then gave them 3 minutes each in AlumaPrep. Rinsed and dried them again, masked and plugged them and then they were ready for paint. Three light coats of VHT caliper paint followed by a few days to cure, then a trip through the oven for an hour to finish curing the paint.
The front master cylinder and splitter were done in Eastwood Chassis Black, carefully chosen for its gloss because it was what I had. I'm not in love with those yet. May work on the paint a little to see if they will look right, on the fence for the moment.
Soon week we will finish the calipers, rebuild them all and get them ready to install.
* This story only gets told over beers.
NobleHops
Recovering geek
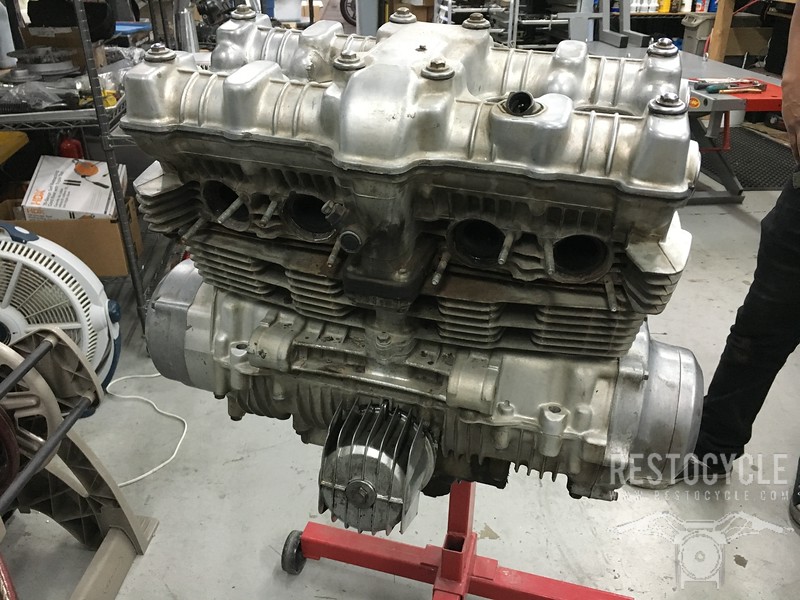
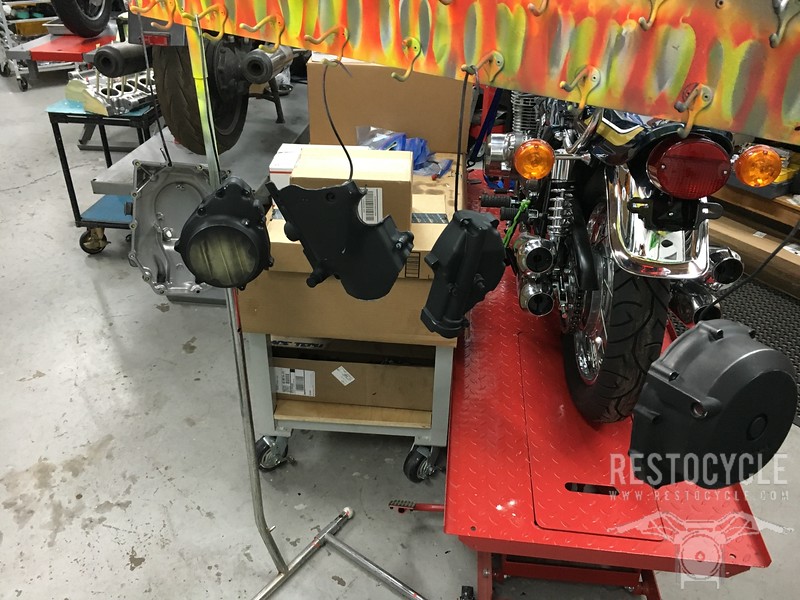
This was a little while ago but of course the engine is on a stand and peeking in the photographs here and there. We bolted it up to this $70 Harbor Freight engine stand and that makes this kind of cleaning and or painting operation so much easier and effective.
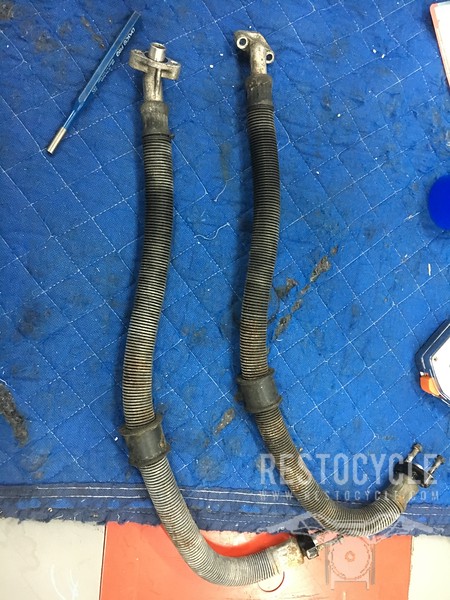
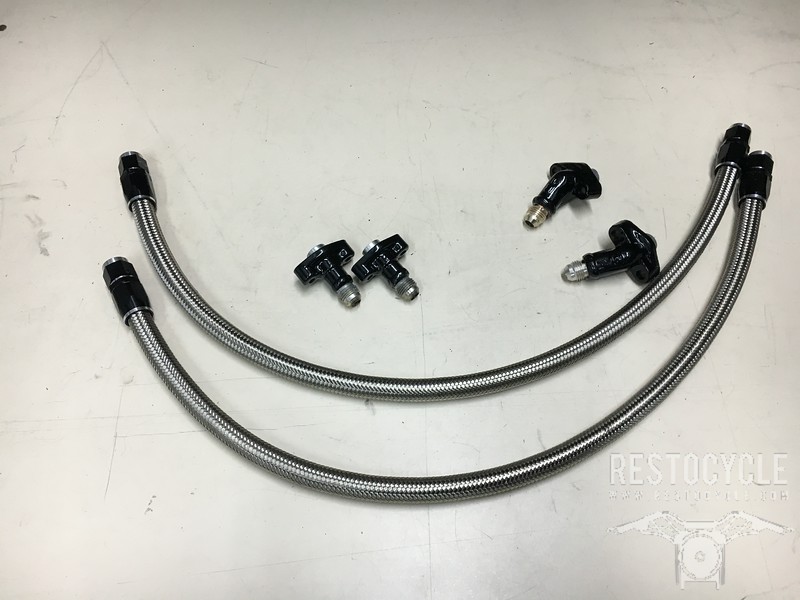
These are the lines my friend is refurbing, should be a fun before-and-after.
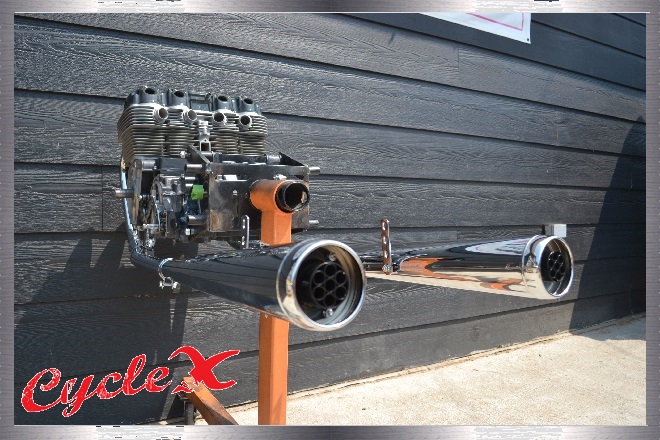
Another friend hooked me up with a complete oil cooler setup. Tomorrow we will hopefully get started on disassembling the engine. We have a nice 900F cam in hand, plus 65mm Cruzinimage pistons and pins that will warm this up to 836cc. At the moment we are planning on a CycleX 4-into-2 exhaust, we want this to be close to stock in sound level and the owner and I both prefer the symmetry of that setup too.
Let's see if this links...
These are the lines my friend is refurbing, should be a fun before-and-after.
Another friend hooked me up with a complete oil cooler setup. Tomorrow we will hopefully get started on disassembling the engine. We have a nice 900F cam in hand, plus 65mm Cruzinimage pistons and pins that will warm this up to 836cc. At the moment we are planning on a CycleX 4-into-2 exhaust, we want this to be close to stock in sound level and the owner and I both prefer the symmetry of that setup too.
Let's see if this links...
NobleHops
Recovering geek
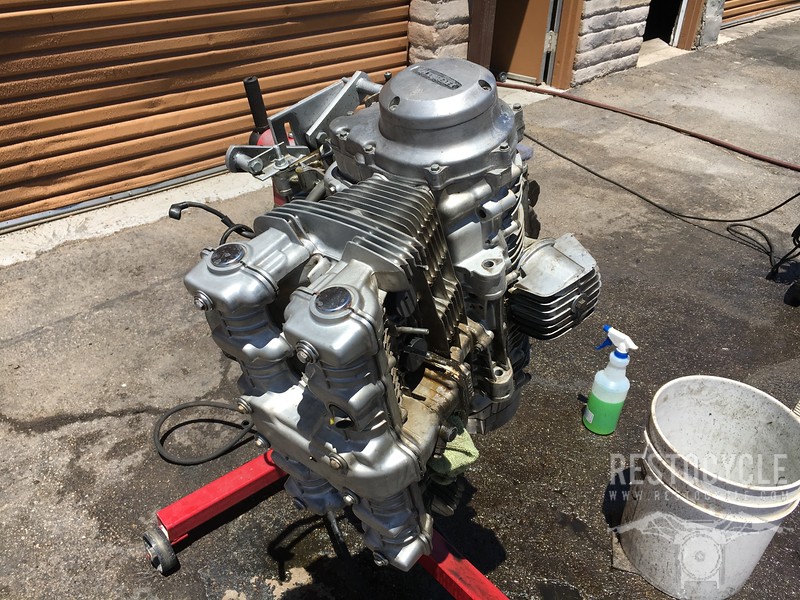
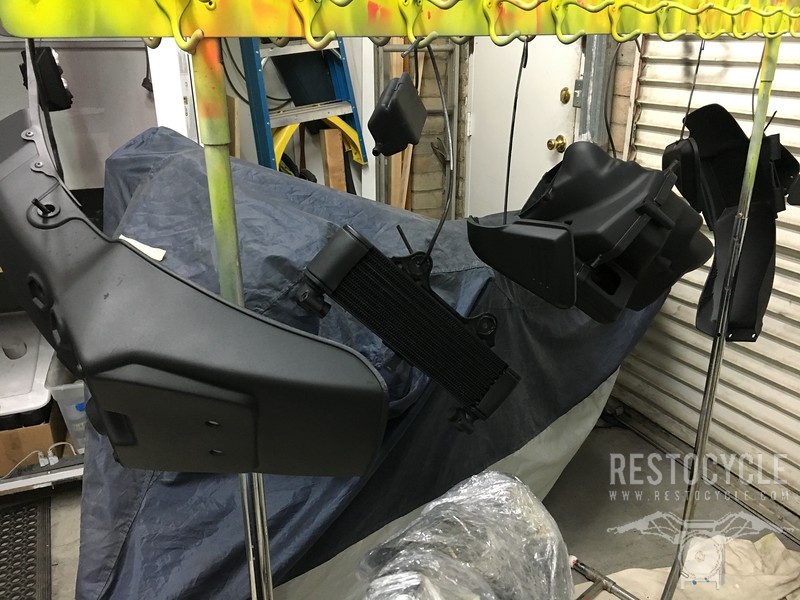
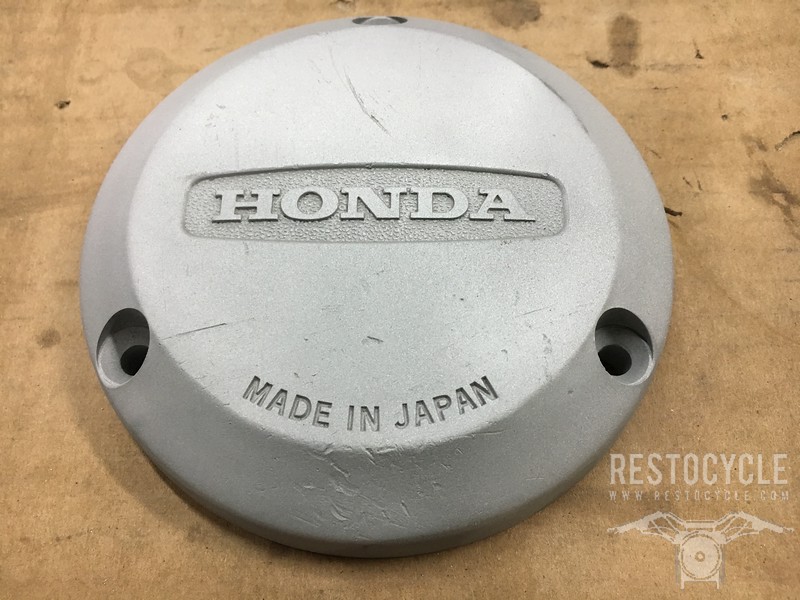
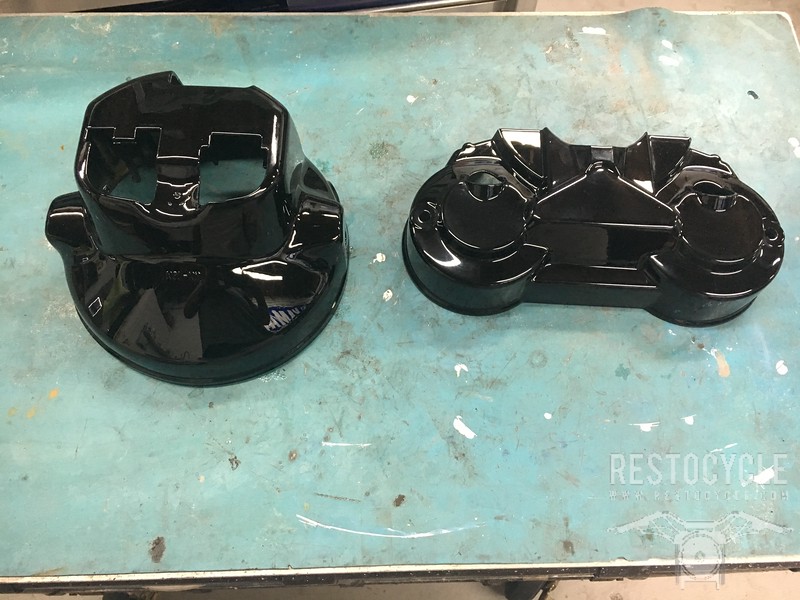
Most of the bikes I did bigger projects on recently were SOHC Hondas, and there is of course a lot of generational difference between them. There is a lot more plastic on these DOHCs, and it looks pretty shabby left to weather.
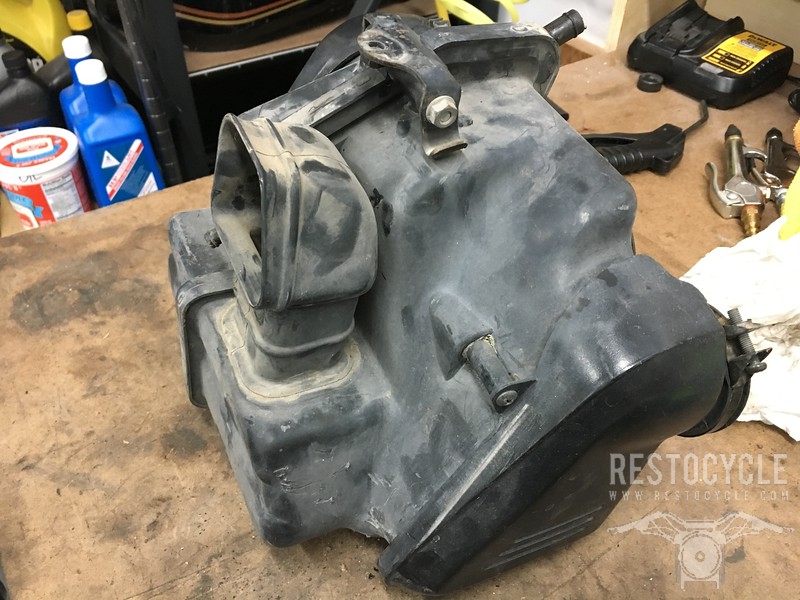
First thing we did was to clean these well and carefully, removed any heavy crud with Simple Green and fine Scotchbrite. Then we actually put them in the vapor blaster and cleaned them very gently with that to get them really spotless. We let them dry hanging overnight, then gently wet-sanded all of the plastic till it had a fine even tooth. Then a wipe with denatured alcohol.
And then we painted it!
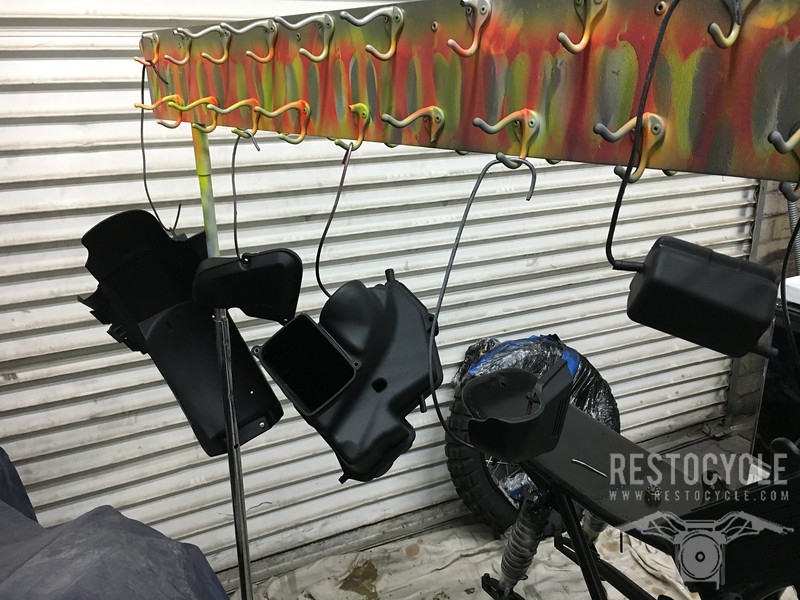
And no surprise, after we let it cure for a couple of days, we rubbed out the paint very carefully with microfiber and spray polish, and they look fantastic. Plastic giveth, and plastic taketh away. This was a lot easier to refurb than other areas of the bike.
...
First thing we did was to clean these well and carefully, removed any heavy crud with Simple Green and fine Scotchbrite. Then we actually put them in the vapor blaster and cleaned them very gently with that to get them really spotless. We let them dry hanging overnight, then gently wet-sanded all of the plastic till it had a fine even tooth. Then a wipe with denatured alcohol.
And then we painted it!
And no surprise, after we let it cure for a couple of days, we rubbed out the paint very carefully with microfiber and spray polish, and they look fantastic. Plastic giveth, and plastic taketh away. This was a lot easier to refurb than other areas of the bike.
...
NobleHops
Recovering geek
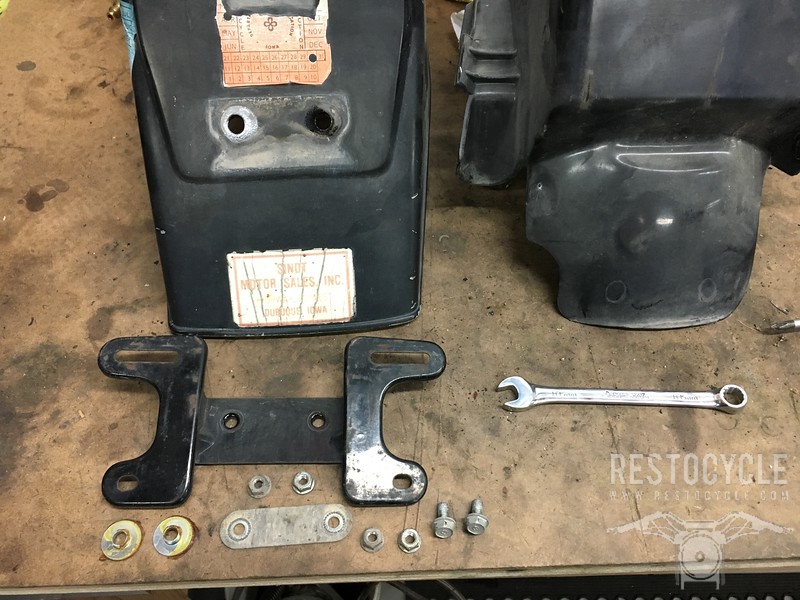
And speaking of plastic, I would really like to lose some of it off this rear fender. I am old-fashioned about the merits of a good rear fender, but this is just a bit too horsey. I've cut these down before with good results, so that's the plan, but I would be very interested in seeing what other guys have done along these lines if anything comes to mind.
NobleHops
Recovering geek
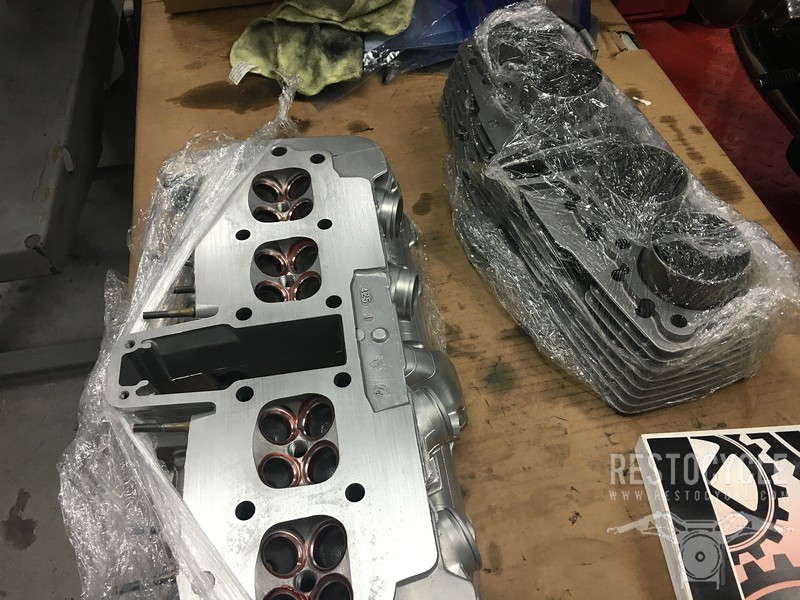
We took the engine apart, inspected, detected, injected and looked for neglected things, found it in overall very good shape. Naturally the valve guide seals were good and worn out and there was evidence of leaking down to the cylinders and a light amount of carbon and blow-by evidenced on the pistons, but really it was not bad. The head and cylinders went off to the machine shop and the seats were recut, guides and valves were fine, just cleaned up and ready for reinstallation.
The cylinders were bored for the 65mm Cruzinimage pistons and the ring end gaps set.
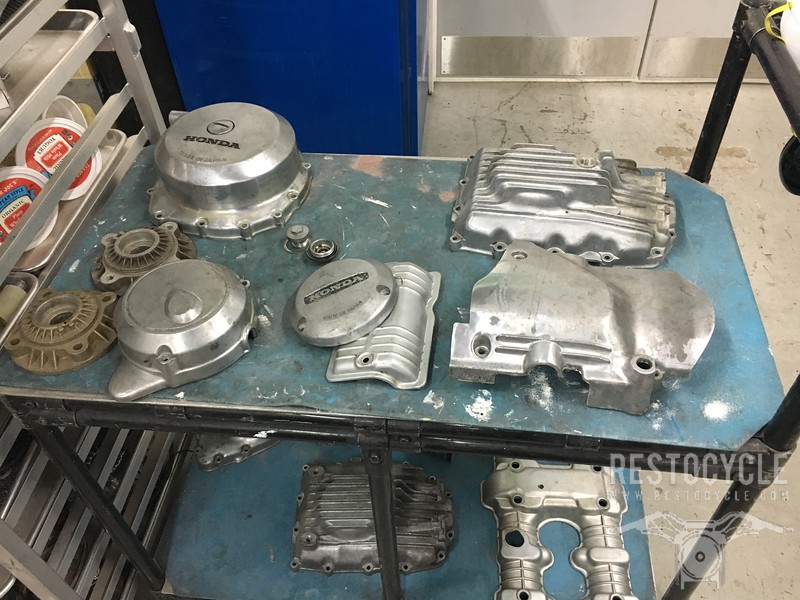
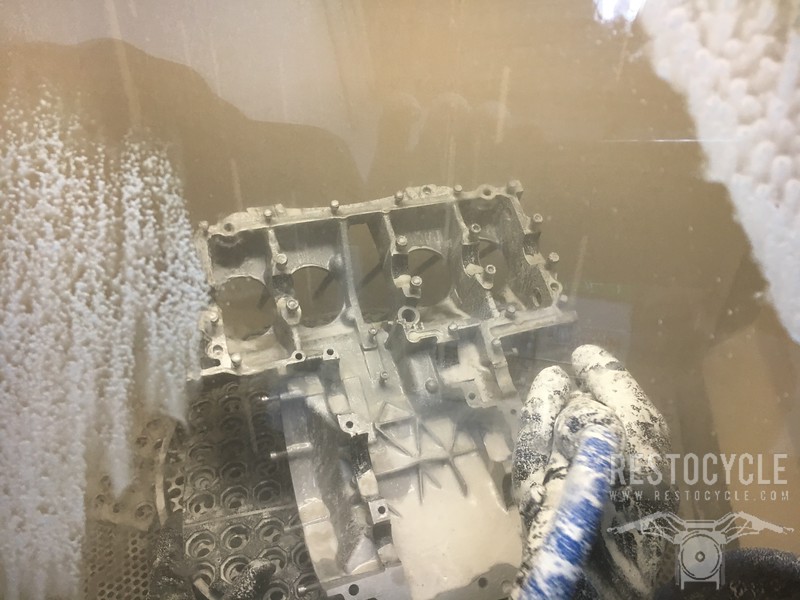
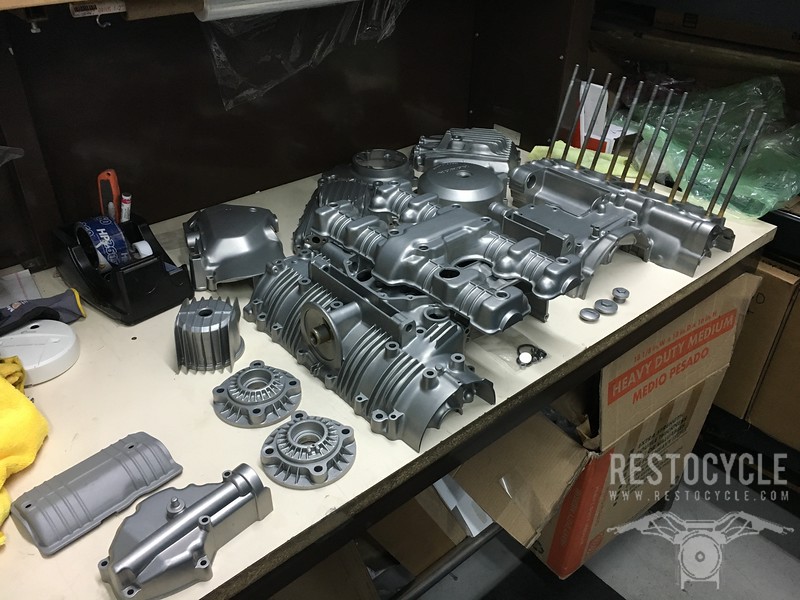
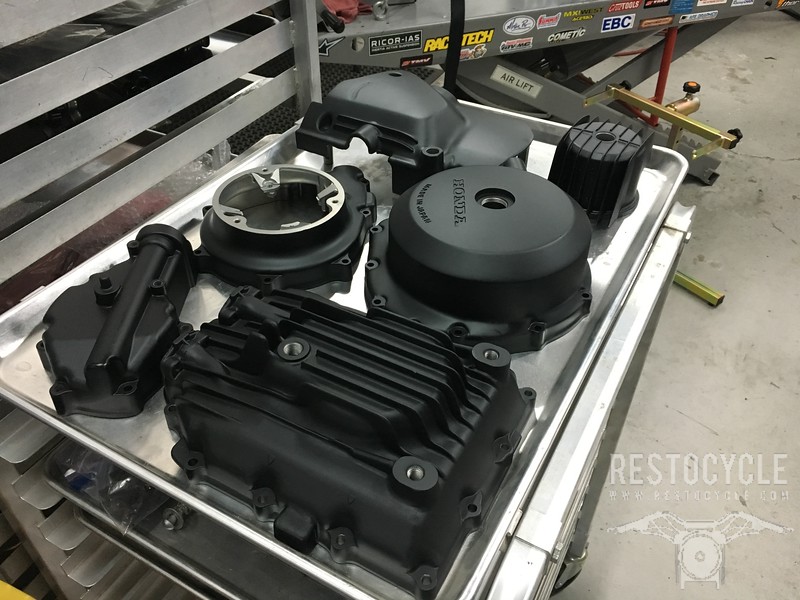
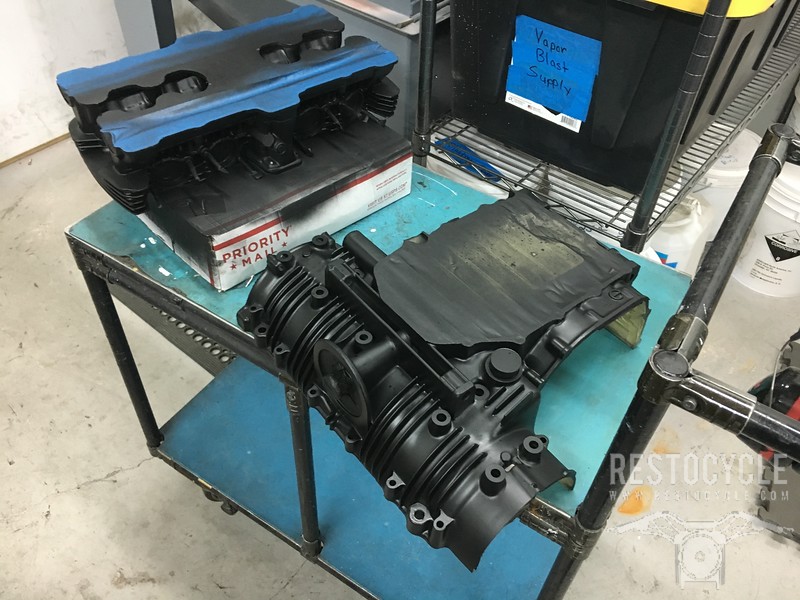
Naturally we vapor blasted it all, in preparation for paint - we are doing this engine in black, with aluminum valve cover, timing cover and generator cover, possibly the starter cover too. On the fence about that last part.
Scared up some more parts for the bike - Cam cap bolts and viton valve guide seals, and cam chains and tensioners from New Zealand.
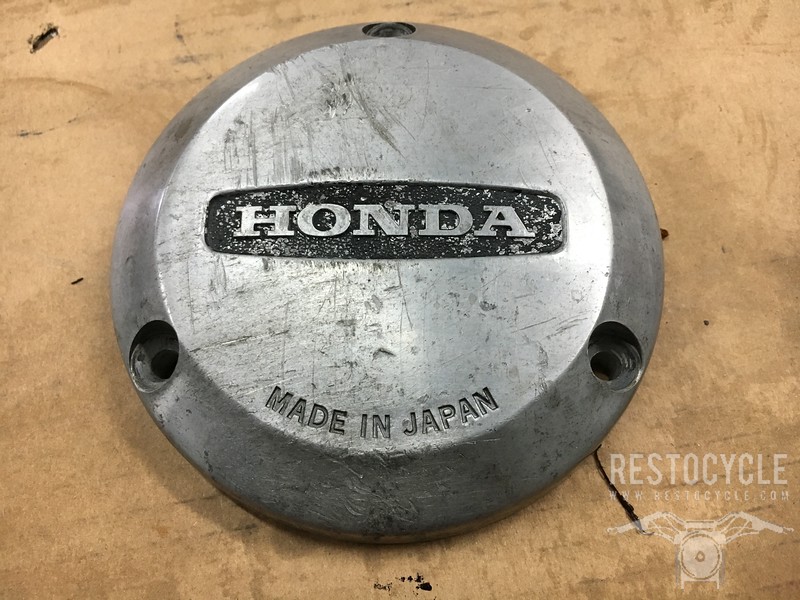
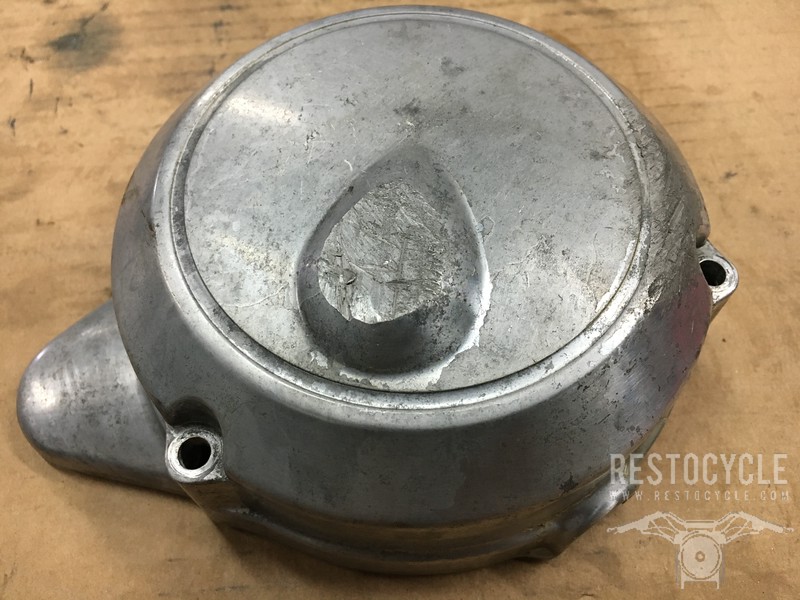
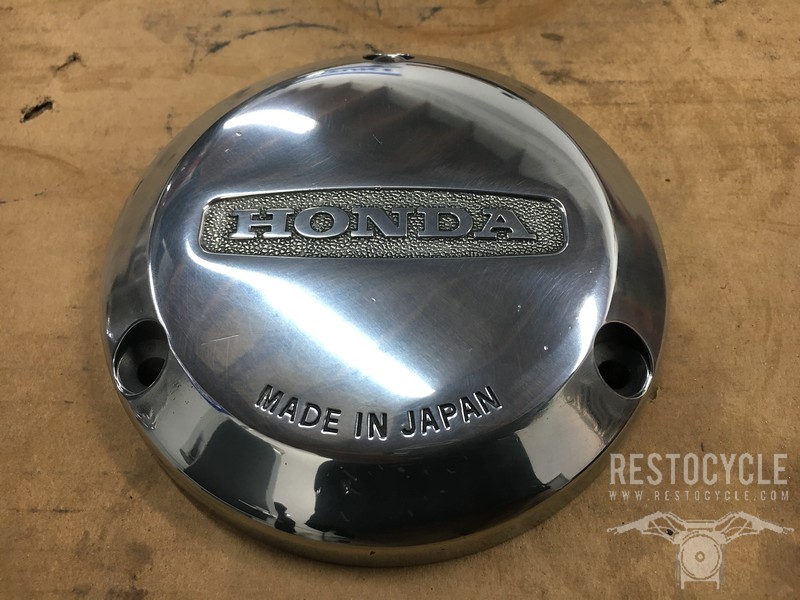
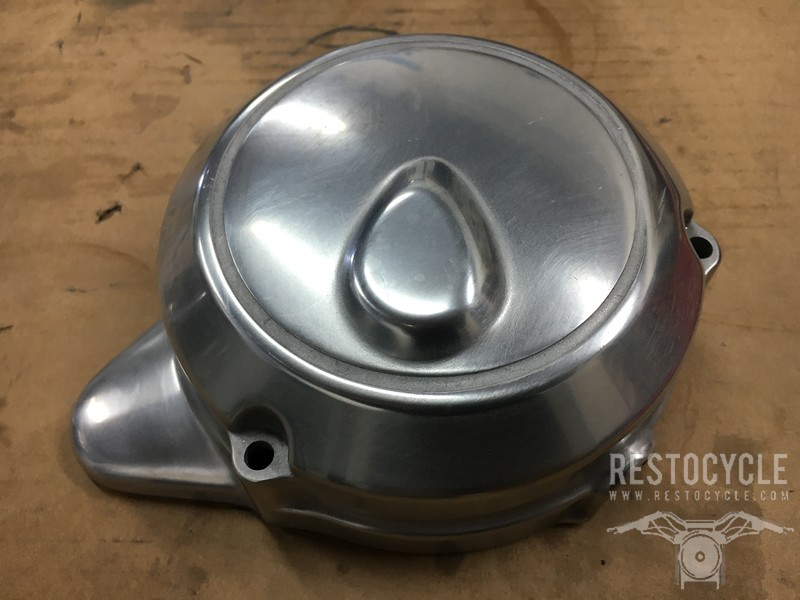
My ignition and generator covers were pretty manky, so just for fun I went after them with abrasives to see how good I could make them. Replacements in much better shape are here, but this was still kind of fun.
...
The cylinders were bored for the 65mm Cruzinimage pistons and the ring end gaps set.
Naturally we vapor blasted it all, in preparation for paint - we are doing this engine in black, with aluminum valve cover, timing cover and generator cover, possibly the starter cover too. On the fence about that last part.
Scared up some more parts for the bike - Cam cap bolts and viton valve guide seals, and cam chains and tensioners from New Zealand.
My ignition and generator covers were pretty manky, so just for fun I went after them with abrasives to see how good I could make them. Replacements in much better shape are here, but this was still kind of fun.
...
NobleHops
Recovering geek
What else - I had my brake brackets done in glossy powdercoat but decided that they would look better in wrinkle, so those went back for recoating, but they are ready and so now I can finish the calipers and get them mounted, along with the master cylinders.
Speigler brake lines are here, black lines with silver fittings. I stuck with the three-line setup for that, looks cleaner to my eye than the two-line setup I put on my CBX.
LSL bars are here too, gloss black, and some cool LSL mirrors.
Going to go with a CycleX 4>2 exhaust, that is inbound.
...
Speigler brake lines are here, black lines with silver fittings. I stuck with the three-line setup for that, looks cleaner to my eye than the two-line setup I put on my CBX.
LSL bars are here too, gloss black, and some cool LSL mirrors.
Going to go with a CycleX 4>2 exhaust, that is inbound.
...
NobleHops
Recovering geek
Odds and ends:
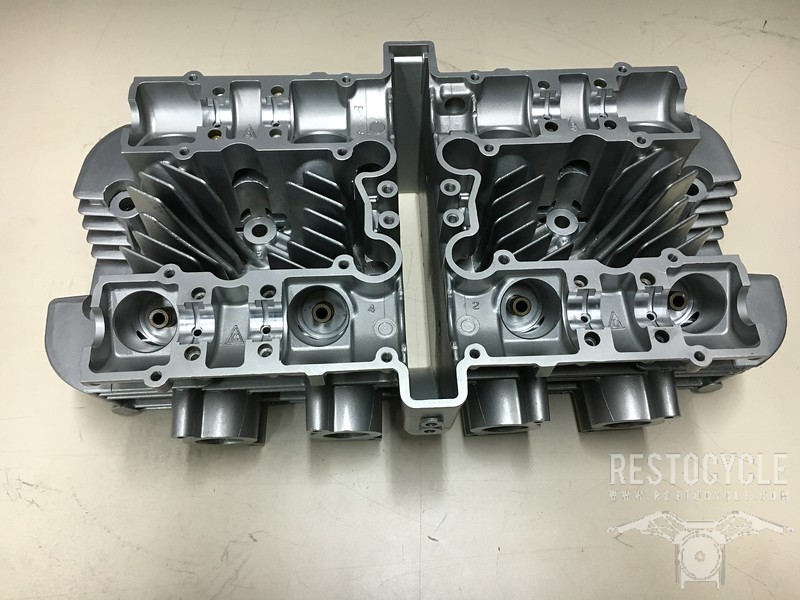
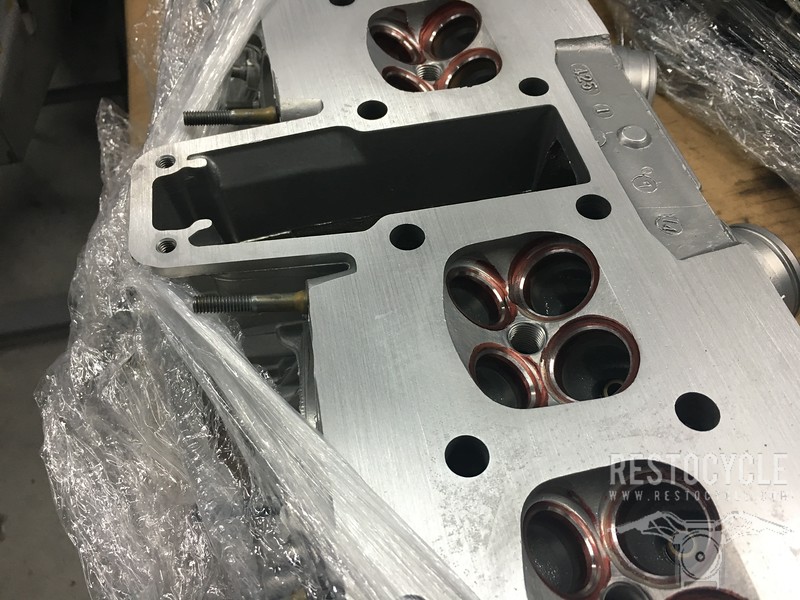
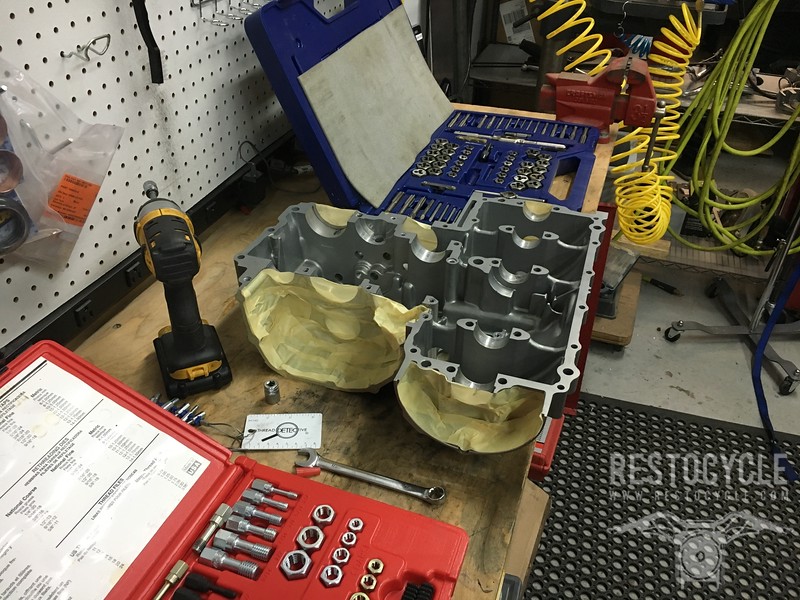
Here's the head post machine shop. We had the gasket surface skimmed a few thou just to aid in sealing and to ensure flatness. Big-bore cylinders to the right.
Had the bucket and gauge surround repainted. Going to need to crack into the gauges as the glass is really grimy, needs cleaning and some sort of antifog treatment too I suppose. Hope that's not a nightmare.
Here's how that chain guard looks in wrinkle powdercoat. I dig it:
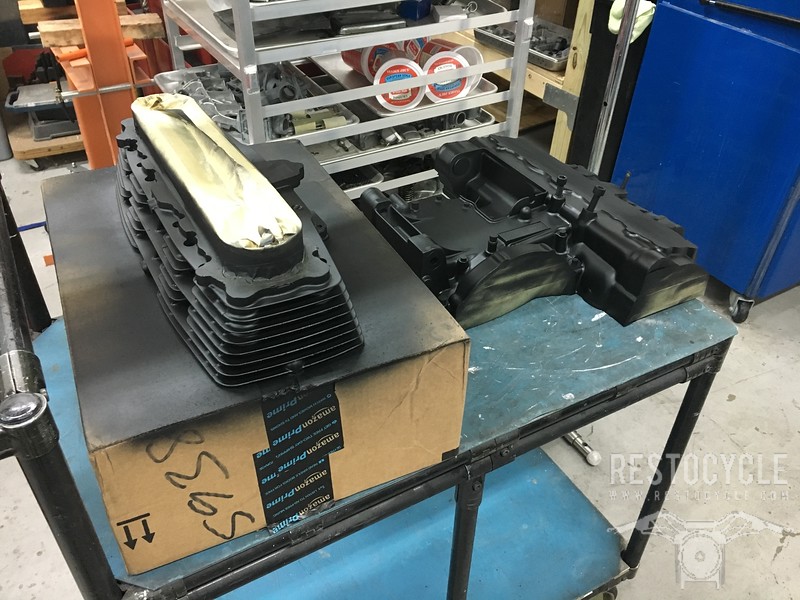
And here's the engine, waiting for me to paint it, hopefully get started on that on Monday.
...
Here's the head post machine shop. We had the gasket surface skimmed a few thou just to aid in sealing and to ensure flatness. Big-bore cylinders to the right.
Had the bucket and gauge surround repainted. Going to need to crack into the gauges as the glass is really grimy, needs cleaning and some sort of antifog treatment too I suppose. Hope that's not a nightmare.
Here's how that chain guard looks in wrinkle powdercoat. I dig it:
And here's the engine, waiting for me to paint it, hopefully get started on that on Monday.
...
NobleHops
Recovering geek
More reassembly - starting with the rear of the bike, the inner and outer fenders and taillight bracket, the rear grab handles, which we powdercoated with the same wrinkle black as the fork and the chain case.
We're also nearly finished with painting the engine. We vapor blasted all the parts, degreased them with denatured alcohol, masked and plugged everything and then went after it with the excellent PJ1 satin engine paint. This flows a little differently than the VHT stuff, took me a little adjusting but once I got the hang of it everything came out great. I let the side covers cure for a few days and them baked them in the shop oven for an hour at 200 degrees to cure the paint.
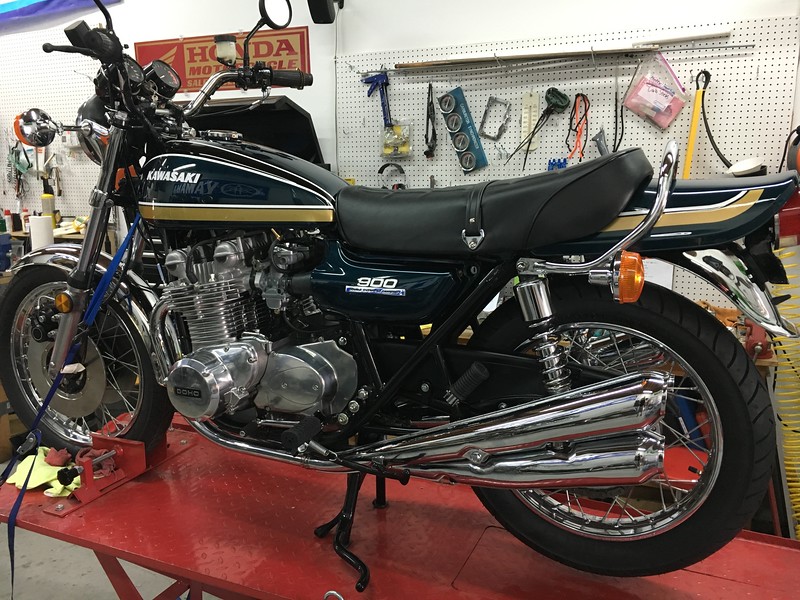
And yes, that is a Z1 in the background, that we just finished all the little details of a total restoration last week.
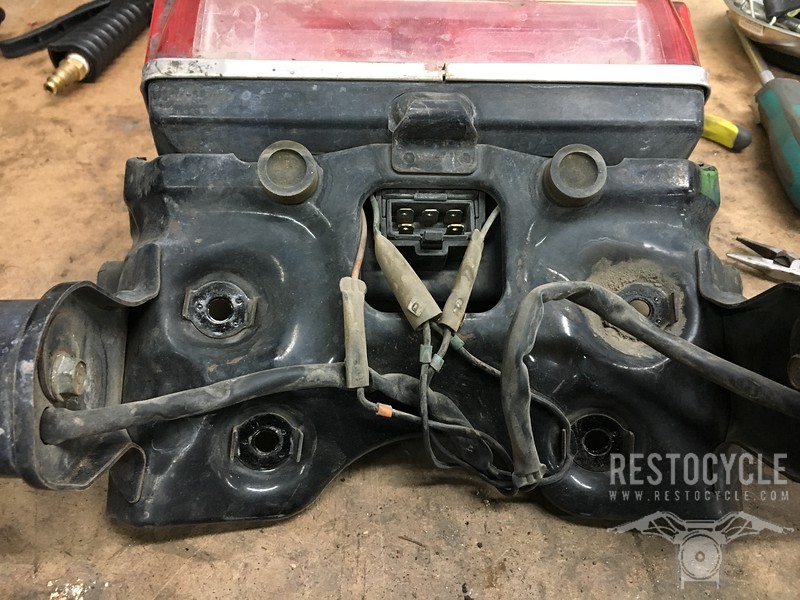
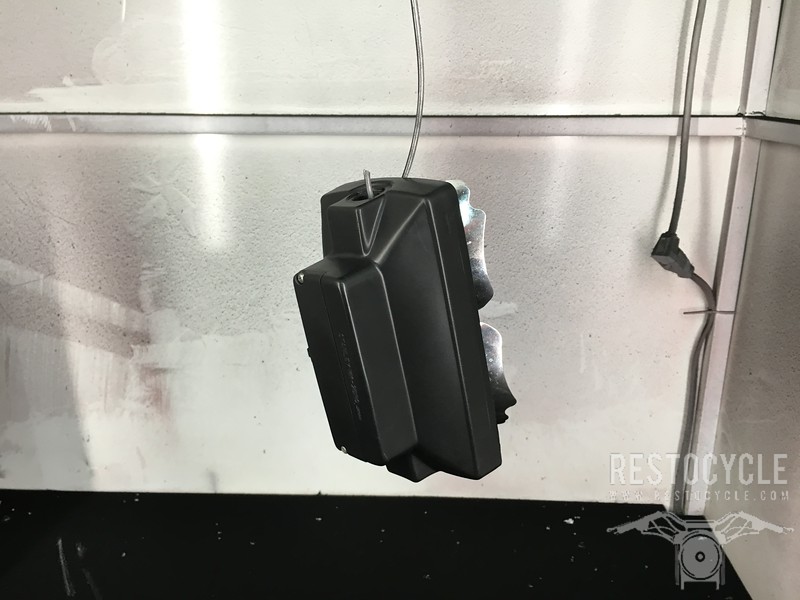
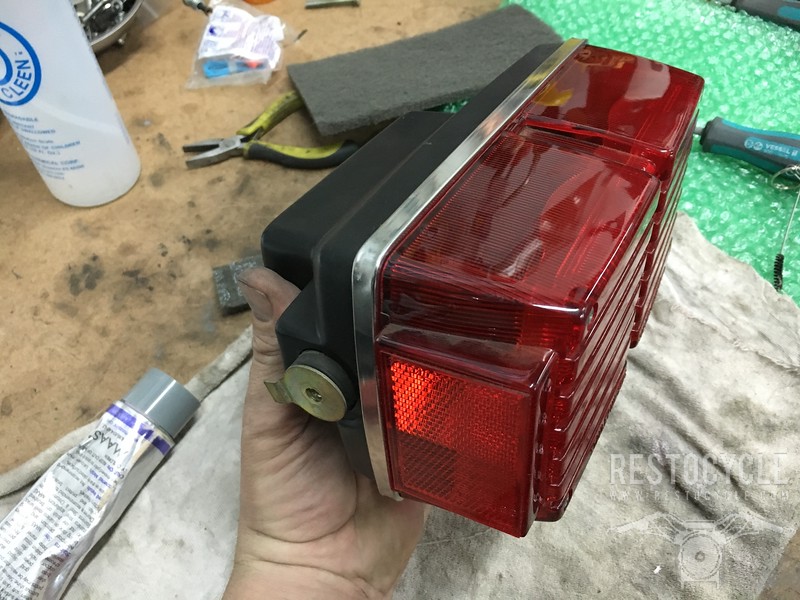
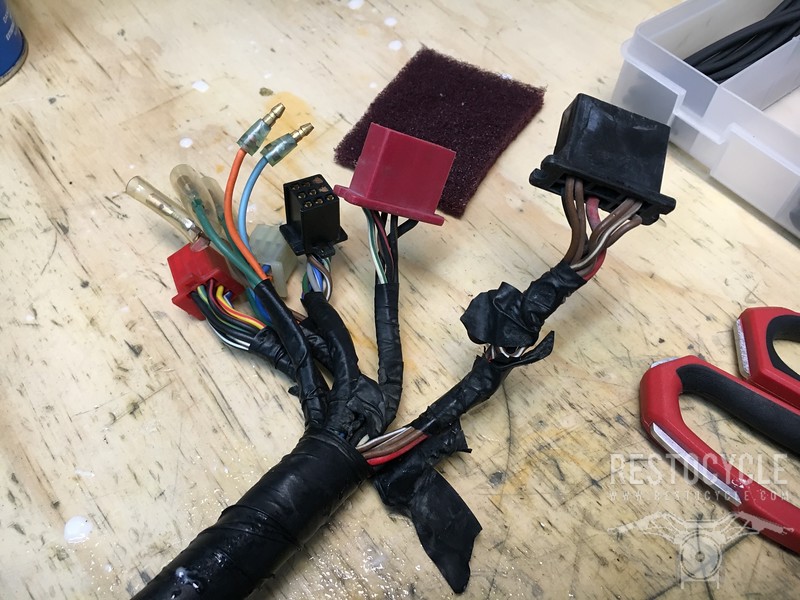
Spent an hour or more on this taillight, you know how that can go. Repainted the plastic, cleaned all the electrical connectors and contacts, polished the metal trim and the screw heads, carefully cleaned then replaced the rubber gasket, installed a NOS lens.
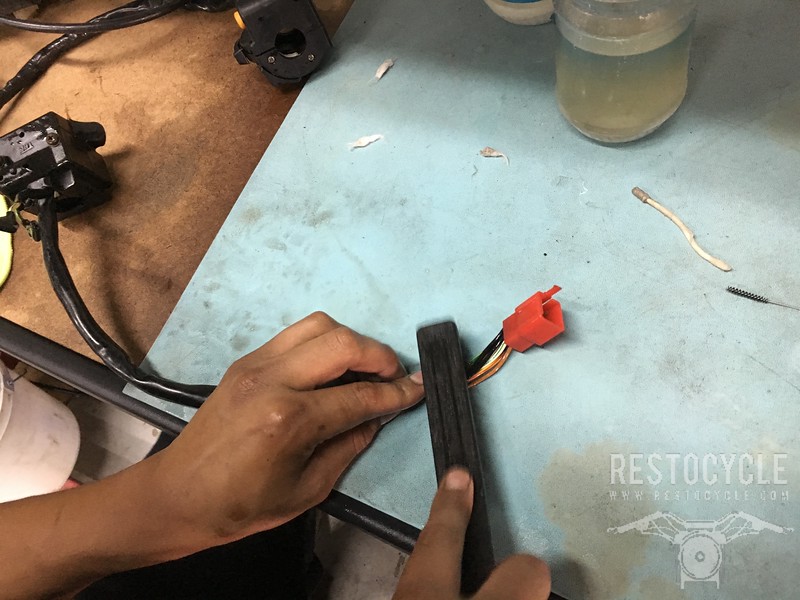
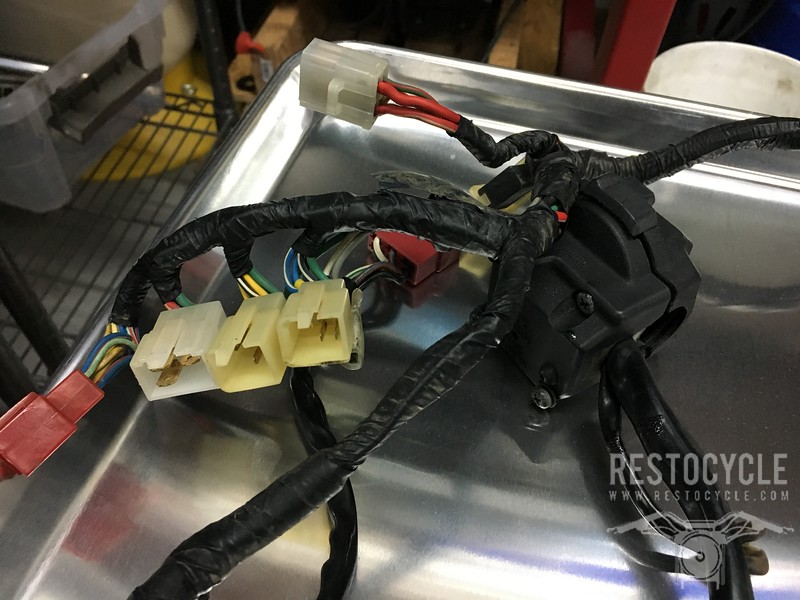
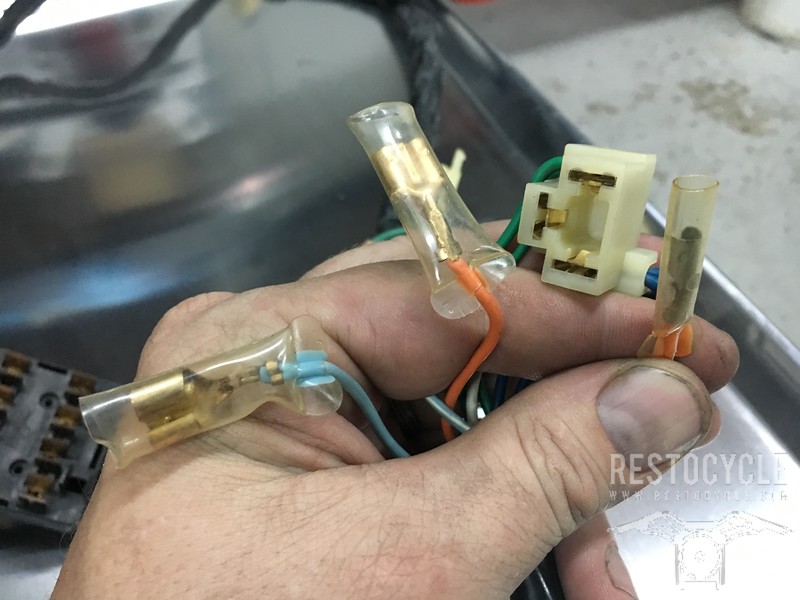
...and then on to the wiring harness, which we probably spent 3 hours on, done and done, scrubbing the wires and plastic connectors, cleaning all of the contacts, cleaning the wrap and applying some new to areas where it had frayed, inspecting everything.
...
We're also nearly finished with painting the engine. We vapor blasted all the parts, degreased them with denatured alcohol, masked and plugged everything and then went after it with the excellent PJ1 satin engine paint. This flows a little differently than the VHT stuff, took me a little adjusting but once I got the hang of it everything came out great. I let the side covers cure for a few days and them baked them in the shop oven for an hour at 200 degrees to cure the paint.
And yes, that is a Z1 in the background, that we just finished all the little details of a total restoration last week.
Spent an hour or more on this taillight, you know how that can go. Repainted the plastic, cleaned all the electrical connectors and contacts, polished the metal trim and the screw heads, carefully cleaned then replaced the rubber gasket, installed a NOS lens.
...and then on to the wiring harness, which we probably spent 3 hours on, done and done, scrubbing the wires and plastic connectors, cleaning all of the contacts, cleaning the wrap and applying some new to areas where it had frayed, inspecting everything.
...
NobleHops
Recovering geek
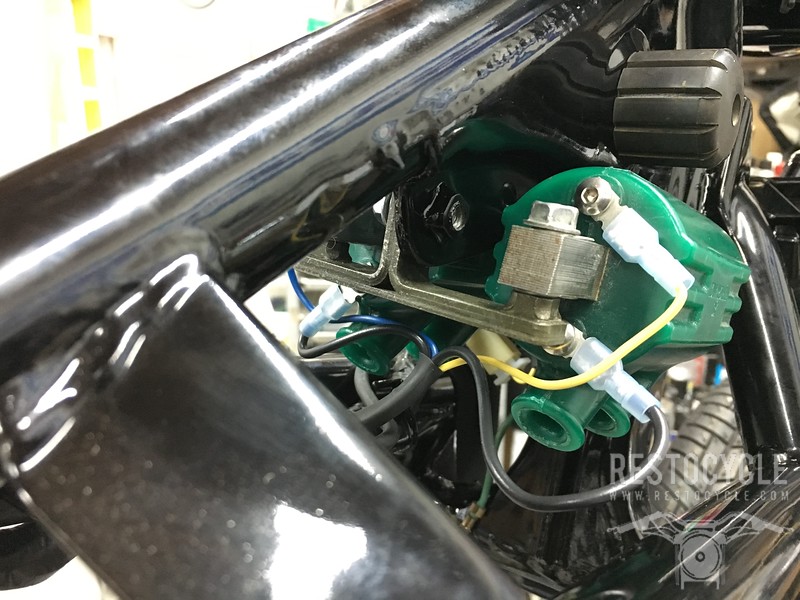
With that cleaned up, the battery box got installed and the wiring harness hung on the frame, and the electrical stuff is being installed. We've opted for some new more modern electrical components in an effort to improve reliability in a few areas including an Electrosports regulator/rectifier, a pair of Procom ignitors, Dyna 3 ohm coils and wires, NGK iridium resistor plugs, and new Tec handlebar switchpods. A very talented guy I found on the 1100F site provided two really excellent upgrades from his bag of tricks: a plug-and-play replacement for the glass fuse holder at the steering head, and a coil power relay module to provide full battery power directly to the coils. I told him I was using Dyna coils and wires with the stock ignition and he made a modification to the coil power harness, running 2 leads for the dyna coils directly from the relay, simplifying and improving that installation when the time comes.
I've also got an inline fuse holder I'm going to install onto the two terminals in the stock solenoid, and remove the 30-amp fusible link within.
The fuse block also includes an optional accessory fuse and pigtail, which takes seconds to install and provides a three-port 15-amp circuit up near the steering head, which I will use to power an accessory USB outlet, a GPS power port and a pair of Oxford heated grips. I neglected to take photos of these products but I will go back and add them - they are just outstanding: very high quality components, beautifully assembled, thoughtfully designed. Really impressive stuff and an outstanding value and service.
And speaking of craftsmen, another friend sent me a pair of beautifully made oil lines for the 900F oil cooler.
...
NobleHops
Recovering geek
Yesterday we also finished painting the engine cases, after extracting the studs, chasing all the threads, and masking and degreasing everything. Just for being thorough we also replated the studs to hopefully prevent them getting cruddy, and used the thread repair dies on the threads to repair slight damage from the thread extraction tools, just so everything goes together as best it can.
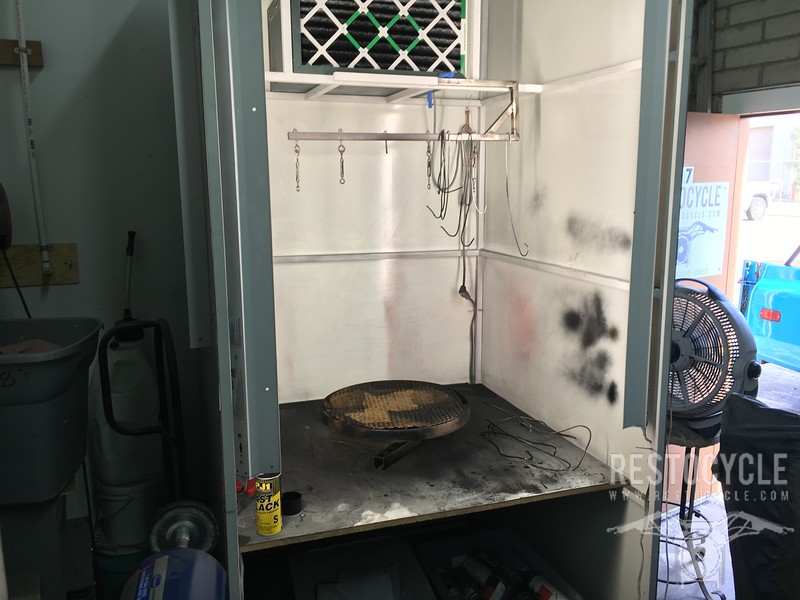
My little homemade spray booth and turntable. Works great!
Next week we will bake the crankcase parts, machine the head or cylinders as needed to fit the trick camchain tensioner parts, and make one final run through all of the engine parts we have accumulated to be sure we have everything we need for reassembly.
...
NobleHops
Recovering geek
The engine paint turned out really well, very happy with that. As planned we let the parts cure for several days and baked them for an hour at 200 degrees, and the finish is smooth and consistent and there's been no chipping or flaking or any other bad behavior during routine handling as we prepare to reassemble it.
I did a skosh of machining on the head to clearance the B chain tensioner. The plan was to reassemble this coming Monday, but as I ran through everything I realize I still have some odds and ends to do first" I have a clutch basket kit that will take a few hours to install, plus a minor shifter modification, and I still need to drill and tap the head for the tensioner parts, and shorten and finish the tensioner screw. Nothing too major but in between interruptions that's all a solid day's work I guess.
Did some work on the wiring, installed Procom spark units, and the R/R. Also skinned the solenoid and its fusible link and installed an inline fuse holder with ring terminals there too, so we have banished all the old glass fuses.
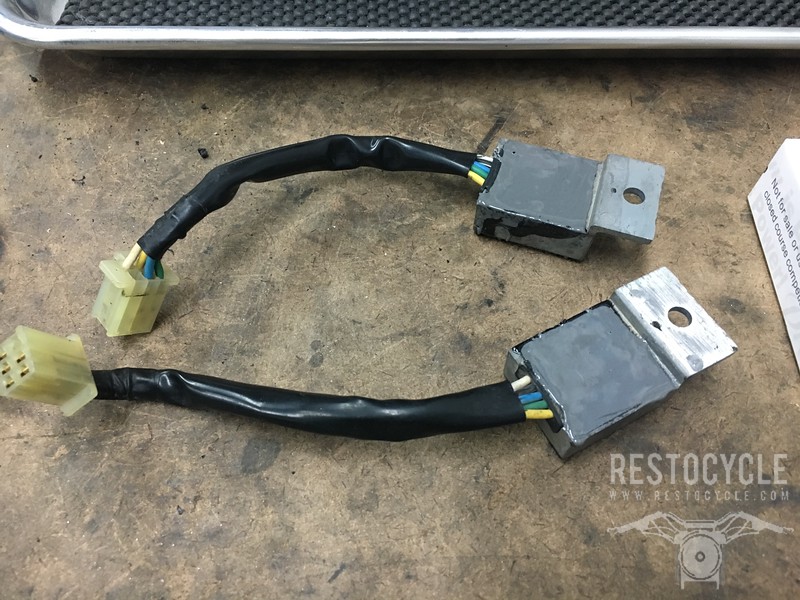
A couple of folks have cautioned me about the longevity of the aftermarket ignitors, so just for fun I took my stock Okis and filled them with JBWeld, as the potting was almost all gone. Let's see THIS leak
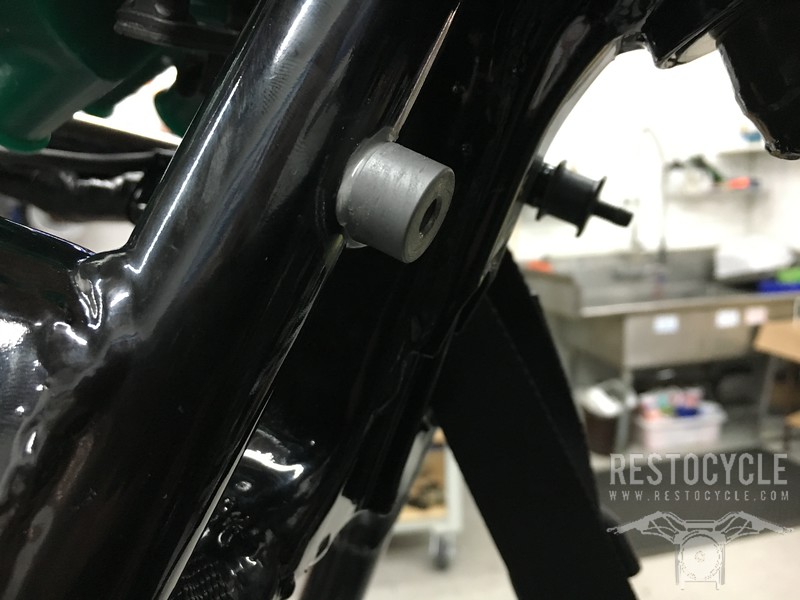
JBWelded in that oil cooler mounting boss, still need to mask and paint it though:
Rebuilt all the brake calipers with new seals, rubber bits, pads, replated hardware:
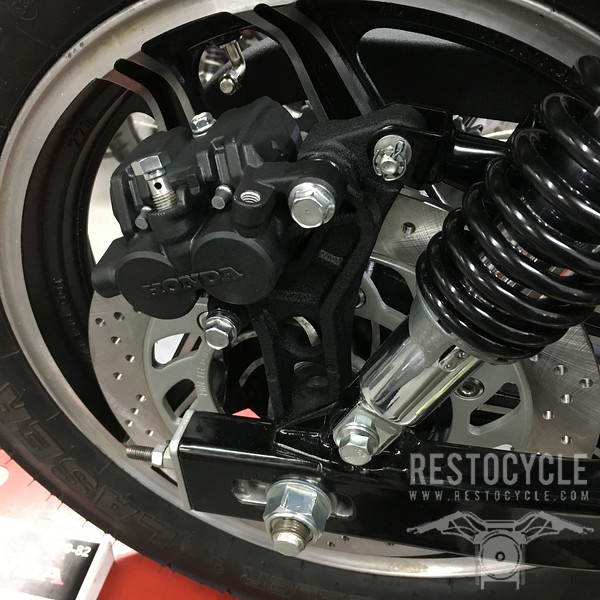
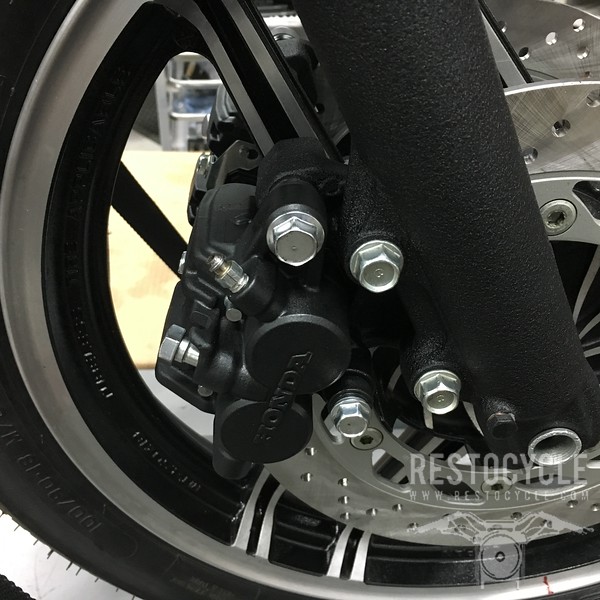
Did have to clearance the left caliper bracket just a skosh in the end, no big thing, although the right one was perfect as it was.
I did however get stuffed on trying to use a cool alloy VF750 torque arm and caliper bracket. It does not line up with the rotor. Not sure what the variable is, perhaps it would work with a different rotor, but I'm shelving that for the moment and will investigate a solution that just uses a different alloy torque arm.
Hope to have a big update in a week or so.
I did a skosh of machining on the head to clearance the B chain tensioner. The plan was to reassemble this coming Monday, but as I ran through everything I realize I still have some odds and ends to do first" I have a clutch basket kit that will take a few hours to install, plus a minor shifter modification, and I still need to drill and tap the head for the tensioner parts, and shorten and finish the tensioner screw. Nothing too major but in between interruptions that's all a solid day's work I guess.
Did some work on the wiring, installed Procom spark units, and the R/R. Also skinned the solenoid and its fusible link and installed an inline fuse holder with ring terminals there too, so we have banished all the old glass fuses.
A couple of folks have cautioned me about the longevity of the aftermarket ignitors, so just for fun I took my stock Okis and filled them with JBWeld, as the potting was almost all gone. Let's see THIS leak
JBWelded in that oil cooler mounting boss, still need to mask and paint it though:
Rebuilt all the brake calipers with new seals, rubber bits, pads, replated hardware:
Did have to clearance the left caliper bracket just a skosh in the end, no big thing, although the right one was perfect as it was.
I did however get stuffed on trying to use a cool alloy VF750 torque arm and caliper bracket. It does not line up with the rotor. Not sure what the variable is, perhaps it would work with a different rotor, but I'm shelving that for the moment and will investigate a solution that just uses a different alloy torque arm.
Hope to have a big update in a week or so.
focusinprogress
City Limit Moto:Parts-Service-Apparel (716)8038606
beautiful work and attention to detail, as always nils!


