
LBC
Been Around the Block
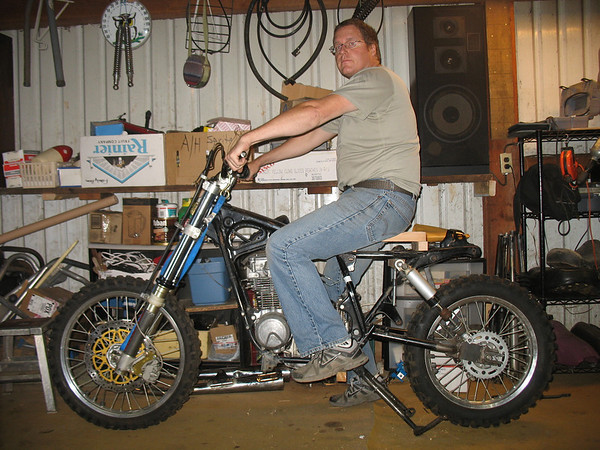
Re: CB900 Scrambler - Stage One Complete
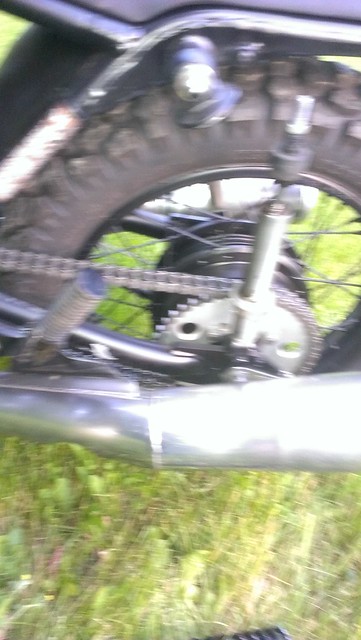
Here's a cool blurry cell phone pic.
I've ridden the bike to work every day this week without any hiccups.
Yesterday evening I felt like doing a non-commute ride so I went to some local back roads near my house. On my way back home I heard a distinct metallic twang and ringing from behind me followed by the an intermittent vibration under the seat. I was cruising about 30mph at the time so I eased off the throttle and used front brake to get her to the side of the road. I put it on the kickstand and assess the back end only to find the above situation.
The jam nut on the damper rod wasn't tight enough on re-assembly so it backed out of the upper shock mount and let loose on a bump which let the spring fly off while I was going down the road. The ringing sound I heard was the spring rolling down the road behind me before ending up in the grass on the shoulder. The vibration under the seat was the rear tire kissing the seat pan since it only had one shock to support my ass.
This is why I wear ATGATT. And this is why I carry a basic metric tool kit.
I walked back up the road and retrieved the spring. Re-assembled and finished my ride a few miles to the house. Consider me luck yet again that the spring didn't end up in the spokes or bounce into an oncoming car or come loose doing 70 on the highway.
Note: I noticed a good amount of whatever damping fluid is supposed to be in these old shocks making its way to the outside. They didn't look servicable when I had them apart so my quest for new suspension needs to happen sooner than later I suppose.
8.3 weeks to Rally WV.:evil


") )
)

