CB900 Scrambler - Rally Approved!!

Re: CB900 Scrambler - To Ride in Anger

Man you move fast. I'm interested in your oil cooler idea, and I love the gauge mount. Keep it uuuuup

1981 CB750K (getting there now)
 
Re: CB900 Scrambler - To Ride in Anger

Went out for a couple days of trail riding this weekend (Hanging Rock 200) but I'll be back to building tonight.
8757047061_16524428c2_z.jpg
 
Re: CB900 Scrambler - To Ride in Anger

kraptastic k said:
Man you move fast. I'm interested in your oil cooler idea, and I love the gauge mount. Keep it uuuuup

1981 CB750K (getting there now)


I'm hoping to get the oil cooler and the battery/electronics mounts fabbed tonight.

I got the vinyl wrap for the tank in the mail but I'm going to need some practice to get it flat over some of the compound curves without making a seam. I'm not giving up on the idea but I may borrow a paint gun for this project and save the wrap for a future tank.
 
Re: CB900 Scrambler - To Ride in Anger

Monday evening build progess...

It was hot and dry out when I got home so I decide to work on the tank.

I layed down some red Duplicolor Metal Specks over light grey primer. Putting it over a light color made it a little too magenta. I'm going to sand it then put some red Duplicolor Metalcast on it to get more of a candy red tone. If I still don't like it I'm going to cover it in a layer of silver and then do the Metalcast.
The lower area below the body line will still be satin black either way.

The inner fender is trimmed to its final dimensions. Pretty inconspicuous so I'll keep it.

8769432470_ee27619778_z.jpg


I put a spare seat cover from a dirtbike seat on while the leather seat is being made. Fits pretty well actually and nice and grippy

8769518086_9e062fb62f_z.jpg


I thougth I had a solution I liked for tail light/license plate bracket but it sat too high. I'm going to patch those holes and weld a plate that puts it all a little lower

I tried a few mock-ups of an oil cooler mount. I decided to try them in some scrap HDPE because I can cut and shape it more quickly. I'm going to drill and tap the frame to mount the final product which will be aluminum. I'm going to shape it to match the ears on the oil cooler.
8769823962_a88297dd6f_z.jpg
 
Re: CB900 Scrambler - To Ride in Anger

Looking super cool man. Nice work on the engine.
 
Re: CB900 Scrambler - To Ride in Anger

Rich Ard said:
Looking super cool man. Nice work on the engine.

Of all the things I thought would be difficult to get looking decent the engine paint was pretty straight forward. Just hope it doesn't flake after a few heat cycles. It's designed for engines so...fingers crossed.
 
Re: CB900 Scrambler - To Ride in Anger

I'm still at it.

Fixed that leaky fork again yesterday. For good this time. I couldn't find a properly sized replacement for the copper washer so Itook the original and lightly tapped it flat with a small hammer and then sanded both sides perfectly flat with a piece of 400 grit on a plate of glass. Success.

Also welded the license plate/tail light bracket. You can barely see it in the last pic here. I'll get better shots tonight.

Put down some of the metal cast paint over the metal specks. Wet sanded last night. I'm liking this tone better.

8791807347_dd98ca4b67_c.jpg


8803000604_c7d26c2c15_z.jpg


This is the first time I have painted with colors that are so sensitive in how that are applied. They catch light and show uneven layer very easily. I should have researched and planned my layering better with this metallic stuff. Some test pieces would have been a good idea but I got in a hurry and just went for it. There were a few spots that got lighter as I color sanded and getting everything to even back out is challenging.

Tapping my patience reserves for sure but I'm learning the process and getting my head around the right technique. Here it is with what is hopefully a final coat of the metacast red.

8791870651_1e89f2111e_z.jpg


It is a bit cloudy in one area. May have been bit too humid when I laid it down. I'll give it a few day sto see if it dries out.

If all goes well I'll sand it one more, then clear, then sand again, then buff, then add two layers of the black trim.....it's a process.


When I was shaving tabs off the rear triangle I removed the mechanical brake switch mount. It was hanging out in an exposed area on the rear tube and there was no good way to hide the wires or protect the switch. I fabbed a new bracket last night that holds the switch up near the motor. I had to extent the arm on the brake petal shaft to reach all the way under the swingarm it all came together. I will get better pics when I pull it out to paint it.
8802425106_4067e56d07_z.jpg


I scrapped a few ideas for battery and electical mounts. Back to the drawing board. I did some more final reassembly while I let my brain stew on the idea. It feels good to put things on when you don't plan to take them off...feels like I'll be riding soon.

8803109720_bc64668676_z.jpg
 
Re: CB900 Scrambler - To Ride in Anger

LBC said:
Fixed that leaky fork again yesterday. For good this time. I couldn't find a properly sized replacement for the copper washer so Itook the original and lightly tapped it flat with a small hammer and then sanded both sides perfectly flat with a piece of 400 grit on a plate of glass. Success.

You should of heated it to cherry red and let it cool down to anneal it. It reverts the copper to its original state after being work hardened and will seal better.

You made some rapid progress there and its looking great, cant wait to see it finished.
 
Re: CB900 Scrambler - To Ride in Anger

notlob said:
You should of heated it to cherry red and let it cool down to anneal it. It reverts the copper to its original state after being work hardened and will seal better.

You made some rapid progress there and its looking great, cant wait to see it finished.

I could swear that I replied to this yesterday but I don't see the post. :eek:

I've seen this concept used elsewhere but never with these little copper washers. I'll definitely use this in the future. Thanks for the brilliant tip!
 
Re: CB900 Scrambler - To Ride in Anger

So close I can taste it.

8804141257_524fbc9dc8_z.jpg


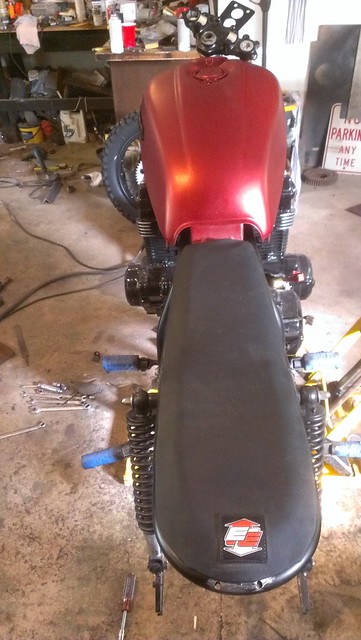
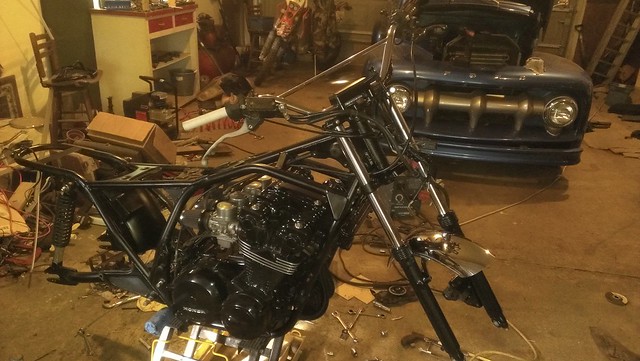
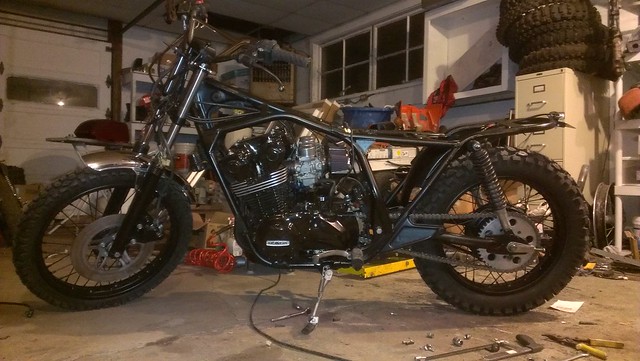
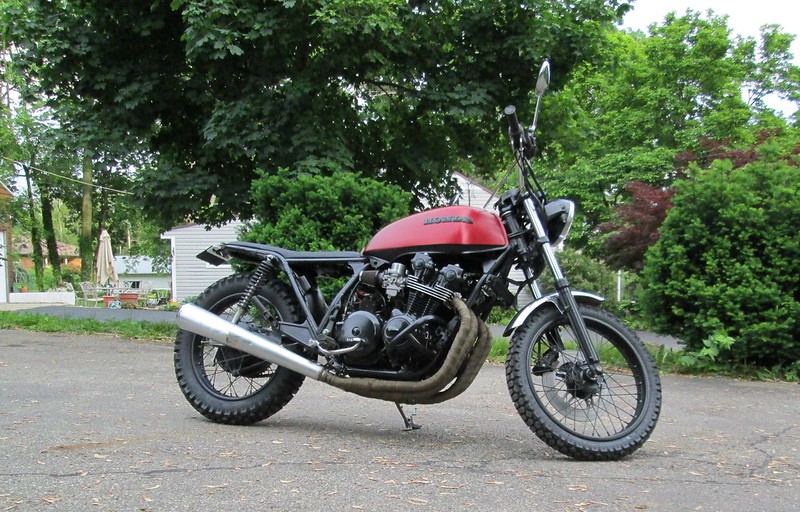
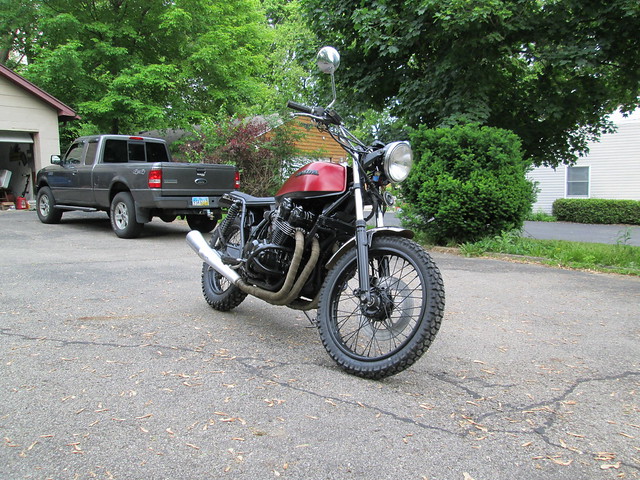
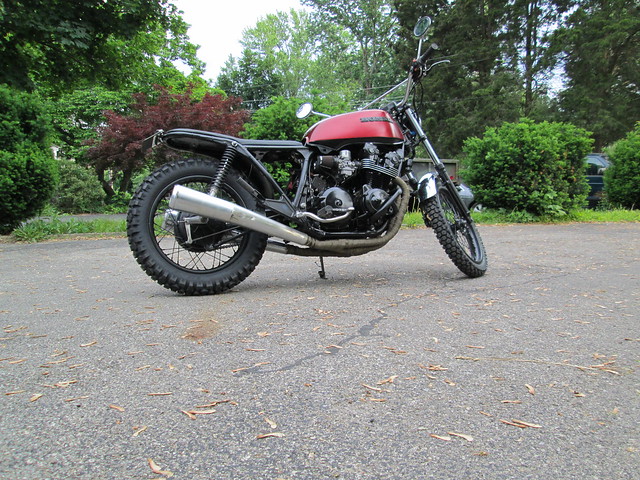
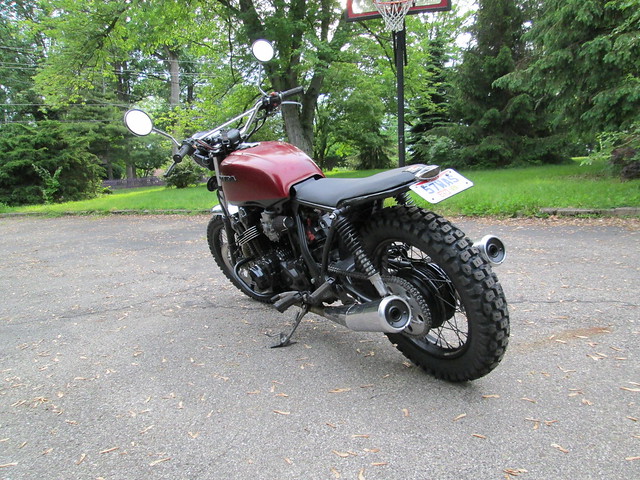
Wheels, fender, chain, swingarm, shocks, handlebars, grips, side cover, levers....all assembled and given proper torque.

Epoxyied the magnet for the speedo pickup to the rotor and tested it out. Bingo.

This kit came with a thermostat that goes under a spark plug. Any thougths on that? I'm not convinced I like the idea.

I finally made a battery box mount that will do for now. I pulled it out to paint it before I took pics so more on that later. I cut away all but the basics of the old stock battery cage and welded a couple of hooks that go under the rear motor mount. It all fits under the pods and keeps the rear triangle clear so that's a win. I was close to doing a swingarm mount but the look and the potential abuse of unpaved back roads convinced me otherwise. When I make an airbox I will probably have to change this setup but this will get me on the road.

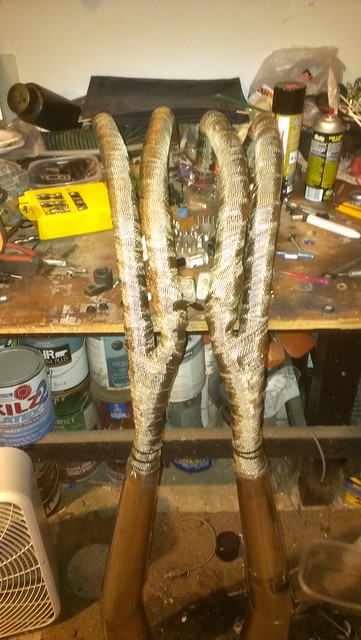
Exhaust wrap installed. Just have to mount them back up. The rear exhaust brackets and the passenger pegs got paint last night so I had to wait.
8814766360_407efac8e7_z.jpg


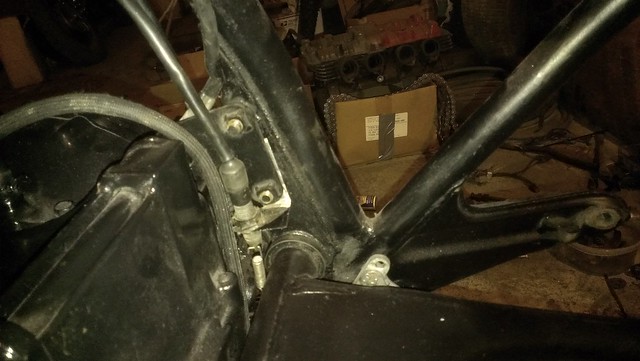
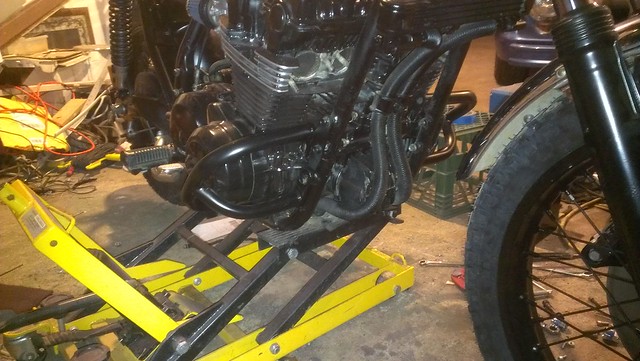
Mounted the crash bars. They took some massaging with a 2lb hammer to get them to line up. I still need 2 more bolts to tie into the front motor mounts. The ones used in the motor swap were too short to make the stretch.
8804299033_096625d509_z.jpg


So what's left?

Install the pipes
Intall carbs with clamps
Install coils and plug wires
Install harness and secure
Install guage and solder dash light connections
Intall battery box and battery
Start bike and sync carbs
Install two final bolts for crash bars
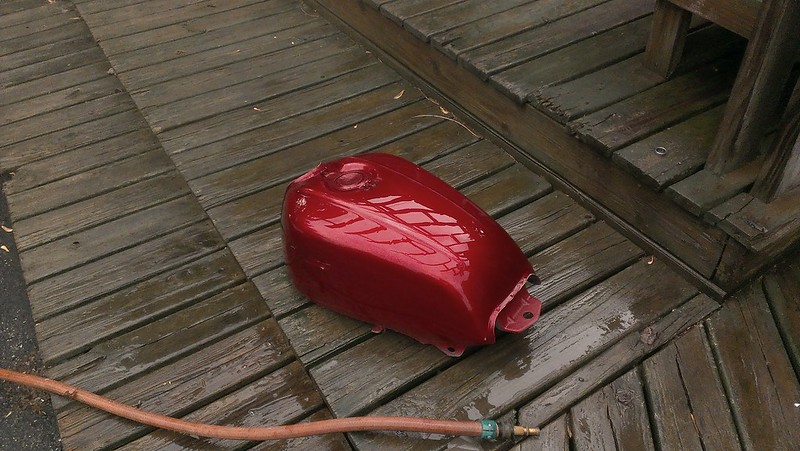
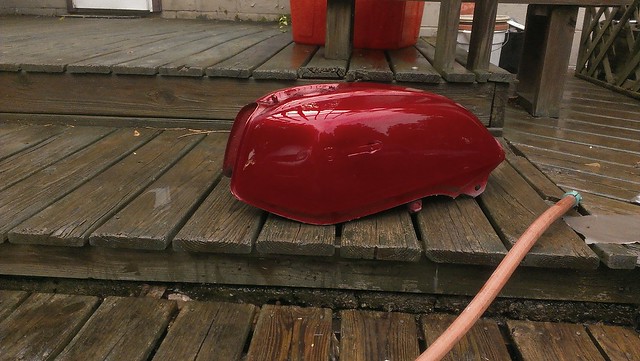
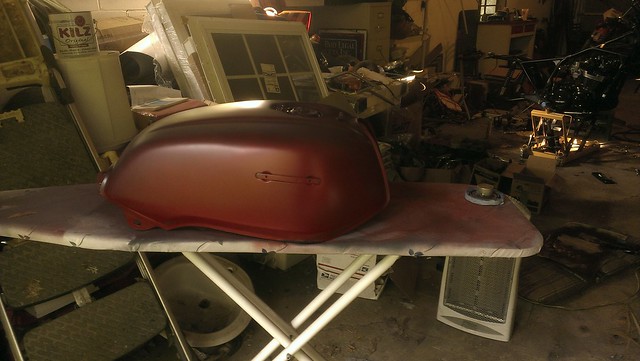
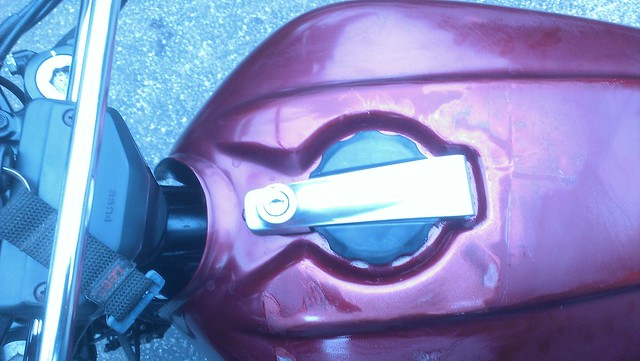
Satin paint and pinstripe on tank
Install tank
Install seat
Mount license plate
Ride :D

Sounds like a nice Friday evening!!! Before a long weekend.
 
Re: CB900 Scrambler - To Ride in Anger

Wow. Just caught myself up to speed on your build. Super cool. Can't wait to see your next updates.
 
Re: CB900 Scrambler - To Ride in Anger

Did a successful shakedown yesterday! Details to come!
8847677092_39c3758a44_z.jpg


8847682214_21ae9b8722_z.jpg


Sent from my EVO using Tapatalk 2
 
Re: CB900 Scrambler - To Ride in Anger

Its looking good, I bet you felt the bumps through seat when off road.
 
Re: CB900 Scrambler - To Ride in Anger

I haven't hit the trails yet but based on some of the big pot holes I've hit I think being able to stand up a little over bumps will be important.

After about 100 miles I have to say the seat is more comfortable than I expected. The footpeg position could use some work. Too high and somewhere between too far forward and too far back.

I'll get some trail video later this week. :)

Sent from my EVO using Tapatalk 2
 
Re: CB900 Scrambler - To Ride in Anger

This thing is sweet!

8862223053_da4317bf7c_z.jpg


I tried to finish her up Friday night but it seemed like everything fought me. The exhaust didn't want to go back on so I wrestled it for over an hour. I put the wiring harness on and hit the starter button...nothing. The relay was bad so I had to replace it with a different one I had that required me to rig a fuse on it. Once that was straight I mounted the carbs and put fuel to them only to have them pour gas all over the motor. FUUUUUU@%!!! The rubber on the float needles had dried out a bit while sitting on the bench the past few weeks. It was about 2:45am by this point. I went to bed rather than throwing tools and shouting.

Saturday morning it was all much smoother. Turned the gas back on and no leaks. Hit the starter and she fired up. Synced the carbs and she purred. Made a wiring harness for the rear signal/brake. Bled the front brake. Grabbed the tank to pull the masking tape and paper off from adding the satin black trim paint. FUBAR. Whatever little bit of fuel that was in the tank gave off enough vapor to melt the paper into the red paint so I have to re-do the top of the tank...whatever...it still looks tough for now.

8863158658_f51e8d88e2_z.jpg


I put almost a hundred miles on it Saturday. I stayed close to home. The headlight mount bolts loosened up on my first short run so I went home and dug up some nylock nuts.

My idle was set to run well cold but once I really got her warmed up the idle was too high so the CV carbs wanted to take off and idle to the moon when I'd stop. I stopped and adjusted it down to a controlled level and I'm set! ended up with the rear springs one notch down from the highest pre-load. I may go one softer.

When I got home I noticed one of the front engine mount bolts was gone where the cash bars attach. It should be easy to replace. (and Loctite)

Pulls strong all the way up as far as I can tell. Plenty of brakes to lock up the front and the rear. With such a low CG it corners really nice even with the 50/50 knobby tires. :clap

I'm calling this Phase I complete! I couldn't be happier with this so far considering this is my first bike build and I've only had her for about 6 weeks!

My wife took some video of the maiden voyage out of the driveway. I'll post that and some dirt footage later this week.

8862494363_c4cd3c146c_c.jpg


8862196883_e6a920af57_z.jpg


8862217695_c3b9b064c9_z.jpg


8862203301_5053037a92_z.jpg
 
Re: CB900 Scrambler - Stage One Complete

Damn, you're still fast. I imagine myself moving at this pace when I have a big boy budget and welding skills. Great DOHC man! We definitely have similar aesthetic tastes as well- the form is the function.
 
Re: CB900 Scrambler - Stage One Complete

Great looking bike!

Whats Phase 2,3,4.... going to mean for the bike?
 
Re: CB900 Scrambler - Stage One Complete

Budget...so I'm a cheap bastard so Phase 1 was to get the bike on the road for as little as possible. I borrowed tools and dug through scrap bins for metal and told all my riding buddies about the project and got plenty of support. It also helped that the bike came with four boxes of hardware, electrical harnesses and parts. (Including a spare oil cooler, set of motor covers, and full head and cams)

Here are the numbers:
Bike $350.00
Registration, title, Ins $102.00
Carb Boots $69.00
Carb Kit $124.00
Handle bars $35.00
Tail Light/signals $42.00
Fork Seals $35.00
Rear Hoop $40.00
Exhaust Wrap $51.00
Tires and Tubes $133.00
Gauges $140.00
Paint $65.00
Seat Foam $22.00
Battery Donated

Total $1,208.00
 
Re: CB900 Scrambler - Stage One Complete

BoJordan said:
Great looking bike!

Whats Phase 2,3,4.... going to mean for the bike?

Thanks!

Phase 2 involves suspension and wheels. I figure there's probably 10-15lbs of un-sprung weight to be shed by swapping to aluminum wheels and a rear disk. If I find the right donor rear end I'll probably swap to an aluminum swingarm to make for less fabrication. I have a few folks willing to donate some forks/trees to the cause from older honda 600R and 650Rs. Haven't decided on shocks but looking to raise the bike by about 2 inches overall and balance out the front and rear.

Phase 3 - Might be a new set of carbs but it's running strong right now so I'm not sure if I'll need that. I want to build an airbox to see how it runs that way at least.

Phase 4 - Maybe some updated controls, braided brake lines, and new wiring. I'd like to try a hydraulic clutch conversion. I have a spare clutch cover and the stock plug on the cover seem like a slave cylinder adapter could be machined in a pretty straight forward way.

The biggest hurdle to progress is that I'm pretty satisfied with the bike as is (I still think I want some extra suspension) and I've got the itch to work over an old thumper. GN, SR, XR, XT.......?

And this is waiting in the garage for some love...
8875078192_6331fe1e93_z.jpg


It's a basket case project I picked up about 6 months ago for almost free. FT500 motor in a modified CL175 frame, CB550 forks with dual disk setup, aluminum rear wheel, Clip-ons, rear sets, tiny little bike with a bigger thumper motor. No title but I think I can fix that.
 
Back
Top Bottom