Follow along with the video below to see how to install our site as a web app on your home screen.
Note: This feature currently requires accessing the site using the built-in Safari browser.
We noticed you are blocking ads. DO THE TON only works with community supporters. Most are active members of the site with small businesses. Please consider disabling your ad blocking tool and checking out the businesses that help keep our site up and free.
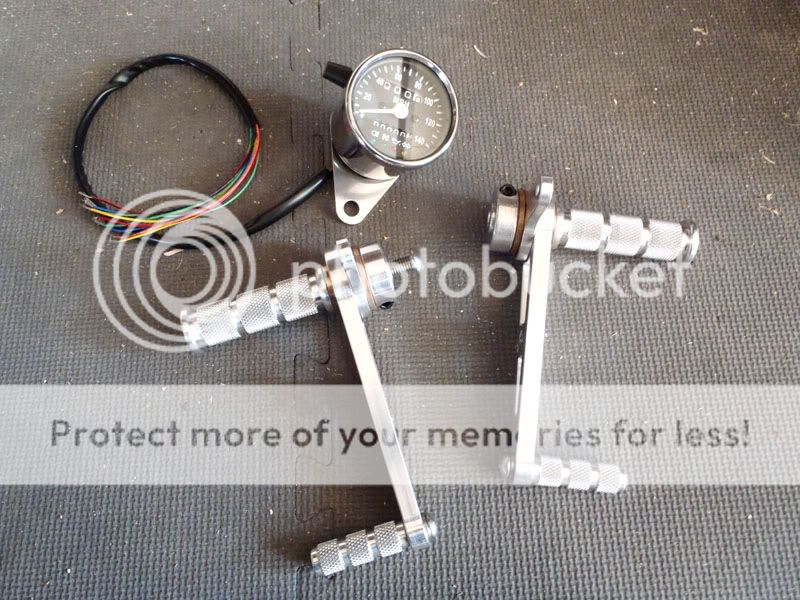
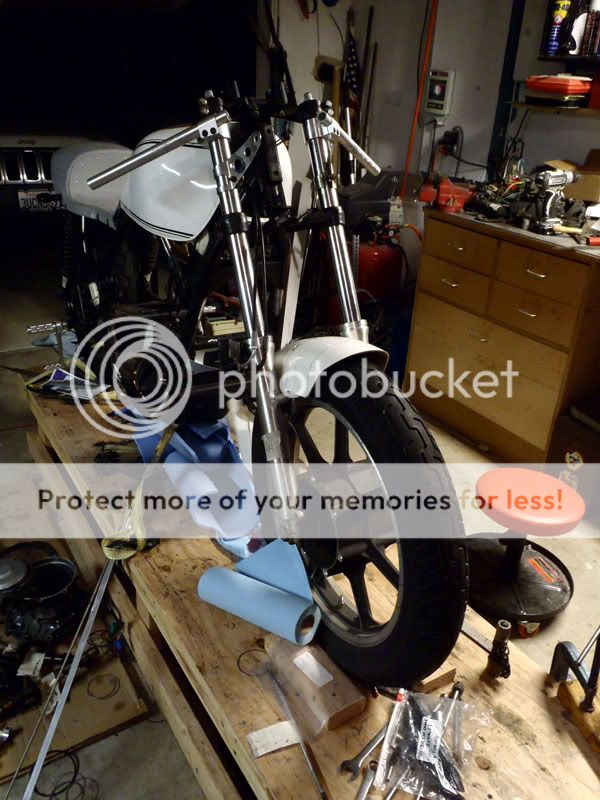
So I haven't been up to much with the build these last few days. I should've ripped the engine apart as soon as I got it out of the frame, since I'm still waiting on my head to get back from the machine shop, and I'm running out of things to do until its back together. Anyway, live and learn. What I have been up to is ordering parts I'll need shortly. Here's a shout out to the Crew at DCC, I ordered a speedometer and their universal rearsets, and got them 4 days later. Thanks guys! I also adjusted the front fender. It was sitting way too high off the wheel.
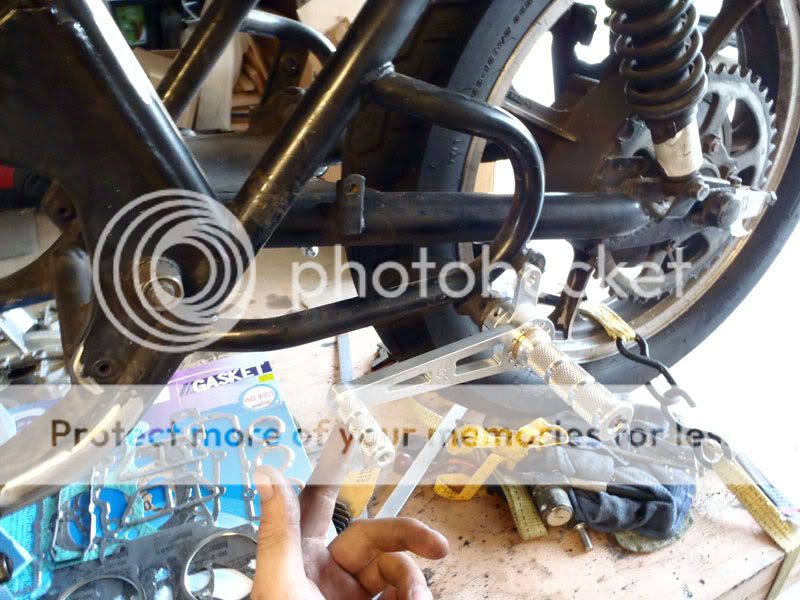
Going to mount the pegs where the mufflers used to mount, it puts my legs at a super comfortable angle when I sit. Win.
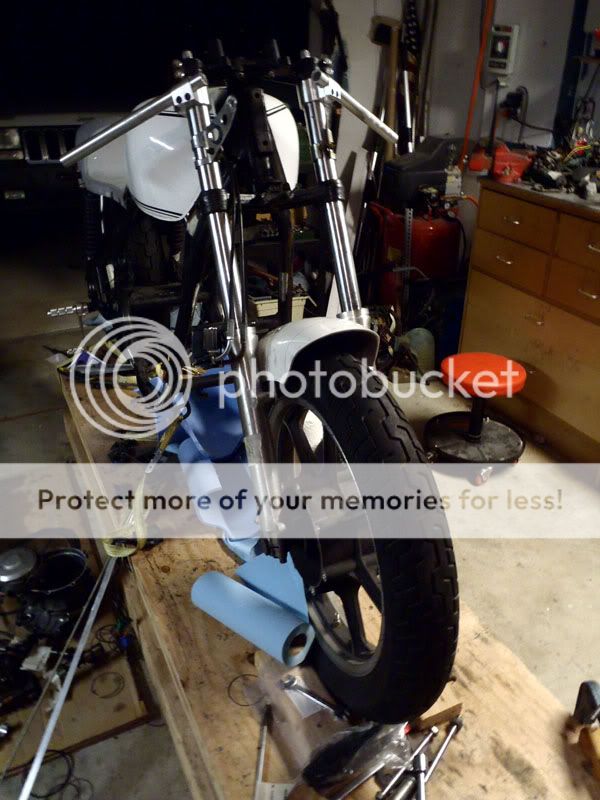
Front fender sitting WAY too high, ugly.
Front fender sitting slightly lower, slightly less ugly. Still going to tweak it.
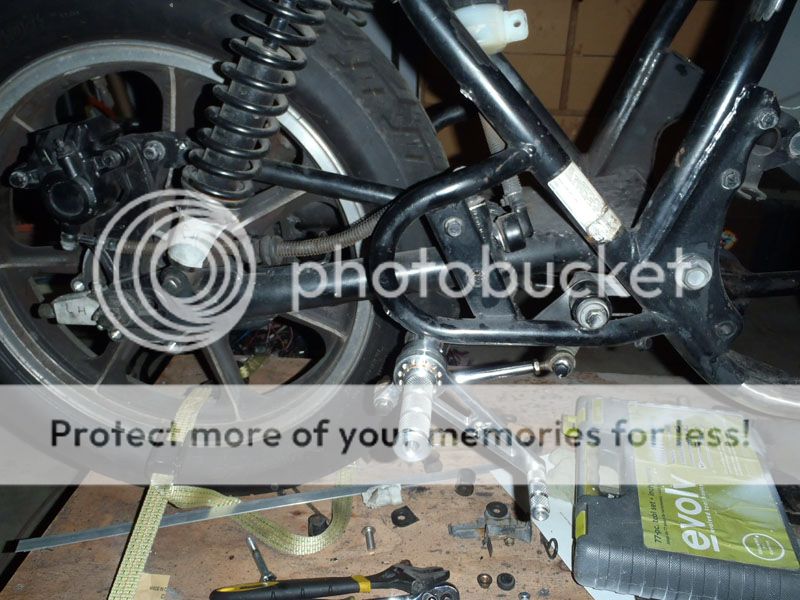
So I've been out of town for a couple days, but here's an update. My machine shop STILL isn't done with the head and valves, and now they want more parts to make sure it all works right, like the cams. Obviously I can't argue with this, but that's yet another week I won't be able to get the motor back together *sigh*. So I put the rear brake stuff back on, and put a linkage together. It worked much better than I'd hoped, since everything just pretty much fit. The linkage was actually the shift linkage in the stock police configuration, and the brake was much longer. Now I think that long one will work perfectly for the shift link with my rearsets once the engine is in. Slow progress, but hopefully it will pick up soon.
So I decided to work on the instrument cluster today, getting everything ready for wiring. I'm going with something different, since I can't find any handlebar controls that I actually like, I'm putting most of the switches in the center. So from left to right, its the high beam/low beam toggle, horn, starter, and run/kill switch. The turn signal is the only one that will remain on the bar for easy access. Hopefully it all works as well in real life as it does in my head, haha.
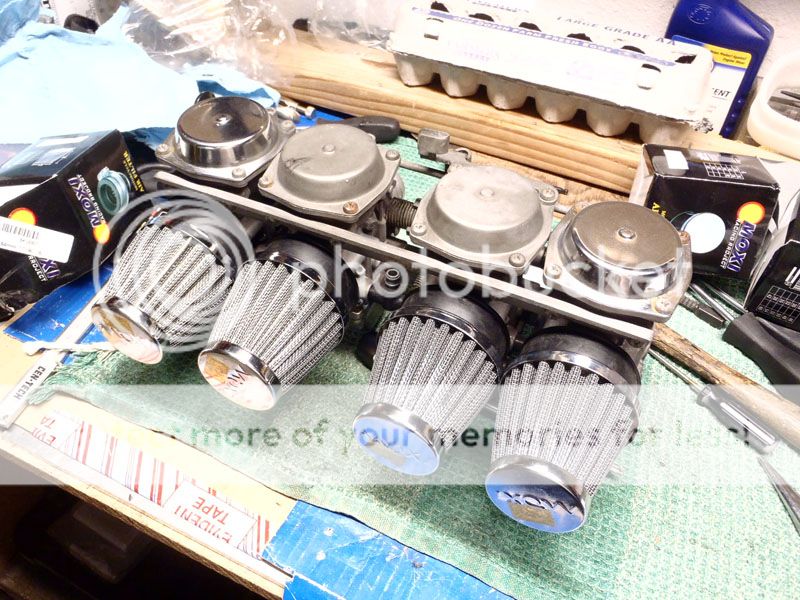
While waiting for some more wiring stuff to get in, I decided to clean up the carbs. They weren't too bad, and here's a pic of them with the air pods being test fitted.
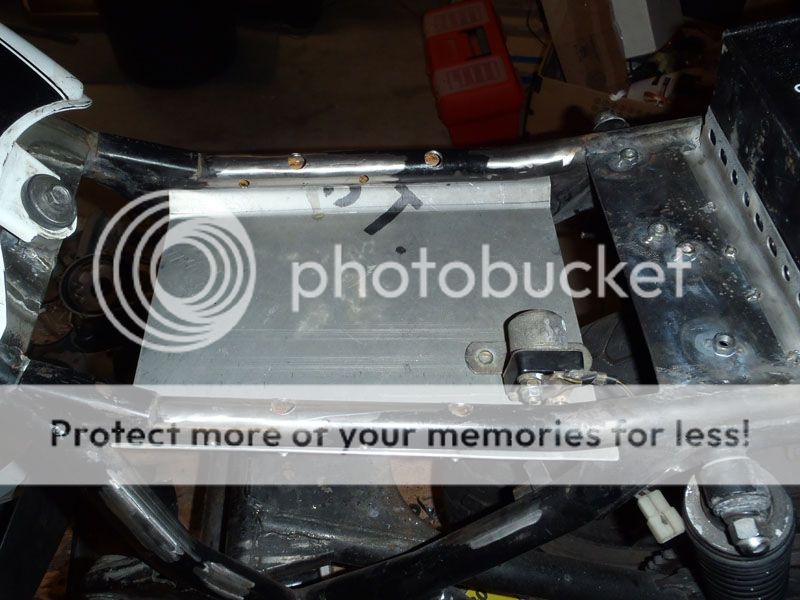
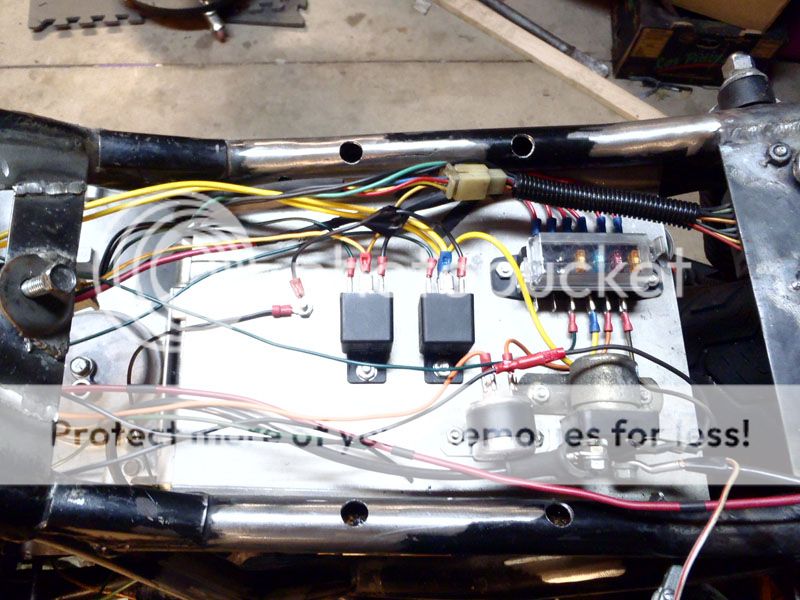
So first thig I did was make this tray out of a street sign. This is bolted directly under the seat and will mount most of the electronics. From the profile view you can hardly even tell its there. All I've done so far is rig power to the ignition switch, and from there to a fuse box. Then I mocked up the starter solenoid, and figured out how to rig the starter button. Took me a few minutes to realize that my starter button is closing the ground side of the circuit, but as everything works, oh well. I also mounted the coils and am using the stock clips and setup going to/from the ignition module. Saves a little bit of headache.
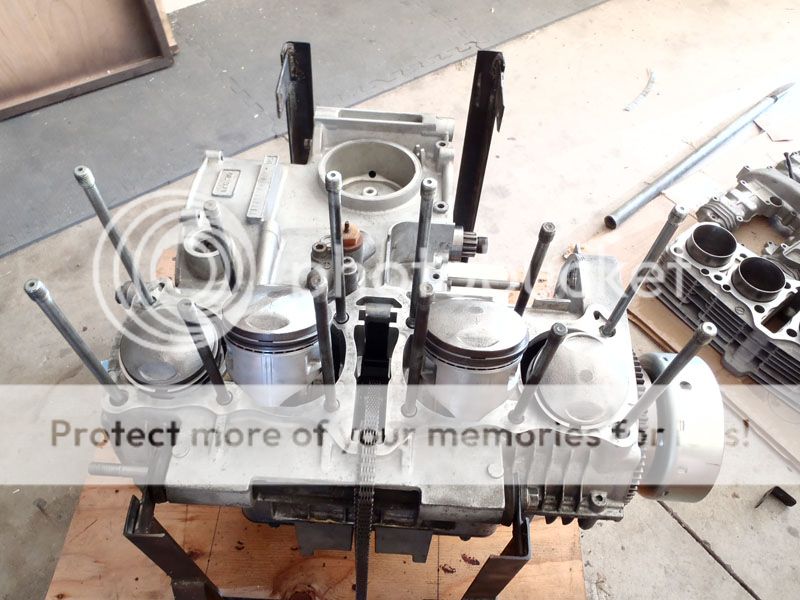
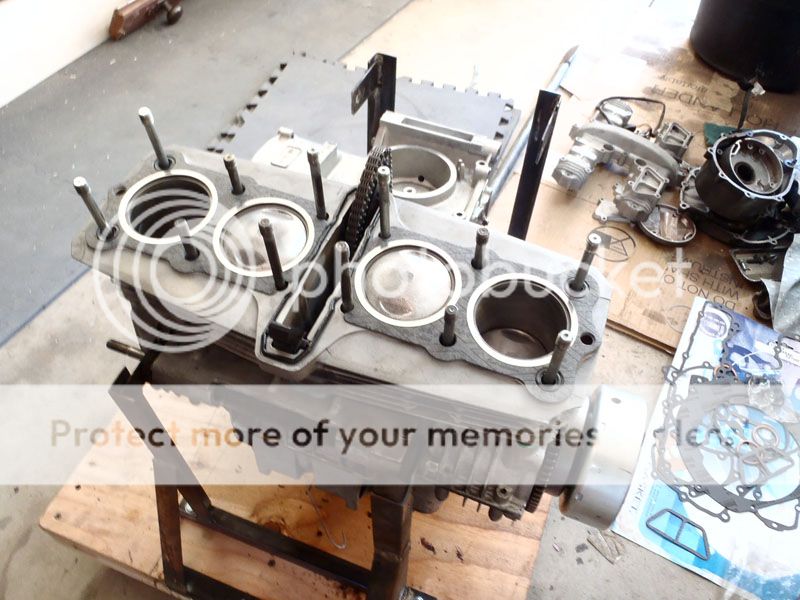
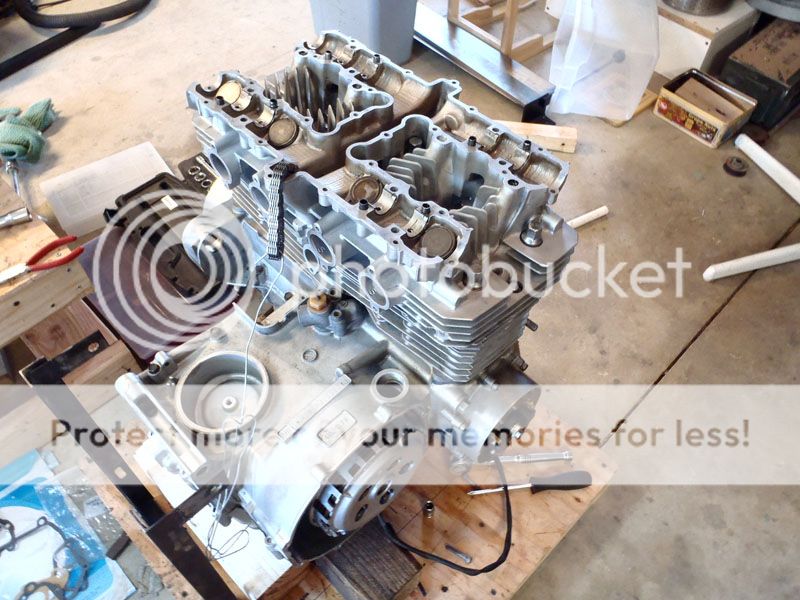
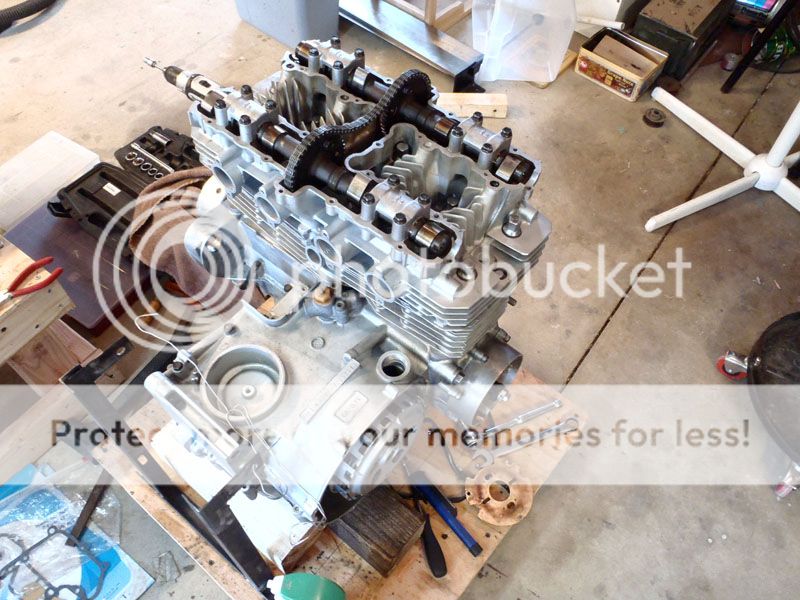
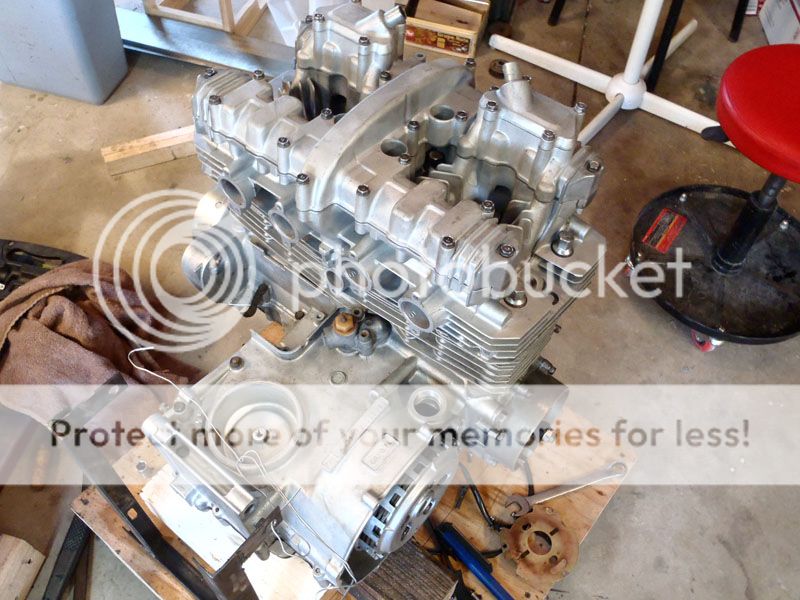
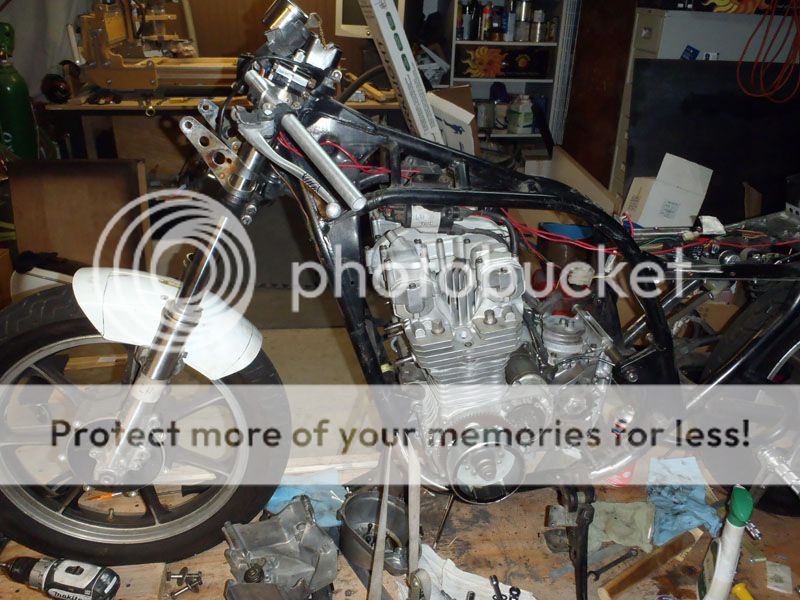
Finally! My cylinder head is back from the machine shop! Work can now resume... Not a whole lot to be said about todays progress, just put the engine back together and mounted it in the frame again. Here are some pics.
Another question for the masses: exhaust. My thought right now is to fab up a Buell style exhaust, meaning I want to run my headers to an underslung muffler. Does anyone out there have a fair amount of know-how when it comes to exhaust flow? I imagine that if I use my stock headers and crossover, I'll retain most of the flow characteristics. So if I fab up a chambered muffler with low exits, would I really lose a lot of power as opposed to a 4 into 1 setup? I'm certainly not opposed to the 4 into1s, but it would be cool to do my own. Thoughts? Opinions?
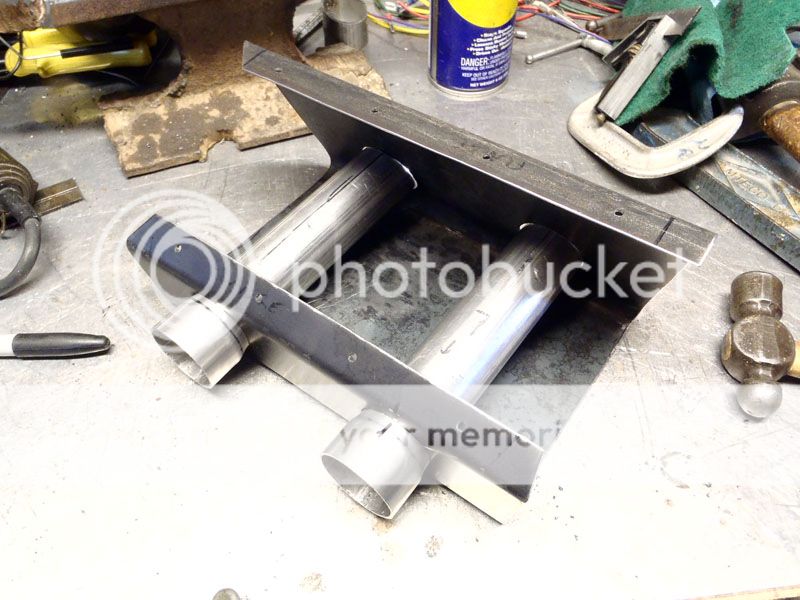
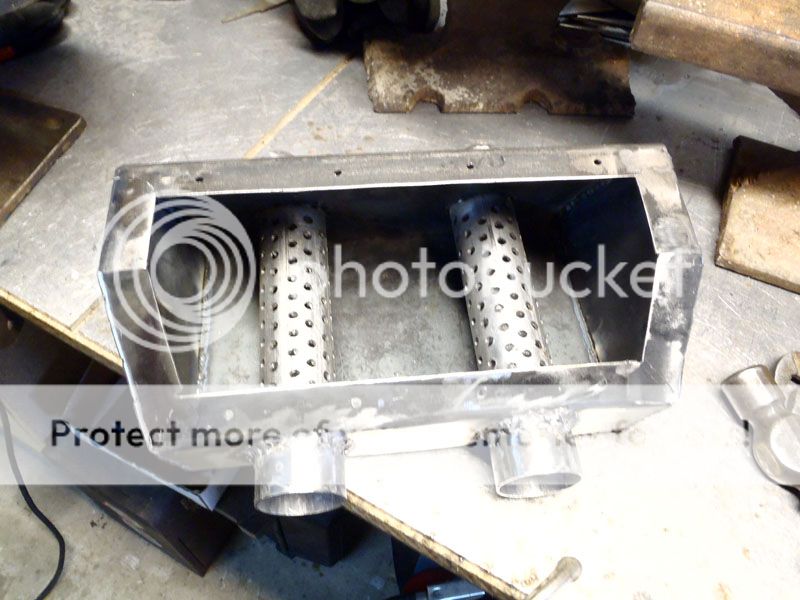
OK, did most of the wiring a couple days ago, just waiting on that ONE package in the mail to finish it up. Then I'll be able to test fire the engine, super excited! I also decided to build my own muffler, which is almost done. I realize now that it will be near useless as a silencer, but I've found a few plans online that I could build. I'm interested in this area, so it might be kind of cool to make a few and see what works best. Pics soon.
As far as design goes, its a legitimate absorbtion silencer, its just so short that I can't see it makng a huge difference. However, earplugs work too.
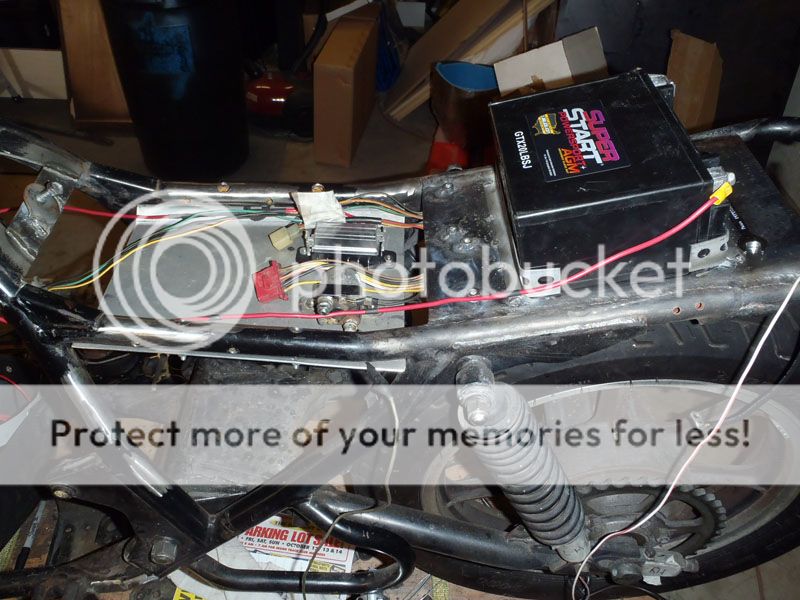
So here are the pics I promised of my recent progress. I did the new wiring harness, and what a difference it made! A fraction on the size and space. I went with the bare minimum, so it really wasn't too difficult. Here is my nre electronics platform, mounted directly below the seat pan.
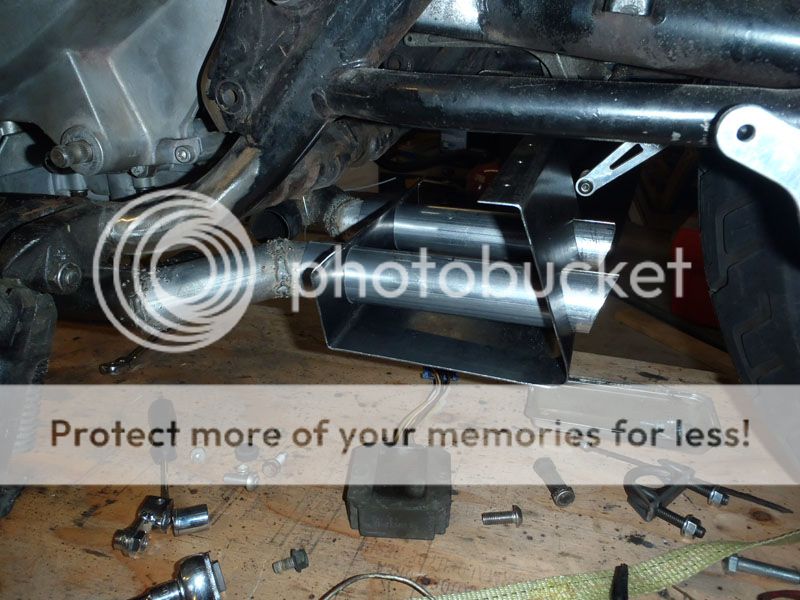
Here is the muffler I made. I really don't think it will do much as a silencer, but I can't wait to start it up and find out. Sound bites coming soon...
On the bike. I was very pleased with how it fills that gap in front of the wheel, and kinda seems to give the bike a lower look.
I filled this with steel wool and welded a cap on it, but forgot to take a photo. I'm sure one will turn up soon though. Still tweaking the position of the exhaust before I mount it, so stand by for final pics.
Steel wool is highly flammable, believe it or not, at least the fine stuff. I found this out the hard way while working in the garage one day. I know many mufflers are wrapped with a steel wool like material,and I am not sure the difference so to be safe you may want to test a peice with a flame to be sure you dont have a potential fire hazard. I totally dig the muffler, It has a Buell thing going on and it does give a nice low look.
Yup, Autotek is right, steel wool isn't that great. They make relatively cheap packing for dirtbikes etc, that would be much safer and work better. Keep it up, I think the box is cool.
Thanks guys, can't argue good advice when you get it. I did get the thickest gauge that's out there, but still. Do you have a link for that packing? I couldn't find any glass wool locally, which is what I originally wanted.
This site uses cookies to help personalise content, tailor your experience and to keep you logged in if you register.
By continuing to use this site, you are consenting to our use of cookies.

")