CB 125J cafe racer restoration

mathiask

Active Member
First ever project. After helping a few mates on building rally cars my hands started itching. But you just don't tinker on a brand new CB 500 x so that was a no go. So I spent a few weeks googling the old interweb for some good 125's that I can work on and transform into a cafe-racer style bike. Nothing that fit my budget was found, until my girlfriend signed her own break up form (just kidding honey) by spotting a cb 125 rotting away and telling me about it.

Rusted fenders, rusted tank, rusted handlebars, rusted suspension, rusted exhaust pipe and a cracked exhaust outlet. Yup, that was going to be it. Better save a classic like that from rotting away any further. So out go 100€ and in comes a project bike that I can spend all winter working on.

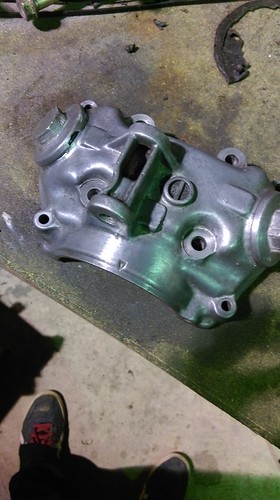
IMAG0490 by Mathias Keulen, on Flickr

What needs to be done?
- New piston
- revision of the gearbox
- maybe some headwork, or getting a new head
- All new wiring loom
- New set of rims
- Revise brakes

Rest is all cosmetic I guess. Would love to have a baked white colour like the 2015 harley sportster had. A clubman steering wheel is a must too. But I want to keep some original parts like the gauges, fenders, tank, spoked rims (but maybe not chromed out). http://i.ytimg.com/vi/kGUxTTvEf3Y/maxresdefault.jpg design wise maybe. Still need to figure that out when I did all the engine work. Anyone got some ideas for a colour of the frame? Maybe silver? Or a bright colour haha?

Everything will be done off-frame. This has to be a top notch result with the bike looking and functioning as if it's just come out of the factory. Basically, where I'm at now is this:

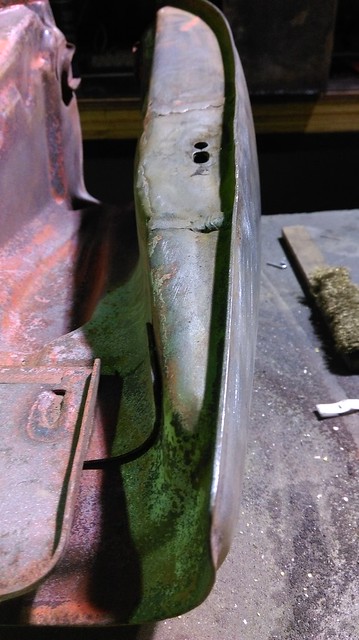
IMAG0531 by Mathias Keulen, on Flickr

I had no clue a bike could have that many nuts, bolts and washers compared to a car. But most of 'm came of easily. Spotted two broken bolts, have to drill them out sometime soon.

Anyone capable of defining the build year on this bike btw? CB125J1005901


No nuts no glory guys ;)
 
So this is what the insides of a CB 125J (or S) look like:

IMAG0542 by Mathias Keulen, on Flickr

Looks pretty ok!

IMAG0544 by Mathias Keulen, on Flickr

Ok that's just clean... how's this possible

IMAG0545 by Mathias Keulen, on Flickr

SUPER clean piston...

IMAG0546 by Mathias Keulen, on Flickr

Gonna need a new gasket set anyway

IMAG0547 by Mathias Keulen, on Flickr

Super clean


Soooo that was a surprise. As some might've already seen: My cilinder has been honed and a new piston was put in. This is a nice surprise as I thought the block was going to be a shitty repair. Still leaves me oblivious as to why it had so little compression. Replacing the piston rings seems unnecessary as they're pretty new too. Does anyone know the stock diameter of an OEM Honda piston for the CB 125??

The one thing that I am thinking about now is putting in a racing cam shaft if I can pick it up cheaply. I'm not going to get it bored as it would cost me a few hundred which would be a shame when the block's only been revised before the bike was put in storage for nearly a decade.

I also know why it wasn't firing. The contact points weren't opening and closing, so there's no spark whatsoever...

Anyone can give me a few tips as to why there would be so little compression? Is the piston too small for the cilinder maybe? (did they bore and hone the cylinder without replacing the piston with an oversize one? This piston says Honda on it without mentioning any oversize measure.
 
I want to order a few parts today.

Anyone knows where I can order the following combination:

- Piston rings
- Nut and bolt set for the engine
- cam chain
- cam sprocket
- racing cam
- contact points


Would anyone know whether or not it's possible to heighten the rear suspension just a tiny bit? Do I need to heighten the front suspension too ?
 
Do you have a motorcycle spec. machine shop you trust? who will measure the inside diameter of your cylinder and also measure the outside diameter of the presently installed piston ? The other reason it may not have much compression is perhaps the valve lash was not adjusted correctly which kept the valves slightly open at Top Dead Center.
I have had problems finding a machine shop that will bore and finish hone my cylinder correctly to give the right clearance(around .02- a max of .04mm of clearance, but be sure to get the correct oem factory Honda service manual for reference)fit between the cylinder and piston.The auto machine shops always say "what you're asking us to do is too tight of a clearance" ::) and then I say "that IS the correct clearance according to my oem Honda factory service manual"
I have a new oem Honda .75mm oversize piston and set of rings for the CB125J if you need it.
 
Getting it measured back here might be a problem, with a severe lack of specialized shops. I could take a micrometer and measure it out, would that be reliable?

Thanks for the offer, I'll keep it in mind! Where'd you get your J ? ;)
 
mathiask said:
Getting it measured back here might be a problem, with a severe lack of specialized shops. I could take a micrometer and measure it out, would that be reliable?

Thanks for the offer, I'll keep it in mind! Where'd you get your J ? ;)

I have a newer 1981' model but I've been running the 'J' piston and rings and it runs good :)
I would find a machinist who has inside and outside micrometers and knows how to use them,a regular 'powersports' type machine shop worker who regularly works on Japanese motorcycles even if you need to send it away w/ clear instructions on the correct specifications.
 
So.... today's the day I will open up the crankcase to see what other parts I need... but it seems the engine list includes the following

- Racing cam
- New piston rings
- Full gasket set
- New clutch handle or repair old one and buy rust dissolvent instead

All engine covers are now shiny after cleaning them with aluminum foil, but I can see clear color differences in the metal... so yea, it'll need a polish. Gotta clean the head and crank case before putting it all together, they'r elooking pretty bad. Cleaning all that metal has been very tiring haha
 
mathiask said:
First ever project.

mathiask said:
Rusted fenders, rusted tank, rusted handlebars, rusted suspension, rusted exhaust pipe and a cracked exhaust outlet.


mathiask said:
This has to be a top notch result with the bike looking and functioning as if it's just come out of the factory.

Ok great then it'll be ok if people with experience give you real advice and firmly critique your project as it progresses. Unless of course you are the luckiest man alive and end up with a showroom quality bike on your first attempt with no guidance or experience.

Details details. When you are trying for a home run, better be ready to hit some fastballs.

It's not too late to lower your expectations.
 
Did you even check the valve clearance before you tore it down?

I can't tell you how many people disassemble perfectly good engines because they don't know the basics.

Those engines have soft heads and valves. They require constant adjustment unless aftermarket parts are used.

Did you get your cylinder checked out by someone that has a clue? Did you measure your piston yet? If not, your showroom goal is already fading.

You mention having to pay hundreds to get it bored. Why? Please tell us the name of the shop that charges hundreds to bore a single motorcycle cylinder.


Rhetoric does not build motorcycles. If you think you are going to build a showroom quality bike on a budget, think again. I can tell easily by the tools you use, the cleanliness (or lack thereof) in the shop, and even just by the way you pile parts on the table that you have maybe let your mouth write a check that your ass will never be able to cash.

Digression is strongly reccommended. Otherwise you better step your game up.
 
Going to be following this build. I will be soon building a 125t into a cafe racer so will be good to look for further ideas.


Sent from my iPhone using Tapatalk
 
This is my first motorcycle build, not my first build ever ;) i actually have a bodywork degree, but engines arent my strong point (yet). Thats why i have two rally engineers assisting me. i need to tear down the engine anyway as the parts fell down when the previous owner tried disassembling it. So no, compression is for when I got the nut and broken cam tensioner out.

The hundreds here are charged by the two shops close (yea, that little). Unfortunately boring and honing here is really expensive and I don't have the experience to do that myself.

And I think my tools are OK, using our car shop tools but I haven't found a problem I couldn't solve with those yet. Not even the rounded off nut problems


Verstuurd vanaf mijn HTC Desire 820 met Tapatalk
 
IMAG0568 by Mathias Keulen, on Flickr

Nut and cam tensioner are out. I can throw away many of the screws as they are in terrible condition. Clutch problem seems to be fixed now too, so new gasket set will have to go in and then I'm done. The piston and cylinder are sized accordingly so I'm guessing the problem are the valves.

Ignition problem seems to be fixed with the coil, condenser and ignition contact point replaced.

Aluminum foil has saved the muffler and the fenders brilliantly. Not sure if I should rechrome them. I like the patina on there and getting everything mint would ruin my 980£ budget even with me doing all the boywork myself.

Need to create a new exhaust pipe btw. I'd consider selling the original muffler and pipe and change it for a simpler and smaller solution.

Handlebars are no longer rusted, ready to sell them off and get a clubman bar. The rusted suspension has been drained and the rust came off nicely. BTW: When I say rusted, I mean there's rust on there. But most of it is surface rust.

The fuel tank is not in a terrible condition. It's a problem with any cb 125 it seems, but mines OK. I cleaned it with thinner and acidic additive mixed with water. Then again with a bit of sand and a lot of shaking. Revised the petcock while at it and it looks like I won't need to sell the tank off and buy a new one.

I think you guys are right with the showroom condition part. It was just too far gone and I have too tight of a budget. But I'll put it back on the road with a neat powder coated look and a working engine. That's what I'll be happy with :)

IMAG0566 by Mathias Keulen, on Flickr

Verstuurd vanaf mijn HTC Desire 820 met Tapatalk
 
Unfortunately, due to someone passing away I have had little time to make some fast needed progress. I've hit a minor fastball with the carb.

The previous owner wondered why the engine was not running well... so far we have found multiple answers to that:
- Fuel tank full of rust and dirt
- Contact point not opening and closing
- Broken condenser
- Broken ignition coil

IMAG0597 by Mathias Keulen, on Flickr

The carb, however, was in a terrible shape internally. I have never worked so much on one single piece of equipment and made so little progress. The carb was a mess externally, but internally it was way worse. It was like somebody mixed yellow chalk with flower and water and put the carb in that mixture.

As I have a budget, I do not want to buy a new carb.

After 2.5 hours this was the external result:

IMAG0600 by Mathias Keulen, on Flickr
Finally, a visible logo of Keihin.

This took a lot of scotchbrite, maxi cleaner and brushing.

I forgot to take a before picture of the inside, but the yellow muck on the inside took the following:
- Gasoline bath
- Maxi cleaner
- Those fluffy ear cleaners with scotchbrite attached
- Keyboard cleaner (aka pressurized air can)
- Needles (the various in-and outlets weren't open anymore
- Scotchbrite
- Scotchbrite
- Scotchbrite

And I'm still not done, but close. There's very little muck left. The float seems to have been soldered before and can be thrown in the bin due to very bad soldering.
 
Due to a tiny accident, there hasn't been much work done apart from cleaning parts. I couldn't move so no trips to the shop during the days.

I hit my first roadblock. Tearing the engine apart was good, as it showed me a few issues:

- Gears are in absolute fantastic condition
- Cam chain tensioner was broken
- Kickstarter wasn't working
- Clutch wasn't working

However, I saw some wear inside the crankcase and much more importantly: The piston. There's also a ton of dirt on the inside of the crankcase and between the gears. Furthermore, there is too much leeway on the crankshaft bearing. It's just not healthy. Last but not least, there seems to be some wear on the edges of the piston hole (the point where the two crankshafts meet. It's just around the edge and it's not too bad. When I'm back on my feet I need to figure out whether or not it's bad news. It's a bit rounded off. Not too bad. Will get pictures from it asap.

I can't seem to get the oil filter nut off (where could I find a suitable tool for that)?

Once I've identified the parts needed, it's off for reassembly. I've called in a Honda expert for putting it all back together with new nuts 'n bolts (which I ordered as many were rusted and I like the sleek look anw)... but I am worried about the crankcase wear around the piston opening. Even if it's just a few mm. Could it hurt?

Oh and I'll need a new swing arm. When measuring everything out I noticed it's not straight and they've been welding and cutting it. Unforunate! But it's not an expensive part. Anyone got summat on sale?

What can you achieve by cleaning A LOT?

IMAG0682 by Mathias, on Flickr

Looks almost brand new to me. If you pay close attention you'll see it's chipped on the left side. Guess they were using the wrong tool when removing that one.
 
Yesterday I went shopping for a kickstarter. But, I found a guy in germany who was selling a full engine block. So I bought 175 euros worth of parts from him:

- Complete engine block (nice for spares needed and reference, was only 50 euros)
- Cam chain tensioner set
- Swingarm
- Rear wheel (in pretty good nick)

I am hoping that the block is in pretty good nick so that I can use more than just the crankshaft and kickstarter.
 
mathiask said:
Due to a tiny accident, there hasn't been much work done apart from cleaning parts. I couldn't move so no trips to the shop during the days.

I hit my first roadblock. Tearing the engine apart was good, as it showed me a few issues:

- Gears are in absolute fantastic condition
- Cam chain tensioner was broken
- Kickstarter wasn't working
- Clutch wasn't working

However, I saw some wear inside the crankcase and much more importantly: The piston. There's also a ton of dirt on the inside of the crankcase and between the gears. Furthermore, there is too much leeway on the crankshaft bearing. It's just not healthy. Last but not least, there seems to be some wear on the edges of the piston hole (the point where the two crankshafts meet. It's just around the edge and it's not too bad. When I'm back on my feet I need to figure out whether or not it's bad news. It's a bit rounded off. Not too bad. Will get pictures from it asap.

I can't seem to get the oil filter nut off (where could I find a suitable tool for that)?

Once I've identified the parts needed, it's off for reassembly. I've called in a Honda expert for putting it all back together with new nuts 'n bolts (which I ordered as many were rusted and I like the sleek look anw)... but I am worried about the crankcase wear around the piston opening. Even if it's just a few mm. Could it hurt?

Oh and I'll need a new swing arm. When measuring everything out I noticed it's not straight and they've been welding and cutting it. Unforunate! But it's not an expensive part. Anyone got summat on sale?

What can you achieve by cleaning A LOT?

IMAG0682 by Mathias, on Flickr

Looks almost brand new to me. If you pay close attention you'll see it's chipped on the left side. Guess they were using the wrong tool when removing that one.

Do you have any pictures of the wear inside the crankcases ?
 
As soon as i do ill post m but my recovery hasnt been to gentle on me. Its only on the right hand crank case.

Verstuurd vanaf mijn HTC Desire 820 met Tapatalk
 
So

I did what I do best: Bodywork

IMAG0810 by Mathias Keulen, on Flickr

The lines are completely messed up. I am straightening them. The right side still needs a bit of work but i've come a long way. Sandblasted the thing again yesterday and putting some epoxy primer over it this afternoon.

I also spent 2 hours sand blasting and sanding the swingarm, which now looks awesome. Same process here: Epoxy on it and let it sit until I am ready to set everything up.

The engine block came in. In excellent nick i think. And I think I will be switching blocks. Going to give that to a Honda guy for setting up the cam chain. This means I will have to sand blast the head one of these days, replace all the parts in it needed and get ready to set up the test setup for the bike (higher springs, seeing where the side stand will go and how I will fabricate the seat). Going for a metal (alu) seat, for extra quality.


I cleaned the inside of the tank with HCL acid, which works fine but is extremely dangerous so be careful guys. Don't have any leaks, and the stuff that came out was just black. Then cleaned it again with alcohol acid (let it sit for a day and then rinsed it). After I epoxied the ext today, i'm going to pour yet another 5 liters of alcohol acid in it and let it sit for a few days before rinsing it one last time.
 
Back
Top Bottom