
We noticed you are blocking ads. DO THE TON only works with community supporters. Most are active members of the site with small businesses. Please consider disabling your ad blocking tool and checking out the businesses that help keep our site up and free.
You are using an out of date browser. It may not display this or other websites correctly.
You should upgrade or use an alternative browser.
You should upgrade or use an alternative browser.
"OLD GOLD" 1975 CL360 LAS VEGAS
- Thread starter work9to5
- Start date
Joe Suzuki
Been Around the Block
If you suspect a leak, get a can of starter fluid, start the bike, and spray around suspect areas (not into the air cleaners though). If the bikes suddenly rev's, you're getting warmer. You likely won't be able to feel a vacuum leak with your hand. Rinse, repeat.
work9to5
See you in the wind.
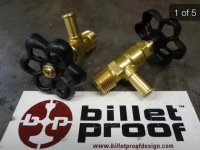
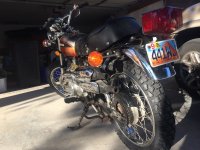
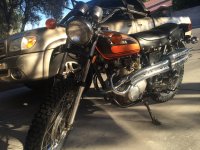
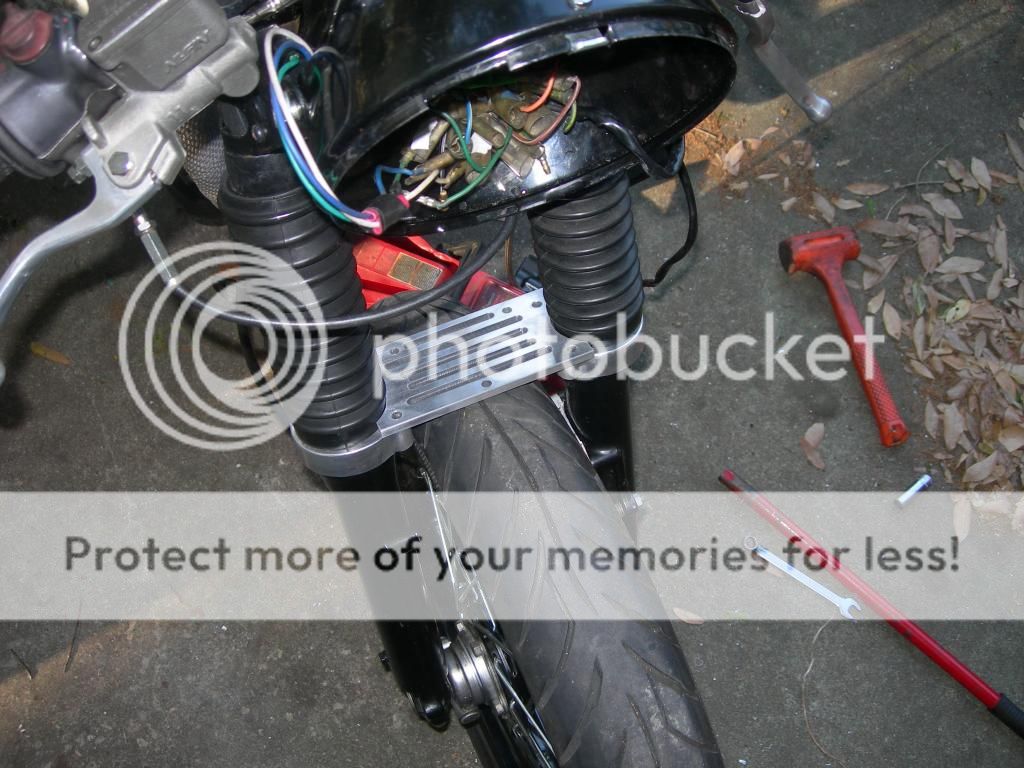
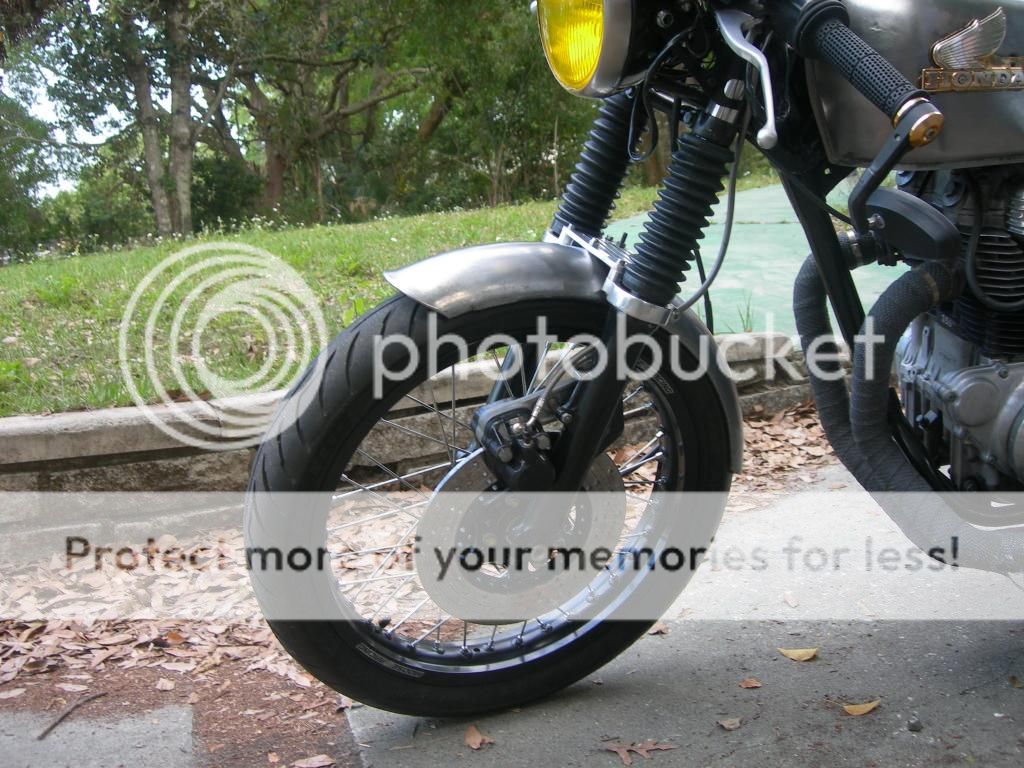
Had a really good day with the bike. Running problem did turn out to be the petcock. Was all gummed up with rust and dirt. Removed rubbers an disassembled then carb dipped it for an hour. It took a lot more cleaning after that and I wasn't able to clear the main tube completely and it's something I'm worried about in the future. Am considering a "non traditional" petcock to replace it. Anyone know the o.d. of the bung on a 360tank? Took it to the tire shop and had shinko 244's mounted. They look great and ride comfortably but havnt taken them to the limit. The stance is off for the bike for me. It's fun as hell but on tight turns I feel like I'm on a dirt track n wanna skid my feet haha. Bars and DCC order came in today. Painted the bars an gonna deal with all that tomorrow. Pics are below-
Attachments
crazypj
Split personality, I fake being smart
You may not have the space to use the 'water tap' type, aftermarket replacements are direct fit and not too expensive (or I wouldn't buy one ") )
)
Have you checked diaphragms for damage/pin holes?
As mentioned, use starter fluid around all the manifold joints,over time the intakes get hard and leak air
Oh, fit a fork brace of some type, the forks are real flimsy and twist when riding.
If you don't have any, I make correct vacuum adapters to screw into carbs for carb sync
)Have you checked diaphragms for damage/pin holes?
As mentioned, use starter fluid around all the manifold joints,over time the intakes get hard and leak air
Oh, fit a fork brace of some type, the forks are real flimsy and twist when riding.
If you don't have any, I make correct vacuum adapters to screw into carbs for carb sync
work9to5
See you in the wind.
Thanks for your in put PJ. I measured and believe the actual petcock will fit. The bung from the tank angles out just a bit giving me just enough room. I realize an aftermarket replacement would be easier. But if all we wanted was easy we wouldn't be riding these bikes right She's actually riding so well that I don't want to mess with her. Starts on the first kick or button tap. Rides and purrs beautifully. Really happy with that aspect of the bike. Tiny but a blast to ride. Took her onto the freeway in the middle of the night last night. Got her up to 65 with no problem. Didn't have my gear on and was wary of the brand new tires but pushed as hard as I could. Rides awesome no soft spots/very responsive. I've thought about a fork brace of some sort. Have to research more options. Want to find something solid that I could mount a bottom mount smaller headlight on.
I parked at a Harley biker bar last night while looking for parking. Was free compared to the lot and I figured it was more secure. Didn't stick around to drink but was surprised at how well received the bike was haha. Everybody was curious about her, didn't expect that from that crowd
She's actually riding so well that I don't want to mess with her. Starts on the first kick or button tap. Rides and purrs beautifully. Really happy with that aspect of the bike. Tiny but a blast to ride. Took her onto the freeway in the middle of the night last night. Got her up to 65 with no problem. Didn't have my gear on and was wary of the brand new tires but pushed as hard as I could. Rides awesome no soft spots/very responsive. I've thought about a fork brace of some sort. Have to research more options. Want to find something solid that I could mount a bottom mount smaller headlight on. I parked at a Harley biker bar last night while looking for parking. Was free compared to the lot and I figured it was more secure. Didn't stick around to drink but was surprised at how well received the bike was haha. Everybody was curious about her, didn't expect that from that crowd
yep careful adjustment so the linked shoe contacts before the "primary" shoe is the first step,then trial and error fine tuning with some test ridingcrazypj said:TheTLS drum brake works pretty good with stock Honda brake shoes but, as with just about everything, can be improved ;D
i know there linings that grip better what do you recomend ?
work9to5
See you in the wind.
I actually got some ebc's on my dime order today. Will be changing them next week. They do seem like they could drop a lot of dust.
As far as stance I'm referring to the dirt bike feel of the ride. I commented on this through out my post. Higher bars (changing tonight to motobars) turns suck. And in heavy acceleration I feel like I'm on a drag bike Shocks have a lot of bounce (going to see if I can adjust them before changing to shorter more stable ones). Seat height (in the process of fabing a lower one). Don't get me wrong it's fun as sh@& but not a riding style I prefer. A friend of mine made a "beyond the pines" reference last night...yeah that happened
As far as stance I'm referring to the dirt bike feel of the ride. I commented on this through out my post. Higher bars (changing tonight to motobars) turns suck. And in heavy acceleration I feel like I'm on a drag bike
Shocks have a lot of bounce (going to see if I can adjust them before changing to shorter more stable ones). Seat height (in the process of fabing a lower one). Don't get me wrong it's fun as sh@& but not a riding style I prefer. A friend of mine made a "beyond the pines" reference last night...yeah that happenedtimberwolffxdl
Been Around the Block
work9to5 said:Jealous of that brake situation, u've got! That's definitely on the top of my list of mods after stance change
I've got one if you're interested
work9to5
See you in the wind.
I just totally fried my right and left hand controls on my 75 cl360. Its my own fault, disassembled them without doing enough research before hand. Because I cant use them I've decided to change the controls around on the bike. I could rewire the switches but that would just be a step backward in the direction I would like to take the bike. So it looks as if I'm about to take a crash course in handle bar rewiring. It is my daily driver so my priority is to get it back to running and lose some of the functions of the controls.
1.) Kill switch elimination- I'm going to eliminate the kill switch for now. I plan on doing this by completing the "loop" by connecting the OEM black and blk/wht wires which originally led to the kill switch.
2. New starter ignition button- I bought a 10amp button switch, which i will wire to the the OEM ingnishion button leads. Yellow/red (juice) and green/red (which seems to be a ground).
3.) New running light on/off switch- I got a pre-wired on/of switch. And this is where I need the most direction. I plan on wiring OEM brn/blu (juice) to the on and blk (ground).
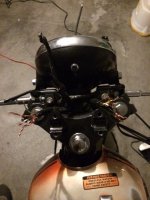
The left hand control is disconnected as well you can see by the pic. I'd like to fix the right before jumping on the left at the same time. Will these systems (START, KILL, LIGHTS) work without those loops (HI/LO, TURNS, HORN) being closed or will they interrupt the other relays when I test them? Will the bike be able to turn on with those left hand wires left open like that?
If anyone has interest in the control housing lmk, I no longer need them. Both are mostly complete and will come with the levers. Both for $40 plus shipping or separately $30+. Just PM me
1.) Kill switch elimination- I'm going to eliminate the kill switch for now. I plan on doing this by completing the "loop" by connecting the OEM black and blk/wht wires which originally led to the kill switch.
2. New starter ignition button- I bought a 10amp button switch, which i will wire to the the OEM ingnishion button leads. Yellow/red (juice) and green/red (which seems to be a ground).
3.) New running light on/off switch- I got a pre-wired on/of switch. And this is where I need the most direction. I plan on wiring OEM brn/blu (juice) to the on and blk (ground).
The left hand control is disconnected as well you can see by the pic. I'd like to fix the right before jumping on the left at the same time. Will these systems (START, KILL, LIGHTS) work without those loops (HI/LO, TURNS, HORN) being closed or will they interrupt the other relays when I test them? Will the bike be able to turn on with those left hand wires left open like that?
If anyone has interest in the control housing lmk, I no longer need them. Both are mostly complete and will come with the levers. Both for $40 plus shipping or separately $30+. Just PM me
Attachments
work9to5
See you in the wind.
So I'm rewiring my switchs and having a little trouble. I'm eliminating kill, hi/low, on/off lights, horn. I bought a switch from DCC to run my indicators from and having trouble running them. Ive been playing around with them trying to find the right setup but keep blowing fuses and need some help. Description is below of what I've done.
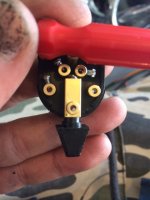
Ok, after further experimentation figured out what's blowing fuses. It's how i had the turn indicators wired. The indicator switch was popping a fuse when ever actuated. So I just disconnected all that. Could it be that the switch is not grounding and that is what's causing the fuse to blow (switch is manufactored to ground to the handle bars but bars are painted so i scraped away paint under them to ground, maybe not enough)? I attached a pic of the inside of the switch. I had it set up so that
orange/white went to back left
blue/white went to back right
orange went to left front
blue went to right front
gray went to front center
How would you do it (keeping in mind that I would like the indicators to be lit at all times and to blink when switch is actuated to right or left)? I'm on my way to buy a lot more fuses Thanks for any help, I'm at a complete loss as to how to do this correctly. And would very much like to avoid any more trial and error situations. Here's whats up with the rest of the wires currently if that helps at all.
yellow- closed (tied off)
yellow/white- closed
red/black- closed
black/yellow-closed
green/red- closed (this one seems the be "live", has juice)
black + black/white= tied to close loop of the kill switch
black+white+brown/blue= my headlight and taillight tied together so that they turn on whenever key is turned on
yellow/red+dark blue =Starter relay. I attached these using a toggle switch which I located under the seat. Seems to be working well.
Royally confused,
Chris
Ok, after further experimentation figured out what's blowing fuses. It's how i had the turn indicators wired. The indicator switch was popping a fuse when ever actuated. So I just disconnected all that. Could it be that the switch is not grounding and that is what's causing the fuse to blow (switch is manufactored to ground to the handle bars but bars are painted so i scraped away paint under them to ground, maybe not enough)? I attached a pic of the inside of the switch. I had it set up so that
orange/white went to back left
blue/white went to back right
orange went to left front
blue went to right front
gray went to front center
How would you do it (keeping in mind that I would like the indicators to be lit at all times and to blink when switch is actuated to right or left)? I'm on my way to buy a lot more fuses
Thanks for any help, I'm at a complete loss as to how to do this correctly. And would very much like to avoid any more trial and error situations. Here's whats up with the rest of the wires currently if that helps at all.yellow- closed (tied off)
yellow/white- closed
red/black- closed
black/yellow-closed
green/red- closed (this one seems the be "live", has juice)
black + black/white= tied to close loop of the kill switch
black+white+brown/blue= my headlight and taillight tied together so that they turn on whenever key is turned on
yellow/red+dark blue =Starter relay. I attached these using a toggle switch which I located under the seat. Seems to be working well.
Royally confused,
Chris
Attachments

crazypj
Split personality, I fake being smart
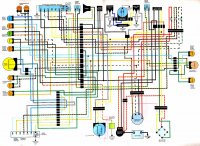
First, you need to get a real picture of wiring harness
The orange or blue with white trace are RUNNING lights, you need 3 wire indicators and run the trace wires to 'dim' side, solid colour to the indicator 'bright' side (3rd wire is ground)
Instead of blowing a bunch of fuses, get an old indicator and use the wires to connect instead of fuse. It will be unlit or real dim if everything is OK. If it's REAL BRIGHT you have a short so re-check wire positions
Green is ground colour, if you connect it to RED you WILL loose all the magic smoke out of the wires
wfo speedracer
Been Around the Block
And you really need to clean that thumbnail, just saying lol


