BSA ZB32 Goldstar

ProSimex said:
why would you do that?

At about 60mph there is a lot of vibration- I think it is more than timing or carburation.
There is no knock or major noise- but I would hate to damage the engine severley by not dealing with the vibes before it begins to knock.
At 50MPH it seems OK
The gearing is probably wrong of the bike- so it could be struggling to make the speed in top gear- I will get someone who knows more than me to ride it first

Thanks

David C
 
Update on the goldstar.

I left it with a friend for a ride, he thinks it may be a front wheel issue- the wheel is a chrome dunlop rim and was bought new about 20 years ago - but never used.
I put a new tube in it- (I had to get a tube from Harley Dublin 21" tubes are impossible to get)
The wheel/tyre /tube have nto been balanced -Is this a problem?

I am not convinced, but I am going to re-set the timing and check the carburation.
If the vibration persists- I think I will have to let it develop and then look at the enigne as it becomes more obvious.
A risky business - I know!

Anyone with other ideas- would be appreciated.

Following the photos on DTT, I was made an offer of €4750.00 ($6200) for the bike, I didn't accept.
 

Attachments

  • 004.JPG
    004.JPG
    216.5 KB · Views: 1,337
I took the BSA out for a ride yesterday- 70miles over the mountains in sun, mist and heavy rain. Biking in Ireland is always like this- 4 seasons in 2 hours.
I thought that the rain and water would get into the magneto - as there is no weather cover- just a metal cap held by a spring. - but It didn't miss abeat for the whole trip.
All went well for 50 miles, then I heard a knock up front. The knock did not follow the enigne revs- so I was sure it was in the frame or wheel area.
I could not identify the problem on the go, so I continued on until I saw the front fuel tank retaining bolt had fallen out and the fuel tank was hitting the frame.
I stopped - but was in the middle of the countryside -so I got a small branch from a tree and stuffed it between the fuel tank and the frame and continued on-
The bike runs very smooth up to about 55miles and hour and then it's a bit too vibey. But at 55, its plenty quick for the twists of the mountain roads around here- also the road surface is crap - so the plunger at the back is bouncing all over the shop.
So it make for a super ride at lower speeds on real twisty roads- so unlikely for me to die.

After a few more miles the branch got crushed by the vibes and fell out- I brought the bike back home with one hand holding the tank off the frame and the other on the throttle.

When I got off I noticed oil on my hand (the one holding the tank) and all over the oil tank, frame, battery and casings.
Looks like a top end oil leak - so I'll have to look for that too.
Also the bolt through the magneto/dynamo strap had fallen out - probably not tight enough.
So after 2 tanks of fuel (300miles) following the rebuild- the only problems are :-

1. Oil leak on top end
2. Fuel tank bolts and rubbers to be replaced
3. magneto bolt to be replaced
4. still no speedo

Not bad for a 60 year old machine that was off the road for 25years

David C
 

Attachments

  • bike run 001.JPG
    bike run 001.JPG
    150.4 KB · Views: 985
  • bike run 002.JPG
    bike run 002.JPG
    146.6 KB · Views: 982
Did you say the wheels were not balanced? That can lead to more vibration and may have a part in the wobbly ride you were experiencing.

Very cool bike, hopefully you can get all the kinks out.
 
Beyond jealous, glad you are riding the beautiful bike. It is worth more than money can buy.
 
Well- I stripped off the tank last night - F==kin' disaster!
Cracked and leaking where the tank hit the frame and has allowed the petrol under the paint.
I will have to braze the crack and repaint the tank. - A friend of mine had done the paint job with car paint and baked it in his oven- but this has not been hard enough to prevent the fuel additive causing a problem.
The fuel additive I've used must be more aggressive to the paint than ordinary petrol- and it's left a yellow stain.
The stain will come off but the tank is looked sorry now.

I also cut new gaskets for the rocker covers and the top of the tunnel and re-fitted- will run the bike with no fuel tank on top to see if there is oil coming from anywhere else- this was partly my own fault as I left the ancient gaskets on the rocker covers during the build.
The oil leaks must be old as there is a lot of oil impregnated in the cylinder fins. I cleaned it out using a brush and degreaser during the build- but it is full of fresh and old oil again after the run last Sunday.
I have used carb cleaner- under aerosol to drive the crud out from the fins - but you can see from the photo that the cylinder is still fairly dirty.
I am not looking for a concourse bike or enigne -but I don't want oil leaks in this area especially as it goes every where when you're riding.

I need some ideas on :-

1. Fixing the tank - I could put petrol resistant filler on it and repaint just the leading edge
(but is this the real job?)
2. How do you guys clean the fins on the old bikes they are very deep on the goldstar
3. I need to make a more aesthethic speedo bracket and one that is stronger (read shorter)

Thanks agin for any interest

David C
 

Attachments

  • bars and levers.JPG
    bars and levers.JPG
    188.5 KB · Views: 321
  • BSA damage 003.JPG
    BSA damage 003.JPG
    234.1 KB · Views: 320
  • BSA damage 002.JPG
    BSA damage 002.JPG
    176 KB · Views: 310
  • BSA damage 001.JPG
    BSA damage 001.JPG
    123.6 KB · Views: 880
fuck you


Sorry what I meant to say was "god damn that a nice bike". I think your just working out the old kinks, and that's to be expected on such an old bike.

Im just jealous
 
Work to date :-

I fitted a temproary fuel tank (small outboard type) to the frame and will go around the block a few times to warm it up and look for further oil leaks.
I will wait for the weather to improve before this- as it's pissin' here at the mo.
The other shots are of the cracks in the tank, I will have to empty the tank and braze all along the ridge with brass.
This can be tricky as it was full of fuel and additive- I will clean it out with detergent and leave it wet inside.
Should I leave the cap open or closed?

The paint is a mess from the additive getting under the lacquer- I need to repaint the tank completely.
I don't know whether to get more transfers for the badge or get a couple of goldstar badges to finish off the tank.

What do you think?

Will post more after the work is done-

DavidC- Ireland
 

Attachments

  • Temporary fuel tank.JPG
    Temporary fuel tank.JPG
    161.3 KB · Views: 806
  • cracks.JPG
    cracks.JPG
    131.2 KB · Views: 791
  • paint lifting.JPG
    paint lifting.JPG
    151.7 KB · Views: 807
A couple of photos after brazing the fuel tank tonight.
Just a few hints :-

1. Don't braze with the tank upside down - the fumes will collect between the tank and the bench and flash out- this can cause discolouration of the tank paint (see photos) and your eyebrows

2. Old filler burns like crazy and does not go out early- what's left is a carbonised coating that has to be sanded off- new filler or paint will not take to burnt filler

3. The metal on a 1950 tank is fu*kin' brilliant -look at the damage this one has had in the past and all it needs is a quick braze to work as a tank again

I'll see my mate with the paint shop tomorrow to see what he thinks about a repair or a full re-paint

The works goes on - but it's good to see the old bike on the road again.

David C - Ireland
 

Attachments

  • Tank repair 002.JPG
    Tank repair 002.JPG
    191.2 KB · Views: 861
  • Tank repair 001.JPG
    Tank repair 001.JPG
    166.6 KB · Views: 864
ProSimex said:
fuck you


Sorry what I meant to say was "god damn that a nice bike". I think your just working out the old kinks, and that's to be expected on such an old bike.

Im just jealous


Lads- I seem to be coming across as a moan about this machine-
This is not the case and is just the Irish way of writing up a post.

Just to be clear- this is a great machine to ride and to own- it's lines are some of the classiest out there - I took my time in selecting this bike and frame shape to buy in the first place.
These plunger frame don't come around too often and I was damn lucky to get it.- On e-bay of all places!
The bikes changed after 1952 and these later models have a different push rod tower, fuel tank, lights- yada-yada-yada.
This machine is in trials trim - so upright -my type
The DBs are 99% cafe racer - clip ons and rearsets - I'm too old for scratching around the back roads on a close ratio box and a GP carb.
This machine is nearly as it came out of the works - 1inch carb- trials trim- big wheels -no brakes - fooookin' brill

All positive here- David C- Ireland
 
Video of enigne running on a temporary fuel after a few laps around the block- small leak from banjo and another from the cylinder head oil way blank- no cracks - I hope

http://youtu.be/PsigKmPY688
 
Got the fuel tank back this morning and the paint job looks good.
I've remade the front mounting arrangement, where the front mounting bolt goes through the frame.
The orignal type top-hat rubbers are not available -so I cut some 12mm stainelss steel tube as a sleeve and cut down some triumph tank support rubbers as bushes.
I will make up a spacer and use a stainless steel bolt to finish it off. I hope that this will allow the rubbers to take the tank weight and vibes without the bolt squeezing the tank lugs.
I'll fit lock nuts and stainless washers too.

Soon have it for a spin

David C - Ireland
 

Attachments

  • BSA fuel tank 001.JPG
    BSA fuel tank 001.JPG
    178 KB · Views: 889
  • BSA fuel tank 002.JPG
    BSA fuel tank 002.JPG
    221.5 KB · Views: 910
  • BSA fuel tank 003.JPG
    BSA fuel tank 003.JPG
    223.4 KB · Views: 883
Speedometer.

I have got a speedometer from my friends in Dehli- this is not a bad looking instrument but has caused more problems in getting it to fit and getting a cable to drive it, than it is worth.

I have got a cable to travel from the gear box out put drive, this then goes through a hole in the oil tank and travels under the fuel tank to the speedo.

I have spent more money on different cables and brackets than on the clock.
I now have a cable that's long enough, has the correct drive and thread for the gear box - but is the wrong thread and drive for the indian clock.
At this stage I am about to modify the cable end at the clock and using a fitting with and electrical thread, make onto the speedo drive - this is going to look a bit crap.

Has anybody got a working, genuine smiths chrono to sell?
I only need one that goes up to 80MPH but I can make the 120MPH one do as well.
I believe that the 120MPH one is more valuable - so I would understand if no one wants to part with this.
if anyone has and 80MPH one I would like to buy it.


I have the bike back together tonight- so she rides again!

Thanks

David C
 

Attachments

  • BSA350ZB 004.JPG
    BSA350ZB 004.JPG
    155.9 KB · Views: 917
Fitted the tank.
I had some difficulty getting the rubberised sleeve and mounts to line up.
The tank mounting holes are not that accurate and I had to make up bushes and nylon washers to make sure the mounting bolt was tight, but not cramping the lugs on the tank.
This was very fiddly and took a long time for what it was.
It's raining a lot here for the next few days, so I won't get a chance to give the goldie a run.

When I do, I'll try to mount the phone for a vid
 

Attachments

  • Tank mount 002.JPG
    Tank mount 002.JPG
    198 KB · Views: 885
  • Tank mount 001.JPG
    Tank mount 001.JPG
    198.1 KB · Views: 855
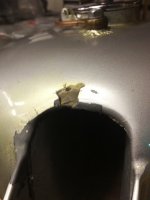
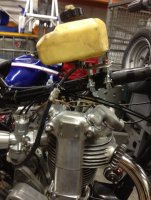
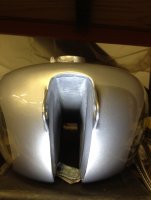
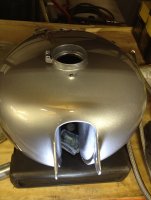
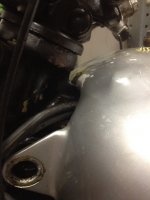
Well folks, I sorted out the fuel tank and leaks as per previous post.
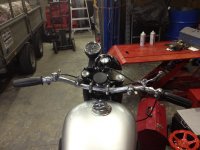
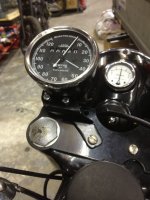
I then set about making the indian speedo work and fit (this is a speedo from Dehli -not Springfield). This was a lot more work than I thought (as usual).
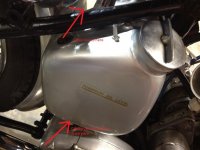
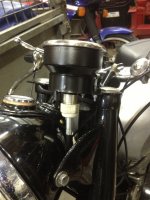
I couldn't find a cable that was the correct drive at the gear box as well as suitable for the indian clock, so I got the gearbox end, to fit as per a standard cable and I filed and 'adjusted' the other end to make contact with the drive in the speedo- this allowed me to get the cable to enter the square hole in the speedo to a depth of about 1/8 inch.
I then cut the knurled nut off the cable end and got an electrical compression gland to fit the cable, a bush to fit the speedo thread and utilised the rubber cable grommet to clamp and grip the outer sheath of the cable -
A bit of a botch - but it looks 'OK' enough and it keeps the cable in, and the weather out.
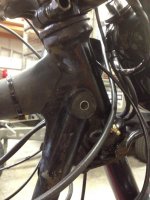
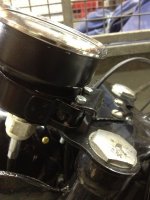
The next issue was how to mount the clock, I had already wasted a few quid on BSA goldstar brackets, rubber shroud, tacho bracket etc. - none of which work!
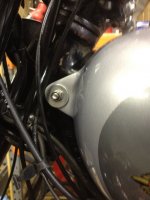
So I decided to make a custom bracket for this clock- just in case in the future I get my hands on real clock and then the other brackets, etc, will be of some use to me.
I got a large hose clamp to fit the smaller diamer of the clock casing- I removed the clamp screw and replaced the threaded spacers with aluminium spacers (I got these by cutting a bent, hollow push rod from a small diesel engine- all very green -recycled push rods - what..)
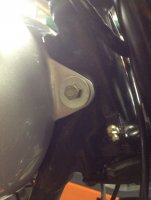
I then had to heat some light steel plate nad bend it to suit the hole centres and catch an existing top yolk screw.

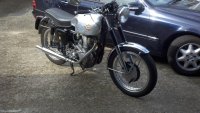
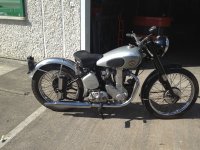
I painted it all gloss black and went for a run - as you can see from the photos -I did 40miles.
This was over the local mountian roads in Dublin - the weather behaved itself for once and I got through the whole trip without anything falling off, coming loose or any issues with carburation or any serious leaks.
The fuel consumption is around 50mpg at this pace, as I can only get it up to 55mpoh on a long straight.
The front brake is non-existant, the back is great and the gears are OK - not so good when you're panicking getting too close to a bad bend- especially down hill!
I got a great kick out of sweeping through the really tight stuff - all at about 30!
No need to frighten yourself by going any quicker.

I am determined to try to get the iphone to video the next trip- a couple of minutes video on the goldie in the mountains around here is great- the back fire on the over run and banging down the gears is a hoot.

Bye for now David C
Ireland
 

Attachments

  • speedo drive.JPG
    speedo drive.JPG
    210.1 KB · Views: 698
  • Speedo top mount.JPG
    Speedo top mount.JPG
    193.9 KB · Views: 743
  • Speedo bracket.JPG
    Speedo bracket.JPG
    201.9 KB · Views: 733
Very nice, the work on the tank it came out great. Look forward to seeing the bike finished. Incidentely the front brake on these bikes are very poor, at least the one I have ridden was.
My dad is sending me a DB32 (pic below) from England, can't wait.
 

Attachments

  • goldie.jpg
    goldie.jpg
    279.3 KB · Views: 304
Back
Top Bottom