'78 GL-1000 ABS Test-Bed Gone Wrong

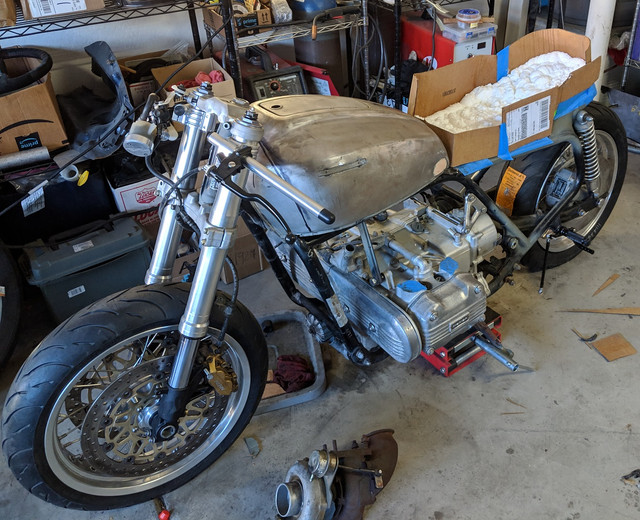
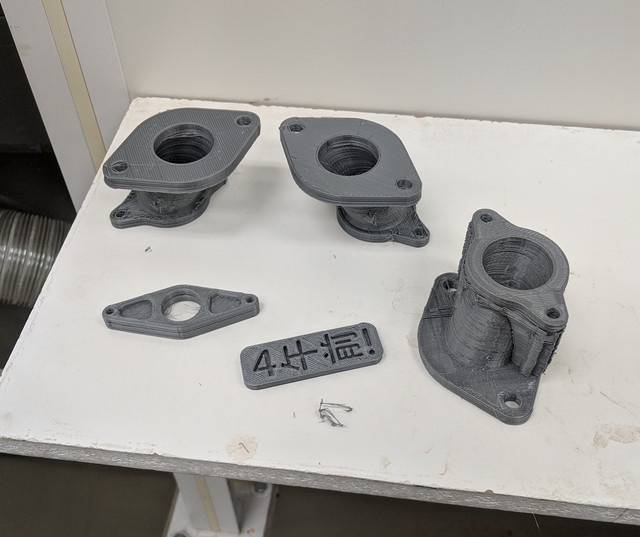
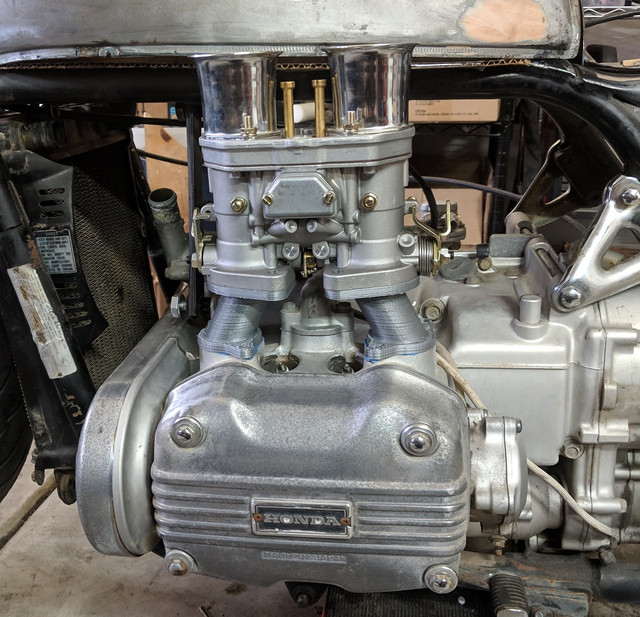
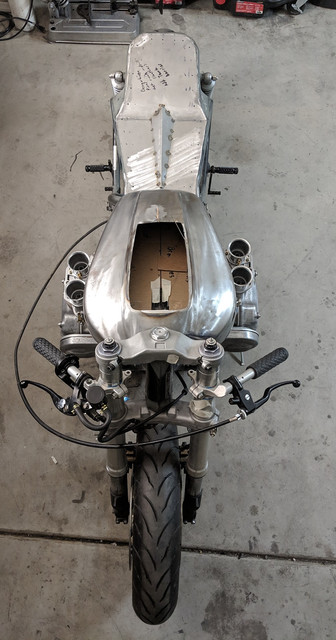
The stock carbs are CV and difficult to get right even with just an air filter change, so you are headed the right direction there. I suggest an electric fuel pump as the mechanical is limited. Always keep in mind that the GL1000 has a PM alternator, and controls voltage by dumping excess current through the regulator (not by controlling the field) to ground, so cutting load too much is not a gain - actually stresses the regulator more. The fan normally only comes on when stopped for a long time, riding at parade speed, or when slowing/stopping after a high speed run - the worst times for the electrical system. I commuted and toured on a '77 for a year and the fan only came on one time while riding after 15 miles of 60 mph followed by stop-and-go, and one time in the driveway after idling for ~15 minutes. But, I had a standard lead-acid battery and it had no problem. The temperature switch for the fan is the two-pole one near the front of the water manifold. A toggle around it is added by many as a safety measure.

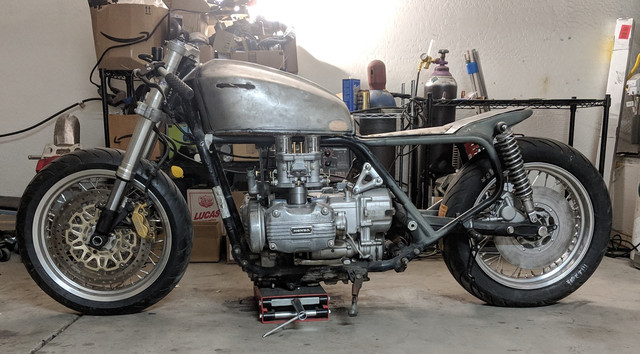
'75 engines had the highest performance primarily due to cms and carbs. You might look into '75 cams.
 
Interesting points on charging and carbs, thank you!

Finals season, so I don't have huge updates right now. But! I've had some fun lately.

My first seat foam mold concept was to create a foam positive buck, bondo it, lay fiberglass for a negative, and then pour into that. After tinkering with it, I've decided to abandon this concept. Instead, I'll 3D print a negative mold and coat it with Smooth-On XTC-3D. The mold will be filled with Flex Foam-It 7FR from the same company. Just bought a Creality Ender 3 printer so I can make it at home.


I also 3D printed some intake runners to verify dimensions before I send the files off to be waterjetted out of T304 stainless. I'm sticking to 1.5" tube as it will be easier to cope and work with - nothing fancy like Randakk's taper-bore stuff. I am considering 3D printing several intake manifolds to play with runner lengths later on - I've seen it before through Formula SAE.

Definitely goofed up my dimensions a little! It gets the point across at least.


Also made a little progress on the gas tank. I just bought an english wheel and will patch the top with it after finals.


Some glamor shots...


Looking good.

As far as cutting the electrical load, that's fine, but be sure to upgrade your regulator/rectifier.

We have modern MOSFET units available, pre-wired to fit your bike and free shipping in the USA.

http://www.sparckmoto.com/Products/Detail/103
 
cbrianroll said:
Is randakk a member here? He's got alot of cool gold wing toys..
Rendakk hangs over at NakedGoldwings.... Along with a bunchnof other great guys check it out if you into old wings without farrings and bags.

Psy

Sent from my LG-H873 using Tapatalk
 
It turns out that I'm pretty terrible at keeping threads going.

Somehow got the bike going alright though! Runs like a champ. Still lots of odds and ends to take care of.

Ended up 3d printing a seat from TPU which worked quite well. Motogadget everything, including front and rear turn signals. 3D printed pods for the brake lamps. Pie cut a full exhaust & TIG'd that together. The CB750 tank somehow works as well!

Untitled.png
 
Interesting points on charging and carbs, thank you!

Finals season, so I don't have huge updates right now. But! I've had some fun lately.

My first seat foam mold concept was to create a foam positive buck, bondo it, lay fiberglass for a negative, and then pour into that. After tinkering with it, I've decided to abandon this concept. Instead, I'll 3D print a negative mold and coat it with Smooth-On XTC-3D. The mold will be filled with Flex Foam-It 7FR from the same company. Just bought a Creality Ender 3 printer so I can make it at home.


I also 3D printed some intake runners to verify dimensions before I send the files off to be waterjetted out of T304 stainless. I'm sticking to 1.5" tube as it will be easier to cope and work with - nothing fancy like Randakk's taper-bore stuff. I am considering 3D printing several intake manifolds to play with runner lengths later on - I've seen it before through Formula SAE.

Definitely goofed up my dimensions a little! It gets the point across at least.


Also made a little progress on the gas tank. I just bought an english wheel and will patch the top with it after finals.


Some glamor shots...


Great build my friend!! It’s been a while and not sure if you’re still following the threads but still worth trying . Can you share CAD drawings for the webers manifolds? I am upgrading mine to EFI and the manifolds would fit perfect!
Cheers!!
 
Great build my friend!! It’s been a while and not sure if you’re still following the threads but still worth trying . Can you share CAD drawings for the webers manifolds? I am upgrading mine to EFI and the manifolds would fit perfect!
Cheers!!
Your bike looks awsome, I was also wondering if you have share the file for your intakes?
 
Back
Top Bottom