1976 CB750/GSX-R750/CBR600F2 Hybrid Build.

Letze

New Member
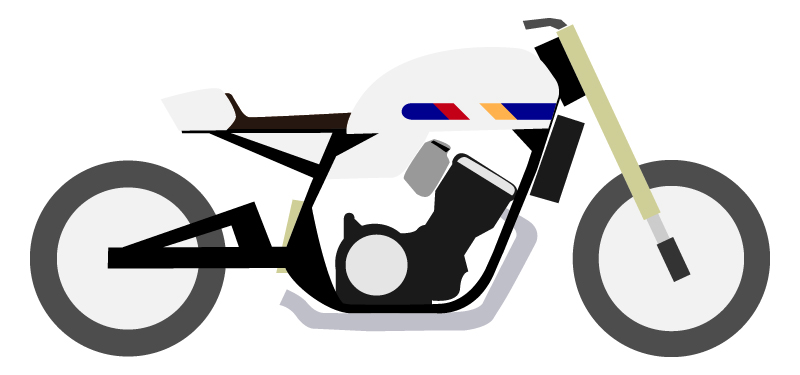
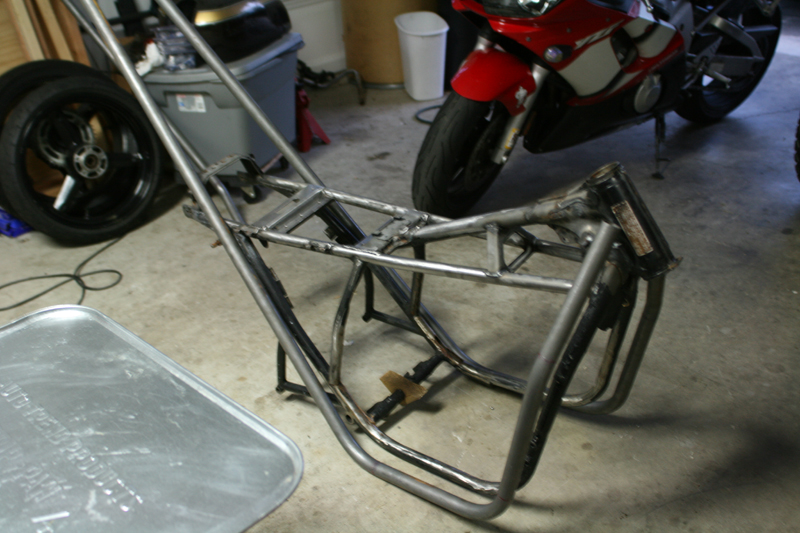
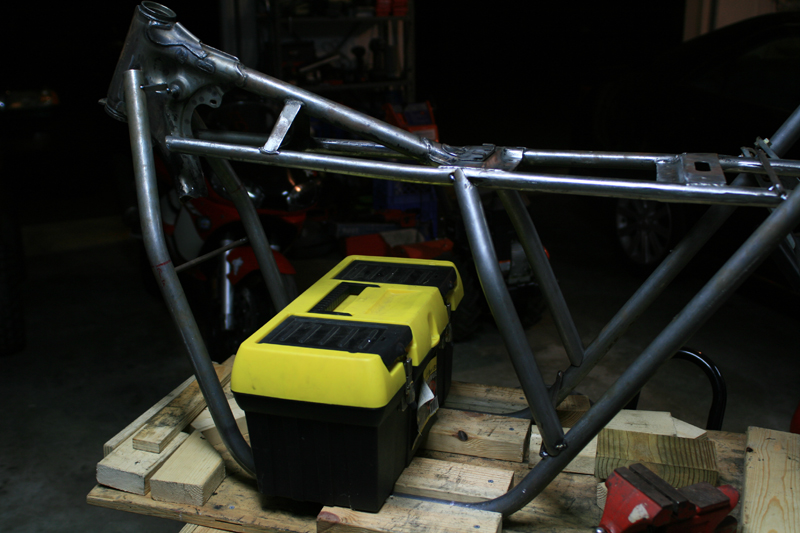
GnarlyCharlie gave me this frame back in November so I could mock up the suspension alterations while I was searching for a good donor CB750 for this project, It originally was just going to be a suspension update for a CB750 with GSX-R forks and a mono shock rear. This changed after I purchased a shifter kart with the intention of putting a CBR600 motor on it. Well after a few close calls with cars and a hand full of warnings from the police. The Final blow was VIR telling me their insurance wouldn't let me run the kart on their track (the main course not the kart track) I decided it was time to move on. So I returned the kart to stock and sold it.

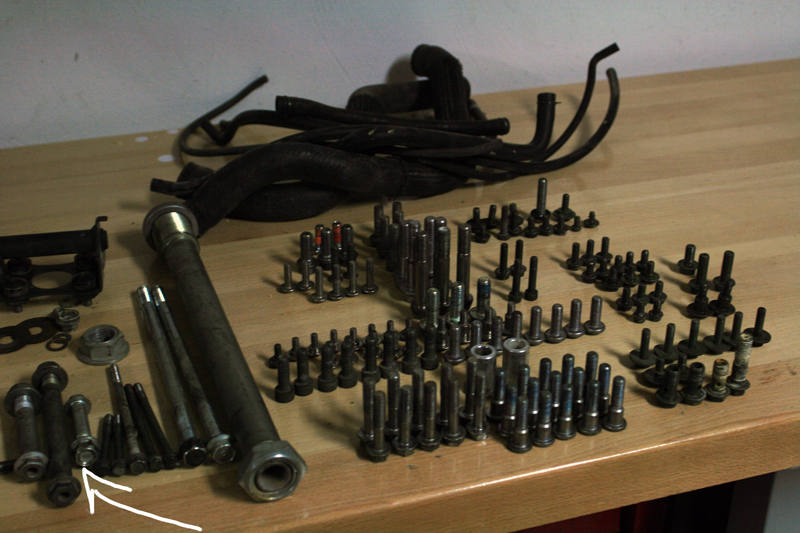
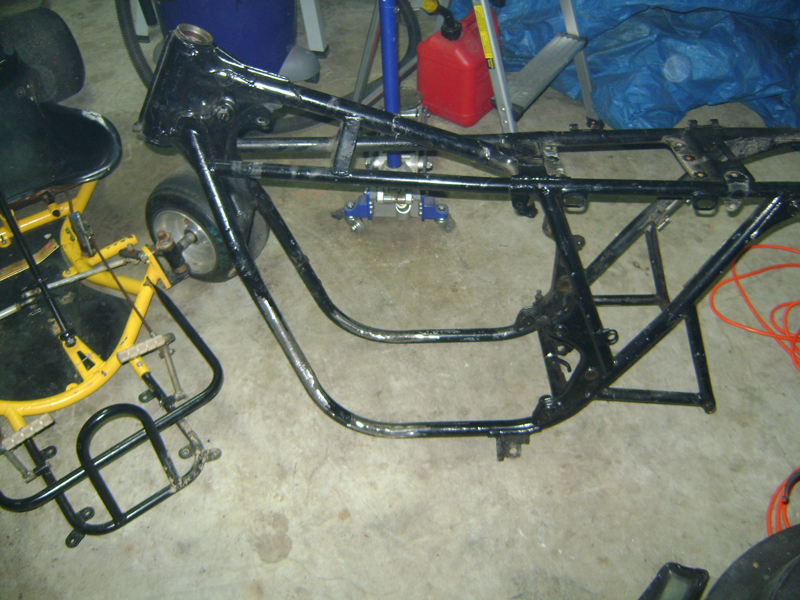
Leaving me with all of this.

blayout.jpg


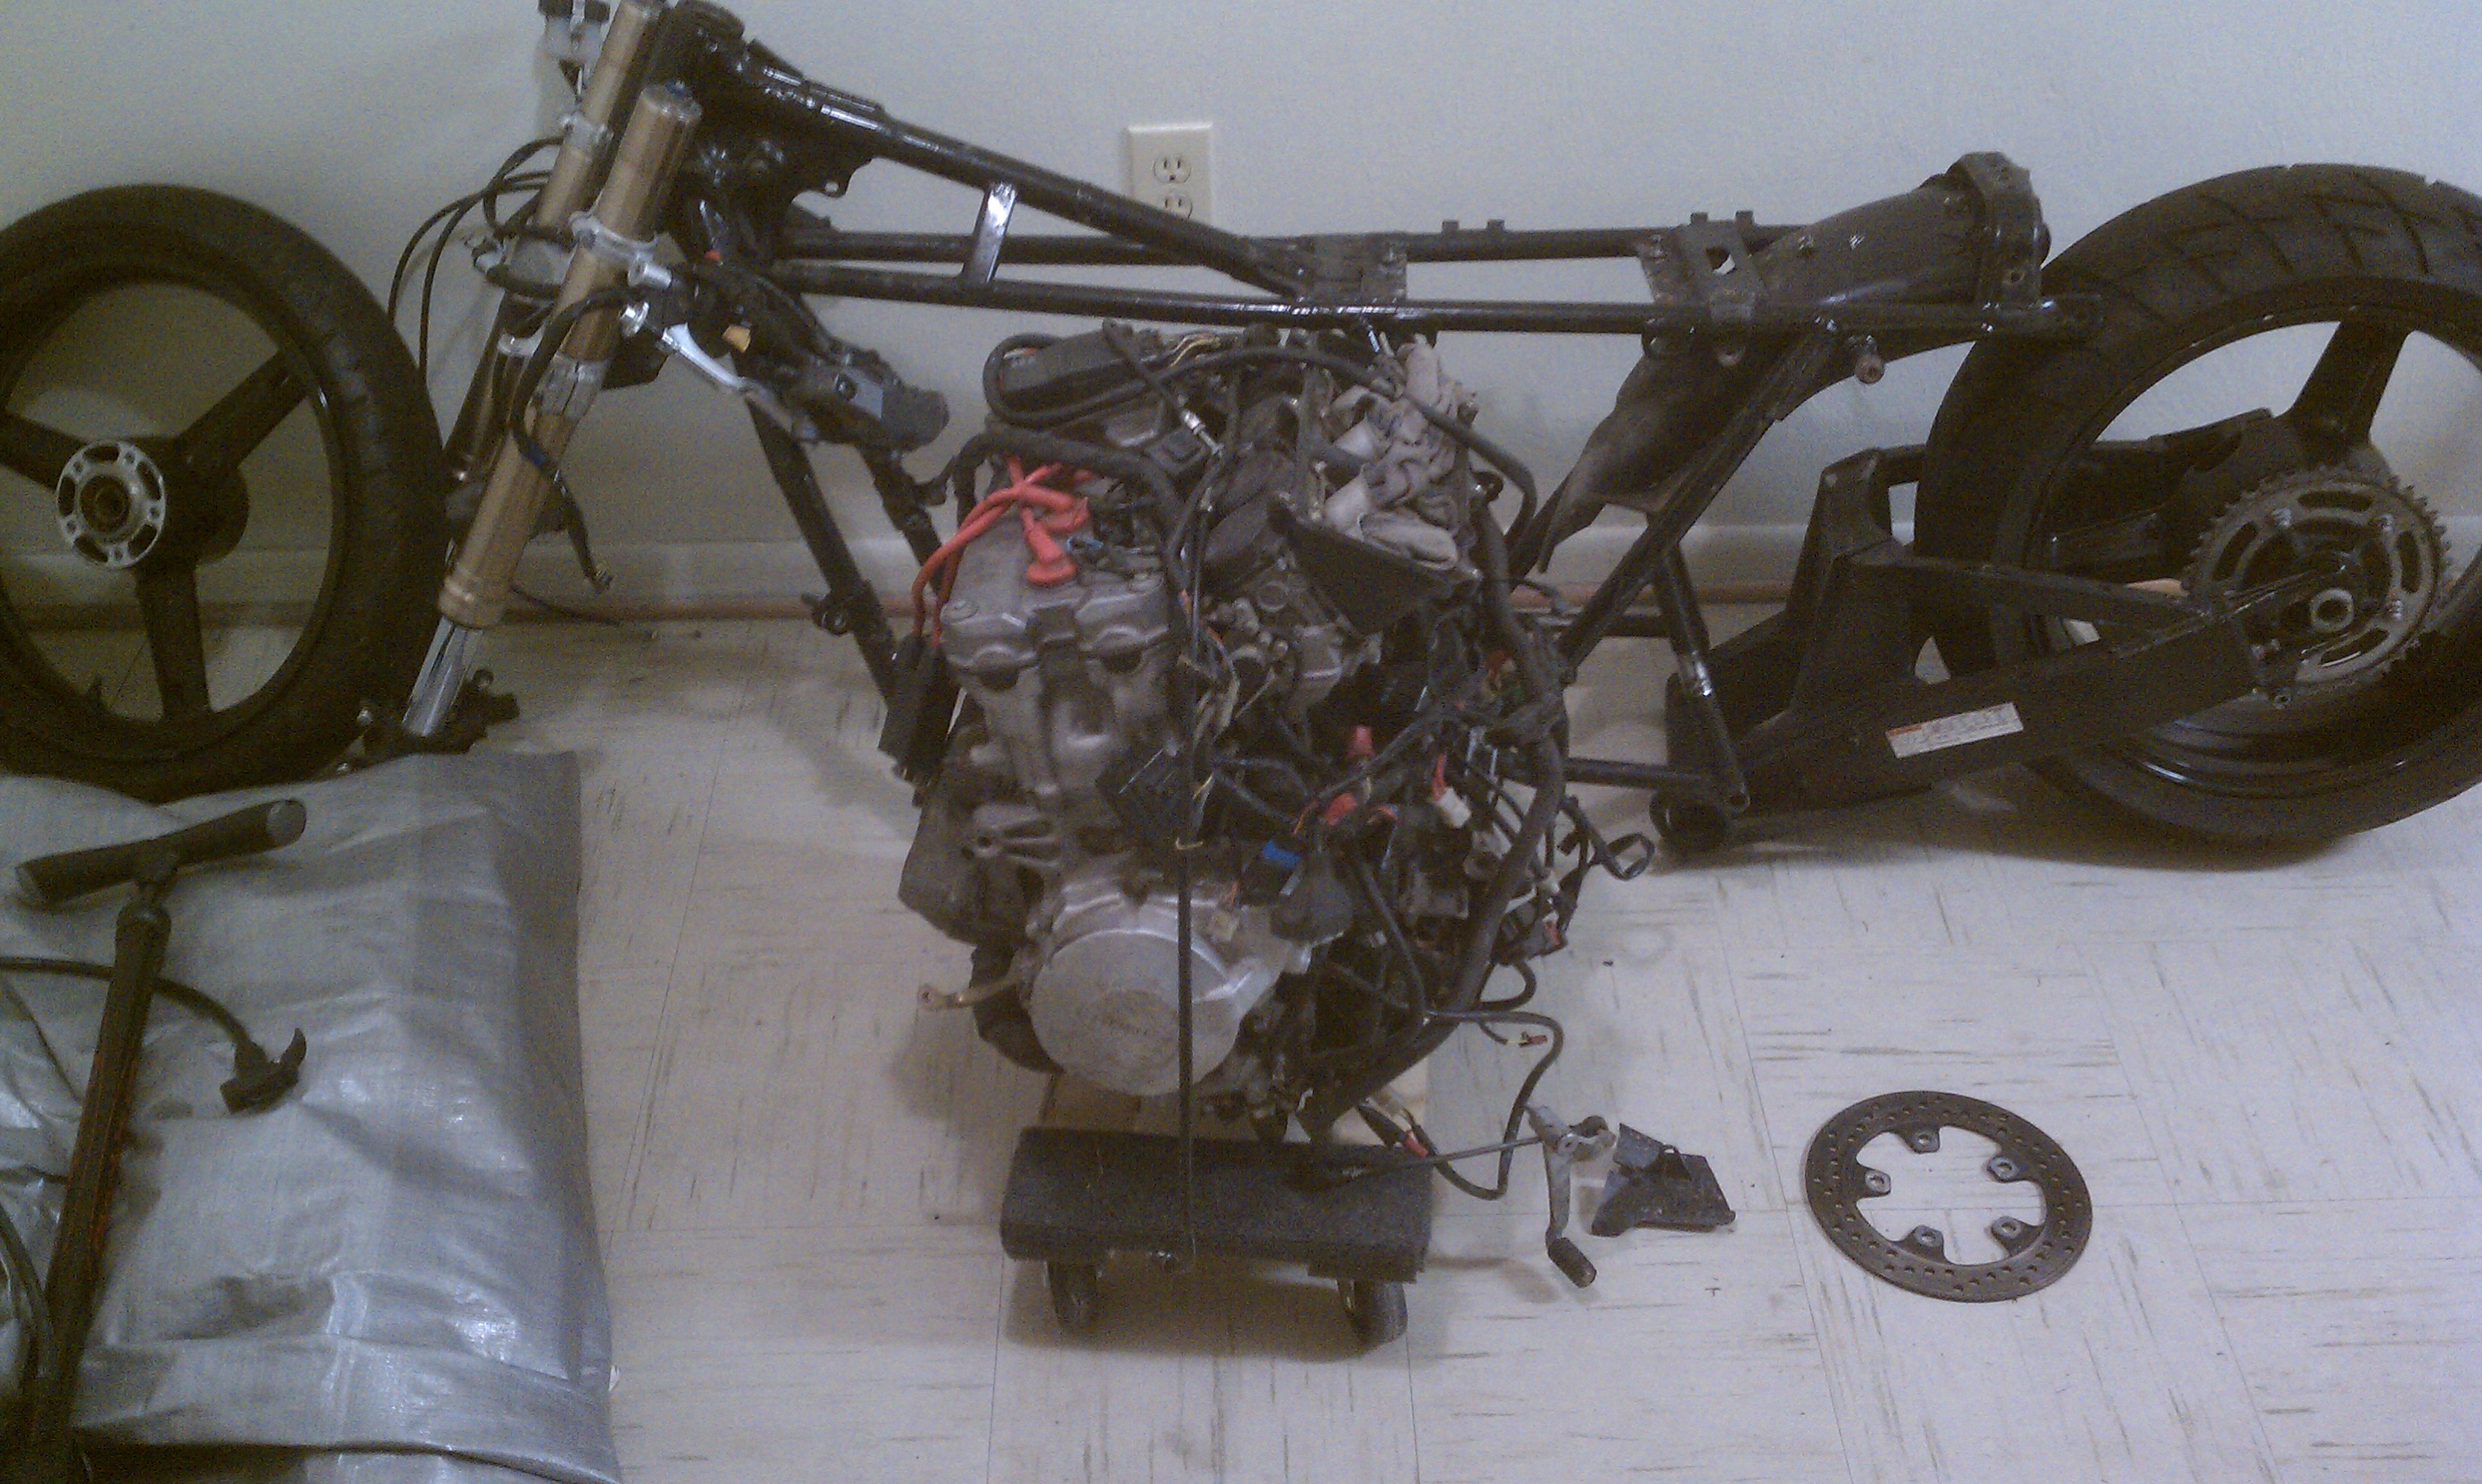
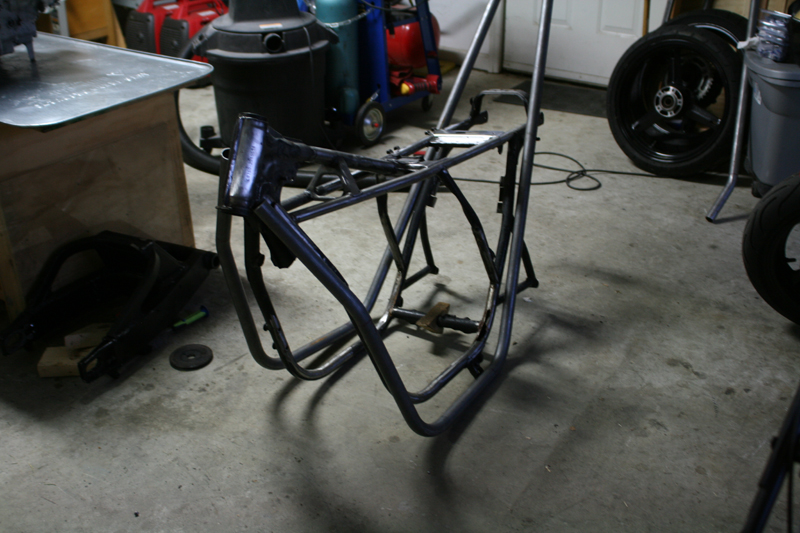
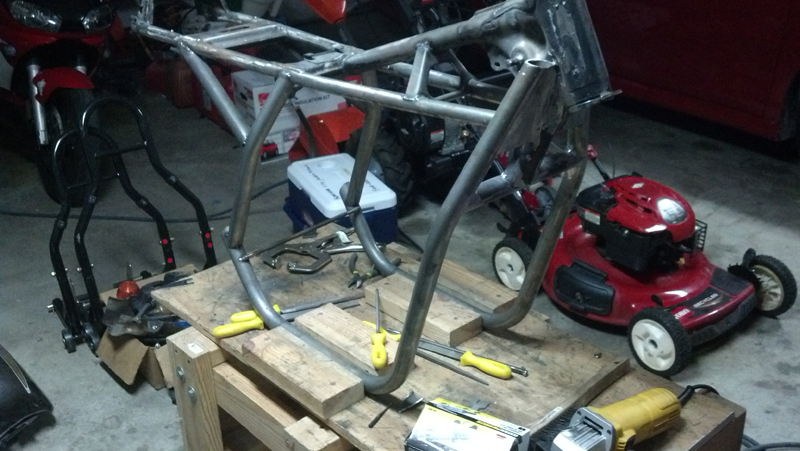
After moving all of my crap back to Roanoke where I had a garage (parents house :D) I started test fitting the motor.

cb750-cbr600-0001.JPG


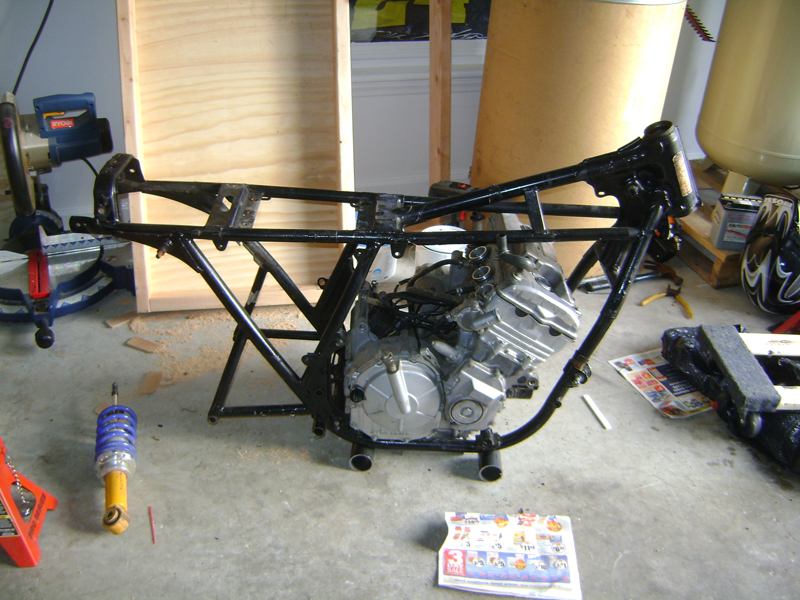
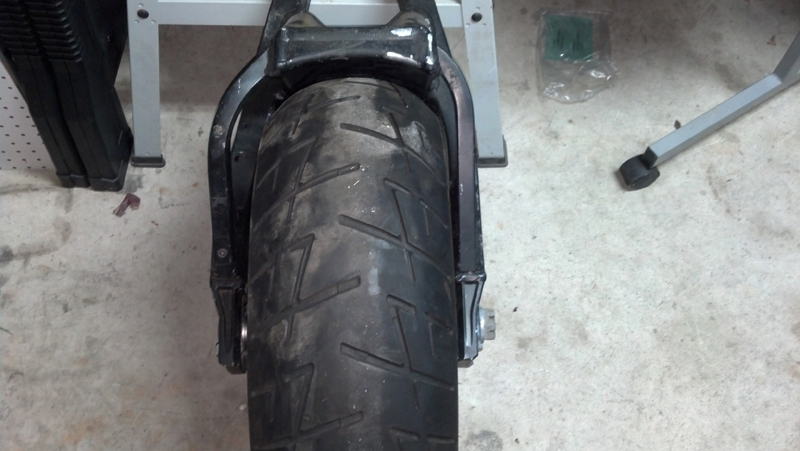
The motor almost fit! but this isn't a game of horse shoes.

bikebuild_002-0004.JPG

bikebuild_002-0003.JPG


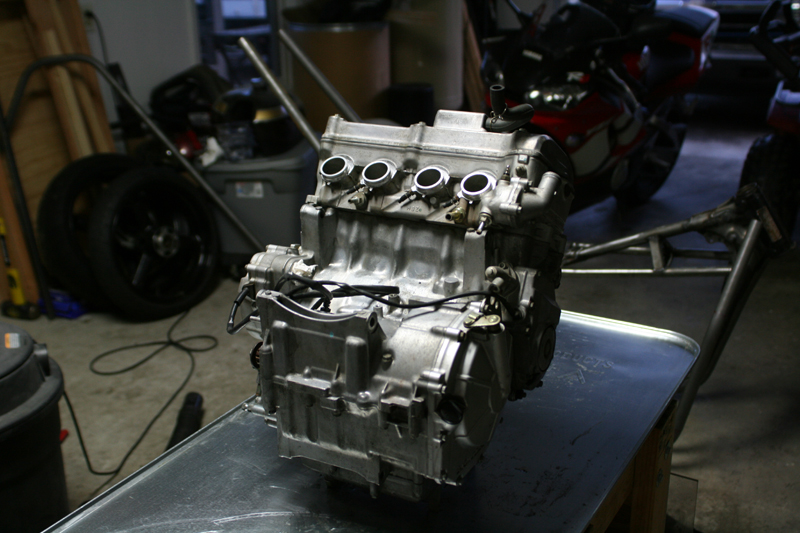
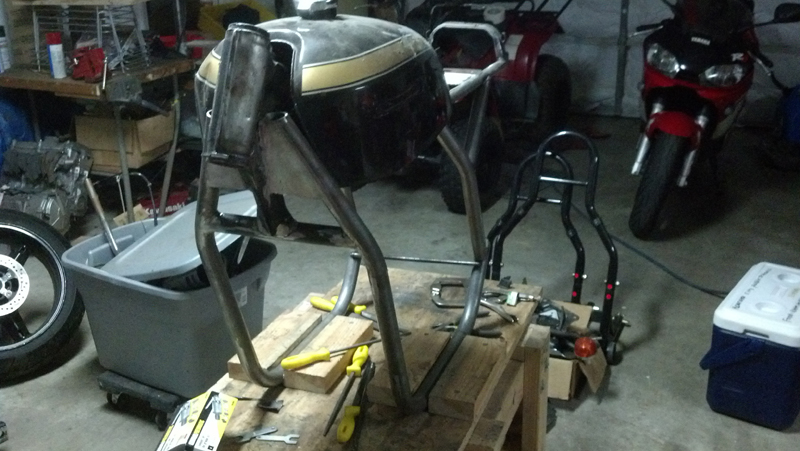
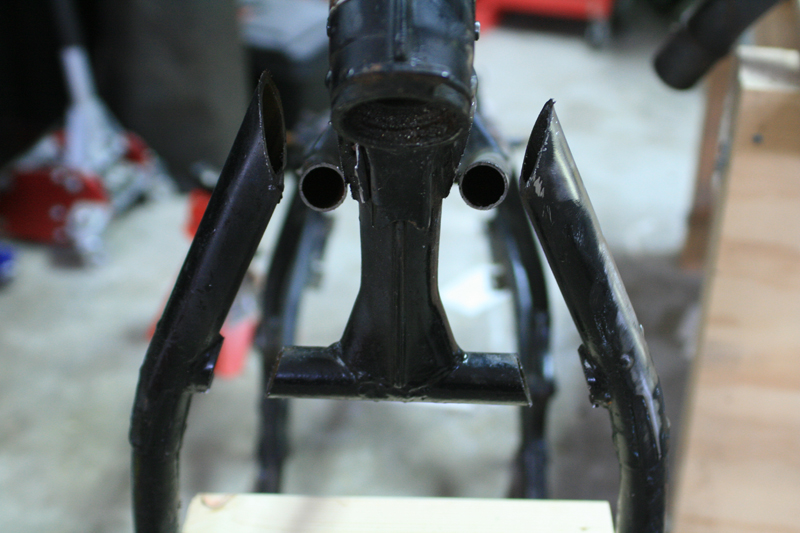
Removing the CB750 motor mounts and cutting the center brace/thing gave me an extra 1cm of clearance that the motor needed to sit down all the way.

bikebuild_002-0006.JPG


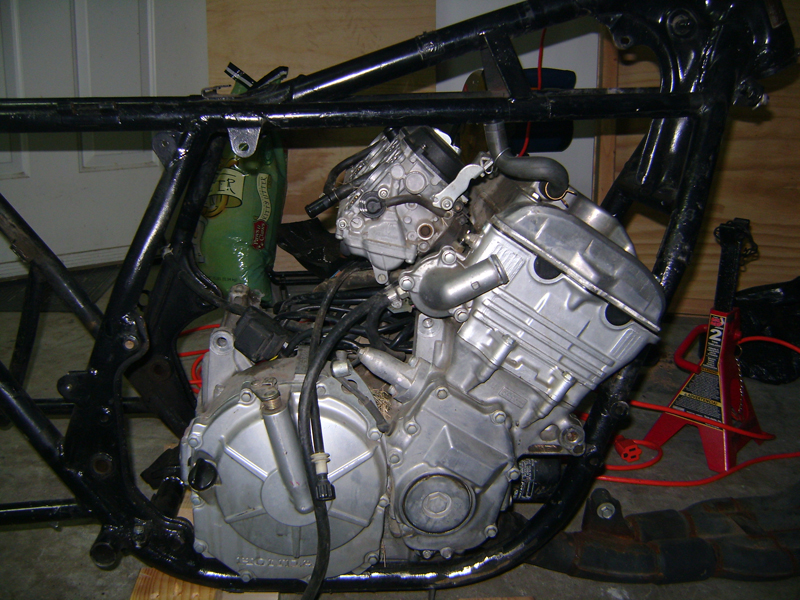
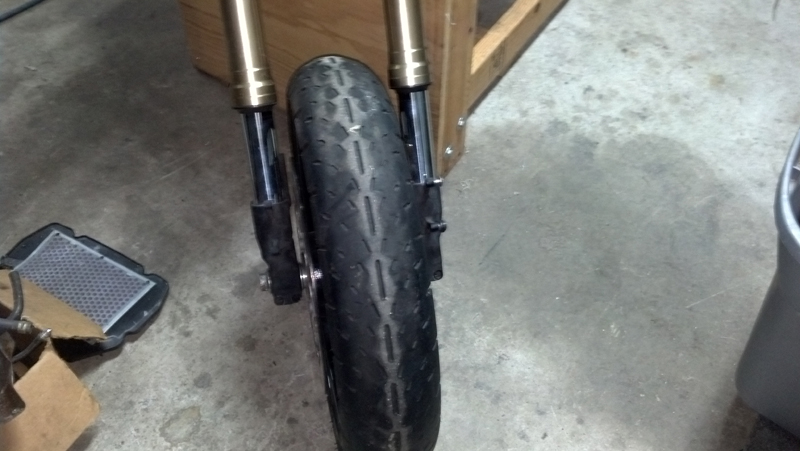
This was great, the carbs even fit although cramped as hell, then I realized something.

bikebuild_002-0009.JPG


Well Shoot... What am I going to do? I KNOW!

lulzcut_1.jpg

lulzcut_2.jpg


MORE CUTTING!

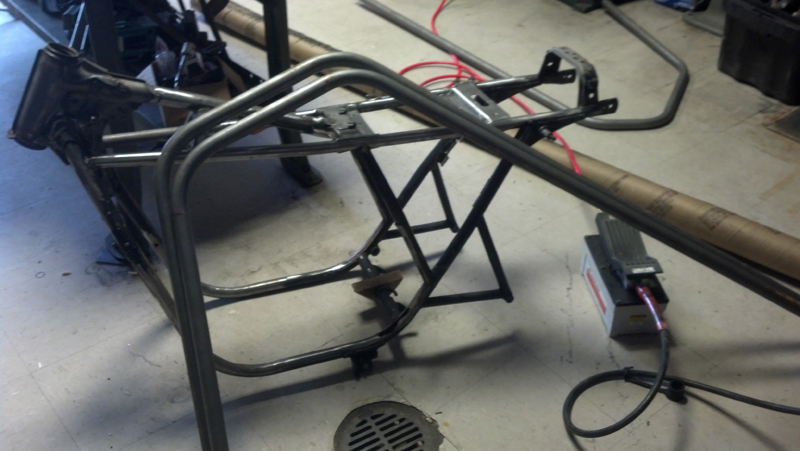
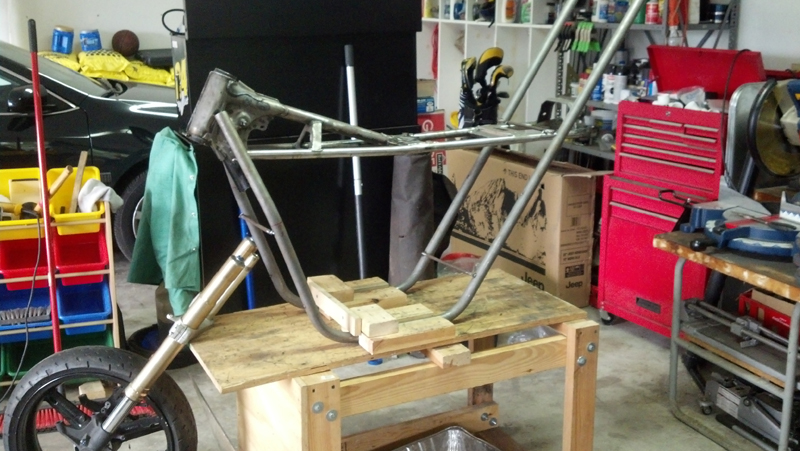
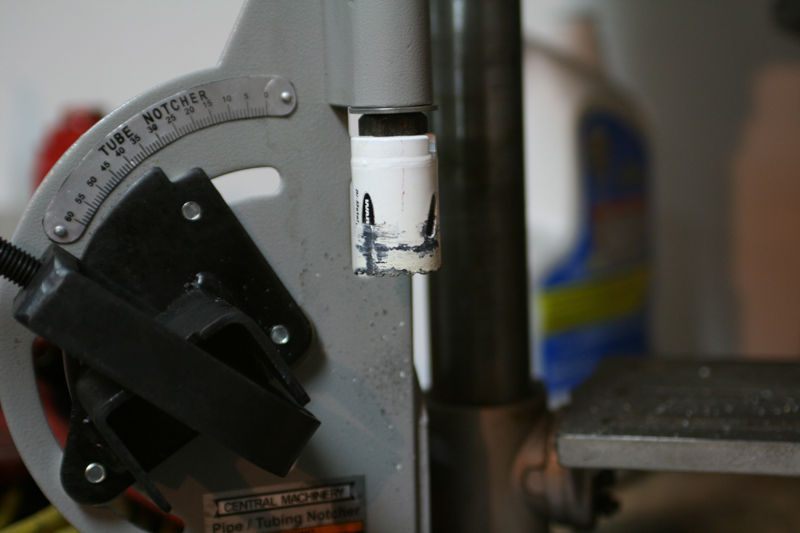
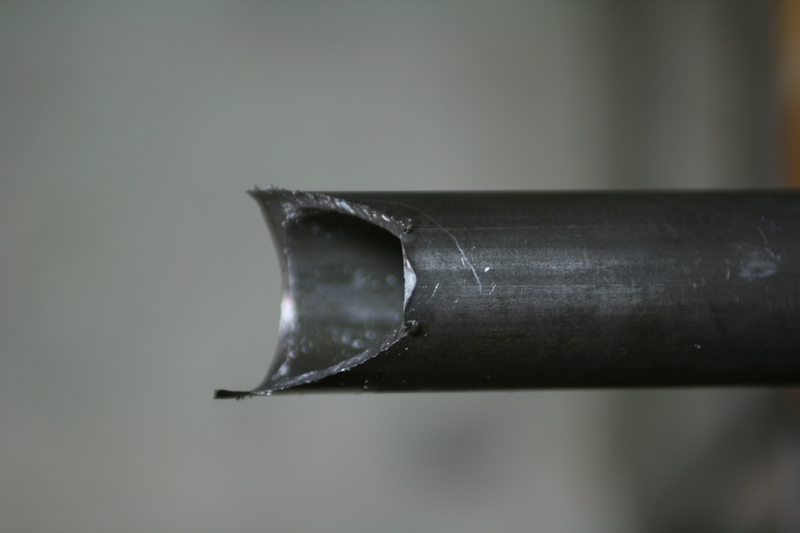
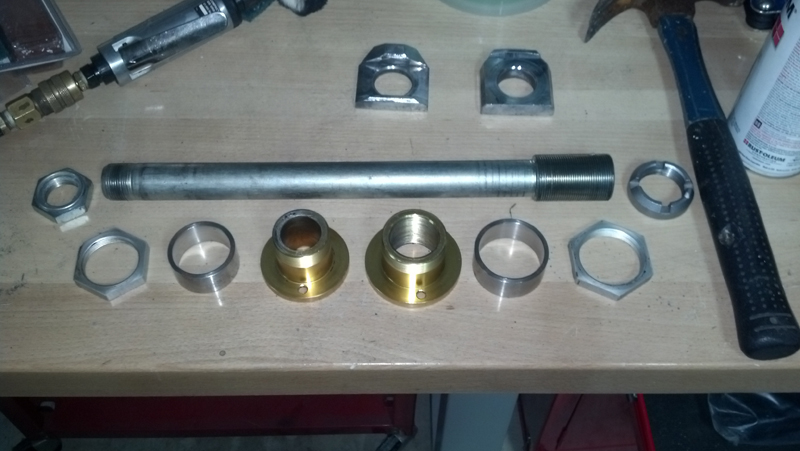
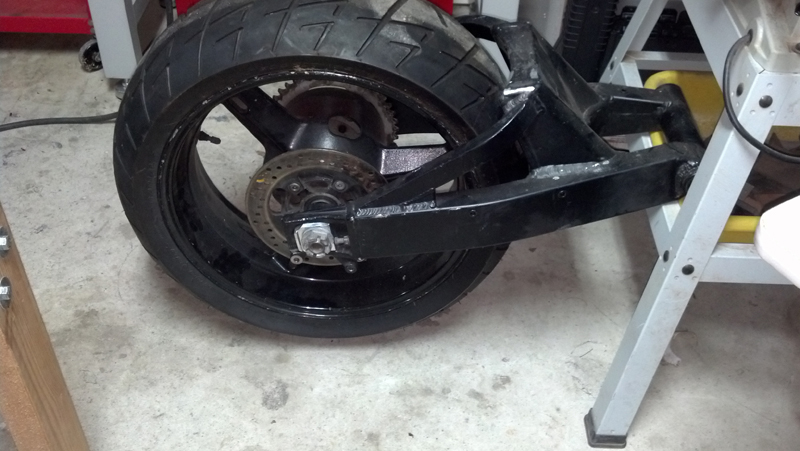
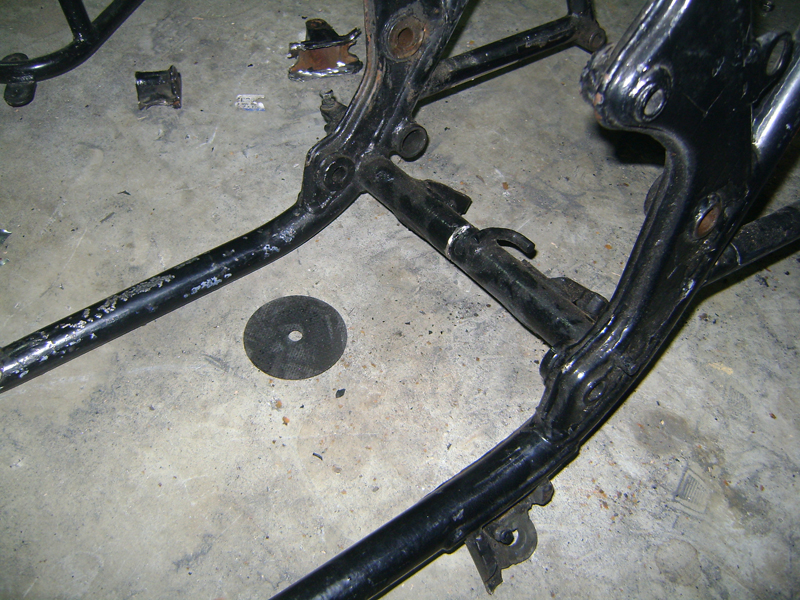
Then i decided I'd clear out the rear motor mounts and the stock pivot mounts as the GSX-R's rear pivot bolt is 25mm in diameter it sure as hell wasn't going to fit in a 10mm hole.

rust_ftl.jpg


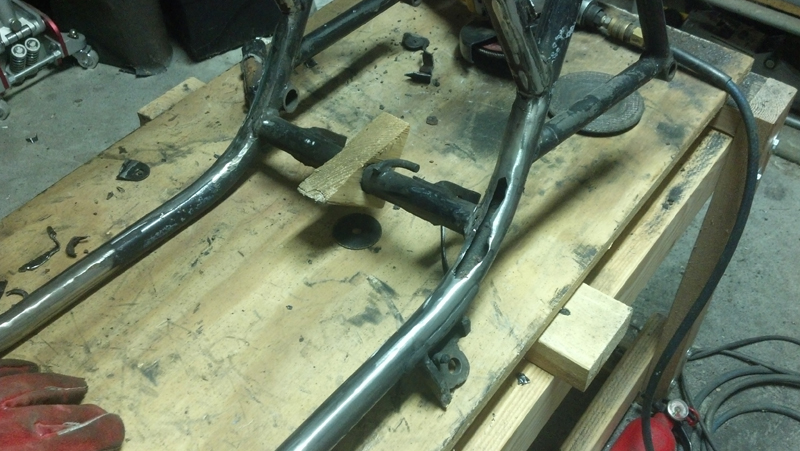
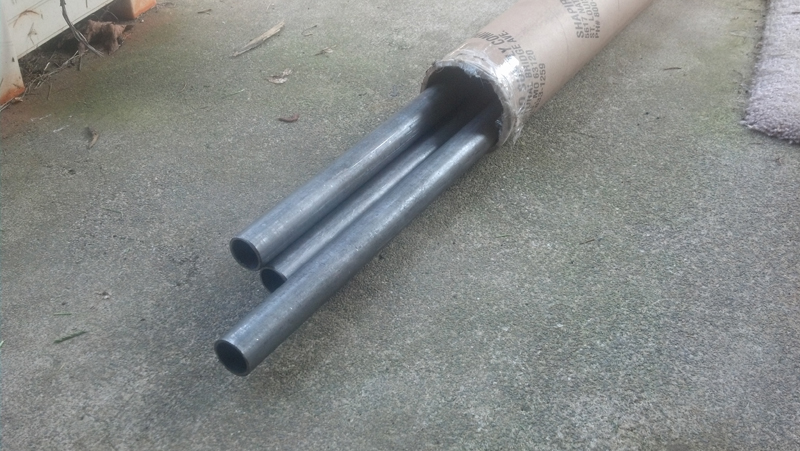
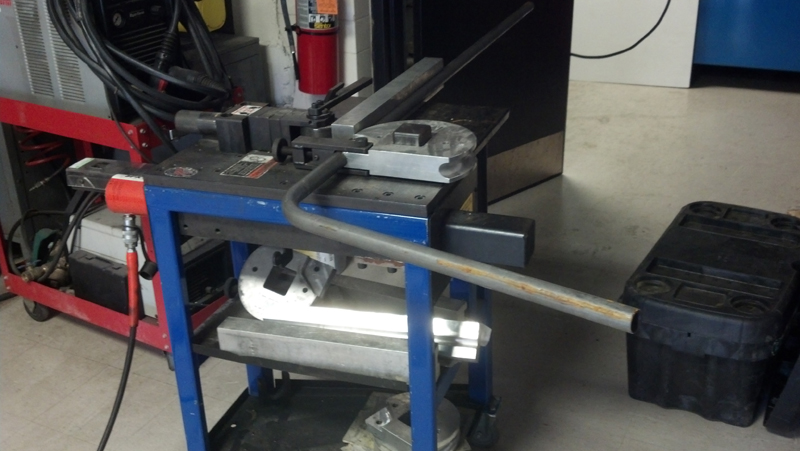
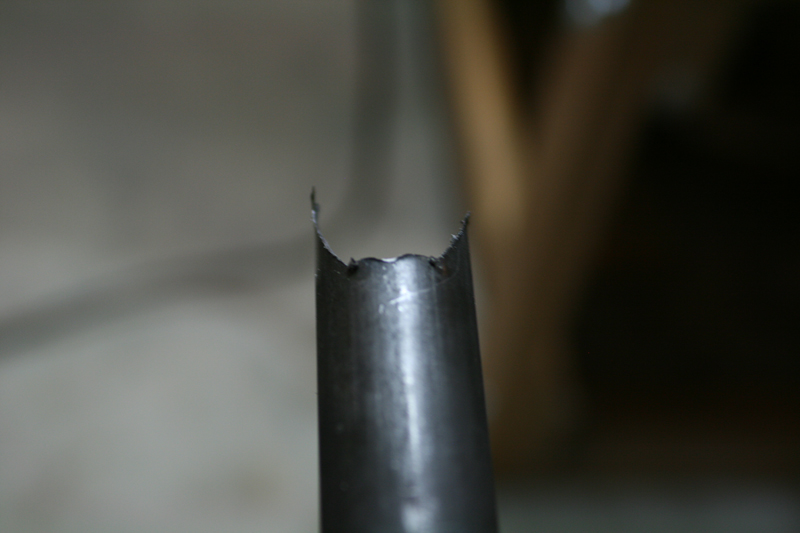
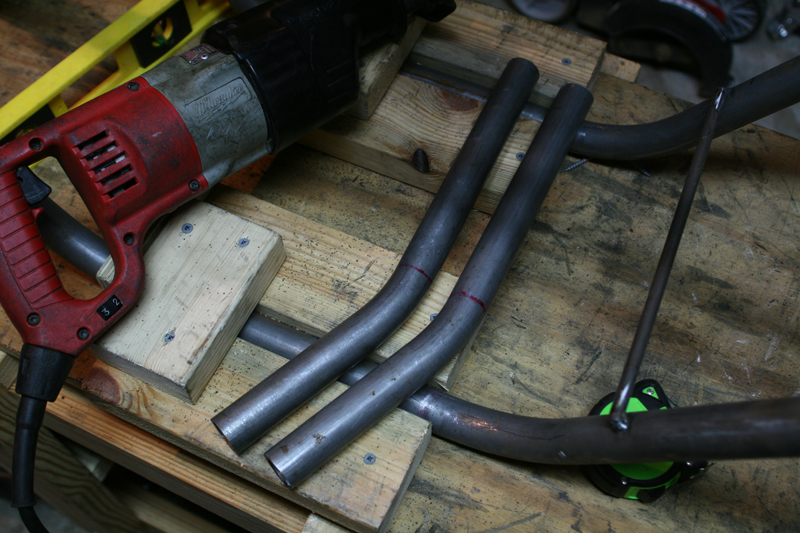
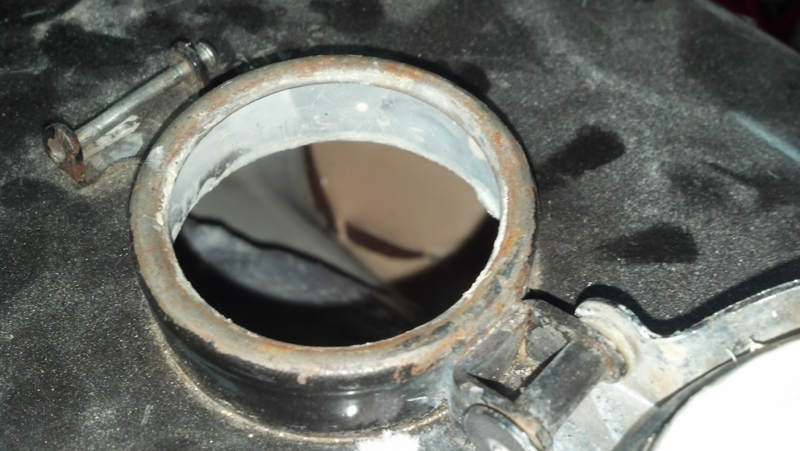
And I was greeted with this and it's not the only one I put my wooden spacers back in place to see how much the tubes were flexing and I saw another fracture in the tubes, currently it looks like the tubes are cracking in various places along what looks like the seam of the tube mostly on the bends. So now I'm sunk, I wont be looking for another frame, that would be nonsense. Why? you've only done work in the area where is's broken. THAT's CORRECT! why use old metal that's potentially rusted in the same way? So now I'm either going to get myself a simple ratchet style tube bender JD Squared Model 3 Tube Bender like the guys on locostusa forums had suggested and bend replacements myself or if I can get my friends in VT's Formula Baja Team to give me a hand have them bend them on a proper machine. Do this all based on the width I'm aiming for rather than force old rusted steel to conform to my crazy demands.
 
So After a long search for a shop who might be able to help me bend some new tubes I almost forgot about a family friend and my welding instructor, who happens to be the head of our community college's SAE Baja Team (lies, I didn't forget I just didn't want to beg :p)

Here's their SAE Baja Vehicle.

403514_411963812167877_192192320811695_1295968_1922326019_n.jpg


After bugging him a bit he got back to me that he does indeed have the dies to bend the tubing I wish to use. YAY ME!... oh crap I only have 1 8 foot section and a bunch of scraps.

So I'll be waiting a little bit till I can proceed.

Till then I sat down and did a flat drawing of what I was hoping to get out of the bike so I dont have to go "imagine (blank)" and hope people understand me.

sketch.jpg


There is a bit left for interpretation for now but it'll give you a better idea of where I'm going with it.
 
STEEL IS HERE STEEL IS HERE!

So I got really excited as my brother brought this into the garage I was working on wire wheeling the possible rust areas so I could make sure the upper half was solid before we did the new lower frame. and to my surprise the steel showed up a day early :D

steelishere.jpg


Dom 1-1/4 x 0.95 wall 3x8' lengths (cause why not!?)
 
Things got interesting today :D

Been really bugged bout how long this part took to sort out, this is mainly due to access to the machine shop at VWCC, so Today I finally got a chance to meet my new team mates on the SAE Baja Team, who offered a bit of insight on tube bending before I got started :D

20120814_tube1.jpg

20120814_tube2.jpg

Not pictured is the one tube I royally buggered up but the second two came out just fine, I was unable to do the whole lower half in the bender against my original wishes but this will provide results still close to my original design so I'm not to bothered by it.

20120814_frame1.jpg

20120814_frame2.jpg

Here's the Tubes beside the frame, kickstand mount has it sitting so the tubes don't line up in the shot but they will work out just fine. The buggered up tubing has the sections to join the back of the lower section to the upper half of the frame. More on that when i get my tube notcher.

20120814_cleanmotor.jpg

Till then I leave you with a shot of my clean CBR600 motor, osha would throw a fit, but kerosene in a spray bottle with a tight spray blasts dirt out of the little tight areas it's hard to get a brush or scotch bright pad.
 
Thanks, for the encouragement. The engineering guys on the baja team gave me a "good luck with that" and a chuckle when I got the tubes bent after they figured out what I was doing.

I Present to you! 2x4 JIG OF CRAP!

20120819_married_1.jpg


So here's sunday's progress, I lobbed off the lower half of the frame, finished cleaning up the tubes, and right now it still needs a little help I'm going to go over those high spots by hand with a file so I don't go through the metal and have to replace the tail too, I can joke about it now but if that happens in a couple weeks I'll be quite mad.

So until Tuesday when start cutting more tube to finish tacking the frame together

Cheers, Letze
 
I shouldn't have bought these damned hole saws.

"bi metal, cuts through steel" the heck it will... yes it was lubricated, yes it's a harbor freight pos and I should have known better.

So... Here's the super awesome bit in question, after the first test piece. which it didn't actually finish.

20120821_notcher_1.jpg


Which resulted in this after I twisted the remaining pieces out.

20120821_notcher_2.jpg

20120821_notcher_3.jpg


If you can tell it's off center, that's after I corrected it with some 1/16th inch thick washers because the tubing wasn't centered in stock configuration (meaning it was far worse than this originally)

So since I didn't get past the test piece I technically didn't make any real progress today, Good thing I still have this reciprocating saw another day. my battery powered one is a POS and this one is bad ass!

20120821_supports_1.jpg
 
After buying real hole saws I have properly notched tubes, a little bit of cleanup at the bench grinder has ensured they're nice and clean.

I had hoped to be at this point on Sunday but I was busy reorganizing my garage space with a new work bench and even a garage computer since I don't enjoy going back and forth covered in metal dust to my computer in my office.

Now, It almost looks like what I started with only fatter!

20120830_takingshape_1.jpg
 
Fun Stuff, So I've been working with the baja team more and more so I've been unable to make huge updates to my bike, That should change soon, I'm currently trying to pick up two 1976/77 Celica GT Coupe's from a friend but those will end up in storage till this bike is finished.

So Here's where I am currently.

2012-10-21_frame1.jpg

2012-10-21_frame2.jpg


I'm happy to announce I finally have what I need to mount the swing arm I'll be making a glorious wooden jig soon to help me mount it correctly now that I've gotten all of the bushings and what not sorted for the rear axle.

If you've never seen a late model GSX-R pivot bolt assembly let me enlighten you! the Steel Bushings you see pictured are the parts that will be welded to my frame, I had them made recently by a friend.

2012-10-21_pivotbolt1.jpg

2012-10-21_pivotbolt2.jpg


This does not include the spacers,bearings,bushings that go with the swingarm that slide onto this... now you get to feel less silly about having a single bolt through your swingarm.
 
This has been my "why didn't I pay more attention to that" problem... this tank is coated on the inside and there's a piece the size of a playing card curling up around the petcock and I'm raging because with that and all of the dents/scrapes in it I'm better off just looking for a replacement.

2012-10-30_tank_coating.jpg


So I've done inventory tonight since work and Baja have been taking up my time. Lucky me I have collected all the remaining parts for the wheel spacers and the 2007 GSX-R 750 Forks have made the 2004 GSX-R 1000 Front wheel at home with no spacing issues. The rear wheel has settled snugly as well.

What remains is getting grease for the taper bearings up top and a new propane torch head to help with seating the All Balls taper bearing races.

So boring pictures for now but a good mile stone marker for the project. once the front end is assembled I can get correct measurements for the rear geometry and start fabbing up the mounts for the arm and the coilover.

2012-10-30_frontend.jpg

2012-10-30_rearend.jpg

2012-10-30_rearside.jpg
 
Well, I just threw my whole steering assembly at the wall because I just found out the threads were damaged... (I had already pressed the new bearing onto it before realizing this) I've got another assembly but the lower clamp has some damage debating on what to do right now. GnarlyCharlie is sending me a K6 Cb750 tripple assembly to get measurements off of (not to cannibalize) so I can finish my blueprints for GSXR replacement stems to my machinist.

i did get a box today I had ordered to get 3 bolts/nuts in the lower left corner, it came with extras :p

2012-11-13_lotsobolts.jpg
 
GnarlieCharlie sent me my carbs back from cleaning. Going to need them soon to mock up the custom airbox
2012-11-23_cartrees.jpg


I'm sure some one is wondering how I'm going to solve this little number that just about every one who does this front end swap runs into...
2012-11-23_neckclearance2.jpg

2012-11-23_neckclearance1.jpg

I could always just run a single nut with locktite and call it a day... but that's not how it's going to be.
2012-11-23_neckgap1.jpg

What in the hell am I doing with all of these clamps/trees? (I gave some away WTH!?)
2012-11-23_trees.jpg

Yea... Soon man... soon.
 
deepwaterimports said:
i am intrigued too see this one unfold

me too...
i have a 77 kz750B and an 06 R6 motor sitting next to each other....not sure how that would work. the motor/ITBs/airbox is way too tall
 
have you ever had one of those moments, where you're packing all of your things and you manage to fit 20lbs into a 10lb bag and you're super proud of yourself only to find you still have 10lbs more to shove into that bag?

Short story... I kinda let the radiator issue sit on the back burner, I thought I had enough room until I started measuring and comparing the 3 radiators I have which made me realize, I don't actually have room for this to fit there.

so what made me frantically size things up and start pulling magical ideas of custom radiators out of my ass was a picture of a CX500 and its outstretched neck.

03_11_2012_honda_cx_500_012.jpg


That's a whole hell of alot of reach compared to mine as seen here.

20120819_married_1.jpg


So as I sit here, some of the engineering students have rubbed off on me and I'm using a student edition of SolidWorks to draw the whole bike over again so that I may create something that is consistent and properly accommodates all components before I continue. Because with this realization I started to consider other issues I would run into with my rear suspension and planned air box design.

I'm going to be spending the rest of the week sorting this issue out. hopefully I'll have a useful model come Wednesday.
 
I saw a fightered VTR1000 once that had a curved radiator under the seat (curved to follow the lines of the tyre).


Might be worth trying something like that first before you tear apart what you've already done.
 
Back
Top Bottom