Follow along with the video below to see how to install our site as a web app on your home screen.
Note: This feature currently requires accessing the site using the built-in Safari browser.
We noticed you are blocking ads. DO THE TON only works with community supporters. Most are active members of the site with small businesses. Please consider disabling your ad blocking tool and checking out the businesses that help keep our site up and free.
New to the forum but not so new to building bikes. I hope to post some projects I have worked on over the years to share some knowledge and experiences - after all I have gained a lot of insight from people posting their own projects on various forums.
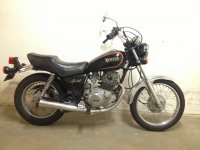
This thread will hopefully be mainly focused on a build I am working on now - a 1983 Yamaha SR250. There are and have been many conversions of this particular bike - I have seen SR250 cafe racers, bobbers, trackers etc, but I am hoping to throw in a couple of original things and am developing parts for sale for it along the way. The aim/direction is to build a bike that does not conform to any particular style/genre, but rather take cues from many and to create something that looks clean and almost standard in some ways. I am not a huge fan of extravagant overly worked customs with wacky paint jobs. Each to his own of coarse!
Hoping to gain and share information and skills working on this bike
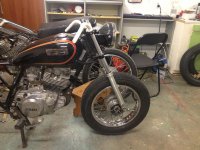
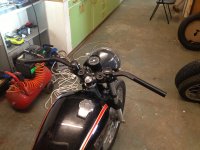
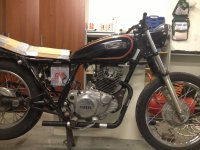
The original bike was in pretty decent condition. Almost a shame to cut it up... except for the fact that these bikes are unapologetically ugly in standard trim!
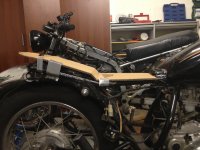
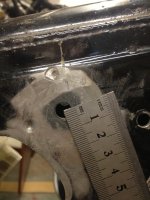
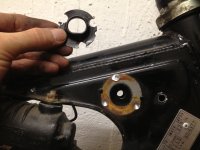
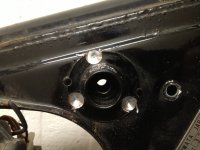
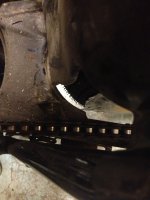
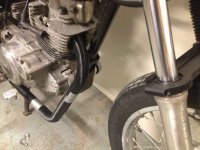
Working on lowering the tank to achieve a better line with the frame rails. Plus looking at how the seat base could be made without removing the stock mudguards that i like. To remove the original tank mounts, just punch a hole right in the middle of each of the 3 spot welds and drill until the weld is removed - but don't drill through the entire sheet metal thickness. The mounts should then just pull off with some pliers or something.
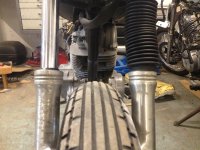
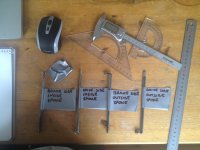
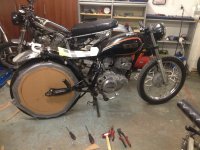
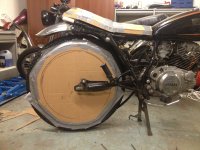
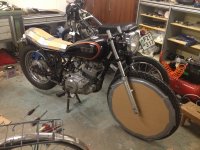
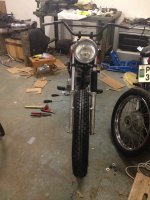
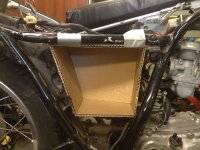
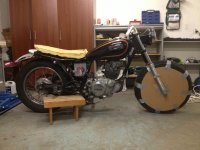
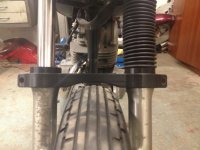
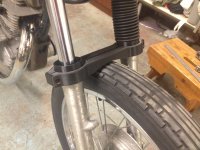
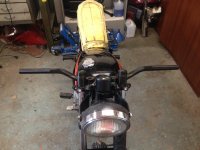
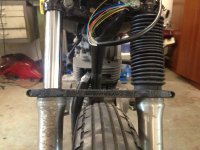
Investigating the possibility of running 19" dirt track style tyres for a street tracker style look... Involves measuring the standard spokes and calculating the percentage increase to get from a 16" rim to a 19" rim. I also did a quick check to see if the rims/tyres would actually fit using a cardboard rim haha. Turns out it is too tight for my liking and really exaggerates the flimsiness of the front forks - just look at the contrast from front on with the massive 19" tyre. Looks goofy. Yes I could do a front fork conversion - I have done one before with a Yamaha DT400:
https://www.youtube.com/watch?v=8xJjccVsdX0
But I want this bike to be a slightly easier build in terms of avoiding adapting parts from other bikes.
Btw, if anyone has questions about how or why i did a certain thing, please fire away. I have received so much help from forums over the years and have not really given anything back. So I hope this can be my chance to give back to the community.
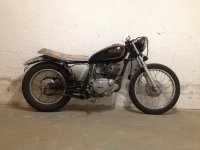
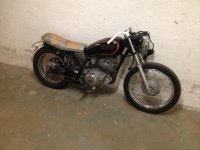
I got quite a few views on youtube for a SR250 I built 4 years ago when I was a real newb and many people asked for more photos of certain aspects of the bike and if I had documented it online at any time - which I didn't/hadn't. But this build will be different! That old bike (which I sold to a friend) can be seen here:
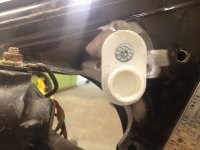
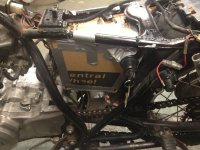
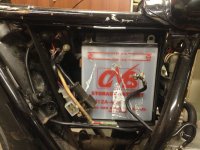
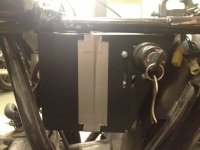
Feels like this project is all over the show but I want to do everything at once! Looking at a nicer battery box/tray design that fits the battery and electrics plus maybe a relocated ignition...
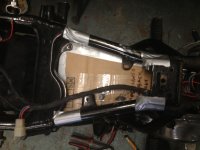
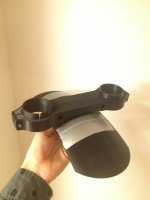
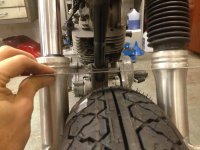
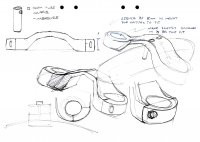
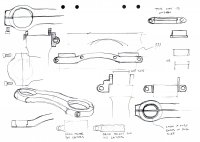
Fork brace measurements and first prototype... Plus considering a 16" front wheel conversion instead of the 19" conversion. This will give a more bobberish look. I always liked bikes that had even rim diameters much more than ones with odd diameters. I just think it looks 'right'. I would also like to integrate the front fender into the brace design - so I can eventually shave the forks ;D
Back to the drawing board for the brace. Its one thing to see a sketch of it, then its another thing to print it out in 3D and 'feel' its size and proportions. And this one was waaay to big and chunky I thought!
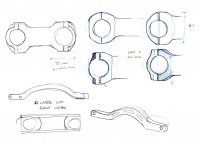
Another attempt at the fork brace - this time much thinner and more in proportion. Plus another attempt at some above yoke clip-ons. This time in more of a riser bar style. I like these a lot more.
Designed and printed (in pieces) an exhaust headers. I like the style of header with sharper lines and tighter curves rather than the vincent style swooping bends. So I tried to match the angles of the frame/engine so it looked right. Has anyone ever used an exhaust header calculator? I tried a few but ended up liking this one the best: http://www.mezporting.com/exhaust_length.html
I also bought and tried reading Philip H. Smiths 'Scientific Design of Exhaust and Intake Systems' but it was just too heavy for me. Most of the principles I understood but I got caught up in all the thousands of possible variables.
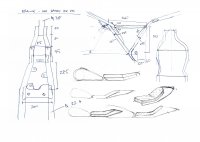
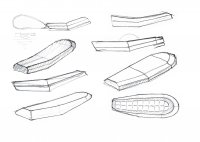
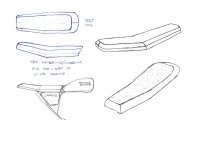
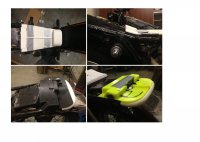
Thought it was about time I figured out what I will do about the seat - for me the key to success for the SR250. The real make or break. No better way than to sketch up some ideas and print them out and test them! Only had time to test the fit for the base of the seat and the mechanical attachment mechanism. I decided I don't like the new trend of 'lush' plaid, pleated or diamond pattern seats... I will go for something cleaner - a bit like Roland Sands seat designs for the modern Triumph Bonnevilles maybe ;D 8)
Good start. I've been working on an sr250 for quite some time also. I've really wanted to do a 16 front wheel conversion. Maybe even put on a 2ls front brake from a 400. I hope to see you do it!
Cheers! How far along are you with your build? Do you have a build thread? Yeah, I will keep you posted on the 16" front wheel thing. A better brake would be awesome actually. Pretty pricy though I think?
I was wondering if it is possible to just improve the current brake by giving it a little mechanical or hydraulic help... Like have you seen hydraulic clutch conversions? Couldn't the same principle be applied to a drum brake? So you get a better/stronger action from the lever? Or even one of these things: http://www.kickstartershop.de/en/Mechanical-clutch-booster
Have a look at my build in my sig. I'm a big fan of the SR250. If I had 6 in my yard I could build them all different and have a blast doing it. Tracker, brat, bobber, cafe, scrambler, and board tracker.
This site uses cookies to help personalise content, tailor your experience and to keep you logged in if you register.
By continuing to use this site, you are consenting to our use of cookies.

")